
Related Manuals for Mobatime DK series


Summary of Contents for Mobatime DK series
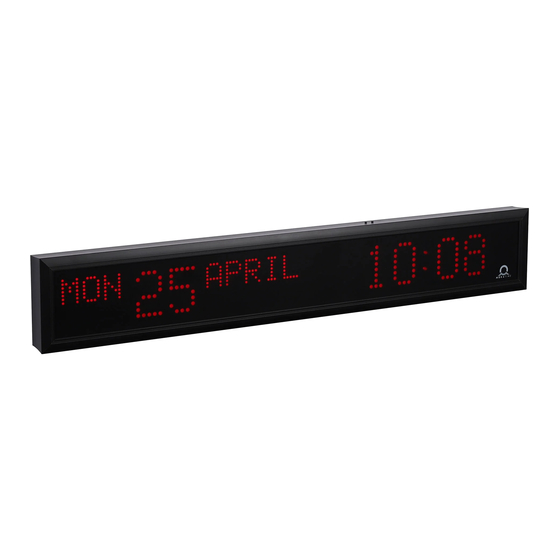
- Page 1 MOUNTING AND INSTRUCTION MANUAL DK series State-of-the-art technology digital calendar clock © MOBATIME BE-800444.05...
- Page 2 It is prohibited to reproduce, to store in a computer system or to transfer this publication in a way or another, even part of it. The copyright remains with all the rights with BÜRK MOBATIME GmbH, D-78026 VS-Schwenningen and MOSER-BAER AG – CH 3454 Sumiswald / SWITZERLAND.
-
Page 3: Table Of Contents
Setting of the initial time for counting down ...................32 Control of the stopwatch using IR remote control ...................33 The stopwatch menu ..........................33 Setting of initial time for counting down....................34 Switching contact ...........................34 Stopwatch menu table..........................35 Local time calculation ..........................37 © MOBATIME 3 / 56 800444.05... - Page 4 Synchronization and time setting – P5 mode 1 and 3..............40 10.3.2 Synchronization only – P5 mode 2 and 4..................40 10.4 Slave clock controlled by MOBATIME serial code, MOBALine, or IRIG-B ..........40 10.5 Slave clock controlled by IF482 over RS232 or RS485 .................40 10.6 Slave clock controlled by supervised RS485 ..................41...
-
Page 5: Description
autonomous, quartz controlled time base with the possibility of synchronization using the following: DCF 77 radio signal, 24 V minute impulses, the MOBATIME serial code, MOBALine, RS 232, RS 485, IRIG-B or GPS ... - Page 6 IR controller for clock set up and stopwatch control On request internal relay – relay can switch for specified duration, when the stopwatch in the countdown mode reach the zero. protection degree IP 54 © MOBATIME 6 / 56 800444.05...
-
Page 7: Assembly
(with the terminal for the connection of the interconnecting cable). Both clock parts are interconnected via a 10-core flat cable. The clock suspension part is delivered separately. © MOBATIME 7 / 56 800444.05... - Page 8 Secure the attachment by tightening the screw using the Allen key. To loosen the frame catch use the reverse procedure (turn clockwise). Note: during the disassembly first withdraw the clock, and suspend the suspension on the upper groove at the pipe insert. © MOBATIME 8 / 56 800444.05...
-
Page 9: Dismantling Of The Clock Rear Cover
Dismantling of the clock rear cover Assembly diagram the anchorage plate does include the interconnecting terminal block, and provides for an easy assembly in two steps type length of the ceiling suspensions; 5, 10, 30, 50 cm © MOBATIME 9 / 56 800444.05... -
Page 10: Connecting Terminal Block
Connecting terminal block © MOBATIME 10 / 56 800444.05... -
Page 11: Control Pcb
Control PCB © MOBATIME 11 / 56 800444.05... -
Page 12: Function Of The Plug Connectors
Function of the plug connectors LINES, DC/DCF OUT – JP1 time signal inputs: The DCF/GPS receiver, polarized impulse line, MOBALine, MOBATIME serial code, IRIG-B, power supply output: DC OUT 11–19 V or passive DCF current loop output TEMP – JP2 connection of the temperature sensor(s) ... -
Page 13: Connection Of The Cable Ends
Connection of the cable ends Installation LINES / DC OUT wire connection TEMP wire connection – 1 or 2 thermometers CTRL wire connection RS232 wire connection RS485 wire connection RELAY connection © MOBATIME 13 / 56 800444.05... -
Page 14: Control Of The Clock Using Keyboard Or Pushbuttons
Function of the pushbuttons in the “Time and date setting“ mode. PB1S advancement to another item to be set up PB2S increase of the item to be set up by 1 PB2L continuous increase of the current item © MOBATIME 14 / 56 800444.05... -
Page 15: Menu For The Setting Of The Clock Parameters
PB1L pushbutton. The item to be set is blinking. By pushing the PB2S button, the adjusted value is increased in steps of 1, by pushing the PB2L button, the value will be continuously increased. © MOBATIME 15 / 56 800444.05... - Page 16 The daylight saving time has been set to start on April 28 at 2 o’clock and to end on October 10 at 3 o’clock in the example described above. © MOBATIME 16 / 56 800444.05...
-
Page 17: Submenu For Network Services Configuration
Submenu for network services configuration Choose the value 2 or 3 in the item P19 (network work mode selection) in the clock menu, then enter the submenu by pushing the PB1L pushbutton for configuring the © MOBATIME 17 / 56 800444.05... -
Page 18: Manual Setting Of The Ip Address Of The Clock
IP address. The item to be set is blinking. By pushing PB2S the adjusted digit value is increased in steps of 1, by pushing the PB2L button the value will be continuously increased. © MOBATIME 18 / 56 800444.05... -
Page 19: Submenu For Setting The Multicast Group Address
(MENU page no. 2) Choose the items R8 or R9 for temperature description or the items R10 – R14 for time-zone names definition in the menu page no. 2 and push the PB1L button to enter © MOBATIME 19 / 56 800444.05... - Page 20 MENU item (R9 – temperature no. 2 description). For closing the menu mode move to item R0 and press PB1L. The clock returns to normal mode. © MOBATIME 20 / 56 800444.05...
-
Page 21: Control Of The Clock Using Ir Remote Control
Note: When the time zone of displayed time and date (menu item P7) is set to the values U1 – U7 or U, the entered time and date is taken as UTC. © MOBATIME 21 / 56 800444.05... -
Page 22: Menu For The Setting Of The Clock Parameters
Submenu for user-specific setting of time constants for data switchover In menu item P2 (time constants for automatic switching over of values) set value U, then enter the submenu by pushing the SET button. The item to be set is blinking. © MOBATIME 22 / 56 800444.05... -
Page 23: Submenu For Setting Of The User-Specific Time Zone
The display shows the following: Enter the hour at which the daylight saving time begins. Push >>. © MOBATIME 23 / 56 800444.05... - Page 24 Push >>. The display shows the following: Enter the month in which the daylight saving time begins. Push >>. Enter the hour in which the daylight saving time begins. Push >>. © MOBATIME 24 / 56 800444.05...
-
Page 25: Submenu For Network Services Configuration
A, b, C and d. By pushing OK, the entered values are stored and the clock returns to the menu item P20. By pushing ESC the clock returns to P20 without storing. © MOBATIME 25 / 56 800444.05... -
Page 26: Manual Setting Of The Subnet Mask
After the last octet setting, set the constant x which determines the interval of synchronization in seconds. By pushing OK, the entered values are stored and the clock returns to the menu item P24. By pushing ESC, the clock returns to P24 without saving. © MOBATIME 26 / 56 800444.05... -
Page 27: Temperature Description And Time-Zone Names Definition (Menu Page No. 2)
with + set U >> the cursor blinks on the 3rd position with + set T pushing the OK button saves the edited text and move back to MENU item R8. Set other parameters in MENU and by pressing OK button return to normal mode. © MOBATIME 27 / 56 800444.05... -
Page 28: The Clock Menu Table
0 - 64, A (automatically) synch. source Type of 1 - 10, A (automatically) synchronization auto detection, applicable for: DCF, the Mobatime serial source code, MOBALine, WTD, IRIG-B or NTP autonomous operation without synchronization synchronization by DCF signal the MOBATIME serial code... - Page 29 Mc* setting of multicast group address Unicast NTP addr Uc* setting of NTP unicast server address SW version r_._(e.g.: r2.68) Note: * possibility to enter the submenu Items P19 to P24 available in NTP, PoE and WiFi variants only © MOBATIME 29 / 56 800444.05...
-
Page 30: Menu Page No. 2 - Display Parameters
Display of description for second measured temperature World time – Time Zone 1 option N – “disabled” 0-64* 0-64 according to time zone table World time – Time Zone 2 option N – “disabled” © MOBATIME 30 / 56 800444.05... - Page 31 Note: * possibility to enter the submenu for description text definition of temperature (up to 5 characters) or time zone name definition (up to 8 characters) © MOBATIME 31 / 56 800444.05...
-
Page 32: Control Of The Stopwatch Via Keyboard
Data order 1/100 second <Minute>:<Second>.<Hundredths of second> 1 second <Hours>:<Minutes>:<seconds>. 1 minute <Hours>:<Minutes> 1 day <Days> By pushing the PB1L button, the entered values are stored and the clock returns to the “Stopwatch” display mode. © MOBATIME 32 / 56 800444.05... -
Page 33: Control Of The Stopwatch Using Ir Remote Control
© MOBATIME 33 / 56 800444.05... -
Page 34: Setting Of Initial Time For Counting Down
It is possible to control an external device such as sound devices. There is normally open contact (NO), normally closed contact (NC) and common contact (COM) on the relay port (JP21) available. © MOBATIME 34 / 56 800444.05... -
Page 35: Stopwatch Menu Table
Counting in increments of 1/100 sec. (with 4-digit display the counting goes on until 59.99 sec., and then continues with displaying of minutes : seconds), up to 59 minutes and 59.99 seconds, at maximum. © MOBATIME 35 / 56 800444.05... - Page 36 When counting is stopped, the dot is displayed after the last digit. Contact 1 – 30, 0 (function disabled) closing Time period of contact closing for stopwatches passing through zero, while operating in countdown mode, starting from a preset time moment. © MOBATIME 36 / 56 800444.05...
-
Page 37: Local Time Calculation
This setting is suitable for calendar digital clocks controlled by a master clock as a MOBALine slave clock in a time distribution system with possibility to display different MOBALine time zones. Calculation using time zone server MOBATIME and time zone display NTP protocol uses UTC time zone automatic... -
Page 38: Calculation Using Time Zone Entries Preconfigured By Moba-Nms Software And Time Zone Display
Displayed time and date calculation is based on the internal time zone table or on the user–specific time zone parameters. See the chapter 15 with actual time zone definition table. © MOBATIME 38 / 56 800444.05... -
Page 39: Non-Network Clock Operation
Configure the jumper JP11 according to table (chapter 2.8) if the source of synchronization is a DCF signal, Mobatime serial code, polarized impulse line, MOBALine or IRIG-B. Choose the item P4 in main MENU (chapter 5) and set the type of synchronization. The auto detection mode (P4:A), when the type of synchronization signal is set automatically, is applicable for DCF signal, Mobatime serial code, MOBALine, IRIG-B, WTD. -
Page 40: Synchronization And Time Setting - P5 Mode 1 And 3
When the normal operation of the line resumes, the clock synchronizes with the incoming pulses. 10.4 Slave clock controlled by MOBATIME serial code, MOBALine, or IRIG-B After the connection of the calendar digital clock to the signal source, time and date are adjusted automatically, following the receipt of valid time information. -
Page 41: Slave Clock Controlled By Supervised Rs485
Items P14 to P17 are set automatically to 9600 baud, 8 bits, even parity, 1 stop-bit. In case of communication problems it is possible to lower the communication speed. The modification of the items P14 to P17 is necessary to proceed in all connected displays identically. © MOBATIME 41 / 56 800444.05... -
Page 42: Ntp And Poe Clock Operation
[234] SNMP manager address [43] or [224] Additional options (refer to document BE-800793) The network administrator must configure the DHCP options accordingly. Assigned parameters can be checked in the submenu of items P20 to P22. © MOBATIME 42 / 56 800444.05... -
Page 43: Manual Setting Through Setup Menu
Hyperterminal note: The Hyperterminal application can be used as an alternative to telnet. It is necessary to activate the options “Send line ends with line feeds” and “Echo typed characters locally” in the Properties -> Settings -> ASCII setup window. © MOBATIME 43 / 56 800444.05... -
Page 44: Snmp
65532 time zone client port number 65534 The menu item P19 must be set to value 1. See chapter 4.2.7 for setting the multicast group address in the item P23 submenu. © MOBATIME 44 / 56 800444.05... -
Page 45: Wifi Clock Operation
After expiration of two minutes timeout after telnet ending there is another two minute period, when the telnet is not functional. The clock is then performing the NTP time synchronization. This period also takes place at the beginning of every hour. © MOBATIME 45 / 56 800444.05... - Page 46 Example of setting network parameters using telnet: command conf –l mobatime set network name of new wireless network command conf –w 4 set version of used coding on WPA2 for new wireless network command conf –d abcdefg set the security key for new wireless network ...
-
Page 47: Testing Mode, Parameter Reset
Using the PB2 or + button on IR set the value behind the colon to 04 Keep pushing simultaneously both buttons or the DISP button on IR, until the display shows FAC1 and clock makes reset © MOBATIME 47 / 56 800444.05... -
Page 48: Firmware Update
After entering the password, check if the firmware version is correct, if it isn’t, it is necessary to repeat the whole procedure. Close the telnet window and end the program tftpd32 with the command exit. © MOBATIME 48 / 56 800444.05... -
Page 49: Time Zone Table
South Australia: Adelaide +9.5 Sun. Oct (02:00) Sun. Apr. (03:00) Northern Territory: Darwin +9.5 Brisbane, Guam, Port Moresby, Yakutsk Sydney, Canberra, Sun. Oct. (02.00) Sun. Apr. (03:00) Melbourne, Tasmania: Hobart UTC (GMT) UTC (GMT) © MOBATIME 49 / 56 800444.05... - Page 50 The Time Zone Table is usually updated every year. The current table is available for download under the following address: www.mobatime.com Customer Area Customer Support Support Resources Software Tools Time Zone Table. In case your device is equipped with a newer version than shown in this manual, the current time zone settings should be checked.
-
Page 51: Character Set
Character set Code page 1250 © MOBATIME 51 / 56 800444.05... - Page 52 Code page 1251 © MOBATIME 52 / 56 800444.05...
- Page 53 Code page 1252 © MOBATIME 53 / 56 800444.05...
-
Page 54: Additional Information
The following circumstances are excluded from the guarantee: - inappropriate handling or interventions - chemical influences - mechanical defects - external environmental influences (natural catastrophes) Repairs during and after the guarantee period are assured by the manufacturer. © MOBATIME 54 / 56 800444.05... -
Page 55: Technical Data
+- 12 – 30 V 10 – 18 mA MIN, CODE (on request) +- 30 – 60 V 10 – 18 mA IRIG B 20 mVpp – 2 Vpp 20 uA – 2 mA © MOBATIME 55 / 56 800444.05... - Page 56 © MOBATIME BE-800444.05...
Need help?
Do you have a question about the DK series and is the answer not in the manual?
Questions and answers