Table of Contents
Advertisement
S/M No. : OT1G0A0001
Service Manual
Microwave Oven & Hood Exhaust
:
KOT-1G0W
Model
KOT-1G0B
KOT-1G0S
• Caution:
In this Manual, some parts can be changed for improving,
their performance without notice in the parts list. So, if you
need the latest parts information, please refer to PPL(Parts
Price List) in Service Information Center (http://svc.dwe.co.kr).
Sep. 2007
Advertisement
Table of Contents
Troubleshooting

Related Manuals for Daewoo KOT-1G0S


Summary of Contents for Daewoo KOT-1G0S
- Page 1 Microwave Oven & Hood Exhaust KOT-1G0W Model KOT-1G0B KOT-1G0S • Caution: In this Manual, some parts can be changed for improving, their performance without notice in the parts list. So, if you need the latest parts information, please refer to PPL(Parts Price List) in Service Information Center (http://svc.dwe.co.kr).
-
Page 2: Table Of Contents
PRECAUTIONS TO BE OBSERVED BEFORE AND DURING SERVICING TO AVOID POSSIBLE EXPOSURE TO EXCESSIVE MICROWAVE ENERGY (a) Do not operate or allow the oven to be operated with the door open. (b) Make the following safety checks on all ovens to be serviced before activating the magnetron or other micro- wave source, and make repairs as necessary: (1) Interlock operation, (2) Proper door closing, (3) Seal and sealing surfaces (arcing, wear, and other damage), (4) Damage to or loosening of hinges and latches, (5) Evidence of dropping or abuse. -
Page 3: Safety And Precautions
SAFETY AND PRECAUTIONS CAUTION : This Device is to be Serviced Only by Properly Qualified Service Personnel. Consult the Service Manual for Proper Service Procedures to Assure Continued Safey Operation and for Precautions to be Taken to Avoid Possible Exposure to Excessive Microwave Energy. 1. -
Page 4: Specifications
SPECIFICATIONS Model KOT-1G0A / KOT-1G4U Power Supply 120V ~ 60 Hz, SINGLE PHASE WITH GROUNDING Rated Current Power Consumption 1600W, Max. Microwave Output Power (IEC 705) 1000W Frequency 2450 MHz Outside Dimensions (WxHxD) 760x427x363 mm ( 29.9" x 16.8" x 14.3" ) Cavity Dimensions (WxHxD) 514x248x347 mm ( 20.2"... -
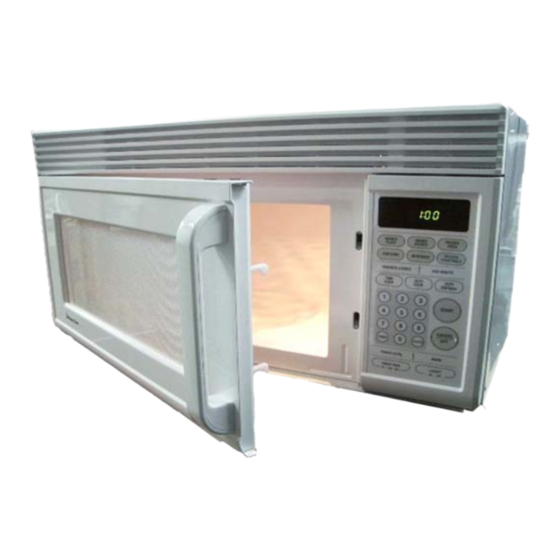
Page 5: External View
EXTERNAL VIEW ; REFER TO THE INSTALLATION GUIDE INSTALLATION ; REFER TO THE INSTALLATION GUIDE OPERATIONS AND FUNCTIONS ; REFER TO THE INSTALLATION GUIDE... -
Page 6: Disassembly And Assembly
DISASSEMBLY AND ASSEMBLY Caution to be observed when trouble shooting Unlike many other appliances, the microwave oven is high-voltage, high-current equipment. It is completely safe during normal operation. However, carelessness in servicing the oven can result in an electric shock or possible danger from a short circuit. - Page 7 1. GENERAL -REMOVING / REINSTALLING WARNING : Personal Injury Hazard Disconnect from the power supply before servicing the unit. Failure to do so could result in electric shock or other personal injury. CAUTION : Personal Injury Hazard Because of the weight and size of the microwave oven, two people are required to safely move and install it. Failure to do so could result in personal injury.
- Page 8 FIG. 1...
- Page 9 2.THE OPERATING CONTROL SYSTEMS -REPLACING THE CONTROL CIRCUIT BOARD WARNING : This Device is to be Serviced Only by Properly Qualified Service Personnel. Consult the Service Manual for Proper Service Procedures to Assure Continued Safety Operation and for Precautions to be Taken to Avoid Possible Exposure to Excessive Microwave Energy. 1.
- Page 10 4. Unplug the following connectors from the control circuit board: a) 2-Pin connector at CN1. b) 2-Pin connector on relay RY1. c) 6-Pin connector at CN3. d) Lift the end of the locking arm on the ribbon cable at CN2, then lift the ribbon cable out of the socket. 5.
- Page 11 3. REPLACING AN OVEN LIGHT SOCKET WARNING : Personal Injury Hazard Disconnect from the power supply before servicing the unit. Failure to do so could result in electric shock or other personal injury. 1. Remove the screws for the vent grille and remove the grille.(See FIG.1) 2.
- Page 12 4. REPLACING THE LINE FUSE WARNING : Personal Injury Hazard Disconnect from the power supply before servicing the unit. Failure to do so could result in electric shock or other per sonal injury. 1. Remove 2 screws from the vent grille and remove the grille (See FIG. 1). 2.
- Page 13 5. REPLACING THE VENT MOTOR CAPACITOR WARNING : Personal Injury Hazard Disconnect from the power supply before servicing the unit. Failure to do so could result in electric shock or other personal injury. CAUTION : Personal Injury Hazard Because of the weight and size of the microwave oven, two people are required to safely move and install it. Failure to do so could result in personal injury.
- Page 14 6. REPLACING/ADJUSTING - INTERLOCK SWITCHES WARNING : Personal Injury Hazard Disconnect from the power supply before servicing the unit. Failure to do so could result in electric shock or other personal injury. -REPLACING A SWITCH FIG. 6 1. Disconnect the electrical supply to the microwave oven. 2.
- Page 15 -MAKING ADJUSTMENTS Refer to FIG. 7-1 for the following steps: 1. If necessary, adjust the interlock switch housing so that the switches operate properly. WARNING : The interlock Monitor Switch provides an additional safety check on the Primary and Secondary Interlock Switches. If the Primary and Secondary Interlock Switches allow the oven to operate with the door open, the Monitor Interlock Switch will blow the line fuse.
- Page 16 7. REPLACING THE THERMOSTAT (BOTTOM / VENT) WARNING : Personal Injury Hazard Disconnect from the power supply before servicing the unit. Failure to do so could result in electric shock or other personal injury. 1. Disconnect the electric supply to the microwave oven. 2.
- Page 17 8. REPLACING THE TRAY MOTOR WARNING : Personal Injury Hazard Disconnect from the power supply before servicing the unit. Failure to do so could result in electric shock or other personal injury. CAUTION : Personal Injury Hazard Because of the weight and size of the microwave oven, two people are required to safely move and install it. Failure to do so could result in personal injury.
- Page 18 9. REPLACING A COOK-TOP LIGHT SOCKET WARNING : Personal Injury Hazard Disconnect from the power supply before servicing the unit. Failure to do so could result in electric shock or other personal injury. CAUTION : Personal Injury Hazard Because of the weight and size of the microwave oven, two people are required to safely move and install it. Failure to do so could result in personal injury.
- Page 19 10. REPLACING THE DOOR ASSEMBLY WARNING : Personal Injury Hazard Disconnect from the power supply before servicing the unit. Failure to do so could result in electric shock or other personal injury. CAUTION : Personal Injury Hazard Because of the weight and size of the microwave oven, two people are required to safely move and install it. Failure to do so could result in personal injury.
- Page 20 11. REPLACING THE GASKET WARNING : Personal Injury Hazard Disconnect from the power supply before servicing the unit. Failure to do so could result in electric shock or other personal injury. Refer to FIG. 11 for the following steps: FIG. 11 1.
- Page 21 12. REPLACING -THE CAVITY THERMOSTAT WARNING : Personal Injury Hazard Disconnect from the power supply before servicing the unit. Failure to do so could result in electric shock or other personal injury. Discharge the high voltage capacitor before working inside the oven. failure to do so could result in electrical shock.
- Page 22 13. REPLACING THE VENTILATION MOTOR FIG. 13 CAUTION : Personal Injury Hazard Because of the weight and size of the microwave oven, two people are required to safely move and install it Failure to do so could result in personal injury. 1.
- Page 23 14. PEPLACING THE POWER CORD WARNING : Personal Injury Hazard Disconnect from the power supply before servicing the unit. Failure to do so could result in electric shock or other personal injury. CAUTION : Personal Injury Heazard Because of the weight and size of the microwave oven, two people are required to safely move and install it. Failure to do so could result in personal injury.
- Page 24 15. REPLACING THE HIGH-VOLTAGE TRANSFORMER WARNING : Personal Injury Hazard Disconect from the power supply before servicing the unit. Failure to do so could result in electric shock or other personal injury. CAUTION : Personal Injury Hazard Because of the weight and size of the microwave oven, two people are required to safely move and install it. Failure to do so could result in personal injury.
- Page 25 16. REPLACING THE HIGH VOLTAGE RECTIFER WARNING : Personal Injury Hazard Disconnect from the power supply before servicing the unit. Failure to do so could result in electric shock or other personal injury. CAUTION : Personal Injury Hazard Because of the weight and size of the microwave oven, two people are required to safely move and install it. Failure to do so could result in personal injury.
- Page 26 17. REPLACING THE HIGH VOLTAGE CAPACITOR WARNING : Personal Injury Hazard Disconnect from the power supply before servicing the unit. Failure to do so could result in electric shock or other personal injury. CAUTION : Personal Injury Hazard Because of the weight and size of the microwave oven, two people are required to safely move and install it. Failure to do so could result in personal injury.
- Page 27 18. REPLACING THE MAGNETRON WARNING : Personal Injury Hazard Disconnect from the power supply before servicing the unit. Failure to do so could result in electric shock or other personal injury. CAUTION : Personal Injury Hazard Because of the weight and size of the microwave oven, two people are required to safely move and install it. Failure to do so could result in personal injury.
- Page 28 8. Mount the new magnetron with its mounting screw. 9. Reinstall the Air guide top, powercord, case blow fan under, vent motor, the case blow fan top and the vent grille on the microwave. 10. Secure the magnetron thermostat to the magnetron using 2 screws. 11.
-
Page 29: Trouble Shooting Guide
TROUBLE SHOOTING GUIDE Following the procedure below to check if the oven is defective or not. 1. Check grounding before checking trouble. 2. Be careful of the high voltage circuit. 3. Discharge the high voltage capacitor. 4. When checking the continuity of the switches, fuse or high voltage transformer, disconnect one lead wire from these parts and check continuity with the AC plug removed. - Page 30 CONDITION CHECK RESULT CAUSE REMEDY Replace Defective mag- Outlet has Check continuity of magnetron Continuity netron proper volt- age Fuse does not Replace blow. Open power sup- Check continuity of Continuity ply cord power supply cord Replace Normal Defective touch control circuit Replace Display do not shown...
-
Page 31: Measurement And Test
MEASUREMENT AND TEST 1. MEASUREMENT OF THE MICROWAVE POWER OUTPUT Microwave output power can be checked by indirectly measuring the temperature rise of a certain amount of water exposed to the microwave as directed below. PROCEDURE 1. Microwave power output measurement is made with the microwave oven supplied at rated voltage and operated at its maximum microwave power setting with a load 1000 5cc of potable water. -
Page 32: Microwave Radiation Test
2. MICROWAVE RADIATION TEST On every service call, checks for microwave energy emission must be made according to the following manner. 1. Remove the cooking rack from the oven cavity, if the microwave oven is, so equipped. 2. Place 275mL(9. oz.) glass of water in the center of the oven bottom. 3. - Page 33 If a microwave oven is found to operate with the door open, report to Department of Service, the manufacturer and CDRH* immediately. Also tell the owner not to use the oven. The interlock monitor switch acts as the final safety switch protecting the customer from microwave radiation. It the interlock monitor switch operates and opens the line fuse, the interlock switches have failed, and you must replace all of them(primary and secondary interlock switches, and the monitor switch), because their contact may be melted and welded together.
-
Page 34: Component Test Procedure
3. COMPONENT TEST PROCEDURE THE THERMOSTAT AND THERMAL CUT OUT There are Two thermostats and Two Thermal Cut Out in the OTR Microwave Oven. They are the cavity thermal cut out and the bottom thermal cut out. The cavity thermal cut out is located air guide top. This thermal cut out is normally- closed , and will open at a set temperature to disable the oven. - Page 35 VENT MOTOR CAPACITOR The Vent motor capacitor is located bottom of the airguide top. It is in use any time the Vent motor is on. The capacitor helps to maintain a constant voltage to the Vent motor so that it runs more efficiently.
- Page 36 COMPONET TEST PROCEDURE RESULT N. O. and C Terminals a) Normal - The meter Switches (with wire leads removed). All of the switches Set the ohmmeter to the R X 1 indicates infinity. are measured in the same manner. scale, and measure the resistance b) Abnormal - The between the normally-open (N.O.) meter indicates zero...
-
Page 37: Wiring Diagram
WIRING DIAGRAM 1. WIRING DIAGRAM... -
Page 38: Circuit Description
2. CIRCUIT DESCRIPTION MICROWAVE COOKING - TIME COOKING 1. When the food is placed inside the oven and door is closed. 1) The low voltage transdormer supplies the necessary voltage to the touch control circuit when the power cord is plugged in. - Page 39 COMPONET TEST PROCEDURE RESULT Terminal-To-Terminal a) Normal - The meter High Voltage Capacitor Set the ohmmeter to the Rx10k indicates several scale, and measure the resistance ohms, then gradual- across the capacitor terminals. ly returns to infinity. b) Abnormal - The meter indicates infin- ity, or zero ohms (a short) immediately.
- Page 40 The Touch control circuit controls the ON-OFF time of RELAY 1 in order to vary the output power of the microwave oven from power level 1 to HI (100%) power. One complete ON and OFF cycle of the RELAY 1 is 29 seconds. The relation between indications on the control panel and the output of the microwave oven is as shown.
- Page 41 3) Fan motor and turn table stop rotating 4) the oven lamp turns off. 5) As soon as the door is opened, the interlock monitor switch contacts close and creates the short circuit. 6) If the contacts of primary interlock switch malfunction the 20A fuse blows open due to the large current surge caused by the short circuit activation, and this in turn stops magnetron oscillation.
-
Page 42: Printed Circuit Board
PRINTED CIRCUIT BOARD 1. CIRCUIT CHECK PROCEDURE 1) Low Voltage Transformer (DMR-161P) Check The low voltage transformer is located on the PCB Measuring condition : Input voltage : 120 V Frequency : 60Hz Voltage LOAD NO LOAD Terminal 7 - 8 AC 11V AC 14.5V NOTE :... - Page 43 MEASURE POINT 4) When there is no microwave oscillation When touching START pad, oven lamp does not turn on. Fan motor does not rotate, but cook indicator in display comes on. *Cause: RELAY 1,2,4 does not operate. -> refer to Circuit Diagram (point 2,3,4) - CHECK METHOD STAGE POINT RELAY 2,4,5 ON...
-
Page 44: Trouble Shooting
TROUBLE SHOOTING Following the procedures below to check if the oven is defective or not. 1. Check grounding before checking trouble. 2. Be careful of the high voltage circuit. 3. Discharge the high voltage capacitor. 4. When checking the continuity of switches or of the high voltage transformer, disconnect one lead wire from these parts and then check conitnuity with the AC plug removed. - Page 45 (TROUBLE 2) Digital readout display does not show programming, even if the membrane keyboard is programmed by touching proper pads. NOTE : Before following the particular steps listed above in the trouble shooting guide for the membrane keyboard, fail- ure, please check for the continuity of each wire-harness between the membrane keyboard and control box assembly.
- Page 46 3. Key check procedure To determine if the membrane keyboard is defective or not, check the continuity of each pad(key) contacts with a multi- meter. 1) 0 pad : Between A and J 2) 1 pad : Between B and J 3) 2 pad : Between C and J 4) 3...
- Page 47 2. COMPONENT INFORMATION 2. COMPONENT INFORMATION 1) TRANSISTOR 1) TRANSISTOR KRA106M R1 = 4.1 Kohm Kohm Kohm Kohm 2) DIODE AND ZENER DIODE...
- Page 48 3. PRINTED CIRCUIT BOARD FILM...
- Page 49 4. PCB CIRCUIT DIAGRAM...
- Page 50 5. PCB LOCATION NO NAME SYMBOL SPECIFICATION PART CODE QT'Y REMARK BUZZER BM-20K 3515600100 C ARRAY 7P(6) 1000PF M 50V CN6XB-102M CAPACITOR CERA 102 50V Z AXIAL CCZB1H102K CAPACITOR CERA C1~4,C6,C7 104 50V Z AXIAL CCZF1H104Z CAPACITOR ELEC 50V RS 10uF CEXE1H100A CAPACITOR ELEC 25V RSS 1000MF...
-
Page 51: Exploded View And Parts List
EXPLODED VIEW AND PARTS LIST 1. DOOR ASSEMBLY (KOT-1G0B / KOT-1G0S) REF NO. PART NAME DESCRIPTION PART CODE Q'TY REMARK 3512209600 KOT-1G0A FRAME DOOR 3511716210 KOT-1G4U 3512606400 KOT-1G0A HANDLE DOOR *O 3512604500 KOT-1G4U HANDLE DOOR *I 3512606500 SCREW TAPPING T2S PAN 4X10 MFZN... - Page 52 2. CONTROL PANEL ASSEMBLY (KOT-1G0B / KOT-1G0S) REF NO. PART NAME DESCRIPTION PART CODE Q'TY REMARK 3518572100 KOT-1G0B SWITCH MEMBRANE KOT-1G0A9A 3518572110 KOT-1G0S 3516733700 KOT-1G0B CONTROL PANEL 3516734800 KOT-1G0S 3516802200 KOT-1G0A BACK PLATE SECC T0.6 3516802210 KOT-1G4U PCB AS KOT-1G0A9A...
- Page 53 3. TOTAL ASSEMBLY (KOT-1G0B / KOT-1G0S)
- Page 54 PART CODE PART NAME DESCRIPTION Q'TY 3511726100 KOT-1G0A9A NEGRO DOOR AS 3511712260 KOT-176SBA SILVER PKCPSWF200 KOT-1G0A9A NEGRO CONTROL-PANEL AS PKCPSWF210 KOT-1G4U9A SILVER 7122401211 SCREW TAPPING T2S TRS 4X12 MFZN 3516118200 CAVITY AS KOT-1G0A9A 3511406200 COVER WAVE GUIDE HEATPROOF PP 3966820200 MOTOR SYNCRO 120V 2W GM-16-12F17 7121400611...
- Page 55 PART CODE PART NAME DESCRIPTION Q'TY 3518003420 MAGNETRON RM228JFP 6CF 3516004000 SPECIAL SCREW T2 BOLT FLANGE 5X12 DACRO 3518903800 THERMOSTAT OFF:160 ON:115 V #187 7121300611 SCREW TAPPING T2S PAN 3X6 MFZN 3512526200 GUIDE AIR *T 3518906310 THERMOSTAT OFF:100 ON:60 V #187 3512782100 HARNESS THERMOSTAT KOT-1G0A9A...
Need help?
Do you have a question about the KOT-1G0S and is the answer not in the manual?
Questions and answers