Table of Contents

Subscribe to Our Youtube Channel
Related Manuals for Daewoo KOT-170U


Summary of Contents for Daewoo KOT-170U
- Page 1 Microwave Oven MODEL: KOT-170U Use and Care Manual Table of Contents Help us help you Important Safety Information Operating Instruction, Tips Cooking Guide Care and Cleaning Installation Save This Manual with Installation Manual...
-
Page 2: Precautions To Avoid Possible
IMPORTANT-SAFETY INSTRUCTIONS Read all instructions before using this appliance. * This appliance must be grounded. Connect PRECAUTIONS TO only to properly grounded outlet. See Grounding Instructions section. AVOID POSSIBLE * Use this appliance only for its intended use as described in this manual. Do not use EXPOSURE TO corrosive chemicals or vapors in this appliance. - Page 3 IMPORTANT-SAFETY INSTRUCTIONS (continued) * Do not let power cord hang over edge of table * Do not operate the oven in microwave while or counter. empty to avoid damage to the oven and the danger of fire. If by accident the oven should * Do not operate this appliance if it has a run empty a minute or two, no harm is done.
- Page 4 IMPORTANT-SAFETY INSTRUCTIONS (continued) * Do not cover the shelf or any other part of the exactly and always cook the meat to an internal oven with metal foil. This will cause temperature of at least 170˚F. This assures that in overheating of the microwave oven.
-
Page 5: Save These Instructions
* Have it installed and properly grounded by a Optional Accessories qualified installer. See the special installation booklet packed with the microwave oven. Available at extra cost from your DAEWOO supplier. * The exhaust fan in the oven will operate automatically under certain conditions (see Charcoal filter Kit (351190030) for non-vented Automatic Fan Feature). -
Page 6: Automatic Fan Feature
VARIABLE POWER LEVELS (1-10) Variable power levels add flexibility to your may wish to use a lower power level when cooking microwave cooking. The power levels on your foods that have a tendency to boil over, such as microwave oven can be compared to the surface scalled potatoes. - Page 7 23. CLOCK - Touch this pad to enter time of day or and cook time. Refer to Sensor Cook Guide. check time of day while microwaving. 11. AUTO COOK (KOT-170U) - Will automatically 24. START - After all selections are made, touch set the microwave power and cook time. Refer this pad to start the oven or timer.
- Page 8 < K O T-170U> < K O T-170S/174S> Frozen Favorite Frozen Favorite Popcorn Beverage Popcorn Beverage Vegetable Choice Vegetable Choice Frozen Frozen Baked Dinner Baked Dinner Snack Snack Pizza Pizza Potato Plate Potato Plate Auto Cook Auto Sensor Cook Auto Defrost Minute Defrost...
-
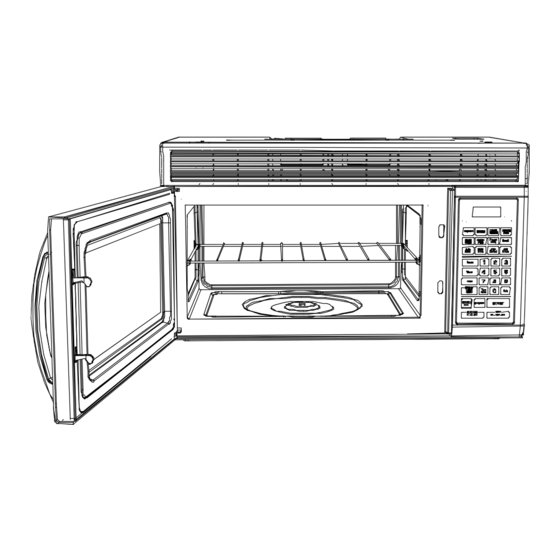
Page 9: Features Of Your Oven
FEATURES OF YOUR OVEN 1. Door Handle. Pull to open door. Door must be For detailed information on each feature, see your securely latched for oven to operate. touch Control Panel section. 2. Door Latches. 5. Grease Filters. 3. Window with metal shield. Screen allows 6. -
Page 10: How To Set The Oven Controls
HOW TO SET THE OVEN CONTROLS This section includes useful information about oven operation. 1. Plug power supply cord into standard 3-pronged 15 Amp, 120V AC 60Hz power outlet socket. 2. After placing the food in a suitable container, open the oven door and put it on the glass tray. The glass tray must always be in place during cooking. - Page 11 CONTROL Time-of-Day Clock • After plugging in the oven or after a power Basic Instructions outage, the Display will scoll “TOUCH CLOCK 1. Touch the CLOCK Pad. “LOCK ENTER TIME” PAD TO ENTER TIME OF DAY”. Touch the will be displayed. CANCEL/OFF Pad and set the clock following 2.
-
Page 12: Two Stage Cooking
Power Level Cooking Guide The power levels on your microwave oven can be Power Level Best Uses compared to the surface units on a range. HIGH High 10 Fish, bacon, vegetables, (power level 10) or full power is the fastest way to boiling liquids cook and gives you 100% power. - Page 13 5. Auto Defrost is programmed for frozen food at • Shield: Use small strips of aluminum foil to 0˚F. If food is stored at a higher temperature, protect thin areas or edges of unevenly shaped expect shorter defrost times. foods such as chicken wings. To prevent arcing, do not allow foil to com within 1-inch of oven 6.
-
Page 14: Auto Defrost
Auto Defrost • During defrosting, the oven will beep a series of short beeps to signal that the food needs to be Use the defrost setting for defrosting meats, turned or rearranged. “TURN FOOD OVER” will poultry and fish from .5 pounds to 6.5 pounds. be displayed. -
Page 15: Auto Start
Auto Start The AUTO START feature allows you to program * To cook with only one Stage, omit steps 5, 6, 7 & 8. your oven to begin cooking at a preset time of day- ** The oven will start cooking at the set time. If the door up to a delay of 11 hours and 59 minutes. -
Page 16: Add Minute
Each time the pad is touched the oven will add 1 minute to the time up to 99 minutes. • The timer cannot be set while cooking. • The door must be shut for the timer to operate. Auto Cook (KOT-170U ONLY) Auto Cook Guide Basic Instructions TOUCH NUMBER 1. -
Page 17: Sensor Cook Guide
Sensor Cook (KOT-170S, KOT-174S • When preparing fresh vegetables, add 1/2 cup of water per 1/2 pound of fresh vegetables. ONLY) Sensor Cook Guide SENSOR COOK will automatically customize the cook time for food in four categories - soup, fresh TOUCH vegetables, muffins and fish fillets. -
Page 18: One Touch Cooking
ONE TOUCH COOKING One touch cooking allows you to cook or reheat many of your favorite foods by touching just one pad. To increase quantity, touch chosen pad unit number in display is same as desired quantity to cook. Popcorn •... -
Page 19: Dinner Plate
Dinner Plate • Place meat and dense vegetables to the outside of Basic Instructions the plate. 1. Touch the DINNER PLATE Pad. The Display • Place delicate foods in the center of the plate. will show “DINNER PLATE” • Cover the plate with wax paper to hold steam •... -
Page 20: Child Safety Lock
Snack Sensor Cook Guide FOOD SNACK NUMBER QUANTITY Basic Instructions TYPE OR WEIGHT 1. Touch the SNACK Pad until the desired food 1 EA is displayed.* 2 EA 1. Bread Once 2. Touch the number pad indicated on the 3 EA Cooking Guide for the cooking weight 4 EA desired.*... -
Page 21: Using The Vent Fan
Using the Vent Fan You can control the 2-speed fan by touching the NOTE: If the temperature gets too hot around the VENT FAN Pad. microwave oven, the exhaust fan in the vent hood will automatically turn on at LOW speed to protect Basic Instructions the microwave oven against danger. -
Page 22: Using The Cooktop Light
Using the Cooktop Light You can control the cooktop light by touching the LIGHT Pad. Basic Instructions • Touch the LIGHT Pad once for turning the cooktop light on. The Display will scroll “ON LIGHT”. • Touch the LIGHT Pad twice for turning the night light on. The Display will scroll “NIGHT LIGHT”. - Page 23 USING FAVORITE CHOICE FAVORITE CHOICE allow you to recall one cooking instruction previously placed in memory and begin cooking quickly. For example, if you heat a roll every morning, program the cooking steps into FAVORITE CHOICE. You can heat your roll each morning by touching FAVORITE CHOICE. FAVORITE CHOICE also allows you to program a function for another person to cook at a later time.
-
Page 24: Care And Cleaning
CARE AND CLEANING Keep your oven clean and sweet smelling. Opening the door a few minutes after cooking helps air out the inside. An occational through wiping a solution of baking soda and water keeps the inside fresh. Don’t use sharp-edged utensils on your oven. The inside and outside oven walls can be scratched. The control panel can be damaged. -
Page 25: The Exhaust Feature
THE EXHAUST FEATURE The exhaust hood feature on your microwave oven is equipped with two metal filters which collect grease. When the fan is operated, air is drawn up through the filters and is then discharged through the provide venting to the outside. -
Page 26: Grounding Instruction
GROUNDING INSTRUCTION This appliance must be your personal responsibility and grounded. In the event of an obligation to have it replaced electrical short circuit, gronding with a properly grounded three- reduces the risdk of electric prong wall receptacle. shock by providing an escape A short power-supply cord is wire for the electric current. -
Page 27: Light Bulb Replacement
LIGHT BULB REPLACEMENT Cooktop Light unscrewing the bulbs. Replace with 30 watt To replace the combination cooktop light/night incandescent bulbs available from your supplier. light, first disconnect power at main fuse or circuit breaker panel or pull plug. Remove screw on right High intensity 30-watt bulbs, which are available in side of light compartment cover and lower cover supermarkets and hardware stores, may also be... - Page 28 Remove the charcoal filter and pull out the lamp cover. Replace the burned-out bulb with a 30-watt bulb. Clean off the grease and dust on hood surfaces often. Use a solution of wrm water and detergent. About I tablespoon of ammonia may be added to the water.
-
Page 29: Specifications
SPECIFICATIONS Power supply 120V Volts AC 60Hz Only Power consumption 1600 W, Max. Microwave output power 1000 W (IEC 705) Microwave frequency 2,450 MHz ± 50MHz Outside dimensions (WxHxD) 760x427x383 mm (29.9x16.8x15.0 in.) Cavity dimensions (WxHxD) 506x256x363 mm (19.9x10.0x14.2 in.) Cavity volume 1.7 Cu. -
Page 30: Microwave Oven Warranty
MICROWAVE OVEN WARRANTY Daewoo Electronics Corperation of America ( DECA) warrants this product to be free from defects in material and workmanship and agrees to remedy any such defect. This warranty covers 2 years labour and 2 years parts, plus an additional 3 years part warranty on magetron only, from the date of original purchase.
Need help?
Do you have a question about the KOT-170U and is the answer not in the manual?
Questions and answers