Sign In
Upload
Manuals
Brands
ZyXEL Communications Manuals
Network Hardware
NSA-2401
ZyXEL Communications NSA-2401 Manuals
Manuals and User Guides for ZyXEL Communications NSA-2401. We have
3
ZyXEL Communications NSA-2401 manuals available for free PDF download: User Manual, Quick Start Manual, Brochure
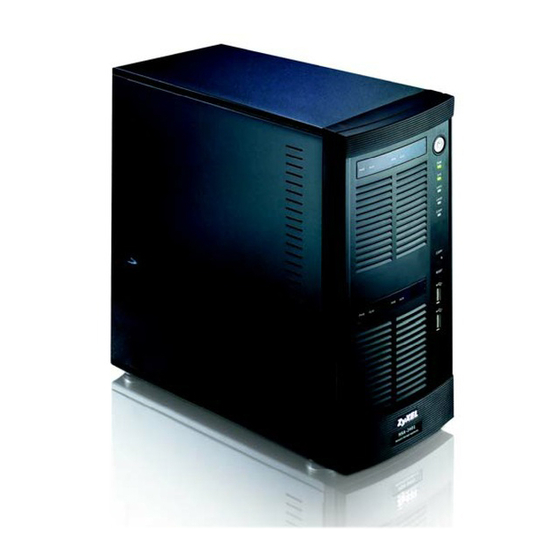
ZyXEL Communications NSA-2401 User Manual (367 pages)
Network Storage Appliance
Brand:
ZyXEL Communications
| Category:
Network Hardware
| Size: 9.24 MB
Table of Contents
About this User's Guide
3
Document Conventions
4
Safety Warnings
6
Table of Contents
9
Contents Overview
9
Table of Contents
11
List of Figures
17
List of Tables
25
Introduction and Tutorials
29
Part I: Introduction and Tutorials
29
Chapter 1 Getting to Know Your NSA
31
Figure 1 NSA Overview
31
NSA-2401 Overview
31
Figure 2 NSA Front Panel Leds
32
Front Panel Leds
32
Table 1 Disk Drive Leds
32
Table 2 NSA Leds
32
COPY Button
33
Power Button
33
Chapter 2 Introducing the Web Configurator
35
Access the NSA Using the NDU
35
Accessing the NSA Web Configurator
35
Web Configurator Overview
35
Figure 3 NDU Main Screen
36
Figure 4 NDA URL
36
Login
36
Web Browser Access
36
Figure 5 NSA Login Screen
37
Figure 6 Change Password Screen
37
User-Level Screens Overview
37
Figure 7 My NSA
38
My NSA Screen
38
Table 3 User-Level Global Labels and Icons
38
Figure 8 My NSA Screen
39
Table 4 My NSA Screen
39
Figure 9 My NSA Share Browsing
40
My NSA Share Browsing Screen
40
Table 5 My NSA Share Browsing Icons
40
Table 6 My NSA Share Browsing
41
Figure 10 My NSA Share Browsing > Move to (or Copy To)
42
Figure 11 My NSA Share Configuration
42
My NSA Share Browsing Move to or Copy to Screen
42
My NSA Share Configuration
42
Table 7 My NSA Share Browsing > Move to (or Copy To)
42
Figure 12 My NSA Change Share Properties
43
My NSA Change Share Properties Screen
43
Table 10 My NSA Change Share Properties
43
Table 8 My NSA Share Configuration Icons
43
Table 9 My NSA Share Configuration
43
Figure 13 My NSA Change Share Properties > Share Access Configuration
45
Share and Folder Names
45
Table 11 My NSA Change Share Properties > Share Access Configuration
45
Figure 14 Password
46
Password Screen
46
Share Paths
46
Administration Screens
47
Table 12 Password
47
Figure 15 Status
48
Global Administration Icons
48
Table 13 Global Labels and Icons
48
Figure 16 Navigation Panel Links
49
Navigation Panel
49
Table 14 Screens Summary
50
Common Screen Icons
51
Main Window
51
Status Messages
51
Table 15 Common Configuration Screen Icons
51
NSA RESET Button
52
Reload Factory Default Configuration File
52
Reset
52
Figure 17 Reset and Reload Timeline
53
Tutorials
55
Figure 18 Administrator Login
56
Figure 19 My NSA
56
Figure 20 Sharing > Users
57
Figure 21 Sharing > Users > Create a New Account
57
Figure 22 Groups
58
Setting up Groups
58
Figure 23 Sharing > Groups > Add Share
59
Figure 24 Shares
59
Setting up Shares
59
Figure 25 Sharing > Shares > Add Share
60
Figure 26 Share Access Configuration
60
Figure 27 Sharing > Shares > Add Share
61
Figure 28 Mapping a Share
61
How to Use Shares
61
Using a Share with Windows Explorer
61
Figure 29 Entering the Share Username and Password
62
Figure 30 Creating a Folder
62
Figure 31 Using the Folder
62
Using a Share with a Web Browser
62
Figure 32 User Login
63
Figure 33 Gonzo's My NSA Screens
63
Figure 34 Gonzo Share Screen
64
Figure 35 Strategy Folder Screen
65
Figure 36 Upload Files Screen
65
How to Find the NSA in os X
65
Figure 37 Opening the Finder
66
Figure 38 Displaying the NSA
66
Figure 39 Displaying the NSA
67
Figure 40 Alternate Method for Displaying the NSA
67
Configuring Security for Web Configurator Sessions
68
Figure 41 Connecting to the NSA
68
How to Configure Security
68
Figure 42 Maintenance > SSL
69
Figure 43 Maintenance > SSL > Edit a Self-Signed Certificate
69
Figure 44 Maintenance > SSL > Edit a Self-Signed Certificate
70
Figure 45 Maintenance > SSL
71
Figure 46 Downloading the Nsa's Certificate
71
Figure 47 Downloading the Nsa's Certificate
72
Figure 48 Certificate
72
Figure 49 Certificate Import Wizard: Welcome
73
Figure 50 Certificate Import Wizard: Certificate Store
73
Figure 51 Certificate Import Wizard: Finish
74
Figure 52 Security Warning
74
Figure 53 Certificate Import Wizard: Successful
74
Figure 54 Maintenance > SSL
75
Figure 55 Maintenance > SSL > Force HTTPS Warning
76
Figure 56 Firefox: Secure Connection Failed
76
Figure 57 Firefox: Secure Connection Failed
77
Figure 58 Firefox: Add Security Exception
77
Figure 59 Firefox: Add Security Exception
78
Figure 60 Firefox: Add Security Exception
79
Figure 62 HTTPS Login
81
Figure 63 Filezilla Site Manager
82
Controlling Access to Shares, Folders, and Files
83
Figure 64 Filezilla Unknown Certificate Warning
83
Figure 65 Sharing > Shares
83
Figure 66 Sharing > Shares > Edit Share
84
Figure 67 Share Access Configuration
84
Figure 68 Sharing > Shares
85
Figure 69 Sharing > Shares > ACL Configuration
85
Figure 70 Sharing > Shares > ACL Configuration > New ACL
86
Figure 71 Sharing > Shares > ACL Configuration > New ACL > Strategy
86
Figure 72 Sharing > Shares > ACL Configuration > New ACL > Strategy > Set ACL
87
Figure 73 Sharing > Shares > ACL Configuration > New ACL > Strategy
88
Figure 74 Sharing > Shares > ACL Configuration > New ACL > Strategy
88
Figure 75 Maintenance > Power Management
89
Creating a Snapshot Job
90
Figure 76 Protect > Snapshot
90
Configuring Snapshot Image Access
91
Figure 77 Protect > Snapshot > Add Job
91
Figure 78 Protect > Snapshot > Snapshot Image Access
91
Using a Snapshot Image to Restore Files
91
Creating a Synchronization Backup
92
Figure 79 Using a Snapshot Image
92
Figure 80 Protect > Backup
92
Figure 81 Protect > Backup > Add Job: Step 1
93
Figure 82 Protect > Backup > Add Job: Step 2
94
Figure 83 Protect > Backup > Add Job: Step 3
95
Figure 84 Protect > Backup > Add Job: Step 3
95
Creating an Archive Backup
96
Figure 85 Protect > Backup > Add Job: Step 4
96
Figure 86 Protect > Backup
96
Figure 87 Protect > Backup > Add Job: Step 1
97
Figure 88 Protect > Backup > Add Job: Step 2
98
Figure 89 Protect > Backup > Add Job: Step 3
99
Figure 90 Protect > Backup > Add Job: Step 4
99
Restoring Archived Files by Backup Job
99
Figure 91 Protect > Backup
100
Figure 92 Protect > Backup > Restore Archive: Step 1
100
Figure 93 Protect > Backup > Restore Archive: Step 2
101
Figure 94 Protect > Backup > Restore Archive: Step 3
101
Figure 95 Protect > Backup > Restore Archive: Progress
102
Figure 96 Protect > Restore: Step 1
102
Restoring by Backup Files
102
Figure 97 Protect > Restore: Step 2
103
Figure 98 Protect > Restore: Step 3
103
Figure 100 Printer Sharing
104
Figure 99 Protect > Restore: Step 4
104
Printer Server Tutorial
104
Figure 101 Printer Connected to NSA: Windows Explorer
105
Figure 102 Printer Connected to NSA: Windows Explorer Warning
105
Figure 103 Printer Driver Needed
105
Figure 104 Applications > Print Server
106
Figure 105 Printer Screen in Windows Explorer
106
How to Increase the Nsa's Storage Capacity
106
Adding an Internal Hard Drive to an Existing Disk Array
107
Connecting External USB Hard Drives
107
Figure 106 Connecting a USB Hard Drive
107
Figure 107 Storage > External Storage > Disk
107
Figure 108 Storage > Internal Storage > Disk
108
Figure 109 Storage > Internal Storage > RAID
108
Figure 110 Storage > Internal Storage > RAID > Add Disk
109
Figure 111 Storage > Internal Storage > Disk
109
Using a Disk Array's Increased Capacity
109
Migrating a RAID to Higher Capacity Hard Drives
110
How to Use Backups and Snapshots
89
Power Resume
89
Chapter 3 Tutorials
55
How to Configure Sharing
55
Overview
55
Setting up User Accounts
55
Figure 61 Firefox: Add Security Exception
80
Using FTPS to Connect to the NSA
81
Figure 112 Storage > Internal Storage > Volume
110
Figure 113 Storage > Internal Storage > Volume > Edit
110
Figure 114 Storage > Internal Storage > Disk
111
Figure 115 Storage > Internal Storage > Disk > Eject
111
Figure 116 Storage > Internal Storage > Disk > Eject
111
Figure 117 Status: RAID Degraded
112
Figure 118 Storage > Internal Storage > RAID
112
Figure 119 Storage > Internal Storage > RAID > Repair
112
Figure 120 Storage > Internal Storage > RAID
113
Web Configurator
115
Table 17 Status
115
Status Screen
117
Chapter 4 Status Screen
117
Figure 121 Status Screen
117
Table 16 Status Icons
118
Chapter 5 System Setting Screen
121
Date/Time
121
Figure 122 System Setting > Date/Time
121
Table 18 System Setting > Date/Time
121
Time Lag
122
Chapter 6 Storage Screens
125
Figure 123 Disks, Raids, and Volumes
125
Storage Screens Overview
125
What You Can Do in the Storage Screens
125
What You Need to Know about Storage
125
Figure 124 Storage > Internal Storage > Status
127
Internal Storage Status Screen
127
Table 19 Storage > Internal Storage > Status
127
Disk
128
Figure 125 Storage > Internal Storage > Disk
128
Internal Disks Screen
128
Screen
129
Table 20 Storage > Internal Storage > Disk Icons
129
Table 21 Storage > Internal Storage > Disk
129
Figure 126 Storage > Internal Storage > Disk > S.M.A.R.T. (Brief Summary)
130
Table 22 Storage > Internal Storage > Disk > S.M.A.R.T. (Brief Summary)
130
Figure 127 Storage > Internal Storage > Disk > S.M.A.R.T. (Full Summary)
131
Table 23 Storage > Internal Storage > Disk > S.M.A.R.T. (Full Summary)
131
Arrays
132
RAID Levels
132
Table 24 RAID Array Levels Quick Comparison
133
Array Status
134
Figure 128 Storage > Internal Storage > RAID
135
RAID Screen
135
Table 25 Storage > Internal Storage > RAID Icons
136
Creating a New RAID
138
Figure 129 Storage > Internal Storage > RAID > Create
138
Table 26 Storage > Internal Storage > RAID
138
Internal Volume Screen
139
Table 27 Storage > Internal Storage > RAID > Create
139
Figure 130 Storage > Internal Storage > Volume
140
Table 28 Storage > Internal Storage > Volume Icons
140
Table 29 Storage > Internal Storage > Volume
141
Creating or Editing an Internal Volume
142
Figure 131 Storage > Internal Storage > Volume > Create
142
Table 30 Storage > Internal Storage > Volume Create
142
Figure 132 Selecting the USB Device
144
Table 31 Selecting the USB Device
144
USB Key Creation
144
External Storage Disk Screen
145
Figure 133 Creating a Duplicate USB Key
145
Figure 134 Creating a Duplicate USB Key: Eject
145
Figure 135 Creating a Duplicate USB Key: Insert
145
Figure 136 Storage > External Storage > Disk
146
Table 32 Storage > External Storage > Disk Icons
146
Table 33 Storage > External Storage > Disk
146
External Volume Screen
147
Figure 137 Storage > External Storage > Volume
147
Table 34 Storage > External Storage > Volume Icons
147
Creating or Editing an External Volume
148
Table 35 Storage > External Storage > Volume
148
Figure 138 Storage > External Storage > Volume > Create
149
Table 36 Storage > External Storage > Volume Create
149
Technical Reference
150
Storage Terminology
151
Jbod
152
Raid 10
152
Table 37 JBOD
152
Table 38 RAID 0
152
Raid 0
153
Raid 1
153
Table 39 RAID 1
153
Table 40 RAID 10
153
Hot-Spare
154
Raid 5
154
Table 41 RAID 5
154
Attributes
155
RAID and Data Protection
155
Table 42 S.M.A.R.T. Attributes
155
Network Screens
159
Figure 139 Stand Alone Teaming Mode
160
Figure 140 Fault Tolerance Teaming Mode
161
Figure 141 Load Balancing Teaming Mode
161
Figure 142 Link Aggregation Teaming Mode
161
Configuring the TCP/IP Screen
162
Figure 143 Jumbo Frames
162
Figure 144 Network > TCP/IP
163
Table 43 Network > TCP/IP
163
Windows/Cifs
164
Figure 145 Active Directory Example Application
166
Figure 146 Network > Windows/Cifs (Workgroup)
166
Windows/Cifs Screen
166
Figure 147 Network > Windows/Cifs (Domain)
167
Table 44 Network > Windows/Cifs
167
Figure 148 Network > NFS
168
NFS Screen
168
Table 45 Network > NFS Icons
168
Add or Edit NFS Share Screen
169
Figure 149 Network > NFS > Add NFS Share
169
Table 46 Network > NFS
169
Figure 150 Network > NFS > NFS Session
170
NFS Session Screen
170
Table 47 Network > NFS > Add NFS Share
170
Table 48 Network > NFS > NFS Session
171
Sharing Screens
173
Figure 152 Sharing > Users > Add User
178
Table 51 Sharing > Users > Create a New Account
178
Figure 153 My NSA
180
Figure 154 Password
180
Figure 155 Sharing > Users > User Information
181
Table 52 Sharing > Users > User Information > Quota List
181
View User Information
181
Figure 156 Sharing > Groups
182
Groups
182
Table 53 Sharing > Groups Icons
182
Table 54 Sharing > Groups
183
Add a New Local Group & Change Group Properties
184
Figure 157 Sharing > Groups > Add a New Local Group
184
Table 55 Sharing > Groups > Add a New Local Group
184
Figure 158 Sharing > Shares
186
Shares
186
Table 56 Sharing > Shares Icons
186
Table 57 Sharing > Shares
187
Create a New Share & Edit a Share
188
Figure 159 Sharing > Shares > Create a New Share
188
Table 58 Sharing > Shares > Create a New Share
188
Figure 160 Sharing > Shares > Create a New Share > Share Access Configuration
189
Table 59 Sharing > Shares > Create a New Share > Share Access Configuration
189
ACL Configuration
190
Figure 161 Sharing > Shares > ACL Configuration
190
Table 60 Sharing > ACL Configuration Icons
190
Table 61 Sharing > Shares > Create a New Share > Share Access Configuration
190
Figure 162 Sharing > Shares > ACL Configuration > New ACL Configuration
191
Table 62 Sharing > Shares > ACL Configuration > New ACL Configuration Icons
191
Table 63 Sharing > Shares > Create a New Share > Share Access Configuration
191
Figure 163 Shares > ACL Configuration > New ACL Configuration > ACL Permission
192
Table 64 Shares > ACL Configuration > New ACL Configuration > ACL Permission
192
Figure 164 Sharing > Shares > Configuration
193
Recycle bin
193
Table 65 Shares > ACL Configuration > New ACL Configuration > ACL Permission
193
Dfs
194
Figure 165 Sharing > Shares > DFS
194
Table 66 Sharing > Shares > DFS
194
Protect Screens
195
Protection Methods Overview
195
Figure 166 Protect > Backup
199
Table 68 Protect > Backup Icons
199
Creating a Backup Job
200
Figure 167 Protect > Backup > Add Job: Step 1
200
Table 70 Protect > Backup > Add Job: Step 1
201
Figure 168 Protect > Backup > Add: Step 2
202
Figure 169 Protect > Backup > Add Job: Step 3
204
Table 71 Protect > Backup > Add Job: Step 2
204
Figure 170 Protect > Backup > Add Job: Step 4
205
Table 72 Protect > Backup > Add Job: Step 3
205
Table 73 Protect > Backup > Add Job: Step 4
205
Figure 171 Protect > Backup > Edit Job: Step 1
206
Figure 172 Protect > Backup > Edit Job: Step 2
207
Restoring by Backup Job
207
Table 74 Protect > Backup > Edit Job: Step 1
207
Table 75 Protect > Backup > Edit Job: Step 2
207
Figure 173 Protect > Backup > Restore Archive: Step 1
208
Table 76 Protect > Backup > Restore Archive: Step 1
208
Figure 174 Protect > Backup > Restore Archive: Step 2
209
Figure 175 Protect > Backup > Restore Archive: Step 3
209
Figure 176 Protect > Restore: Step 1
210
Table 78 Protect > Backup > Restore Archive: Step 3
210
Table 79 Protect > Restore: Step 1
210
Figure 177 Protect > Restore: Step 2
211
Protect > Restore: Step 2
211
Table 80 Protect > Restore: Step 2
211
Figure 178 Protect > Restore: Step 3
212
Protect > Restore: Step 3
212
Table 81 Protect > Restore: Step 3
212
Figure 179 Protect > Restore: Step 4
213
Protect > Restore: Step 4
213
Snapshots
213
Table 82 Protect > Restore: Step 4
213
Table 83 Protect > Snapshot > Snapshot Jobs Icons
215
Creating/Editing Snapshots
216
Table 84 Protect > Snapshot > Snapshot Jobs
216
Snapshot Images
217
Table 86 Protect > Snapshot > Snapshot Images Icons
218
Table 87 Protect > Snapshot > Snapshot Images
218
Figure 183 Protect > Backup Software
219
Application Screens
221
Ftp
222
Figure 185 Applications > FTP
223
Table 88 Applications > FTP
223
Print Server
224
Print Server Rename
224
Figure 188 Applications > Copy Button
225
Table 90 Applications > Print Server > Rename
225
Table 91 Applications > Copy Button
225
Figure 189 Applications > Copy Button > Edit
226
Table 92 Applications > Copy Button > Edit
226
Table 93 Applications > Copy Button > Edit
226
Log
228
Figure 191 Maintenance > Log
229
Figure 192 Maintenance > Log > Log Classes
229
Log Records Configuration
230
Search
230
Editing a Backup Job
206
Maintenance Screens
227
Figure 195 Maintenance > Log > Log Config > Buzzer Priority
231
Table 96 Maintenance > Log > Log Config > Log Records Configuration
231
Table 97 Maintenance > Log > Log Config > Buzzer Priority
231
Figure 196 Maintenance > Log > Log Report Configuration > Mail Setting
232
Table 98 Maintenance > Log > Log Report Configuration > Mail Setting
232
Figure 197 Maintenance > Log > Log Report Configuration > Report Setting
233
Figure 198 Maintenance > Log > Log Report Configuration > Syslog Server Setting
234
Table 100 Maintenance > Log > Log Report Configuration > Syslog Server Setting
234
Configuration
235
Figure 199 Maintenance > Configuration
235
Figure 200 Maintenance > Configuration > Warning
235
Table 101 Maintenance > Configuration
235
Figure 201 Maintenance > Configuration > Restarting
236
Table 102 Maintenance > Configuration
236
Figure 202 Maintenance > SSL
237
Ssl
237
Table 103 Maintenance > SSL
238
Figure 203 Maintenance > SSL > Edit a Self-Signed Certificate
239
Firmware Upgrade
239
Table 104 Maintenance > Configuration
239
Figure 204 Maintenance > FW Upgrade
240
Power Management
240
Table 105 Maintenance > FW Upgrade
240
Figure 205 Maintenance > Power Management
241
Table 106 Maintenance > Power Management
241
Figure 206 Maintenance > Power Management > Edit
242
Power Control Schedule
242
Shutdown
243
Table 99 Maintenance > Log > Log Report Configuration > Report Setting
233
Export Log
234
Chapter 7 Network Screens
159
Network Screens Overview
159
What You Can Do in the Network Screens
159
What You Need to Know about the Network Screens
159
TCP/IP Screen
160
Chapter 8 Sharing Screens
173
Overview
173
What You Can Do in the Sharing Screens
173
What You Need to Know about the Sharing Screens
173
Figure 151 Sharing > Users
175
Table 49 Sharing > Users Icons
175
Users
175
Table 50 Sharing > Users
176
Create a New Account & Change Account Properties
178
Table 69 Protect > Backup
209
Table 77 Protect > Backup > Restore Archive: Step 2
209
Restoring by Backup Files
210
Table 107 Maintenance > Power Management > Edit
243
Figure 207 Maintenance > Shutdown
244
Figure 208 Maintenance > Shutdown > Confirm Restart
244
Figure 209 Maintenance > Shutdown > Confirm Shutdown
244
Table 108 Maintenance > Shutdown
244
Chapter 9 Protect Screens
195
Table 67 Protection Methods Overview
195
What You Can Do in the Protect Screens
196
What You Need to Know about Protection Methods
196
Backup Summary
198
NSA Backup Screens
198
Figure 180 Protect > Snapshot > Snapshot Jobs
214
Figure 181 Protect > Snapshot > Add Job
216
Figure 182 Protect > Snapshot > Snapshot Images
217
Table 85 Protect > Snapshot > Add Job
217
Backup Software Screen
218
Chapter 10 Application Screens
221
Overview
221
What You Can Do in the Application Screens
221
What You Need to Know about the Application Screens
221
Figure 184 Printer Sharing
222
Figure 186 Applications > Print Server
224
Figure 187 Applications > Print Server > Rename
224
Table 89 Applications > Print Server
224
Changing the Copy Button Share
225
Copy Button
225
Chapter 11 Maintenance Screens
227
Overview
227
What You Can Do in the Maintenance Screens
227
What You Need to Know about the Maintenance Screens
227
Figure 190 Maintenance > Log
228
Table 94 Maintenance > Log Icons
228
Figure 193 Maintenance > Log > Search Filters
230
Figure 194 Maintenance > Log > Log Config > Log Records Configuration
230
Table 95 Maintenance > Log > Search Filters
230
Log Buzzer Priority Configuration
231
Report Configuration
231
Troubleshooting and Specifications
245
Part III: Troubleshooting and Specifications
245
Chapter 12 Troubleshooting
247
Troubleshooting Overview
247
Power, Hardware Connections, and Leds
247
NSA Login and Access
249
Users Cannot Access the NSA
251
Backups and Snapshots
252
External USB Disks
253
Chapter 13 Product Specifications
255
Feature Tables
255
Table 109 Physical Features
255
Table 111 NSA Hardware Specifications
257
Table 112 NSA Firmware Specifications
258
Power Consumption
259
Table 110 Firmware Features
255
Specification Tables
257
Figure 210 Power Adaptor Pinout
259
Table 113 Power Consumption in Watts (W)
259
Part IV: Appendices and Index
261
Appendices and Index
261
Appendix A Log Messages
263
Table 114 Log Messages
263
Appendix B Setting up Your Computer's IP Address
273
Figure 211 Windows XP: Start Menu
274
Figure 212 Windows XP: Control Panel
274
Figure 213 Windows XP: Control Panel > Network Connections > Properties
275
Figure 214 Windows XP: Local Area Connection Properties
275
Figure 215 Windows XP: Internet Protocol (TCP/IP) Properties
276
Figure 216 Windows Vista: Start Menu
277
Figure 217 Windows Vista: Control Panel
277
Figure 218 Windows Vista: Network and Internet
277
Windows Vista
277
Figure 219 Windows Vista: Network and Sharing Center
278
Figure 220 Windows Vista: Network and Sharing Center
278
Figure 221 Windows Vista: Local Area Connection Properties
279
Figure 222 Windows Vista: Internet Protocol Version 4 (Tcp/Ipv4) Properties
280
Figure 223 Mac os X 10.4: Apple Menu
281
Figure 224 Mac os X 10.4: System Preferences
281
Figure 225 Mac os X 10.4: Network Preferences
282
Figure 226 Mac os X 10.4: Network Preferences > TCP/IP Tab
282
Figure 227 Mac os X 10.4: Network Preferences > Ethernet
283
Figure 228 Mac os X 10.4: Network Utility
283
Figure 229 Mac os X 10.5: Apple Menu
284
Figure 230 Mac os X 10.5: Systems Preferences
284
Figure 231 Mac os X 10.5: Network Preferences > Ethernet
285
Figure 232 Mac os X 10.5: Network Preferences > Ethernet
286
Figure 233 Mac os X 10.5: Network Utility
286
Figure 234 Ubuntu 8: System > Administration Menu
287
Figure 235 Ubuntu 8: Network Settings > Connections
287
Figure 236 Ubuntu 8: Administrator Account Authentication
288
Figure 237 Ubuntu 8: Network Settings > Connections
288
Figure 238 Ubuntu 8: Network Settings > Properties
289
Figure 239 Ubuntu 8: Network Settings > DNS
289
Figure 240 Ubuntu 8: Network Tools
290
Figure 241 Opensuse 10.3: K Menu > Computer Menu
291
Figure 242 Opensuse 10.3: K Menu > Computer Menu
291
Figure 243 Opensuse 10.3: Yast Control Center
292
Figure 244 Opensuse 10.3: Network Settings
292
Figure 245 Opensuse 10.3: Network Card Setup
293
Figure 246 Opensuse 10.3: Network Settings
294
Figure 247 Opensuse 10.3: Knetwork Manager
295
Figure 248 Opensuse: Connection Status - Knetwork Manager
295
Appendix C Importing Certificates
297
Figure 249 Internet Explorer 7: Certification Error
298
Figure 250 Internet Explorer 7: Certification Error
298
Figure 251 Internet Explorer 7: Certificate Error
298
Figure 252 Internet Explorer 7: Certificate
299
Figure 253 Internet Explorer 7: Certificate Import Wizard
299
Figure 254 Internet Explorer 7: Certificate Import Wizard
300
Figure 255 Internet Explorer 7: Certificate Import Wizard
300
Figure 256 Internet Explorer 7: Select Certificate Store
300
Figure 257 Internet Explorer 7: Certificate Import Wizard
301
Figure 258 Internet Explorer 7: Security Warning
301
Figure 259 Internet Explorer 7: Certificate Import Wizard
302
Figure 260 Internet Explorer 7: Website Identification
302
Figure 261 Internet Explorer 7: Public Key Certificate File
303
Figure 262 Internet Explorer 7: Open File - Security Warning
303
Figure 263 Internet Explorer 7: Tools Menu
304
Figure 264 Internet Explorer 7: Internet Options
304
Figure 265 Internet Explorer 7: Certificates
305
Figure 266 Internet Explorer 7: Certificates
305
Figure 267 Internet Explorer 7: Root Certificate Store
305
Figure 268 Firefox 2: Website Certified by an Unknown Authority
306
Figure 269 Firefox 2: Page Info
306
Figure 270 Firefox 2: Tools Menu
307
Figure 271 Firefox 2: Options
307
Figure 272 Firefox 2: Certificate Manager
308
Figure 273 Firefox 2: Select File
308
Figure 274 Firefox 2: Tools Menu
309
Figure 275 Firefox 2: Options
309
Figure 276 Firefox 2: Certificate Manager
310
Figure 277 Firefox 2: Delete Web Site Certificates
310
Figure 278 Opera 9: Certificate Signer Not Found
311
Figure 279 Opera 9: Security Information
311
Figure 280 Opera 9: Tools Menu
312
Figure 281 Opera 9: Preferences
312
Figure 282 Opera 9: Certificate Manager
313
Figure 283 Opera 9: Import Certificate
313
Figure 284 Opera 9: Install Authority Certificate
314
Figure 285 Opera 9: Install Authority Certificate
314
Figure 286 Opera 9: Tools Menu
315
Figure 287 Opera 9: Preferences
315
Figure 288 Opera 9: Certificate Manager
316
Figure 289 Konqueror 3.5: Server Authentication
317
Figure 290 Konqueror 3.5: Server Authentication
317
Figure 291 Konqueror 3.5: KDE SSL Information
317
Figure 292 Konqueror 3.5: Public Key Certificate File
318
Figure 293 Konqueror 3.5: Certificate Import Result
318
Figure 294 Konqueror 3.5: Kleopatra
318
Figure 295 Konqueror 3.5: Settings Menu
319
Figure 296 Konqueror 3.5: Configure
319
Appendix D Open Source Licences
321
Gnu General Public License
331
Appendix E Legal Information
351
Appendix F Customer Support
353
Index
359
Advertisement
ZyXEL Communications NSA-2401 Quick Start Manual (112 pages)
Network Storage Appliance
Brand:
ZyXEL Communications
| Category:
Network Hardware
| Size: 1.17 MB
Table of Contents
Table of Contents
1
Quick Start Guide
1
Front and Rear Panels
2
Setup Wizard
15
Troubleshooting
19
Deutsch
21
Français
39
Configuration Requise
40
Italiano
57
Risoluzione Dei Problemi
73
Svenska
75
繁體中文
93
ZyXEL Communications NSA-2401 Brochure (4 pages)
Network Storage Appliance
Brand:
ZyXEL Communications
| Category:
Network Hardware
| Size: 0.51 MB
Advertisement
Advertisement
Related Products
ZyXEL Communications NSA-2400
ZyXEL Communications NSA-220 Series
ZyXEL Communications NSA-210
ZyXEL Communications NSA-2400-1T
ZyXEL Communications NSA-220 Plus
ZyXEL Communications Network Storage Appliance NSA-220
ZyXEL Communications NXC Series
ZyXEL Communications NSA221
ZyXEL Communications NSA221 - V 4.00 EDITION 1
ZyXEL Communications NSA325
ZyXEL Communications Categories
Gateway
Network Router
Switch
Wireless Router
Adapter
More ZyXEL Communications Manuals
Login
Sign In
OR
Sign in with Facebook
Sign in with Google
Upload manual
Upload from disk
Upload from URL