Sign In
Upload
Manuals
Brands
Ricoh Manuals
All in One Printer
Aficio 1018
Ricoh Aficio 1018 Manuals
Manuals and User Guides for Ricoh Aficio 1018. We have
5
Ricoh Aficio 1018 manuals available for free PDF download: Service Manual, Copy Reference Manual, Operating Instructions Manual
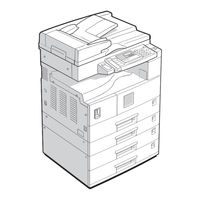
Ricoh Aficio 1018 Service Manual (513 pages)
GESTETNER, LANIER, RICOH, SAVIN MFP
Brand:
Ricoh
| Category:
All in One Printer
| Size: 9.73 MB
Table of Contents
Service Manual
1
Table of Contents
11
Important Safety Notices
27
B120 (Rla Only)
29
Installation
31
Installation Requirements
33
Environment
33
Machine Level
34
Minimum Space Requirements
35
Power Requirements
35
Copier Installation
36
Power Sockets for Peripherals
36
Accessory Check
36
Installation Procedure
40
Platen Cover Installation
40
Accessory Check
40
Ardf Installation
41
Accessory Check
41
Installation Procedure
41
Adf Installation
43
Accessory Check
43
Installation Procedure
43
Two-Tray Paper Tray Unit Installation
45
Accessory Check
48
One-Tray Paper Tray Unit Installation
48
Imb Installation
51
Accessory Check
51
Installation Procedure
51
Dram Installation
52
Anti-Condensation Heater Installation
53
Tray Heaters
54
Upper Tray Heater
54
Lower Tray Heater (Two-Tray Model Only)
55
Tray Heaters for the Optional Paper Feed Units
56
Key Counter Installation
59
Preventive Maintenance
61
Pm Tables
63
Preventive Maintenance Schedules
63
How to Clear the Pm Counter
65
Replacement and Adjustment
67
General Cautions
69
Pcu (Photoconductor Unit)
69
Transfer Roller
69
Scanner Unit
69
Laser Unit
70
Fusing Unit
70
Paper Feed
70
Important
70
Special Tools and Lubricants
70
Exterior Covers & Operation Panel
71
Rear Cover
71
Rear Lower Cover (Two-Tray Models Only)
71
Copy Tray
72
Left Upper Cover
72
Front Upper Left Cover and Operation Panel
72
Right Upper Cover
72
Top Rear Cover
72
Left Cover
73
Front Long Cover
73
Front Right Cover
74
Right Rear Cover
74
Right Door
75
By-Pass Tray
76
Left Lower Cover (Two-Tray Models Only)
77
Right Lower Cover (Two-Tray Models Only)
77
Platen Cover Sensor
77
Scanner Section
78
Exposure Glass/Df Exposure Glass
78
Exposure Glass
78
DF Exposure Glass
78
Lens Block
79
Exposure Lamp, Lamp Stabilizer Board
79
Original Width Sensor
80
Original Length Sensor
80
Sensor Positions
80
Changing the Original Sensor Positions (8K/16K)
81
Procedure
82
Scanner Motor
83
Scanner H
83
Adjustment of 2Nd Scanner Position
84
Adjustment of 1St and 2Nd Scanner Alignment
85
Laser Unit
86
Location of "Caution" Decal
86
Toner Shield Glass
87
Laser Unit
87
Ld Unit
88
Polygonal Mirror Motor
88
Laser Unit Alignment Adjustment
89
Pcu Section
90
Pcu
90
Pick-Off Pawls
90
Toner Density Sensor
90
Opc Drum
91
Charge Roller and Cleaning Brush
92
Cleaning Blade
92
Developer
93
After Replacement or Adjustment
94
Toner Supply Motor
95
Paper Feed Section
96
Paper Feed Roller
96
Friction Pad
96
Paper End Sensor
96
Exit Sensor
97
Non-Duplex Models
97
Duplex Models
97
By-Pass Feed Roller and By-Pass Paper End Sensor
98
Registration Roller
99
By-Pass Paper Size Sensor
100
Registration Clutch
100
Registration Sensor
101
Upper Paper Feed Clutch and By-Pass Feed Clutch
101
Relay Clutch
102
Relay Sensor
102
Lower Paper Feed Clutch
102
Vertical Transport Sensor
103
Paper Size Switch
103
Image Transfer
104
Image Transfer Roller
104
Image Density Sensor
104
Fusing
105
Fusing Unit
105
Thermistor
105
Fusing Lamp
106
Hot Roller
106
Thermofuse and Thermostat
107
Hot Roller Stripper Pawls
107
Pressure Roller and Bushings
108
Nip Band Width Adjustment
109
Duplex Unit (Duplex Models Only)
110
Duplex Exit Sensor
110
Duplex Entrance Sensor
110
Duplex Inverter Sensor
110
Duplex Transport Motor
111
Duplex Inverter Motor
111
Duplex Control Board
111
Other Replacements
112
Quenching Lamp
112
High-Voltage Power Supply Board
112
Imb (Memory Board)
113
Bicu (Base-Engine Image Control Unit)
113
Iob (I/O Board)
114
Main Motor
114
Rear Exhaust Fan
114
Left Exhaust Fan
115
Psu (Power Supply Unit)
115
Gearbox
116
Replacement Procedure
116
Gear Arrangement Within the Gearbox
117
Copy Adjustments: Printing/Scanning
118
Printing
118
Registration - Leading Edge/Side-To-Side
118
Blank Margin
119
Main Scan Magnification
119
Scanning
120
Registration: Platen Mode
120
Magnification
121
Standard White Density Adjustment
122
Adf Image Adjustment
123
Registration and Blank Margin
123
Sub-Scan Magnification
123
Troubleshooting
125
Service Call Conditions
127
Sc Code Descriptions
128
Electrical Component Defects
134
Sensors
134
Switches
135
Blown Fuse Conditions
136
Led Display
136
Bicu
136
Iob
136
Firmware Modification History
137
Service Tables
140
Using Service Program Modes
142
Accessing SP Modes
142
Accessing Copy Mode from Within an SP Mode
142
How to Select a Program Number
143
To Input a Value or Setting for an SP Mode
143
Sp Mode Tables
144
SP1-XXX (Feed)
144
SP2-XXX (Drum)
147
SP4-XXX (Scanner)
152
SP5-XXX (Mode)
158
SP6-XXX (Peripherals)
165
SP7-XXX (Data Log)
167
Test Pattern Printing (Sp5-902)
172
Input Check (Sp5-803)
173
Output Check (Sp5-804)
177
Output Check Table
177
Copy Jam History (Sp7-903)
178
Smc Printing (Sp5-992)
179
Original Jam History Display (Sp7-905)
179
Memory All Clear (Sp5-801)
180
Using a Flash Memory Card
180
Without Using a Flash Memory Card
181
Program Upload/Download
182
Program Download (SP5-827)
182
Program Upload (SP5-826)
183
Nvram Data Upload/Download
184
NVRAM Data Download (SP5-825)
184
NVRAM Data Upload (SP5-824)
185
Aps and Platen/Adf Cover Sensor Output Display (Sp4-301)
186
Adf Aps Sensor Output Display (Sp6-901)
187
Serial Number Input (Sp5-811)
188
ID Sensor Error Analysis (Sp2-221)
189
User Tools
190
How to Enter and Exit User Tools
190
User Tools Table
190
System Setting Table
190
Copy Features Table
191
Detailed Section Descriptions
192
Overview
194
Component Layout
194
Paper Path
196
Drive Layout
197
Board Structure
198
Block Diagram
198
Copy Process Overview
200
Development
201
Scanner Drive
203
Original Size Detection in Platen Mode
204
Image Processing
206
Sbu (Sensor Board Unit)
207
Auto Image Density (Ads)
208
Ipu (Image Processing Unit)
209
Image Processing Path
211
Imb (Memory Controller and Dram)
221
Video Control Unit (Vcu)
222
Overview
223
Laser Exposure
223
Auto Power Control (Apc)
224
Ld Safety Switch
225
Photoconductor Unit (Pcu)
226
Drive
227
Drum Charge
228
Charge Roller Voltage Correction
229
ID Sensor Pattern Production Timing
230
Drum Charge Roller Cleaning
231
Developer Mixing
233
Development Bias
234
Toner Supply
235
Toner Bottle Replenishment Mechanism
235
Toner Supply Mechanism
236
Toner Density Control
237
Overview
237
Toner Density Sensor Initial Setting
239
Toner Concentration Measurement
239
Vsp/Vsg Detection
239
Toner Supply Reference Voltage (Vref) Determination
239
Toner Supply Determination
239
Toner Supply Motor on Time Determinations
240
Toner Supply in Abnormal Sensor Conditions
241
ID Sensor
241
TD Sensor
241
Toner Near End/End Detection and Recovery
242
Toner Near End Detection
242
Toner Near End Recovery
242
Toner End Detection
242
Toner End Recovery
242
Drum Cleaning and Toner Recycling
243
Drum Cleaning
243
Toner Recycling
243
Paper Feed
244
Overview
244
Paper Feed Drive Mechanism
245
Paper Feed and Separation Mechanism
245
Paper Lift Mechanism
246
Paper End Detection
246
Paper Size Detection
247
Paper Tray
247
By-Pass Tray
248
Side Fences
249
Paper Registration
249
Image Transfer and Paper Separation
250
Overview
250
Image Transfer Current Timing
251
Transfer Roller Cleaning
252
Paper Separation Mechanism
252
Image Fusing and Paper Exit
253
Overview
253
Fusing Drive and Release Mechanism
253
Fusing Entrance Guide Shift
254
Pressure Roller
254
Fusing Temperature Control
255
Overview
255
Fusing Lamp Control
257
Pre-Heat Mode (Fusing Idling)
258
To Prevent Offset When Making Multiple Copies on Small-Width Paper
258
Reduced Copy Speed with Narrow Paper
258
Overheat Protection
259
Duplex Unit
260
Overall
260
Drive Mechanism
261
Basic Operation
262
Larger than A4 Short-Edge/Lt Short-Edge
262
Up to A4 Short-Edge/Lt Short-Edge
263
Feed in and Exit Mechanism
264
Energy Saver Modes
265
Overview
265
Low Power Mode
266
Entering Low Power Mode
266
What Happens in Low Power Mode
266
Returning to Stand-By Mode
267
Night/Off Mode
267
Entering Night/Off Mode
267
What Happens in Night/Off Mode
268
Returning to Stand-By Mode
268
Auto Reverse Document Feeder B379
270
Overall Machine Information
272
Mechanical Component Layout
272
Electrical Component Layout
273
Drive Layout
274
Detailed Section Descriptions
275
Original Size Detection
275
Pick-Up and Separation
277
Original Transport and Exit
278
Single-Sided Originals
278
Double-Sided Originals
279
Original Trailing Edge Sensor
280
Stamp
281
Timing Charts
282
Single-Sided Original Mode (A3)
282
Single-Sided Original Mode (A3, Stamp Mode)
283
Double-Sided Original Mode
284
Double-Sided Original Mode (Stamp Mode)
285
Jam Detection
286
Overall Electrical Circuit
287
Free Run
288
Procedure
288
One-Sided Free Run Process
288
Two-Sided Free Run Process
288
Replacement and Adjustment
289
Df Exit Table and Cover
289
Original Feed Unit
290
Left Cover
291
Pick-Up Roller
292
Feed Belt
293
Separation Roller
294
Original Set/Original Reverse Sensors
295
Original L/W Sensor, Trailing Edge Sensor
296
Feed Clutch, Pick-Up Sol, Transport Motor, Feed Motor
297
Exterior
297
DF Feed Clutch
297
Pick-Up Solenoid
297
Transport Motor
297
DF Feed Motor
297
Registration Sensor
298
Stamp Solenoid and Original Exit Sensor
299
Document Feeder B387
300
Overall Information
302
Mechanical Component Layout
302
Electrical Component Layout
303
Drive Layout
304
Detailed Section Descriptions
305
Original Size Detection
305
Pick-Up and Separation
307
Original Transport and Exit Mechanism
308
Stamp
309
Timing Charts
310
A3, Stamp Mode
311
Jam Detection
312
Overall Electrical Circuit
313
Free Run
314
Procedure
314
Free Run Process
314
Replacement and Adjustment
315
Exterior Covers
315
Rear Cover
315
Original Table
315
Front Cover
315
Original Entrance Guide
315
Df Feed Cover
316
Feed Unit
316
Separation Roller
316
Pick-Up Roller
317
Feed Belt
317
Original Sensors (Width, Length, Trailing Edge)
318
Original Set Sensor
319
Transport Motor
319
Df Cover Open Sensor/Feed Clutch/Rom/Df Drive Board
320
Exterior
320
Feed Cover Open Sensor
320
Feed Clutch
320
Rom
320
DF Drive Board
320
Registration Sensor
321
Pick-Up Solenoid
321
Stamp Solenoid
322
Paper Tray Unit B384
324
Overall Machine Information
326
Mechanical Component Layout
326
Electrical Component Layout
327
Drive Layout
328
Detailed Descriptions
329
Paper Feed and Separation Mechanism
329
Paper Lift Mechanism
330
Paper End Detection
332
Paper Height Detection
333
Paper Size Detection
334
Side and End Fences
335
Side Fences
335
End Fence
335
Replacement and Adjustment
336
Feed Roller Replacement
336
Tray Main Board Replacement
337
Tray Motor Replacement
337
Relay Clutch Replacement
338
Upper Paper Feed Clutch Replacement
339
Lower Paper Feed Clutch Replacement
340
Lift Motor Replacement
341
Paper End Sensor Replacement
342
Vertical Transport Sensor Replacement
342
Paper Size Switch Replacement
343
Paper Tray Unit B385
344
Overall Machine Information
346
Mechanical Component Layout
346
Electrical Component Layout
347
Drive Layout
348
Detailed Descriptions
349
Paper Feed and Separation
349
Paper Lift Mechanism
350
Paper End Detection
352
Paper Height Detection
353
Paper Size Detection
354
Side and End Fences
355
Side Fences
355
End Fence
355
Replacement and Adjustment
356
Feed Roller Replacement
356
Tray Main Board Replacement
357
Tray Motor Replacement
358
Lift Motor Replacement
359
Paper End Sensor Replacement
360
Paper Size Switch Replacement
360
Specifications
362
General Specifications
364
Duplex Unit (B043 Only)
367
Machine Configuration
368
Optional Equipment
369
Ardf
369
Adf
370
One-Tray Paper Tray Unit
371
Two-Tray Paper Tray Unit
372
16MB IMB (Copier Memory Unit)
372
Service Tables
375
Fax Unit
386
Removal and Replacement
399
Error Codes
405
Fax Sc Codes
413
Fax Sc Code Table
414
Function no
418
How to Enter and Exit Service Mode
418
Service Level Functions
418
Data Transfer
425
Fax Software Download
425
Fax Sram Download
426
Fax Sram Upload
427
Bit Switches
428
System Switches
428
Scanner Switches
439
Plotter Switches
444
Communication Switches
449
G3 Switches
454
Ncu Parameters
462
Dedicated Transmission Parameters
473
Programming Procedure
473
Service Ram Addresses
477
Operation Dump List
492
Ncu (Us)
495
Ncu (Europe/Asia)
496
Features List
501
Capabilities of Programmable Items
504
Overall Machine Control
505
Video Data Path
506
Advertisement
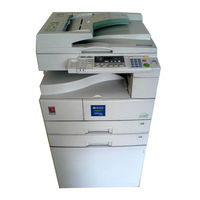
Ricoh Aficio 1018 Copy Reference Manual (100 pages)
Ricoh Aficio 1015: User Guide
Brand:
Ricoh
| Category:
All in One Printer
| Size: 3.11 MB
Table of Contents
Operating Instructions
1
Safety During Operation
5
Safety Information
5
How to Read this Manual
7
Machine Types
8
Table of Contents
12
Guide to Components
15
Options
17
Operation Panel
18
On Indicator
19
Panel Display
20
Displays and Key Operations
20
1 Basics
21
Turning on the Power
21
Turning on the Main Power
21
Starting the Machine
22
Changing Modes
23
Originals
24
Sizes and Weights of Recommended Originals
24
Sizes Difficult to Detect
25
Original Sizes and Scanning Area/Missing Image Area
26
Copy Paper
27
Recommended Paper Sizes and Types
27
Non-Recommended Paper
29
Paper Storage
30
Toner
31
Handling Toner
31
Toner Storage
31
Used Toner
31
2 Copying
33
Basic Procedure
33
Auto off
34
Setting Originals
35
Placing Originals on the Exposure Glass
35
Loading Originals in the Document Feeder
36
Setting Custom Original Size in the Document Feeder
37
Basic Functions
39
Adjusting Copy Image Density
39
Selecting an Original Type
39
Selecting Copy Paper
40
Auto Reduce/Enlarge
42
Sort
43
Copying from the Bypass Tray
45
When Copying Onto Envelopes
48
Other Functions
49
User Codes
49
Auto Start
49
Preset Reduce/Enlarge
50
Zoom
51
Combine
52
Series Copies
54
Book→1 Sided
54
Combination Chart
55
3 Troubleshooting
57
If Your Machine Does Not Operate as You Want
57
Message
57
Display
58
If You Cannot Make Clear Copies
59
If You Cannot Make Copies as You Want
60
Combine
60
B Loading Paper
61
Loading Paper in the Optional Paper Tray Unit
61
D Changing the Toner Cartridge
63
Clearing Misfeeds
65
Changing the Paper Size
68
Changing the Paper Size in the Paper Tray
68
Changing the Paper Size in the Optional Paper Tray Unit
70
4 User Tools (Copier Features)
73
Accessing the User Tools (Copier Features)
73
Exiting the User Tools
74
User Tools Menu (Copier Features)
75
Settings You Can Change with the User Tools
76
Copier Features
76
5 Remarks
81
Do's and Don'ts
81
Where to Put Your Machine
82
Machine Environment
82
Power Connection
83
Access to Machine
84
Maintaining Your Machine
85
Cleaning the Exposure Glass
85
Cleaning the Platen Cover
85
Cleaning the Document Feeder
85
6 Specification
87
Mainframe
87
Document Feeder (ADF) (Option)
91
Paper Tray Unit (1-Tray Type) (Option)
92
Paper Tray Unit (2-Tray Type) (Option)
93
16MB Copier Memory Unit (Option)
94
32MB DIMM (Option)
95
Index
96
Ricoh Aficio 1018 Operating Instructions Manual (74 pages)
FAX Option Type 1018
Brand:
Ricoh
| Category:
Fax Machine
| Size: 1.61 MB
Table of Contents
Basic Features
1
Important Safety Instructions
7
How to Read this Manual
8
Table of Contents
9
Manuals for this Machine
11
Basic Features (this Manual)
11
Advanced Features
11
1 Getting Started
13
Guide to Components
13
Front View
13
Rear View
15
Operation Panel
16
Receive File Indicator
16
Communicating Indicator
16
Starting the Machine
18
Turning on the Power
18
Turning off the Power
19
Switching between Copy Mode and Facsimile Mode
20
Reading the Display
21
Reading the Display and Using Keys
21
Standby Display
22
Communication Display
22
Display Prompts
22
2 Faxing
23
Overview
23
Changing Memory Transmission and Immediate Transmission
23
Setting Originals
24
Placing a Single Original on the Exposure Glass
25
Loading Originals in the Document Feeder
26
If the Machine Cannot Detect the Size of Your Original
27
Original Sizes Difficult to Detect
28
Memory Transmission
29
Canceling a Memory Transmission
32
Canceling the Transmission before the Original Is Scanned
32
Canceling a Transmission While the Original Is Being Scanned
32
Canceling a Transmission While the Message Is Being Sent
33
Immediate Transmission
34
Canceling an Immediate Transmission
36
Canceling a Transmission before You Have Pressed the Start Key
36
Canceling a Transmission after You Have Pressed the Start Key
36
Scan Settings
37
Resolution
37
Original Type
38
Image Density (Contrast)
39
Dialing
40
Number Keys
40
Quick Dials
42
Speed Dials
43
Groups
44
Reception
46
Selecting the Reception Mode
46
3 Setup
47
Own Name/Fax Header/Own Fax Number
47
Registering Own Name/Fax Header/Own Fax Number
48
Quick Dial
50
Registering Quick Dials
50
Quick Dial Key and Function Key Label (Dial Label)
52
Deleting Quick Dials
55
Speed Dial
56
Registering Speed Dial
56
Deleting Speed Dial
58
Groups
60
Registering Groups
60
Deleting Groups
62
Entering Text
64
Available Characters
64
Keys
64
How to Enter Text
65
4 Troubleshooting
67
Adjusting Volume
67
Error Messages and Their Meanings
69
When the {Facsimile} Key Is Lit in Red
70
When the Receive File Indicator Is Lit
71
Solving Problems
72
Index
73
Advertisement
Ricoh Aficio 1018 Operating Instructions Manual (60 pages)
Printer controller
Brand:
Ricoh
| Category:
Printer Accessories
| Size: 1.25 MB
Table of Contents
Table of Contents
7
Setting up the Printer Driver and Canceling a Print Job
9
PCL Menu 6/5E - Accessing the Printer Properties
9
Windows 95/98/Me - Accessing the Printer Properties
9
Windows 2000/Windows XP- Accessing the Printer Properties
10
Windows NT 4.0 - Accessing the Printer Properties
12
Postscript - Setting up for Printing
14
Windows 95/98/Me - Accessing the Printer Properties
14
Windows 2000/Windows XP- Accessing the Printer Properties
15
Windows NT 4.0 - Accessing the Printer Properties
17
Macintosh - Setting up for Printing
18
Canceling a Print Job
20
Windows 95/98/Me, Windows 2000, Windows XP, Windows NT 4.0 - Canceling a Print Job
20
Macintosh - Canceling a Print Job
21
Uninstalling the Printer Driver and Software
23
Uninstalling the PCL 6/5E Printer Driver
23
Windows 95/98/Me - Uninstalling the PCL 6/5E Printer Driver
23
Windows 2000/Windows XP- Uninstalling the PCL 6/5E Printer Driver
23
Windows NT 4.0 - Uninstalling the PCL 6/5E Printer Driver
24
Uninstalling the Postscript Printer Driver
25
Windows 95/98/Me - Uninstalling the Postscript Printer Driver
25
Windows 2000/Windows XP- Uninstalling the Postscript Printer Driver
25
Windows NT 4.0 - Uninstalling the Postscript Printer Driver
26
Macintosh - Uninstalling the Postscript Printer Driver
26
Troubleshooting
27
Error & Status Messages on the Control Panel
27
Machine Does Not Print
29
Other Printing Problems
30
Using the Control Panel
31
Adjusting Printer Features
31
Printer Features Menu
31
Printer Features Parameters
35
Job Control Menu
35
Network Setup Menu
42
Maintenance Menu
43
List Print Menu
45
Adjusting System Settings
48
Accessing the System Settings
48
System Settings Parameters
49
Appendix
53
Collate and Rotate Collate
53
Specifications
54
Options
55
Index
56
Ricoh Aficio 1018 Operating Instructions Manual (32 pages)
System Settings
Brand:
Ricoh
| Category:
All in One Printer
| Size: 0.86 MB
Table of Contents
Table of Contents
8
Manuals for this Machine
9
Machine Types
10
Additional Functions Provided by Internal Options
11
Copy Mode
11
Facsimile Mode (Option)
11
Printer Mode (Option)
11
1 Modes
13
Changing Modes
13
Multi-Access
14
Copy Mode
16
Changing to Copy Mode
16
Facsimile Mode
17
Changing to Facsimile Mode
17
Sending a Fax
17
Printing a Received Fax
17
Printer Mode
18
Changing to Printer Mode
18
Printing
18
2 User Tools (System Settings)
19
Keys for User Tools (System Settings)
19
Accessing the User Tools (System Settings)
21
Exiting from the User Tools
22
Printing the Counter Value
22
User Tools Menu (System Settings)
23
Settings You Can Change with the User Tools
24
System Settings
24
Index
29
Advertisement
Related Products
Ricoh aficio 1013F
Ricoh aficio 1013
Ricoh Aficio 1015
Ricoh Aficio 1018D
Ricoh 1000SF - Aficio SP B/W Laser
Ricoh Aficio 1060
Ricoh Aficio 1075
Ricoh Aficio 1050
Ricoh Aficio 1035 Series
Ricoh Aficio 106/LD215c
Ricoh Categories
All in One Printer
Printer
Digital Camera
Copier
Printer Accessories
More Ricoh Manuals
Login
Sign In
OR
Sign in with Facebook
Sign in with Google
Upload manual
Upload from disk
Upload from URL