Sign In
Upload
Manuals
Brands
Fuji Xerox Manuals
Copier
ApeosPort-IV C7780
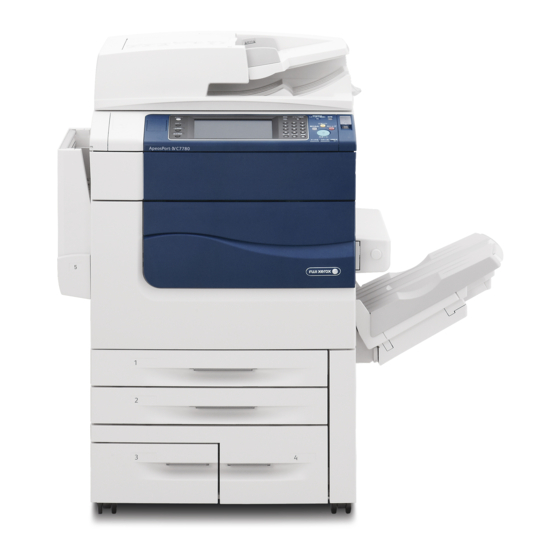
Fuji Xerox ApeosPort-IV C7780 Manuals
Manuals and User Guides for Fuji Xerox ApeosPort-IV C7780. We have
3
Fuji Xerox ApeosPort-IV C7780 manuals available for free PDF download: Administrator's Manual, User Manual, Quick User Manual
Fuji Xerox ApeosPort-IV C7780 Administrator's Manual (739 pages)
Brand:
Fuji Xerox
| Category:
All in One Printer
| Size: 16.44 MB
Table of Contents
Table of Contents
3
1 Before Using the Machine
15
Preface
16
This Guide
16
Types of Manuals
17
Organization of this Guide
18
Using this Guide
18
Conventions
19
Interface Cables
21
Using the Ethernet Interface
21
Using the USB Interface
21
Energy Saver Mode
23
Changing the Interval for Entering Energy Saver Mode
24
Changing the Screen Default
26
Customizing the Control Panel
26
Setting the Screen after Auto Clear
27
Customizing the Button Layout
28
Assigning Services to the <Custom> Buttons
32
Adjusting Screen Brightness
33
Entering Text
34
2 Paper and Other Media
35
Paper Types
36
Loadable Quantity and Weight for Supported Paper
37
Supported Paper Type
43
Storing and Handling Paper
44
Unusable Paper
44
Loading Paper
46
Loading Paper in Trays 1 to 2
46
Loading Paper in Tray 3
47
Loading Paper in Tray 4
48
Loading Paper in Tray 5 (Bypass)
49
Loading Tab Paper in Tray 5 (Bypass)
49
Loading Paper in Tray 6 (HCF2 (2000 Sheets))
50
Loading Paper in Tray 6 (HCF B1-S)
51
Loading Tab Paper in Tray 6 (HCF B1-S)
52
Loading Postcards in Tray 6 (HCF B1-S)
53
Facilitating Feeding of Heavyweight Paper Loaded in Tray 6 (HCF B1-S)
54
Improving the Paper Feeding Performance in Tray 6 (HCF B1-S)
55
Loading Paper in Tray 8 (Inserter)
56
Loading Tab Paper in Tray 8 (Inserter)
57
Changing the Paper Size
58
Changing the Paper Size for Trays 1 to 2
58
Changing the Paper Size for Tray 3
59
Changing the Paper Size for Tray 4
60
Changing the Paper Size for Tray 6 (HCF2 (2000 Sheets))
61
Changing the Paper Size for Tray 6 (HCF B1-S)
63
Changing the Paper Settings
65
3 Maintenance
69
Replacing Consumables
70
Replacing the Toner Cartridges
72
Replacing the Waste Toner Bottle
74
Replacing Drum Cartridge R1
76
(For Customers Having a Spot Maintenance Contract)
76
Replacing Drum Cartridge R2/R3/R4
79
(For Customers Having a Spot Maintenance Contract)
79
Replacing the Staple Cartridge for Finisher C2 or Finisher C2 with Booklet Maker
84
Replacing the Booklet Staple Cartridge (Finisher C2 with Booklet Maker or Finisher D2-P with Booklet Maker)
85
Replacing the Staple Cartridge for Finisher D2-P with Booklet Maker
87
Emptying the Punch Scrap Container for Finisher C2 or Finisher C2 with Booklet Maker
88
Emptying the Punch Scrap Container for Finisher D2-P with Booklet Maker
89
Replacing the Staple Scrap Container for Finisher D2-P with Booklet Maker
90
Cleaning the Machine
93
Cleaning the Exterior
93
Cleaning the Touch Panel
94
Cleaning the Document Cover and Document Glass
94
Cleaning the Constant Velocity Transport Glass and Document Presser
95
Cleaning the Document Feeder Roller
95
Executing Calibration
97
Executing 2 Sided Color Scanning Calibration
101
Printing a Report/List
103
Deleting a Private Charge Print Job with an Invalid User ID
104
Setting Restore Tool
105
4 Machine Status
107
Overview of Machine Status
108
Machine Information
109
General Information
109
Paper Tray Status
111
Print Reports
111
Printer Reports
113
Fax Reports
115
Automatically Printed Reports/Lists
119
Overwrite Hard Disk
120
Print Mode
120
Fax Receiving Mode
123
Faults
124
Press the <Machine Status> Button
124
Supplies
125
Billing Information
126
On the [Machine Information] Screen
126
User Account Billing Information
127
5 Tools
129
System Settings Procedure
130
Step 1 Entering System Administration Mode
130
Step 2 Entering the System Administrator User ID and Passcode
130
Step 3 Selecting [Tools]
131
Step 4 Selecting a Setting Item on the [Tools] Screen
131
Step 5 Setting a Feature
133
Step 6 Exiting System Administration Mode
133
Tools Menu List
134
Common Service Settings
149
Machine Clock/Timers
149
Auto Print
150
Connection Interval
150
Daylight Savings
151
Audio Tones
152
Screen/Button Settings
153
Default Language
154
Paper Tray Settings
155
Image Quality Adjustment
159
Reports
161
Maintenance
162
Software Options
163
Alignment Adjustment
163
Finisher Adjustment
164
Software Upgrade
164
Watermark
165
Secure Watermark
166
Force Annotation
168
Print Universal Unique ID (Apeosport Series Models Only)
170
Image Log Control (Apeosport Series Models Only)
170
Notify Job Completion by E-Mail
173
Other Settings
173
Auto Job Promotion
174
Keyboard Input Restriction
177
Software Download
180
Data Indicator
181
Copy Service Settings
182
Copy Tab - Features Allocation
182
Preset Buttons
183
Copy Defaults
183
Original Type
184
Output Color
184
Single Color
184
Background Suppression
185
Color Shift
185
Copy Control
188
Original Size Defaults
190
Reduce/Enlarge Presets
191
Custom Colors
191
Annotations - Create Comments
191
Connectivity & Network Setup
192
Port Settings
192
Upnp Discovery
195
Protocol Settings
196
Machine's E-Mail Address/Host Name
199
Proxy Server Settings (Apeosport Series Models Only)
200
EP Proxy Server Setup
201
SIP Settings
202
T.38 Settings
204
Outgoing/Incoming E-Mail Settings
205
Remote Authentication/Directory Service
206
Security Settings
210
Certificate Revocation Retrieval Settings
213
Other Settings
214
Print Service Settings
215
Allocate Memory
215
Delete Form
217
Other Settings
217
Substitute Tray
218
Scan Service Settings
222
First Tab
222
Scan Defaults
223
Scan to PC Defaults
225
Original Size Defaults
225
Output Size Defaults
226
Reduce/Enlarge Presets
226
Other Settings
226
Background Suppression Level
227
Shadow Suppression Level
227
Fax Service Settings
229
Screen Defaults
229
Fax Defaults
230
Fax Control
231
Fax Received Options
235
Reduce/Enlarge Presets
236
Original Size Defaults
237
Local Terminal Information
237
Internet Fax Control
238
E-Mail/Internet Fax Service Settings
241
E-Mail Control
241
Folder Service Settings
244
Job Flow Service Settings
245
Media Print Service Settings
246
Stored File Settings
247
Web Applications Service Setup
249
Server Certificate Verification Settings
249
Server Setup
250
Other Settings
252
Web Browser Setup
253
Setup
255
Create Folder
255
Stored Programming
257
Create Job Flow Sheet
257
Create Job Flow Sheet Keyword
265
Add Address Book Entry
265
Address Type
267
Transfer Protocol
268
Relay Broadcast
271
Create Fax Group Recipients
272
Add Fax Comment
273
Paper Tray Attributes
273
Accounting
274
Create/View User Accounts
274
Account Limit
275
Reset Account
276
View Accounts
277
Reset User Accounts
277
System Administrator's Meter (Copy Jobs)
278
Accounting Type
278
Accounting Login Screen Settings
279
Fax Billing Data
280
Accounting/Billing Device Settings
280
Interrupt Mode
281
Authentication/Security Settings
283
System Administrator Settings
283
Authentication
284
Create Authorization Groups
286
User Details Setup
287
Passcode Policy
288
Allow User to Disable Active Settings
290
Job Status Default
291
Overwrite Hard Disk
291
6 Centreware Internet Services Settings
293
Installation of Centreware Internet Services
294
Configuration on the Machine
294
Preparations
294
Starting Centreware Internet Services
296
Configuring Machine Settings Using Centreware Internet Services
297
7 Printer Environment Settings
299
Print Overview
300
Supported Operating Systems
302
Installation When Using USB Port
303
Step 1 Preparations
303
Step 2 Configuration on the Machine
303
Step 3 Configuration on the Computer
304
Centreware Internet Services Setting Items
304
Installation When Using TCP/IP (Lpd/Port 9100)
305
Step 1 Preparations
305
Step 2 Configuration on the Machine
305
Step 3 Configuration on the Computer
306
Centreware Internet Services Setting Items
307
Installation When Using Netware
308
Step 1 Preparations
308
Step 2 Configuration on the Machine
308
Step 3 Configuration on the Computer
310
Centreware Internet Services Setting Items
310
Installation When Using Microsoft Network (SMB)
311
Step 1 Preparations
311
Step 2 Configuration on the Machine
311
Step 3 Configuration on the Computer
312
Centreware Internet Services Setting Items
312
Installation When Using Internet Printing Protocol (IPP)
313
Step 1 Preparations
313
Step 2 Configuration on the Machine
313
Step 3 Configuration on the Computer
314
Centreware Internet Services Setting Items
314
Installation When Using Ethertalk
315
Step 1 Preparations
315
Step 2 Configuration on the Machine
315
Step 3 Configuration on the Computer
316
Centreware Internet Services Setting Items
316
8 E-Mail Environment Settings
317
E-Mail Overview
318
Preparations
320
Installation Procedures
322
Step 1 Enabling Port and Setting up TCP/IP
322
Step 2 Configuring E-Mail Environment
323
Centreware Internet Services Setting Items
324
9 Scanner Environment Settings
325
Scan Service Overview
326
Configuration of Store to Folder
328
Step 1 Enabling Port and Setting up TCP/IP
328
Step 2 Registering a Folder
329
Step 3 Configuring a Computer
329
Configuration of Scan to PC
330
Step 1 Preparations
330
Step 2 Enabling Port and Setting up TCP/IP
331
Step 3 Configuration on the Computer
332
Configuration of Store to USB
333
Centreware Internet Services Setting Items
333
Step 1 Available USB Memory Devices
333
Configuration of Network Scanning (Job Template Scanning)
334
Step 1 Preparations
334
Step 2 Enabling Ports and Setting up TCP/IP
334
Step 3 Configuring the SNMP Port
335
Step 4 Configuration on the Computer
336
Configuration of Scan to Home (Apeosport Series Models Only)
337
Step 1 Preparations
337
Step 2 Enabling SMB Port and Setting up TCP/IP
337
Step 3 Configuring Remote Authentication
338
Step 4 Configuring Scan to Home
339
Step 5 Configuration on the Computer
341
Configuration of Job Flow Sheets
342
Step 1 Enabling Ports and Setting up TCP/IP
342
Step 2 Configuring the SNMP Port
343
Step 3 Configuration on the Computer
343
Configuration of Store & Send Link
344
Centreware Internet Services Setting Items
344
Step 1 Configuring E-Mail
344
Step 2 Enabling Authentication
344
Step 3 Other Settings
344
10 Using IP Fax (SIP)
347
IP Fax (SIP) Overview
348
Preparations
348
Settings by System Configuration
348
System Requirements for the Machine
348
Installation Procedures
349
Step 1 Enabling Port and Setting up TCP/IP
349
Step 2 Configuring the SIP User Name
350
Step 3 Configuring Fax Environment
350
Step 4 Configuring the SIP Server
351
Step 5 Registering the Voip Gateway
352
11 Using the Internet Fax Service
355
Internet Fax Overview
356
Preparations
356
E-Mail Environment
356
System Requirements for the Machine
356
Installation Procedures
358
Step 1 Enabling Port and Setting up TCP/IP
358
Step 2 Configuring E-Mail Environment
359
Step 3 Testing the Internet Fax
360
12 Using the Server Fax Service
361
Server Fax Overview
362
Preparations
362
System Requirements for the Machine
362
Installation Procedure
363
Installation Overview
363
Step 1 Fax Settings
363
Step 2 Setting the Server Fax Feature
364
13 Encryption and Digital Signature Settings
367
Encryption and Digital Signature Overview
368
Types of Certificate
368
Encryption Features for Communication
368
Encryption and Digital-Signature Features for Scan Files
369
Configuration of HTTP Communications Encryption
370
Installation Overview
370
Step1 Configuration on the Machine
370
Step2 Configuration on the Computer
371
Configuration of Encryption Using Ipsec
372
Installation Overview
372
Step1 Import and Configuration of a Certificate
372
Step2 Configuration on the Machine (Configuration of Ipsec)
373
Step3 Configuration on the Computer
374
Configuration of E-Mail Encryption/Digital Signature
375
Installation Overview
375
Step1 Configuration on the Machine
375
Step2 Configuration on Sender and Recipient
377
Configuration of Pdf/Docuworks/Xps Signature (Apeosport Series Models Only)
379
Installation Overview
379
Step1 Configuration on the Machine
379
Step2 Configuration on the Computer
381
14 Authentication and Accounting Features
383
Note
384
Overview of Accounting Feature
385
Overview of Authentication and Accounting Feature
384
Overview of Authentication Feature
384
Authentication
386
User Types Managed by Authentication Feature
386
User Roles and Authorization Groups
386
Types of Authentication
388
Types of Account Administration
389
Authentication and Accounting Relationship
390
Services Controlled by Authentication
391
Overview
391
Services Restricted by User ID Authentication
391
Services Restricted by the Combined Use of Smart Card Authentication and User ID Authentication
393
Authentication for Job Flow Sheets and Folders
396
Overview
396
When the Authentication Feature Is Disabled
398
When the Authentication Feature Is Enabled
401
Jobs Manageable by Account Administration
404
Configuration for Authentication
407
Installation Overview
407
Enabling Authentication
407
Changing the Default Authorization Group Settings
410
Creating an Authorization Group
410
Configuration for IC Card Reader (Optional)
412
Step 1 Preparations
412
Step 2 Logout Method Using the Smart Card
412
Step 3 Registering Smart Card Information
413
Configuration for Account Administration
414
Step 1 Selecting an Accounting Type
414
Step 2 Registering User Information
414
User Authentication Operations
416
Authenticating Login Users
416
Changing Passcode
417
15 Problem Solving
419
Troubleshooting
420
Machine Trouble
421
Image Quality Trouble
426
Trouble During Copying
432
Unable to Copy
432
The Copy Result Is Not What was Expected
433
Trouble During Printing
436
Unable to Print
436
The Print Result Is Not What was Expected
437
Trouble During Faxing
439
Sending Problems
439
Receiving Problems
444
Trouble During Scanning
448
Unable to Scan with the Machine
448
Unable to Import Scanned Documents to the Computer
449
Unable to Send a Scanned Document over the Network (FTP/SMB)
450
Unable to Send E-Mail
451
The Image Is Not What was Expected
451
Network-Related Problems
453
When Using SMB
453
When You Cannot Print
454
When Using Netware
455
When Using TCP/IP
459
When Using Ethertalk
460
Centreware Internet Services Problems
461
E-Mail Features Problems
462
Internet/Intranet Connection Problems
463
Ipv4 and Ipv6 Connection Problems
464
Media Print - Text Trouble
467
Media Print - Photos Trouble
468
Error Code
469
Other Errors
550
Paper Jams
551
Paper Jams in Tray 3
552
Paper Jams in Trays 1 to 2
552
Paper Jams in Tray 4
553
Paper Jams in Tray 5 (Bypass)
553
Paper Jams in Tray 5 (Bypass) with HCF B1-S
554
Paper Jams in Tray 6 (HCF2 (2000 Sheets))
555
Paper Jams in Tray 6 (HCF B1-S)
557
Paper Jams at Lever 1A and Knob 1C
558
Paper Jams in the Transfer Module
560
Paper Jams in the Bottom Left Cover
562
Paper Jams in the Bottom Right Cover
563
Paper Jams in the Output Tray
564
Paper Jams at the Lever 1A
564
Paper Jams in the Finisher C2 and the Finisher C2 with Booklet Maker
564
Paper Jams at the Lever 1D and the Wheel 1C
565
Paper Jams at the Levers 1A and 1B
566
Paper Jams at the Lever 2A
567
Paper Jams at the Lever 2A (Using the Knob 2C)
568
Paper Jams at the Lever 2B
569
Paper Jams at the Lever 2B (Using the Knob 2C)
569
Paper Jams at the Lever 3
570
Paper Jams at the 4A (for the Finisher C2 with Booklet Maker)
572
Paper Jams at the Lever H
572
Paper Jams at the Lever 4B (for the Finisher C2 with Booklet Maker)
573
Paper Jams at the Booklet Tray (for the Finisher C2 with Booklet Maker)
574
Paper Jams in the Finisher D2-P with Booklet Maker
575
Paper Jams in Tray 8 (Inserter)
575
Paper Jams at the Lever 1A and the Knob 1C
576
Paper Jams at the Lever 1B
577
Paper Jams at the Lever 1D
577
Paper Jams at the Lever 3B and 3D
578
Paper Jams at the Lever 3E and the Knob 3C
579
Paper Jams at the Lever 3G and the Knob 3F
579
Paper Jams at the Lever 4B and the Knob 3A
580
Paper Jams at the Lever 2A and the Knob 3A When D2 Folder Unit Is Installed
581
Paper Jams at the Lever 2B and the Knob 2C When D2 Folder Unit Is Installed
581
Paper Jams at the Knob 2C, the Levers 2E/2F and the Tri-Fold Output Tray 2D When D2 Folder Unit Is Installed
582
Paper Jams at the Tri-Fold Tray 2D and the Lever 2G When D2 Folder Unit Is Installed
583
Paper Jams at the Unit 4 and Knob 4A for the Finisher D2-P with Booklet Maker
583
Paper Jams at the Finisher Tray
584
Paper Jams at the Output Tray
584
Paper Jams at the Booklet Output Tray for the Finisher D2-P with Booklet Maker
585
Document Jams
586
Stapler Faults
589
With Booklet Maker
590
Staple Jams in the Booklet Staple Cartridge for the Finisher C2 with Booklet Maker or Finisher D2-P with Booklet Maker
591
Staple Jams in the Staple Cartridge for the Finisher D2-P with Booklet Maker
593
Staple Cartridge Taken off from Unit for the Finisher D2-P with Booklet Maker
595
Solving Curled Output for the Finisher D2-P with Booklet Maker
597
16 Appendix
599
Specifications
600
Fax Function
605
Printable Area
612
Internal Fonts
613
Optional Components
615
Alignment Adjustment Settings
618
Alignment Adjustment Settings
619
Perpendicularity Adjustment
622
Skew Adjustment
623
Scale Adjustment
624
Print Position Adjustment
625
Fold Position Adjustment
627
Single Fold Position Adjustment
630
Booklet Position Adjustment
631
C Fold Position Adjustment
632
Z Fold Position Adjustment
634
Z Fold Half Sheet Position Adjustment
635
Adjust Image Transfer
636
ESC/P-K Emulation
640
Fonts
641
ESC/P-K Emulation Settings
642
Magnification Table
649
Paper Size and Number of Printable Characters
653
PDF Direct Print
655
Docuworks Direct Print
657
PCL Emulation
659
Output Feature
661
Pcl Settings List
662
HP-GL/2 Emulation
667
Output Feature
668
HP-GL/2 Emulation Settings
669
Hard Clip Area
675
Printable Area
676
Auto Layout
678
Notes and Restrictions
685
Notes and Restrictions on the Use of the Copy Feature
689
Notes and Restrictions on the Use of the Print Feature
690
Notes and Restrictions on the Use of the Scan Features
692
Notes and Restrictions on the Use of the Fax Feature
697
Notes and Restrictions on the Use of the E-Mail/Internet Fax Feature
698
Notes and Restrictions for IP Fax (SIP)
703
Notes and Restrictions When Connecting with Internet Service Provider
704
Notes and Restrictions on the Interrupt Mode
706
Notes and Restrictions on Folders
708
Notes and Restrictions on Job Flows
709
Notes and Restrictions on the Security Features
711
Notes and Restrictions for Using SMB
712
Notes and Restrictions for Using TCP/IP
714
Notes and Restrictions for Using Ethertalk
715
Notes and Restrictions for Using Bonjour
716
Notes and Restrictions for Print E-Mail
718
Using the Telephone
719
Activity Report
721
EP System
724
Glossary
725
Index
727
Advertisement
Fuji Xerox ApeosPort-IV C7780 User Manual (433 pages)
Brand:
Fuji Xerox
| Category:
Copier
| Size: 12.73 MB
Table of Contents
Table of Contents
3
Before Using the Machine
13
Preface
14
Types of Manuals
15
Using this Guide
16
Organization of this Guide
16
Conventions
17
Safety Notes
19
Electrical Safety
20
Machine Installation
21
Operational Safety
24
Consumable
27
Location of Warning and Caution Labels
29
Regulation
31
Radio Frequency Emissions (Class B)
31
Product Safety Certification (CB)
31
Regulatory Information for RFID
31
Environment
32
About License
33
Rsa Bsafe
33
Heimdal
33
JPEG Code
33
Libcurl
34
Freebsd
34
Openldap
35
Des
37
Aes
37
TIFF (Libtiff)
37
ICC Profile (Little Cms)
37
XPS (XML Paper Specification)
37
EDICT and COMPDIC
37
Cyrus SASL
38
Legal Notice
39
Product Overview
41
Machine Components
42
Power Source
50
Switching the Main Power on
50
Switching the Power on
50
Switching the Power off
51
Switching the Main Power off
52
Ground Fault Interrupter
53
Energy Saver Mode
54
Entering the Energy Saver Mode
55
Exiting the Energy Saver Mode
55
Control Panel
56
Middle Size Color UI
56
Large Size UI
60
Screens and Buttons Displayed
63
About the [Services Home] Screen
64
Entering Text
68
Copy
69
Copying Procedure
70
Step 1 Loading Documents
70
Document Glass
71
Step 2 Selecting Features
72
Step 3 Entering a Quantity
73
Step 4 Starting the Copy Job
74
Step 5 Confirming the Copy Job in Job Status
75
Operations During Copying
76
Stopping the Copy Job
76
Changing the Number of Copies
77
Interrupting the Copy Job
78
Simple Copy
79
Paper Supply (Selecting the Paper for Copying)
79
Reduce/Enlarge (Making Enlarged/Reduced Copies)
80
Sided Copying (Making 2 Sided Copies)
81
Black & White/Color (Selecting the Color for Copying)
81
Lighten/Darken (Adjusting the Copy Density)
82
Pages Per Side (Copying Two Pages Onto One Sheet)
82
Staple
82
Copy
85
Reduce/Enlarge (Making Enlarged/Reduced Copies)
85
Paper Supply (Selecting the Paper for Copying)
89
Output Color (Selecting the Color for Copying)
92
Sided Copying (Making 2 Sided Copies)
96
Copy Output (Specifying Finishing Options)
96
Pages Per Side (Copying Multiple Pages Onto One Sheet)
97
Lighten/Darken (Adjusting the Copy Density)
97
Image Quality
98
Original Type (Selecting the Document Type)
98
Image Options (Adjusting Copy Density/Sharpness/Saturation of Images)
99
Image Enhancement (Erasing the Background Color of Documents/Adjusting Contrast)
100
Color Effects (Selecting an Image Quality)
101
Color Balance (Adjusting Color Balance)
102
Color Shift (Adjusting the Color Tone)
104
Gloss Level (Enhancing Gloss of the Document)
105
Layout Adjustment
106
Sided Copying (Making 2 Sided Copies)
106
Book Copying (Copying Facing Pages Onto Separate Sheets)
108
Sided Book Copying (Making 2 Sided Copies of Facing
109
Original Size (Specifying the Scan Size for the Document)
111
Mixed Size Originals (Scanning Different Size Documents Simultaneously)
112
Edge Erase (Erasing Edges and Margin Shadows of the Document)
113
Image Shift (Adjusting the Image Position)
114
Invert Image (Making Reversed Copies of Images)
117
Original Orientation (Specifying the Orientation of Loaded Documents)
118
Image Rotation (Changing the Orientation of Images)
118
Output Format
120
Sided Copying (Making 2 Sided Copies)
120
Select [Copy] on the [Services Home] Screen
120
Booklet Creation (Creating a Booklet)
121
Covers (Attaching Covers to Copies)
124
Pages Per Side (Copying Multiple Pages Onto One Sheet)
125
Poster (Making Enlarged Copies Spread over Multiple Sheets)
127
Repeat Image (Making Multiple Copies on One Sheet)
128
Annotations (Adding a Comment/A Date/Page Numbers to Copies)
129
Watermark (Printing Control Numbers on the Background of Copies)
135
Secure Watermark (Managing Document Security)
138
Tab Margin Shift (Copying on Tab Stock Paper)
141
Face Up/Down Output (Specifying Face up or Down)
142
Folding (Outputting Bi-Folded/Tri-Folded Paper)
142
Preset Repeat Image (Making Multiple Copies on a Single Sheet)
143
Transparency Options (Inserting Blank Sheets between Transparencies)
144
Copy Output (Specifying Finishing Options)
146
Original Orientation
148
ID Card Copy (Copying both Sides of an ID Card)
153
Job Assembly
155
Build Job (Processing Documents Scanned with Different Settings as One Job)
155
Select [Copy] on the [Services Home] Screen
155
Booklet Creation
156
Segment Separators
156
Sample Job (Checking the Finished Output of the Copy)
160
Combine Original Sets (Adding Originals)
161
Delete Outside/Delete Inside (Deleting Outside or Inside of the Selected Area)
162
Stored Programming (Calling a Stored Program for Build Job)
164
Fax
165
Fax Procedure
166
Step 1 Loading Documents
166
Step 2 Selecting Features
168
Step 3 Specifying Destinations
169
Step 4 Starting the Fax Job
171
Step 5 Confirming the Fax Job in Job Status
172
Operations During Faxing
173
Stopping the Fax Job
173
Changing the Scan Settings
174
About Internet Fax
176
Internet Fax Features
176
Sending Internet Fax
178
Receiving Internet Fax
179
Useful Features
181
About IP Fax (SIP)
184
IP Fax (SIP) Features
185
Feature Comparison with Regular Fax
187
Sending IP Fax (SIP)
188
Receiving IP Fax (SIP)
188
About Server Fax
189
Sending Server Fax
189
Simple Fax
191
Specifying a Destination Using the Numeric Keypad
192
Speed Dialing (Specifying a Destination Using an Address Number)
192
Specifying a Destination Using a One Touch Button
193
Resolution (Specifying the Scanning Resolution)
194
Original Type (Selecting the Document Type)
195
Sided Scanning (Transmitting 2-Sided Originals)
196
Fax/Internet Fax
197
Internet Fax/Fax/Ip Fax (SIP) (Selecting Internet Fax/Fax)
197
Add (Sending Faxes to Multiple Recipients)
198
Specifying a Destination Using the Address Book
199
Speed Dialing (Specifying a Destination Using an Address Number)
200
Specifying a Destination Using a One Touch Button
201
Specifying a Destination Using the Keyboard Screen
202
Specifying a Destination Using the Redial Feature
203
Specifying a Line (Port)
203
Entering Specific Symbols
204
Removing/Confirming a Recipient
205
Lighten/Darken (Adjusting Fax Density)
205
Sided Scanning (Transmitting 2-Sided Originals)
206
Original Type (Selecting the Document Type)
207
Resolution (Specifying the Scanning Resolution)
208
Layout Adjustment
209
Sided Scanning (Transmitting 2-Sided Originals)
209
Original Size (Specifying the Scan Size for the Original)
209
Select [Fax/Internet Fax] on the
209
Home] Screen
209
Mixed Size Originals (Scanning Different Size Documents Simultaneously)
210
Book Faxing (Scanning Facing Pages Onto Separate Sheets)
211
Reduce/Enlarge (Specifying a Scan Ratio)
213
Fax/Internet Fax Options
214
Acknowledgement Report (Confirming Transmission Results)
214
Fax/Internet Fax Options
215
Starting Rate (Selecting a Communication Mode)
216
Priority Send/Delay Start (Specifying Send Priority/Send Time)
217
Transmission Header Text (Adding Sender Name and Phone Number to Faxes)
219
Cover Page (Transmitting Documents with a Cover Page)
220
Internet Fax Subject (Specifying the Internet Fax Subject)
222
Internet Fax Message (Editing the Internet Fax Mail Contents)
222
Recipient Print Sets (Printing Multiple Sets at the Remote Machine)
224
Pages Per Side (Combining Multiple Pages into One Sheet)
224
Remote Folder (Using Remote Folder)
225
F Code (Using F Code Transmission)
228
Internet Fax Profile (Specifying Internet Fax Profiles)
232
Encryption (Sending Internet Fax Encrypted by S/MIME)
233
Digital Signature (Sending Internet Fax with a Digital Signature by S/MIME)
234
More Options
235
Remote Polling (Retrieving Files from Remote Machines)
235
Select [Fax/Internet Fax] on the [Services Home] Screen
235
Store for Polling (Storing Files on the Machine that a Remote Machine Can Retrieve)
238
On-Hook (Confirming Remote Machine Response Prior to Transmission)
239
Broadcast
241
Broadcast Send (Transmitting to Multiple Recipients)
241
Relay Broadcast (Transmitting Documents through a Relay Station)
242
Remote Relay Broadcast (Performing Relay Broadcast to Remote Locations)
245
Receiving Faxes
249
Switching between Auto Receive and Manual Receive
250
Using Auto Receive
250
Using Manual Receive
251
Using Folder Receive
251
Facsimile Information Services
252
Using the Receiver
252
When Not Using a Receiver
253
Scan
255
Scanning Procedure
256
Step 1 Loading Documents
256
Step 2 Selecting the Features
258
Step 3 Starting the Scan Job
261
Step 4 Confirming the Scan Job in Job Status
262
Step 5 Saving the Scanned Data
263
Operations During Scanning
264
Stopping the Scan Job
264
Previewing the Scanned Images During a Scan Job
265
Changing Scan Settings
266
E-Mail
267
Address Book (Specifying an E-Mail Address)
268
New Recipient (Entering an Address)
270
Add Me (Adding the Sender's Address)
271
Recipient(S) (Editing a Recipient)
272
From (Setting the Sender's Address)
273
Subject (Setting the Subject)
274
Message (Entering the E-Mail Body)
274
Preview (Previewing the Scanned Images During a Scan Job)
274
Color Scanning (Selecting an Output Color)
275
Sided Scanning (Scanning both Sides of a Document)
276
Original Type (Selecting the Document Type)
277
File Format (Selecting a File Format for Output Data)
278
Network Scanning
287
Preview (Previewing the Scanned Images During a Scan Job)
288
Color Scanning (Selecting an Output Color)
288
Sided Scanning (Scanning both Sides of a Document)
288
Original Type (Selecting the Document Type)
288
File Format (Selecting a File Format for Output Data)
288
Scan to PC
289
Transfer Protocol (Selecting a Transfer Protocol)
289
Address Book (Specifying a Destination PC Using the Address Book)
290
Browse (Specifying a Destination PC by Browsing Your Network)
291
Specifying a Destination (Specifying a Destination PC Using the Screen Keyboard)
292
Preview (Previewing the Scanned Images During a Scan Job)
294
Color Scanning (Selecting an Output Color)
294
Sided Scanning (Scanning both Sides of a Document)
294
Original Type (Selecting the Document Type)
294
File Format (Selecting a File Format for Output Data)
294
Store to Folder
295
Color Scanning (Selecting an Output Color)
296
Sided Scanning (Scanning both Sides of a Document)
296
Original Type (Selecting the Document Type)
296
Preview (Previewing the Scanned Images During a Scan Job)
296
Store to USB
297
Save in (Specifying a Storage Location in the USB Memory Device)
298
Details (Displaying the Details of a Storage Location in the USB Memory Device)
299
Preview (Previewing the Scanned Images During a Scan Job)
299
Color Scanning (Selecting an Output Color)
299
Sided Scanning (Scanning both Sides of a Document)
300
Original Type (Selecting the Document Type)
300
File Format (Selecting a File Format for Output Data)
300
Store & Send Link
301
Scan to (Displaying the E-Mail Address of the Authenticated User)
302
From (Displaying the E-Mail Address of the Authenticated User)
302
Subject (Setting the Subject)
302
Message (Entering the E-Mail Body)
302
Color Scanning (Selecting an Output Color)
302
Sided Scanning (Scanning both Sides of a Document)
302
Original Type (Selecting the Document Type)
302
Preview (Previewing the Scanned Images During a Scan Job)
303
File Format (Selecting a File Format for Output Data)
303
Advanced Settings
304
Photographs (Scanning a Color Photograph)
304
Image Options (Adjusting Scan Density and Image Sharpness)
305
Image Enhancement (Erasing the Background Color of Documents/Adjusting Contrast)
306
Shadow Suppression (Suppressing the Document Background)
307
Color Space (Specifying the Color Space)
307
Layout Adjustment
309
Resolution (Specifying a Scanning Resolution)
310
Sided Scanning (Scanning both Sides of a Document)
310
Book Scanning (Scanning Facing Pages on Separate Sheets)
310
Original Size (Specifying a Scan Size)
312
Mixed Size Originals (Scanning Different Size Documents Simultaneously)
313
Edge Erase (Erasing Edges and Margin Shadows in the Document)
314
Reduce/Enlarge (Specifying a Scanning Ratio)
315
Original Orientation (Specifying the Orientation of the Loaded Documents)
316
E-Mail Options/Filing Options
317
Mail], [Store to Folder], [Network Scanning]
317
On the [Services Home] Screen, Select
317
To USB]
317
[Scan to PC], [Store & Send Link], or [Store
317
Quality/File Size (Specifying an Image Compression Ratio When Scanning)
318
Read Receipts (Specifying Read Receipts)
318
Split Send (Sending in Sections)
319
File Name (Specifying a Name for the File to be Sent)
320
Reply to (Specifying a Reply Address)
320
File Name (Specifying a Name for the File to be Saved)
321
File Name Conflict (Setting the Action to be Taken for File Name Conflict)
321
Digital Signature (Sending E-Mail with a Digital Signature by S/MIME)
322
Encryption (Sending E-Mail Encrypted by S/MIME)
322
Login Name
323
Meta Data
323
Password
323
Send from Folder
325
Folder Operating Procedure
326
Step 1 Opening the [Send from Folder] Screen
326
Step 2 Selecting a Folder
326
Step 3 Checking/Selecting Files in a Folder
327
Step 4 Operating Files in a Folder
327
Selecting a Folder
328
Checking/Operating Files in a Folder
329
Checking File Details
331
Printing Files in a Folder
332
Configuring/Starting Job Flow
335
[Link Job Flow Sheet to Folder] Screen
337
Job Flow Restrictions
339
Job Flow Sheets
341
Job Flow Procedure
342
Step 1 Opening the [Job Flow Sheets] Screen
342
Step 2 Selecting a Job Flow Sheet
343
Step 3 Confirming/Changing the Job Flow Sheet
343
Step 4 Starting the Job Flow Sheet
343
Selecting/Changing a Job Flow Sheet
344
Stored Programming
347
Stored Programming Overview
348
Registering/Deleting/Renaming Stored Programs
349
Registering Stored Programs
350
Notes and Restrictions on Registering Stored Programs
351
Registering Stored Programs for Build Job
352
Deleting Stored Programs
352
Entering/Changing a Stored Program Name
353
Assigning/Changing Icons for Stored Programs
354
Calling a Stored Program
355
Calling a Stored Program for Build Job
356
Web Applications
357
Web Applications Overview
358
Accessing Web Applications
359
Accessing Using Buttons Registered on the [Services Home] Screen
360
Media Print (Text and Photos)
361
Overview of Media Print
362
Supported Media and File Formats
363
Notes and Restrictions on Media Print
364
Media Print - Text
365
Selecting Files
365
[Select from List] Screen
366
Media Print - Photos
367
Selecting Files
367
[Select from List] Screen
368
Selecting the Printing Options
369
Media Print - Photos
369
Media Print - Text
370
Index Print
371
11 Job Status
373
Job Status Overview
374
Checking Current/Pending Jobs
375
Checking Completed Jobs
377
Printing and Deleting Stored Jobs
378
Secure Print
378
Sample Set
380
Delayed Print
382
Charge Print
384
Private Charge Print
386
Public Folder
388
Undelivered Faxes
390
Printing Pending Jobs
392
Press the <Job Status> Button
392
Handling Error Terminations
393
Fuji Xerox ApeosPort-IV C7780 Quick User Manual (48 pages)
Brand:
Fuji Xerox
| Category:
All in One Printer
| Size: 2.87 MB
Table of Contents
Troubleshooting
2
Table of Contents
4
C1: Simple Copy
8
Reduce/Enlarge
9
C3: 2 Sided Copying
10
Book Copying
11
C5: Mixed Sized Originals
12
C6: Edge Erase/Image Shift
13
Pages Per Side
14
Booklet Creation
15
Copy Output / Sorting
16
C10: Repeat Image
17
ID Card Copy
18
P1: Job Types
29
Paper Tray/Paper Type
29
P2: Secure Print
30
P3: 2 - Sided Print
31
Booklet Print
32
Pages Per Sheet
33
Watermarks
34
PC Faxing
35
Media Print Text/Photo
36
Clearing Paper Jams
38
Replacing Consumables
41
Advertisement
Advertisement
Related Products
Fuji Xerox DocumentCentre C400 Series
Fuji Xerox DocumentCentre C320 Series
Fuji Xerox DocumentCentre C240 Series
Fuji Xerox ApeosPort-IV C6680
Fuji Xerox DocuCentre-IV C5580
Fuji Xerox ApeosPort-IV 4070
Fuji Xerox ApeosPort-IV 3070
Fuji Xerox ApeosPort-IV 5070
Fuji Xerox ApeosPort-II C7500
Fuji Xerox DocuCentre-V C7775
Fuji Xerox Categories
All in One Printer
Printer
Copier
Scanner
Office Equipment
More Fuji Xerox Manuals
Login
Sign In
OR
Sign in with Facebook
Sign in with Google
Upload manual
Upload from disk
Upload from URL