
Related Manuals for Kyocera Mita S-9100DN


Summary of Contents for Kyocera Mita S-9100DN
-
Page 1: Operation Guide
Operation Guide Please read this Operation Guide before using the printer. Keep it close to the printer for easy reference. - Page 2 This guide, any copyrightable subject matter sold or provided with or in connection with the sale of the page printer, are pro- tected by copyright. All rights are reserved. Copying or other re- production of all or part of this guide, any copyrightable subject matter without the prior written consent of Kyocera Corporation is prohibited.
- Page 3 Otherwise, this license is governed by the laws of the country in which you acquired the Program. Typeface Trademark Acknowledgement All resident fonts in this printer are licensed from Agfa Corpora- tion. Helvetica, Palatino and Times are registered trademarks of Lino- type-Hell AG.
- Page 4 4. You agree not to duplicate or copy the Software or Typefac- es, except that you may make one backup copy. You agree that any such copy shall contain the same proprietary notices as those appearing on the original. 5. This License shall continue until the last use of the Software and Typefaces, unless sooner terminated.
-
Page 5: Table Of Contents
1 Removing the Main Circuit Board ... B-1 1.1 Notes on Handling the Main Circuit Board and DIMM ... B-1 1.2 Removing the Main Circuit Board from the Printer .. B-1 2 Installing DIMMs... B-2 2.1 Removing DIMM ... B-2... -
Page 6: Contents
Appendix C Host Computer Interface... C-1 1 Parallel Interface... C-1 1.1 Parallel Interface Communication Modes... C-1 1.2 Interface Signals... C-1 2 Serial Interface ... C-2 2.1 Interface Signals... C-2 3 RS-232C Protocol... C-3 4 RS-232C Cable Connection ... C-4 4.1 Preparing an RS-232C Cable... C-4 4.2 Connecting the RS-232C Cable ... -
Page 7: Introduction
Auto Media Type Selection function that selects the media automatically before printing. If you install the option doc- ument finisher to the printer, you can also make stitching. This section explains the following topics: • For More Information... -
Page 8: Important! Please Read First
IMPORTANT! PLEASE READ FIRST Caution Labels Caution labels have been attached to the printer at the following locations for safety purposes. BE SUFFICIENTLY CAREFUL to avoid fire or electric shock when removing a paper jam or when replacing toner. Label 2 High temperature inside. -
Page 9: Installation Precautions
Installation Precautions Q Q Q Q Environment CAUTION • Avoid placing the printer on or in locations which are unstable or not level. Such locations may cause the printer to fall down or fall over. This type of situation presents a danger of personal injury or damage to the printer. -
Page 10: Precautions For Use
If the power cord is damaged, there is a danger of fire or electrical shock..• If the printer will not be used for a short period of time (overnight, etc.), turn the power switch OFF (O). - Page 11 • Keep the toner container and the waste toner box away from children..Other Precautions • If the printer will not be used for an extended period of time, remove the paper from the cassette, return it to its original package and reseal it.
-
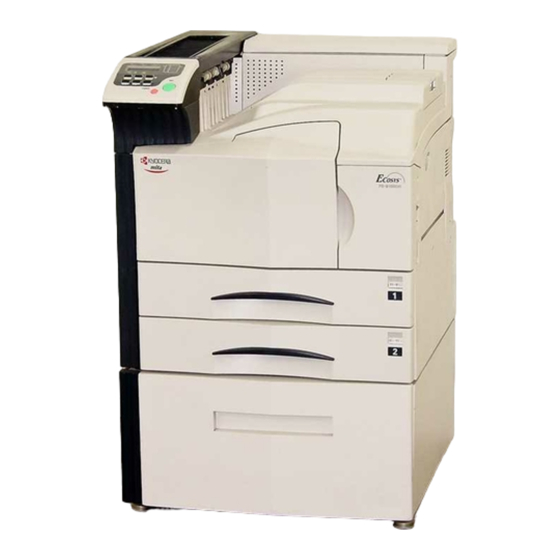
Page 12: Chapter 1 Names Of Parts
Chapter 1 Names of Parts C D E... - Page 13 Chapter 1 Names of Parts 1 Operator panel Contains the keys and indicators for operating the printer. 2 Front cover Open to replace the toner container or waste toner box. 3 Paper cassette 2 Second cassette that holds up to about 500 sheets of stan- dard paper.
-
Page 14: Chapter 2 How To Load Paper
Chapter 2 1. How to Load Paper Paper can be loaded into the two paper cassettes and the MP tray. 1.1 Loading Paper into the Paper Cassette Up to about 500 sheets of standard paper (80 g/m ed into the each paper cassette. Inch specifications Each paper cassette can be set to hold paper of any desired size from 11 ×... -
Page 15: Loading Paper Into The Mp (Multi-Purpose) Tray
Gently push the paper cassette back in. NOTE Before leaving the printer in disuse for a prolonged period of time, remove the paper from the paper cassette(s) and seal it in its original packaging to protect from moisture. Also, when stor- ing paper in a high temperature and high humidity environment, seal it in a moisture-proof bag. -
Page 16: Setting Envelopes
If the leading edge of the paper is curled, straighten it out before loading the paper in the MP tray. 1.3 Setting Envelopes When using the optional printer function, envelopes can be set in the MP tray. Open the MP tray. -
Page 17: Chapter 3 Using The Operator Panel
Chapter 3 This chapter explains the following topics: • Understanding the Operator Panel • Using the Operator Panel 1. Understanding the Operator Panel The operator panel has an LCD message display, indicators, and eight keys. Message Display (See page 3-2) Interface Indicator (See page... -
Page 18: Operation Indicators
The message display gives information in the form of short mes- sages. The eight messages listed below are displayed during normal warm-up and printing. Other messages that may appear when the printer needs the op- erator’s attention are explained on page Message The printer is self-testing after power-up. -
Page 19: Paper Size Indicator
Youkei4* * With only the MP tray feeding NOTE While the printer is processing data, the SIZE display indicates the paper size selected by the application software. 1.5 Paper Type Indicator This shows the paper type defined for the current paper cas- sette. -
Page 20: Using The Operator Panel
2.1 Menu Selection System The following is the hierarchy diagram of the menu selection system of the printer. The vertical transition is made with the 3 and 4 keys and horizontal transition is made with the 2 and 1 keys. To change or finalize configuration on an item, use the ENTER key. - Page 21 Chapter 3 Using the Operator Panel Continued Interface > Parallel Interface > Serial Interface > Network Interface > Option Continued on the next page >Parallel I/F Auto >Baud rate 9600 >Data Bits >Data Bits >Stop Bits >Stop Bits >Parity None >Protocol DTR (pos.)&XON >Barcode Mode...
- Page 22 [SPSZ] Emulation > >Print KPDL Errs KPDL Emulation > KPDL (AUTO) >Print KPDL Errs >Alt. Emulation PCL 6 Emulation > Line Printer Emulation > >Code Set IBM Printer IBM US Emulation > >Code Set DIABLO US DIALO US Emulation >...
- Page 23 Chapter 3 Using the Operator Panel Continued Print Quality > Opt. ROM > Hard Disk > RAM DISK Mode RAM DISK Mode > Memory Card > Continued on the next page >KIR Mode >KIR Mode >EcoPrint Mode >EcoPrint Mode >Resolution Fast 1200 mode >Print Density >Read Data...
- Page 24 Continued >MP Tray Mode Paper Handling > >MP Tray Size >MP Tray Type >Cassette1 Size > >Cassette 1 Type Plain >Feed Select >Duplex Mode >Stack Select >Stitch Adjust > >Override A4/LT >Type Adjust >Reset Type Adjust Continued on the next page Cassette >MP Tray Mode First...
- Page 25 >New Toner Installed >MSG Language English >Form Feed Time Out 030sec. >Sleep Timer > >>Sleep Mode 030 min. >Print HEX-DUMP >Printer Reset >Resource Prot. >Buzzer >Buzzer >Auto Continue > >>Auto Continue Mode Off >Auto Continue > Mode On >>Print >Service >...
-
Page 26: Using The Menu Selection System
The menu selection system is activated by the MENU key while the printer is Ready. 2.2.1 Printing the Menu Map The printer prints a full list of menu selections. Note that menus indicated on the list may vary depending on which option units are installed on the printer. -
Page 27: E-Mps
3-11 In either job mode, when printing a document, the print data is transferred from the computer to the printer then stored on the printer’s hard disk. Since copies of the document are printed us- ing the stored data, printing is performed faster with less compu- ter spooling time and less network traffic. -
Page 28: Quick Copy
Job storage requires a hard disk installed in the printer. Howev- er, printing barcoded job IDs on documents is possible using the RAM disk feature of the printer. On how to use the RAM disk, see Operating a RAM Disk on page 3-34. - Page 29 Since you can proof the printouts before printing the re- maining copies, wastage of paper can be reduced. The printer prints one copy and, at the same time, saves the print job on the hard disk. You can also change the number of copies when resuming printing from the operator panel.
- Page 30 The print jobs are not deleted even when the printer is turned off. Q Q Q Q Releasing a Stored Job To print a stored job through the operator panel: Press the MENU key.
- Page 31 Printing a List of Code Jobs If you select Permanent Job Storage on the printer driver, you can have a List of Code Job printed using the operator panel. The List of Code Job may be used to read the barcode ID for the stored job you want to reprint by using a barcode reader.
- Page 32 >List of VMB Press the ENTER key. A question mark (?) appears. >List of VMB ? Press the ENTER key again. The printer prints a list of jobs currently posted in the virtual mailboxes as shown below. VIRTUAL MAIL BOX LIST...
- Page 33 Chapter 3 Using the Operator Panel When the desired maximum number of jobs is set, press the ENTER key. Press the MENU key. The display returns to Ready. Q Q Q Q Maximum Space Assigned to Temporary Code Jobs This changes the hard disk space that holds temporary code jobs.
-
Page 34: Changing The Interface Parameters
Nibble (high). For details, see Computer Interface. After setting the interface, be sure to reset the printer or turn the power off at least once. The new setting will be enabled thereafter. Press the MENU key. Press the 3 or 4 key repeatedly until Interface >... -
Page 35: Baud Rate
Chapter 3 Using the Operator Panel Press the 3 or 4 key to display the desired mode. The display changes as shown below. Press the ENTER key. Nibble (high) (default) AUTO Normal High speed Press the MENU key. The message display returns to Ready. - Page 36 Network Interface Status Page after the Printer Status Page. The following example explains how to activate TCP/IP protocol to connect the printer in the network. You can select Netware or EtherTalk in a similar manner. >TCP/IP > If TCP/IP is currently displays Off, select On using the 3 or 4 key.
-
Page 37: Network Status
The default setting is On (print). The network interface status page will be printed out after the printer status page. NOTE Printing out a network interface status page may not be possi- ble with some optional network interface cards. -
Page 38: Changing The Emulation
KPDL (AUTO) Emulation KPDL is the Kyocera’s implementation of the PostScript lan- guage. The KPDL (AUTO) emulation enables the printer to au- tomatically change the emulation mode according to the data received when printing. - Page 39 Ready. Auto Printing of KPDL Error The printer can be set to print error data during KPDL emulation. If this is set to On, error data will be printed only when trouble oc- curs during printing. The factory default setting is Off.
-
Page 40: Setting The Default Font
You can select the default font for the current interface. In addi- tion to the internal fonts, all fonts that are downloaded to the printer memory, or fonts stored on a memory card, hard disk, or option ROM, can be selected as the default font. - Page 41 Chapter 3 Using the Operator Panel Q Q Q Q Changing Type for Courier/Letter Gothic Courier or Letter Gothic font type can be selected as Regular or Dark. For example, to change the type of Courier, proceed as follows: Press the MENU key. Press the 3 or 4 key repeatedly until Font >...
-
Page 42: Using Page Set Menus
>List of Option Fonts ? Press the ENTER key again. Processing appears, then Ready. The printer prints a list of fonts with a short sample and font ID (number) for each font. Internal Scalable and Bitmapped Fonts List Font Name... - Page 43 Chapter 3 Using the Operator Panel Press the 3 or 4 key repeatedly until Page set > ap- pears. Page Set > Press the 2 key. Press the 3 or 4 key repeatedly until >Copies ap- pears. >Copies Press the ENTER key. A blinking cursor ( _ ) appears. >Copies Press the 3 or 4 key to increase or decrease the value of the figure where the cursor is blinking.
-
Page 44: Page Protect
Press GO error occurs due to insufficient printer memory. Be sure to return this setting to Auto in order to main- tain high printer memory efficiency. This can be done as follows. Press the MENU key. Press the 3 or 4 key repeatedly until Page Set > ap- pears. - Page 45 Chapter 3 Using the Operator Panel Linefeed (LF) Action This procedure instructs the printer what to do when it receives a linefeed code (character code 0AH). Press the MENU key. Press the 3 or 4 key repeatedly until Page Set > ap- pears.
-
Page 46: Setting The Print Quality
Ad- justment of the Print Density. KIR (Kyocera Image Refinement) This printer incorporates the KIR (Kyocera Image Refinement) smoothing function. At a resolution of 600 dpi this function pro- vides high print quality by providing the software enhancement of print resolution. -
Page 47: Operating An Option Hard Disk
Press the MENU key. The message display returns to Ready. 2.2.9 Operating an Option Hard Disk By installing the option hard disk into the printer, the e-MPS function can be used. The printer’s menu selection system al- lows you to perform the following operations on the hard disk. - Page 48 Check that the message display has changed to Waiting, then press the GO key. This writes file to the hard disk and instructs the printer to automatically print out a hard disk write information page as shown below. WRITE INFORMATION...
- Page 49 Printing a List of Data Names on page Deleting Data It is possible to use the printer to delete data from a hard disk one by one. To delete data from a hard disk, proceed as follows. Check that the hard disk contains data. Otherwise, the >Delete Data menu will not appear on the message display.
-
Page 50: Operating A Ram Disk
It acts similarly to the hard disk except that the data is effective only when the printer is pow- ered up. - Page 51 Waiting. Check that the message display has changed to Waiting, then press the GO key. This writes the file to the RAM disk and instructs the printer to automatically print out a RAM disk write information page as shown below.
-
Page 52: Operating A Memory Card
Printing a List of Data Names on page Deleting Data It is possible to use the printer to delete data from a RAM disk one by one. To delete data from a RAM disk, proceed as follows. Check that the RAM disk contains data. Otherwise, the >De- lete Data will not appear on the message display. - Page 53 If a memory card with the font data is already inserted into the slot when the printer is turned on, the fonts are automatically read into the printer. To re-read fonts into the printer from a memory card, proceed as follows.
- Page 54 See Printing a List of Data Names on page Deleting Data It is possible to use the printer to delete data from a memory card one by one. To delete data from a memory card, proceed as follows. Check that the memory card contains data.
- Page 55 Ready. Printing a List of Data Names The printer prints a list of all data names (referred to as parti- tions) stored in a memory card for reference. (Printing a list is also available for a font card.) To print a list of data names for the memory card, proceed as follows.
-
Page 56: Paper Handling
(This is the factory setting.) Q Q Q Q First Mode (Automatic Manual Feeding) The printer automatically feeds any paper placed on the MP tray even if another paper source is selected. After all paper in the MP tray is printed, paper will be fed from the paper source origi- nally selected. - Page 57 Setting the MP Tray Type You can automatically select the paper cassette according to the selection made by the application (printer driver). The facto- ry default setting is Plain. For more details about the paper types that can be fed from the...
- Page 58 Setting the Cassette Paper Type Make this setting to match the paper type fed from the paper cassette of the printer. If the paper type is set correctly, you can perform printing using the media type selection function from the application (printer driver).
- Page 59 You can select from which paper source printing will be per- formed. If no option units are installed, the only selections are the paper cassette and MP tray of the printer. If option paper feeders are installed, they can also be selected.
-
Page 60: Stack Select
Press the MENU key. Press the 3 or 4 key repeatedly until Paper Handling > appears. Paper Handling > Press the 2 key. Press the 3 or 4 key repeatedly until >Duplex Mode appears. >Duplex Mode None Press the ENTER key. A blinking question mark (?) ap- pears. - Page 61 Customizing Paper Type The following describes the procedure used to set a user-de- fined paper type for the printer. Eight custom user settings may be registered. After having been set, any of these may be called up when setting the paper type for a paper source.
- Page 62 Press the ENTER key. A blinking question mark (?) ap- pears. >Type Adjust > ? Custom 1 Press the 3 or 4 key to display the desired paper type. The display changes as shown below. Custom (1 to 8) Plain Transparency Preprinted Labels...
-
Page 63: Other Modes
3 or 4 key. • Message Language Selecting • Automatic Form Feed Timeout Setting • Sleep Timer Setting • Received Data Dumping • Printer Resetting • Resource Setting • Alarm (Buzzer) Setting • Auto Continue Setting • Service Menu (for service personnel) -
Page 64: Sleep Timer
Ready. Automatic Form Feed Timeout Setting When the printer receives no data for a certain time, it times out and releases the current interface: it prints whatever data it has in its buffer and feeds out the page. You can adjust the time-out time as follows: Press the MENU key. - Page 65 Ready. 3-49 Received Data Dumping It is possible to print data received by the printer as hexadeci- mal code for the purposes of debugging programs and files. Press the MENU key. Press the 3 or 4 key repeatedly until Others > ap- pears.
-
Page 66: Printer Reset
In addition to the message displayed when the paper supply is exhausted, or when paper jamming occurs, an audio warning is made to sound. This is useful, for example, when the printer is in a location some distance from the user. -
Page 67: Auto Continue
GO, KPDL error Press GO, and File not found Press GO), the next received data is automatically printed after a set period of time elapses. For example, if the printer is shared over a network as a network printer and one person causes one of the above errors, after the set period of time elapses, the data sent from the next person is printed. -
Page 68: Status Page
Q Q Q Q Printing the Service Status Page The service status page contains printer settings information that is more detailed than the standard status page and is there- fore for mostly service purposes. To print a service status page, proceed as follows;... -
Page 69: Chapter 4 Troubleshooting
Chapter 4 This chapter explains how to handle printer problems that may occur. If a problem cannot be corrected, contact your Kyocera Mita dealer. This chapter explains the following topics: • General Guide • Print Quality Problems • Indicators and Messages •... -
Page 70: Print Quality Problems
Open the printer front cover and check that the main charger unit is correctly installed. Clean the charger wire. Open the printer front cover. Pull the cleaning knob slowly in and out a few times. See Toner Container Replacement on page Refresh drum. - Page 71 Make sure the paper type setting is correct. See page 5-5. Clean the charger wire. Open the printer front cover. Pull the cleaning knob slowly in and out a few times. See Toner Container Replacement on page Refresh drum. See the following procedures in the operator panel and try cleaning the drum surface using the printer's built-in cleaning system.
-
Page 72: Indicators And Messages
This message will be displayed when replacing the toner container after the message Replace Press GO toner Clean printer is displayed. After cleaning the inside of the printer, press the GO key and the printer will be ready for printing. - Page 73 Close the printer front cover. Close front cover Close the printer left cover. If left cover of the option paper feeder is open, 2 or 3 is displayed. Close left cover 1 (-3) Close the reverse adapter cover of the option document finisher.
-
Page 74: Error Messages
I/F occupied environmental settings on the interface from which data are presently being received. The ID entered for a private job, or a stored job is not correct. Check the ID that is set using the printer ID error driver. - Page 75 05: Specified file not on memory card. 06: No memory for use by memory card. Expand printer memory. The data transferred to the printer was too complex to print on a page. Press the GO key to resume Print overrun printing.
-
Page 76: Correcting A Paper Jam
Then the printer automatically warms up, goes on-line, and continues printing. Depending on the point at which the jam occurred, the printer may or may not print the jammed page. If paper jams occur frequently, try using a different type of paper, replace with paper from another ream, turn the stack of paper over, or turn the paper the other way around. -
Page 77: Jam In Paper Cassette
Pull out the paper cassette. Remove the jammed paper while taking care not to tear it. If the paper has been torn, remove all the scraps from the inside the printer. Close the paper cassette. 4.2 Jam at the MP Tray Paper is jammed at the MP tray. -
Page 78: Jam In Left Cover 1
CAUTION • Take care not to leave any small pieces of paper in the printer when removing paper jams as this may result in fire. • The printer’s fixing unit is extremely hot. Take sufficient care when working in this area, as there is a danger of getting burned. -
Page 79: Jam In Left Cover 2
Chapter 4 Troubleshooting Pull up the lock lever and open left cover 1. Remove the jammed paper. Push the lever (gray colored) to raise the duplex unit and remove the jammed paper. If there is jammed paper in the output section, remove it. 4-11 Close left cover 1. -
Page 80: Chapter 5 Paper Selection
There are three general grades of paper: economy, standard, and premium. The most significant difference between grades is the ease with which they pass through the printer. This is affect- ed by the smoothness, size, and moisture content of the paper, and the way in which the paper is cut. - Page 81 Thickness (Caliper) Thick paper is referred to as high-caliper paper and thin paper as low-caliper paper. The paper used with the printer should be nei- ther extremely thick nor extremely thin. If you are having prob- lems with paper jams, multiple feeds, and faint printing, the paper you are using may be too thin.
-
Page 82: Special Paper
(long grain) or parallel to the width (short grain). Short grain paper can cause feeding problems in the printer. All paper used in the printer should be long grain. Other Paper Properties Porosity: Refers to the density of the paper structure; that is, how openly or compactly the fibers are bonded. -
Page 83: Adhesive-Backed Labels
Many envelopes have a diagonal grain orientation (See Grain on page crease on its way through the printer. Before purchasing enve- lopes for use with the printer, test a sample to verify the enve- lope’s suitability. Do not use envelopes that have an encapsulated liquid adhe- sive. -
Page 84: Paper Type
The printer is capable of printing under the optimum setting for the type of paper being used. Setting the paper type for the paper source from the printer’s op- erator panel will cause the printer to automatically select the paper source and print in the mode best suited to that type of paper. -
Page 85: Chapter 6 Maintenance
Assuming an average toner coverage of 5 % and Ecoprint mode turned off, the toner container will need replacing approximately once every 40,000 pages.* * For a new printer with a toner kit installed for the first time, the number of copies that can be printed will be approximately 20,000. - Page 86 Chapter 6 Maintenance Grasp the handle on the toner container and insert the toner container along the rail of the printer. When inserting, be sure that the gear side of the toner container faces the printer. Leave the front cover open to allow insertion of the waste toner box.
- Page 87 When the grid is clean, remove the grid cleaner from the printer and dispose of it. The grid cleaner is not re- usable. Fit the new waste toner box to the printer.
- Page 88 Remove the blue colored cleaning brush. Pull up the lock lever on the left side of the printer, and open the left cover 1. Clean the separator by moving the cleaning brush from left to right along with the separator.
-
Page 89: Appendix A Fonts
Fonts This appendix explains the types of fonts you can use with the printer. A font is a set of characters of a particular design. The design is referred to as a typeface. Several characteristics identify a font. These include the code set (For details on the code sets, read the... - Page 90 Appendix A Fonts 3 3 3 3 PCL (Scalable and Bitmap) Fonts...
- Page 91 Appendix A Fonts 3 3 3 3 KPDL Fonts (1)
- Page 92 Appendix A Fonts 3 3 3 3 KPDL Fonts (2)
-
Page 93: Appendix B Expansion Memory
Expanded printer memory enables you to print more complex pages, download more fonts, and define more macros. 1. Removing the Main Circuit Board The main circuit board of the printer is equipped with two sockets for memory expansion. Expansion memory is available in the form of DIMMs. -
Page 94: Installing Dimms
Q Q Q Q DIMMs to be used See your Kyocera Mita dealer for purchasing information of the DIMMs that are best suited for use with this printer. 16 MB, 32 MB, 64 MB, and 128 MB DIMMs can be used for memory ex- pansion. -
Page 95: Appendix C Host Computer Interface
Appendix C This appendix explains the signals used in the printer’s parallel and RS-232C interfaces. It also lists pin assignments, signal functions, timings, connector specifications, and voltage levels. The RS-232C protocols are also covered. Finally, it explains how to use the printer in a multi-computer environment. -
Page 96: Interface Signals
It goes low when the GO key is pressed to set the printer offline. +5 V DC (Pin 18) This line is connected to the printer’s +5 V DC line (+5 V ±0.5 V, maximum 400 mA [Serial and Parallel total], fused). Error* [nFault] (Pin 32) When the high-speed parallel line control is on (FRPO O2=2), this line returns error status. -
Page 97: Rs-232C Protocol
Appendix C Host Computer Interface 3. RS-232C Protocol A protocol is a set of rules the computer follows in sending data to the printer. They are indicated on the status page. Parameters can be changed from the operator panel. See Interface Modes on page 3-19. -
Page 98: Rs-232C Cable Connection
C-2. If you have an IBM communication adapter cable type 1502067, you will have to resolder the wiring at the printer end of the cable. The procedure is as follows. Remove the plastic cover from the printer end of the cable. - Page 99 Appendix C Host Computer Interface The Properties sheet is displayed for the selected COM port. Click on the Port Settings tab and set the port properties. After setting the properties, click the OK button. Q Q Q Q DOS Enter the following commands: C:\>MODE COM1:96,N,8,1,P C:\>MODE LPT1:=COM1 To test the interface, enter the following:...
- Page 100 This appendix explains how to install each option unit. Also refer to the manuals of the respective option units. 1. Available Options The printer has the following options available. For instructions on installing individual options, refer to the documentation included with the option.
-
Page 101: Appendix D Option Units
Provide finishing with about 3,000 sheets at a time with high- speed and large-capacity processes. DF-71 also provides a punch function. They are installed at the left side of the printer. DF-75 Document Finisher Provides the staple, punch (option), offset and stitch functions. It is installed at the left side of the printer. -
Page 102: Installing Option Units
Guide. 2.2 DF-70/71/75 Document Finishers DF-70/71/75 Document Finisher can be installed to the printer. DF-70/71 For details of installing the optional finisher in the printer, see the DF-70/71/75 Installation Guide. 2.3 Network Interface The FS-9100DN/FS-9500DN have the standard Network inter- face. -
Page 103: Hard Disk
2.4 Hard Disk Insert the hard disk into its slot on the main circuit board of the printer. If a hard disk unit is installed in the printer, received data can be rasterized and stored on this hard disk. This enables high-speed printing of multiple copies using an electric sort func- tion. -
Page 104: Appendix E Specifications
Appendix E Specifications Specifications Item Printing method Printing speed ( ): MP tray Resolution First print (A4 or Letter size, depending on input data) Warm-up time Controller Main memory Operating system Interfaces Memory card slot Self test Maximum duty cycle Drum Developer Main charger... - Page 105 Appendix E Specifications Item Paper feed trays Capacity of output tray Ambient conditions Power requirements Power consumption Operating noise (in accordance with ISO 7779 [Bystander Position, sound pressure level at the front]) Dimensions Weight FS-9100DN Cassette : A5 to A3/Ledger size universal cassette. Holds 500 sheets of thickness 0.11 mm MP tray : 88 ×...
-
Page 106: Glossary
The printer can output received data. Operator panel This is located on the top of the printer. The panel consists of the message display, three indicators and eight keys. The message display shows the printer’s status. Press the keys when you want to switch the printer between online and offline status, or to can- cel printing. - Page 107 Install the printer driver on the computer connected to the printer. RAM disk This is a virtual disk drive that uses part of the printer’s memory. With RAM disk you can set any memory size arbitrarily, and use electronic sorting (to reduce print time).
-
Page 108: Index
Index Access code 3-13, 3-14 Adhesive label 5-4 Alarm (buzzer) setting 3-50 Amorphous silicon drum E-1 Auto continue 3-51 Automatic manual feeding 3-40 Barcode reader 3-19, D-1, D-2 Binding 3-43 Cassette paper size 3-41 Charger unit 1-2, 4-2, 6-3 Cleaning brush 1-2, 6-4 Cleaning knob 1-2, 6-3 Code job 3-12, 3-15 Permanent code jobs 3-17... - Page 109 Plastic bag 6-1, 6-2 Preprinted paper 5-3, 5-4 PRESCRIBE 4-3, C-3 Print density 3-31, 4-3 Print quality 3-30, 4-2 Printer driver 3-11, 1-2 Protocol 3-19, C-1, C-3 Punch unit 4-4, D-1 RAM disk 3-34, 4-7, 1-2 Recycled paper 5-4 Index-2...
- Page 110 Kyocera Mita Corporation 2-28, 1-Chome, Tamatsukuri, Chuo-ku Osaka 540-8585, Japan Phone: (06) 6764-3555 ©2001, 2002 by KYOCERA MITA CORPORATION. All rights reserved. Revision 1.4., 2002.10...
- Page 111 Printer Driver Guide Printer Driver Guide Printer Driver Guide Printer Driver Guide...
- Page 112 CompactFlash is a trademark of SanDisk Corporation. Preface This guide contains information on how to install, config- ure, and use the printer drivers for the Kyocera Mita FS-9100DN and FS-9500DN printers. The printer drivers and other utility software are supplied on the Mita Digital Library CD-ROM ROM, and from the Internet.
- Page 113 2.1.5 Installing the Hard Disk... 2-5 2.1.6 Using the RAM Disk... 2-5 2.1.7 Selecting the User Name... 2-6 2.1.8 Selecting the Printer Description Language ... 2-7 Chapter 3 Printing Through Application Software ...3-1 3.1 Setting the Paper Size ... 3-1 3.1.1 Custom Size Settings ...
-
Page 114: Chapter 1 Installing The Printer Driver
Chapter 1 Kyocera Mita Digital Library CD-ROM will automatically start to play its installation menu which guides you through the installa- tion of the printer driver. NOTE To make CD-ROMs play automatically when inserted in the CD- ROM drive, the Auto insert notification for the CD-ROM drive must be activated. - Page 115 Accept. In the Select driver options window, check the True Type screen fonts. To use Kyocera Mita printer command language PRE- SCRIBE as module, check the Prologue/Epilogue Module if you use it, and then click Next.
-
Page 116: Chapter 2 Setting The Defaults
The Device Settings tab enables you to setup option devices such as the paper feeder so that the printer can recognize them. Each printer has a unique set of options that are listed in the Device Settings window. If you have attached one or more printer options, check that option. -
Page 117: Installing The Paper Feeder (Pf-75)
2.1.2 Installing the Paper Feeder (PF-75) Check that the optional paper feeder (PF-75) is installed on the printer correctly. PF-75 Browse Start > Settings > Printers. Right click on the Kyocera Mita FS-9100DN KX or Kyocera Mita FS-9500DN KX icon and then click Properties. -
Page 118: Installing The Document Finisher (Df-70/Df-71)
Chapter 2 Setting the Defaults 2.1.3 Installing the Document Finisher (DF-70/DF-71) Check that the optional document finisher (DF-70/DF-71) is in- stalled on the printer correctly. DF-70/DF-71 Browse Start > Settings > Printers. Right click on the Kyocera Mita FS-9100DN KX or Kyocera Mita FS-9500DN KX icon and then click Properties. -
Page 119: Installing The Document Finisher (Df-75)
2.1.4 Installing the Document Finisher (DF-75) Check that the optional document finisher (DF-75) is installed on the printer correctly. DF-75 Browse Start > Settings > Printers. Right click on the Kyocera Mita FS-9100DN KX or Kyocera Mita FS-9500DN KX icon and then click Prop- erties. -
Page 120: Installing The Hard Disk
RAM Disk. Click the OK button. 2.1.6 Using the RAM Disk Turn the RAM disk mode On and set its size using the printer’s operator panel beforehand. Browse Start > Settings > Printers. Right click on the Kyocera Mita FS-9100DN KX or Kyocera Mita FS-9500DN KX icon and then click Prop- erties. -
Page 121: Selecting The User Name
Click the OK button. Chapter 2 Setting the Defaults 2.1.7 Selecting the User Name You can register your name to the printer driver. After registra- tion, you can select the name from the operator panel when printing using the e-MPS function. -
Page 122: Selecting The Printer Description Language
Click the OK button. 2.1.8 Selecting the Printer Description Language Select the printer description language adequate for the data to be printed from among PCL XL, PCL 5e and KPDL (PostScript compatible). When using the virtual mailbox function, select PCL XL or PCL 5e. - Page 123 Select PCL XL, PCL 5e, or KPDL in the Page Descrip- tion Language drop down list, and click the OK button. Click the OK button. Chapter 2 Setting the Defaults...
-
Page 124: Chapter 3 Printing Through Application Software
3.1 Setting the Paper Size Set paper of the size specified for the document in the application into the printer’s paper cassette. (For de- tails on how to set paper sizes, refer to the Guide.) Be sure that the document is correctly formatted with the paper size you intended to use. - Page 125 Cus- NOTE Settings made from applications are not saved when the application is closed. The default settings are re- stored when the application is opened the next time. To change the printer driver default settings, make printer settings from Windows.
-
Page 126: Custom Size Settings
Select the Custom Size from the Paper Size drop down list. In the printer’s operator panel, press the MENU key and press the 3 or 4 key until Paper Handling > appears. Next, press the 2 key followed by the 3 or 4 key until >MP Tray Size appears. -
Page 127: Advanced Media Settings
You can use the advanced media setting mode. There are three advanced media settings: Cover Mode, Page Insert, and Trans- parency Interleaving. Display the printer driver’s Properties dialog box from the application software, then click the Settings button. The Advanced Media Settings dialog will appear. Se- lect Cover Mode, Page Insert or Transparency Inter- leaving. -
Page 128: Setting The Duplex Printing
Chapter 3 Printing Through Application Software 3.2 Setting the Duplex Printing Browse File > Print. The Print dialog box will be dis- played. Click on the Name drop down list, all the printers in- stalled under Windows are listed. Select Kyocera Mita FS-9100DN KX or Kyocera Mita FS-9500DN KX. -
Page 129: Using The Booklet Mode
3.3 Using the Booklet Mode If you select Booklet Mode, double-sided pages with the stitch- ing areas will be printed. When selecting Booklet Mode with the document finisher DF-75, double-sided stitching print will be done. NOTE Stitching print supports the print sizes: A3, Ledger, B4, A4-R and Letter-R. -
Page 130: Using The Document Finisher (Df-70/Df-71)
Chapter 3 Printing Through Application Software 3.4 Using the Document Finisher (DF-70/DF-71) DF-70 provides the staple function, while DF-71 provides the punch function. Browse File > Print. The Print dialog box will be dis- played. Click on the Name drop down list, all the printers in- stalled under Windows are listed. -
Page 131: Using The Document Finisher (Df-75)
3.5 Using the Document Finisher (DF-75) DF-75 provides the staple, punch and double-sided stitching print functions. Browse File > Print. The Print dialog box will be dis- played. Click on the Name drop down list, all the printers in- stalled under Windows are listed. Select Kyocera Mita FS-9100DN KX or Kyocera Mita FS-9500DN KX. -
Page 132: E-Mps
Four Job Retention modes have the following benefits: • Quick Copy: When you need another copy of a finished print job, you can print it out at the printer operator panel. There is no need to print from the computer again. -
Page 133: Using Job Retention
Quick Copy Printing This allows you to print as many additional copies as you want until the printer is turned off, it is useful in cases such as when there are sudden increases in the required number of copies during a meeting. - Page 134 If additional copies are required, print using the Quick Copy sub menu in the e-MPS menu at the printer oper- ator panel. For details, see Chapter 3 in the Operation Guide.
- Page 135 Chapter 3 in the Operation Private Printing You need to enter a password to retrieve the job, confidentiality is assured even if you share the printer with others. Print jobs will be deleted when they are printed or when the printer is turned off.
- Page 136 Set the desired 4-digit access code using any numbers between 0 and 9. This number is synonymous with the user ID which is required to enter at the printer opera- tor panel when retrieving. Click the OK button. The Print dialog box is displayed again.
- Page 137 Access Code checkbox and enter the desired 4- digit access code using any numbers between 0 and 9. You must enter this number at the printer operator pan- el when printing. Click the OK button. The Print dialog box is displayed again.
-
Page 138: Using Virtual Mailbox Printing
The print jobs will not be deleted when the printer is turned off. 3 3 3 3 Before Using VMB To use the VMB functions, select PCL XL or PCL 5e and then set the Mailbox Name and Virtual Output Tray beforehand. - Page 139 Enter the mailbox name under Mailbox Name, and the tray number in the Virtual Output Tray, and then click the Save button. NOTE The Multiple virtual mailbox tray number can be speci- fied at a time using commas (,) and hyphen (-). The Mailbox Name will be displayed in the Defined Names list box.
- Page 140 To print, use the Print VMB Data sub menu in the e-MPS menu at the printer operator panel and specify the virtual mailbox numbers. You can also print the list of virtual mailbox trays. For details, see the Operation Guide.
-
Page 141: Using Code Job
3.6.3 Using Code Job A unique number and barcode is automatically assigned to each job as it is stored on the printer. The number appears when jobs are listed in utilities such as KM-NET Printer Disk Manager or KM-NET VIEWER. The number is also printed, together with its barcode, on the code Job List. - Page 142 Set whether or not to print the barcode on the printouts. The barcode can also be printed in various positions on the page, with or without its code number as shown here by selecting its position in the printer driver. Lower right Lower right...
- Page 143 Kyocera Mita Corporation 2-28, 1-Chome, Tamatsukuri, Chuo-ku Osaka 540-8585, Japan Phone: (06) 6764-3555 ©2001 by KYOCERA MITA CORPORATION. All rights reserved. Revision 1.1., 2001. 11...