Table of Contents
Advertisement
Quick Links
Advertisement
Chapters
Table of Contents
Troubleshooting

Related Manuals for Motorola Omnii


Summary of Contents for Motorola Omnii
- Page 1 Omnii HAND-HELD COMPUTER (Windows Embedded Hand-Held 6.5) USER GUIDE...
- Page 3 OMNII HAND-HELD COMPUTER USER GUIDE 8000225 Rev. G March 3, 2014...
- Page 4 Windows® and the Windows Logo are trademarks or registered trademarks of Microsoft Corporation in the United States and/or other countries. The Bluetooth® word mark and logos are owned by Bluetooth SIG, Inc. and any use of such marks by Motorola is under license.
-
Page 5: Revision History
Revision History Changes to the original guide are listed below: Change Date Description -01 Rev G 03/2014 Rebrand for Motorola. -
Page 7: Table Of Contents
TABLE OF CONTENTS Table of Contents About This Manual .......................... xix Text Conventions ..........................xx Overview of the Omnii Hand-Held Computer.................. xx Regulatory Labels ........................... xxiii Chapter 1: Basic Operation Omnii Features ..........................1-3 Omnii Modules Available ........................ 1-5 Preparing the Omnii for Operation ....................1-5 Switching the Omnii On and Off...................... - Page 8 Omnii (Windows Embedded Hand-Held 6.5) User Guide Standard Keys ..........................2-7 Modifier Keys ..........................2-8 Activating Modifier Keys...................... 2-9 Locking Modifier Keys ......................2-9 Function Keys and Macro Keys .....................2-10 Function Keys ........................2-10 Macro Keys ......................... 2-11 Numeric Keyboards — Accessing Alpha Keys ................2-11 The Keypad Backlight........................2-12...
- Page 9 The Phone ............................3-4 The Onscreen Phone Keypad......................3-4 Sending & Ending Phone Calls Using the Onscreen Phone Keypad........3-4 Sending & Ending Calls Using the Omnii Keyboard ............3-5 Making a Conference Call....................3-5 Programming Speed Dial ....................3-5 Managing Phone Settings ......................3-8 Text Messages ..........................
- Page 10 Omnii (Windows Embedded Hand-Held 6.5) User Guide Alarms............................. 3-16 Pictures & Videos ........................... 3-17 Using the Camera...........................3-17 Moving Photos to the Omnii ......................3-18 Opening a Photo..........................3-18 Deleting a Photo ..........................3-18 Editing a Photo ..........................3-19 Creating a Slide Show ........................3-19 Using the Video Recorder ......................3-19...
- Page 11 Table of Contents ix Motorola Software Advantage......................4-5 Microsoft Software..........................4-5 Settings ............................4-5 Clocks & Alarms..........................4-6 Lock ..............................4-6 Home .............................. 4-7 Appearance Tab – Changing the Theme (Background) ..............4-7 Beaming a Theme to Another Device ....................4-7 Items Tab – Customizing the Today Screen...................4-8 Power..............................
- Page 12 Omnii (Windows Embedded Hand-Held 6.5) User Guide Program Buttons Tab ......................4-45 Up/Down Control Tab......................4-46 OneShots ..........................4-46 Macro Keys ......................... 4-47 Unicode Mapping ........................ 4-48 Scancode Remapping......................4-49 Lock Sequence Tab ......................4-51 The Phone – Managing Settings ....................4-51 Phone: Sounds Tab ........................4-53...
- Page 13 Table of Contents xi Kiosk Menu ......................... 4-77 Administrator Password ...................... 4-78 Shell Settings ........................4-78 Restrictions.............................4-83 Control Panel Settings ......................4-84 Import and Export Settings....................4-85 Activating a Change – User Mode ..................4-87 Regional Settings ...........................4-87 Remove Programs .........................4-88 Scanner Settings ..........................4-89 Restoring Default Settings ....................
- Page 14 Docking station does not seem to power on............... 5-14 Omnii charge indicator LED stays off.................. 5-14 Omnii charge indicator LED is red..................5-14 Spare battery LED is red with a battery installed..............5-14 Spare battery LED does not turn on when a battery is installed......... 5-14 Quad Docking Station –...
- Page 15 Table of Contents xiii Appendices Appendix A: Port Pinouts Omnii Docking Connector ....................... A-3 Snap Modules Connectors......................A-4 Cable Connectors for Vehicle Cradle Model ST1002 ..............A-5 Omnii Battery Contacts ........................A-6 Appendix B: Imagers Applet The Imagers Applet......................... B-3 Required Applets ..........................
- Page 16 SE4500SR Decode Zone......................D-15 SE4600LR – Long Range Imager..................... D-16 SE4600LR Decode Zones ....................D-18 Appendix E: Omnii Specifications The Omnii Hand-Held Computer (Model 7545) ................E-3 Hardware ..........................E-3 Regulatory Approvals........................ E-5 Lithium-ion Smart Battery 5000 mAh (ST3001)................E-5 Wireless Radios..........................
- Page 17 The Omnii XT15f Hand-Held Computer (Model 7545XT) ............... F-3 Hardware Specifications.........................F-4 Regulatory Approvals ........................F-5 The Freezer Keyboards........................F-6 Lithium-ion Smart Battery 5000 mAh (ST3001) for Omnii Chiller Model ........F-6 Lithium-ion Smart Battery 5300 mAh (ST3002) for Omnii Arctic Model ......... F-7 Quick Defrost Application ....................... F-8 Settings............................F-9 Suspend Threshold......................
-
Page 19: About This Guide
Text Conventions ..........xx Overview of the Omnii Hand-Held Computer ......xx... -
Page 21: About This Manual
About This Guide About This Manual This user manual describes how to configure, operate, and maintain the Omnii Hand-Held Computer. Chapter : About This Guide provides a basic overview of the Omnii Hand-Held. Chapter 1: Basic Operation describes the steps required to get the Omnii ready for operation. -
Page 22: Text Conventions
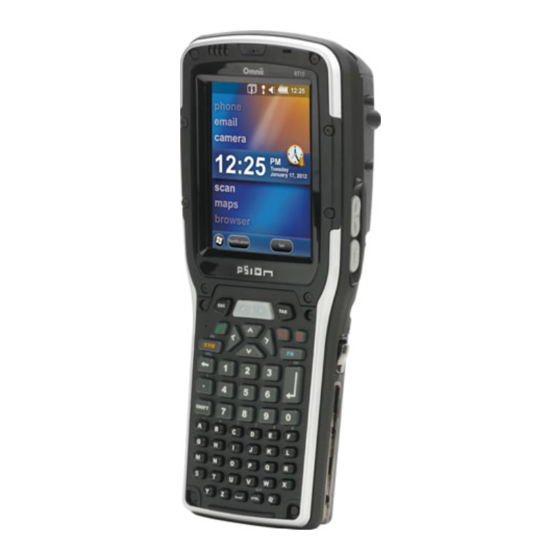
Overview of the Omnii Hand-Held Computer The Omnii Hand-Held Computer is a modular, industrial hand-held computer. A variety of options are available to suit applications in courier/delivery, field service, manufacturing facilities, material handling applications in warehouses, ports and yards, with a focus on real time wireless data transactions. - Page 23 - Signature capture. • Keyboards - Large selection of backlit keypads in both alpha and numeric formats. For a list of currently available keyboard configurations, consult your Motorola representative, or go to: http://www.motorolasolutions.com/US-EN/Product+Lines/Psion/?WT.mc_id=psion_us_p_handheld • Voice, Audio & Feedback - High volume beeper: 95 dBA.
- Page 24 • Optional UMTS 3.8 G HSPA+ radio NOTE 802.11a/b/g/n and Bluetooth are available simultaneously. The following figures illustrate the main features of the Omnii — for detailed views, please see “Omnii Features” on page 1-3. Omnii XT15 and Omnii RT15 Variants...
-
Page 25: Regulatory Labels
Top View (Scanner Window) Figure 3 Laser Aperture Omnii XT15f Freezer Variant Figure 4 NOTE For details about the Omnii XT15f freezer units, refer to Appendix F: “Omnii XT15f Freezer Variants” Omnii XT15f Omnii XT15f 34-key numeric keyboard 58-key alphanumeric keyboard... - Page 26 Omnii (Windows Embedded Hand-Held 6.5) User Guide Laser Warning Label Figure 5 MODEL No: LASER RADIATION 7545 DO NOT STARE INTO BEAM CLASS 2 LASER PRODUCT (IEC) CLASS II LASER PRODUCT (CDRH) 650-680nm LASER DIODE Max.Output:1.4mW (SCAN ) <1mW(AIM) IEC60825-1:2007 (2nd Edition) This label is affixed below the scanner window.
-
Page 27: Chapter 1 Basic Operation
Preparing the Omnii for Operation ........1-5... -
Page 29: Omnii Features
Basic Operation 1 - 3 Omnii Features Front View of the Omnii XT15 Model with Alphanumeric Keyboard Figure 1-1 Speaker Beeper LEDs Display Scan key Microphone FN Modifier key Symbol Modifier key ENTER/Power key... - Page 30 1 - 4 Omnii (Windows Embedded Hand-Held 6.5) User Guide Side Views of the Omnii XT15 Figure 1-2 Left Side Right Side Volume rocker button Vertical scroll button Scan button ENTER button Battery release button Side rail Slot for snap module arm...
-
Page 31: Omnii Modules Available
To see a current list of Omnii accessories and modules, go to the Motorola website at: http://www.motorolaso- lutions.com/US-EN/Product+Lines/Psion/?WT.mc_id=psion_us_p_handheld Documents Available To see a current list of documents and download what you need, go to the Knowledge Base on the Motorola Ingenuity Working community website: http://community.psion.com/knowledge/w/knowledgebase/product-manuals.aspx Preparing the Omnii for Operation The Battery The Omnii is powered by a Lithium-ion Smart Battery pack, 5000 mAh —... -
Page 32: Switching The Omnii On And Off
1 - 6 Omnii (Windows Embedded Hand-Held 6.5) User Guide Battery packs shipped from the factory are charged to approximately 40% and must be fully charged prior to use. Batteries can be charged using a variety of chargers and docking stations. For detailed information, see “Battery Details”... -
Page 33: Resetting The Omnii
Press and hold the [Power] button down for at least one second. When the unit is turned off, normally it automatically enters a power-saving, “suspend” state. When the Omnii is switched on from the suspend state, operation resumes within a few seconds in the screen in which you were working prior to turning the computer off. -
Page 34: Boot To Boost
To execute a hard reset: • Remove the battery. • Using a coin, or other conductive item, connect pins 5 and 6 of the Omnii battery contacts for at least six seconds. Pin 6 Pin 5 • Replace the battery and power the Omnii on. The computer will boot as if from a cold reset. -
Page 35: Imager And Scanner Options
“Wi-Fi Config - Setting Up the 802.11a/b/g/n Radio” on page 4-33. The Omnii is also available with one of the following Wireless WAN radio options: the Cinterion MC75i EDGE or the Cinterion PH8-P HSPA+. Refer to “Wireless Radios” on page E-6 Appendix E: “Omnii Specifications”... -
Page 37: Chapter 2 Getting To Know Your Omnii
OMNII GETTING TO KNOW YOUR OMNII Operating System ..........2-5 Battery Details . - Page 38 Kiosk ...........2-36 Data Transfer Between Omnii and a PC ....... .2-36 Uploading Data in a Docking Station .
- Page 39 Cleaning the Omnii ........
-
Page 41: Operating System
RAM is only backed up for a short period of time. If you choose Maximum Backup Time, the Omnii shuts off with more energy left in the battery so RAM can be backed up for a longer period of time. -
Page 42: Charging The Battery
For detailed information about these accessories, please see Chapter 5: “Accessories”. Normally it takes 3 to 4 hours to charge a battery. The Omnii intelligent charging system protects the battery from over-charging by terminating the charge process when the battery is at maximum capacity. % Charge Completed... -
Page 43: The Power Button (55-Key And 66-Key Keyboards Only)
Getting To Know Your Omnii 2 - 7 Keyboard Layouts Figure 2-1 [Power] button [SCAN] [End] key [SYM] Modifier key [Talk] key [FN] Modifier key [ENTER/Power] key [SHIFT] Modifier key [Windows] key 36-Key Numeric 123 Keyboard 55-Key Long Alphanumeric Keyboard The Power Button (55-Key and 66-Key Keyboards only) The [Power] button in the upper right corner of the keyboard switches the unit on and off. -
Page 44: Modifier Keys
The [SCAN] Key The Omnii is equipped with a single [SCAN] key on the keyboard and an extra [SCAN] button located on the left side of the unit. [SCAN] keys activate the scanner beam. For units that do not have internal scanners, these keys can be remapped to serve other functions. -
Page 45: Activating Modifier Keys
Modifier keys are remapped using the Scancode Remapping applet. The Symbol SIP will automatically display and use the new mappings after the next reboot. The onscreen keyboard corresponds to the specific keyboard on your Omnii — either numeric or alphanu- meric. The sample below reflects an alphanumeric keyboard layout. -
Page 46: Function Keys And Macro Keys
Function Keys and Macro Keys In addition to the standard keyboard functions, the Omnii supports function keys and macro keys. All function keys and macro keys can be custom defined for each application. The Open TekTerm application utilizes these keys (for detailed information, see the Open TekTerm Software User Manual, PN 8000073). -
Page 47: Macro Keys
“Macro Keys” on page 4-47 for details about creating macros. Several of the Omnii keyboards are equipped with a series of macro keys that can be programmed to replace frequently used keystrokes, along with the function of executable keys like the [ENTER/Power] key, the [BACKSPACE] key, any function key and arrow key, etc. -
Page 48: The Keypad Backlight
[FN] key ‘on’. Remember that depending on how your Omnii is set up in the ‘One Shots’ tab, you may find that you need to press the [FN] key twice to lock it ‘on’. Refer to “OneShots”... -
Page 49: Calibrating The Touchscreen
Tap on Start>Settings>System icon. • Tap on the Screen icon. • In the General tab, tap on the orientation that best suits the way in which you use your Omnii. NOTE For information about screen rotation, refer to “Screen Rotation” on page 4-96. -
Page 50: Indicators
Place the stylus on the sliding lock, flick it to the right and release to unlock the touchscreen and display the screen options. Indicators The Omnii uses LEDs (Light Emitting Diodes), onscreen messages, vibrations, and audio tones as indicators. LEDs The Omnii is equipped with four coloured LEDs. This section outlines what these LEDs indicate. -
Page 51: Battery Charge Status Led
2 - 15 Omnii (Windows Embedded Hand-Held 6.5) User Guide Battery Charge Status LED The far left LED is reserved for battery charge status. This indicator is active even when the hand-held is inserted in a docking station (and in suspend mode) so that the charge status of the battery can be detected easily. -
Page 52: Audio Indicators
There are two slots available in the battery compartment — the lower slot is provided for a microSD (Secure Digital) card, which provides additional non-volatile memory to your Omnii, and the upper slot is for a SIM (Subscriber Identity Module) card, which allows access to the Voice option, access to the Internet, and so on. -
Page 53: Scanners And Imagers
If your unit has a [Power] button, press and hold down the [FN] key and the [Power] button for a minimum of three seconds. The Omnii supports a wide range of scanner options to address a variety of user application requirements. Refer to the following sections for detailed information: •... -
Page 54: Basic Scanner Operations
Getting To Know Your Omnii 2 - 18 • EA11 2D imager: reads 1D and 2D barcodes including damaged and low contrast regular 1D barcodes. Smallest barcode at 5 mil with a minimum read distance to 2.8 inches and a maximum read distance of 5.1 inches;... -
Page 55: Troubleshooting
2 - 19 Omnii (Windows Embedded Hand-Held 6.5) User Guide Troubleshooting If the scanner is not working, investigate the following: • Is the unit on? • Check that the barcode symbology being scanned is enabled for the hand-held you are using. Check any other parameters that affect the scanning procedure or the barcode. -
Page 56: Navigating In Windows Embedded Hand-Held 6.5 And Applications
Tap on the navigation bar to display additional icons. Navigating Using the Keyboard If you prefer to use the keyboard to move the cursor around the screens on your Omnii, refer to the tab le following for a description of the navigation keys. -
Page 57: The Today Screen
Go to Start Menu [Windows] Keep in mind that unlike a desktop computer, the Omnii does not support key chording (pressing two keys at the same time). You must press one key followed by the next in sequence. The Today Screen The Today screen provides quick access to a default list of applets such as phone, voicemail, and so on. -
Page 58: Customizing The Today Screen
Getting To Know Your Omnii 2 - 22 Customizing the Today Screen The items you see in the Today screen are Windows defaults. To customize the screen to suit your purposes: • Tap on the Start button. Tap on the Settings icon followed by the Home icon. -
Page 59: Time, Date And Alarms
2 - 23 Omnii (Windows Embedded Hand-Held 6.5) User Guide • Tap on Voicemail in the Today screen. • Type your voicemail number. Time, Date and Alarms • Tap on Start>Alarms icon to display Clock & Alarms screen. Setting the Alarm You can set a maximum of three alarms. -
Page 60: Text Messages
Getting To Know Your Omnii 2 - 24 • To set the time, highlight the hours and then the minutes in the clock and use the arrow keys to increase or decrease the numbers, or type the hours and minutes directly from the keyboard or soft keyboard. - Page 61 2 - 25 Omnii (Windows Embedded Hand-Held 6.5) User Guide Menu softkey To compose and send a text message on your Omnii: • Tap on the Menu softkey, and choose New from the menu. • In the To field, type the name of the person to whom you want to send a text message, or to insert a number from your contacts list, tap on Menu>Add Recipient, and choose a name.
-
Page 62: E-Mail Notification
You can synchronize the Calendar so that any meetings, appointments and so on are displayed on your Omnii Today screen as well as on your PC. Refer to “Synchronizing E-mail with Outlook (PC with Windows XP OS)” on page 3-9 “Synchronizing E-mail with Outlook (PC with Windows Vista or Windows 7)”... -
Page 63: Creating And Editing Appointments
2 - 27 Omnii (Windows Embedded Hand-Held 6.5) User Guide Calendar softkey Menu softkey The default calendar displays any scheduled appointments. To choose the format of your calendar: • Tap on the Calendar softkey – this key scrolls through the calendar formats. - Page 64 If you’ve no further additions for the appointment, tap on OK. Otherwise, move to the Categories section following. Using Categories Categories help you organize and track the different types of data you keep on your Omnii. To assign an appointment to a category: •...
-
Page 65: Deleting Appointments
2 - 29 Omnii (Windows Embedded Hand-Held 6.5) User Guide New category softkey • Tap in the checkbox next to the category to which you want to assign the appointment. • Tap OK. Your appointment is assigned to the category or categories you chose. - Page 66 Getting To Know Your Omnii 2 - 30 Navigation bar Tap anywhere in the navigation bar to display the hotkeys. Hotkeys Tap and drag the stylus to the left to display additional hotkeys. Tap on a hotkey to display the associated app.
-
Page 67: The Softkey Bar
The Softkey Bar The Omnii is equipped with a softkey bar at the bottom of the screen. It displays softkeys that allow you to access menus and commands. Note that the softkeys change to reflect the program with which you are working. -
Page 68: Creating A New Folder
• Tap the Menu softkey, and in the pop-up menu, choose New Folder. • Use the Omnii keyboard or the soft keyboard to assign a name to the folder. Renaming a File • Press and hold the stylus on the file you want to rename. A ring of dots is displayed followed by a pop- up menu. -
Page 69: Deleting A File
2 - 33 Omnii (Windows Embedded Hand-Held 6.5) User Guide Deleting a File • Press and hold the stylus on the file or folder you want to delete until a pop-up menu is displayed. • Tap Delete to remove the file. -
Page 70: Programs - Using Applications
Getting To Know Your Omnii 2 - 34 Programs – Using Applications • Tap the Start button in the softkey bar to display the programs installed on your Omnii. Program Icons Figure 2-7 Opening an Application • Tap on a the Program icon to launch the associated program. -
Page 71: Settings
Switch To: To make an application listed in this screen active, highlight the application, and tap on Menu>Switch To. For additional information about the Task Manager, refer to “Task Manager” on page 4-97. Settings • Tap Start followed by the Settings icon to display the setting options for your Omnii. Settings Icons Figure 2-8... -
Page 72: Kiosk
The Desktop Docking Stations allow your hand-held to upload transaction data to a server computer when a radio link is not available. When Omnii is properly inserted in a docking station, a dock icon is displayed in the navigation bar at the top of the screen. -
Page 73: Using Windows Mobile Device Center
The plastic is partially soluble in oils, mineral spirits, aircraft de-icing fluid, and gasoline. The plastic slowly decomposes in strong alkaline solutions. • Exposure to aircraft de-icing fluids can degrade the plastics on the Omnii. If the Omnii is used near aircraft de-icing environments, regular rinsing with water is recommended. •... -
Page 75: Chapter 3 Programs
Using the Camera ........3-17 Moving Photos to the Omnii........3-18 Opening a Photo . - Page 76 3 - 2 Omnii (Windows Embedded Hand-Held 6.5) User Guide Editing a Photo .........3-19 Creating a Slide Show .
-
Page 77: Programs
Programs 3 - 3 Programs Omnii programs are all available from the Start screen. • Tap on the Start button in the lower-left corner of the Today screen to display the Start screen. Tapping on an icon in this screen launches the associated applet. -
Page 78: The Phone
3 - 4 Omnii (Windows Embedded Hand-Held 6.5) User Guide The Phone The Omnii can be equipped with optional phone capabilities. To access the phone pad on a unit that includes the phone option: • Tap on Start>Phone icon. The Onscreen Phone Keypad The onscreen phone keypad provides phone services like those you may find on your cellular phone. -
Page 79: Sending & Ending Calls Using The Omnii Keyboard
Tap on [End] button on the onscreen phone keypad. Sending & Ending Calls Using the Omnii Keyboard The 55-key and the 66-key Omnii keyboards come equipped with phone keys – each has a [Talk] and an [End] key on the physical keyboard. - Page 80 3 - 6 Omnii (Windows Embedded Hand-Held 6.5) User Guide Speed dial number Call softkey This dialog box lists the phone numbers and the speed dial key to which the phone number has been assigned. • Tap on the Speed Dial Number (the number to the left of the phone number you want to dial), or Tap on the Call softkey in the softkey bar at the bottom of the screen;...
- Page 81 Programs 3 - 7 A sequential speed dial key is automatically assigned in the Location field. You can tap on the arrows to the right of the Location field to change the auto assignment. Using the Contact List to Program a Speed Dial •...
-
Page 82: Managing Phone Settings
4-51. Text Messages Tapping on the Text option in the Today screen displays this screen. This option allows you to compose, send and receive text messages using your Omnii. IMPORTANT For details about using the Text Messages feature, refer to “Text... -
Page 83: E-Mail
For POP3 accounts, if you move e-mail messages to a folder you create, the link between the messages on the Omnii and the copies on the mail server are broken. When you next connect, the mail server will recognize that the messages are missing from the Omnii Inbox folder and delete them from the server, preventing dupli- cation of messages. -
Page 84: Changing Synchronization Settings
3 - 10 Omnii (Windows Embedded Hand-Held 6.5) User Guide NOTE Synchronizing e-mail does not require that the Omnii have an independent con- nection to the Internet. • In ActiveSync on your PC, tap on Tools>Options in the tool bar at the top of the screen. -
Page 85: Synchronizing E-Mail With Outlook (Pc With Windows Vista Or Windows 7)
Programs 3 - 11 • Tap on the Select Folder button. • Add a check mark next to the folders in this screen that you want to synchronize with your Omnii, and tap on OK. The E-mail Synchronization screen is displayed again. •... -
Page 86: Sending An E-Mail
If an Exchange Server is detected, a screen is displayed where you can enter the Server address, your user name and so on, and sync the Omnii with the Exchange Server directly over a cellular or wireless network when you are not connected to your PC. -
Page 87: Working With The Contacts List
Programs 3 - 13 Working with the Contacts List The Contacts screen allows you to work with existing entries, search for a particular contact and create new entries. Contact Menu Commands A Menu softkey at the bottom of the screen provides additional commands that allow you to work with the contacts in this list. -
Page 88: Communicate Tab - Adding Contacts
3 - 14 Omnii (Windows Embedded Hand-Held 6.5) User Guide To search for a particular entry: • Tap on the Enter a name ... field, and type the name you are searching for in the Contacts list. • To narrow your search to names beginning with a particular letter, tap on the appropriate alpha character grouping. -
Page 89: Info Tab
This screen allows you to enter useful information about your contact. Internet Explorer You can connect to Internet Explorer in two ways: by connecting the Omnii directly to the Internet or by connecting through your PC (see “ActiveSync®” on page 3-27). -
Page 90: Calendar
3 - 16 Omnii (Windows Embedded Hand-Held 6.5) User Guide • Tap on the address bar – the field near the top of the screen where URLs are entered – to highlight the current URL. • Type a new URL in the address bar. -
Page 91: Pictures & Videos
Using the Camera • Tap on Start>Pictures & Videos. Keep in mind that if there are no pictures stored on your Omnii as yet, you’ll only see the Camera icon in this screen. • Tap on the Camera icon to activate the camera. -
Page 92: Moving Photos To The Omnii
Connect your device to your PC with ActiveSync. • Locate the pictures on your PC, and drag photos from their folder to the Mobile Device (Omnii). The Omnii can be found under Computer (My Computer on PCs running Windows XP). -
Page 93: Editing A Photo
Programs 3 - 19 Editing a Photo • Tap on a thumbnail photo to open it. • Tap on Menu>Edit. The Rotate command is now displayed in the softkey bar. Additional editing tools are listed in the Menu. Creating a Slide Show To view a slide show: •... -
Page 94: Windows Media
Windows Media Windows Media allows you to play music and videos on your Omnii. You can use Windows Media to play digital audio and video files that are stored on your Omnii or on the web. -
Page 95: Windows Live
The Notes application is an electronic notepad you can use to jot down your ideas quickly. You can enter text using the soft keyboard, the Omnii keyboard, or you can create a handwritten note on the screen by using the transcriber. -
Page 96: Creating And Converting Handwritten Notes To Text
• Choose Transcriber from the menu. When you choose Transcriber, you can write notes in your own handwriting. Omnii converts the notes into typed text for you. A Transcriber Intro screen is displayed to provide information to help you work with the Transcriber. -
Page 97: Renaming A Note
Programs 3 - 23 • At the top of the Transcriber Intro screen, tap on OK. • In the blank Note screen, use your stylus to write a note as clearly as possible. The text in the note is converted from handwritten to printed text. Renaming a Note •... -
Page 98: Task Notification
3 - 24 Omnii (Windows Embedded Hand-Held 6.5) User Guide • Begin speaking into the microphone on the Omnii. Make certain that you move the Omnii to within a few feet of the source of the sound you want to record. - Page 99 Programs 3 - 25 Creating a Task • Tap in the field labelled Tap here to add a new task. • Type your task description. • Press [ENTER] to add the task to your list. Edit Editing a Task • Tap on a task in the task you want to edit.
-
Page 100: File Explorer
3 - 26 Omnii (Windows Embedded Hand-Held 6.5) User Guide Each of the nine items in this screen, when tapped, displays a drop-down menu where you can choose from a list of options. • Once you’ve completed all the appropriate fields, tap on OK to save your changes. -
Page 101: Activesync
By connecting the Omnii to a PC through your desktop docking station and running ActiveSync or Mobile Device Center on your PC, you can view Omnii files, drag and drop files between the Omnii and the PC, connect to the Internet, and so on. -
Page 102: Using Internet Sharing
Right-click on Bluetooth Network Connections, and click on Bluetooth Network Devices. • If the Omnii is listed as a Network Access Point, choose Connect. If it is not listed, choose Create a new connection and use the New Connection Wizard to add the Omnii to the list. -
Page 103: Task Manager
Omnii passcode on your PC and on your Omnii. • If a pairing code has not been assigned to your Omnii, choose Create a pairing code for me, and type the Omnii passcode on your PC and on your Omnii. - Page 104 3 - 30 Omnii (Windows Embedded Hand-Held 6.5) User Guide • Tap in the Search For field, and type the information or a fragment of the information for which you are searching. • In the Type: drop-down menu, choose the location in which you want to conduct the search.
-
Page 105: Imager And Camera Demo
Programs 3 - 31 Imager and Camera Demo An Imager And Camera demo applet is provided to illustrate how the imager and camera work. To launch the demo applet: • Tap on the Imager and Camera icon. IMPORTANT Refer to Appendix B: “Imagers Applet”... -
Page 106: Excel Mobile
Create short text notes and voice recordings on your Omnii to remind you about important meetings, ideas, etc. and synchronize them with your notes. • Prepare information in OneNote on your PC and then transfer it to your Omnii where it will be available to you wherever you and your Omnii go. IMPORTANT... - Page 107 Next. • Tap on Finish to begin the partnership between the Omnii and the PC. Now you’ll be able to pass notes back and forth between your PC and your Omnii. Creating A Note •...
- Page 108 Underline, Strikethrough and Clear All. • Take Picture: When you tap on this option, the Omnii switches to camera mode so that you can snap a picture to include in your note. Press [ENTER] to snap a photo that is automatically inserted into your note.
- Page 109 • On your Omnii, tap on Start>ActiveSync, and then tap on Sync. During synchronization, the notes you created on your Omnii are copied to a new Office OneNote 2010 note- book called OneNote Mobile on your PC. When synchronization is done, you can drag the transferred notes...
-
Page 110: Word Mobile
To launch a new Word document, you’ll need to tap on the New softkey. Text Input Modes In addition to the soft keyboard, you can enter text using the Omnii keyboard, soft keyboard or the transcriber. IMPORTANT Refer to “Notes”... -
Page 111: Sharepoint Workspace Mobile
Kiosk Kiosk allows the administrator to tailor how the Omnii operates and the options the user can access. Note that the look of the Today screen will change from icons that are finger accessible to a list of items that is best accessed using a stylus. -
Page 112: Modem Link
3 - 38 Omnii (Windows Embedded Hand-Held 6.5) User Guide Modem Link Modem link allows you to use the GPRS connectivity on your phone to connect your laptop or PC to the Internet. Remote Desktop Mobile This program allows you to log onto a Windows Terminal Server and run the desktop programs from the server on your Omnii. -
Page 113: Disconnecting Without Ending A Session
SIM Toolkit UI is an ETSI/SMG standard for Value Added Services and e-commerce using GSM phones. The Omnii operator can, for example, check bank accounts and pay bills using a SIM Toolkit-enabled phone with an appropriate SIM Toolkit-specific SIM card which will provide much of the information required to conclude a transaction over GSM. -
Page 115: Chapter 4 Settings
Overview of Software ......... . .4-5 Motorola Software Advantage ....... . .4-5 Microsoft Software . - Page 116 4 - 2 Omnii (Windows Embedded Hand-Held 6.5) User Guide Modem Connection Setup ........4-24 Advanced Modem Settings.
- Page 117 Settings 4 - 3 Contrast..........4-63 Customer Feedback .
- Page 118 4 - 4 Omnii (Windows Embedded Hand-Held 6.5) User Guide Deleting a Profile ........4-103 TweakIT .
-
Page 119: Overview Of Software
Remote Desktop protocol Settings The applets contained under the Settings icon in the Start screen allow you to tailor how your Omnii behaves, the appearance of the Today screen, and so on. The Settings applications are further divided into Personal,... -
Page 120: Clocks & Alarms
It is critical that you store your password in a safe place. If you forget it, a ‘clean start’ must be performed by certified Motorola personnel. A clean start returns the Omnii to factory settings. Only the data stored in a CF or SD memory card are preserved. -
Page 121: Home
• Tap on the theme or background you want to use. Tap on OK to assign the background you’ve chosen to your Omnii. NOTE You can also use a personal picture as your background. Tap on the checkbox to the left of Use this picture as the background, and tap on the Browse button to locate your picture. -
Page 122: Items Tab - Customizing The Today Screen
4 - 8 Omnii (Windows Embedded Hand-Held 6.5) User Guide The Omnii scans for visible devices within range of the hand-held and lists them in the Beam screen. • Tap on the device to which you want to send the theme. -
Page 123: Power
This tab monitors and displays the current battery capacity of the battery installed in the Omnii. Advanced Tab This tab allows you to tailor how long the Omnii can remain idle before the screen is turned off while running on battery power and also on external power. -
Page 124: Battery Details Tab
The Estimated Battery Backup is the amount of battery power that has been reserved or set aside to protect data until a fully charged battery can be installed in the Omnii. When the battery capacity is depleted up to the Estimated Battery Backup Time reserve specified in the Suspend Threshold tab, the Omnii shuts off automati- cally and uses the reserve power to preserve the data stored on the Omnii. -
Page 125: Battery Health
Slide the Suspend Threshold button to the left to decrease the power reserved for backup purposes; this increases the Omnii operating time – the amount of time the Omnii will operate before shutting down – but reduces the power reserved for backup purposes to a minimum of 24 hours. -
Page 126: Sound & Notifications
This option allows you to enable or disable the battery health service. Wakeup Device on Battery Insert When this option is enabled, whenever the battery is replaced, the Omnii is powered up from a suspend state and the current health of the battery is displayed. -
Page 127: Notifications Tab
You can choose a specific Ring type for this event from the drop-down menu, perhaps Vibrate and ring. In the Ring tone drop-down menu, you can choose the tone or sound of the ring. If your Omnii vibrates and emits the ring you selected, you will immediately know your hand-held is receiving an incoming phone call. -
Page 128: Beam
4 - 14 Omnii (Windows Embedded Hand-Held 6.5) User Guide Beam Enabling the Beam applet makes your Omnii visible and available to others wanting to beam information to your unit. Bluetooth Setup Bluetooth is a global standard for wireless connectivity for digital devices and is intended for Personal Area Networks. -
Page 129: The Devices Tab - Scanning For Bluetooth Devices
Scroll to the Device tab. • To discover and list all Bluetooth devices in range of the Omnii, tap on the Scan button in the softkey bar at the bottom of the screen. The Omnii scans for Bluetooth devices within a 10 meter range. Any Bluetooth devices within range appear in... - Page 130 The drop-down menu at the top of the Device tab allows you to limit the scope of the scan to a particular type of device. If, for example, you choose Computer from this menu, only computers within range of the Omnii are...
-
Page 131: Pairing A Device
Omnii. Tap on Yes and type the PIN. When authentication is complete, tap on Done. After entering the device PIN, the Services dialog appears with a list of services available for that device. -
Page 132: Servers Tab
‘Bluetooth master’ and the hand-held, the ‘Bluetooth slave’. In order for the remote device to connect to the Omnii, the Omnii must offer a service in the form of a server. The Servers tab allows these services to be enabled and configured. -
Page 133: Mode Tab
When Discoverable is enabled, other Bluetooth devices within range (approximately 10 meters) can detect your Omnii and can establish a bond or use a Bluetooth service. Note that other devices can detect your unit whether or not a bond has been created. -
Page 134: About Tab
4 - 20 Omnii (Windows Embedded Hand-Held 6.5) User Guide About Tab Name displays the broadcasted name of the Omnii. The name can be changed in the About applet – tap on Start>Settings>System>About icon. Tap on the Device ID tab, and change the name. -
Page 135: Connecting Using A Bluetooth Gprs Phone
Bluetooth-equipped phone. Before you begin, make certain that the Bluetooth phone is turned on, that the Bluetooth radios in your Omnii and phone are enabled (turned on), and that the hand-held and phone are within 10 metres of each other. Both should be discoverable. - Page 136 4 - 22 Omnii (Windows Embedded Hand-Held 6.5) User Guide 2. Tap on the Connections icon. Under ISP: WWAN - GPRS, tap on Add a new modem connection. 3. Type a name for the connection. 4. Tap on the Select a modem drop-down menu, and choose Bluetooth. Tap on Next.
-
Page 137: Connections - Connecting To The Internet
Internet with Internet Explorer, and so on. Connections – Connecting to the Internet To activate a connection, make certain that any necessary equipment (such as a radio) is installed in your Omnii. You’ll need the following information from your ISP to make an Internet connection: •... -
Page 138: Modem Connection Setup
TCP/IP settings. If your Omnii does not have access to a mobile phone network, insert a modem card in the unit. 1. Tap Start>Settings. Tap on the Connections folder icon followed by the Connections icon. -
Page 139: Advanced Modem Settings
Settings 4 - 25 5. In the My Connections screen, enter the phone number exactly as you want it dialed. If, for example, you need to dial 9 for an outside line, enter 9 at the beginning of the phone number. 6. -
Page 140: Domain Enroll
To protect sensitive company data, businesses use firewalls and proxy servers to limit access to company resources to company employees only. If you need to access information on your company server remotely, the Domain Enrollment utility allows you to sync your Omnii credentials with your company enrollment server, allowing you to access your work remotely. -
Page 141: Network Cards
If you uncheck Automatically discover server, a Server field is displayed where you must manually enter the server name. Allow a few minutes for your Omnii to sync and enroll in your company domain. You may need to restart your unit after the enrollment process is completed. -
Page 142: Changing Network Card Settings
If necessary, use a network cable to connect the network card to your network. Refer to the documentation shipped with your network card for details. • To activate the connection, launch the desired program (e.g., Internet Explorer). The Omnii will connect automatically. Changing Network Card Settings •... -
Page 143: Vpn Connection Setup
Settings 4 - 29 • In the Configure Network Adapters dialog box, tap on the drop-down menu below My network card con- nects to, and choose either The Internet or Work. VPN Connection Setup A VPN connection provides a secure connection to servers through the Internet. Before you begin, you need the following information from your network administrator: password, domain name, TCP/IP settings and a host name or IP address of the VPN server. -
Page 144: Managing An Existing Connection
In Host name/IP, type the VPN server name or IP address. • Tap on the VPN type radio button next to the type of authentication for your Omnii: IPSec/L2TP or PPTP. Your network administrator will let you know which option applies to your unit. -
Page 145: Proxy Server Tab
Edit. Changing a Connection Setting Name Your Omnii has two sets of connection settings: My ISP and My Work Network. If you want to change one or both of these options to something more familiar to you, follow these steps. -
Page 146: Selecting A Network
ISP. The My Work Network settings are used for private network connections (corporate networks), while My ISP settings are used for Internet network connections. When you use programs such as Internet Explorer, your Omnii automatically connects using private network settings under My Work Network or Internet settings under My ISP, depending on specifications. You can determine how your Omnii connects. -
Page 147: Wi-Fi Config - Setting Up The 802.11A/B/G/N Radio
Wi-Fi Config - Setting Up the 802.11a/b/g/n Radio Omnii contains an integrated 802.11a/b/g/n radio module. The Wi-Fi Config application is used to configure the radio for one or more wireless network profiles. Follow the steps in this section to help configure the radio in your unit. -
Page 148: Wi-Fi Config: Status Tab
4 - 34 Omnii (Windows Embedded Hand-Held 6.5) User Guide Wi-Fi Config: Status Tab The Status tab displays information about the wireless network to which Omnii is configured to connect. When there are no network profiles configured, this tab is not populated. - Page 149 Settings 4 - 35 Connect: Used to connect to an already existing wireless network configuration. Add New: Used to create a new wireless network configuration. Edit: Used to change values in an existing wireless network configuration. Remove: Used to delete a wireless network configuration. Scan: Used to detect and list available wireless networks.
- Page 150 Each Auth. Mode has a unique Configure Profile screen attached to it with fields appropriate to the authorization mode you’ve chosen. Open Authentication Open authentication does not provide security. When this option is chosen, Omnii will connect to wireless networks which do not use authentication or encryption. WEP (Wired Equivalent Privacy) WEP provides static security to prevent others from accidentally accessing your network.
- Page 151 Settings 4 - 37 WPA & WPA2 Personal PSK (Pre-Shared Key) When PSK is selected, either WPA Personal PSK or WPA2 Personal PSK — a shared key must be configured on both the access point and the hand-held computer. One of the following can be chosen from the Encryption drop-down menu: TKIP, AES or TKIP+AES.
- Page 152 TLS: Provides strong security via the use of client certificates for user authentication. Verify Server Certificate When the Verify Server Certificate box is checked, the Omnii will verify the certificate provided by the authenti- cation server during the authentication process. This requires that an appropriate certificate be manually installed on Omnii for the verification.
-
Page 153: Configuring Tcp/Ip
Configuring TCP/IP If your network is not using a DHCP server, you will need to assign an IP address. IP Address and Name Servers To assign an IP Address for the Omnii: • Tap on Start>Settings>Connections folder icon>Wireless Manager icon. - Page 154 4 - 40 Omnii (Windows Embedded Hand-Held 6.5) User Guide • In the Wi-Fi screen, use the scroll bar at the top of the screen to scroll to the Network Adapters tab. • Tap on tiwlnapi1. The IP Address screen offers two options: a server-assigned IP address or a user-assigned IP address.
-
Page 155: Wi-Fi Config: Advanced Tab
• b/g only: forces the radio to operate in the 2.4 GHz band only. The Omnii will only associate with an AP that supports the DSSS data rates 1, 2, 5.5 & 11 Mbps and OFDM data rates: 6, 9, 12, 18, 24, 36, 48, 54Mbps. -
Page 156: Wireless Manager
11n – Block Ack When 11n – Block Ack is enabled, the Omnii will not send an ACK for every packet received, but it will send an ACK after a block of data is received. The duration of time before sending an ACK is negotiated with the AP. -
Page 157: Personal Folder
Settings 4 - 43 Personal Folder • Tap on Start>Settings>Personal icon. App Launch Keys This icon allows you to map a key to an application so that you can then launch the application from a single key-press. - Page 158 4 - 44 Omnii (Windows Embedded Hand-Held 6.5) User Guide To assign an application key: • Tap the Add button. • Press the key you want to use to launch an application. (If an unsupported key is pressed, a message appears on this screen letting you know.)
-
Page 159: Buttons
Settings 4 - 45 example, you want to assign an application launch key to launch the Word Mobile application, you can leave this field blank. If you want to assign an application launch key that will open a specific document in the Word Mobile application, you need to browse to and choose that document while the cursor is in the Data field. -
Page 160: Up/Down Control Tab
Sliding the bar to the right increases the key repeat rate. OneShots The options in this tab allow you to determine how modifier keys on your Omnii behave. For each modifier key – [ALT], [SHIFT], [CTRL], [SYM] and [BLUE/FN] – you have the following options in the drop-down menu: Lock, OneShot, and OneShot/Lock. -
Page 161: Macro Keys
“Sincerely yours,[ENTER]Bob” with a single keypress. For all keyboard types, you can program up to 15 macro keys. Some Omnii keyboards have macros keys ([M1], [M2] and so on) that are physically present on the keyboard. When you record a macro sequence and assign it to one of these predetermined macro keys, pressing that key (e.g., [M1]) executes the macro and... -
Page 162: Unicode Mapping
4 - 48 Omnii (Windows Embedded Hand-Held 6.5) User Guide • Type the macro sequence you want to assign to a keyboard key. You can type text and numbers, and you can program the function of special keys into a macro. -
Page 163: Scancode Remapping
Settings 4 - 49 • Tap on the Add/Edit button. • Highlight a value in the Unicode mapping list. • Position the cursor in the Unicode Mapping field, and type a Unicode value for the highlighted key. NOTE To add a shifted state – [SHIFT] and/or [CTRL], tap on the checkbox next to ‘SHIFT Pressed’... - Page 164 4 - 50 Omnii (Windows Embedded Hand-Held 6.5) User Guide If the scancode is remapped to a function or a macro, the first and second columns remain blank while the third column contains the function name or macro key number (e.g., Macro 2).
-
Page 165: Lock Sequence Tab
Type the key sequence to unlock the keyboard. The Phone – Managing Settings An optional phone feature is available for your Omnii hand-held. This section details how to tailor phone settings like the ring type and tone, phone services, and so on. - Page 166 4 - 52 Omnii (Windows Embedded Hand-Held 6.5) User Guide IMPORTANT For details about sending and ending calls, making conference calls, managing contacts, and so on, refer to “The Phone” on page 3-4. You can adjust phone settings such as the ring type and tone, choose phone services such as barring calls, and so on.
-
Page 167: Phone: Sounds Tab
Settings 4 - 53 Phone: Sounds Tab Ring Type and Ring Tone The SIM card phone number is displayed at the top of this screen. The Ring Type drop-down menu allows you to tailor the type of ring used for incoming calls. The Ring Tone drop-down menu allows you to determine the ring tone of incoming phone calls. - Page 168 4 - 54 Omnii (Windows Embedded Hand-Held 6.5) User Guide IMPORTANT If you enter an incorrect PIN, a message is displayed letting you know that you’ll need to reenter the correct value. You have a limited number of chances to enter the correct PIN. The number varies for different services.
-
Page 169: Phone: Services Tab
Settings 4 - 55 Phone: Services Tab The Services tab allows you to customize the behaviour of your phone. You can, for example, block all incoming calls, tailor to whom your caller ID will be transmitted, set up call forwarding and so on. NOTE Keep in mind that some services may not be supported by your network, or they may not have been subscribed to. -
Page 170: Phone: Data Tab
4 - 56 Omnii (Windows Embedded Hand-Held 6.5) User Guide Phone: Data Tab This screen is used to configure your WWAN data connection to the ISP. NOTE For details about setting up your data connection, refer to Appendix G: “Wireless Wide Area Network (WWAN)”,... -
Page 171: Phone: Hearing Aid Mode Tab
Settings 4 - 57 The Diagnostics tab lists details about each network found. The information in this screen may be useful to support personnel if they are attempting to diagnose a problem with your network. Phone: Hearing Aid Mode Tab When Hearing Aid Mode is enabled, the audio path is altered to accommodate those using a magnetically coupled hearing aid (T-coil). -
Page 172: About
Device ID Tab This tab provides fields in which you can assign a Device name and Description (optional) for the Omnii. This name is used by the Omnii to identify itself to other devices. -
Page 173: Battery Power Tab
This tab allows you to tailor the Omnii backlight behaviour to best preserve battery life. • To define how long the backlight should stay on when the Omnii is not in use, tap in the checkbox to the left of Turn off backlight if device is not used for. -
Page 174: Backlight Tab
Keypad backlight This tab allows you to tailor the backlight behaviour of the Omnii screen and keypad to best preserve battery life. The top sliding button adjusts the screen brightness while the bottom sliding button adjusts the keypad brightness. - Page 175 Settings 4 - 61 Personal Tab The Personal tab lists the name of the certificate issuer and the expiration date. • To view additional information about a personal certificate, tap on a certificate in the list. • To delete a certificate, tap and hold the stylus on the item you want to delete until a pop-up menu is dis- played.
-
Page 176: Compass
Tap on the Calibrate button and follow the directions to calibrate the compass. Make certain that you perform the figure ‘8’ indicated in the instructions in a fairly wide loop to better ensure successful calibration. When the compass calibration is complete, a message appears on the Omnii screen indicating successful cali- bration. NOTE... -
Page 177: Contrast
Drag the sliding button between Light and Dark to achieve the desired screen colour contrast. Customer Feedback This option allows Microsoft to track how you use your Omnii so that they can make improvements to the soft- ware. The radio buttons in this screen allow you to turn this feature on or off. -
Page 178: Status
The RilLog utility captures Radio Interface Layer (RIL) debug outputs. When you tap on the Start button, debug data is collected so that, if necessary, it can be forwarded to a Motorola technician for evaluation. The Utilities tab also provides a HeaterLog that can be used to log heater control logic board information. -
Page 179: Motion Meter
Motion Meter Tapping on the Start button enables the Motion Meter feature. Once enabled, this applet records the number of impacts the Omnii has sustained, the distance of the fall in meters, the duration in 10 of a second, and the date and time that the event occurred. -
Page 180: Error Reporting
GPS (Global Positioning System) With a Global Positioning System (GPS) receiver, you can locate your exact position on a map. However, even without a GPS receiver, several different mapping programs can run on your Omnii. • Tap on Start>Settings>System tab>GPS icon. - Page 181 You can go to: http://www.microsoft.com/windowsphone/en-gb/howto/wp7/web/use-maps-to-find-a-place.aspx if a map-viewing program is not included with your Omnii, and copy the file to your Omnii. • Tap on the Hardware tab, and set the GPS hardware port to COM2. Set the Baud rate to 4800.
-
Page 182: Gps (Global Positioning System) Settings
Always on – the GPS module is powered on at all times regardless of the power state of the Omnii (sus- pend mode). • On, and off in suspend – the GPS module is powered on, but if the Omnii is in suspend mode, the GPS module is turned off. - Page 183 AGPS reduces Time To First Fix (TTFF) and increases the likelihood of finding and keeping a fix in poor coverage areas such as indoor sites. AGPS downloads satellite ephemeris (orbital) data to the Omnii periodi- cally through Wi-Fi or WWAN. The downloaded data is used by the GPS module to speed the process of...
- Page 184 The Use default settings option is generally acceptable for most applications. Note that aside from the Update field in which you can choose how long the fix is stored in your Omnii, the field values cannot be edited. The Use custom settings option is generally used to configure devices that will have access only to an intranet rather than the Internet and should only be altered with the assistance of qualified Motorola personnel.
-
Page 185: Imagers Settings
Settings 4 - 71 Imagers Settings The Imagers applet is used to create, modify, delete and activate imager settings. The principle uses of the applet are to decode barcodes and to capture images. To launch this applet: • Tap on Start>Settings>System, and then tap on the Imagers icon. IMPORTANT Refer to Appendix B: “Imagers Applet”... -
Page 186: Manage Triggers
4 - 72 Omnii (Windows Embedded Hand-Held 6.5) User Guide Manage Triggers Manage Triggers allows you to configure how barcode scanners and other devices are triggered. You can configure the trigger ID for each trigger button for both single- and double-click, and the double-click time. - Page 187 Settings 4 - 73 Edit Tapping this button brings up the Edit mapping dialog, so that you can edit existing trigger mappings. Remove Tapping this button removes an existing mapping. The OK button in the Manage Triggers screen saves all changes made. If the [ESC] key is pressed, all changes are discarded.
-
Page 188: Managed Programs
4 - 74 Omnii (Windows Embedded Hand-Held 6.5) User Guide Trigger Press Type You can enable either an Up/Down or Double Click response to a trigger press. Normally, when a trigger (keyboard key, etc.) is pressed and released, a “trigger down” event is sent to the “owner” – that is, the applica- tion receiving the trigger press information –... -
Page 189: Main Tab
Settings 4 - 75 Main Tab This tab lists the memory allocated for file and data storage and for program storage. Storage Card The Storage Card screen indicates the total storage card or RAM disk memory along with the amount in use. Microphone Use this dialog box to adjust the gain for the specific microphones associated with your hand-held. -
Page 190: Partnerup
Tapping on a preloaded client in the PartnerUp screen displays a drop-down menu from which the operator can choose from an array of related options. Quick Defrost (Heater Settings) The Quick Defrost applet provides a number of tools to monitor and configure the heaters installed in the Omnii XT15f freezer units. Kiosk Kiosk allows the administrator to tailor how the Omnii operates and the options the user can access. -
Page 191: Kiosk Menu
Settings 4 - 77 • Tap on Start>Settings>System>Kiosk icon. If an administrator password is not yet set, this is indicated at the bottom of this screen. Tapping on the Admin- istrator Password option displays the following screen. • Type a New password, and then re-enter it in the Confirm new password field. NOTE Once an administrative password is assigned, each time Kiosk is launched, a dialog box will be displayed requesting the password. -
Page 192: Administrator Password
4 - 78 Omnii (Windows Embedded Hand-Held 6.5) User Guide The Kiosk menu provides access to the categories to help you tailor the look and operation of the Omnii for the user. Administrator Password If you want to change an existing password, you need to complete the Administrator Password screen: •... - Page 193 Adding Applications The Add and Edit buttons allow you to search for applications in the storage areas on your Omnii (e.g., Windows, My Device, etc.), and add applications to the list of items in the Today screen.
- Page 194 4 - 80 Omnii (Windows Embedded Hand-Held 6.5) User Guide Tapping on a storage area – Windows for example – displays the applications you can add to the Today screen from that storage area. Advanced Tab This tab provides a number of options to restrict what is available on start up.
- Page 195 Sequence”. In these cases, it is important that you make note of the key sequence you’ve chosen. Launching an Application at Startup If you enable Launch an application on Startup, a screen is displayed where you can choose the application that will be launched automatically when the Omnii is powered up.
- Page 196 Next, tap on the application you want the Omnii to launch on startup. Your choice is displayed in the Advanced tab. Startup program • Tap on OK. NOTE Remember that changes do not take effect until the Omnii is set to User Mode and the unit is reset.
-
Page 197: Restrictions
Tapping in the View menu displays a drop-down menu where you can define restrictions for each storage area of the Omnii. Restricted items are marked in the checkbox to the left – in the sample screen above, soli- taire.exe is restricted. -
Page 198: Control Panel Settings
This options allows you to tailor items displayed in both the Settings screen and in the Today screen. NOTE Remember that changes do not take effect until the Omnii is set to User Mode and the unit is reset. Refer to “Activating a Change –... -
Page 199: Import And Export Settings
Import these settings from one device to multiple devices of the same oper- ating system. IMPORTANT A copy of this file should also be saved in a central repository for all Motorola .xml files with a predefined name so that other Motorola utilities can locate it. - Page 200 4 - 86 Omnii (Windows Embedded Hand-Held 6.5) User Guide Tapping on the Export button displays an Export Settings screen. The default Name – Kiosk_Settings – can be changed by the administrator even after it has been saved. The .xml file contains all of the Kiosk configured settings, including the Administrator Password. When the file is imported to a device, the new password is applied immediately.
-
Page 201: Activating A Change - User Mode
A new screen, the Kiosk Access screen, is displayed. • Tap on Change to User mode. You’ll need to reset the Omnii so that the changes you specified can take effect. • Tap on Yes to reset the Omnii and activate your changes. -
Page 202: Remove Programs
4 - 88 Omnii (Windows Embedded Hand-Held 6.5) User Guide • Tap on the drop-down menu to choose your language and region. Once you’ve selected a language and region, you may need to adjust the way numbers, currency, the time and the date appear in your Omnii. -
Page 203: Scanner Settings
Settings 4 - 89 Scanner Settings IMPORTANT Refer to Appendix C: “Scanner Settings” for additional details. The Scanners icon in the Settings menu provides access to dialog boxes in which you can tailor barcode options. • Tap on Start>Settings, and then tap on System followed by the Scanners icon. Restoring Default Settings If you want to restore the factory defaults after making changes, the defaults can be applied to a selected parameter, sub-tree of parameters, or all scanner parameters. - Page 204 For both integrated and external scanners, this parameter determines which character is sent to the application installed in your Omnii following a double-click. A dialog box appears, asking that you press the key you want to insert. The ASCII/Unicode key value of the keypress is displayed.
- Page 205 Data Handling This option allows you to choose the code page your Omnii will use to display data – Default Local ASCII or ISO-8859-1 Latin 1. Codepage: Tapping on this option displays a window in which you can define the code page your Omnii will use.
-
Page 206: Translations Tab
4 - 92 Omnii (Windows Embedded Hand-Held 6.5) User Guide Translations Tab The Translations tab allows you to define up to 10 cases, each consisting of up to 10 rules in sequential order. Only one case will be applied to a barcode and a case will only be applied if all rules specified in the case are successful –... -
Page 207: Port Replicator Port A (Com5) And Port B (Com6)
This parameter must be set to on in order for Omnii to recognize the device connected to the Port Replicator 9-pin (COM5). Power (COM6 only) Pin 9 on Omnii COM6 is reserved for 5V power out and is defaulted to OFF. This parameter must be set to on to enable power to a Snap Module or Vehicle cradle. Baud Double-tapping on this parameter displays a pop-up window in which you can choose an appropriate rate of data transfer. - Page 208 Trigger On Sequence and Trigger Off Sequence If a SICK scanner connected to an Omnii port requires a serial stream of data bytes to trigger the scanner on and another to trigger the scanner off, the Trigger On Sequence and Trigger Off Sequence parameters allow...
-
Page 209: Screen
Tap Start>Settings. Tap on the System icon, and then tap on the Screen icon. This icon allows you to align (calibrate) your touchscreen, turn ClearType on and off and adjust the size of the text displayed on the Omnii screen. IMPORTANT Refer to “Calibrating the Touchscreen”... -
Page 210: Screen Rotation
Tap Start>Settings. Tap on the System icon, and then tap on the Screen Rotation icon. This screen allows you to determine how your Omnii screen will behave depending on how the unit is rotated. All orientations: screen rotates to portrait or landscape to match the orientation of the actual Omnii. -
Page 211: System Properties
Settings 4 - 97 IMPORTANT Refer to “Screen” on page 4-95 for details about this screen. System Properties This program identifies the computer software and hardware components, indicating which components are installed, their identification, version or part numbers, and whether they are enabled or disabled. •... -
Page 212: Total Recall
Total Recall Total Recall is a Motorola utility developed to maintain applications and settings during a cold boot, as well as clone settings to other devices. This utility creates a restore point of a device at a known state. This can be... -
Page 213: Creating A Backup
Settings 4 - 99 a clone (the administrator can store different configurations for different uses to clone to other hand-held computers). NOTE Total Recall works differently (e.g. restore on cold boot or on clean boot) on dif- ferent OS platforms and versions (e.g. Windows CE 5.0, 6.0, Windows Mobile, Windows Embedded Hand-held). -
Page 214: Creating A Clone
A Settings Only Clone can be copied to a wider array of devices, but it should not be used as an autorestore profile. • Tap on the Create Clone button to begin the process. Your Omnii model type and OS will be identified in the cloning statement to ensure that you target devices of the same type. •... -
Page 215: Managing Profiles
Settings 4 - 101 Managing Profiles You can view profiles and choose profile options from the menus in this section. Viewing a Profile • Tap on the Manage Profile button to see your list of profiles. Highlight a profile, and then you can choose to View the Profile Summary and go on to the next menu, Profile Details. - Page 216 4 - 102 Omnii (Windows Embedded Hand-Held 6.5) User Guide • Next, tap on the option button you want to use: • Restore Now – restores the profile immediately. If you are restoring a profile that is a backup or Full Clone, the computer will clean reset first;...
-
Page 217: Deleting A Profile
Settings 4 - 103 USB drive prepared for cloning Autorun installation on next Omnii Deleting a Profile • In the Total Recall home screen, tap on Delete Profile. • Highlight the backup you want to delete, and tap on the [-->](Next) button. -
Page 218: Advanced Interface And Network Settings
4 - 104 Omnii (Windows Embedded Hand-Held 6.5) User Guide This utility allows you to ‘tweak’ or adjust system settings such as the interface, network and servers. Advanced Interface and Network Settings Enable IPv6 This option allows you to enable Internet Protocol, version 6, that has been published to use 128-bit IP address... -
Page 219: Advanced Services Settings
SNTP (Simple Network Time Protocol) Server The SNTP Server Name typed in this dialog box is used to synchronize Omnii time with that of the time server. A warm reset must be performed once the server name has been entered. -
Page 220: Registry Editor
4 - 106 Omnii (Windows Embedded Hand-Held 6.5) User Guide Registry Editor This option is reserved for senior administrators who have a strong understanding of registry keys and values. Careless registry editing can cause irreversible damage to the Omnii. -
Page 221: Chapter 5: Accessories Pistol Grips
Desktop Docking Stations - Models ST4002 and ST4003 ..... . 5-10 Charging a Battery Installed in Omnii ......5-12 Indicators . - Page 222 Vehicle Cradle Mounting Recommendations ......5-19 Insertion and Removal of Omnii ....... .5-21 Maintaining the Vehicle Cradle .
-
Page 223: Pistol Grips
Prior to installation, make sure the trigger mechanism is securely snapped into the pistol grip body and that the trigger operates properly. The pistol grip is attached to the back of Omnii using the four threaded inserts in the upper part of the Omnii casing (see Figure 5-2 Attaching the Pistol Grip). -
Page 224: Carrying And Protective Accessories
There are several Omnii carrying and protective accessories to help you work safely and comfortably. Attaching Carrying Accessories If your Omnii is not fitted with a hand strap, you can install it using the carrying accessory kit supplied. You’ll need: •... -
Page 225: The Hand Strap - Model St6025
Hard Shell Holster - Model ST6055 A hard shell holster that includes a belt, leg tie-down, and tether, can be used to hang Omnii with a pistol grip from your waist. Note that holsters are designed for both right- and left-handed use. -
Page 226: Power Accessories
(USB variant): powers and charges the hand-held. It provides communications via USB Model ST4001 1.1/2.0 Host and USB 2.0 Client connectors and provides a DC IN port. When attached to Omnii, it allows ActiveSync or Windows Mobile Device Center connectivity with your PC, and the use of a USB device... - Page 227 Accessories 5 - 7 • (Serial variant): provides a powered DE9M serial connector. It powers and charges Omnii, Model ST4005 and provides serial communications to tethered devices. The DE9M connector is capable of speeds up to 115,200 bps. Pin 9 is reserved for 5V power out and is defaulted to .
-
Page 228: Ac Wall Adaptor - Models St1050 And St1050-Ar
Figure 5-6 Snap Module Installation on page 5-7). • To remove the charger, press down on the base of the clip arms to release them from the Omnii side rails and slide the adaptor off. • Connect the charger to an AC or DC power source using the appropriate regional plug or cable. Then connect the charger’s DC plug into the Snap Module’s DC jack. -
Page 229: Chargers And Docking Stations: General Information
• The Desktop Docking Stations operate as both chargers and docking stations. Operating as a charger, both the battery installed in Omnii and a spare battery can be charged. Priority is given to charging the hand-held's battery. See “Desktop Docking Stations - Models ST4002 and ST4003” on page... -
Page 230: Installation - Chargers And Docking Stations
5 - 10 Omnii (Windows Embedded Hand-Held 6.5) User Guide Normally it takes 3 to 4 hours to charge a battery. The Omnii intelligent charging system protects the battery from over-charging by terminating the charge process when the battery is at maximum capacity. - Page 231 Accessories 5 - 11 Omnii can be inserted into two desktop docking stations which are designed to charge the battery installed in the hand-held along with a spare battery pack: Models ST4002 and ST4003. IMPORTANT These docking stations can only be used to charge Motorola approved lithium-ion batteries.
-
Page 232: Charging A Battery Installed In Omnii
The LED on Omnii lights up indicating that the unit has external power and battery charging will begin. It is safe to leave the unit in the desktop docking station while it is not in use — the battery will not be overcharged. -
Page 233: Indicators
The front-mounted LED on the desktop docking station indicates the spare battery charge status. The LED on Omnii is active even when the hand-held is inserted in a docking station (and in suspend mode) so that the charge status of the battery can be detected easily. -
Page 234: Troubleshooting
The indicators, applications, and drivers required to use and monitor the desktop docking station as a dock (as opposed to a charger) are installed on Omnii — no applications are present on the docking station itself. Docking station does not seem to power on. -
Page 235: Quad Docking Station - Model No. St4004
DC IN connector RJ45 Ethernet ports The ST4004 Quad Docking Station is designed to accept up to four Omnii hand-held computers. The docking station powers the units and their internal battery charger. The docking station also connects up to four of the hand-held computers to a 10/100 Base-T Ethernet network and allows for Ethernet data transfer. -
Page 236: Indicators
Check with a qualified electrician if you are uncertain of your receptacle grounding. The ST4004 supplies DC power to enable the Omnii internal fast charger. Normally, a full charge of the battery will take from 3 to 4 hours. -
Page 237: Connecting To The Ethernet Network
Connecting to the Ethernet Network Network Access Omnii automatically detects insertion into the docking station and loads the appropriate drivers to communicate with the network. To connect more docking stations downstream (up to 4 on the same network), use the... -
Page 238: Troubleshooting
Omnii Charge Indicator LED is Red If the Omnii charge indicator is red when Omnii is in any of the four bays, the quad dock cannot read the battery, is in charging timeout, or it is not a Motorola battery. -
Page 239: Vehicle Cradle Mounting Recommendations
Figure 5-16 Mounting holes Release button Power/Communications port Motorola also supplies a range of standard mounts for the hand-held vehicle cradles, and the Omnii vehicle cradles are compatible with all of them. Vehicle Cradle Mounting Recommendations WARNING Before mounting a vehicle cradle in a vehicle, there are a number of operator safety issues that require careful attention. - Page 240 5 - 20 Omnii (Windows Embedded Hand-Held 6.5) User Guide IMPORTANT It is strongly recommended that all fork lift mounting solutions use clamp bases rather than plate bases that require penetrating through the vehicle for installation. Choose from one of the following clamp bases to secure the vehicle cradle/arm assembly to the vehicle: •...
-
Page 241: Insertion And Removal Of Omnii
Insertion and Removal of Omnii If your Omnii is equipped with a cover, or the ST6025 double loop hand strap, these accessories need to be removed before installing the unit in a vehicle cradle. There is no need to remove other handstraps or pistol grips from the unit. -
Page 242: Maintaining The Vehicle Cradle
Two latches in the cradle hold Omnii firmly in place. Although these latches are designed for at least 100,000 insertion and removal cycles, they will wear over time and will no longer lock Omnii securely in the cradle. For replacement parts and instructions contact Motorola. Partial disassembly is required. -
Page 243: Wiring Guidelines
Figure 5-21 Connecting ST1002 to vehicle power and communications in a typical setup on page 5-25. The Omnii charging LED (see “Battery Charge Status LED” on page 2-15) indicates that external power is available, and it also indicates the charging status of the internal battery. -
Page 244: Wiring Vehicle Power And Communications To The Cradle
Keep in mind that Omnii will continue to operate with or without vehicle power as long as its battery has suffi- cient charge. If an unfused power source must be used, a fuse assembly (PN 19440-300) must be added to the extension power cable (the fuse and instructions are supplied with the cable). - Page 245 * Note: The serial port is 5 VDC, 1 A maximum power out and is defaulted to off. To enable power to this port, in your Omnii desktop, go to Start>Settings>System>Scanners, which opens the Scanner Settings menus. In the Ports menu, select for the Power parameter under the COM6 port.
-
Page 246: Battery Charger (6-Slot) - Model St3006
5 - 26 Omnii (Windows Embedded Hand-Held 6.5) User Guide Battery Charger (6-Slot) - Model ST3006 The ST3006 is designed to charge up to six Omnii lithium-ion batteries at one time. IMPORTANT The battery charger is shipped with its own quick start guide —... -
Page 247: Operator Controls
Each battery charge slot is equipped with four LEDs to indicate the charge status of the battery. When the Omnii batteries are inserted in the charger, the colour and behaviour of the LEDs associated with the charging bays in use indicate the status of the charge. -
Page 248: Troubleshooting
5 - 28 Omnii (Windows Embedded Hand-Held 6.5) User Guide Troubleshooting Improper Battery Storage Storing batteries in the gang charger for extended periods (more than a week or two) is not recommended. Lithium-ion batteries lose capacity if they are maintained at full charge for long periods of time. See the battery handling recommendations in “The Battery”... - Page 249 Omnii Docking Connector ........
-
Page 251: Omnii Docking Connector
Port Pinouts A - 3 Omnii Docking Connector The docking interface on the base of Omnii is custom-designed to dock with a device via an array of spring-mounted pins. The following are the pin assignments of the interface. Pin #... -
Page 252: Snap Modules Connectors
A - 4 Omnii (Windows Embedded Hand-Held 6.5) User Guide Snap Modules Connectors • Model ST4000 (Charger only variant): power and charge. • Model ST4001 (USB Host/Client variant): power, charge, communications via USB 1.1/2.0 Host and USB 2.0 Client connectors, DC IN port. -
Page 253: Cable Connectors For Vehicle Cradle Model St1002
Port Pinouts A - 5 Cable Connectors for Vehicle Cradle Model ST1002 • The ST1002 Vehicle Cradle has a 44-pin connector that allows connection with either the CA3001 Vehicle Cradle Power and Communications Cable (DE9M serial port, 2 USB Host interfaces, and power cable) or the power-only CA3000 Vehicle Cradle Power Cable. -
Page 254: Omnii Battery Contacts
A - 6 Omnii (Windows Embedded Hand-Held 6.5) User Guide DE9M Serial USB Type A Power Pin # Signal Pin # Signal Pin # Signal 5Vdc 1A power out Omnii Battery Contacts Battery Contact Pinout Figure A-1 7 6 5 4 3 2... - Page 255 APPENDIX B IMAGERS APPLET BImagers Applet The Imagers Applet ......... . . B-3 Required Applets .
- Page 256 B - 2 Omnii (Windows Embedded Hand-Held 6.5) User Guide Modifying a Barcode Setting ......B-15 Translation Tab –...
-
Page 257: The Imagers Applet
Imagers Applet B - 3 The Imagers Applet The Imagers applet is used to create, modify, delete and activate imager settings. The principle uses of the applet are to decode barcodes and to capture images. A Demonstration Application is provided to demonstrate how the imager works. -
Page 258: Barcode Decoding Symbology Predefined Presets
B - 4 Omnii (Windows Embedded Hand-Held 6.5) User Guide Barcode Decoding Symbology Predefined Presets The following presets select groups of similar barcodes for decoding. NOTE It is recommended that the default preset be used whenever possible. Factory Default This preset enables the decoding of frequently used barcodes. -
Page 259: Image Capture Predefined Presets
Imagers Applet B - 5 Low power This preset minimizes the use of the flash so as to conserve the battery power on the Omnii. Glossy surface This preset minimizes the use of the flash so as to reduce reflection. This preset is used to read barcodes that are behind glass, or inside the plastic window of an envelope. -
Page 260: Selecting A Camera
• One preset – either predefined or custom – is marked as active. Selecting a Camera Your Omnii has a built-in imager and a camera. One camera must be selected for configuration. To select a camera: • Tap on the Camera Presets drop-down menu to view the camera options. -
Page 261: Modifying A Custom Preset
Imagers Applet B - 7 • Type the name of the new preset in the dialog box. • Tap on OK to save your changes. The preset list is displayed; the new custom preset appears at the end of the list. It is marked as read and write. -
Page 262: Removing A Custom Preset
B - 8 Omnii (Windows Embedded Hand-Held 6.5) User Guide • Tap on the + symbols to expand the lists so that you can view the parameter settings. • Scroll through the parameter list until you reach the parameter that you want to change. -
Page 263: Selecting A Camera
Tap on the Camera Presets drop-down menu to view the camera options. • Choose a camera – either Imager, the imager located at the top of the unit, or Color Camera, the camera located at back of the Omnii. IMPORTANT Currently, only the ‘Imager’ can be used to read barcodes. The Color Camera is limited to taking photos. -
Page 264: Creating A Custom Preset
B - 10 Omnii (Windows Embedded Hand-Held 6.5) User Guide • Tap on the + sign to expand one of the lists so that you can view the parameter settings. Creating a Custom Preset A new custom preset is created by modifying a preset – either a predefined preset or an existing custom preset. -
Page 265: Modifying A Custom Preset
Imagers Applet B - 11 Modifying a Custom Preset The parameter values in a custom preset can be modified. It is recommended that very few changes be made to a custom preset. To ensure that it will work reliably, it should be as close as possible to the original prede- fined preset. -
Page 266: Removing A Custom Preset
B - 12 Omnii (Windows Embedded Hand-Held 6.5) User Guide Removing a Custom Preset • Highlight the custom preset you want to delete, and tap on the Remove button. A window is displayed warning you that you are about to remove a preset. -
Page 267: Creating A Custom Preset
Imagers Applet B - 13 • Tap on the + sign to expand one of the lists so that you can view the parameter settings. Creating a Custom Preset A new custom preset is created by modifying a preset – either a predefined preset or an existing custom preset. -
Page 268: Modifying A Custom Preset
B - 14 Omnii (Windows Embedded Hand-Held 6.5) User Guide Modifying a Custom Preset The parameter values in a custom preset can be modified. It is recommended that very few changes be made to a custom preset. To ensure that it will work reliably, it should be as close as possible to the original prede- fined preset. -
Page 269: Removing A Custom Preset
Imagers Applet B - 15 Removing a Custom Preset • Highlight the custom preset you want to delete, and tap on the Remove button. A window is displayed warning you that you are about to remove a preset. • Tap on Yes to remove the preset or No to cancel the operation. Filter Tab –... -
Page 270: Translation Tab - Configuring Rules
B - 16 Omnii (Windows Embedded Hand-Held 6.5) User Guide - Highlight the parameter and then press the [SPACE] key, or double-click on the parameter. The following screen is displayed: • When you’ve completed your edits, tap on OK. Translation Tab – Configuring Rules Translation rules enable the automatic processing of barcode data. -
Page 271: Case Rules
Imagers Applet B - 17 • Tap on the No rule drop-down menu to display the rules. When you choose a rule, an associated screen is displayed in which you can define the rule. Case Rules The case rules are defined as follows: •... -
Page 272: Advanced Tab
When you have completed all the changes, tap on the Save button. Configuring Triggers Viewing The Trigger Configuration The trigger on the Omnii hand-held is configured using the Manage Triggers applet. The Imagers applet provides a shortcut to the Manage Triggers applet. •... -
Page 273: Barcode Symbologies
Imagers Applet B - 19 Adding, Editing and Removing Triggers For instruction about adding, editing and removing triggers, refer to “Manage Triggers” on page 4-72. Barcode Symbologies There are two sets of barcode symbologies, one for Imager and one for Color Camera. To display the barcodes available: •... -
Page 274: Imager Barcode Symbologies
B - 20 Omnii (Windows Embedded Hand-Held 6.5) User Guide • Tap on an Barcode Preset to display the barcode symbologies. Imager Barcode Symbologies The barcode symbologies for the Imager are listed in this section. Imager Barcode Symbologies All 1D With Strong Recovery... -
Page 275: Color Camera Barcode Symbologies
Imagers Applet B - 21 Imager Barcode Symbologies MSI Plessey (disabled) Code 11 (disabled) Interleaved 2 of 5 (disabled) Matrix 2 of 5 (disabled) Discrete 2 f 5 (disabled) Telepen (disabled) Gs1 DataBar (disabled) TLC-39 (disabled) 2D PDF-417 2D micro PDF-417 CodaBlock F (disabled) CodaBlock A (disabled) 2D Data Matrix... -
Page 276: Color Camera Barcode Symbologies
Imagers Applet B - 22 Color Camera Barcode Symbolo- gies UPC-A Code 93 (disabled) Codabar Interleaved 2 of 5 (disabled) Gs1 DataBar (disabled) Gs1 Composite 2D PDF-417 2D micro PDF-417 2D Data Matrix 2D QR Code 2D Maxicode (disabled) 2D Aztec (disabled) Postal: PlanNET (disabled) Postal: PostNET (disabled) Postal: Australia (disabled) - Page 277 APPENDIX C SCANNER SETTINGS CScanner Settings Barcode Settings ..........C-3 Scanner Options .
-
Page 279: Barcode Settings
NOTE Your Omnii comes preconfigured from the factory for internal scanner types. To determine the type of scanner installed in your unit, go to Start>Setting>System>System Properties icon. -
Page 280: Restoring Default Settings
C - 4 Omnii (Windows Embedded Hand-Held 6.5) User Guide IMPORTANT To improve the decode speed and performance, enable (set to ‘on’) only those codes that are required by the application. Keep in mind that some barcode types are only available when an internal imaging scanner is installed. All internal scanners can be configured using these dialog boxes. -
Page 281: Decoded (Internal) Advanced Options
1 min., 2 min. or 3 min. NOTE This parameter is only used if the Trigger Mode has been set to Continuous On and Omnii is mounted in a fixed position; otherwise, ‘Low Power Timeout’ is not used. Parameter Scanning Setting this parameter to on enables decoding of parameter barcodes. -
Page 282: Decoded (Internal) Data Options
C - 6 Omnii (Windows Embedded Hand-Held 6.5) User Guide Linear security level 1 specifies that the following code types must be successfully read twice before being decoded: Code Type Length Codabar MSI Plessey 4 or less D 5 of 5... -
Page 283: Decoded (Intermec Iscp
Scanner Settings C - 7 When this parameter is enabled, the scanner transmits data from PDF417 and MicroPDF417 barcodes containing Character Set ECIs, even when the ECI Protocol is disabled. ECI Decoder Setting this parameter to on enables the scanner to interpret any Extended Channel Interpretations (ECIs) supported by the scanner. - Page 284 C - 8 Omnii (Windows Embedded Hand-Held 6.5) User Guide Low Power Timeout To extend laser life, you can select the time the scanner remains active following a successful decode. The scanner wakes from low power mode when a barcode is scanned — a successful decode restores normal flashing.
-
Page 285: Non-Decoded Scanners
Scanner Settings C - 9 The barcode symbologies for the scanner are listed in table following. Decoded (Intermec ISCP) Barcode Symbologies Code 39 TLC-39 (disabled) Code 128 2D PDF-417 EAN 13 2D micro PDF-417 EAN 8 Discrete 2 of 5 (disabled) UPC-A Telepen (disabled) UPC-E... - Page 286 C - 10 Omnii (Windows Embedded Hand-Held 6.5) User Guide Short Code When enabled, this parameter allows scanning of short I 2 of 5 barcodes (2 characters). When disabled, these short barcodes are rejected. Enabling “Short Code” may reduce the robustness of the decoding since the hand-held must decode more potential barcodes;...
-
Page 287: Scanner Specifications
APPENDIX D INTERNAL IMAGER & SCANNER SPECIFICATIONS DInternal Imager & Scanner Specifications Internal Scanners and Imagers........D-3 SE955 Scanner . -
Page 289: Internal Scanners And Imagers
Internal Scanners and Imagers This appendix lists specifications for the following internal scanners and imagers. For a current list of model numbers and descriptions for Omnii scanner pod and back cover kits, please contact your Motorola represent- ative or go to: http://www.motorolasolutions.com/US-EN/Product+Lines/Psion/?WT.mc_id=psion_us_p_handheld. -
Page 290: Se965 Scanner
D - 4 Omnii (Windows Embedded Hand-Held 6.5) User Guide SE965 Scanner SE965 Dimensions 0.46 in. H x 0.85 in. W x 0.61 in. D 11.75 mm H x 21.6 mm W x 15.5 mm D Weight 0.27 oz./7.6 g... -
Page 291: Se965 Decode Zones
Internal Imager & Scanner Specifications D - 5 SE965 Decode Zones... -
Page 292: Se1224Hp - High Performance Scanner
D - 6 Omnii (Windows Embedded Hand-Held 6.5) User Guide SE1224HP - High Performance Scanner Parameter SE1224HP Type Laser Class 2 Light Source Visible Laser Diode 650 nm Scan Rate 35 (± 5) scans/sec (bi-directional) Scan Angle/Field of View 42º (typical), 30º (narrow) -
Page 293: Se1524Er - Extended Range Scanner
Internal Imager & Scanner Specifications D - 7 SE1524ER – Extended Range Scanner Parameter Specification Type Laser Class 2 Light Source Visible Laser Diode 650 nm Scan Rate 35 (± 5) scans/sec (bi-directional). Scan Angle/Field of View 13.5° ± 0.7° Scan Patterns Linear Minimum Print Contrast... -
Page 294: Ev15 Imager
D - 8 Omnii (Windows Embedded Hand-Held 6.5) User Guide SE1524ER Decode Zone B (Long Range, Large Codes) EV15 Imager Parameter Specification Light Source 617 nm highly visible LED Scan Angle 40º Minimum Print Contrast Minimum 25% Minimum X. Dimension 0.1 mm (4 mils) -
Page 295: Ea11 Decoded 2D Imager
Internal Imager & Scanner Specifications D - 9 EA11 Decoded 2D Imager Parameter Specification Scan Rate 2D mode: 56 images/s auto adaptive Linear Emulation Mode 200 scans/s auto adaptive Scan Angle 38.9° (horizontal), 25.4° (vertical) Optical Resolution 752 (H) x 480 (V) pixels, 256 gray levels Print Contrast down to 25% Versions... -
Page 296: Ea11 Typical Reading Distances
D - 10 Omnii (Windows Embedded Hand-Held 6.5) User Guide EA11 Typical Reading Distances EA20X Imager Parameter Specification Light Source 617nm highly visible LED, 650nm laser framing/aiming Scan Rate 2D mode: 60 images/s auto adaptive Linear Emulation 200 scans/s auto adaptive... -
Page 297: Ea20X Typical Reading Distances
Internal Imager & Scanner Specifications D - 11 Parameter Specification Operating Current 410mA @ 3.3V scanning with power save Power Saving Mode Ambient Light From 0 to 100,000 lux Regulatory Approvals UL, cUL, VDE certified, RoHS compliant, Class 2 Laser EA20X Typical Reading Distances... -
Page 298: Hhp 5080Sr Imager/Decoder
D - 12 Omnii (Windows Embedded Hand-Held 6.5) User Guide HHP 5080SR Imager/Decoder Parameter Specification Focal Point - SR 7 inches (17.8 cm) from lens plate Image Sensor 752 x 480 CMOS sensor Motion Tolerance 4 inches per second Rotational Sensitivity 360°... -
Page 299: Se4500Sr - Standard Range Imager
Internal Imager & Scanner Specifications D - 13 SE4500SR – Standard Range Imager Parameter Specification Power Requirements - 3.3 V ± 0.3 V at 23° C Input Voltage Operating Mode Supply Currents (conditions VCC=VCC_SENSOR=VCC_ILLUM = 3.3VDC) (at 23° C): 500 µA Low Power Idle 18 mA... - Page 300 D - 14 Omnii (Windows Embedded Hand-Held 6.5) User Guide Parameter Specification Shock 2000 G ± 5% applied via any mounting surface at -30º and 55º C for a period of 0.85 ± 0.05 msec 2500 G ± 5% applied via any mounting surface at 23º C for a period of 0.85 ±...
-
Page 301: Se4500Sr Decode Zone
Internal Imager & Scanner Specifications D - 15 SE4500SR Decode Zone 22.9 11.4 SE4500-SR 4.5 11.4 5 mil Code 39 6.67 mil PDF417 22.9 7.5 mil Code 39 10.6 10 mil PDF417 10.1 13 mil (100% UPC) 15.5 15 mil PDF417 14.7 15 mil Data Matrix 12.4... -
Page 302: Se4600Lr - Long Range Imager
D - 16 Omnii (Windows Embedded Hand-Held 6.5) User Guide SE4600LR – Long Range Imager Parameter Specification Input Voltages 3.3 V ±10%, 75 mA max 1.8 V ±10% or 3.3 V ±10%, 30 mA max VCC_INTFC 3.0 V - 8.4 V, 800 mA VCC_ILLUM 3.3 V ±10%, 70 mA max... - Page 303 Temperature: Operating -20º to 55º C (-4º to 131º F) Storage -40º to 70º C (-40º to 158ºF) (-30º C (22º F) for Omnii XT15f Arctic variant) Humidity: Operating 95% RH, non-condensing at 55º C Storage 85% RH, non-condensing at 70º C Maximum Engine Dimen- 38.23 mm W x 19.34 mm H x 27.00 mm D...
-
Page 304: Se4600Lr Decode Zones
D - 18 Omnii (Windows Embedded Hand-Held 6.5) User Guide SE4600LR Decode Zones... - Page 305 EOmnii Specifications The Omnii Hand-Held Computer (Model 7545) ......E-3 Hardware ..........E-3 Regulatory Approvals .
-
Page 307: The Omnii Hand-Held Computer (Model 7545
Omnii Specifications E - 3 The Omnii Hand-Held Computer (Model 7545) NOTE For Omnii freezer unit hardware specifications, please go to Appendix F: "Omnii XT15f Freezer Unit (Model 7545XT)". NOTE Performance specifications are nominal and subject to change without notice. - Page 308 E - 4 Omnii (Windows Embedded Hand-Held 6.5) User Guide • Integrated microphone and speaker. • Optional Push-to-Talk speaker. • Walkie-talkie style Push-to-Talk – VoIP over Wi-Fi or WWAN. • Vibration feedback. Power Management • Battery Pack: 5000 mAh high capacity Lithium-ion (for battery specifications, see “Lithium-ion Smart...
-
Page 309: Regulatory Approvals
RoHS compliant • WEEE compliant • REACH compliant Lithium-ion Smart Battery 5000 mAh (ST3001) For safety instructions, please see “Lithium-ion Battery Safety Precautions” in the Omnii Hand-Held Computer Regulatory & Warranty Guide (PN 8000191). Parameter Specification Model Number ST3001 Chemistry... -
Page 310: Wireless Radios
E - 6 Omnii (Windows Embedded Hand-Held 6.5) User Guide Wireless Radios Cinterion, Model MC75i GSM/GPRS/EDGE Radio Parameter Specification Manufacturer Cinterion, Model MC75i Form Factor Quad-Band GSM 850/900/1800/1900 MHz EDGE (E-GPRS) multi-slot class 12 GPRS multi-slot class 12 GSM release 99... -
Page 311: Cinterion Ph8-P Gsm/Gprs/Edge/Umts/Hspa+ Radio
Omnii Specifications E - 7 Parameter Specification CSD Data Transmission Up to 14.4 kbps, V.110 Non-transparent mode Point-to-point MO and MT Text and PDU mode Voice Triple-rate codec for HR, FR, and EFR Adaptive multi-rate AMR Basic hands-free operation Echo cancellation... - Page 312 E - 8 Omnii (Windows Embedded Hand-Held 6.5) User Guide Parameter Specifications HSPA features 3GPP Release 6, 7 DL 14.4Mbps, UL 5.7Mbps UE CAT. [1-6], 11, 12 supported Compressed mode (CM) supported according to 3GPP TS25.212 UMTS features 3GPP Release 4...
-
Page 313: 802.11A/B/G/N Radio
Omnii Specifications E - 9 Parameter Specifications General Power saving modes GPS tracking in parallel to 2G/3G diversity operation Software AT commands Hayes, 3GPP TS 27.007 and 27.005, and proprietary Cinterion Wireless Modules commands SIM Application Toolkit SAT Release 99... - Page 314 E - 10 Omnii (Windows Embedded Hand-Held 6.5) User Guide Parameter Sub-parameter Specification Transmit Power 802.11b +18 dBm typical, +19.5 dBm max 802.11g +13 dBm typical, +14.5 dBm max 802.11a +12 dBm typical, +13.5 dBm max 802.11n (2.4 +12 dBm typical, +13.5 dBm max GHz) 802.11n (5 GHz)
-
Page 315: Bluetooth Radio
Omnii Specifications E - 11 Bluetooth Radio Parameter Specification Manufacturer Murata, Model LBEH1Z9PFC Form Factor Embedded surface mount module, 11.4 x 9.4 mm * This is a combo module containing both Wi-Fi 802.11a/b/g/n and Bluetooth V2.1+EDR radio Antenna Port U.FL jack (shared with Wi-Fi 802.11b/g/n radio) Antenna Type PCB substrate patch antenna. - Page 317 OMNII XT15F FREEZER VARIANTS The Omnii XT15f Hand-Held Computer (Model 7545XT) ..... . F-3 Hardware Specifications........F-4 Regulatory Approvals .
-
Page 319: The Omnii Xt15F Hand-Held Computer (Model 7545Xt
Performance specifications are nominal and subject to change without notice. The Omnii XT15f is a modular, industrial hand-held computer suitable for cold chain and extreme weather envi- ronments. These units are equipped with heating hardware to prevent condensation from developing on or inside the Omnii. -
Page 320: Hardware Specifications
F - 4 Omnii (Windows Embedded Hand-Held 6.5) User Guide Hardware Specifications Physical Dimensions • Length: 226 mm (8.89 in) • Width: At display: 98 mm (3.86 in) • Depth: At display: 82 mm (3.2 in) At grip area: 31 mm (1.22 in) •... -
Page 321: Regulatory Approvals
Omnii XT15f Freezer Variants F - 5 WARNING Powered cradles are designed to allow the Omnii to be powered by a vehicle battery. The battery installed in the Omnii is also recharged by the vehicle battery. This option accepts DC power sources over the range 11.5V to 30V. -
Page 322: The Freezer Keyboards
[Windows] key Lithium-ion Smart Battery 5000 mAh (ST3001) for Omnii Chiller Model The Omnii Chiller model is shipped with the standard ST3001 Lithium-ion Smart Battery. The ST3002 Arctic battery is available as an option. See Lithium-ion Smart Battery 5300 mAh (ST3002) for Omnii Arctic Model on page F-7 for information about this battery. -
Page 323: Lithium-Ion Smart Battery 5300 Mah (St3002) For Omnii Arctic Model
Lithium-ion Smart Battery 5300 mAh (ST3002) for Omnii Arctic Model NOTE This battery model is not restricted to the Omnii Arctic variant. It can be ordered as an option for the Omnii Chiller variant. The Omnii Arctic model is shipped with the Arctic ST3002 Lithium-ion Smart Battery. -
Page 324: Quick Defrost Application
Figure F-3 Quick Defrost Application The Omnii XT15f is a freezer capable hand-held computer with integrated heaters designed to improve the functionality and operation of the hand-held device in extreme cold environments. The Arctic variant has two heaters; one for the display and one for the scanner window. The Chiller variant has only one heater which is located on the scanner window. -
Page 325: Settings
Omnii XT15f Freezer Variants F - 9 Settings The Quick Defrost application opens in the Settings tab. Suspend Threshold The Suspend Threshold option allows you to maintain heat for a limited time when the computer enters Suspend mode. Once the threshold is reached, the heater will stay off while the computer is in suspend. -
Page 326: Heater System
Heater System This section displays information on the heater system. Status (Individual Heaters) The LED state for this parameter indicates whether or not communication between the Omnii main system and the heater control logic board has been successful. Description The communication between the heater control logic board and the Omnii main system has been established successfully. -
Page 327: Display And Scan Window Heaters
Omnii XT15f Freezer Variants F - 11 Display and Scan Window Heaters This section displays information on the individual heaters. NOTE If the scanner/imager is not connected, the scan window heater will be disabled (greyed out). Status These LED status indicators report the heating mode for each individual heater. -
Page 328: System Properties
F - 12 Omnii (Windows Embedded Hand-Held 6.5) User Guide System Properties The System Properties window displays the heater software and hardware components. • Tap on Start>Settings>System>System Properties icon and scroll to Heater Info. The information also includes heater identification, version or part numbers, and indicates if they are installed. - Page 329 APPENDIX G WIRELESS WIDE AREA NETWORK (WWAN) GWireless Wide Area Network (WWAN) Wireless WAN ..........G-3 Navigation Bar Icons .
-
Page 331: Wireless Wan
Motorola offers the Cinterion MC75i EDGE WWAN radio and a Cinterion PH8-P HSPA+ WWAN radio. An Omnii Hand-Held Computer equipped with a GSM/GPRS radio has wide area networking capabilities. With this radio and a SIM card, you can wirelessly transfer data, and you use the Omnii voice option to place phone calls. - Page 332 G - 4 Omnii (Windows Embedded Hand-Held 6.5) User Guide Tap here to display the phone setting tabs. • Scroll to the Data tab. Data Tab Figure G-1 By default the connection uses CHAP (Challenge Handshake Authentication Protocol); however, if your ISP does not support CHAP, tapping in the box to the left of PAP only authentication for: directs the connection to use PAP (Password Authentication Protocol) instead.
-
Page 333: Disconnecting From A Network
Wireless Wide Area Network (WWAN) G - 5 A home data connection is automatically set up. • To connect to the Internet, tap on the Start>Internet Explorer icon. NOTE Any application that needs Internet access will establish a packet data con- nection –... - Page 334 G - 6 Omnii (Windows Embedded Hand-Held 6.5) User Guide • Choose Add a new modem connection. In most cases, you should choose Add a new modem connection from ISP: WWAN - GPRS. However, if you need to use a Proxy server, choose this option from My Work Network.
-
Page 335: The Security Tab - Entering A Pin
Wireless Wide Area Network (WWAN) G - 7 • If required, type a User name and Password. • If you need to specify TCP/IP and Server information (i.e., you are using a static IP address) tap on the Advanced... button to complete the necessary details. •... -
Page 336: Network Configuration
G - 8 Omnii (Windows Embedded Hand-Held 6.5) User Guide Network Configuration By default the radio modem automatically chooses from the available and allowed networks (allowed networks are the home network and all other networks with which the home network has a roaming agreement). You may find there are some situations in which you want to override this default behaviour. -
Page 337: Omnii Xt15Ni Battery Information
Omnii XT15ni Battery Information ........H-4... - Page 339 USA and Canada for use in Class I, Division 2-Groups A, B, C and D T6 environments. The users of this product are cautioned to use accessories and peripherals approved by Motorola. The use of accessories other than those recommended, or changes to this product that are not approved by Motorola, may void the compliance of this product and may result in the loss of the user's authority to operate the equip- ment.
-
Page 340: Omnii Xt15Ni Battery Information
The Omnii XT15ni must only be used when the ambient temperature is between -20°C and +50°C (-4°F and +122°F). The Omnii XT15ni may NOT be connected to any of its available accesso- ries while in potentially hazardous locations. This includes anything that uses the communications docking connector, headset, or microphone jacks. - Page 341 ....... . 4-43 barcode reader approvals, Omnii freezer (including scanner) ..F-5 integrated scanner, operation of .
- Page 342 Index - II Omnii (Windows Embedded Hand-Held 6.5) User Guide imager operation ........B-20 .
- Page 343 Index - III debug (error handling) Add Remove ......4-63 ....... . . 2-29 Decoding symbology file, renaming .
- Page 344 Index - IV Omnii (Windows Embedded Hand-Held 6.5) User Guide Unicode Mapping ......4-48 keyboard keys, freezer .
- Page 345 ....F-3 Trigger On Sequence Omnii XT15ni (non-incendive) hand-held ......4-94...
- Page 346 Index - VI Omnii (Windows Embedded Hand-Held 6.5) User Guide Postal Unicode ........4-48...
- Page 347 ........3-24 Omnii XT15f Freezer Hand-Held Computer .
- Page 348 Index - VIIIOmnii (Windows Embedded Hand-Held 6.5) User Guide Restore Profile WWAN (Wireless Wide Area Network) ......4-102 .
- Page 350 MOTOROLA, MOTO, MOTOROLA SOLUTIONS and the Stylized M Logo are trademarks or registered trademarks of Motorola Trademark Holdings, LLC and are used under license. All other trademarks are the property of their respective owners. © 2014 Motorola Solutions, Inc. All Rights Reserved.