Table of Contents
Advertisement
Quick Links
Download this manual
See also:
Reference Manual
Musician's Guide
(includes PC3K6, PC3K7, and PC3K8)
®
Kurzweil is a registered trademark of Young Chang Co., Ltd. ©2009 All rights reserved. Young Chang®, Kurzweil ®, V. A. S. T. ®, PC3K®,
PC3®, KDFX®, Pitcher®, and LaserVerb®, KSP8 ™, K2661™, K2600™, K2500™, and K2000™ are trademarks of Young Chang Co., Ltd. All
other products and brand names are trademarks or registered trademarks of their respective companies. Product features and specifications
are subject to change without notice.
You may legally print up to two (2) copies of this document for personal use. Commercial use of any copies of this document
is prohibited. Young Chang Co. retains ownership of all intellectual property represented by this document.
910523-002 – V1 December 2010
Advertisement
Table of Contents

Related Manuals for Kurzweil PC3K Series


Summary of Contents for Kurzweil PC3K Series
- Page 1 Musician’s Guide (includes PC3K6, PC3K7, and PC3K8) ® Kurzweil is a registered trademark of Young Chang Co., Ltd. ©2009 All rights reserved. Young Chang®, Kurzweil ®, V. A. S. T. ®, PC3K®, PC3®, KDFX®, Pitcher®, and LaserVerb®, KSP8 ™, K2661™, K2600™, K2500™, and K2000™ are trademarks of Young Chang Co., Ltd. All other products and brand names are trademarks or registered trademarks of their respective companies. Product features and specifications are subject to change without notice. You may legally print up to two (2) copies of this document for personal use. Commercial use of any copies of this document is prohibited. Young Chang Co. retains ownership of all intellectual property represented by this document. 910523-002 – V1 December 2010...
- Page 2 The lightning flash with the arrowhead symbol, CAUTION within an equilateral triangle, is intended to alert the user to the presence of uninsulated "dangerous voltage" within the product's RISK OF ELECTRIC SHOCK enclosure that may be of sufficient magnitude DO NOT OPEN to constitute a risk of electric shock to persons.
-
Page 3: Important Safety Instructions
Important Safety Instructions 1)Read these instructions 2)Keep these instructions. 3)Heed all warnings. 4)Follow all instructions. 5)Do not use this apparatus near water. 6)Clean only with dry cloth. 7)Do not block any of the ventilation openings. Install in accordance with the manufacturer’s instructions. 8)Do not install near any heat sources such as radiators, heat registers, stoves, or other apparatus (including amplifiers) that produce heat. 9)Do not defeat the safety purpose of the polarized or grounding‐type plug. A polarized plug has two blades with one wider than the other. A grounding type plug has two blades and a third grounding prong. The wide blade or the third prong are provided for your safety. If the provided plug does not fit into your outlet, consult an electrician for replacement of the obsolete outlet. 10)Protect the power cord from being walked on or pinched, particularly at plugs, convenience receptacles, and the point where they exit from the apparatus. 11)Only use attachments/accessories specified by the manufacturer. 12)Use only with a cart, stand, tripod, bracket, or table specified by the manufacturer, or sold with the apparatus. When a cart is used, use caution when moving the cart/apparatus combination to avoid injury from tip‐over. 13)Unplug this apparatus during lightning storms or when unused for long periods of time. 14)CAUTION: Danger of explosion if battery is incorrectly replaced. Replace only with the same or equivalent type (CR2032). 15)Refer all servicing to qualified service personnel. Servicing is required when the apparatus has been damaged in any way, such as power‐supply cord or plug is damaged, liquid has been spilled or objects have fallen into the apparatus, the apparatus has been exposed to rain or moisture, does not operate normally, or has been dropped. Warning- To reduce the risk of fire or electric shock, do not expose this apparatus to rain or mois- ture. -
Page 4: Kurzweil International Contacts
Kurzweil International Contacts Contact the Kurzweil office listed below to locate your local Kurzweil representative. American Music & Sound 5304 Derry Avenue #C Agoura Hills California 91301 USA telephone: (800) 994‐4984 fax: (818) 597‐0411 Email: Info@AmericanMusicAndSound.com Kurzweil Co., LTD iPark Building #102, Floor 9 Jeongja‐Dong 9, Bundang‐Gu Soungnam‐Shi, Gyeonggi‐Do 463‐859 South Korea www.ycpiano.co.kr www.youngchang.com www.kurzweil.com TECHNICAL SUPPORT Email: support@Kurzweil.com... -
Page 5: Table Of Contents
Table Of Contents Kurzweil International Contacts............................iv Chapter 1 Introduction Keeping Current ................................1‐2 Overview of the PC3K..............................1‐2 How the PC3K Works ..............................1‐3 VAST Synthesis ................................1‐3 KB3 Tone Wheel Emulation ............................1‐3 VA‐1 Programs .................................1‐3 How to Use This Manual ..............................1‐4 Do I Have Everything?..............................1‐4 Boot Loader..................................1‐4 Battery....................................1‐4 Options ....................................1‐5 Sound ROM Expansion Card..........................1‐5 Pedals..................................1‐5 Ribbon Controller ..............................1‐5 Breath Controller ..............................1‐5 Chapter 2 Startup Make Connections ................................2‐1 Make Music..................................2‐1 Startup—the Details ................................2‐2 Before You Start................................2‐2 Connecting the Power Cable (Line Cord) ......................2‐2... - Page 6 Chapter 3 User Interface Basics Mode Selection .................................3‐1 Mode Buttons ...................................3‐2 Bank Buttons..................................3‐2 Sliders ....................................3‐3 Program and Category Buttons .............................3‐4 Picking favorites ...............................3‐4 Pitch Wheel and Mod Wheel ............................3‐5 Navigation ..................................3‐6 The Display................................3‐6 Pages ...................................3‐6 The Top Line................................3‐6 The Bottom Line................................3‐6 The Soft Buttons................................3‐7 The Cursor Buttons ..............................3‐7 The Chan/Layer Buttons............................3‐7 The Edit Button .................................3‐8 The Exit Button .................................3‐8 Data Entry ..................................3‐9 The Alpha Wheel ..............................3‐9 The Plus/Minus Buttons ............................3‐9 The Alphanumeric Pad ............................3‐9 Double Button Presses ............................3‐10 Intuitive Data Entry...............................3‐11 Changing the Current Layer in Multi‐Layer Programs ..................3‐11...
- Page 7 Keyboard Naming ..............................5‐5 Deleting Objects ................................5‐6 Dependent Objects ..............................5‐6 Saving and Loading Files—Storage Mode........................5‐6 Special Button Functions ..............................5‐7 Chapter 6 Program Mode VAST and KB3 Programs..............................6‐1 VAST Program Structure ..............................6‐2 KB3 Program Structure ..............................6‐4 KB3 Mode ..................................6‐4 Real‐time Controls in KB3 Mode..........................6‐5 Playing KB3 Programs .............................6‐5 KB3 Mode Buttons (Mute Buttons) ........................6‐5 MIDI Control of KB3 Programs..........................6‐6 The Program Mode Page ..............................6‐9 Control Setup ................................6‐9 The Soft Buttons in Program Mode ........................6‐10 Controller Entry Values in Program Mode......................6‐10 Editing VAST Programs..............................6‐11 The Soft Buttons in the Program Editor ......................6‐11 The MODE Buttons in the Program Editor......................6‐12 Algorithm Basics ................................6‐13 Common DSP Control Parameters ........................6‐14 Alt Input for Algorithms (Cascade Mode)......................6‐17 Dynamic VAST................................6‐18 The KEYMAP Page................................6‐19...
- Page 8 Sostenuto Pedal (SosPdl) ............................6‐25 Freeze Pedal (FrzPdl) .............................6‐25 Ignore Release (IgnRel) ............................6‐25 Hold Through Attack (ThrAtt) ..........................6‐26 Hold Until Decay (TilDec).............................6‐26 The PITCH Page................................6‐26 The AMP Page................................6‐26 The Algorithm (ALG) Page ............................6‐27 The DSP Control (DSPCTL) Page ..........................6‐28 The DSP Modulation (DSPMOD) Page ........................6‐29 The OUTPUT Page ................................6‐30 Pan ....................................6‐31 Pan Mode .................................6‐31 Output: Pan, Gain, and Mode..........................6‐32 Pan Table ..................................6‐32 Crossfade and Crossfade Sense (XFadeSense) ....................6‐32 Drum Remap ................................6‐32 Exclusive Zone Map ...............................6‐33 The COMMON Page ..............................6‐33 Pitch Bend Range Up and Down..........................6‐34 Monophonic ................................6‐34 Legato Play ................................6‐34 Portamento ................................6‐34 Portamento Rate..............................6‐35 Attack Portamento..............................6‐35 Globals..................................6‐35...
- Page 9 Key Tracking................................6‐45 Velocity Tracking ..............................6‐46 Source, Depth ................................6‐46 Impact..................................6‐46 The Program FX (PROGFX) Page ..........................6‐47 Insert ..................................6‐47 Aux 1, Aux 2 ................................6‐47 Output ..................................6‐47 Auxiliary Send Parameters............................6‐48 Aux1 Mod, Aux2 Mod ............................6‐48 The Layer FX (LYR_FX) Page ............................6‐49 The Controllers (CTLS) Page............................6‐50 Function Soft Buttons ..............................6‐51 Set Controllers (SetCtl)............................6‐51 New Layer (NewLyr) .............................6‐51 Duplicate Layer (DupLyr) .............................6‐51 Import Layer (ImpLyr)............................6‐51 Delete Layer (DelLyr).............................6‐51 Name ..................................6‐51 Save...................................6‐52 Delete..................................6‐52 INFO ..................................6‐52 Editing VAST Programs With KVA Oscillators......................6‐53 Basic Use of KVA Oscillators ..........................6‐53 Setting KVA Oscillator Type ..........................6‐54 Advanced Use Of KVA Oscillators ........................6‐55 Editing KB3 Programs..............................6‐60 The Tone Wheels (TONEWL) Page ..........................6‐60...
- Page 10 StealBar..................................6‐65 The PERC2 Page................................6‐65 PercLevel, DecayTime, OrgLevel .........................6‐65 The KEYCLK Page .................................6‐66 KeyClick...................................6‐66 Volume ..................................6‐66 Decay ..................................6‐66 VelTrk ..................................6‐66 Pitch ..................................6‐67 Random ..................................6‐67 ReTrigThresh ................................6‐67 Note Attack................................6‐67 Note Release ................................6‐67 The MISC Page ................................6‐68 PreampResp................................6‐68 Leakage ..................................6‐68 LeakMode ................................6‐69 SpeedCtl ...................................6‐69 VibChorCtl................................6‐69 VibChorSel................................6‐69 VolAdjust .................................6‐69 BendRngUp, BendRngDn .............................6‐69 Sustain ..................................6‐69 Sostenuto..................................6‐69 LesliePedal ................................6‐69 The EQ Page..................................6‐70 The OUTPUT Page ................................6‐70...
- Page 11 Note Map .................................7‐11 Velocity Scale (VelScale) ............................7‐12 Velocity Offset .................................7‐13 Velocity Curve (VelCurve).............................7‐15 Low Velocity (LoVel), HighVelocity (HiVel).......................7‐17 The Pan/Volume (PAN/VOL) Page ..........................7‐18 Entry Volume, Exit Volume...........................7‐18 Entry Pan, Exit Pan ..............................7‐18 The BEND Page................................7‐19 Bend Range (Semitones) and Bend Range (Cents): Up and Down ..............7‐19 Aux Bend 1 Up and Aux Bend 1 Down ......................7‐20 Aux Bend 2 Range ..............................7‐20 Controllers ..................................7‐20 Continuous Controllers ............................7‐21 Switch Controllers ..............................7‐22 The Controller Destination List ..........................7‐22 Shift Key Number, Shift Key (ShKeyNum, ShiftKey) ..................7‐27 Continuous Controller Parameters ........................7‐30 Switch Controller Parameters ..........................7‐31 The WHEEL Page................................7‐33 The SLIDER and SLID2 Pages............................7‐34 The Continuous Control Pedal (CPEDAL) Page .......................7‐35 The Pressure (PRESS) Page............................7‐36 The Footswitch Pages (FT SW1, FT SW2, FT SW3) ....................7‐37 The Arpeggiator Switch (ARP SW) Page ........................7‐38 The SWITCH Page .................................7‐39 The RIBBON Page................................7‐40...
- Page 12 Name ..................................7‐67 Save...................................7‐67 Delete..................................7‐68 New Zone (NewZn) ...............................7‐68 Duplicate Zone (DupZn) ............................7‐68 Import Zone (ImpZn).............................7‐68 Delete Zone (DelZn)...............................7‐68 TRIGGER KEYS (KEYTRG)............................7‐69 Recording A Setup To Song Mode ..........................7‐69 Chapter 8 Quick Access Mode Soft Buttons In Quick Access Mode........................8‐2 The QA Editor ..................................8‐2 Chapter 9 Effects Basic Overview.................................9‐1 Effects Stages and Routing ............................9‐1 Processor Power Allocation ............................9‐2 A Note on Modes..............................9‐3 Aux Override................................9‐3 Master Effects ................................9‐4 Effects Mode ..................................9‐5 The CHANFX Page................................9‐5 The AUXFX1 and AUXFX2 Pages ..........................9‐5 Override ..................................9‐6 Chain ..................................9‐6 Output ..................................9‐6 Mod Override................................9‐6...
- Page 13 Gated Ducking Delay.............................9‐13 DegenRegen................................9‐13 Equalizers (EQ) ................................9‐13 Enhancers.................................9‐14 EQ Morpher................................9‐14 Compressors, Expanders, and Gates .......................... 9‐14 Expansion ................................9‐15 Multiband Compression............................9‐15 Gates ..................................9‐15 Super Gate ................................9‐16 Chorus .....................................9‐16 Flanger.....................................9‐17 Quantize + Flange ..............................9‐17 LaserVerb ..................................9‐17 Filters ....................................9‐18 Resonant Filter ................................9‐18 Envelope Filter ................................9‐18 Triggered Filter................................9‐18 LFO Filter .................................9‐19 Distortion ..................................9‐19 Polydistort................................9‐20 Rotating Speakers ................................9‐20 Vibrato/Chorus................................9‐21 Tremolo and AutoPan ..............................9‐22 AutoPan ...................................9‐22 Tremolo ..................................9‐22 Pitcher....................................9‐22...
- Page 14 Pressure Map (Receive) ............................10‐8 System Exclusive ID (SysExID) ..........................10‐9 Bank Select ................................10‐9 Local Keyboard Channel (LocalKbdCh) ......................10‐10 The Channels Page...............................10‐13 Enable ..................................10‐13 Program..................................10‐13 Pan ..................................10‐14 Volume ...................................10‐14 Program Lock, Pan Lock, Volume Lock ......................10‐14 Program Change Formats............................10‐15 Extended Program Changes ..........................10‐15 QAccess ..................................10‐16 The Soft Buttons in MIDI Mode..........................10‐18 Program Change (PrgChg)..........................10‐18 Reset Channels (RsetCh)............................10‐18 Panic..................................10‐18 Chapter 11 Master Mode MAIN....................................11‐1 Tune ..................................11‐2 Transpose .................................11‐2 FX Mode...................................11‐2 Drum Remap ................................11‐2 ID Entry..................................11‐2 Setup Controllers (SetupCtls) ..........................11‐2 Master Table Lock (Master Lock) .........................11‐3 Demo Button ................................11‐3...
- Page 15 Loader....................................11‐16 About .....................................11‐16 Save ....................................11‐16 SAMPLE MEMORY (MEMORY) ..........................11‐17 MAP..................................11‐17 Defragment (Defrag) ............................11‐17 Preview Sample (PRVIEW) ............................11‐17 Chapter 12 Song Mode and the Song Editor Getting Started with the Sequencer ..........................12‐1 What is a Sequencer?..............................12‐1 Song Mode: The MAIN Page ............................12‐1 Current Song (CurSong) ............................12‐2 Tempo..................................12‐2 Recording Track (RecTrk) ............................12‐3 Program (Prog) ...............................12‐3 Track Number (Trk:#).............................12‐3 Volume (Vol)................................12‐4 Pan ....................................12‐5 Mode..................................12‐6 Location (Locat) ..............................12‐6 Mode Indicators (+ and x): ............................12‐6 Activity Indicators ..............................12‐6 Track Status Indicators............................12‐6 Track Channels................................12‐7...
- Page 16 Song Mode: The Filter Pages (RECFLT and PLYFLT).....................12‐15 Notes..................................12‐15 LoKey ..................................12‐15 Hi.....................................12‐15 LoVel..................................12‐16 Hi.....................................12‐16 Controllers ................................12‐16 Controller................................12‐16 LoVal..................................12‐16 Hi.....................................12‐16 PitchBend ................................12‐16 ProgChange ................................12‐16 MonoPress ................................12‐16 PolyPress ................................12‐16 The Rec, Play, and Stop Soft Buttons .........................12‐16 The Done Soft Button ............................12‐16 Song Mode: The MISC Page ............................12‐17 Control Chase................................12‐17 Quant ..................................12‐17 Grid..................................12‐17 Swing ..................................12‐18 Release..................................12‐18 Key Wait.................................12‐18 Song Mode: The STATS Page .............................12‐18 The Song Editor................................12‐19 Song Editor: The COMMON Page ..........................12‐19 Tempo..................................12‐19 TimeSig...................................12‐19 FX Track .................................12‐20 DrumTrack................................12‐20...
- Page 17 The Keymap Editor ...............................14‐1 Keymap Editor Parameters ...........................14‐3 The Soft Buttons in the Keymap Editor.......................14‐5 Special Double Button Presses in the Keymap Editor..................14‐6 Building a Keymap ................................14‐7 Editing Samples ................................14‐9 The Miscellaneous (MISC) Page ........................... 14‐9 The TRIM Page..............................14‐12 Appendix A Specifications MIDI Implementation Chart ............................A‐1 Specifications ...................................A‐2 Appendix B PC3K Bootloader Using the Bootloader Menu ........................... B‐1 System Update (PC3K Software, Objects, Etc.) ....................B‐2 Run Diags ‐ PC3K Diagnostics Utility ........................B‐2 System Reset................................B‐2 System Utilities ................................ B‐3 TOC-xiii...
- Page 18 Appendix C Changing PC3K Voltage Removing the fuse holder ............................C‐1 Appendix D PC3K Objects (V 1.31) Programs ..................................D‐1 Setups ....................................D‐9 Effect Presets with Algorithms ...........................D‐11 How to Use These Tables............................D‐11 Reverbs ..................................D‐11 Delays ..................................D‐15 Chorus ..................................D‐17 Flange ..................................D‐18 Phaser ..................................D‐18 Trem / Panner / Spatial............................D‐19 Rotary ..................................D‐19 Distortion ................................D‐20 Dynamics ................................D‐21 EQ / Filters ................................D‐21 Chorus / Combi..............................D‐23...
-
Page 19: Chapter 1 Introduction
Introduction Chapter 1 Introduction Greetings. Your new instrument offers amazing acoustic, electric, and synthesizer sounds, combined with sample loading and advanced programming features that will let you create almost any sound you can imagine. This manual covers the PC3K in its 88, 76, and 61‐note configurations (PC3K8, PC3K7, and PC3K6.) For the most part, anywhere we talk about the PC3K in this manual we mean any of these instruments. The PC3K comes loaded with 64 MB of ROM sounds, powered by Kurzweil’s newest custom chip set. In addition to the great sounds and programming features, the PC3K is fully equipped with performance features you’ll use at every gig. For example, there are nine conveniently situated sliders for accurately emulating the drawbars on a tone wheel organ such as a Hammond B3™. And the PC3K’s 24 dedicated sound select buttons, along with its Quick Access banks will let you instantly choose and change sounds whenever you like. In addition to the many impressive features and sounds of the PC3, the PC3K allows users to tap into the massive wealth of samples and programs developed for our legendary K Series over the past 18 years. The PC3K is capable of loading most K series object files (with extensions .KRZ, .K25, or .K26,) including samples, keymaps, programs, and setups, (see Appendix E for details,) once again underscoring our commitment to the concept of non‐obsolescence by design. Additionally, the PC3K can load .PC3 files that were created with the PC3. The PC3K can also load WAVE and AIFF files (see page 13‐7 for details.) You can choose to delve into the extensive libraries of existing K Series samples or decide to fill the PC3Kʹs flash memory with your own custom samples. In either case, you have the most powerful version of Kurzweilʹs V.A.S.T technology ever developed at your fingertips to help sculpt your sounds. Sample files can be loaded via USB from a thumb‐drive or directly from a computer. The PC3K offers 128 megabytes of user sample memory, and samples remain loaded even while power is off. Once samples are loaded into the PC3Kʹs flash memory, there is zero load time for those samples when powering on the instrument. Advanced program, keymap and sample editing features allow you to customize your sounds further. Youʹre able to map any sample to any key, tune individual samples, change the start, alt start, loop point and end point of samples and even assign a controller to adjust sample start point in real‐time. If you’ve used other Kurzweil gear, you’ll have no trouble getting up and running quickly. Bear in mind, however, that the PC3K’s beauties are more than skin‐deep; you’ll want to read this manual, as well as the materials at the www.kurzweil.com website to take full advantage of your instrument. ... -
Page 20: Keeping Current
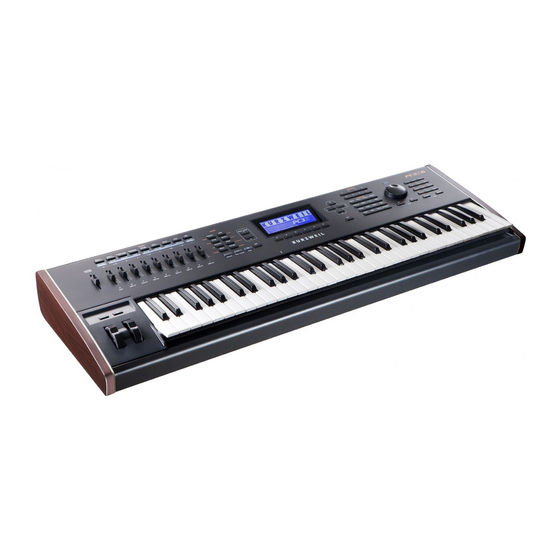
Introduction Keeping Current Keeping Current Check for new documentation and operating system upgrades before you start using your instrument. When new software is available for the PC3K, it will be posted at www.kurzweil.com. You’ll use the PC3K’s Boot Loader (described in this manual) to upgrade your instrument to use the new software. Pictured below is the 88‐key PC3K8. Overview of the PC3K The PC3K’s 800+ programs include the Orchestral and Contemporary sound blocks, General MIDI (GM), Stereo Triple Strike Piano, Classic Keys for realistic vintage electric piano sounds, and new String Sections. Multi‐zone performance setups are also provided; many of these setups use note triggers to play factory‐recorded songs that provide grooves and arpeggiation that make great templates for performance or recording. An on‐board sequencer with front panel transport buttons lets you record your ideas any time inspiration strikes. This sequencer (Song mode) lets you play back MIDI type 0 or 1 sequences, record and play back your own songs, and record multi‐timbral sequences received via MIDI. Before we get into explaining VAST, here are a few of the features that by themselves make the PC3K an impressive stage and studio machine. It has 128‐voice polyphony and is fully multi‐ timbral, so that different programs can be played on each MIDI channel. There’s an on‐board digital effects processor providing multiple simultaneous effects, including real‐time effects control, internally or via MIDI. In fact, the PC3K offers more effects processing power than Kurzweil’s much‐lauded KSP8 studio effects processor. The PC3K offers 128 megabytes of user sample memory. Samples can be loaded via USB from a thumb‐drive or directly from a computer, and samples remain loaded even while power is off. Once samples are loaded into the PC3Kʹs flash memory, there is zero load time for those samples when powering on the instrument. The PC3K is compatible with most K series object files (with extensions .KRZ, .K25, or .K26,) including samples, keymaps, programs, and setups (see Appendix E for details.) Additionally, the PC3K can load .PC3 files that were created with the PC3. The PC3K can also load WAVE and AIFF files (see page 13‐7 for details.) In addition to the standard stereo audio output pair, there are two additional balanced analog outputs, as well as a digital output. All of the outputs are available to you simultaneously. For backup, storage, and moving files, there’s two types of USB ports on the back panel of the ... -
Page 21: How The Pc3K Works
Introduction How the PC3K Works How the PC3K Works The PC3K integrates three MIDI‐driven components: a MIDI controller (the keyboard, or an external MIDI controller), a sound engine, and an effects processor that employs the same effects used in Kurzweil’s KSP8. The sound engine responds to the MIDI events generated by the MIDI controller, and turns them into sounds that are processed within the variable architecture of the algorithms—or by oscillators for KB3 programs. The resulting sound can then be routed through the PC3K’s effects and to the audio outputs. VAST Synthesis The PC3K’s Variable Architecture Synthesis Technology (V.A.S.T.) lets you build sounds from realistic instrumental samples and sampled synth waveforms—then modify the nature of those sounds through a wide variety of digital signal‐processing (DSP) functions. The PC3K also generates its own synth waveforms, which can be combined with the samples or used on their own. While many other synthesizers may offer a fixed set of DSP tools (typically filtering, pitch, and amplitude modulation) the PC3K’s Variable Architecture lets you arrange a combination of DSP functions from a long list of choices. The functions you choose define the type of synthesis you use. Each layer of every program has its own DSP architecture, which we call an algorithm. Within each algorithm, you can select from a variety of DSP functions. Each function can be independently controlled by a variety of sources including LFOs, ASRs, envelopes, a set of unique programmable functions (FUNs), as well as any MIDI control message. The many different DSP functions and the wealth of independent control sources give you an extremely flexible, truly vast collection of tools for sound creation and modification. The PC3K offers powerful editing features we call Dynamic V.A.S.T. and Cascade Mode. • Dynamic V.A.S.T. allows you to “wire” your own algorithms, combining different DSP functions in any order you like, including parallel and serial configurations. • Cascade Mode lets you route any layer of a program into the DSP of any other layer. Any of the 32 layers of a program can go into any other layer. When you’re ready to jump in and start creating programs, turn to Chapter 6. -
Page 22: How To Use This Manual
How to Use This Manual This manual describes how to connect and power up your PC3K, getting around the front panel, and a brief description of the operating modes. For information on editing and advanced programming features, refer to additional material provided on the Kurzweil website: http://www.kurzweil.com The best way to read this manual is with your PC3K in front of you. By trying the examples we give to illustrate various functions, you can get a quick understanding of the basics, then move on to the more advanced features. Do I Have Everything? Your PC3K shipping carton should include the following in addition to your instrument: • Power cable • Sustain pedal • USB cable • Getting Started manual (this book) • Warranty card If you don’t have all of these components, please call your Kurzweil/Young Chang dealer. You may also want to purchase a USB thumb drive for portable backups and storage. Boot Loader When you need to update the PC3K’s software or run diagnostic tests, you’ll use the Boot Loader. To bring up the Boot Loader, hold down the Exit button (below the cursor buttons, to the right of the display) while powering on your PC3K. Refer to Appendix B for details on the Boot Loader. Battery The PC3K uses a CR2032 battery to power its clock. The battery should last five years, and a message will tell you when the battery needs replacing. The access panel on the bottom of the PC3K (which you can easily remove with a screwdriver) allows you to get at the battery for removal and replacement. CAUTION: Danger of explosion if battery is incorrectly replaced. Replace only with the same or equivalent type (CR2032). -
Page 23: Options
Introduction Options Options Ask your Kurzweil dealer about the following PC3K options: Sound ROM Expansion Card The PC3K has a socket for a 64 MB expansion card to add additional Kurzweil ROM sounds. This is user installable (the expansion kit comes with complete instructions). Pedals The PC3K has jacks for three switch pedals (for functions like sustain or program/setup changes) and two continuous pedals (for functions like volume control and wah). Your Kurzweil dealer stocks the following optional pedals: FS‐1 Standard box‐shaped switch pedal KFP‐1 Single piano‐style switch pedal KFP‐2M Double piano‐style switch pedal unit CC‐1 Continuous pedal Ribbon Controller There’s a dedicated modular jack (like a telephone jack) on the rear panel of the PC3K for connecting this 600‐mm (24‐inch) ribbon controller. You can configure the PC3K to use the ribbon as a single large controller, or a three‐section controller with independent settings for each section. Breath Controller You can plug a Yamaha (or equivalent) breath controller into the dedicated jack on the PC3K’s rear panel. - Page 24 Introduction Options...
-
Page 25: Chapter 2 Startup
Startup Make Connections Chapter 2 Startup If hooking up new gear is familiar to you, and you just want to get going, here’s a quick description of what you need to get started with your PC3K. If you need more information, thorough descriptions of each step follow. Make Connections 1. Set the keyboard on a hard, flat, level surface. Make sure to leave plenty of room for ventilation. 2. Four adhesive‐backed rubber feet are provided with your PC3K. If you want to attach them to the bottom of the PC3K(recommended to prevent scratching your tabletop), carefully turn the keyboard over, remove the paper backing from the rubber feet and attach them now, near each corner, all on the same level. 3. Connect the power cable. 4. Make sure your sound system is at a safe volume level. Also make sure that the PC3K’s MASTER VOLUME slider (on the far left side of the front panel) is all the way down. 5. Plug in a pair of stereo headphones or run standard (1/4‐inch) audio cables from your amplifier or mixer to the MIX audio outputs on the PC3K. (Use the Main Left out for mono.) Balanced (“TRS” or “Stereo”) cables are recommended. Make Music 1. Power up your PC3K, raise the level of the MASTER VOLUME slider, and check out some of the programs and setups. The PC3K starts up in Program mode by default. Press one of the mode buttons to the left of the display to switch modes. 2. If you hear distortion, reduce the gain on your mixing board, or use the pad if it has one. 3. Scroll through the program list with the Alpha Wheel, or the dedicated Category and Program buttons, and try the PC3K’s many sounds. -
Page 26: Startup-The Details
Startup Startup—the Details Startup—the Details This section walks you through the hookup of your PC3K. We’ll take a look at the rear panel, then describe the power, audio, and other cable connections. Before You Start... Don’t connect anything until you make sure your PC3K is properly and safely situated. Also, if your PC3K has been out in the cold, give it time to warm up to room temperature before starting it, since condensation may have formed inside the PC3K. It is normal for the rear panel near the MIDI jacks to become warm after a while. Connecting the Power Cable (Line Cord) The PC3K runs on AC power: 100, 120, 230, or 240 volts at 50–60 Hz. Your dealer will set the voltage switch to match the voltage in your area. The voltage level is set with a selector on the rear panel of the PC3K. Unless you are sure it needs to be changed, you shouldn’t adjust this. When you’ve connected the cable at the PC3K end (as you face the back of the PC3K, the power connection is at the right), plug it into a grounded outlet. If your power source does not have the standard three‐hole outlet, you should take the time to install a proper grounding system. This will reduce the risk of a shock. Connecting Audio Cables Analog After you’ve turned down the level on your sound system, connect the PC3K’s analog audio outputs to your sound system using a pair of stereo or mono audio cables. Mono cables will always work, but if you’re going into balanced inputs, use stereo cables for a better signal‐to‐ noise ratio and a bit more volume. The PC3K’s analog outputs are balanced, and generate a “hotter” signal than some previous Kurzweil instruments. You’ll find four 1/4‐inch balanced audio output jacks on the rear panel. For now, connect one end of each audio cable to your mixing board or PA system inputs, and connect the other end to the jacks marked Main Left and Right on the rear panel of the PC3K. If you have only one input available, use the PC3K’s Main Left output to get the full signal in mono. -
Page 27: Connecting Midi
Startup Startup—the Details Digital For digital audio output from the PC3K, connect a 75‐Ohm coaxial cable from the PC3K’s RCA Digital Out jack to the AES or S/PDIF input of the receiving device. You may need an RCA‐to‐ XLR adapter to connect with the receiving device. If the receiving device receives only optical signals, you’ll need a converter as well. The PC3K’s Master Page (press the Master mode button) lets you select a range of useful sample rates for the digital output. The RCA jack labeled ʺSync Inʺ allows you to synchronize the PC3Kʹs S/PDIF Digital Audio output sample rate to an external S/PDIF source. Although no audio signal is received by the ʺSync Inʺ jack, its clock is received and may be used to set the output sample rate. For more, please see Master Mode Page 1: Digital Output on page 11‐9. NOTE: Sync In is NOT a ʺWord Clockʺ input. Only a valid S/PDIF signal is recognized. Connecting MIDI The simplest MIDI configuration uses a single 5‐pin MIDI cable: either from the MIDI Out port of your PC3K to the MIDI In port of another instrument, or from the MIDI Out port of another MIDI controller to the MIDI In port of the PC3K. There are all sorts of possible configurations, including additional synths, personal computers, MIDI effects processors, and MIDI patch bays. Depending on your system, you may want to use the PC3K’s MIDI Thru port to pass MIDI information from a MIDI controller to the PC3K and on to the next device in your system. You can also connect MIDI devices to the PC3K’s MIDI Out port, which can send channelized MIDI information from the keyboard or through the PC3K from your MIDI controller. The MIDI Thru port can be configured to serve as an additional MIDI Out by sliding the nearby switch to the Out position. You can also use the PC3K’s USB port to send and receive MIDI. By default the PC3K will show up as a USB MIDI device. If you choose USB Temporary Drive from Storage mode, the PC3K will temporarily (while on that Storage mode page) become a “virtual storage device” and USB MIDI will be disabled. Different host programs on your computer may indicate various errors as the USB MIDI device is no longer present. Leaving Storage mode will restore USB MIDI functionality. USB MIDI and 5‐pin MIDI can be used at the same time; the MIDI signals will be combined into a single 16‐channel MIDI stream. -
Page 28: Pedals
Startup Startup—the Details Pedals Plug your switch or continuous pedals into the corresponding jacks on the PC3K’s rear panel. We recommend using the Kurzweil pedals described on page 1‐5, but you can use almost any switch or continuous pedal, as long as it adheres to the following specifications (as most pedals do): Switch pedals ‐inch tip‐sleeve plug Continuous pedals 10‐kOhm linear‐taper potentiometer, ‐inch tip‐ring‐sleeve plug with the wiper connected to the tip. If you use a third‐party (non‐Kurzweil) switch pedal, make sure it’s connected before you turn on your PC3K. This ensures that the pedal will work properly (it might function backward—off when it’s down and on when it’s up—if you turn on your PC3K before plugging in the pedal). Similarly, don’t press any of your switch pedals while powering up, because the PC3K verifies each pedal’s orientation during power up. If you’re pressing a pedal, you might cause it to work backward. The pedals are independently programmable within each zone of every setup. Here are the default settings for the five pedals you can use with the PC3K: Switch Pedal 1 Controller 64 (Sustain) Switch Pedal 2 Controller 66 (Sostenuto) Switch Pedal 3 Controller 67 (Soft) Continuous Control Pedal 1 Controller 11 (Expression / Volume) Continuous Control Pedal 2 Controller 4 (Foot Pedal) produces a “wah” effect in many setups Breath The 3.5mm jack labeled Breath accepts a standard breath controller, which sends standard MIDI Breath (MIDI 2) messages. The PC3K’s preset programs and setups don’t respond to breath, but if you have other instruments that do respond to Breath, you can control them from the PC3K via MIDI. You can also program the PC3K so that the breath controller sends a different MIDI message. This would enable you to use a breath controller to affect the PC3K, but then other instruments ... -
Page 29: Ribbon
Startup Startup—the Details Ribbon Plug the optional Kurzweil Ribbon Controller into the modular Ribbon jack on the rear panel. The ribbon controller itself should rest on a flat surface; it fits nicely between the keys and the buttons and sliders on the front panel. The ribbon is a continuous controller. You can program the ribbon controller to send MIDI Controller messages 1–127, as well as several specialized messages. It generates values of 0–127 for whatever MIDI Controllers you assign it to send. Just press it, and slide your finger along the ribbon to change the value of the message it’s sending. You can configure the ribbon to have one control section that runs its entire length, or to have three sections of equal length. It sends its highest values when you press it at the end where the cable connects. When you configure it to have three sections, each section sends its highest values at the end closest to the cable. Caution: The modular jack is designed for connection to the Kurzweil Ribbon Controller option only. Don’t plug any other modular plugs into the Ribbon jack. Switching On the Power The PC3K’s power switch is on the rear panel, adjacent to the power cable connection. When you power up, the display briefly shows some startup information. The Program mode display then appears. It looks like the diagram below, though your PC3K may be different from the example. The first time you power up (or after a reset), your instrument will be set to operate on MIDI Channel 1 (as shown at the far right of the top line above). Set the volume at a comfortable level. You’ll get the best signal‐to‐noise ratio if you keep the PC3K at full volume, and adjust the level from your mixing board. You may also want to adjust the display contrast and brightness. There are two small knobs on the rear panel of the PC3K for this purpose. -
Page 30: Usb Storage Port
Startup Startup—the Details USB Storage Port You can plug a USB mass storage device such as a “thumb drive” into the PC3K for backing up, archiving, sharing your work, and updating your software. Any size USB mass storage device will work, though thumb drives are recommended for their portability, durability, and low price. The USB Storage port is on the back panel of the PC3K, but it is easily accessible from the front of the instrument. A USB connector will only fit into the port if oriented properly, so don’t force it into the port, as this may damage your PC3K or USB device. If you are having trouble inserting your USB connector into the port, try flipping the connector over. Caution: Do not remove a USB device while the display says Loading... or Saving.. Removing a USB device during a file transfer can cause data corruption. USB Computer Port Next to the USB Storage port on the back panel of the PC3K is a USB Computer port. The USB Computer port works for MIDI (transmit and receive) or to connect your PC3K to a computer for file transfer. By default, the USB port is set to MIDI mode. When selecting USB PC connection in Storage mode, USB MIDI will temporarily be disabled. We recommend that you use the USB cable provided with your PC3K and do not use extension USB cables. The PC3K’s USB Computer port is only intended for connection to a USB Type A port. In USB Storage mode, a ʺPC3Kʺ virtual drive will appear on your computer desktop. One important thing to know here is that this is a virtual drive. You can save to this drive from the PC3K, but you must immediately transfer that file to your desktop (or other folder). You must copy data from the PC3K virtual drive to your computer’s drive or else the data will be lost. Note: When transferring files to and from the PC3K via the USB Computer Port, the maximum size of files that can be transferred is approximately 1.6MB. This is suitable for most objects. For transferring audio sample files, use the USB Storage Port with a USB mass storage device such as a “thumb drive.” When using the USB Storage Port to transfer files, the file size that can be transferred is limited only by the size of the USB mass storage device, and the PC3K’s available object and sample memory. When you leave Storage Mode, there will be a prompt telling you that the PC3K is turning back into a USB MIDI device ‐ which you have to acknowledge. If you haven’t copied the file(s) to your desktop (or other place on the computer) it won’t be on the virtual disk when you leave storage mode. Depending on your computer’s operating system, you may sometimes see a scary device ... -
Page 31: Setting The Clock
Startup PC3K Programs Setting the Clock The first time you start up your PC3K is probably a good time to set the instrument’s clock to your current local time. Do this from the Master Page. The clock will time‐stamp your files that have been stored via USB. PC3K Programs The PC3K powers up in Program mode, where you can select and play programs (called patches, presets, or voices on other instruments). Programs are preset sounds composed of up to 32 layers of samples or waveforms. If you’ve left Program mode, just press the Program mode button or Exit button to return. Selecting Programs When you are in Program mode, there are four basic ways to select a PC3K program: • Press one of the Bank buttons (above the sliders on the left side of the front panel) to select a bank, then press a Category button and a Program button to choose within the bank. The Category and Program buttons are on the front panel, between the screen and the alpha wheel. • Type the program’s ID (number) on the alphanumeric buttonpad, then press Enter. If you make a mistake, press Clear, then start over. • Scroll through the list using the Alpha Wheel • Scroll through the list using the Plus or Minus button under the Alpha Wheel, or the cursor buttons (the arrow buttons to the right of the display). The PC3K has various settings for responding to MIDI Program Change commands from external sources. These are explained in Chapter 10, so we won’t go into them here. You should be able to change programs by sending Program Change commands from your MIDI controller. Easy Audition Any time you want to hear what a program sounds like, highlight the program’s name (while in Program mode) then press the Play/Pause button to play a brief sample. The Demo Button parameter on the Master Mode II page must be on for Easy Audition to work; the parameter is ... -
Page 32: Vast Programs
Startup PC3K Programs Info Box There’s a box at the left side of the display. The info box, as it’s called, displays information about the current program (there’s also an info box for Setup mode). Soft buttons On most PC3K screens, the bottom line of the display identifies the function of each of the buttons beneath the display. We call these buttons soft buttons, because they do different things depending on what’s currently showing in the display. In Program and Quick Access modes, you can change octaves with the Octav‐ and Octav+ buttons under the display. The Info soft button shows you relevant details about the current item. The Xpose‐/Xpose+ buttons are a shortcut for quick transposition in semitone (half step) increments. You can use them to transpose the entire PC3K as much as three octaves up or down. The top line of the display shows the current amount of transposition (Xpose). Press both Xpose buttons simultaneously to return transposition to zero. The Panic button (or a double press of Cancel and Enter at the bottom of the alphanumeric keypad) sends an All Notes Off message and an All Controllers Off message—both to the PC3K and over all 16 MIDI channels. You won’t need it often, but it’s nice to have. VAST Programs A “normal” VAST program is what most of the factory programs are. The info box contains details about the different layers in each program, usually indicating the keymap used in each layer. The line under the keymap name indicates the layer’s keyboard range. In this case, only the first two displayed layers extend across the entire keyboard (A 0 to C 8). The × symbol to the right of each layer shows that the keymap is a stereo keymap. KB3 Programs KB3 (organ) programs differ from VAST programs in that they don’t have layers. Instead they rely on oscillators that mimic the tone wheels used in many popular organs. Consequently, the info box shows only the waveform used in the program. Because of their architecture, KB3 programs require different processing within the PC3K. KB3 programs play only on a single channel at a time (VAST programs will work fine on that channel, too). The quickest way to get to the KB3 programs is by pressing the KB3 button that’s above the sliders. When you’re ready to start doing your own programming, check out Chapter 6. -
Page 33: Setups
Setups Setups Setups are preset combinations of programs. Setups can have up to 16 zones, each of which can be assigned to any range of the keyboard (overlapping or split). Each zone can have its own program, MIDI channel, and MIDI control assignments, as well as riff and arpeggiator settings. Press the Setup mode button to the left of the display. Its LED will light, telling you that you’re in Setup mode. Notice that the Setup mode display is similar to the Program mode display. If the setup has four or fewer zones, the box at the left shows you the programs assigned to each of the setup’s zones. If the setup is composed of more than four zones, then the box displays the first four zones; at the top of the box will be text showing the total number of zones. See page 7‐1 for a more detailed description. Many setups include arpeggiation and note‐triggered songs to create some pretty amazing grooves that you can use as is, or as templates for your own material. As you play with these setups, experiment with the sliders and other controllers for a wide range of effects. Some of these grooves keep playing after you’ve released the keys that got them going. When you want to stop them, select another setup, or press the Setup mode button (or Stop for riffs). Quick Access A really convenient way to select programs and setups is to use Quick Access mode, where you select a Quick Access bank from a list of factory preset or user‐programmed banks. Each bank contains ten memory slots, or entries, where you can store any combination of programs or setups. While you’re in Quick Access mode, you can select any program or setup in the bank with buttons 0 through 9 or the cursor keys. The PC3K comes with a few Quick Access banks already programmed so you can get an idea of how they work. You’ll probably create your own Quick Access banks to help you select programs and setups with a minimum of searching. Press the Quick Access mode button to the left of the display. Its LED lights, to tell you you’re in Quick Access mode. The top line of the display tells you which Quick Access bank is selected. Use the Chan/Layer buttons (to the left of the display) to scroll through the banks. The names of each of the ten entries in the bank are listed in the center of the display. Many of their names will be abbreviated. The currently selected entry’s full name is shown near the bottom of the display. The amount of transposition is displayed to the left of the entry name. If the current entry is a program, you’ll see the current keyboard (MIDI) channel displayed to the right of the entry’s name. If it’s a setup, you’ll see the word Setup. The entries on the Quick Access page are arranged to correspond to the layout of the numeric buttons on the alphanumeric pad. When you’re ready to create your own Quick Access banks, turn to Chapter 8 to learn about the Quick Access Editor. -
Page 34: The Other Modes
Startup The Other Modes The Other Modes There are five other mode buttons on the front panel. See Chapters 3 and 4 for more detailed descriptions of the modes. Effects mode Enable/disable effects presets, and set Aux overrides. MIDI mode Configure the PC3K for sending and receiving MIDI information. Master mode Define performance and control settings. Song mode Record and edit sequences (songs); play Type 0 and Type 1 MIDI sequences. Storage mode Load and save programs, setups, sequences, and other objects via USB device. Software Upgrades It’s easy to upgrade the PC3K’s operating system and objects (programs, setup, etc.) using the boot loader to install upgrades into flash ROM. When upgrades are available you can download them from www.kurzweil.com and install them via one of the PC3K’s two USB ports. As upgraded software becomes available, you can either get files from your Young Chang dealer or download the new stuff from the Web. To stay in touch, check out our Web site: www.kurzweil.com When you’ve acquired an upgrade, you can install it yourself in a matter of minutes. Use the Boot Loader, as described in Appendix B. 2-10... -
Page 35: User Interface Basics
User Interface Basics Mode Selection Chapter 3 User Interface Basics This chapter will show you how to get around the front panel of your PC3K. Your interactions can be divided into three primary operations: mode selection, navigation, and data entry. There is also an assignable control section. Mode Selection The PC3K is always in one of eight primary operating modes. Select a mode by pressing one of the mode buttons — they’re to the left of the display. Each mode button has an LED that lights to indicate the current mode. Only one mode can be selected at a time. Program mode Select and play programs, and modify them with the Program Editor. Setup mode Select and play setups (16 keyboard zones with independent MIDI channel, program and control assignments), and modify them with the Setup Editor. Quick Access mode Select from a list of preset banks, each containing a list of ten programs and/or setups that can be viewed in the display for easy selection. Modify the preset banks and create your own with the Quick Access Editor. Effects mode Enable/disable effects or set Aux overrides. MIDI mode Define how your PC3K sends and receives MIDI information, and configure each channel to receive independent program, volume, and pan messages that override the normal Program mode settings. Master mode Define performance and control characteristics for the entire PC3K. -
Page 36: Mode Buttons
User Interface Basics Mode Buttons Song mode Use the PC3K’s sequencer to record and play back your keyboard performance, play Type 0 and Type 1 MIDI sequences, and record multi‐ timbral sequences received via MIDI. Storage mode Interface with the PC3K’s USB storage or computer ports to load and save programs, setups, samples, and more. The PC3K’s tone wheel organ emulation is called KB3 mode. You automatically enter this mode when you select a KB3 program. The KB3 Bank button takes you there directly. Mode Buttons When you press a mode button, its LED lights up to indicate that the mode has been selected. If pressing a mode button does not light its LED, press the Exit button one or more times, then try again. Additional labeling for each mode button indicates special functions that relate to some of the PC3K’s editors. Bank Buttons The Bank buttons, situated in the top left corner of the PC3K’s front panel, let you choose different banks of programs (e.g., KB3 programs or Classic Keys programs). Within each bank, you can use the Program and Category buttons (to the right of the display) to select individual programs. The Bank buttons have special functions in KB3 mode, indicated by labels beneath each button. -
Page 37: Sliders
User Interface Basics Sliders Sliders In KB3 mode, the PC3K’s nine sliders emulate an organ’s drawbars. For example, slider A emulates an organ’s 16’ drawbar. In other modes, the sliders can be used to send values for different MIDI controllers. In either case, you may have to move the slider past the current value for its selected function before slider movement will have any effect. Most VAST programs use the sliders for these functions: Data Filter frequency, Brightness MIDI 13 Filter resonance, Tremolo rate control MIDI 22 Layer volume, Envelope control, Lo EQ MIDI 23 Layer volume, Envelope control, Hi EQ MIDI 24 Layer volume for thumps and release MIDI 25 FX control 1 MIDI 26 FX distortion drive MIDI 27 FX distortion warmth MIDI 28 Reverb / delay control... -
Page 38: Program And Category Buttons
User Interface Basics Program and Category Buttons Program and Category Buttons Use the Program and Category buttons, in conjunction with the Bank buttons, to directly select PC3K programs. Each of the 16 categories contains 8 programs. Picking favorites When you select a program within a category, your selection will be remembered. For example, choose program 3 in the Organ category (press Category: Organ, then Program: 3). Now move to the strings by pressing the Category: Strings button. If you press the Category: Organ button again, you will be returned to program 3 in the Organ category. In this way, each category can have a “favorite” program. You can make program selections within each category ahead of time. This way, you’ll be able to access the program you want in any category simply by pressing appropriate category button. Important things to remember about your “favorites”: • You must save your PC3K’s Master Table to remember your selections across power cycles. See Chapter 11 for information about the Master Table. • Your selections are bank‐dependent. In other words, you can save eight in the Base 1 bank, eight in the Exp 1 bank, etc. -
Page 39: Pitch Wheel And Mod Wheel
User Interface Basics Pitch Wheel and Mod Wheel Pitch Wheel and Mod Wheel Pitch To the left of the PC3K’s keyboard are the Pitch Wheel and the Mod Wheel, as well as the SW and Arp buttons. Push the Pitch Wheel away from you to raise the pitch of the note(s) you are playing. Pull it towards you to lower the pitch. Most programs are set so that the pitch wheel will raise and lower pitch by a whole step, although some programs use the pitch wheel to lower pitch by as much as an octave. The Pitch Wheel has a spring so that it will snap back to place (i.e., back to the original pitch) when you release it. The Mod Wheel performs a variety of functions. Different programs may use it for filter sweeps, tremolo/vibrato, wah, or layer volume. The Arp button turns on and off the PC3K’s Arpeggiator. The SW button (MIDI 29) can be programmed to do a variety of things. Often it is used for layer enable or effect enable. -
Page 40: Navigation
User Interface Basics Navigation Navigation The navigation section of the front panel consists of the display and the buttons surrounding it. These navigation buttons will take you to every one of the PC3K’s programming parameters. The Display Your primary interface with the PC3K is its backlit graphic display. As you press various buttons, this fluorescent display reflects the commands you enter and the editing changes you make. The ample size of the display (240‐by‐64 pixels) enables you to view lots of information at one time. Pages Within each mode, the functions and parameters are organized into smaller, related groups that appear together in the display. Each one of these groups of parameters is called a page. Each mode has what we call an entry‐level page; it’s the page that appears when you select that mode with one of the mode buttons. Within each mode and its editor(s), the various pages are selected with the navigation buttons. There are many pages, but there are a few features common to each page. The illustration below shows the entry‐level page for Program mode. The Top Line On the top line of most pages, there’s a reminder of which mode you’re in and which page you’re on. Many pages display additional information in the top line, as well. The Program‐mode page above, for example, shows you the current amount of MIDI transposition and the currently selected MIDI channel. The top line is almost always “reversed”—that is, it has a white background with blue characters. The Bottom Line The bottom line is divided into six (sometimes fewer) sets of reversed characters that serve as labels for the six buttons directly beneath the display. These labels—and the functions of the buttons—change depending on the currently selected page. Consequently the buttons that select these functions are called “soft” buttons. -
Page 41: The Soft Buttons
User Interface Basics Navigation The Soft Buttons The soft buttons are called “soft” because their functions change depending on the currently selected mode and page. Sometimes they perform specific functions, like changing MIDI channels in Program mode. In the Program Editor and other editors, they’re also used to move to different pages of programming parameters. If a soft button’s label is in all capital letters (KEYMAP, for example), pressing the corresponding soft button takes you to a page of parameters. If the soft button is labeled in lower‐case or mixed‐case letters (Save, for example), the soft button performs some kind of function. The Cursor Buttons To the right of the display are four buttons arranged in a diamond fashion. These are called the cursor buttons. They move the cursor around the currently selected page, in the direction indicated by their labels. The cursor is a highlighted (reversed) rectangle (sometimes it’s an underscore). It marks the value of the currently selected parameter. Programming the PC3K involves selecting various parameters and changing their values. Select parameters by highlighting their values with the cursor. You can change the highlighted value with any of the data entry methods described in the data entry section below. The Chan/Layer Buttons To the left of the display are two buttons labeled Chan/Layer. Their function depends on the current mode. In Program mode, for example, they shift through the MIDI channels, showing the program assigned to each channel. This changes the MIDI channel the PC3K uses internally, as well as the channel you’re using to send information to other synths connected to the PC3K’s MIDI Out port (MIDI slaves). Changing the current MIDI channel also changes the corresponding setting on the MIDI mode TRANSMIT page. When you press both Chan/Layer buttons at the same time you will be returned to Channel 1, Check out the chart on page 3‐10 for more shortcuts you can make with double button presses. When you’re in the Program Editor, the Chan/Layer buttons let you view each layer in the program. You can see the corresponding parameters in each layer by scrolling through the layers with these buttons. In the Setup Editor, the Chan/Layer buttons scroll through the zones in the current setup. In Quick Access mode, they scroll through the Quick Access banks, and in ... -
Page 42: The Edit Button
User Interface Basics Navigation The Edit Button The Edit button activates each of the PC3K’s editors, and acts as a shortcut to many pages within the Program Editor. Pressing the Edit button tells the PC3K that you want to change some aspect of the object marked by the cursor. For example, when a program is selected and you press Edit, you enter the Program Editor. If a setup is selected, you enter the Setup Editor. There are editors accessible from just about every operating mode. To enter an editor, choose one of the modes (mode selection), and press Edit. An editing page for that mode will appear. You can then select parameters (navigation) and change their values (data entry). If the value of the selected parameter has its own editing page, pressing the Edit button will take you to that page. For example, in the Program Editor, on the PITCH page, you might see LFO1 assigned as the value for Pitch Control Source 1. If you select this parameter (the cursor will highlight its value—LFO1 in this case), then press the Edit button, you’ll jump to the page where you can edit the parameters of LFO1. Naturally, you can find every page in the current editor by using the soft buttons, but often it’s easier to use the Edit button shortcut. The Exit Button Press Exit to leave the current editor. If you’ve changed the value of any parameter while in that editor, the PC3K will ask you whether you want to save your changes before you can leave the editor. See Chapter 5 for information on saving and naming. The Exit button also takes you to Program mode if you’re on the entry level page of one of the other modes. If at some point you can’t seem to get where you want to go, press Exit one or more times to return to Program mode, then try again. -
Page 43: Data Entry
The Alpha Wheel The Alpha Wheel is especially useful because it can quickly enter large or small changes in value. If you turn the Alpha Wheel one click to the right, you’ll increase the value of the currently selected parameter by one increment. One click to the left decreases the value by one increment. If you turn it rapidly, you’ll jump by several increments. You can also use the Alpha Wheel to enter names when you’re saving objects. The Plus/Minus Buttons These buttons are located just under the Alpha Wheel. The Plus button increases the value of the currently selected parameter by one, and the Minus button decreases it by one. These buttons are most useful when you’re scrolling through a short list of values, or when you want to be sure you’re changing the value by one increment at a time. One press of the Plus or Minus button corresponds to one click to the right or left with the Alpha Wheel. These buttons will repeat if pressed and held. Pressing the Plus and Minus buttons simultaneously will move you through the current list of values in large chunks instead of one by one. Don’t confuse these buttons with the +/‐ button on the alphanumeric pad. This button is used primarily for entering negative numeric values and switching from uppercase to lowercase letters (and vice versa). The Alphanumeric Pad As its name implies, this set of 14 buttons lets you enter numeric values, and to enter names one character at a time. Depending on where you are, the PC3K automatically enters letters or numerals as appropriate (you don’t have to select between alphabetic or numeric entry). When you’re entering numeric values, press the corresponding numeric buttons, ignoring decimal places if any (to enter 1.16, for example, press 1, 1, 6, Enter). The display will reflect your entries, but the value won’t actually change until you press Enter. Before pressing Enter, you can return to the original value by pressing Cancel. Pressing Clear is the same as pressing 0 without pressing Enter. When entering names, you can use the Left/Right cursor buttons or the <<< / >>> soft buttons to move the cursor to the character you want to change. Use the labels under the alphanumeric buttons as a guide to character entry. Press the corresponding button one or more times to insert the desired character above the cursor. The Cancel button is equivalent to the >>> soft button, and Enter is the same as OK. The Clear button replaces the currently selected character with a space. The +/‐ button toggles between uppercase and lowercase letters. There’s also a convenient feature called keyboard naming, which lets you use the keyboard to enter characters in names. See page 5‐5. -
Page 44: Double Button Presses
User Interface Basics Data Entry Double Button Presses Pressing two or more related buttons simultaneously executes a number of special functions depending on the currently selected mode. Make sure to press them at exactly the same time. …pressing these In this mode buttons …does this: or editor… simultaneously… ARP, SW Brings up quick arpeggiator configuration page. Octav-, Octav+ Reset MIDI transposition to 0 semitones. Double-press again to go to previous transposition. -
Page 45: Intuitive Data Entry
Intuitive Data Entry Intuitive Data Entry Many parameters have values that correspond to standard physical controllers. In many cases, you can select these values “intuitively,” rather than having to scroll through the Control Source list. Do this by selecting the desired parameter, then holding the ENTER button while moving the desired physical control. For example, on the LAYER page in the Program Editor, you can set the range of the currently selected layer as follows: use the cursor buttons to move the cursor to the value for the LoKey parameter, press (and hold) the Enter button, then press the note you wish to be the lowest note for the currently displayed layer. The note you triggered will appear as the value for the LoKey parameter. Repeat the process for the HiKey parameter. Another example: select Program 199 while in Program mode. Press Edit to enter the Program Editor. Press the PITCH soft button to select the PITCH page. Move the cursor to the Src1 parameter. Hold the Enter button, and move the Pitch Wheel. PWheel will be selected as the value for Src1. You can also use the keyboard to choose control sources, since most key numbers correspond to a value on the control source list. If you have a certain control source that you use over and over (for example, LFO1), this can be the quickest way to enter its value. To do this: highlight a parameter which uses a value from the control source list, hold down Enter, then strike the key corresponding to the control source you want to choose. LFO1, for example, is assigned to B5. Also, for almost every parameter, you can hold the Enter button and move the Data Slider (Slider A) to run through the range of values for the currently selected parameter. This is not as precise as the Alpha Wheel, but much faster. Changing the Current Layer in Multi-Layer Programs When editing a multi‐layer program, you can quickly switch between layers by holding the Enter button, then striking a key. The PC3K will change the current layer to that key’s layer. If the key is part of more than one layer, subsequent key strikes will cycle through each layer that has that key in its range. Note: This method for changing the current layer in a multi‐layer program will NOT work if the currently highlighted parameter has a note number or control source for its value. In this case, the key you strike will function as described in Intuitive Data Entry, above. 3-11... -
Page 46: Search
User Interface Basics Search Search There’s a convenient way to find any string of characters within the currently selected list, or range of values. Hold the Enter button and press any of the numeric buttons. A dialog appears. Type in the string of characters you want to find. For example, if you’re looking at the program list and you want to find all programs containing the word “Horn,” you would type h‐o‐r‐n. This function is not case‐sensitive; it will find upper and lower case characters regardless of what you type. When you’ve typed the string of characters you want to find, press Enter. The PC3K searches through the current list of objects or values, finds all items that match the string of characters you typed, and displays the first one it finds. Hold Enter and press one of the Plus/Minus buttons to search for the next higher‐ or lower‐numbered object that contains the string of characters. The string you select remains in memory. You can store and select a string of characters with each of the numeric buttons. Hold Enter and press one of the numeric buttons at any time to select that string for a search. When the string appears, you can change it, or just press Enter to find that string. Quick Song Recording and Playback There are three buttons—labeled Record, Play/Pause, and Stop—below the mode selection buttons. They control the recording and playback of songs from any mode; you don’t have to be in Song mode to record or play back. However, you’ll need to make sure that the Demo Button parameter on Master Mode Page 2 is set to “Off.” Otherwise these buttons are used for Easy Audition (see page 2‐7). Master Mode is described in Chapter 11. Using these buttons affects the current track of the current song—that is, the song and track that were selected the last time you were in Song mode. When you record, the recording track and recording mode are determined by the current settings in Song mode; likewise for the playback mode when you’re playing a song. When the sequencer status is STOPPED (neither the Record‐button LED nor the Play/Pause‐ button LED is lit or flashing), press Record to put the sequencer in REC READY status. The Record‐button LED lights (red). Then press Play/Pause to start recording. The Play/Pause‐ button flashes (green) to indicate the tempo. Any countoff is determined by the current Song‐... -
Page 47: The Operating Modes
The Operating Modes What the Modes Are Chapter 4 The Operating Modes In this chapter we’ll discuss the theory behind the mode concept, and we’ll describe the basic operating features of each mode. What the Modes Are The modes exist to make the PC3K logical to work with. With as many performance and programming features as the PC3K has, it’s helpful to break them into groups. These groups are called modes. There are eight primary modes; they’re described briefly in the section called Using the Modes on page 4‐2, then the rest of the manual is dedicated to explaining each primary mode in turn. Each mode is named for the kind of operations you perform while in that mode, and each mode’s editor (if any) contains all of the parameters related to editing the type of object found in that mode. In Setup mode, for example, you select setups (and only setups) for performance or editing. All of the setup‐editing parameters are grouped together on the Setup‐Editor page, which is accessible through Setup mode. Selecting Modes When the PC3K is on, it’s always operating in one of the eight primary modes represented by the LED‐highlighted buttons to the left of the display—or in one of the editors corresponding to the current operating mode. Pressing one of the mode buttons selects the corresponding mode. This is the mode’s entry level. At the entry level, the LED of the selected mode is lit. Only one mode can be selected at a time. From any primary mode, you can get to any other primary mode simply by pressing one of the mode buttons. If you’re in an editor, however, you must press Exit to return to the mode’s entry ... -
Page 48: Finding Square One
Select Program parameter; press Edit Most editors Previous mode or editor Press Exit Finding Square One If, at any time, you don’t know where you are, and the mode LEDs are all unlit, press Exit one or more times. This will return you to the entry level of whatever mode you were in, and if you press Exit enough times, you will always return to Program mode, the startup mode. If you’ve made any changes, you’ll be asked whether you want to save before leaving any editor. Press the No soft button or the Exit button if you don’t want to save. If you want to save, press the Rename or Yes soft button, and you’ll see the Save dialog, which is described in Saving and Naming on page 5‐3. Using the Modes You can play your PC3K regardless of the mode you’re in. The PC3K’s MIDI response is almost always active. Even so there are three modes that are more performance‐oriented than the others. These are Program, Setup, and Quick Access modes. We’ll describe each of the eight modes briefly in this section. Program Mode The PC3K starts up in Program mode, where you can select, play, and edit programs. The Program mode entry‐level page shows the currently selected program, as well as a small segment of the program list. The Program Editor takes you to the core of the PC3K’s sound editing parameters. Setup Mode Setup mode lets you select, play, and edit setups. Setups consist of up to 16 separate zones, split or overlapping, each having its own program, MIDI channel, and control parameters. Setups are great for performance situations, whether you’re playing multiple PC3K programs or ... -
Page 49: Quick Access Mode
Quick Access Mode Another feature for live performance, Quick Access mode enables you to combine programs and setups into banks of ten entries. Each of these programs or setups can be selected with a single alphanumeric button. Different banks are selected with the Chan/Layer buttons. There’s a selection of factory preset banks, and you can use the Quick Access Editor to create your own banks and store them in the PC3K’s memory. There’s a full description in Chapter 8. You can also use Quick Access banks as a way to remap incoming or outgoing Program Change commands. Effects Mode Effects mode sets the behavior of the PC3K’s effects processor. The Effects mode page lets you tell the PC3K how to select effects configurations called chains. Chapters 9 shows you how. MIDI Mode You’ll use MIDI mode to configure the PC3K’s interaction with other MIDI instruments, by setting parameters for transmitting and receiving MIDI. You’ll also use it to configure your PC3K for multi‐timbral sequencing. On the CHANNELS page, you can assign a program to each channel, and enable or disable each channel’s response to three types of MIDI control messages: Program Change, volume and pan. See Chapter 10. Master Mode Master mode, described in Chapter 11, contains the parameters that control the entire PC3K. Global settings for tuning, transposition, velocity and aftertouch sensitivity, and other preferences are adjusted here. You can also get to GM Mode from here and set the sample rate for the PC3K’s digital output. Song Mode Song mode enables you to play sequences (songs) stored in the PC3K’s memory, and provides a fully featured sequencer that you can use to record songs. You can also record multi‐timbrally via MIDI, or load standard MIDI files (Type 0 or 1). The Song Editor also enables you to modify existing sequences stored in memory. See Chapter 12. Storage Mode Storage mode lets you load and save programs and other objects using an USB device. See Chapter 13. - Page 50 The Operating Modes Using the Modes...
-
Page 51: Editing Conventions
Editing Conventions Introduction to Editing Chapter 5 Editing Conventions Introduction to Editing Programming (editing) the PC3K always involves three basic operations: mode selection, navigation, and data entry. First, select the mode that relates to the object you want to edit—a program, a setup, etc. Then select the object you want to edit, and press the Edit button to enter the editor within that mode. For programs, setups, songs, and quick access banks, these objects are “selected” when you are on the main page of their corresponding mode. In these cases you can press the Edit button with anything selected on their main page to access their editor. Often there will be more objects inside of these “main page” editors, such as shift patterns and velocity patterns, and they can be edited by selecting their parameter with the cursor and pressing the Edit button. An editor contains all the parameters that define the object you’re programming. Next, you navigate around the editor’s page(s) with the soft buttons, and select parameters with the cursor (arrow) buttons. When you’ve selected a parameter (its value is highlighted by the cursor), you can change its value with one of the data entry methods. When you change a value, you’ll normally hear its effect on the object you’re editing. The PC3K doesn’t actually write your editing changes to memory until you save the object you’re working on. It then allows you to choose between writing over the original object, or storing the newly edited version in a new memory location. What’s an Object? If you’ve been wondering what we mean by the term “object,” it’s an expression we use for anything that can be named, saved, deleted, or edited. Here’s a list of all the types of objects: Programs Factory‐preset or user‐programmed sounds stored in ROM or flash memory. A program is one or more layers of sound, with programmable DSP functions applied to the keymaps within each layer. Algorithms Factory‐preset or user‐programmed V.A.S.T. DSP Functions stored in ... -
Page 52: Object Type And Id
Number controller destination. Velocity patterns Factory‐preset or user‐programmed sequences of note velocity shift information, used by the arpeggiator for detailed velocity triggering in arpeggiation. Master tables The values that are set for the global control parameters on the Master mode page, as well as the settings for the parameters on the Transmit, Receive, and Channels pages in MIDI mode, and the programs currently assigned to each MIDI channel. Name tables Contains a list of dependent objects needed by the other objects in a file at the time the file was saved. Object Type and ID The PC3K stores its objects in memory using a system of ID numbers that are generally organized into banks. Each object is identified by its object type and object ID; these make it unique. An object’s type is simply the kind of object it is, whether it’s a program, setup, song, or whatever. The object ID is a number from 1 to the maximum that distinguishes each object from other objects of the same type. For example, within a bank you can have a setup, a program, and an effect, all with ID 201; their object types distinguish them. You can’t, however, have two programs with ID 201. Object Type Object ID Object Name Program Hot Keys Setup Silicon Bebop Velocity Map Linear ROM (factory preset) objects have ID numbers in a number of banks. When you save objects that ... -
Page 53: Saving And Naming
Editing Conventions Saving and Naming Saving and Naming When you’ve edited an object to your satisfaction, you’ll want to store it in memory. There’s a standard procedure for saving and naming, which applies to all objects. You can press the Save soft button, of course, but it’s easier to press the Exit button, which means “I want to leave the current editor.” If you haven’t actually changed anything while in the editor, you’ll simply exit to the mode you started from. If you have made changes, however, the PC3K will ask you if you want to save those changes. This is the first Save dialog, the Exit page. Press Cancel to resume editing, No to exit the editor, or Yes to save your edits and move to the Save page. The Rename soft button on the Save page takes you immediately to the naming dialog, where you assign a name to the object you’re saving. You haven’t saved yet, but you’ll be able to after you’ve named the program. The cursor underlines the currently selected character. Press the <<< or >>> soft buttons to move the cursor without changing characters. Press an alphanumeric button one or more times to enter a character above the cursor. The characters that correspond to the alphanumeric buttons are labeled under each button. If the character that appears is not the one you want, press the button again. Press the +/‐ button on the alphanumeric pad to switch between upper and lower case characters. Press 0 one or more times to enter the numerals 0 through 9. Press Clear (on the alphanumeric pad) to erase the selected character without moving any other characters. Press the Delete soft button to erase the selected character. All characters to the right of the cursor will move one space left. Press the Insert soft button to insert a space above the cursor, moving all characters to the right of the cursor one space to the right. Press the Cancel soft button if you decide not to name the object. Press OK when the name is set the way you want to save it. In addition to the letters and numerals, there are three sets of punctuation characters. The easiest way to get to them is to press one of the alphanumeric buttons to select a character close to the one you want, then scroll to it with the Alpha Wheel. Here’s the whole list: ! “ # $ % & ’ ( ) * + , ‐ . / 0 1 2 3 4 5 6 7 8 9 : ; < = > ? @ A through Z [ \ ] ^ _ ` a through z. (space). Pressing the Plus/Minus buttons simultaneously is a short cut to the following characters: 0, A, a and (space). If you’re wondering how we came up with this sequence of characters, it’s composed of ASCII ... -
Page 54: Rom Objects
Editing Conventions Saving and Naming ROM Objects If the object you started from was a ROM (factory preset) object, the PC3K will automatically suggest the next available (unused) ID as the ID for the edited object. If that’s the ID you want, press the Save soft button, and the object will be stored in memory with that ID. Otherwise, you can select any ID from 1 to the maximum. This page also gives you the opportunity to return to the naming dialog (as described in the previous section) or, by pressing the Object soft button, to access the Object Utilities (see The Utilities (UTILS) Page on page 13‐11). If you select an ID that’s already in use, the PC3K will tell you that you’re going to replace the ROM object that’s already been assigned that ID. If you don’t want to do that, you can select a different ID. Or you can press the Plus/Minus buttons simultaneously to toggle between the ID that the PC3K suggested and the original ID. Or press the Cancel soft button to cancel the operation. If you decide not to cancel or change the ID, and you press the Replace soft button, the PC3K will write your newly edited object over the existing ROM object. Actually, it only appears that way, since you can’t truly write to ROM. The ROM object will reappear if you delete the newly edited object (there are soft buttons in each editor for deleting objects). Memory Objects If the original object was a memory object, the PC3K will assume you want to replace it, and will suggest the same ID as the original object. (In all modes other than Song mode, a diamond icon preceding an item’s ID indicates a memory object). As with ROM objects, you can cancel, replace, or change the ID and save to an unused ID. If you replace a memory object, however, it’s definitely gone! -
Page 55: Keyboard Naming
Editing Conventions Saving and Naming Keyboard Naming The keyboard naming feature A0 to C8 (Standard 88-note Keyboard) makes naming objects convenient, by letting you use the keyboard (or your MIDI controller) to enter the name of the object you’re modifying. When you’re in a Rename dialog, use either of the Chan/ Layer buttons to change Move cursor to start of name Delete; move characters left one space between the keyboard naming Move cursor left one space Insert;... -
Page 56: Deleting Objects
Editing Conventions Deleting Objects Deleting Objects Within most editors, there are soft buttons for deleting objects. When you want to delete an object, press the Delete soft button, and the PC3K will ask you if you want to delete the object. (At this point in the dialog, you can select another object with any of the data entry methods.) Press OK if you want to delete it, or press Cancel if you don’t. The PC3K won’t let you delete ROM objects (also known as “factory” objects). Memory objects, on the other hand, are gone when you delete them! If you’ve “replaced” a ROM object by saving a memory object with the same ID, the ROM object is invisible, but still there. Deleting the memory object stored at the same ID will restore the ROM object. You’ll often delete objects to gain memory space, or to organize the memory banks before saving objects to storage. To delete multiple objects, use the Delete Objects utility available in Master mode. It’s described on page 11‐13. Dependent Objects A dependent object is an object that’s linked in memory with at least one other object. For example, if you create a setup that uses a program that you also created, that program is a dependent object of the setup. When you start to delete an object that has dependent objects, the Delete dialog gives you a choice: Delete dependent objects? If you press Yes, the PC3K will delete the object and all its dependent objects when you execute the Delete function. In our example, if you were deleting the setup you created, and you chose to delete dependent objects, the dependent program would get deleted as well. If you press No at the Delete dependent objects? prompt, the PC3K deletes only the object, but keeps the dependent objects. In our example, the setup would get deleted, but the dependent program would remain. When deleting objects and their dependents, the PC3K deletes only those dependent objects that aren’t dependent on other objects that you’re not deleting. For example, suppose you have two setups that contain the same program. If you delete one of the setups, and delete dependent objects with it, the setup gets deleted, but the program that’s contained in the other setup remains in memory. Saving and Loading Files—Storage Mode Saving a file simply involves selecting objects or a complete bank of objects to be stored as a ... -
Page 57: Special Button Functions
Editing Conventions Special Button Functions Special Button Functions The Mode buttons and the Chan/Layer buttons have additional functions, depending on the mode or editor you’re in. The table below describes some of these special button functions. Button Special Function Program Mutes Layer 1 of current program in Program Editor. Mute 1 Setup Mutes Layer 3 of current program in Program Editor. Mute 3 Q Access Solos current layer in Program Editor. Solo Effects In Program Editor, bypasses (mutes) current program’s FX preset (plays program dry.) In... - Page 58 Editing Conventions Special Button Functions...
-
Page 59: Program Mode
Program Mode VAST and KB3 Programs Chapter 6 Program Mode Programs are the PC3K’s performance‐level sound objects. They’re preset sounds equivalent to the patches, presets, voices, or multis that you find on other synths. Program mode is the heart of the PC3K, where you select programs for performance and editing. The PC3K is packed with great sounds, but it’s also a synthesizer of truly amazing depth and flexibility. When you’re ready to start tweaking sounds, the Program Editor is the place to start. The PC3K offers two new powerful editing features: Cascade Mode and Dynamic VAST. • Cascade Mode lets you route any layer of a program into the DSP of any other layer. Any of the 32 layers of a program can go into any other layer. • Dynamic VAST lets you “wire” your own algorithms. You can combine different DSP functions in any order you like, including parallel and serial configurations. VAST and KB3 Programs It is important to understand the difference between VAST programs and KB3 programs. VAST programs contain up to 32 layers, each of which contains a keymap or KVA oscillator. Keymaps consists of a number of samples assigned to a particular keyboard range. KVA oscillators use powerful DSP to generate a range of simple and complex waveforms (see Editing VAST Programs With KVA Oscillators on page 6‐53 for more details.) KB3 programs use a much different architecture. There are no layers or algorithms, just a set of oscillators (designed to emulate the tonewheels in a Hammond Organ) that start running as soon as you select a KB3 program. The next two sections give more detailed descriptions of the differences in structure between VAST programs and KB3 programs. There are several performance features (and a few issues) ... -
Page 60: Vast Program Structure
Program Mode VAST Program Structure VAST Program Structure You might want to take a look at Figure 6‐1 on page 6‐3, which depicts the hierarchy of a VAST program, from individual samples all the way up to setups, which can contain up to 16 programs. Every VAST program contains at least one layer. A layer consists of a keymap and an algorithm for processing the samples contained in the keymap. Each sample is a separate digital recording of some kind of sound: musical, vocal, industrial, any sound at all. Individual samples are assigned to specific key ranges (from A 2 to D 3, for example), and are also assigned to be triggered at specific attack velocities. These assignments constitute the keymap. When you trigger a note, the PC3K looks to the keymap of each layer of the currently active VAST program(s) to determine which samples to play. The sound engine then fetches the requested samples and generates a digital signal representing the sound of the samples. This signal first passes through the DSP functions that make up the algorithm. It then passes through the PC3K’s effects processor, and finally appears—with some level of effects applied to it—at one or more of the audio outputs. The layer is the VAST program’s basic unit of polyphony, that is, each layer constitutes one of the 128 voice channels the PC3K can activate at any time. If you have a program that consists of two layers covering the note range from A 0 to C 8, each key you strike triggers two voice channels. Note: One exception to this structure is when using a KVA oscillator, the sound source for that layer is not derived from a keymap, but is generated at the algorithm stage (though keymap information is still used to set key range and maximum amplitude.) After this, the structure is the same as described above. See Editing VAST Programs With KVA Oscillators on page 6‐53 for more details. - Page 61 Program Mode VAST Program Structure Zone Zone Zone Zone Zone Zone Zone Zone 16 keyboard zones— each with independent program, MIDI channel, and control assignments Selected for performance and editing in Program mode; up to 32 layers per program A keymap processed through an algorithm, modulated by control sources...
-
Page 62: Kb3 Program Structure
Program Mode KB3 Program Structure KB3 Program Structure There’s nothing quite like the sound of the classic Hammond™ B‐3 tone wheel organ, especially when played through a Leslie™ rotating speaker system. We’ve done extensive testing and analysis with several tone wheel organs, and created our own models to emulate the unique tone wheel sound. We even took into account the way that older organs start to sound different (and arguably better) as their capacitors begin to leak—and we included a parameter that lets you vary the amount of grunge (leakage) in your sound. KB3 programs use oscillators to emulate the tone wheel sound. Each oscillator operates independently, and has its own pitch and amplitude control. You can control how many oscillators are used for a KB3 program. There are two oscillators per voice, for a total of 256. You can use up to 91 of them in a KB3 program (the 92nd is reserved to produce key click). Because the oscillators start running as soon as you select a KB3 program, there are always voices available—unlike VAST programs, which start “stealing” notes when you reach the polyphony limit. The oscillators—we’ll call them tone wheels from here on—are divided into an upper and lower group. The upper tone wheels use the samples in the PC3K’s keymaps to generate sound, while the lower tone wheels use sine waves. You can change the keymap of a KB3 program’s upper tone wheels to produce a large array of sounds. By changing the keymap from sine to a saw wave it is possible to emulate the sound of classic combo organs like the Vox™ and Farfisa™ models. KB3 Mode KB3 programs are different enough from VAST programs that we use the term KB3 mode to describe what’s going on when you play a KB3 program. Whenever you play a KB3 program, you are in KB3 mode. The blue LED in the KB3 button will light when the current program is a KB3 program. If you want to create your own KB3 program, start by editing an existing KB3 program. You can play KB3 programs only on a single channel at a time. -
Page 63: Real-Time Controls In Kb3 Mode
When you’re in Program mode, the Mute buttons always control KB3 effects. In a setup containing a KB3 program, if you want the Mute buttons to control KB3 effects, you’ll have to edit the setup, because in Setup mode, the Mute buttons mute and unmute zones by default. 1. Go to Setup mode, and select the setup you want to edit. Press Edit. 2. Press either more soft button until you see the COMMON soft button. Press it, and your display should show the following screen: 3. Select the Mutes parameter and change its value to KB3 Control. 4. Don’t forget to save. Playing KB3 Programs One of the standard performance features of many tone wheel organs is the set of drawbars for emulating the stops on a pipe organ. Moving the drawbars controls the amplitude of either the fundamentals or the harmonics of the notes (out to increase amplitude, in to decrease it). The PC3K’s sliders serve as the nine drawbars found on most tone wheel organs. Pushing the sliders up is the equivalent of pushing the drawbars in (removing fundamentals or harmonics). Subharmonics Fundamental Harmonics Slider A Slider B Slider C Slider D Slider E Slider F Slider G Slider H... -
Page 64: Midi Control Of Kb3 Programs
Program Mode KB3 Program Structure In normal operational modes, using the Mute buttons to change a program’s KB3 effects doesn’t affect the program; the effects return to their programmed settings the next time you select the program. If, however, you’re in an editor when you change the effects, you’re actually editing the program. If you like the changes, you can save the program with the new KB3 effects settings. If you don’t like the changes, you can exit without saving, and the program will revert to its previous settings. The Mute buttons also send MIDI Controller information to the PC3K’s MIDI Out port. See Column 2 of Table 6‐3 to check which Controller numbers the buttons send. Of course, you can change the programmed settings for the KB3‐mode buttons. For each of the buttons, there’s a corresponding parameter in the Program Editor. Corresponding Effect Button Name Page and Comments Category Parameter Rotary Fast / Slow MISC: SpeedCtl On / Off MISC: VibChorCtl Vibrato Chorus / Vibrato... - Page 65 Program Mode KB3 Program Structure MIDI Controller KB3 Program Feature Number PC3K Drawbar1 Drawbar2 Drawbar3 Drawbar4 Drawbar5 Drawbar6 Drawbar7 Drawbar8 Drawbar9 Expression Pedal Percussion On/Off Percussion High/Low Percussion Loud/Soft Percussion Fast/Slow Rotating Speaker Slow/Fast Vibrato/Chorus On/Off Vibrato/Chorus Selector Key Click Level...
- Page 66 Program Mode KB3 Program Structure You may find it more convenient to use the local keyboard channel. In this case, the PC3K remaps incoming MIDI to the PC3K’s current channel, so in Program mode, you’ll always play the program on the PC3K’s current channel. Incoming MIDI also gets sent to the PC3K’s MIDI Out port. On the other hand, in this case your MIDI source’s transmitting channel must match the PC3K’s local keyboard channel for anything to work. Furthermore, for KB3 programs, some of the MIDI Controller numbers listed in Table 6‐3 won’t necessarily work. Things are a bit different for playing setups. In this case, you must use the local keyboard channel to be able to play and control all of the setup’s zones. Set LocalKbd to match the channel your external MIDI source is using (so if, for example, your MIDI source transmits on Channel 1, set LocalKbd to 1). All MIDI information that the PC3K receives on the local keyboard channel gets remapped to the channels and control destinations used by the zones in the setup. The PC3K also remaps certain MIDI Controller messages that it receives on the local keyboard channel, so that they correspond (in most cases) to the default assignments for the PC3K’s physical controllers (Mod Wheel, sliders, ribbons, etc.). While this ensures that the physical controllers work in a consistent and relatively standard fashion for most setups and VAST programs, it necessitates a few adjustments to make incoming MIDI Controller messages control the KB3 features listed in Table 6‐3. Without these adjustments, some of the KB3 features won’t respond to MIDI Controller messages—this is true when you’re playing programs as well as when you’re playing setups. To make everything work properly, you need to make sure that all the appropriate physical controllers are assigned for KB3 control. Physical controller assignments are handled by setups, and are defined by parameters on several pages in the Setup Editor. Each zone of a setup has its own controller assignments. Programs don’t have controller assignments, so they “borrow” them from a special setup that’s reserved for that purpose. This setup is called the Control Setup; it’s determined by the value of the ControlSetup parameter (on the TRANSMIT page in MIDI mode). You can read about Control Setups in detail on page 6‐9. When you’re playing a setup on the local keyboard channel, each zone that uses a KB3 program must have the appropriate physical controller assignments. When you’re playing a KB3 program, Zone 1 of the Control Setup must have the appropriate physical controller assignments. One final word—for now—about using the local keyboard channel: all the MIDI information received on the local keyboard channel also gets sent—after being remapped—to the PC3K’s MIDI ...
-
Page 67: The Program Mode Page
Program Mode The Program Mode Page The Program Mode Page The top line of the Program mode entry‐level page shows your mode location, the present MIDI transposition, the MIDI bank name and MIDI program number of the highlighted program, and the current MIDI channel. The info box at the left of the Program mode page gives you information about the current program. Generally, the info box shows the keymap assigned to each layer. The line beneath the name of the keymap indicates the keyboard range of that layer. In the diagram above, for example, there’s one layer that extends from C 0 to C 8—the default range. The representation of these layer ranges is approximate; they’re intended to let you know if you have a layered keyboard (lines overlapping) or a split keyboard (lines not overlapping). The info box can display up to four layers at a time. If the current program has more than four layers, you can view their keymaps by pressing and holding down the Enter button and scrolling with the Chan/Layer buttons. For KB3 programs, the info box shows the keymap used for the upper tone wheels. Note: For VAST layers using KVA oscillators, the info box may or may not show the name of the oscillator being used. See Advanced Use Of KVA Oscillators on page 6‐55 for more details. Control Setup The Control Setup defines what the PC3K’s physical controllers (wheels, sliders, pedals, etc.) do while you’re in Program mode. It’s a convenient way to apply the controller assignments in your setups globally. Just choose an existing setup to be the Control Setup using the ControlSetup parameter on the MIDI mode TRANSMIT page. While you’re in Program mode, many of the controller assignments for Zone 1 of the Control Setup also apply to the programs you play (this is true for MIDI control messages as well, unless you have turned off MIDI control). -
Page 68: The Soft Buttons In Program Mode
The Program Mode Page If you don’t like the way the physical controllers work in Program mode, you can either select a different Control Setup, or edit the existing one. Any changes you make to the current Control Setup will also affect the way that setup works in Setup mode. There are a few important points to remember about the Control Setup: • The current Control Setup governs controller assignments for all modes except Setup, where each setup has its own unique assignments. • The current Control Setup is used by all programs in Program mode. • You cannot change the Control Setup from within Program mode. • The Control Setup doesn’t affect the sound of a program, only the assignments of certain physical controllers. The samples and keymaps assigned to a program are unaffected by the Control Setup. While you’re in Program mode, the PC3K ignores the programs assigned to the setup that you choose as the Control Setup. • Almost all of the VAST programs in the PC3K are designed to respond to the controller assignments in the default Control Setup (126 Internal Voices). Therefore you’ll want to use 126 Internal Voices as the Control Setup in most cases. However, if you want to change the controller assignments for any program or set of programs (either VAST or KB3), use a Control Setup that has the controller assignments you want. The Soft Buttons in Program Mode Use the Octav– and Octav+ soft buttons to transpose up or down by a full octave. Pressing both Octav buttons simultaneously returns the transposition to its original setting. Pressing the Panic soft button sends an All Notes Off message and an All Controllers Off message on all 16 MIDI channels. Press the Info soft button to see all of the controller assignments of the current program. Scroll down the page using the Alpha Wheel or the Plus/Minus buttons. -
Page 69: Editing Vast Programs
Program Mode Editing VAST Programs Editing VAST Programs The Program Editor is where you begin to modify the PC3K’s resident sounds, and to build your own sounds around sample keymaps or KVA oscillators (see Editing VAST Programs With KVA Oscillators on page 6‐53 for some differences.) There’s virtually no limit to the sounds you can create using the tools in the Program Editor. Note: This section describes the Program Editor as it applies to VAST programs. See Editing KB3 Programs on page 6‐60 for information about editing KB3 programs. To enter the Program Editor, start in Program mode and press Edit. The Program‐mode LED will go out, and the KEYMAP (Keymap) page will appear. The top line of the display gives you the usual reminder of your location. It also tells you which layer you’re viewing, and how many layers there are in the program. You can use the Chan/Layer buttons to scroll through the layers, if the program has more than one. Here’s a method for jumping quickly to a specific layer in a program—it’s especially useful in multi‐layered drum programs. Hold the Enter button and strike a key. The display will show the layer(s) assigned to that key. If more than one layer is assigned to the same key, repeatedly striking the key (while continuing to hold the Enter button) will cycle through all layers assigned to that key. This method will work in most places within the Program Editor, but there is an exception: if the parameter you have highlighted has a note number or control source as its value, then holding Enter and striking a note will call up that note or control source. For all other parameters, however, this method will switch between layers. The Soft Buttons in the Program Editor The Program Editor’s soft buttons are labeled by the words that appear in the bottom line of the ... -
Page 70: The Mode Buttons In The Program Editor
Program Mode Editing VAST Programs Two of the soft buttons in the Program Editor are special cases. They’re the soft buttons that select the editing pages for the first and last DSP functions (Pitch and Level, respectively) of the current program’s algorithm. One of these soft buttons is labeled PITCH, and pressing it will take you to the DSPCTL (DSP Control) page with the Pitch parameter highlighted. The other one of these soft buttons is labeled AMP, and pressing it will take you to the DSPCTL page with the Level parameter highlighted. Additionally, pressing the DSPCTL soft button will take you to the DSPCTL page. The MODE Buttons in the Program Editor When in the Program editor, each of the MODE select button has a different function. Beside each button is the name of its function in the Program editor. When activated, the button’s LED will light up. Mute 1, 2, 3, and 4 Each of the top four MODE select buttons serve to mute one of the current program’s first four layers. Pressing the Program button mutes layer 1, pressing the MIDI button mutes layer 2, pressing the Setup button mutes layer 3, and pressing the Master button mutes layer 4. Solo Pressing the Q Access button solos the current layer. Mute Active Pressing the Song button mutes the current layer. FX Bypass Pressing the Effect button bypasses all effects. Note, however, that if either of the Aux Overrides in Effects mode are active, then those effects are still applied. Compare Pressing the Storage button calls up the Compare Editor, which recalls the program pre‐edit ... -
Page 71: Algorithm Basics
Program Mode Algorithm Basics Algorithm Basics Press the ALG soft button in the Program Editor to take you to the Algorithm (ALG) page. The basic definition: an algorithm is the “wiring” (signal path) of a sample to the audio outputs, through a series of digital signal processing (DSP) functions that you select. The PC3K’s algorithms are the core of Variable Architecture Synthesis Technology. The DSP functions are synthesis tools (filters, oscillators, etc.) that you assign to the various stages of the algorithm. The DSP functions you choose determine the type of synthesis you use. Each of the 59 available algorithms represents a preset signal path. With our new Dynamic VAST feature, you can edit any preset signal path and make your own, unique algorithms, but that will be explained further on in this section. Take a look at Algorithm 1 in the diagram below. It’s one of the simplest algorithms. The DSP functions are represented by the rectangular blocks. The lines connecting the blocks together indicates the flow of the digital signal from left to right; they represent what we call the “wire” of the algorithm: the actual physical path that the signal follows through the algorithm. Selecting different algorithms can be compared to connecting different DSP functions with different wiring diagrams. Think of the left side of each block as its input, and the right side as its output. Depending on the algorithm, the signal may split into two wires, enabling part of the signal to bypass certain portions of the algorithm. Split wires may rejoin within the algorithm, or they may pass all the way through as split signals. If the last block has two wires at its output, we call it a double‐ output algorithm. If it has one wire, it’s a single‐output algorithm, even if there are two wires in earlier portions of the algorithm. Each block of the algorithm represents a certain function in the signal path. In every non‐ cascaded algorithm (see Alt Input for Algorithms (Cascade Mode) below), the signal flows first through a one‐stage DSP function that controls the pitch of the samples in the keymap (this function is represented as a block labeled PITCH in the upper right‐hand corner of the display). In fact, the first DSP function in each algorithm always controls pitch, even though it doesn’t apply in every instance and, as will be explained later in this section, it is bypassed in cascaded algorithms. Similarly, the last DSP function always controls the final amplitude of the signal (this function is represented as a block labeled AMP in the upper right‐hand corner of the display). The number of function‐parameters a DSP function can have depends on the relative size of its function‐block on the Algorithm page; for instance, a function‐block that is three slots long can have up to three function‐parameters, whereas a function‐block that is two slots long can have up to two function‐parameters. For each function‐parameter, there’s a corresponding “subpage” ... -
Page 72: Common Dsp Control Parameters
Program Mode Algorithm Basics source in the Controller List to modulate the function‐parameter. The above italicized parameter‐types are described in Common DSP Control Parameters on page 6‐14. More information on the subpages can be found in The DSP Control (DSPCTL) Page on page 6‐28 and The DSP Modulation (DSPMOD) Page on page 6‐29. Highlighting any of the function‐blocks on the ALG page and pressing the Edit button takes you to the DSPCTL page. Common DSP Control Parameters The type of DSP function available for any function block depends on the algorithm. Some of the specialized functions like the PANNER are always located just before the final AMP function. Others, like the three‐input functions, appear only in algorithms that are structured for three‐ input functions. You can change the nature of each layer of a program simply by assigning different DSP functions to the layer’s algorithm. Your level of control goes much deeper than that, however. Each DSP function has one or more parameters to which you can patch a variety of control sources to modify the behavior of the DSP functions themselves. The parameters on the various control‐input pages are very similar; in fact, there are six parameters that appear on almost every page. Consequently we refer to them as the common DSP control parameters. Although the parameters on the control‐input pages differ slightly from function to function, you can expect to see some or all of the common DSP control parameters whenever you select the control‐input page for any of the DSP functions. You’ll recognize the common DSP control parameters, along with several other parameters. Keep in mind that there’s a set of common control parameters for each of the DSP functions; in this case we’re describing them only as they apply to the pitch control function. Function-parameter Unlike the other five common DSP parameters, the function‐parameters are accessible on both ... - Page 73 Program Mode Algorithm Basics By adjusting the function‐parameter, you can add a fixed amount of adjustment to any DSP function. For the Pitch function, adjusting the function‐parameter will change the pitch in semitone increments. Use this as a starting point to set the pitch where you want it to be normally. This will shift the pitch of the currently selected layer, and will affect the playback rate of sampled sounds. Sampled sounds have an upper limit on pitch adjustment. It’s normal for the pitches of sampled sounds to “pin” (stop getting higher) when you adjust the pitch upward in large amounts. The oscillator waveforms can be pitched higher. Any sound can be pitched downward without limit. The primary use of adjusting the function‐parameter or fine adjust parameter (which will be explained under the next heading) is to offset the cumulative effects of the other DSP function parameters. For example, you might set a high value for key tracking (defined below) for a dramatic change in effect across the keyboard. The effect might be too much at one end of the keyboard, however, so you could use one of the adjust parameters to reduce the initial amount of that effect. The PC3K always uses real values of measurement, rather than just arbitrary numbers, for adjustable parameters. This means that you specify pitch in semitones (ST) and cents (ct), and amplitude in decibels (dB). Remember that the parameters on the control‐input pages are cumulative—they can add to or subtract from the effects of the other parameters on the page, depending on their values. For example, even if you’ve adjusted the pitch of a sample so high that it pins, the effects of the other parameters may bring the pitch back down to a workable range. Only the function‐parameters can be modulated by a control source. Fine Adjust Parameter You can add slight detuning to the pitch with the fine adjust parameters. Notice that there are actually two fine adjust parameters for the Pitch function: one that changes the pitch in cents (100ths of a semitone), and one that changes it according to its frequency (in increments of Hertz—cycles per second). Since we’re discussing the universal control sources here, and not specifically pitch, we’ll move on for now, as the Hz parameter applies only to pitch‐related functions. See The PITCH Page on page 6‐26 for a more thorough description of Hz. Hard-wired Parameters Key Tracking This is a quick way to get additional control based on the MIDI note number of each note you ...
- Page 74 Program Mode Algorithm Basics Velocity Tracking A positive value for velocity tracking will raise the pitch as you trigger notes with higher attack velocities. This is great for getting a trace of detuning based on your attack velocity, especially in drum programs, where you can make the pitch of the drum samples rise slightly with higher‐ velocity Note Ons, just as drums do when you strike them harder. Negative values will lower the pitch as you increase the attack velocity. Programmable Parameters Source 1 (Src1) This parameter takes its value from a long list of control sources including every MIDI control number, a host of LFOs, ASRs, envelopes and other programmable sources. Src1 works in tandem with the parameter beneath it on the page: Depth. Choose a control source from the list for Src1, then set a value for Depth. When the control source assigned to Src1 is at its maximum, the pitch will be altered to the full depth you set. For example, if you set Src1 to MWheel, and set Depth to 1200 ct, the pitch will rise as you push the Mod Wheel up on your PC3K or MIDI controller, reaching a maximum of 1200 ct (12 semitones, or one octave). Source 2 (Src2) This one’s even more programmable. Like Src1, you choose a control source from the list. But instead of setting a fixed depth, you can set a minimum and maximum depth, then assign another control source to determine how much depth you get. Try this example. (Make sure Src1 is set to OFF first, so the two sources don’t interact.) Start with Program 199, and press Edit. Press the PITCH soft button to select the PITCH page. Set the Src2 parameter to a value of LFO1, then set the Minimum Depth parameter to 100 ct, and Maximum Depth to 1200 ct. Then set the Depth Control parameter to MWheel. This lets you use the Mod Wheel to vary the depth of the oscillation in pitch generated by the LFO. Now, when the Mod Wheel is down, the pitch will oscillate between a semitone (100 ct) up and a semitone down (the default waveform for LFO1 is a sine wave, which goes positive and negative). With the Mod Wheel up, the pitch will oscillate between an octave up and an octave down. Since the Mod Wheel is a continuous control, you can achieve any amount of depth control between the minimum and maximum. If you had set the Depth Control to Sustain, for example, ...
-
Page 75: Alt Input For Algorithms (Cascade Mode)
Program Mode Algorithm Basics Alt Input for Algorithms (Cascade Mode) Cascade mode is a particularly powerful feature of the PC3K that allows you to create unique algorithms of previously unattainable levels of complexity. The following three figures show the signal path of a program configured using the PC3K’s new Cascade mode: On the ALG (Algorithm) page of every layer, the Alt Input parameter lets you select any other layer to go through the current layer’s DSP. You can set it up so that layer 1 goes into layer 2 into 3 (as shown above). If you turn down the volume on layers 1 and 2, then you are hearing true cascading—it’s like a big chain with each algorithm feeding into the next, and what you hear is layer 3’s output. You can also have the volumes of all three layers turned up, which will mix the signal of all three layers. You could, in the same program, also decide to run layer 4 into 5 into 6 into 13 into 25 if you wanted. Any of the 32 layers can go into any other layer. 6-17... -
Page 76: Dynamic Vast
Program Mode Algorithm Basics The Cascade mode algorithms (very much like triple mode on a K2600) start at ID 101. Note in the above figures how algorithm 101 looks very similar to algorithm 1. Each Cascade mode algorithm corresponds to its non‐cascade equivalent, which has the same ID number minus 100. For example, algorithm 105 is a cascade mode version of algorithm 5. On the Alg page, select which layer you want to have running through your cascade layer with the Alt Input parameter. Make sure to turn down the Amp volume on your source layers if you only want to hear whatʹs coming out of the final cascade layer. Dynamic VAST The Dynamic VAST editor is yet another particularly powerful feature of the PC3K that allows you to edit the wiring of an algorithm. With Dynamic VAST, literally thousands of wiring schemes are possible. Using Cascade mode in conjunction with Dynamic VAST gives you almost infinite control over your program’s sound and behavior by enabling you to create your own unique, complex algorithms. To enter the Dynamic VAST editor, select the ALG (Algorithm) page by pressing the ALG soft button. Highlight the Algorithm parameter, select an algorithm, and press the edit button. This action calls up the Edit Algorithm (EditAlg) page in which you can edit the wiring of the selected algorithm. Parameter Range of Values Default Inputs 1, 2 Outputs 1, 2 Number of Blocks 1 to 4 Output Mode Normal, Sep. -
Page 77: The Keymap Page
Program Mode The KEYMAP Page The KEYMAP Page Press the KEYMAP soft button to call up the KEYMAP page. The parameters on this page affect sample root selection, i.e., which samples are played on which keys. Parameter Range of Values Default Keymap Keymap List 1 Piano f Left Transpose -128 to 127 semitones Key Tracking ± 2400 cents per key Velocity Tracking ± 7200 cents Alt Method Switched, Continuous Switched Stereo... -
Page 78: Velocity Tracking (Veltrk)
Program Mode The KEYMAP Page Velocity Tracking (VelTrk) This is another common DSP control parameter. As with the other parameters on the KEYMAP page, this shifts the position of the keymap. Different attack velocities will play different pitch shifts of the sample root assigned to that note range. If the shift is great enough, the next higher or lower sample root will be played, which in some cases (many drum programs, for example) will play an entirely different sound. Positive values will play higher pitches of the sample root when you use hard attack velocities (they shift the keymap downward), while negative values will play lower pitches. Method (AltMethod) See Alternative Switch (AltControl and AltMethod) below. Stereo You’ll use this parameter when you’re working with stereo samples. When you set this parameter to On, the KEYMAP page changes slightly: An additional Keymap parameter appears. The two keymap parameters are distinguished as Keymap 1 and Keymap 2. The KEYMAP page parameters will affect both keymaps. When the Stereo parameter is set to On, the OUTPUT page for the current layer will show an additional pair of Pan parameters. The PC3K contains both stereo and mono samples. Keymaps designed for stereo use are labeled with names beginning with “Stereo” or ending in “Left,” “Right,” “L,” or “R.” For stereo keymap playback, set Stereo “On” and assign corresponding Left and Right keymaps to Keymap1 and Keymap2 respectively. For keymaps beginning with “Stereo,” assign the same keymap to both Keymap1 and Keymap2. If you select the same keymap for Keymap1 and Keymap2, the PC3K automatically uses the left side for Keymap1 and the right side for Keymap2. Once you have the keymaps assigned, go to the OUTPUT page and set the panning for each sample as desired. Keep in mind that using stereo keymaps reduces the polyphony of the program. For example, if you had a two‐layer program with stereo keymaps in each layer, each note you play would use 4 of your 128 voices, allowing a total of 32 notes before all the voices have been used. If you’re not using stereo samples, you should set this parameter’s value to Off. 6-20... -
Page 79: Timbre Shift
KEYMAP page to ‐4 semitones, then setting the Adjust on the PITCH page to +4 semitones. For multi‐sample layers with narrow key ranges, large amounts of timbre shifting will cause different sample roots to be played back. Playback Mode This gives you numerous options for manipulating the samples in the current layer as you trigger them. Normal leaves the samples unaffected, while Reverse plays them in reverse. At a value of Reverse, the samples will continue to loop as long as notes are sustained. To play them just once in reverse, you would adjust the length of the layer’s amplitude envelope (explained later in this chapter). BiDirect (bidirectional) causes the samples to loop infinitely, alternating between normal and reversed playback. Noise replaces the samples with a white noise generator. Alternative Controller (AltControl) See Alternative Switch (AltControl and AltMethod) below. Alternative Switch (AltControl and AltMethod) Many, but not all, PC3K sample roots have been pre‐assigned a carefully chosen, fixed alternate sample start or end point that can be selected using the Alternate Switch feature (AltControl and AltMethod parameters). This feature allows you to control the sample playback start/end time triggered by any control source. Use the AltControl parameter to specify a control source that will cause the sample to begin or end at the Alt point. Then use the AltMethod parameter to choose between switched and continuous calculation of the Alt point. If the value of AltMethod is Switched, the PC3K will use the Alt point when the relevant control source is at a value greater than 64 at Note Start. If AltMethod is Continuous, the Alt point will vary depending on the value of the relevant control source at Note Start. As an example, suppose you’re working with a flute keymap and wish to control the amount of chiff heard at the beginning of the sound. On the KEYMAP page in the Program Editor, set AltControl to MWheel. Now the Mod Wheel controls how much of the initial sample attack is used. If you set AltMethod to Switched and move the Mod Wheel at least half‐way up, at Note Start the sample will begin at the pre‐set alternate start point (in this case, slightly past the initial chiff). If you set the AltMethod to Continuous, the PC3K will interpolate the sample’s starting point based on the position of the Mod Wheel. If the Mod Wheel is 75% of the way up at Note ... -
Page 80: The Layer Page
Program Mode The LAYER Page Emulating Legato Play If you place the Alt point after the initial attack transients of the sample, then you can use the Alt Switch to emulate legato playing in an acoustic instrument. As an example, set Keymap to 14 Flute. Now set the AltControl parameter to Chan St (Channel State). Now if you play notes separately, the initial breathy chiff will be heard. But if you play the notes legato (connecting them smoothly), the Alt point is used and you do not hear the chiff. This is because the Chan St is turned on as long as any note is being held. Most of the PC3K’s ROM samples have their Alt points set for purposes of legato play. In most cases the difference in attacks is subtle, but for some sounds, like drums, the difference can be more noticeable. The LAYER Page Press the LAYER soft button to call up the LAYER page. Here you’ll set a number of parameters that affect the current layer’s keyboard range, attack and release characteristics, and response to various controls. Parameter Range of Values Default Low Key C -1 to G 9 High Key C -1 to G 9... -
Page 81: Low Key (Lokey)
Program Mode The LAYER Page Low Key (LoKey) This sets the lowest active note for the current layer. This parameter’s value cannot be set higher than the value for HiKey. The standard MIDI key range is C 1—G 9 (0‐127). Middle C is C 4 (ISP). High Key (HiKey) Here you set the highest active note for the current layer. This parameter’s value cannot be set lower than the value for LoKey. Low Velocity (LoVel) With this parameter you define the lowest attack velocity at which the layer will be enabled (generate a sound). The values for this parameter and the next are expressed in the standard musical dynamics markings, similar to the values available for the velocity maps. Attack velocities that are below this threshold will not trigger notes. If you set this parameter’s value higher than the HiVel value, the layer will not play at all. High Velocity (HiVel) Similarly, this will set the highest attack velocity at which the layer will be enabled. Attack velocities above this threshold will not trigger notes in this layer. Using LoVel and HiVel, you can set up velocity switching between up to eight layers. If you need even more, you can do it using the Enable and Enable Sense (S) parameters (page 6‐24). Pitch Bend Mode (Bend) This determines how Pitch bend control messages will affect the current layer. A value of All bends all notes that are on when the Pitch bend message is generated. A value of Key bends only those notes whose triggers are physically on when the Pitch bend message is generated (notes held with the sustain pedal, for example, won’t bend). This is great for playing guitar solos on top of chords—play a chord, hold it with the Sustain pedal, then play your licks and ... -
Page 82: Minimum Delay (Mindly), Maximum Delay (Maxdly)
Program Mode The LAYER Page Minimum Delay (MinDly), Maximum Delay (MaxDly) The length of the delay is determined by these two parameters. When the control source assigned to DlyCtl is at its minimum, the delay will be equal to the value of MinDly. The delay will be equal to the value of MaxDly when the control source is at its maximum. If DlyCtl is set to OFF, you get the minimum delay. If it’s set to ON, you get the maximum delay. This doesn’t change the note’s attack time, just the time interval between the Note On message and the start of the attack. The delay is measured in seconds. Enable This assigns a control source to activate or deactivate the layer. When the value of the assigned control source is between the minimum and maximum thresholds set by the Sense (S) parameter, the layer is active. When the value of the assigned control source is below the minimum or above the maximum, the layer is inactive. By default, many layers have the Enable parameter set to ON, so the minimum and maximum thresholds don’t matter. They’re relevant only when Enable is set to a specific control source (like MWheel). Some local control sources (KeyNum and AttVel, for example) are not valid for the Enable parameter. In these cases, you should use the global equivalent (GKeyNum and GAttVel in this example). Enable Sense (S) This parameter determines how and when a layer is enabled by the control source assigned for the Enable parameter. Enable Sense has three values: orientation, minimum, and maximum. Suppose for a moment that you’re editing a program, and in the current layer you’ve set the value of Enable to MWheel, which causes the Mod Wheel to control whether the layer is active. The default values for Enable Sense are as follows: orientation is Norm; minimum is 64, and maximum is 127. This means that when the Mod Wheel is less than halfway up, the layer is disabled. The layer plays only when the Mod Wheel is more than halfway up. Change the orientation to Rvrs, and the layer plays only when the Mod Wheel is less than halfway up. Change the orientation back to Norm, and change the minimum to 127. Now the layer plays only when the Mod Wheel is all the way up. You could use this parameter to set up a two‐layer program that would let you use a MIDI ... -
Page 83: Opaque
3–D 3. Sustain Pedal (SusPdl) When this parameter is on, the layer will respond to all sustain messages (Controller destination 64, Sustain). When off, the current layer will ignore sustain messages. On2 means that the sustain pedal will not catch the release of a note that is still sounding when the sustain message is received; this can be very useful in a program that uses amplitude envelopes with a long release time. Sostenuto Pedal (SosPdl) When Sostenuto is on, the layer will respond to all sostenuto messages (Controller destination 66, Sostenuto). When off, the layer ignores sostenuto messages. Sostenuto, as you may know, is a feature found on pianos that have three pedals. Pressing the Sostenuto pedal on a piano (usually the middle pedal) sustains the notes whose keys you were holding down when you pressed the pedal. Notes played after the pedal is already down do not get sustained. Freeze Pedal (FrzPdl) This parameter activates or deactivates the layer’s response to Freeze pedal messages (Controller destination 69, Freeze). The Freeze pedal control causes all notes that are on to sustain without decay until the Freeze pedal control goes off. If a note is already decaying, it will freeze at that level. Ignore Release (IgnRel) When on, the layer will ignore all Note Off messages received by the PC3K. This should be used only with sounds that decay naturally, otherwise the sounds will sustain forever. When IgnRel is off, the layer responds normally to Note Off messages. This parameter can come in handy when your PC3K is slaved to a drum machine or sequencer, which sometimes generates Note Ons and Note Offs so close together that the envelope doesn’t have time to play before the note is released. You’ll also want to use this parameter when you’re playing staccato, and the sound you’re playing has a long amplitude envelope. This parameter should be used only with notes that eventually decay to silence. Sustaining sounds will sustain forever. Do not use Ignore Release with Monophonic programs (page 6‐34). 6-25... -
Page 84: Hold Through Attack (Thratt)
Program Mode The PITCH Page Hold Through Attack (ThrAtt) When on, this parameter causes all notes in the layer to sustain through the entire first attack segment of their amplitude envelopes, even if the notes have been released. If you have a sound with a slow attack, or an attack that’s delayed with the delay control, setting this parameter to On will make sure your notes reach full amplitude even if you’re playing fast. When set to Off, notes will release as soon as you release the note (generate a Note Off). If the first attack segment of the layer’s amplitude envelope is very short, you probably won’t notice a difference between values of On and Off. Hold Until Decay (TilDec) When on, this parameter causes all notes in the layer to sustain through all three attack segments in their amplitude envelopes even if the notes have been released. Looped amplitude envelopes will not loop, however, if the notes are released before reaching the end of the final attack segment. Notes will go into their normal releases if they are released after the envelope has looped. When set to Off, notes will release as soon as a Note Off message is generated. The PITCH Page Pressing the PITCH soft button takes you to the DSPCTL page with the Pitch function highlighted. See The DSP Control (DSPCTL) Page on page 6‐28 for more information on the Pitch function. The AMP Page Pressing the AMP soft button takes you to the DSPCTL page with the Amp function (labeled as “Level”) highlighted. See The DSP Control (DSPCTL) Page on page 6‐28 for more information on the Amp function. -
Page 85: The Algorithm (Alg) Page
Program Mode The Algorithm (ALG) Page The Algorithm (ALG) Page Press the ALG soft button to call up the Algorithm (ALG) page. The top line of the display gives you the usual mode reminder, and tells you which layer you’re looking at, as well as how many layers are in the current program. You can view the ALG pages of any other layers in the program by using the Chan/Layer buttons. The central portion of the page shows the algorithm for the currently selected layer. You see the number of the algorithm (from 1 to 28, 101 to 131, and the IDs for any user‐defined algorithms) and a graphic representation of the signal path, as well as the currently selected DSP functions within the signal path. To use a different algorithm, select the Algorithm parameter and use any data entry method to select a different one. To change the DSP function within an algorithm, move the cursor to the block you want to change, then use the Alpha Wheel or Plus/Minus buttons. There’s a staggering number of combinations of algorithms and DSP functions alone, not to mention the numerous controls that can be used to modify the DSP functions. Note: Changing a layer’s algorithm can affect the layer’s sound drastically. It’s a good idea to bring down the volume of your PC3K or your sound system before changing algorithms. See Algorithm Basics on page 6‐13 for information on editing algorithms. 6-27... -
Page 86: The Dsp Control (Dspctl) Page
Program Mode The DSP Control (DSPCTL) Page The DSP Control (DSPCTL) Page Before reading further, be sure to read Algorithm Basics on page 6‐13 and Common DSP Control Parameters on page 6‐14. Press the DSPCTL soft button to call up the DSP Control (DSPCTL) page, which is displayed below: Function Parameter Range of Values Default Pitch -128 to 127 semitones Fine Adjust ± 100 cents Pitch Hertz Adjust ±... -
Page 87: The Dsp Modulation (Dspmod) Page
Program Mode The DSP Modulation (DSPMOD) Page The label of a function‐parameter depends on its corresponding function‐block in the current layer’s algorithm. The above DSPCTL page corresponds to the following algorithm: The DSP Modulation (DSPMOD) Page Before reading further, be sure to read Algorithm Basics on page 6‐13 and Common DSP Control Parameters on page 6‐14. Press the DSPMOD soft button to call up the DSP Modulation (DSPMOD) page, which is displayed below: Parameter Range of Values Default Source 1 Control Source List Depth (Depends on Function) Source 2 Control Source List Depth Control Control Source List... -
Page 88: The Output Page
Program Mode The OUTPUT Page Each function‐parameter’s subpage contains the programmable parameters of the highlighted function‐parameter. By assigning control sources to modulate a function‐parameter, you can enable real‐time control of your program’s sound and behavior. You can assign Src1 to any control source, and can specify its maximum value with the Depth parameter. Src2 is different— you can assign it to any control source, but can also assign a control source to its maximum value with the DptCtl parameter. You can then specify the range of Src2’s depth with the MinDepth and MaxDepth parameters. Note: The PC3K features an easy shortcut for quickly assigning any of the PC3K’s realtime controllers (sliders, wheels, buttons, etc.) to a currently selected parameter (such as the Src1 and Src2 parameters above.) Simply hold the Enter button and move the desired controller. The label of a function‐parameter depends on its corresponding function‐block in the current layer’s algorithm. The above DSPMOD page corresponds to the following algorithm: The OUTPUT Page Press the OUTPUT soft button to get to the OUTPUT page, where you set the layer’s pre‐ and post‐FX panning. There are actually four different configurations of the OUTPUT page; which one you see depends on whether the current layer uses a stereo keymap, and whether it uses program FX or layer‐specific effects (more on this in The Program FX (PROGFX) Page on page 6‐47 and The Layer FX (LYR_FX) Page on page 6‐49). Regardless of the page’s configuration, there are parameters for adjusting the pan position, the pan mode, the pan table (if any), the crossfade control, and the crossfade sense. Layers that use stereo keymaps, or that use layer‐specific FX, have additional parameters on their OUTPUT pages. The following page is for a mono keymap program that uses program FX: 6-30... -
Page 89: Pan
Program Mode The OUTPUT Page Parameter Range of Values Default Pan (or Pan 1) ± 64 (Pan 2) ± 64 Pan Mode Fixed, +MIDI, Auto, Reverse +MIDI (Output Pan) ± 64 (Output Gain) -96 to 48 decibels (Output Pan Mode) Fixed, +MIDI +MIDI Pan Table... -
Page 90: Output: Pan, Gain, And Mode
These parameters are analogous to the output parameters on the COMMON page, but are layer‐ specific—the COMMON output parameters apply to all layers. You can use the output parameters on the OUTPUT page to adjust the panning and gain of the post‐FX signal of the current layer. Pan Table The factory preset pan tables are key‐specific panning schemes by which the note that each key produces is uniquely panned. These tables are particularly useful for producing the stereo image of a drum set when creating percussion programs, or for producing the stereo image of a piano when creating piano programs. Crossfade and Crossfade Sense (XFadeSense) The Crossfade parameter lets you select a control source to fade the current layer’s amplitude from zero to maximum. When XFadeSense is Normal, the layer is at full amplitude when the Crossfade control is at minimum. With XFadeSense set to Reverse, the layer is at zero amplitude when the Crossfade control is at minimum. This parameter is similar to the Src1 and Depth parameters for the Amp function on the DSPCTL and DSPMOD pages, but the attenuation curve for the Crossfade parameter is optimized specifically for crossfades. To crossfade two layers in the same program, assign the same control source for the CrossFade parameters in both layers, then set one of their XFadeSense parameters to a value of Norm, and the other’s to Rvrs. Drum Remap The Drum Remap parameter should generally not be changed. This parameter lets the PC3K know how drum programs are mapped so that drum sounds can be properly remapped when using the General MIDI (GM) drum map (see below.) Kurz1 designates that the current drum program was originally a PC2 program, and that it uses the PC2 drum map (programs 113‐119 use this map.) Kurz2 designates that the current drum kit uses the new PC3K drum map (all other factory drum programs use this map: 120, 241‐248, 369‐376.) The new drum map is similar to that of the PC2, except tom‐tom sounds have been moved into octave C3‐C4, so they are more easily playable with the main kick and snare drum sounds in that octave. When editing a kit, make sure to follow the layout of the drum map being used if you want to be able to properly remap the kit to the GM drum map. Programs that have the Drum Remap parameter set to Off will not be viewed by the PC3K as drum programs and will not be affected when remapping to the GM drum map. 6-32... -
Page 91: Exclusive Zone Map
Program Mode The COMMON Page In most keyboards and synthesizers, drum programs are mapped as dictated by the General MIDI (GM) industry standard. The GM drum map isn’t optimally intuitive in terms of playability, so we developed our own unique keymap that is more intuitive and lends better to performance. However, the GM drum map is so commonplace that many players feel most comfortable playing drum programs with the GM drum map. So, we designed the PC3K such that you can remap drum programs to the GM drum map. You can set drum programs to remap to the GM drum map in Master Mode. On the Master Mode I screen set the drum remap parameter to GM. To return drum programs to their original maps, set this parameter to None. See Drum Remap on page 11‐2 in the Master Mode chapter for more information. Exclusive Zone Map The Exclusive Zone Map is another parameter that applies principally to drum programs. When using a drum program, you may want the closed hi‐hat sounds to “cut off” open hi‐hat sounds. Since you can remap the keymaps of drum programs, this parameter remaps “cut off keys” accordingly. Like Drum Remap, you can use this parameter on any program, but you probably won’t want to do this. The COMMON Page The COMMON page is reached by pressing the COMMON soft button in the Program Editor. Here’s where you find 12 frequently‐used parameters that affect the entire current program, not just the current layer. Notice that when the Monophonic parameter is set to its default value of Off, the four monophonic parameters do not appear on the page. Parameter Range of Values Default Pitch Bend Range Up ±... -
Page 92: Pitch Bend Range Up And Down
Pitch Bend Range Up and Down Use these parameters to define how much the pitch will change when you move your Pitch Wheel. For both Pitch Bend Range parameters, positive values will cause the pitch to bend up, while negative values will cause the pitch to bend down. Large positive values can cause samples to bend to their maximum upward pitch shift before the Pitch Wheel is fully up (or down). This will not happen when bending pitch down. Monophonic When off, the program is polyphonic—it can play up to 128 notes at a time. Notice that when the Monophonic parameter is off, the LegatoPlay parameter and the three Portamento parameters do not appear on the COMMON page. This is because only monophonic programs can use portamento. When On, the program will play only one note at a time. This makes it possible to use and to determine the behavior of the portamento feature. Do not set Ignore Release On (page 6‐25) when you are using Monophonic programs, since the lack of Note Off messages will prevent you from switching programs properly. Legato Play When Legato Play is on, a note will play its attack only when all other notes have been released. This is useful for realistic instrumental sounds. Portamento This parameter is either on or off. The default value of Off means that portamento is disabled for the current program. Portamento is a glide between pitches. On actual acoustic instruments like violin and bass, it’s achieved by sliding a finger along a vibrating string. On most keyboards that offer portamento, it’s achieved by holding down a key that triggers the starting note, then striking and releasing other keys. The pitch glides toward the most recently triggered note, and remains at that pitch as long as the note remains on. The PC3K gives you two ways to get portamento. See the Attack Portamento parameter below. When you’re applying large amounts of portamento to multi‐sampled sounds (Acoustic Guitar, for example), the PC3K will play more than one sample root as the pitch glides from the starting pitch to the ending pitch. This may cause a small click at each sample root transition. You can reduce the number of clicks you’ll hear by entering the Program Editor and adjusting the KeyTrk parameter on both the KEYMAP and PITCH pages. The quickest way is to set the KeyTrk value on the KEYMAP page to 0, and to 100 on the PITCH page. This will stretch the sample root that plays at C 4 across the entire keyboard. Now any amount of portamento will play only one sample root, and the clicks will disappear. 6-34... -
Page 93: Portamento Rate
As long as the combined values of the KeyTrk parameters on both pages add up to 100, you’ll have normal semitone intervals between keys. If you set both parameters to values of 50, for example, the sound will still play normally, and you’ll have several sample roots (about half the number of the original sound) stretched evenly across the keyboard, instead of just one. This will give you fewer clicks than in the original sound, but not as much change in timbre as setting the KEYMAP KeyTrk value all the way to 0. Set the KEYMAP KeyTrk parameter higher to reduce the change in timbre, or set the PITCH KeyTrk value higher to reduce the number of clicks. Just make sure the combined values add up to 100, to preserve the normal intervals between notes. Portamento Rate The setting for Portamento rate determines how fast the current note glides from starting pitch to ending pitch. The value of this parameter tells you how many seconds the note takes to glide one semitone toward the ending pitch. At a setting of 12 keys/second, for example, the pitch would glide an octave every second. The list of values is nonlinear; that is, the increments get larger as you scroll to higher values. Attack Portamento This parameter toggles between two types of portamento. When set to On, the PC3K remembers the starting pitch so you don’t have to hold a note on to achieve portamento. The pitch always glides to each new note from the previously triggered note. When set to Off, the pitch will glide to the most recently triggered note only when the previous note is still on (in other words, you must use legato fingering). Globals This is another toggle, which affects LFO2, ASR2, FUNs 2 and 4. When off, these three control sources are local; they affect each individual note in the layers that use them as a control source. They begin operating each time a note in that layer is triggered. When the Globals parameter is set to On, these control sources become global, that is they affect every note in every layer of the current program, they’re not specific to any one layer. When these control sources are global, they begin operating as soon as the program is selected. When Globals are on, LFO2, ASR2, and FUNs 2 and 4 will appear on their respective pages preceded by the letter G to indicate that they’re global. You’ll use global control sources when you want to affect all notes in a program uniformly, and local control sources when you want to affect each note independently. For example, you’d use a global LFO controlling pitch to create a Leslie effect on an organ sound, since you want the affect applied to all the notes you play. You’d use a local LFO controlling pitch to create a vibrato for a solo violin, since you want to be able to vary the rate and depth of the vibrato for each note. -
Page 94: Demo Song
Program Mode The COMMON Page When the OPanMode is set to Fixed the pan position remains as defined with the OutPan parameter, ignoring MIDI pan messages. When the OPanMode is set to +MIDI, MIDI pan messages (MIDI 10) will shift the sound to the left or right of the Pan parameter setting. Message values below 64 shift it left, while those above 64 shift it right. Demo Song The Demo Song parameter allows you to choose the demo song for the current program. The demo song is a short, pre‐programmed song that gives you a demonstration of the program in a musical context. You can play a program’s demo song in any page in the Program mode by pressing the Play/Pause button, and stop the song by pressing the Stop button (both buttons are located under the MODE buttons on the front panel). When in the Program mode entry‐level page, you can hear a demo song in whatever program you want by pressing the Play/Pause button with one program selected, and then selecting another program. None of the KB3 programs have demo songs, but by this method, you could, for example, hear the demo song for program 83 Big Old Jupiter played with the KB3 program 53 Testify. Note: You can also trigger and stop demo songs with a simultaneous double button press of the up and down cursor buttons. 6-36... -
Page 95: The Lfo Page
Program Mode The LFO Page The LFO Page LFOs are low‐frequency (i.e., subsonic frequency) oscillators. You’ll use the LFO page to define the behavior of the two LFOs available to each layer. LFOs are periodic (repeating) control sources. The basic elements are the rate and shape, which define how frequently the LFO repeats, and the waveform of the modulation signal it generates. With the PC3K, you can set upper and lower limits on each LFO’s rate, and assign a control source to change the LFO’s rate in realtime, if you wish. Because of its periodic nature, the LFO is perfect for creating effects like vibrato (cyclic variation in pitch) and tremolo (cyclic variation in amplitude). When you’re editing LFOs, or any control source, remember that it must be assigned to control some parameter before you’ll hear the effects of your edits. LFO1 is always local, meaning that it’s triggered with each Note On event, and runs independently for each note in the layer. LFO2 is local by default, but can be made global. This is done on the COMMON page, by setting the Globals parameter to On, which causes LFO2, ASR2, FUN2 and FUN4 all to become global. Global controls uniformly affect every note in each layer. Parameter Group (Available Range of Values Default for each of LFO1 and LFO2) Minimum Rate 1/4 note, 1/8 note, 1/8 triplet, 1/16 note, 0.00... -
Page 96: Minimum Rate
Program Mode The LFO Page Minimum Rate This is the slowest rate at which the LFO runs. When its Rate Control is set to OFF, or when the control source assigned to it is at its minimum, the LFO runs at its minimum rate. As previously mentioned, the values 1/4 note, 1/8 note, 1/8 triplet, and 1/16 note sync the Minimum Rate with the PC3K’s system tempo. Of course, if you choose to tempo sync your LFO, then the LFO rate is fixed, and you can specify neither Maximum Rate nor Rate Control. The display changes thusly: Maximum Rate This is the fastest possible rate for the LFO. When its Rate Control is set to ON, or when the control source assigned to it is at its maximum, the LFO runs at its maximum rate. Rate Control Assign any control source in the list to modulate the LFO’s rate between its minimum and maximum. A continuous control like the Mod Wheel is a natural choice, enabling you to get just about any rate between minimum and maximum. But you can use a switch control too, to get just the minimum or maximum with nothing in between. Assigning MPress as the rate control for an LFO vibrato gives you an easy way to increase the vibrato rate in realtime, as you can on many acoustic instruments. LFO Shape The shape of the LFO waveform determines the nature of its effect on the signal its modulating. An easy way to check the effects of the different LFO shapes is to set LFO1 as the value for the Src1 parameter on the PITCH page, and set the Depth for Src1 to 400 cents or so. Then go to the LFO page, set the Min and Max rates for LFO1 at 0.00 Hz and 4.00 Hz or so, and set the Rate control to MWheel. Now play your MIDI controller and you’ll hear the LFO’s rate change when you move its Mod Wheel. Select different LFO Shapes and check out the effect on the pitch. LFO Phase Use this parameter to determine the starting point of the LFO’s cycle. One complete cycle of the LFO is 360 degrees. 0 degrees phase corresponds to a control signal value of 0, becoming positive. Each 90‐degree increment in the phase represents a quarter‐cycle of the LFO. When an LFO is local, the phase parameter gives you control over the starting point of the LFO ... -
Page 97: The Asr Page
Program Mode The ASR Page The ASR Page ASRs are three‐section unipolar envelopes—attack, sustain, and release. The PC3K’s ASRs can be triggered by a programmable control source, and can be delayed. ASR1 is always a local control. ASR2 is local by default, but becomes global if the Globals parameter on the COMMON page is set to On. ASRs are frequently used to ramp the depth of pitch or amplitude in a vibrato or tremolo, enabling delays in those effects. The ASR page consists of two rows of five parameters, one row for each of the ASRs. Parameter Range of Values Default Trigger Control Source List Mode Normal, Hold, Repeat Normal Delay 0 to 30 seconds 0 seconds Attack 0 to 30 seconds... -
Page 98: Attack
Program Mode The Function (FUN) Page Attack This defines how long the ASR takes to ramp up from minimum to maximum effect on whatever it’s patched to. Release This defines how long the ASR takes to fade to minimum from its maximum. If the ASR’s trigger switches off before the ASR has reached maximum, the ASR releases from that level. The Function (FUN) Page FUN is short for function. The PC3K’s four FUNs greatly extend the flexibility of the control sources. Each FUN accepts input from any two control sources, performs a selectable function on the two input signals, and sends the result as its output, which can be assigned like any other control source. Using the FUNs involves defining them on the FUN page, then assigning one or more of them as control sources. The FUN page looks like this: There are three parameters for each FUN. Inputs a and b can be any control source from the Control Source list. The control sources you want to combine are the ones you’ll assign as the values for these parameters. The Function parameter determines what mathematical function is applied to the two inputs. When a FUN has been assigned as a control source, the PC3K reads the values of the two control sources defined as Inputs a and b. It then processes them according to the setting for the Function parameter, and the resulting value is the FUN’s output. 6-40... -
Page 99: The Amplitude Envelope (Ampenv) Page
Program Mode The Amplitude Envelope (AMPENV) Page The Amplitude Envelope (AMPENV) Page Amplitude envelopes have three sections: attack, decay, and release. The attack section determines how long each note takes to reach its assigned amplitude level after you trigger a Note On event. The decay section determines how quickly and how much a sustained sound fades before a Note Off is triggered. The release section determines how quickly a sound fades to silence after a Note Off is triggered. Press the AMPENV soft button to reach the Amplitude Envelope page. For many programs, it will look like the diagram below, which tells you that the amplitude for the current layer is the default, “natural” ROM amplitude envelope that’s applied to each sample and waveform during its original development process. You’ll leave the amplitude envelope in Natural mode when you don’t want to change the way the current layer’s loudness develops. If you want to build your own amplitude envelope, just turn the Alpha Wheel a click. The value Natural will change to User, and a set of AMPENV parameters will appear. The sound will change when you do this, because the default settings for the User envelope, as shown in the diagram below, take effect as soon as you leave Natural mode. Returning to Natural mode applies the original amplitude envelope once again. Many programs feature User envelopes with appropriate envelope settings. This is usually the case for programs that use samples of acoustic instruments, since it provides a convenient starting point for you to adjust the envelopes. You’ll tweak the parameters on the AMPENV page when you want to shape the amplitude characteristics of your sounds. A graphic view of the amplitude envelope will appear on the display to give you a visual sense of the envelope’s characteristics. The dots along the envelope graphic indicate the breakpoints between the envelope’s various segments. The small horizontal arrow represents the end of the decay section. The small downward‐pointing arrow represents the beginning of the release section. 6-41... -
Page 100: Attack Segment Times
Program Mode The Amplitude Envelope (AMPENV) Page Because the PC3K’s ROM samples are stored in a compressed format, applying an altered amplitude envelope can change more than just the amplitude of your sound, since it also changes the rate at which the samples are decompressed for playback. When the samples are made to play back with altered envelopes, the timbres can evolve in new and interesting ways. The AMPENV page’s top line gives you the usual location reminder, points out the currently selected layer, and tells you the relative scale of the envelope’s graphic view. The envelope graphic shrinks in scale as the segment times get longer. This auto‐zoom feature maximizes the available display space. Try lengthening one of the segment times. The envelope graphic will stretch to fill the display from left to right. When it fills the display, it will shrink to half its size, and the top line will indicate that the scale has changed (from [1/1] to [1/2], for example). Each parameter on this page has two values, as listed below. For the envelope segments, the first (upper) value is the duration of the segment, and the second is the amplitude level at the completion of the segment. For the Loop parameter, the values define how the envelope loops, and how many times the loop cycles. Parameter Group Parameter Range of Values Time 0 to 60 seconds Attack Segment 1, 2, 3 Level 0 to 100%... -
Page 101: Decay Segment
Loop Type There are seven different values for Loop type. A value of Off disables looping for the current layer’s amplitude envelope. Values of seg1F, seg2F, and seg3F are forward loops. In each case, the amplitude envelope plays through the attack and decay sections, then loops back to the beginning of the first, second, or third attack segments, respectively. Values of seg1B, seg2B, and seg3B, are bidirectional loops. The amplitude envelope plays through the attack and decay sections, then reverses and plays backward to the beginning of the first, second, or third attack segment, respectively. When it reaches the beginning of the assigned attack segment, it reverses again, playing forward to the end of the decay section, and so on. Number of Loops A value of Inf makes the amplitude envelope loop until a Note Off is generated. Values of 1 through 31 indicate how many times the loop will repeat after the amplitude envelope has played once through its normal cycle. Regardless of the loop type and the number of loops, each note goes into its release section as soon as its Note State goes off (that is, when a Note Off is generated). The envelope will continue to loop as long as Note State remains on, whether it’s held on by a pedal, by the IgnRel parameter (described in the section entitled The LAYER Page on page 6‐22), or whatever. The Envelope 2 (ENV2) and Envelope 3 (ENV3) Pages The PC3K offers two envelopes in addition to AMPENV. Like AMPENV, ENV2 and ENV3 can be assigned like any other control source. Unlike AMPENV, however, ENV2 and ENV3 can be bipolar. This means that you can set negative values for them. (Obviously, you can’t have an amplitude less than zero, so AMPENV is unipolar—the values range from either 0 to 100% or 0 to 150%.) A bipolar envelope controlling pitch, for example, could modulate the pitch both above and below its original level. 6-43... -
Page 102: The Envelope Control (Envctl) Page
Program Mode The Envelope Control (ENVCTL) Page Another difference is that AMPENV always controls the amplitude of the layer, so even if you use it as a control source for other functions, it will still affect the layer’s amplitude. ENV2 and ENV3 affect only those layers that have them assigned as a control source. Also, AMPENV uses an exponential attack (the amplitude rises much faster at the end of the attack segment than it does at the beginning), while ENV2 and ENV3 use linear attacks (the attack segment increases at the same rate from start to finish). The pages for Envelopes 2 and 3 are reached with the soft buttons ENV2 and ENV3. When you select these pages, you’ll find a display that looks very much like the AMPENV page. The only differences are that you can program an amount for Rel3; the Rel1 and Rel2 limits, which are ±100%; and in the envelope graphic, which has a dotted line running horizontally across the display. This is the zero level line; negative level values for the various envelope segments will cause the envelope graphic to dip below this line. The Envelope Control (ENVCTL) Page The Envelope Control page gives you realtime control over the rates of each section of the amplitude envelope for both natural and user envelopes (see The Amplitude Envelope (AMPENV) Page on page 6‐41.) Press the ENVCTL soft button to reach the ENVCTL page. The display’s top line reminds you of the current layer. The column on the left lists the three section types of the amplitude envelope, and each corresponding line lists the values for the five DSP control parameters that are available for each section type. The DSP control parameters are: Adjust, Key tracking, Velocity tracking, and Source/Depth, which are listed at the top of each corresponding column. When AMPENV is set to User mode, the Attack and Release sections on this page apply to the attack and release sections on the AMPENV page. It’s important to keep in mind that the values for the various parameters are cumulative, meaning that if for example you set attack to be controlled by Keytrk and VelTrk, the resulting change on Attack would be 6-44... -
Page 103: Adjust
Program Mode The Envelope Control (ENVCTL) Page affected by the combination of the values produced by KeyTrk and VelTrk. Also note that unlike previous Kurzweil models, ENVCTL does affect the attack sections of natural envelopes. Additionally, the bottom line of this page lets you make use of the Impact feature, which lets you boost or cut the amplitude of the first 20 milliseconds of a note’s attack. The parameters and values in the following parameters list (see below) apply to each of the three envelope sections—attack, decay, and release. We’ll describe them only once, since their functions are largely the same for each envelope section. The only difference is with velocity tracking, which is only available as a parameter to control attack sections of the amplitude envelope (however, you can assign attack velocity as the value for the Source parameter in each of the sections). The values of each of these parameters multiply the rates of the envelope sections they control. Values greater than 1.000x make the envelope sections run faster (they increase the rate), while values less than 1.000x make the envelope sections run slower. Say for example that on the current layer’s AMPENV page you had set the Decay section’s time at 2.00 seconds, and its level at 0%. This sets the layer’s amplitude to fade to silence two seconds after the completion of the last attack segment. The decay time is two seconds; the decay rate is 50% per second. Now if you select the ENVCTL page and set the Decay Adjust parameter to a value of 2.000x, you’ve increased the decay rate by a factor of two, making it twice as fast. The rate increases to 100% per second, and the decay time is now one second instead of two. Note: Since 0 multiplied by any number equals 0, the envelope parameters on this page will have no effect on any AMPENV sections set to 0 seconds. A way around this is to change any AMPENV sections set to 0 to 0.02 seconds. Parameter Group (Available Range of Values for each of Att, Dec, Rel, Imp) Adjust 0.018 to 50.000x (-24.0 to 24.0 dB for Imp) -
Page 104: Velocity Tracking
Program Mode The Envelope Control (ENVCTL) Page Velocity Tracking Use your attack velocity as the control input for the current layer’s attack section (this parameter doesn’t apply to decay or release). When the value of this parameter is greater than 1.000x, attack velocities greater than 64 make the attack section run faster, and attack velocities below 64 make it run slower. This gives you realtime attack control over the envelope. Source, Depth These two parameters work together to let you assign a control like the Mod Wheel to affect the current layer’s amplitude envelope in realtime. The value of the Source parameter defines which control affects the envelope section, and the value of the Depth parameter defines how much the rate is multiplied when the control is at its maximum value, 127. No effect is had when the control is at its minimum value, 0, and Depth values are scaled for controller values in between. Note: For each note triggered, you can only set the controller value that will scale the Depth parameter of an envelope section before that section of the envelope is triggered. For controllers assigned for Attack, the controller value used will be the last received before the note is triggered. For controllers assigned for Decay, the controller value used will be the last received before the final section of the attack envelope reaches its maximum amplitude. For controllers assigned for Release, the controller value used will be the last received before the note is released. To put it another way, for each envelope section, you cannot change the rate of a note’s envelope once that section of the envelope has been triggered. Impact Impact can boost or cut note volume by up to 24 dB during the first 20 milliseconds of the attack of an envelope. This feature is an easy way to get more “thump” from your bass and drum sounds. 6-46... -
Page 105: The Program Fx (Progfx) Page
-95 to 24 decibels Aux Send (%) 0 to 100% Auxiliary Send Parameters Aux Pre/Post Insert Post, Pre Post Type dB, % Aux Modulation Control Source List On the PC3K, a program can have up to 11 insert effects and 2 aux effects using up to 16 DSP “units.” An insert is essentially just an effect that you apply to a program or layer, while aux effects receive signal from all active programs’ aux sends. Note the 0/0 Units in the middle of the top line of the page. This figure indicates how many of the total units are being used by the highlighted insert; the left‐hand number is the size of the insert, and the right‐hand number is the total number of units being used by the program. If you exceed the maximum number of DSP units, the PC3K will notify you that you have done so, and no effects will be applied to the program. Insert The Insert effect is the effects chain that is applied to the main audio bus. Aux 1, Aux 2 The Aux effect is the effects chain that is applied to the selected auxiliary audio bus. -
Page 106: Auxiliary Send Parameters
Program Mode The Program FX (PROGFX) Page Auxiliary Send Parameters The Auxiliary Send parameters determines the level of the program signal sent to the auxiliary effects chain. Aux Send The Aux Send parameter determines the level of the program signal sent to the auxiliary effects chain. Pre/Post Insert The Pre/Post Insert parameter determines the point at which the auxiliary effect is applied to the signal. When this parameter is set to Post, the PC3K applies the auxiliary effect to the signal post‐ insert, i.e., after the insert effect has been applied. When this parameter is set to Pre, the PC3K applies the auxiliary effect to the signal pre‐insert. To hear a program put through two effects in series (i.e., through two cascaded effects), choose your desired effects for the Insert and either Aux (for whatever Aux you choose, the other should be set to 0 None), set each bus’ Output to Main, and set the Aux Send parameter to either 0 dB or 100%. Then, set the Pre/Post Insert parameter to Post. To hear a program put through two effects in parallel (i.e., through two distinct effects), choose your desired effects for the Insert and either Aux (again, for whatever Aux you choose, the other should be set to 0 None), set each bus’ Output to Main, and set the Aux Send parameter to either 0 dB or 50%. Then, set the Pre/Post Insert parameter to Pre. With respect to each other, the Auxes are always in parallel, that is, they cannot be cascaded. Type The Type parameter determines how the selected wet aux signal (i.e., with effects applied) is mixed into the final signal. Additionally, it determines the units in which the Aux Send parameter values are. When Type is set to dB, the Aux Send parameter values are in units of decibels (dB). The value specified in the Aux Send parameter is the amount of program signal sent to the aux effects chain. To hear equal parts wet signal and dry signal (the signal with no effects applied) on the main audio output, set the main Insert effect to 0 None and the Insert Output to Main, and set the Aux 1 effect to your desired effect and the Aux 1 Output to Main. Then, set the Aux1 Send to ... -
Page 107: The Layer Fx (Lyr_Fx) Page
Program Mode The Layer FX (LYR_FX) Page The Layer FX (LYR_FX) Page Press the LYR_FX soft button to call up the Layer FX (LYR_FX) page. On this page, you can apply layer‐specific effects. There are three Layer FX Modes: Use Program FX, Layer‐Specific FX, and Use Another Layer’s FX. Use Program FX Mode With Use Program FX Mode selected, the current layer will use the effects configured on the Program FX (PROGFX) page. See The Program FX (PROGFX) Page on page 6‐47 for more information on program FX. Layer-Specific FX Mode With Layer‐Specific FX selected, you can configure the effects for the current layer. This mode’s parameters are similar to those of the PROGFX page. This mode is shown in the following display: All of the Layer‐Specific FX mode parameters have the same functions and ranges of values as their corresponding parameters on the PROGFX page. See The Program FX (PROGFX) Page on page 6‐47 for more information on these parameters. Use Another Layer’s FX Mode With Use Another Layer’s FX selected, you can put the current layer through the effects of ... -
Page 108: The Controllers (Ctls) Page
Program Mode The Controllers (CTLS) Page The Controllers (CTLS) Page Press the CTLS soft button to call up the Controllers (CTLS) page. The Controllers page is a list of the controllers on the PC3K you will be most likely to use as control sources and the values of those controllers. The page appears thusly: Controller Range of Values Default Value Slider A (6) None, 0-127 Slider B (13) None, 0-127 Slider C (22) None, 0-127 Slider D (23) None, 0-127 Slider E (24) -
Page 109: Function Soft Buttons
Program Mode Function Soft Buttons Function Soft Buttons The remainder of this chapter describes the soft buttons that perform specific functions, as opposed to selecting programming pages. The descriptions below are arranged in the order in which you would see the soft buttons if you pressed the more> button repeatedly. You can always get to these buttons, regardless of which page is currently selected. Set Controllers (SetCtl) As explained in The Controllers (CTLS) Page, the SetCtl soft button captures the values of the nine sliders, modwheel, breath controller, and switch. New Layer (NewLyr) Create a new layer, numbered one above the highest existing layer. The new layer’s parameters are those of the single layer in Program 999, called Default Program. When you press this button, the PC3K will tell you that it is creating a new layer, then will return to the page you were on. The new layer becomes the current layer, and is the highest‐numbered layer in the program. If the current program already has its maximum number of layers, the PC3K will tell you that you can’t add any more. Program 999 makes a good template for programs that you build from the algorithm up. You might want to edit Program 999 to adjust one or more parameters to values you want to use in your template program. If you like the settings of the default layer as they are, however, remember not to make any permanent changes to Program 999. Duplicate Layer (DupLyr) Create a copy of the current layer, duplicating the settings of all its parameters. The copy becomes the current layer, and is the highest‐numbered layer in the program. Import Layer (ImpLyr) Copy a specific layer from another program into the current program. This button brings up a dialog that prompts you to select a layer number and a program number. The dialog tells you ... -
Page 110: Save
Program Mode Function Soft Buttons Save Start the process of saving the current program. Delete Delete the current program from memory. You can also delete any other program from memory by scrolling through the list that appears when you press the Delete soft button, then pressing Delete again when the desired program is selected. If you attempt to delete a ROM program, the PC3K will say it’s deleting the program, but it doesn’t actually do it. INFO Press the INFO soft button to go to the INFOEDIT page where you can edit the controller assignment info for the current program. On the INFOEDIT page, use the Chan/Layer buttons to scroll through the current program’s list of controller assignment info. Each assignment info entry has a MIDI controller number and a Text parameter to describe what the assignment controls. To edit the text of a controller assignment, press the Text soft button. To create a new controller assignment info entry, press the New soft button (you will be prompted for a MIDI controller number.) To create a new controller assignment info entry with the same text as the current info entry, press the Dup soft button (you will be prompted for a MIDI controller number.) To delete the current controller assignment info entry, press the Delete soft button (you will be prompted to confirm or cancel.) To return to the program editor press the Done soft button or the Exit button. See Export on page 13‐12 for details on exporting program info. 6-52... -
Page 111: Editing Vast Programs With Kva Oscillators
Program Mode Editing VAST Programs With KVA Oscillators Editing VAST Programs With KVA Oscillators The PC3K uses KVA oscillators as another way to generate sounds in VAST programs. Unlike keymaps, which play samples stored in ROM, KVA oscillators create DSP‐generated waveforms every time they are triggered. The KVA oscillators can create a range of waveforms, from high quality simple waveforms familiar to users of classic analog synths, to complex waveforms which take advantage of the PC3K’s internal processing power and complex signal routing capabilities. Though the PC3K does have keymaps containing samples of basic synth waveforms, the use of KVA oscillators provides users with better portamento, more modulation options, higher sound quality, and other advantages which will be explained in this section. Learning to use KVA oscillators instead of keymaps (where appropriate) is simple and will increase the versatility of your VAST editing capabilities. VAST programs using layers with KVA oscillators can also be combined with other layers using keymaps. Basic Use of KVA Oscillators To understand the basic minimal setup of a KVA based program, select the program 1019 VA1NakedPWMPoly, and press the Edit button. If you are familiar with editing VAST programs, the first thing you may notice is that on the KEYMAP page, Keymap is set to 999 Silence (More on this in Advanced Use Of KVA Oscillators on page 6‐55.) Next, look at the AMPENV page. The AMPENV mode is set to User, which gives you control over the amplitude envelope (more on using Natural mode later.) Finally, look at the ALG page. In the current algorithm the 3 block KVA oscillator PWM has been selected, which generates the sound for this ... -
Page 112: Setting Kva Oscillator Type
Program Mode Editing VAST Programs With KVA Oscillators keymaps. For each oscillator, its coarse pitch parameter is named by an abbreviation of the oscillator name followed by “Pch.” For example, the coarse pitch parameter for a saw wave oscillator will be called Saw Pch. On the DSPCTL sub page for any oscillator Pch. parameter, you can adjust fine pitch by cents and Hertz, as well as KeyTrk and VelTrk settings for pitch. Note: Be sure to differentiate between the different pitch parameters, each used either only for keymaps or only for KVA oscillators. The Pitch parameter on the top left of the DSPCTL and DSPMOD pages always appears in VAST programs but only affects the pitch of keymaps. If a KVA oscillator is being used, this Pitch parameter will have no affect on the layer’s pitch, in which case the oscillator Pch. parameter described above must be used to control the pitch of the oscillator. Setting KVA Oscillator Type The PC3K comes with 19 Different KVA oscillators. There are 11 high quality anti‐aliased oscillators (free of digital artifacts,) and 8 oscillators that exhibit some aliasing (digital artifacts) in the higher octaves. The anti‐aliased oscillators use up more DSP resources than the ones with aliasing, but the improvement in sound quality is quite noticeable. We strongly recommend using the anti‐aliased oscillators for most applications. The tables below list KVA oscillators by type and function block size. Before setting an oscillator, you must choose an algorithm which includes a block that matches the block size for the oscillator that you wish to use. See The Algorithm (ALG) Page on page 6‐27 and Algorithm Basics on page 6‐13 for more on selecting algorithms. Once you have picked an algorithm with the desired block size, highlight the block and use the alpha wheel to scroll through the available functions until you find the desired oscillator. The SYNC SQUARE oscillator is an 8 block oscillator that requires the use of two layers (4 blocks each) and the Alt Input feature of cascade mode. See below for details on setting up the ... -
Page 113: Advanced Use Of Kva Oscillators
Program Mode Editing VAST Programs With KVA Oscillators Setting Up The Sync Square Oscillator: The Sync Square oscillator is actually comprised of two oscillators, a master and a slave, set up to emulate the way sync square oscillators worked on classic analog synthesizers. To create a program using Sync Square, select Default Program, #999. Select ʺnoneʺ on the keymap page. Select ʺuserʺ on the Ampenv page for an amp envelope. On the ALG page, select Algorithm 5 at the top of the page. Use the cursor buttons to select the function block and use the alpha wheel to select the ʺSYNC SQUARE (master) >>ʺ function. Next, press the << soft button to change soft button pages until you see ʺDupLyrʺ. Press DupLyr to duplicate the layer, creating layer 2. In layer 2, on the ALG page, change the function block to ʺ>> SYNC SQUARE (slave)ʺ, and set the Alt Input parameter to ʺLayer 1ʺ. The final step is to go to Layer 1ʹs DSPCTL page and turn the Level parameter all the way down, to ‐96dB (this ensures that you will only hear the output of the slave oscillator on layer 2, which is the intended function of Sync Square.) Now the Sync Square oscillator should be working. The ʺSyncoffʺ parameter, Sync Offset, is the main parameter for shaping the tone of this sound. Syncoff sets the sync offset between the master and slave square waves in each corresponding oscillator, which changes the shape of the waveform output by the slave oscillator. The Sync Square oscillator is most expressive when the Syncoff parameter modulated during performance. Use the DSPMOD page to assign an envelope or continuous controller like the Mod Wheel for this parameter to hear the effect (see The DSP Modulation (DSPMOD) Page on page 6‐29, as well as The DSP Control (DSPCTL) Page on page 6‐28 and Common DSP Control Parameters in Algorithm Basics on page 6‐13, for details on setting up modulation and other ways to control parameters, and see The Envelope 2 ... - Page 114 Program Mode Editing VAST Programs With KVA Oscillators cut some of the high frequencies from any signal that passes through it, in this case the PWM signal is passing through. With the LOPASS function still selected, press the Edit button. This brings you to the main parameter for the LOPASS object on the DSPCTL page, which is LP Frq (you can also reach this page using the DSPCTL soft button.) Here you can adjust the initial value of the function, in this case it is cut off frequency for the low pass filter. For this example, leave this initial value set to its default. With the LP Frq parameter selected, press right on the cursor button to get to this function’s sub page (the right half of the display.) Select the Veltrk parameter and use the alpha wheel or alpha numeric pad to turn it all the way up to 10800ct. Now keyboard velocities will affect the LP Frq parameter. A velocity of 127 will cause the filter’s cut off frequency to move up 10800 cents from its initial value, a velocity of 0 will have no effect on the cut off frequency, and values in between will increase the cut off frequency by a scaling between 0 and 10800 cents. Overall, this will cause higher played velocities to increase the cut off frequency, making the oscillator sound brighter, and lower velocities to lower the cut off frequency, making the oscillator sound duller. This method can be used to control any DSP function that is loaded into an algorithm. See Common DSP Control Parameters in Algorithm Basics on page 6‐13 for other control parameters available on the DSPCTL page. Alternatively, you could assign cut off frequency to be controlled by any continuous controller, such as the Mod Wheel. Start again with the unedited patch 1019 VA1NakedPWMPoly. Follow the same steps as above, but instead of changing any parameters on the DSPCTL page, press the DSPMOD soft button to reach the DSP Modulation page. On the left side of the screen, choose the parameter for LP Frq, and then press the right cursor button to reach the LP Frq sub page. On this sub page, you can assign any continuous controller to control the cut off frequency of the LOPASS function (or the main parameter for any function loaded in the current algorithm.) Select the Src1 parameter, hold the Enter button and move the Mod Wheel to quickly select MWheel (the Mod Wheel) as your control source. Next, press the cursor down button to select the Depth parameter, then use the alpha wheel or alpha numeric pad to turn it all the way up to 10800ct. Now the Mod Wheel will affect the LP Frq parameter. Moving the Mod Wheel all the way up (a value of 127) will cause the filter’s cut off frequency to move up 10800 cents from its initial value, moving the Mod Wheel all the way down (a value of 0) will have no effect on the cut off frequency, and values in between will increase the cut off frequency by a scaling between ...
- Page 115 Program Mode Editing VAST Programs With KVA Oscillators Oscillator Specific Control And Modulation Parameters: Several KVA oscillators also have their own modulation parameters that must be accessed to control the oscillator’s intended function. Below is a list of these oscillators and their distinctive parameters, grouped by block size. Though the following parameters could be left at one setting, utilizing one of the DSPCTL or DSPMOD techniques described in the above examples will expose a wider range of expression from each oscillator. 1 Block: LPNOIZ A noise generator combined with a low pass filter. Use the Noiz Frq parameter to control the cut off frequency of the filter. NOISE A simple noise generator. Use the Noise parameter to control the noise initial amplitude. SW + SHP (Sawtooth + Shaper) This oscillator is capable of basic FM Synthesis. Its distinctive parameter is Pch Coar. This oscillator must come after the sound source in an algorithm (either keymap or oscillator) in order to hear the effect of Pch Coar, which can radically change whatever the oscillator receives as an input. Works well placed after a Sine source. 2 Block: SINE+ This oscillator has an effect on an input signal that is similar to ring modulation. Its distinctive parameters are Sin+ Pch and Sine+ Am. This oscillator must come after the sound source in an algorithm (either keymap or oscillator) in order to hear the intended effect of Sin+ Pch and Sine+ Am, which can radically change whatever the oscillator receives as an input. The Sin+ Pch and Sine+ Am parameters affect the pitch and amplitude of the sine waveform without affecting the pitch of the input source, though these parameters will have a big effect on how the input signal is processed. ...
- Page 116 Program Mode Editing VAST Programs With KVA Oscillators PWM (Pulse Width Modulation) [Aliased (not recommended)] This oscillator’s distinctive parameter is PWM Wid, which adjusts pulse width from values of 1‐ 99. With PWM Wid set to a value of 50, PWM produces a square wave. The further the PWM Wid parameter is set from 50, the narrower the pulse width becomes, changing the shape of the output waveform and thus altering the oscillator’s tonal quality. 3 Block: PWM (Pulse Width Modulation) [Anti‐Aliased (recommended)] Same as 2 Block PWM, See above. 4 Block: SYNC SAW Sync Saw consists of two saw waves, one that you hear (the slave) and one that controls the slave (the master.) This oscillator’s distinctive parameter is SyncOff, which controls the offset of the slave and master waves. With SyncOff set to 0, the master has no effect on the slave. When an offset is set, the slave restarts its wave cycle every time the master wave completes a cycle. Offsets cause the slave to restart its cycle in the middle of normal sawtooth cycles, which causes the slave’s waveform shape and sound to be altered. SUPER SAW The Super Saw oscillator consists of two saw waves. This oscillator’s distinctive parameter is Detune, which has settings from 0‐50 cents, allowing you to detune both of the saw waves by up to 50 cents away from the root pitch of the key played. Detune affects both saw waves, one is detuned above the original root pitch, and the other is detuned below the original root pitch. TRIPLE SAW The Triple Saw oscillator consists of three saw waves. This oscillator’s distinctive parameter is Detune, which has settings from 0‐50 cents, allowing you to detune two of the saw waves by up to 50 cents away from the root pitch of the key played. Detune affects two of the saw waves, one is detuned above the original root pitch, and the other is detuned below the original root pitch. The third saw wave always plays the root pitch and is not affected by Detune. 6-58...
- Page 117 Editing VAST Programs With KVA Oscillators 8 Block: SYNC SQUARE (master) >>, >>SYNC SQUARE (slave) See above, Setting Up The Sync Square Oscillator: on page 6‐55. Use Of Keymaps and Natural Amplitude Envelopes With KVA Oscillators: Keymaps are important in layers using KVA oscillators, even though their samples are not usually heard in these layers (see the note below for exceptions.) Keymap selection is important because the maximum amplitude set for each key in the keymap is applied to the oscillator. For most uses of KVA oscillators, users will want to use the 999 Silence keymap because each key in the keymap is set to the same maximum amplitude, unlike many instrument keymaps. The 999 Silence keymap ensures uniform amplitude behavior of an oscillator, and with the amplitude envelope set to user mode, users can easily shape all aspects of an oscillator’s amplitude. The PC3K also has the ability to apply natural amplitude envelopes to oscillators. With an amplitude envelope set to natural mode, each oscillator note takes on the amplitude qualities of each sample in a keymap (with each note relative to sample key placement.) Each sample in a keymap has a natural envelope that was created during it’s original development process. Natural envelopes have much more detail than what is possible to create with the user amplitude envelope, and they are useful when trying to mimic specific instrument amplitude envelopes. When using this technique, remember that the maximum amplitude of each key is set by the current keymap. You can still control the overall parameters of a natural envelope by using the ENVCTL page. See the programs 213 Perc>Morph>Bass & 315 ElectroPercSynth for examples of KVA layers that use this technique. Each program uses percussion keymaps with natural envelopes to produce a fast, percussive attack. Also note that when using a KVA oscillator and a keymap other than 999 Silence, the layer will use the name of the keymap in the ...
-
Page 118: Editing Kb3 Programs
Program Mode Editing KB3 Programs Editing KB3 Programs You can edit a wide assortment of any KB3 program’s parameters. You can also create your own KB3 programs, though you must start with an existing KB3 program to do this. A regular PC3K program cannot be turned into a KB3 program. If you’re not sure whether the current program is a KB3 program, check the KB3 button (located above the right most slider). If the blue LED is on, then the current program is a KB3 program. Enter the KB3 program editor by pressing the Edit button while a KB3 program is selected in program mode. You’ll quickly see that the KB3 editor differs from the standard VAST program editor. The Tone Wheels (TONEWL) Page KB3 Mode uses DSP‐generated waveforms for the lower half of its tone wheels and samples for the upper half of its tone wheels. Using the parameters on the TONEWL page, you can specify which sample you wish to use, the number of tone wheels (which will affect how many other voices are available to you), and other related settings. Parameter Range of Values Upper Tone Wheel Keymap Sample List Upper Volume Adjust -96 to 96 dB... -
Page 119: Upper Volume Adjust
Program Mode The Tone Wheels (TONEWL) Page Upper Volume Adjust Since sample volumes can vary, while the volume of DSP‐generated waveforms will remain consistent, you may find it necessary to adjust the level of the sample‐based tone wheels. This parameter lets you adjust the amplitude of the upper (sample‐based) tone wheels relative to amplitude of the waveform‐generated tone wheels. Number of Tone Wheels This parameter lets you specify the number of tone wheels used by a KB3 program. The classic tone wheel organs used 91 tone wheels, though the lowest 12 were for the pedals only. Therefore, you may find 79 a good number of tone wheels to specify for realistic organ emulations. This would leave you 88 voices for other programs. You can specify up to 91 tone wheels. The number of PC3K voices used by a KB3 program is (number of tone wheels + 1) / 2, rounded to the next highest whole number if the result is a fraction. So, for example, with 79 tone wheels specified you would use 40 voices. Keep in mind that these voices are permanently allocated and running while the KB3 program is selected, and cannot be stolen. The additional voice used by KB3 programs is for keyclick. Organ Map The organ map controls the relative amplitude of each key, per drawbar. Like the wheel volume maps, these maps are based on measurements we’ve made on actual organs. Equal uses the same volume for each key and drawbar, and is not based on a real B3. Peck’s is a good normal map, from a B3 in good condition. Eric’s is a bit more idealized; it’s smoothed out, but less realistic. Bob’s is more uneven, based on an old B3. Wheel Volume Map The wheel volume map determines the volume level for each tone wheel. We’ve provided several tone wheel volume maps here, based on measurements we’ve taken on different organs. Equal is a map with all tone wheels at the same volume. It’s not based on a real B3. Bright is a ... -
Page 120: The Drawbars (Drawbr) Page
Program Mode The Drawbars (DRAWBR) Page The Drawbars (DRAWBR) Page Press the Drawbr soft button to view the DRAWBR Page. This page lets you edit KB3’s drawbars. Mode When you set Mode to Preset, the preset drawbar settings on this page will be installed at program selection. The drawbar values will immediately change, however, as soon as you move the corresponding drawbar. Set Mode to Live if you want the drawbar volume settings at program selection to be determined by the positions of the drawbar controllers (sliders). With either setting, any engagements of the drawbar controllers subsequent to program selection will affect drawbar volumes. Steps This parameter lets you specify the increments by which drawbar volumes will change. Choose either 0–8, to approximate the drawbar settings on actual organs, or choose 0–127 for a finer degree of resolution. Volume This parameter appears only if you’ve set Mode (see above) to Preset. Use the Volume parameter to set the preset volume of each of the nine drawbars. The available values will be 0–8 or 0–127, depending on the setting of the Steps parameter. Tune This parameter lets you tune each of the nine drawbars up or down in semitone steps. The values for the Tune parameter on the DRAWBR page shown above represent standard drawbar settings on a real B3, as shown in Table 6‐1 on page 6‐5. The Set Drawbars (SetDBR) Soft Button Press the SetDBR soft button to capture the current position of the drawbars, and use those ... -
Page 121: The Pitch Page
Program Mode The PITCH Page The PITCH Page The PITCH page parameters for KB3 programs is much like the PITCH page parameters for VAST programs. The only difference is that for KB3 programs, there are no Hz, KeyTrk, or VelTrk parameters. For a full description of the PITCH‐page parameters, see Common DSP Control Parameters on page 6‐14, The DSP Control (DSPCTL) Page on page 6‐28, and The DSP Modulation (DSPMOD) Page on page 6‐29. The AMP Page The AMP page parameters for KB3 programs is much like the AMP page parameters for VAST programs. The only difference is that for KB3 programs, there are no KeyTrk or VelTrk parameters. For a full description of the AMP page parameters, see Common DSP Control Parameters on page 6‐14, The DSP Control (DSPCTL) Page on page 6‐28, and The DSP Modulation (DSPMOD) Page on page 6‐29. 6-63... -
Page 122: The Perc1 Page
Program Mode The PERC1 Page The PERC1 Page Percussion is a characteristic feature of tone wheel organs. It’s especially useful while soloing, since percussion adds an extra “plink” (actually an extra tone at a defined harmonic) to the attack. You can reach the percussion parameters by pressing the Perc1 and Perc2 soft buttons. Parameter Range of Values Percussion Off, On Volume Soft, Loud Decay Slow, Fast Harmonic Low, High Velocity Tracking 0 to 100% Low Harmonic Drawbar 1 to 9 High Harmonic Drawbar 1 to 9 Steal Bar Drawbar 1 to 9... -
Page 123: Harmonic
Program Mode The PERC2 Page Harmonic This parameter switches between high and low harmonic percussion settings. The actual pitch is controlled by the LowHarm and HighHarm parameters. On keyboard models, you can toggle between low and high harmonics by pressing Assignable Controller Button 8 (Mute button 8). VelTrack Here is where you specify the degree to which key velocity controls percussion volume. A value of zero corresponds to no velocity tracking, which is like a real tone wheel organ. Other values add velocity tracking, so that increased velocity results in louder percussion. LowHarm Controls which drawbar is used as the basis for the percussion when Harmonic is set to Low. On an actual tone wheel organ, this is Drawbar 4 (2nd harmonic). The actual pitch obtained depends on the drawbar tuning. HighHarm Controls which drawbar is used as the basis for the percussion when Harmonic is set to High. On an actual tone wheel organ, this is Drawbar 5 (3rd harmonic). The actual pitch obtained depends on the drawbar tuning. StealBar Controls which drawbar is disabled when the percussion effect is turned on. On an unmodified tone wheel organ, the ninth drawbar is the one disabled. Any drawbar can be selected. The PERC2 Page Parameter Group (Available for each combination of Range of Values the Volume and Decay parameters on the PERC1 page) Percussion Level 0 to 24.0 dB Decay Time... -
Page 124: The Keyclk Page
Program Mode The KEYCLK Page The KEYCLK Page The Key Click feature adds a decaying burst of pitched noise to the attack of notes. Unlike the percussion, the key click is “multi‐triggered,” which means that every new note will trigger it. The parameters on this page primarily control the decay, volume, and pitch of the key click. Parameter Range of Values Key Click Off, On Volume -96.0 to 0.0 dB, in 0.5-dB increments Decay 0.005 to 1.280 seconds, in 0.005-second increments VelTrk 0 to 100% Pitch 1 to 120 Random 0 to 100%... -
Page 125: Pitch
Program Mode The KEYCLK Page Pitch Sets the basic pitch of the key click noise, relative to the highest tonewheel’s pitch. The pitch is controlled by a steep lowpass filter applied to white noise. The filter’s cut off frequency is controlled relative to key number, higher keys move the cutoff frequency up, lower keys move the cutoff frequency down. Random Controls the degree to which a random amount of amplitude variation is added to the key click. ReTrigThresh This parameter lets you set the volume level below which key click must decay before it will be retriggered. Note Attack Controls the attack characteristic of notes. Normal provides a smoothed attack, while a setting of Hard has an instant attack and will produce an audible click, in addition to any amount of key click specified with the other parameters on this page (you might prefer not to specify any additional key click when you use this setting). PercHard sets a hard attack level for percussion only; notes without percussion use a normal attack. Note Release Controls the release characteristic of notes. A setting of Normal has a smoothed release, while a setting of Hard has an instant release. Hard will produce an audible click. 6-67... -
Page 126: The Misc Page
Program Mode The MISC Page The MISC Page The MISC page contains an assortment of control parameters, including Leslie speed control and vibrato/chorus selection. Parameter Range of Values Preamp/Expression Response Off, On Leakage -96.0 to 0.0 dB, in 0.5-dB increments Leak Mode None, Type A, Type X, Type Y, Type Z Speed Control Slow, Fast Vibrato/Chorus Control Off, On Vibrato/Chorus Type Selection... -
Page 127: Leakmode
Program Mode The MISC Page LeakMode Selects between different leakage models, determining which leakage harmonics are emphasized. TypeA provides an overall tone wheel leakage, with all tone wheels leaking a small amount. TypeX, TypeY, and TypeZ emulate different degrees of drawbar leakage, where the leakage components correspond to the nine drawbars, instead of all the tone wheels. SpeedCtl Select either Fast or Slow to choose the speed of the rotary speaker emulation. On keyboard models, you can toggle between fast and slow speed using Assignable Controller Button 1 (Mute button 1). When you select a KB3 program, the PC3K sends several MIDI Controller messages both locally and to the MIDI Out port. One of those messages is Controller number 68, with a value corresponding to the value of SpeedCtl (Slow = 0, Fast = 127). VibChorCtl Choose On or Off to turn on or off either vibrato or chorus (as selected with the VibChorSel parameter). On keyboard models, you can toggle between on and off using Assignable Controller Button 2 (Mute button 2). When you select a KB3 program, the PC3K sends several MIDI Controller messages both locally and to the MIDI Out port. One of those messages is Controller number 95, with a value corresponding to the value of VibChorCtl (Off = 0, On = 127). VibChorSel Choose the vibrato or chorus program (there are three of each) you wish to use with this KB3 program. Note that you must set VibChorCtl (also on the MISC page) to On to hear the effect. On keyboard models, you can select the vibrato or chorus you want using Assignable Controller Buttons 3 and 4 (Mute buttons 3 and 4. When you select a KB3 program, the PC3K sends several MIDI Controller messages both locally and to the MIDI Out port. One of those messages is Controller number 93, with a value corresponding to the value of VibChorSel (Vib1 = 0, Vib2 = 36, Vib3 = 58, Chor1 = 79, Chor2 = 100, and Chor3 = 122). VolAdjust Provides an overall volume adjust for the KB3 model. Use this parameter to “normalize” KB3 programs with other programs. BendRngUp, BendRngDn Respectively control the upward and downward pitch bend ranges of the KB3 program. -
Page 128: The Eq Page
Program Mode The EQ Page The EQ Page The four column headers on this page represent two shelving bands of equalization and two parametric bands. The KB3 EQ offered here, though, is not implemented as a true EQ section; instead, it adjusts the volume of the tone wheels based on frequency. If the tone wheels are based on sine waves, then this acts similarly to a real EQ. Parameter Group (Available for each EQ band) Range of Values Gain -24.0 to 24.0 dB, in 0.2-dB increments Frequency 16 to 25088 Hz, in varying increments Width -128 to 128 Semitones, in 2-semitone increments Each EQ section has Gain (G), Frequency (F), and Width (W) controls. Frequency controls the ... -
Page 129: The Program Fx (Progfx) Page
Program Mode The Program FX (PROGFX) Page The Program FX (PROGFX) Page This page is the same as the VAST Program editor PROGFX page (see page 6‐47) except for one important difference: there is no Pre/Post insert parameter for the auxiliary sends. The LFO, ASR, and FUN Pages The rest of the pages—LFO, ASR, and FUN— are the same for KB3 programs as they are for VAST programs, so we won’t describe them again here. Begin on page 6‐37 to find descriptions of these pages. Programming Tips This section provides some starting points for creating your own KB3 programs. Remember that you’ll have to start with one of the existing KB3 programs. As described below, the most prominent difference between organ vintages is the number of tone wheels used. Keep in mind, however, that the sound of an actual tone wheel organ will depend not only on its age, but also on how well it has been maintained. Octave folding, where an octave (or part of an octave) is repeated at the top or bottom of the keyboard, is handled automatically by KB3 Mode, emulating the folding done on actual tone wheel organs. Early Tone Wheel Organs. Instruments of this period had 91 tone wheels. To get this sound, go to the TONEWL page, select 91 tone wheels, and set lowest pitch to C 1. Start with the Junky Wheel Volume Map and Bob’s Organ Map. You may also want to increase the Key Click level, since this tends to become louder on older organs. Middle Period Organs. To model one of these instruments, set 82 tone wheels and a low note of A 1. Use the Mellow Wheel Volume Map and Eric’s Organ Map. Set Key Click to a moderate ... - Page 130 Program Mode Programming Tips 6-72...
-
Page 131: Setup Mode
Setup Mode Chapter 7 Setup Mode In Setup mode, the PC3K can take on the identity of 16 distinct instruments and 16 distinct MIDI transmitters, each of which can use the setup’s physical controller assignments (or any subset of those controller assignments). For example, you can create a setup that is split into 16 different keyboard regions (called zones). Each zone can play its own program, while also transmitting on its own MIDI channel. Each zone can also have an independent arpeggiator and one riff. You can also record the output of a setup to Song mode. Selecting setups in Setup mode is much like selecting programs in Program mode—just use one of the normal data entry methods to scroll through the list of setups. There are, however, some important differences between a program and a setup. A program plays on a single keyboard zone and on a single MIDI channel. A setup enables you to use up to 16 keyboard (or MIDI controller) zones, each of which can have its own program, MIDI channel, and control assignments. The parameters you define for each setup affect programs only while you are in Setup mode. An exception to this is the control setup, which we discuss on page 7‐2. Press the Setup mode button to enter Setup mode. You’ll see a list of setups, which you can select with any data entry method. The info box on the left‐hand side of the main Setup mode page displays the zones and corresponding programs used in the current setup. Below the program name for each zone is a line representing the zone’s key range. For example, in the setup above, “Acoustic Split,” the zone for the program “NYC Kits” has a key range that covers the entire keyboard, from approximately C‐1 to G9. The zones for the programs “Studio C Strings” and “NYC Jazz Grand” have key ranges that approximately cover the upper two‐thirds of the keyboard, and “Upright Growler” covers part of the lower keyboard. You can also see which zones have a riff, indicated by “riFF” to the right of the program name. For example, in the setup above, the zone for the program “NYC Kits” has a riff. If there are more than four zones in the current setup, you can view the other zones by holding down the Enter button and using the Chan/Layer buttons to scroll through the current setup’s zones. You can transpose the entire setup up or down by octaves with the two Octav soft buttons. Use the two Xpose soft buttons to transpose the setup up or down by half steps. When you transpose a setup, the split points between zones remain in place; each program is transposed within its respective zone. The Panic soft button sends All Notes Off and Reset All Controllers messages to all zones, and stops all arpeggiators and riffs. -
Page 132: The Control Setup
Setup Mode The Control Setup Press the Info soft button to see a list of all of the controller assignments for all zones of the current setup. On the Info page, use the Alpha Wheel, cursor buttons, or ‐ / + buttons to scroll through the list. When you select a setup in Setup mode, the PC3K sends a number of MIDI messages, on each of the MIDI channels used by the setup. Some of these include: Program Change commands, MIDI Bank Select messages, Pan and Volume messages, and entry values for physical controllers (entry values are the values that take effect as soon as you select the setup; there are also controller exit values, which are the values of the controllers when you leave the setup—either by selecting another setup or by exiting Setup mode). The values of all these messages depend on the parameters you define in the Setup Editor. The Control Setup In addition to zone splitting and layering, Setup mode is a powerful way to take advantage of the PC3K’s programmable sliders, ribbon controllers, and assignable buttons. In order to provide some of the same flexibility for Program mode, we created the control setup, which defines the controller assignments for programs in Program mode. The default control setup is 126 Internal Voices, but you can choose any control setup you want. To do this, go to the MIDI‐mode TRANSMIT page and use any normal data entry method to change the ControlSetup parameter. When you reenter Program mode, all programs will now respond to many of the controller assignments defined in Zone 1 of the control setup (Zones 2– 16 are not relevant in Program mode, because a program can occupy only one MIDI channel). Once you save changes to the control setup, those changes will affect all programs when you are in Program mode. You may want to program several different control setups, and switch among them for different applications. - Page 133 Setup Mode The Control Setup Control Setup–Setup Parameters Affecting Parameters Not Affecting Editor Page, Zone 1 Program Mode Program Mode CH/PROG Arpeggiator, Destination, LocalPrg, Channel, MIDIBank, BankMode MIDIProg, Status, EntryProgChg KEY/VEL PAN/VOL ExitVolume, ExitPan EntryVolume, EntryPan BEND AuxBend1Up, BendRangeUp(ST), AuxBend1Dwn, BendRangeUp(ct), AuxBend2Rng BendRangeDown(ST),...
-
Page 134: Zone-Status Leds In Setup Mode
Setup Mode The Control Setup In summary, physical controller destinations, their curves and states, and the Arpeggiator parameters all define controller assignments for programs in Program mode. The other parameters have no effect; this keeps Program mode relatively simple. Program mode lets you change values for transposition, MIDI channels, and programs independently of the control setup. Once you save changes to the control setup, those changes will affect all programs when you are in Program mode. For example, programming the Large Ribbon in the control setup to have three sections will mean that in every program in Program mode, you will have a three‐section Large Ribbon. You may want to program several different control setups, and switch among them for different applications. Zone-status LEDs in Setup Mode Take a minute to scroll through some of the factory setups. As you change setups, you’ll notice that the LEDs in the eight buttons above the programmable sliders go on and off and change color. These LEDs indicate the status of each of the zones in the setup. You may also see the Solo button go on. This means that the setup is configured to have only one zone playing when you select it. While you’re in Setup mode, each of the eight zone‐status LEDs will always be in one of four states: Empty zone—that is, a zone that has no program or MIDI channel associated with it. For example, if you select a setup and only four status LEDs light up (regardless of their color), the setup contains just four zones. Whenever you’re in Setup mode, the number of lines in the info box matches the number of zone‐status LEDs that are lit. Green Active zone. As long as no other zone is soloed, an active zone plays notes— and generates controller information, program changes, and entry/exit controller values. If another zone is soloed, an active zone is “backgrounded”—it’s status LED remains green, but it doesn’t play notes or generate controller information. Orange Muted zone. Muted zones don’t play notes or generate controller information, but they do generate program changes and entry/exit controller values. Solo zone. As you might have guessed, only one zone can be soloed at a time. When a ... -
Page 135: Soloing A Zone
Remember that any changes you make to zone status in Setup mode are temporary; as soon as you select another setup, that setup’s programmed zone status takes over. To change a setup’s zone status permanently, use the Setup Editor (see Status on page 7‐8). Soloing a Zone To solo a zone, set the Status parameter on the Setup Editor CH/PROG page (see The Setup Editor and The Channel/Program (CH/PROG) Page below) to Solo (or Solo+Muted). The Chan/Layer buttons—in addition to scrolling through the zones of the current setup—now select the soloed zone. If you scroll through the zones, you will see the red solo LED moving across the mute buttons. After one zone is soloed, you can choose a different zone to be soloed by pressing on its zone‐status button; this action unsolos the previously soloed zone. Additionally, you can configure a setup such that you can solo zones in real time by assigning any of the controller destinations to SoloZn. See Controllers on page 7‐20 for more information on controller destination assignments in Setup mode. The Setup Editor From Setup mode, press the Edit button to enter the Setup Editor, where you can make changes to the currently selected setup. Use the soft buttons to select the various Setup Editor pages. The upper line of each page displays the usual mode reminder, as well as the current Setup Editor page, and the current zone. Use the Chan/Layer buttons to select one of up to sixteen different zones, each having its own set of Setup Editor pages. The parameters on the Setup Editor pages define what each of a setup’s zones sends—both to internal programs and to the MIDI Out port. They also determine how the PC3K responds to MIDI signals received from a MIDI controller connected to the PC3K’s MIDI In port (when the Local Keyboard Channel matches the transmit channel of your MIDI controller). Compare Pressing the Storage button calls up the Compare Editor, which recalls the setup pre‐edit settings, allowing you to compare your edited setup with the original setup. Pressing the Storage button again returns you to the Setup editor. Using the Compare Editor makes no changes to the current setup. The display diagrams you see in this chapter show the default values for setup 126 Internal Voices. -
Page 136: The Channel/Program (Ch/Prog) Page
Setup Mode The Channel/Program (CH/PROG) Page The Channel/Program (CH/PROG) Page This is the first page you see when you enter the Setup Editor. Here, you can select programs, MIDI channels, and MIDI Bank numbers for each of the setup’s 16 zones. You can also solo or mute each zone, and assign zones to be controlled by the PC3K’s Arpeggiator. Parameter Range of Values Default Program Program List 1 Standard Grand Destination Destination List USB_MIDI+MIDI+Local Channel 1 to 16 MIDI Bank 0 to 127 MIDI Program (MidiProg) -
Page 137: Destination
Setup Mode The Channel/Program (CH/PROG) Page Destination This parameter determines whether the currently selected zone transmits only to the PC3K (Local), transmits only to the MIDI port (MIDI), transmits only to the USB port (USB_MIDI), transmits to a pair of destinations (MIDI+Local, USB_MIDI+Local, or USB_MIDI+MIDI), or transmits to all destinations (USB_MIDI+MIDI+Local). Channel The Channel parameter defines the MIDI transmit channel for the currently selected zone. You can set it to any of the 16 MIDI channels. Normally, you will want each zone on a separate MIDI channel. This is necessary if you want to combine different programs in the setup. If two zones have the same MIDI channel (and destination), but they have different program settings, there will be conflicts: no MIDI device, including the PC3K, can respond correctly to two different simultaneous Program Change commands on one channel. The result will be that only one Program Change will be recognized, and every note played will sound double (if Note Maps are on). This can create odd and unpredictable timing effects, and will reduce your polyphony by 50%. Nevertheless, there will be occasions when “stacking” zones on the same MIDI channel might come in handy. Suppose you want a physical controller on the PC3K to send data for two different numbered MIDI Controllers on the same channel. In this case, you must create two zones assigned to the same channel, but with different controller assignments. Here’s one example: if a receiving synth is using Controller 1 for modulation depth and Controller #13 for modulation speed, you can increase both the depth and the speed with Slider A. Start by assigning Slider A in Zone 1 to MWheel and in Zone 2 to MIDI 13; then assign both zones to the same MIDI channel. (You may want to make sure you aren’t sending doubled notes. Use the Note Map parameter on the KEY/VEL page to set one zone’s Note Map to Linear and the other zone’s Note Map to Off.) Another example: create two or more zones that are identical except for their transposition settings. Now you can play parallel intervals (or chords) with single keystrikes. MidiBank Before reading this section on MIDI Banks, be sure to read the note in the section Program on page 7‐6. -
Page 138: Midi Program (Midiprog)
Status This parameter determines what the current zone does when you select the setup in Setup mode. Muted means that the zone sends and receives program changes and entry/exit controller values, but doesn’t play notes. If the value is Active, the zone sends and receives normally via MIDI. Solo causes only the current zone to play, “backgrounding” all other zones (backgrounded zones send and receive program changes and entry/exit controller values, but don’t play notes). With a value of Solo+Muted, the current zone is both soloed and muted; when the zone isn’t soloed, it won’t produce sound). See the section about zone‐status LEDs (page 7‐4) for more information about muting and soloing zones. Input Channel In Setup mode, an external MIDI device (such as a keyboard or sequencer) will play notes of a single program by default (if the Local Keyboard Channel parameter is set to off, see page 10‐10 for details.) The played program will be on a Zone that has a Channel parameter (on the CH/ PROG page) which matches the channel on which the external MIDI device is transmitting. (If no Zone’s Channel parameter matches, the external device will play notes of the last program that was using that channel in Program Mode or from a previously loaded Song or Setup.) When the Program of a Setup Zone is played this way, Setup MIDI parameters (most noticeably key range and transposition) will not be applied. If you want these parameters applied, set the Input Channel parameter to match the channel on which the external MIDI device is transmitting. To play the entire Setup from an external MIDI device, see Local Keyboard Channel (LocalKbdCh) on page 10‐10. When Local Keyboard Channel is set to something other than Off, the Input Channel parameter has no effect and will appear in parentheses. Input Channel basically has the same effect as Local Keyboard Channel, except you can choose to play only one or some Setup Zones form an external device, instead of all Zones. To play more than one Zone from an external device, set each desired Zone’s Input Channel parameter to match the channel on which the external MIDI device is transmitting. It is also possible to use the Input Channel parameter to use multiple external devices which each play a specific Zone or Zones. For details on controlling assignments made to the PC3K’s physical controllers (sliders, switches, mod wheel, etc.) from an external MIDI device, see Continuous Controller Messages From External MIDI Devices on page 10‐10. -
Page 139: Midi Bank Mode (Bankmode)
#32. Ctl 0/32 means it is sent as a dual‐controller (two‐byte) message, with the most‐significant byte (MSB) of the bank number sent as Controller 0 and the least‐significant byte (LSB) as Controller 32. Bank Select messages allow you to specify banks numbered 0‐127. The MIDI Specification is a little ambiguous when it comes to Bank Select messages, as to whether they should be only Controller 0, only Controller 32, or both Controllers sent as a pair. Different manufacturers design their instruments to respond to different schemes, and if you send Bank Select in a form an instrument doesn’t like, it may ignore it or interpret it incorrectly. The BankMode parameter is designed to allow the greatest flexibility in addressing other MIDI instruments. Usually you can look on the MIDI Implementation chart in the user’s manual of an instrument to determine how it’s designed to receive Bank Select messages, and then set BankMode for each zone to suit the instrument that is receiving data from it. The default setting, which works with the largest number of other instruments, is Ctl 0/32. A BankMode value of K2600 is intended for use with the K2000, K2500, or K2600. The Bank Select message is sent as Controller 32, with a value between 0 and 127. The K2000, K2500, and K2600 support only 10 banks, with 99 programs per bank, so Program Changes 100 or higher are sent as Bank Select 1, followed by the last two digits as a Program Change. For example, if Program 124 is assigned to the zone, this will be sent out the MIDI Out port as Bank Select (Controller 32) 1, and then Program Change 24. Entry Program Change (EntryProgChg) This parameter enables or disables bank and program change commands sent to internal programs or to the MIDI Out jack when you select setups. If it’s set to On, the program numbers for the programs in the 16 zones will be sent via MIDI when a setup is selected. By setting this parameter to Off, you can select a setup on the PC3K without changing the internal programs or those on MIDI devices receiving from the PC3K. This is useful if you want to send only controller data to the PC3K or to MIDI devices, without changing program assignments. Arpeggiator The Arpeggiator parameter determines whether the Arpeggiator will affect notes played in the current zone. The Arpeggiator affects only those zones that have this parameter set to a value of For any given zone, the Arpeggiator plays notes only within that zone’s Key Range. If the Arpeggiator, for example, tries to play a C 4 in a zone, but that zone’s Key Range ends at C4, the note will not sound. However, another zone whose Key Range ends at C5 will be able to play the 4 from the Arpeggiator. Therefore, setting a zone’s Key Range can be important in deciding how it will respond to the Arpeggiator. The LoKey and HiKey parameters on the ARPEGGIATOR 2 page (see page 7‐50) determine whether the notes you play get arpeggiated. -
Page 140: The Key/Velocity (Key-Vel) Page
Setup Mode The Key/Velocity (KEY-VEL) Page The Key/Velocity (KEY-VEL) Page The Key/Velocity page allows you to set key range, velocity range, transposition, and Note Maps for each zone. Note: MIDI velocity of notes played on the PC3K keyboard are first affected by any Velocity Scale, Offset, and Curve settings made on each zone’s KEY‐VEL page. The resulting velocity is then affected by any Vel Map settings made on the Master Mode II page (see page 11‐4.) Also, MIDI velocities sent to the USB or MIDI out port are first affected as explained above, and then affected by settings on the MIDI mode Transmit page (see page 10‐1.) Parameter Range of Values Default Low Key C -1 to G9 C -1 High Key C -1 to G9 Transpose -128 to +127 Semitones... -
Page 141: Low Key (Lokey), High Key (Hikey)
Low Key (LoKey), High Key (HiKey) The LoKey and HiKey parameters define the note range of the currently selected zone. The easiest way to change these values is to press and hold the Enter button and press the key of the note you wish to enter. You can set these values with normal data entry methods as well. You can create “negative” ranges as well. To do this, select the HiKey parameter and set its limit lower than the LoKey limit. This results in the zone being active at the top and bottom of the keyboard, but being silent in the range between the two limits. This lets you create a layer with a “hole” in the middle, which you can then fill with a different sound on another zone. The limits of MIDI are C‐1 to G9. The untransposed 88‐key range is A0 to C8. The untransposed 76‐key range is E1 to G7. Transpose This changes the pitch of the zone, without changing its position on the keyboard. It changes the MIDI note numbers generated by the keys in the zone, without physically shifting the zone. The range is ‐128 to 127 semitones. Since there are 12 semitones (or half steps) to an octave, you can transpose up or down over ten octaves. If you transpose out of the range of the active voice, however, no notes will sound; MIDI note numbers will transmit, but notes will not. Note Map Note Map lets you change the way notes are sent from the PC3K. The default setting is Linear: all notes go out as played. Pressing the Minus button takes you to Off; no notes are sent, but controllers and other non‐note data are. Setting Note Map to Inverse effectively turns the keyboard upside‐down, with the highest key being A 0 and the lowest C 9. If you set Note Map to Constant, all of the keys on the keyboard will play the same note. The note defaults to C4, but you can change this with the Transpose parameter. This works well when you want the sound from a particular key to play with every note of another zone—for example, playing a ride cymbal with every note in a bass line. Next are the alternating note maps, which let you divide the keyboard in some unique ways. If you are using two or more MIDI devices (including the PC3K), you can expand polyphony by assigning each zone to a different alternating note map. For example, if you have two PC3Ks, you can assign two zones to each play the same program on a different PC3K, thereby doubling polyphony. To split a zone into one of two alternating note maps, set Note Map to 1 of 2; now the zone plays on every second key, starting on C, but won’t play on any other keys. Set another zone to 2 of 2, and this zone will play on every second key, starting on C , thus covering the remaining keys. -
Page 142: Velocity Scale (Velscale)
Setup Mode The Key/Velocity (KEY-VEL) Page Velocity Scale (VelScale) This lets you amplify or diminish velocity response. Normal response is 100%. Higher values make the keyboard more sensitive (you don’t need to play as hard to get higher MIDI velocities) while lower values make it less sensitive (playing harder doesn’t change MIDI velocity as much). You can also set the scale to a negative number, in which case the velocity response is turned upside‐down: playing harder produces a softer sound and vice versa. This is useful for creating velocity‐based crossfades between zones. See the following section on Velocity Offset for ideas about negative scaling. The following illustration shows what happens when you change Velocity Scale. Note that Velocity Scale is the only parameter changed in this example; the other parameters are set to their defaults (offset = 0, curve = linear, min = 1, max = 127). Velocity Scale: 100% as you strike the keys harder (increase the velocity) MIDI velocity increases proportionally Velocity Scale: 200% MIDI velocity reaches maximum on medium strike velocity Velocity Scale: 50% MIDI velocity never reaches maximum, even on... -
Page 143: Velocity Offset
Setup Mode The Key/Velocity (KEY-VEL) Page Velocity Offset VelOffset also changes the response, but in a more direct way, by adding or subtracting a constant to the key velocity. For example, if this is set to 25 (assuming a scale of 100%), then 25 is added to the velocity of every keystroke, usually making the sound that much louder. The softest possible keystroke will have a value of 25, while a keystroke with velocity of 102 will produce the same sound as a note with velocity 127 (102+25=127). Negative values diminish the response: a setting of ‐25 means the loudest velocity available will be 102, while any keystroke 25 or below will produce a velocity of 1 (a velocity value of zero has a special meaning in MIDI and cannot be used for Note Ons). You can think of Scale as being a proportional change to the velocity, while Offset is a linear change. The maximum values for Offset are ±127. The following illustration shows the effects of Velocity Offset. Note that Velocity Offset is the only parameter changed in this example; the other parameters are set to their defaults (scale = 100%, curve = linear, min = 1, max = 127). Velocity Offset: +64 low velocity keystrikes produce medium MIDI velocity and greater Velocity Offset: -64 low velocity keystrikes result in MIDI velocity of 1; maximum MIDI velocity reduced Strike Velocity 7-13... - Page 144 Setup Mode The Key/Velocity (KEY-VEL) Page Offset and Scale work together. If scaling takes the velocity out of the ballpark — for example, you want to set it to 300% but that puts all of your notes at maximum velocity — using a negative offset, say around ‐60, can make it possible to still play at different volumes, although your curve will still be a lot steeper than normal. If you use a negative scaling, then you must use an offset: otherwise all of your velocities will end up as zeroes (well, ones actually, since a MIDI note‐on with velocity zero is something else). So to get true inverse scaling (that is, minus 100%), you must set an offset of 127 to get the full range of velocities. Setting the offset to 127 and the scale to ‐100% produces a slope like this (which is the same as the reverse linear curve): Strike Velocity Note that Offset and Scale affect only MIDI velocities; that is, these parameters don’t change Velocity Tracking in the programs themselves. Therefore, some programs (such as organ sounds, which often have low VelTrk values) may respond only subtly to Offset and Scale, or not at all. 7-14...
-
Page 145: Velocity Curve (Velcurve)
Setup Mode The Key/Velocity (KEY-VEL) Page Velocity Curve (VelCurve) VelCurve lets you taper the velocity response. The default setting is Linear, which means that the output velocity changes directly proportionally to the played velocity. Expand produces a curve that is less steep than the linear curve at keystrike velocities below 64, and steeper than the linear curve at keystrike velocities above 64. In other words, when you’re playing softly, you’ll notice velocity differences less than with a linear curve, while when you’re playing hard, you’ll notice velocity differences more. Compress produces a velocity curve that is the opposite of the expanded curve—that is, you’ll notice velocity differences more when you’re playing softly than when you’re playing hard. Velocity Curve: Linear as you hit the keys harder (increase the velocity) MIDI velocity increases proportionally Velocity Curve: Compress MIDI velocity is greater at medium strike velocity than with Linear curve Velocity Curve: Expand MIDI velocity is less at... - Page 146 Setup Mode The Key/Velocity (KEY-VEL) Page Crossfade is designed to be used in tandem with the Reverse Crossfade curve, enabling you to perform smooth crossfades between different programs. Bump tapers velocity response to resemble a bell curve, so that notes are loudest when your keystrike velocity is 64. Notes get softer as the keystrike velocity approaches 0 or 127. Velocity Curve: Linear as you hit the keys harder (increase the velocity) MIDI velocity increases proportionally Velocity Curve: Bump MIDI velocity is greatest at medium strike velocity Velocity Curve: Crossfade Below medium strike velocity, MIDI velocity is less than with Linear curve;...
-
Page 147: Low Velocity (Lovel), Highvelocity (Hivel)
Setup Mode The Key/Velocity (KEY-VEL) Page Low Velocity (LoVel), HighVelocity (HiVel) LoVel and HiVel set the minimum and maximum velocity limits that the current zone transmits. A keystroke in the current zone whose velocity — after it has been scaled and offset — is below the minimum does not generate a Note On. Neither does a keystroke whose velocity after processing is above the maximum. These parameters are useful for “velocity switching”— having a key play different sounds depending on how hard you strike it. The values can be anywhere from 1 to 127. As with other parameters, zones can overlap or be totally discrete, or be identical. Usually, LoVel will have a smaller value than HiVel, but as with LoKey and HiKey, you may also create a gap in velocity response, by setting negative ranges for velocity. Velocity Min: 1, Max: 64 No MIDI Note Ons are transmitted when you strike keys with medium velocity or greater Strike Velocity Velocity Min: 64, Max: 127 No MIDI Note Ons are transmitted unless you strike... -
Page 148: The Pan/Volume (Pan/Vol) Page
None Entry Pan None, 0-127 None Exit Pan None, 0-127 None Entry Volume, Exit Volume Entry Volume enables you to control the initial MIDI volume setting for each zone of the current setup. When you select a setup in Setup mode, MIDI channels for zones that have an Entry Volume value other than None will receive that value as a MIDI volume control message (MIDI Controller 07.) This sets the starting volume level for each zone. Subsequent MIDI volume control signals sent to the setup’s MIDI channels affect the volume normally. When you exit the current setup, each zone sends another volume control message (MIDI Controller 07) to set the volumes on the PC3K’s MIDI channels, according to the value of the Exit Volume parameter (unless Exit Volume is set to None.) The setting of the Volume Lock parameter on the MIDI mode CHANNELS page (see Chapter 10) determines whether this parameter has any effect. Entry Pan, Exit Pan You can set entry and exit values for Pan as well. When you select a setup, the PC3K sends a MIDI pan control (MIDI Controller 10) message on each MIDI Channel in each zone; another MIDI pan control message is sent when you exit the setup. The Entry and Exit values for Pan are the same as those for Volume. There is also a Pan Lock parameter on the MIDI‐mode CHANNELS page, which overrides the Setup Editor’s Pan settings. If you are trying to set the Pan and the program doesn’t seem to be responding, you should check the Mode parameter on the OUTPUT page in the Program Editor. If it is set to Fixed, then the PC3K is ignoring the MIDI Pan message; setting Mode to +MIDI allows you to control the program’s panning from the Setup Editor. Most programs respond to pan messages on the next keystrike. This means that if you hold a ... -
Page 149: The Bend Page
Setup Mode The BEND Page The BEND Page The parameters on the BEND page define the bend ranges for each of the three types of pitch bend messages the PC3K can respond to. Parameter Range of Values Default Bend Range Up (semitones) Prog, 0 to 127 semitones Bend Range Up (cents) Prog, 100 cents Bend Range Down (semitones) Prog, 0 to 127 semitones... -
Page 150: Aux Bend 1 Up And Aux Bend 1 Down
Setup Mode Controllers and PitchDwn (controller destinations 130 and 131) as a Pitch Wheel destinations (see PWUp and PWDn on The WHEEL Page on page 7‐33,) and use MIDI 21 and MIDI 15 (controller destinations 21 and 15) for other controllers, such as the Sliders and Ribbon (see Aux Bend 1 Up/ Down and Aux Bend 2 Range below.) Keep in mind that not all MIDI devices respond to Bend Range messages. With many older MIDI instruments, you must set bend ranges on the devices themselves. Changing programs sends a Bend Range message with the current program’s values. So does pressing Panic, which is a quick way to reset your PC3K or MIDI slaves if you’ve used a controller to modulate the bend range. Aux Bend 1 Up and Aux Bend 1 Down Like BendRangeUp/Down, Aux Bend 1 defines the range for Pitch Bend messages, but does so for those physical controllers assigned to controller destination 21, MIDI 21. There are two parameters related to AuxBend 1: an upward value (AuxBend1Up) and a downward value (AuxBend1Dwn). This means that you can set different values for upward and downward pitch‐ shifting. For example, you could get the Pitch Wheel to give you both vibrato and whammy‐bar effects for the guitar program in a setup. In the zone that contains the guitar program, set AuxBend1Up to 2ST and AuxBend1Dwn to 12ST, then assign the PWUp and PWDn parameters on the WHEEL page to a value of MIDI21. Now moving the Pitch Wheel up gives you a whole tone of upward bend, while moving it down gives you a full octave of downward bend. In most factory setups, AuxBend 1 is set as the destination for the optional Ribbon controller (see The RIBBON Page on page 7‐40). Aux Bend 2 Range The PC3K allows you to specify a third pitch bend range; this is called AuxBend 2, and it defines ... -
Page 151: Continuous Controllers
Setup Mode Controllers Any MIDI Controller can be used as the assignment for any physical controller (and for multiple physical controllers, as well). Or in other words, any physical controller like the Mod Wheel can be programmed to send any MIDI control signal. In addition, each controller in each setup zone can be tweaked just like keyboard velocity (or any other Setup‐mode parameter). Although controller editing on the PC3K can be somewhat complex, it can also be very rewarding. To get an idea of the expressive capabilities of Setup mode, explore the factory setups that come with the PC3K. The PC3K’s physical controllers include the following: • The nine sliders (A, B, C, D, E, F, G, H, I) in the Assignable Controllers section • The two Continuous Control Pedal jacks (CC Pedal 1 and CC Pedal 2) • The optional Ribbon Controller, which you can define as a one‐ or three‐section controller • The Pitch Wheel • The Modulation Wheel (Mod Wheel) • Keyboard aftertouch, or Mono Pressure (MPress) • The optional Breath Controller (which is connected to Continuous Controller Pedal 2) • The two Panel Switches above the Pitch and Mod Wheels and Program Buttons 1–8 • The three Footswitch pedal jacks (1, 2, and 3) The following tables provide an overview of the physical controllers and their parameters. Continuous Controllers See Continuous Controller Parameters on page 7‐30 for information on each parameter. Setup Editor Physical Controller... -
Page 152: Switch Controllers
MWheel Default assignment for Mod Wheel Breath Default assignment for Breath Controller MIDI 03 Foot Default assignment for CC Pedal 2 PortTim Monophonic PC3K programs respond to this Controller if portamento is turned on Table 7-5 Controller Destination List 7-22... - Page 153 Controllers Corresponding Controller Destination Description Number Name Data Almost all PC3K programs have this Controller assigned to filter frequency or brightness Volume MIDI Volume Balance MIDI Balance MIDI 09 MIDI Pan—programs which use the PANNER algorithm will respond to real-time pan adjustments; all other programs will...
- Page 154 85–90 MIDI 85–90 MIDI Controllers 85–90 GM Reverb With PC3K in General MIDI mode, controls Reverb send level MIDI 92 GM Chorus With PC3K in General MIDI mode, controls Chorus send level 94-95 MIDI 94-95 MIDI Controllers 94–95...
- Page 155 Setup Mode Controllers Corresponding Controller Destination Description Number Name SetupInc Setup Increment—increments current setup number SetupDec Setup Decrement—increments current setup number SetpGoto Go to Setup—selects setup Start Sequencer function Stop Sequencer function Continue Sequencer function TransUp Transpose Up (ST) TransDown Transpose Down (ST) ArpOn Any value turns Arpeggiator On.
- Page 156 Setup Mode Controllers Corresponding Controller Destination Description Number Name ArpGliss Arpeggiator Gliss, 0-63 = off, 64-127 = on. (See The ARPEGGIATOR Page on page 7-43) SusLatch For Arpeggiator Latch Pedals mode, 0-63 = off, 64-127 = on. (See The ARPEGGIATOR Page on page 7-43) Panic Panic SoloZn...
-
Page 157: Shift Key Number, Shift Key (Shkeynum, Shiftkey)
Setup Mode Controllers Shift Key Number, Shift Key (ShKeyNum, ShiftKey) These controller destinations allow you to play musical scales and single note patterns on any programmable continuous controller in a setup, without the need of playing the physical keys of the keyboard. These features are especially useful for playing fast arpeggiations. These destinations only work when combined with other destinations and features, so be sure to read this whole section to gain a complete understanding. Using a Kurzweil Ribbon as a controller gives you the most options, but these destinations can also be controlled by any slider, pedal, key pressure, etc. Using the Kurzweil Ribbon provides more accurate control since it has a longer physical range than other controllers. Also, if you set it in Absolute mode, you can jump from one note to any other note in the pattern in any octave. With a slider you have to go through all the intermediate notes of the pattern. A way of partially doing this with sliders is to assign the Shift Key Number controller to several sliders with different ranges. (See The Ribbon Configuration (RIBCFG) Page on page 7‐41 for details on Ribbon options, and Scale and Add on page 7‐30 for details on changing controller ranges.) Shift Key Number (ShKeyNum, controller destination 176) works in a similar way to Key Number (KeyNum, controller destination 134). Both controllers basically generate a monophonic stream of notes. The difference is that Key Number plays through all notes chromatically, while Shift Key Number only plays notes relative to a Shift Pattern. For example, when controlling Shift Key Number from a slider, notes are triggered from a Shift Pattern in forwards order as you move the slider up, and backwards order as you move the slider down. If in our zone we have selected the Shift Pattern 2: minor, the notes being played by the slider will be only the root, the minor third and fifth in the chosen key, triggering notes in any octave up and down the keyboard. (See Shift Key below for details on selecting the root note and octave.) Selecting The Desired Notes: You must select a Shift Pattern for the desired zone in order for Shift Key Number to have an ... - Page 158 Setup Mode Controllers Selecting The Desired Key (Root Note): Shift Key (ShiftKey, controller destination 177) allows the user to select the key (root note) of the Shift Pattern triggered by Shift Key Number. A Shift Pattern is a relative pattern based on a root note. All notes triggered by a Shift Pattern are shifted from the root note by the value of each pattern step (in half‐steps.) Shift Key Settings Value Key (root note) 10-19 20-29 30-39 40-49 50-59 60-68 69-78 79-88 89-98 99-108 109-118 119-127 Last Note Played When using a Shift Pattern with Shift Key Number you can select the key with one or more controllers set to the Shift Key destination. You can use a continuous controller such as a slider to cycle through keys, or switches set to predetermined keys. For example, if you are playing a song that moves between 2 or 3 keys, a couple of switches could be programmed in order to send the appropriate Shift Key message for each key change. That way all the notes you are triggering with a Shift Key Number controller will be in the appropriate scale. You could also ...
- Page 159 Setup Mode Controllers A Note About Octave Range: When using Shift Key Number, shift patterns with more than 12 steps begin triggering notes in higher octaves. This is done because longer shift patterns use up more of a controller’s range, and limit the number of octaves that a single controller can trigger. Since the lowest octave of a program is often too low to be musically useful, the PC3K will automatically start triggering notes from longer shift patterns in higher octaves. This saves room in the controller’s range of values for triggering more useful octaves. See the table below for Shift Pattern step ranges and their corresponding starting octave. Default Octave Shifting Total # of Shift Pattern Steps Starting Octave 1-12 C0-C1 13-24 C1-C2 25-36 C2-C3 37-48 C3-C4 Selecting The Desired Octave Range: You adjust the starting octave manually, using the Add parameter on the corresponding ...
-
Page 160: Continuous Controller Parameters
Setup Mode Controllers Continuous Controller Parameters The continuous (physical) controllers are those that have a range of values: the two wheels, the optional ribbon controller, the nine sliders, the two Continuous Control pedals, the optional breath controller (the jack of which is connected to CC pedal 2), and mono pressure (aftertouch). As the table on page 7‐21 shows, all of them use the same parameters. Each parameter’s function is described below. Dest Use this parameter to select a destination from the MIDI Controller Destination list (see page 7‐22). Scale After you’ve selected a continuous physical controller, you can modify the controller’s response similarly to the ways you can modify velocity response. Refer to the graphs beginning on page 7‐12 for illustrations of the velocity scaling parameters. Scale lets you amplify or diminish the action of the controller. Full scale is 100%. Higher values will make the controller more sensitive, and lower values will make it less so. Setting the scale to a negative number makes the controller action work in reverse. As with velocity, you can use a controller to crossfade between two zones by setting the scaling for one zone positive and the other negative. Maximum scale values are +300% and ‐300%. This adds or subtracts a constant to the controller, and at the same time sets minimum or maximum values (there’s no need for separate Max and Min parameters). If Add is 25, the minimum value of the controller will be 25. If it is ‐25 (and scale is 100%) the first one‐fifth of the controller’s movement (25/127 Ý 1/5) will send value of 0, and the maximum value of the controller will be 102 (= 127‐25). As with velocity, Scale is a proportional change to the controller, while Offset is a linear change. The values for Offset range from ‐128 to 127. Curv This lets you taper the controller response. The default setting is Linear, which means that the response follows a straight line as you move the controller. Setting Curv to Expand produces a curve that is less steep than the linear curve at keystrike velocities below 64, and steeper than the linear curve at keystrike velocities above 64. In other words, when you’re playing softly, you’ll notice velocity differences less than with a linear curve, while when you’re playing hard, you’ll notice velocity differences more. Setting Curv to Compress produces a velocity curve that is the opposite of the expanded curve—that is, you’ll notice velocity differences more when you’re playing softly than when ... -
Page 161: Switch Controller Parameters
Setup Mode Controllers Entry (Ent) and Exit Values Entry value allows you to specify an initial value for a controller in a setup that will be sent whenever you select that setup. For example, if you want to make sure that all of the modulation in a zone is turned off when you select a setup, assign a physical controller to a destination of MIDI 01 (MWheel) and set Entry Value to 0. Entry values ignore the current position of the physical controller when the setup is selected. In fact, if the physical controller is above or below the entry value when the setup is selected (which it often is), moving the controller will have no effect until it is past its entry value. In the modulation example above, moving the assigned controller won’t turn on any modulation until it’s pushed all the way down, and then up again. An entry value of None is quite different from a value of 0. None means that there will be no initial controller command when the setup is selected, and any subsequent movement of the physical controller will be effective. Exit Value tells the PC3K to send a value for that controller whenever you leave the setup, either by selecting another setup or by selecting a different mode altogether. It can be very useful when a controller is doing something to the sound, and you don’t want that effect to continue after you leave the setup. For example, if you want to make sure a zone’s pitch returns to normal whenever you leave a setup, you would set Exit Value to 64 for any controller whose Destination parameter is set to PitchUp. Again, None means no command is sent. Switch Controller Parameters Switch (physical) controllers have only two states: on and off. The PC3K switch controllers are: • Panel Switches Arp and SW • Footswitch Pedals 1, 2, and 3 • Programmable Switches 1–8 (Program Select buttons 1–8) Keep in mind the following two things when working with the PC3K’s switches. First, the buttons above the sliders are dedicated to zone status and muting, as well as sequencer muting, and are not assignable controllers. Second, in Program mode, the Program Select buttons function as program select buttons if none of them are assigned in the control setup; if at least ... - Page 162 Setup Mode Controllers Off Control (OffControl) OffControl determines what MIDI Controller or other message will be sent when the switch is off—that is, either unpressed or toggled from the on position. The list of available controllers on page 7‐22 is the same as for the continuous controllers, and can be accessed the same way. OnValue OnValue sets the value of the Controller when the switch is on. In the case of conventionally switched functions, such as sustain, the OnValue will be 127. (For example, the default for Footswitch 1 is Controller 64 — Sustain — with an On Value of 127.) However, you might want to use a button or pedal as a “soft” switch, in which case you might set OnControl to 7 (Volume) and OnValue to 50, and OffControl to 7 and OffValue to 127. OnControl and OffControl can also both be set to Off, so that turning on the switch has no effect at all in this zone. This can be useful when you are using one switch for multiple functions in different zones. OffValue OffValue is the value of the Controller when the switch is off. The default value is 0. You might want to change this, as in the “soft switch” example above: in order to bring the zone up to full volume when you release the pedal, set OffValue to 127. Entry (Ent) and Exit States Entry State determines whether an initial setting for the switch will be sent when the setup is selected. There are three choices: None (no change), Off (the Off value), and On (the On value). With a Panel Switch button, if the Entry State is On, the button will light as soon as you select the setup. Exit State similarly determines whether a setting for the switch will be sent when you leave the setup, either for another setup or for Program mode. The same three choices (On, Off, and None) are available. This is very useful for turning off sustains when changing setups. 7-32...
-
Page 163: The Wheel Page
Setup Mode The WHEEL Page The WHEEL Page The two wheels are typical of what is found on many keyboards. The left one is normally used for pitch bend and springs back to center, while the right wheel is normally used as a standard Mod Wheel. On the Wheel page in the Setup editor, the pitch wheel has two parameters—one for pushing the pitch wheel up and one for pushing it down—whereas the mod wheel has one. The WHEEL page parameters are described in Continuous Controller Parameters on page 7‐30. Parameter Range of Values Default Destination (PWUp) Control Destination List PitchUp Destination (PWDn) Control Destination List PitchDwn Destination (MWhl) Control Destination List MWheel Scale ±... - Page 164 Setup Mode The SLIDER and SLID2 Pages The SLIDER and SLID2 Pages You can assign each of the PC3K’s nine programmable sliders to a destination on each of the 16 zones. Or, you can assign any combination of sliders to the same zone, allowing you tremendous flexibility. For example, you can assign Sliders A and B to modulate pitch and volume on Zone 1, then assign Slider C to control panning on Zones 2, 3, and 10. The SLIDER soft button gives you access to Sliders A–E. Press the SLID2 soft button to program Sliders F–I. The SLIDER page parameters are described in Continuous Controller Parameters on page 7‐30. Parameter Range of Values Default Destination (Slider A) Control Destination List Data Destination (Slider B) Control Destination List...
-
Page 165: The Continuous Control Pedal (Cpedal) Page
Setup Mode The Continuous Control Pedal (CPEDAL) Page The Continuous Control Pedal (CPEDAL) Page If you look at the back of the instrument, you will see that there are two jacks for plugging in two CC (Continuous Control) pedals and a jack labeled Breath Controller. Like the nine programmable sliders, you can assign these controllers on each of the 16 zones, or you can assign any combination of these controllers to the same zone. The CPEDAL page parameters are described in Continuous Controller Parameters on page 7‐30. Parameter Range of Values Default Destination (CPed1) Control Destination List Express Destination (CPed2) Control Destination List Foot Destination (Breath) Control Destination List Breath Scale... -
Page 166: The Pressure (Press) Page
Setup Mode The Pressure (PRESS) Page The Pressure (PRESS) Page The PC3K features mono pressure, commonly called aftertouch on other keyboards. A word about pressure: Key Range in a zone does not define which notes will generate pressure in that zone. If pressure is enabled in a zone, playing with aftertouch anywhere on the keyboard will produce data. For example, if Zone 1’s Key Range is C3–C5 and you play C2 and push down on the note, pressure messages will be sent from Zone 1. As with any other physical controller, however, you can disable pressure in any zone, or scale it or offset it differently in the various zones. It might help to think of pressure as an extra wheel—wheels operate in a zone regardless of Key Range, and so does pressure. The PRESS page parameters are described in Continuous Controller Parameters on page 7‐30. Note: MIDI pressure generated on the PC3K keyboard is first affected by any Pressure Scale, Offset, and Curve settings made on each zone’s PRESSURE page. The resulting pressure values are then affected by any Press Map settings made on the Master Mode II page (see page 11‐6.) Also, MIDI pressure messages sent to the USB or MIDI out port are first affected as explained above, and then affected by settings on the MIDI mode Transmit page (see page 10‐1.) Parameter Range of Values Default Destination Control Destination List MPress Scale ±... -
Page 167: The Footswitch Pages (Ft Sw1, Ft Sw2, Ft Sw3)
Setup Mode The Footswitch Pages (FT SW1, FT SW2, FT SW3) The Footswitch Pages (FT SW1, FT SW2, FT SW3) On the back of the instrument, there are three jacks for Footswitch pedals. All the foot switches in the default control setup are set to a switch type that doesn’t generate a note, and consequently the range of values for their respective Destination parameters is the Control Destination list. There are three Footswitch pages, one for each Footswitch. The FT SW page parameters are described in Switch Controller Parameters on page 7‐31. Parameter Range of Values Default Type Momentary, Toggle Momentary Ft Sw1: Sustain On Control Control Destination List Ft Sw2: Sostenut... -
Page 168: The Arpeggiator Switch (Arp Sw) Page
Setup Mode The Arpeggiator Switch (ARP SW) Page The Arpeggiator Switch (ARP SW) Page The PC3K keyboard offers two Panel switches, located above the pitch and mod wheels. The left switch is the Arp (short for “arpeggiator”) button. By default, the Arp switch functions as the arpeggiator switch, and toggles on and off the PC3K arpeggiator, but you can assign this switch to any Controller. See The ARPEGGIATOR Page on page 7‐43 for information on how to configure the PC3K’s arpeggiator. The ARP SW page parameters are described in Switch Controller Parameters on page 7‐31. Parameter Range of Values Default Type Momentary, Toggled Toggled On Control Control Destination List... -
Page 169: The Switch Page
Setup Mode The SWITCH Page The SWITCH Page The right Panel switch is the SW button, located above the Modwheel. By default, this switch is assigned to MIDI29, but you can assign this switch to any MIDI Controller. The SWITCH page parameters are described in Switch Controller Parameters on page 7‐31. Parameter Range of Values Default Type Momentary, Toggled Toggled On Control Control Destination List MIDI29 On Value None, 0 to 127 Off Control Control Destination List MIDI29 Off Value None, 0 to 127... -
Page 170: The Ribbon Page
Setup Mode The RIBBON Page The RIBBON Page The RIBBON page lets you define the controller assignment for the PC3K’s ribbon controller. The optional Ribbon controller senses movement when you press on it and move your finger left or right; this creates numerous possibilities for controlling pitch, volume, panning, crossfades between zones, or any other uses you might imagine. The optional Ribbon controller can be used as a single long controller, or it can be divided into three separate sections, each with its own controller assignments (this is done on the RIBCFG page, see below). The two small arrows above the strip indicate the boundaries of the three sections. The large arrow above the ribbon points to the center of the ribbon, for when the ribbon is configured in one section. Note that there are three assignable parameter groups on the RIBBON page. When the Ribbon is set to act as a single section controller, the only parameters that affect its behavior are those of Section 1 (Sect1). When the Ribbon is set to act as a three‐section controller, each parameter group affects only its respective Ribbon section. To modify other ribbon parameters, go to the The Ribbon Configuration (RIBCFG) Page below. The RIBBON page parameters are described in Continuous Controller Parameters on page 7‐30. Parameter Range of Values Default Destination Control Destination List MIDI21 Scale ± 300% 100%... -
Page 171: The Ribbon Configuration (Ribcfg) Page
Range of Values Default Ribbon Configuration One Section, Three Sections One Section Position Mode Relative, Absolute Relative Spring On, Off Center 0 to 127 Ribbon Configuration You can use the Ribbon as one controller, or divide it up into three smaller sections, each with its own controller assignments. Choose a value of One Section or Three Sections for the Ribbon Configuration parameter. With Three Sections chosen, the page changes such that you can adjust the parameters of each section: Position Mode (PosMode) When you touch the Ribbon, the PC3K responds in one of two ways, depending on the setting of the PosMode parameter. Relative means that wherever you touch the Ribbon becomes the “zero point” for whatever the Ribbon is controlling; you won’t notice any change in the sound until you slide your finger. Relative mode tends to be the most natural for performance—just wiggle your finger anywhere on the Ribbon to get vibrato in many factory programs and setups. You get the same effect no matter where you do the wiggling. 7-41... -
Page 172: Spring
Spring to Off in a setup, but want to be sure of the initial sound of the setup, go to the RIBBON page in the setup, and for each Ribbon for which you’ve set Spring to Off, set the entry value (Ent) parameter to a value of 0 (or whatever you like). Center This defines the zero point for the Ribbon (or for each section on the Ribbon)—the point at which the Controller to which the Ribbon is assigned has no effect on the sound. You can choose any point between 0 and 127. A value of 64 puts the zero point in the physical center of the Ribbon. Values of 0 and 127 place the zero point at the section’s extreme left and extreme right. Note that setting the Spring parameter to Off disables the Center parameter for that ribbon. The value you choose for this parameter can have considerable effect. In many factory setups, for example, the Ribbon affects pitch. In these setups, changing the value of the Center parameter would transpose the setup. The ARPEGGIATOR & ARPEGGIATOR 2 (ARP1, ARP2) Pages Each zone in a setup has its own Arpeggiator. When activated, each Arpeggiator takes MIDI note input from the PC3K keyboard (or via MIDI) and outputs a rhythmic pattern of MIDI notes. You can control the speed and nature of the pattern in real time. Each Arpeggiator can affect both the PC3K and external MIDI instruments. The notes produced by the Arpeggiator in a given zone go to all of that zone’s destinations: local, MIDI, or both. You can also set one zone’s arpeggiator to override arpeggiators on other zones using the Arpeggiator Global (ArpGlobal) parameter on Setup Mode’s COMMON page. The concept behind the PC3K’s Arpeggiators is fairly simple, although the options are extensive. You might think of each Arpeggiator as a “note processor,” generating complex output from relatively modest input. You can select any number of notes for the input, and tell the Arpeggiator to recognize and remember them. This is called “latching” the notes. The Arpeggiator then processes them by playing them repeatedly, and/or transposing them up and down the keyboard. You have control over several processing parameters: velocity, order, duration, transposition, orchestration, whether the notes are played simultaneously, and whether the intervals between notes are filled chromatically. You can also tell the Arpeggiator how to deal with new information coming from the keyboard when the Arpeggiator is already processing notes. The arpeggiator also includes step sequencers for note and velocity shifting, allowing you to ... -
Page 173: The Arpeggiator Page
0-60 Limit Option Stop, Reset, Unipolar, Bipolar, Float Res, Unipolar Float Uni, Float Bip ShftPattrn (Shift Pattern) Off, (1-69 factory patterns, user created patterns) Active The first parameter on the Arpeggiator menu is Active, which specifies whether or not the Arpeggiator is on for the current zone. This parameter can be switched from the ARPEGGIATOR page, or for real‐time control, it can be switched on using Controller number 147 (ArpOn) and switched off using Controller number 148 (ArpOff); these Controllers can, of course, be assigned as the destination of a PC3K physical controller. Turning Active on affects zones whose ZoneArpeg values are also set to On. By setting the ZoneArpeg parameter (on the CH/PRG page) to Off or On in the individual zones of a setup, you can choose which zones will be controlled by the Arpeggiator when it is on. Beats The Beats parameter sets the number of notes per beat. The tempo is based on quarter notes. Therefore, if you set it to 1/4, you will get one note per beat of the clock. At 1/16, you will get 4 notes per beat, and so forth. You can go all the way to 96 notes per beat (1/384), but at most tempos, divisions smaller than 1/64 will sound pretty much the same. To find a Beats value, 7-43... - Page 174 Setup Mode The ARPEGGIATOR & ARPEGGIATOR 2 (ARP1, ARP2) Pages multiply the notes you want per beat by 4. For example, 4 notes per beat (16th notes) would be 4*4=16, a Beats value of 1/16. Three notes per beat (8th note triplets) would be 3*4=12, a Beats value of 1/12. Six notes per beat (16th note triplets) would be 6*4=24, a Beats value of 1/24. Note that when recording arpeggiations to a PC3K MIDI track, you must turn on real‐time quantization and set it to the same Grid value in order for the selected Beats value to sync properly with the tempo grid (see Quant and Grid on page 12‐17.) Play Order This parameter determines the order in which the PC3K plays arpeggiated notes. Played causes them to play back in the chronological order in which you played and latched them. Upwards means that notes play in ascending pitch order, regardless of their chronological order. Downwards means descending pitch order. UpDown causes notes to play from lowest pitch to highest, then from highest pitch to lowest, repeating the cycle until you stop the arpeggiation. The notes at the very top and very bottom only play once. UpDown Repeat is similar to UpDown, except that the notes at the top and bottom play twice (repeat) when the Arpeggiator reverses direction. Random plays the currently latched notes in completely random order. Shuffle plays them at random, but keeps track of the notes so that no note repeats until all of the others have played. Walk is a “random walk” order: each successive note is either the next or previous note (in chronological order). For example, suppose you’ve latched four notes—G 4, B 4, D 5, and F 5— in that order. The first note the Arpeggiator plays is the G 4. The second note will be either B 4 ...
- Page 175 Setup Mode The ARPEGGIATOR & ARPEGGIATOR 2 (ARP1, ARP2) Pages Pattern engages a step sequencer for arpeggiator velocity patterns, which shifts the velocity of each arpeggiated note according to a sequenced pattern. There are 74 pre programed velocity patterns that you can choose from the VelPatt field, some of which create rhythms by using velocity values of ‐127 or “none” to leave rests in the arpeggiation. The sequencer uses the velocity received from the first note played as the center position to shift velocities up or down from. If no other keys are playing, patterns will start over each time a key is pressed (there are some exceptions to this when using ARPEGGIATOR Latch parameters other than “Keys,” though a newly triggered pattern will always start at step 1.) When triggering velocity patterns from more than one key at a time, each consecutive step of the pattern shifts the velocity from a different inputted key, the order of which is decided by the order parameter on the ARPEGGIATOR page. Note: For patterns with negative velocity values, if the velocity of the first played note is low enough that a pattern step could result in a velocity of zero, some notes may have a velocity of zero and therefore produce no sound. You can edit the included patterns by pressing “Edit” with a pattern highlighted in the VelPatt field (see edit screen below.) The top line of the “EditVelocityPatt” page displays the pattern’s name and total number of steps. This page also shows the full name for a pattern whose name does not fit on the ARPEGGIATOR page. Each pattern can have up to 48 steps, and each step can shift velocities by ± 127 steps. You can insert a step with a value of “none” by entering ‐127 and then shifting down one more step. A step with the value “none” causes the arpeggiator to play nothing for that step, allowing you to create rhythmic patterns by using “none” to leave spaces. Pressing Step‐ removes the last step in the list, pressing Step+ inserts a new velocity step at the end of the list (the pattern editor remembers the values of removed steps until you save or exit.) Use the cursor to move between pattern steps, use the alpha wheel, alphanumeric pad, or plus/minus buttons to enter the velocity shift amount for each step. Press More to see a second page for patterns with more than 24 steps. Press Delete to delete the pattern from memory. Press Rename to rename the pattern and save. Pressing Save gives you the option to save the pattern or rename and save. To create a new VelPatt, edit an existing pattern and choose Rename when saving. Press Exit to return to the ARPEGGIATOR page. When exiting the editor, it will automatically give you the option to save the pattern if changes have been made. For more detailed instructions on these functions, see Saving and Naming on page 5‐3.
- Page 176 ± 6 Human3 ± 10 Human4 ± 15 Chimp1 ± 25 Chimp2 ± 35 Chimp3 ± 50 Chimp4 ± 64 MissNotes1 through MissNotes9 makes the PC3K randomly miss playing a percentage of inputted notes. See the table below for percentages and their equivalent settings. Each of these settings also randomly changes some of the inputted velocities in a range of ± 5, with the purpose of simulating a more human played sound. Note: Missed Notes are actually output as notes with a velocity of zero. Approximate % of Velocity Setting Notes Missed MissNotes1 % 10 MissNotes2 % 20 MissNotes3 % 30...
- Page 177 Setup Mode The ARPEGGIATOR & ARPEGGIATOR 2 (ARP1, ARP2) Pages Shift Amount You can tell the Arpeggiator to transpose all of the currently latched notes each time it plays through them. Shift determines how much transposition will occur for each cycle of notes. For example, if you have latched C4 and F4, and you assign a Note Shift of 2, the Arpeggiator will play C4, F4, D4, G4, E4, A4, and so on until it reaches the Limit value. The Shift values can range from ‐88 to 88, with 0 (the default) being no transposition. Shift Limit Limit determines how far up or down the Arpeggiator shifts from the original note. The minimum value is 0, and the maximum is 60. When the Arpeggiator reaches the limit, the Arpeggiator responds according to the setting for the Limit Option parameter. Limit Option This parameter determines what the Arpeggiator does when it has shifted the currently latched notes up (or down) to the shift limit. Stop causes the Arpeggiator to stop when it reaches the shift limit. Reset causes the Arpeggiator to return to its original pitch and repeat the latched cycle of notes, transposing each cycle according to the settings for Note Shift and Shift Limit. If the limit allows the notes to go out of MIDI range (for example, if you set Shift to 12, set the limit to 60, and play C6), then those “ghost” notes don’t sound, but they take up rhythmic space: the Arpeggiator waits for the cycle to play itself out before starting over. Unipolar means that after playing up to the shift limit, the Arpeggiator begins shifting notes in the opposite direction, until it reaches the original pitch, where it reverses again. To determine the next note when it reaches the shift limit, the Arpeggiator calculates the interval between the shift limit and what the next note would be if the shift limit weren’t there. It then plays the note that is the calculated interval lower than the last note before the shift limit. The same thing happens in reverse when the arpeggiated notes get back down to the original pitch. The following table makes this easier to visualize by showing the result of arpeggiating one note (C4) in Unipolar mode, with Note Shift set to 3 ST and various values for Shift Limit. Resulting Arpeggiation (When LimitOption is Unipolar) Shift Limit Comment Down...
- Page 178 Setup Mode The ARPEGGIATOR & ARPEGGIATOR 2 (ARP1, ARP2) Pages Float Res adds a bit of apparent randomness to the process. “Float” means that when the Arpeggiator reaches the shift limit, it resets—but not to its original pitch as with plain Reset. Like Unipolar and Bipolar, it looks at the first note that would exceed the shift limit, and calculates the interval between that note and the shift limit. It then restarts the cycle of latched notes, transposing the entire cycle by the interval it just calculated, then shifting each subsequent cycle by the value of Note Shift, until it reaches the shift limit again. Here’s a very simple example. Suppose that the only note in the Arpeggiator cycle is C4, Note Shift is 4 (a third), and Shift Limit is 7 (so notes won’t get shifted above G4). The Arpeggiator plays C4, then E4. The next note should be G 4, but that’s above the shift limit—so the PC3K calculates the difference between that G 4 and the shift limit (G4): one semitone. It adds that difference to the original starting note (C4) and plays that note next—C 4. The next note (F4) is within the shift limit, but the next note (A4) isn’t, so it gets translated into D4—and so on. Float Uni uses the same concept and applies it to Unipolar mode: when the Arpeggiator reaches the shift limit, it calculates the difference between the next note and the limit, and transposes the next cycle of notes down by that interval, then shifts each subsequent cycle down until it reaches the original pitch. Float Bip is similar to Float Uni, but the downward shift limit isn’t the original pitch, it’s the negative of the Shift Limit value. The Arpeggiator can be a lot of fun, even if you don’t always understand exactly what it’s doing. Keep in mind that the stranger the algorithm you set up, the more unlikely the notes will stay close to one key, so if you want to create something that’s going to sound at all diatonic, keep it simple. Shift Pattern (ShiftPatt) ShiftPatt engages a step sequencer for arpeggiator note patterns. The inputted note number of ...
- Page 179 Setup Mode The ARPEGGIATOR & ARPEGGIATOR 2 (ARP1, ARP2) Pages step. A step with the value “none” causes the arpeggiator to play nothing for that step, allowing you to create rhythmic patterns by using “none” to leave spaces. When the arpeggiator determines the range of pattern notes played with the Limit parameter (see below,) steps with a value of “none” will be calculated as a step value of 0. Use the chan up/down buttons to change the direction in which pattern steps are played (indicated by Up, Down, or Flat on the right of the top line.) With pattern direction set to Up, the pattern plays as expected, starting at step one and moving up through each step towards step 48. With pattern direction set to Down, the pattern starts at step one, but then moves to the last step and continues to move backwards through the steps down towards step 1. Additionally, patterns set to Down base all notes after step one in the octave below the first note played. These settings are most useful for arpeggiating chord patterns upwards or downwards from the root note. Patterns set to Flat will not repeat in other octaves like those set to Up or Down (depending on the Limit parameter.) Patterns set to Flat play without transposition, the Limit parameter will not transpose the pattern but it can still restrict note range. Press Delete to delete the pattern from memory. Press Rename to rename the pattern and save. Pressing Save gives you the option to save the pattern or rename and save. To create a new ShiftPatt, edit an existing pattern and choose Rename when saving. Press Exit to return to the ARPEGGIATOR page. When exiting the editor, it will automatically give you the option to save the pattern if changes have been made. For more detailed instructions on these functions, see Saving and Naming on page 5‐3. 7-49...
-
Page 180: The Arpeggiator 2 Page
Setup Mode The ARPEGGIATOR & ARPEGGIATOR 2 (ARP1, ARP2) Pages The ARPEGGIATOR 2 Page Parameter Range of Values Default Latch Keys, Overplay, Arpeg, Add, Auto, Keys Pedals, Autohold, 1NoteAuto Low Key C -1 to G9 C -1 High Key C -1 to G9 Glissando Off, On SyncTo... - Page 181 Setup Mode The ARPEGGIATOR & ARPEGGIATOR 2 (ARP1, ARP2) Pages Auto is independent of Latch; every note you play is automatically latched, and the Arpeggiator runs as long as you hold at least one arpeggiated note. As long as you keep holding on at least one note (it doesn’t have to be the same note the whole time), every note you play in the arpeggiation range gets latched. Pedals is sort of a combination of Keys, Add, and Overplay modes. It relies on both Latch (MIDI 157) and Latch2 (MIDI 158). If neither latch controller is on, notes will arpeggiate only while you are holding down keys (similar to Keys mode). If you activate Controller 158, the keys currently held down will latch, and any additional keys played while Controller 158 is on will also latch (similar to Add mode). When Controller 158 is off, any keys that are not currently held down will be removed from the arpeggiation. If you activate Controller 157, keys currently held down will latch, and any additional keys played while Controller 157 is on will play normally (similar to Overplay mode). This mode is called Pedals mode because you might want to assign Footswitch 1 to Latch (Controller 157) and Footswitch 2 to Latch2 (Controller 158) to make the pedals function similarly to sustain and sostenuto pedals. Additionally, you could assign one Footswitch to SusLatch (Controller 160)—doing this makes the Footswitch act as a sustain pedal when Arp is off, and as a Latch pedal when Arp is on. Autohold is similar to Auto. Holding at least one arpeggiated note on and playing other notes latches those notes. Unlike in Auto mode, if you stop holding at least one arpeggiated note on, the arpeggiation continues playing (although you can’t latch any more notes). In this case, if you strike another key within the setup’s arpeggiation range, you start a new arpeggiation sequence. Autohold is useful for arpeggiating chords: when you play a chord, it gets latched, and continues arpeggiating after you release the chord. When you play another chord, the previous chord gets unlatched, and the new one gets latched. You can use the Panic soft button to stop arpeggiation at any time. 1NoteAuto is similar to Autohold, except only the last note played is latched (even if previously played notes are still being held.) 1NoteAuto is specifically designed for use with Shift Patterns (see above,) because Shift Patterns are designed to be played from one note at a time (though you can use 1NoteAuto without a Shift Pattern as well.) Using 1NoteAuto for zones that use a Shift Pattern ensures that Shift Patterns will sound correct by only allowing one note at a time to trigger the pattern. You can use the Panic soft button to stop arpeggiation at any time. 1NoteAutoLow and 1NoteAutoHi are also designed for use with Shift Patterns. They work ...
- Page 182 Setup Mode The ARPEGGIATOR & ARPEGGIATOR 2 (ARP1, ARP2) Pages SyncTo The SyncTo parameter determines what an arpeggiator will sync to. An arpeggiator can sync to another arpeggiator, a riff, or a song playing from Song mode. You can choose a specific arpeggiator or riff to sync to by setting SyncTo to Arp 1–16 or Riff 1‐16, and the current arpeggiator will always sync to that arpeggiator or riff. For example, if you have an arpeggiator on a bass sound in zone 1 and an arpeggiator on a lead sound in zone 2, you may always want the lead arpeggiation in zone 2 to sync to the bass arpeggiation in zone 1. In this case you would set the SyncTo parameter in zone 2 to Arp 1. You may want to have a little more freedom and not be tied to the bass arpeggiation in zone 1 as the main “timekeeper.” Maybe you want to start with the lead arpeggiation in zone 2 and have the bass arpeggiation in zone 1 start later. In this case you would set the SyncTo parameter for zone 2 to FirstArp.Av. With this setting, the arpeggiator will look for the first available arpeggiator to sync to. So if both the bass arpeggiation and the lead arpeggiation have this parameter set to FirstArp.Av., the arpeggiation that is started first will be the main “timekeeper.” If the lead arpeggiator starts first, the bass arpeggiator will see that as the first available arpeggiator to sync to and will do so. If the bass arpeggiator is started first, the lead arpeggiator will see that as the first available arpeggiator to sync to and will do so. This can be very handy if you are using multiple arpeggiators and want to do some live improvisation; you can start and stop different arpeggiators and as long is there is one arpeggiator playing, any arpeggiator with SyncTo set to FirstArp.Av. will sync back up when triggered again. You can also choose FirstRiff.Av., which behaves the same way as FirstArp.Av., but makes your arpeggiator look for the first available riff to sync to. A setting of Main Seq. will sync the arpeggiator to the song currently loaded in Song mode. You can select a song in Song mode, then play it from setup mode with the front panel Play/Pause button. (Doing this temporarily replaces the programs in your setup’s zones with the program used for each channel in the song, so it’s best to make a setup that uses the same programs as your song on the same MIDI channels. If you plan on syncing riffs with a song, it may be easier to start by creating a setup, then recording the setup into a song. See Recording A Setup To Song Mode on page 7‐69 for details.) A setting of First Avail. will sync the arpeggiator to the first available arpeggiator, riff, or song from Song mode.
- Page 183 Setup Mode The ARPEGGIATOR & ARPEGGIATOR 2 (ARP1, ARP2) Pages set to DownBeatWait, for instance, and trigger the arpeggiator while no other arpeggiators are running. As soon as you start something else to sync to, the bass arpeggiator will start playing as well (provided that it is set to sync to something else or the first available.) If something to sync to is already running, DownBeatWait behaves just like DownBeat. With SyncType set to AnyBeatWait, if there is something playing to sync to, the arpeggiator will wait for the next beat to start. The difference from AnyBeat is that if there is nothing to sync to, this arpeggiator will not start. This can be useful if you want to start multiple arpeggiators synced to something else. You could have a bass arpeggiator set to AnyBeatWait, for instance, and trigger the arpeggiator while no other arpeggiators are running. As soon as you start something to sync to, the bass arpeggiator will start playing as well (provided that it is set to sync to something else or the first available). If another arpeggiator is already running, AnyBeatWait behaves just like AnyBeat. With SyncType set to Loop, if there is already a riff or song playing to sync to, the current arpeggiator will wait for the playing riff or song to restart its loop (if it is looped) before starting (see Loop on page 7‐62 for looping riffs, and Loop on page 12‐11 for looping songs.) This way you can trigger the arpeggiator to start ahead of time, and have it start in sync at the start of the playing riff or song’s loop (provided that it is set to sync to a riff, song, or the first available). With SyncType set to Stop, if there is already something playing to sync to, the current arpeggiator will wait for what is playing to stop before starting. This way you can trigger the arpeggiator to start ahead of time, and have it start in sync at the release (stopping) of the riff, arpeggiator, or song that you are syncing to. With SyncType set to StartWait, if there is nothing playing to sync to, the current arpeggiator will wait for something it can sync to to begin playing first before starting. This is similar to DownBeatWait, but it will only trigger the arpeggiator the first time that whatever it is syncing to starts. This way you can trigger the arpeggiator to start ahead of time, and have it start in sync ...
-
Page 184: Real-Time Control Of Arpeggiator Parameters
Setup Mode The ARPEGGIATOR & ARPEGGIATOR 2 (ARP1, ARP2) Pages Real-time Control of Arpeggiator Parameters You can have real‐time control over several arpeggiator parameters, by assigning physical controllers to special arpeggiator Controller Destinations. Any input (or entry value) from a physical controller assigned to an arpeggiator Controller Destination overrides the programmed values for the parameters of the arpeggiator on that controller’s zone. The override remains in effect until you select a different setup (or a different program in Program mode.) Remember, each of the following Controller Destinations affects only the arpeggiator for the zone which your controller is assigned to. Corresponding Controller ARPEGGIATOR Operation Number Parameter ArpOn Any controller value turns the Arpeggiator On. ArpOff Any controller value turns the Arpeggiator Off. ArpOrder Arpeggiator Order, each range of values selects one of nine options in order of the parameters list: 0-14... - Page 185 Setup Mode The ARPEGGIATOR & ARPEGGIATOR 2 (ARP1, ARP2) Pages Corresponding Controller ARPEGGIATOR Operation Number Parameter ShiftPatt Selects one of the 128 patterns in the ShiftPatt Bank for the ARPEGGIATOR page of a controller’s zone. ShiftPBank Each increment of 7 (0-6, 7-13...112-127) selects one of the 17 ShiftPatt Banks for the ARPEGGIATOR page of a controller’s zone.
-
Page 186: The Common Page
1 to 16 Mutes Zone Mutes, KB3 Control Zone Mutes Arpeggiator Global Off, Arp 1 to 16 Arpeggiator Sync Not in Sync, Sync Mode Not in Sync Tempo When Clock Source is set to Internal, the Tempo parameter sets the PC3K system’s tempo. The Tempo parameter values are in units of BPM (beats per minute). You can also set the tempo using the tap tempo function. Press the left and right cursor buttons simultaneously to access the TEMPO page (see TEMPO on page 11‐10.) Clock Source With the Clock Source parameter, you can set the PC3K—within the current setup—to generate its own tempo by setting Clock Source to Internal, or you can set the PC3K to sync up with the tempo from another device—assuming the device is sending MIDI clock data to the PC3K via MIDI or USB—by setting Clock Source to External. When Clock Source is set to External, the Tempo parameter disappears from the display. -
Page 187: Kb3 Channel
Setup Mode The COMMON Page KB3 Channel With this parameter, you can specify the KB3 channel in the current setup. Note that if you assign a KB3 program to a zone not assigned to the KB3 channel, the PC3K will notify you on the CH/PRG page. For setups with KB3 and VAST programs, you can program a switch to toggle back and forth between having the sliders and mute buttons function as they would with KB3 programs, and having the sliders and mute buttons function as they would with VAST programs. In the Setup editor, go to the COMMON page and set the Mutes parameter to KB3 Control. Now pick a switch—say SW, which is right next to the Arp button. Go to the SWITCH page (or corresponding editor page for whatever switch you choose), and set OnControl to KB3Mutes (enter 169, or scroll to the end of the Controller List). Do this for all zones in the setup. Now you can toggle back and forth between having drawbars or having sliders work on the non‐KB3 sounds by pressing the SW switch. See Editing KB3 Programs on page 6‐60 for more information on the KB3 mode and the KB3 channel. Mutes The Mutes parameter gives you manual control over the behavior of the buttons above the programmable sliders. There’s really only one case in which you’d need to worry about this parameter: when you have a setup that contains both VAST programs and a KB3 program, and you want the buttons to control KB3 features. By default, the PC3K uses the Mute buttons (the buttons above the sliders on keyboard models) to control the muting and unmuting of zones—which means you don’t have real‐time control over any KB3 features. Change the Mutes parameter to KB3 Control to use the Mute buttons as real‐time KB3 controllers. The white labeling above the buttons describes their functions. Arpeggiator Global (ArpGlobal) With the ArpGlobal parameter, you can set each zone’s Arpeggiator to act as if they all have the same parameters on the ARPEGGIATOR page. In addition to OFF, there are as many ArpGlobal settings as there are zones in the current setup. For example, in a seven‐zone setup, you can select a value of OFF, or Arp 1–7 for ArpGlobal. The number of the ArpGlobal setting indicates ... -
Page 188: Riffs
Setup Mode Riffs Riffs Riffs are full songs or individual tracks of a song created in the PC3K’s Song mode that you can trigger in setup mode. Standard MIDI files may also be imported to Song mode and then used as riffs in setups. Every zone in a setup can have itʹs own riff—a completely independent sequence. You can use a setup with many riffs to trigger and stop looped sequences of different instrument parts. Alternatively, a single riff can play multiple instrument parts. Each riff could be used as a different song section of a backing track. To use a riff, first go to Song mode and note the ID# of the song, section of song and track that you will use for your riff. Next go to Setup mode and create a setup. On the CH/PRG page of the Setup Editor, choose the program that you want to use for the riff on the current zone. Program changes that are recorded in song mode will be ignored when using the song as a riff in a setup. You can also set up the playback event filter in Song mode to ignore other types of events as well. Once you have selected your program, press the more soft button until you get to the RIFF1 and RIFF2 pages. The following sections describe the contents of these pages. Note: By default, setting a zone to trigger a riff will disable the ability to play notes of that zone’s program from the keyboard. To re‐enable this ability, see Local on page 7‐62. The RIFF1 Page The first Riff page appears as shown below, and has the following parameters: Parameter Range of Values Default Riff Off, On Song Song List 0 None (Bar) - Page 189 Setup Mode Riffs Riff Setting the Riff parameter to On will enable the riff feature for the current zone in setup mode. Setting this parameter to Off will disable the riff for this zone. Song Select the song you wish to use in the Song parameter by using the Alpha Wheel, ‐/+ buttons, or the alphanumeric pad. Start Use the Start parameter to specify the riff start point. The time format is Bar : Beat : Tick. Bar can be set to any bar in the sequence, and Beat can be set to any beat in that bar (beat range is dependent on time signature.) Tick can be set from 0 to 959. Since there are 960 possible start points within a beat, you can specify your riff to start on any common beat subdivision moments (and a few uncommon ones). The following Tick values correspond to the following beat subdivision moments: Beat Subdivision Beat Subdivision Tick Value Moment Quarter note 8th note 8th note triplet 16th note 16th note quintuplet 16th note triplet (sextuplets) Table 7-6 Subdivision Values 7-59...
- Page 190 Setup Mode Riffs Stop Use the Stop parameter to specify the riff stop point. Like the Start parameter, the time format for Stop is Bar : Beat : Tick. Bar can be set to any bar in the sequence, and Beat can be set to any beat in that bar (beat range is dependent on time signature.) Tick can be set from 0 to 959. Refer to Table 7‐6 for Tick values. The PC3K restricts the selectable values for the Stop parameter such that the current riff is at least one beat long. Transpose/Root Note With the Transpose parameter set to On, the riff will transpose to the value set in the Root Note parameter. So, if you have a riff whose root note is C4, you can set a new root note in the setup so that the riff will play in the correct range. In this scenario, if you want to trigger your riff from C1 but it was recorded at C4, you would set Transpose to On and Root Note to C1. Your riff will now play in the desired range when triggered from the C1 key, which now corresponds to the note C4. SrcTrack (Source Track) The SrcTrack parameter determines the source track of the riff (from the riff’s original sequence in Song mode.) Along with the Start and Stop parameters, SrcTrack allows you to use a single sequence as a riff for many zones, and to select a different source track and Start/Stop parameter setting for each zone to avoid having to create a special sequence for each riff. To create a setup with multiple riffs each playing a single instrument part, set a single track for the SrcTrack parameter, and that track of the sequence will play with the program on the current zone. Repeat the process on other zones using the same song for the riff, but using a different SrcTrack for each zone. To create a setup with a single riff that plays multiple instrument parts, set SrcTrack to ALL. Each track of the sequence will play its track through the zones which have corresponding MIDI channels (MIDI channels are set for each zone on The Channel/Program (CH/PROG) Page of the Setup Editor, see page 7‐6.) Re Channel Use the Re Channel parameter when the current zone’s MIDI channel and the channel that the riff was recorded on are not the same. When Re Channel is set to On, the track selected for the SrcTrack parameter will play through the MIDI channel of the current zone. For example, if you ...
-
Page 191: The Riff2 Page
Setup Mode Riffs The RIFF2 Page The second Riff page appears as shown below, and has the following parameters: Parameter Range of Values Default (HiKey) C -1 to G9 C -1 Trigger (LoKey) C -1 to G9 (HiKey) C -1 to G9 C -1 Release (LoKey) C -1 to G9 CondRel Off, On Local Off, On Loop... - Page 192 Setup Mode Riffs Next, move your cursor to the right to highlight the second value of the Trigger field (this will be the high end of the trigger key range.) Use one of the methods described above to select a key value for this trigger field. If you want to have only one key start a riff, set the Trigger key range from A#0 to A#0 for example, and your riff will be triggered to start only by pressing the A#0 key. If you want your trigger key range to be larger, set your Trigger key range to be, for instance, A#0 to A#1. Now any key that is pressed within this range will trigger your riff to start. Note: the LoKey and HiKey values on the KEYVEL page do affect the riff. If your riffʹs trigger and release notes are not within the LoKey and HiKey range on the KEYVEL page, your riff will not be able to be triggered from the keyboard. Release The way you release riffs is analogous to the way you trigger them. You can assign a physical controller to destination 164 RiffOff, or you can select a key or key range with the Release parameter. You set this the same way that you set the trigger range. Move your cursor so that the left field of the Release parameter is highlighted (this will be the low end of the trigger key range.) Now select a key value by using the Alpha Wheel, ‐/+ buttons or intuitive entry. Move your cursor to the right field and repeat the process (this will be the high end of the trigger key range.) If you set both of the Release values to A0, the Riff will stop when you release A0. So, if you use the settings described above and in the Trigger section above, your setup’s riff will start when you press A#0, and it will stop when you press and release A0. Note: the LoKey and HiKey values on the KEYVEL page do affect the riff. If your riffʹs trigger and release notes are not within the LoKey and HiKey range on the KEYVEL page, your riff will not be able to be triggered from the keyboard. Conditional Release (CondRel) The CondRel parameter allows you to have a riff play only while a key is pressed and held, and nothing will stop or restart that riff until the key is released. To use conditional release, set the same range for the Trigger and Release ranges on the RIFF2 page. Any key that is pressed and held within this range will play the selected riff. Release the key and the riff will stop. Playing any other key in this zone while triggering a riff with CondRel–even if they are within the Trigger and Release ranges–will not retrigger or stop the zone’s riff. Local If you want to trigger your riff without playing the current zone’s program, set Local to Off. Local is set to Off by default since most users wont want to play the program in the zone they are using for a riff, but only wish hear that zone’s program as a backing track. With Local set to On, you will play the current zones program any time a key is pressed. This could create undesired “grace notes” if you trigger a riff that has a downbeat at the same time you are playing a note.
- Page 193 Setup Mode Riffs sync to external MIDI clock. You can also manually choose a tempo by selecting a value from 20 to 400 for BPM. Use the Alpha Wheel or ‐ /+ buttons to choose between the options or set a tempo. You can also use the alphanumeric pad followed by pressing the Enter button to enter a tempo. SyncZone The SyncZone parameter determines which zone a riff will sync to. You can choose to sync to a riff or arpeggio in a specific zone by setting SyncZone to Riff 1–16 or Arp1‐16, and the current riff will always sync to the riff or arpeggio in the set zone. For example, if you have a drum riff in zone 1 and a bass riff in zone 2, you may always want the bass riff in zone 2 to sync to the drum riff in zone 1. In this case you would set the bass riff SyncZone to Riff 1. You may want to have a little more freedom and not be tied to the drum riff as the main “timekeeper.” Maybe you want to start with the bass riff and have the drum riff start later. In this case you would set SyncZone to FirstRiff.Av. With this setting, the riff will look for the first available riff to sync to. So if both the drum riff and the bass riff have this parameter set to FirstRiff.Av., the riff that is started first will be the master. If the bass riff starts first, the drum riff will see that as the first available riff to sync to and will do so. If the drum riff is started first, the bass riff will see that as the first available riff to sync to and will do so. This can be very handy if you have multiple riffs and want to do some live remixing; you could have the drums drop out, and—as long is there is a riff playing—they will sync back up when triggered again. You can also choose FirstArp.Av., which behaves the same way as FirstRiff.Av., but makes your riff look for the first available arpeggiator to sync to. A setting of Main Seq. will sync the riff to the song currently loaded in Song mode. You can select a song in Song mode, then play it from setup mode with the front panel Play/Pause button. (Doing this temporarily replaces the programs in your setup’s zones with the program used for each channel in the song, so it’s best to make a setup that uses the same programs as your song on the same MIDI channels. If you plan on syncing riffs with a song, it may be easier to start by creating a setup, then recording the setup into a song. See Recording A Setup To Song Mode on page 7‐69 for details.) A setting of First Avail. will sync the riff to the first available riff, arpeggiator, or song from Song mode. Note: If you have multiple riffs or arpeggiators already playing when using FirstRiff.Av., FirstArp.Av., or First Avail. for the current riff, the current riff will sync to the riff or arpeggiator of the lowest numbered zone that has a riff or arpeggiator playing. SyncType The SyncType parameter allows you to choose how your riff will sync to other riffs, arpeggiators, and Songs (depending on your settings made for the SyncZone parameter.) With SyncType set to None, your riff will start playing as soon as it is triggered. It will not sync to ...
- Page 194 Setup Mode Riffs With SyncType set to AnyBeatWait, the riff will wait for the next beat to start. The difference from AnyBeat is that if there is nothing playing to sync to, this riff will not start. This can be useful if you want to start multiple riffs synced to one riff. You could have a bass riff set to AnyBeatWait, for instance, and trigger the riff while no other riffs are running. As soon as you start another riff, the bass riff will start playing as well (provided that it is set to sync to another riff or the first available). If something is already playing to sync to, AnyBeatWait behaves just like AnyBeat. With SyncType set to Loop, if there is already a riff or song playing to sync to, the current riff will wait for the playing riff or song to restart its loop (if it is looped) before starting (see Loop on page 7‐62 for looping riffs, and Loop on page 12‐11 for looping songs.) This way you can trigger the riff to start ahead of time, and have it start in sync at the start of the playing riff or song’s loop. With SyncType set to Stop, if there is already something playing to sync to, the current riff will wait for what is playing to stop before starting. This way you can trigger the riff to start ahead of time, and have it start in sync at the release (stopping) of the riff, arpeggiator, or song that you are syncing to. With SyncType set to StartWait, if there is nothing playing to sync to, the current riff will wait for something it can sync to to begin playing first before starting. This is similar to DownBeatWait, but it will only trigger the riff the first time that whatever it is syncing to starts. This way you can trigger the riff to start ahead of time, and have it start in sync at the start of the riff, arpeggiator, or song that you are syncing to. If you stop the riff and try to start it again while the thing you are syncing to is already playing, StartWait will not start the riff. With SyncType set to LoopWait, if there is already a riff or song playing to sync to, the current riff will wait for the playing riff or song to restart its loop (if it is looped) before starting (see Loop on page 7‐62 for looping riffs, and Loop on page 12‐11 for looping songs.) This way you can trigger the riff to start ahead of time, and have it start in sync at the start of the playing riff or ...
- Page 195 Setup Mode Riffs arpeggiator’s downbeat will occur. With RelSynTyp set to AnyBeat, if there is already a something playing to sync to, the riff will wait only until the next beat before stopping when released. Depending on when you release the riff it will stop in sync with a beat, but it may be on an upbeat or a downbeat. With RelSynTyp set to DownBeatWait, the riff will wait for the downbeat of the next measure to stop when released. The difference from DownBeat is that if there is nothing playing to sync to, the riff wont stop when released. If another riff is already running, DownBeatWait behaves just like DownBeat. With RelSynTyp set to AnyBeatWait, if there is already a something playing to sync to, the riff will wait for the next beat before releasing. The difference from AnyBeat is that if there is nothing playing to sync to, this riff will not stop when released. This can be useful if you want to stop a riff in sync only when another riff is playing. If something is already playing to sync to, AnyBeatWait behaves just like AnyBeat. With RelSynTyp set to Loop, if there is already a riff or song playing to sync to, the current riff will wait for the playing riff or song to restart its loop (if it is looped) before stopping when released (see Loop on page 7‐62 for looping riffs, and Loop on page 12‐11 for looping songs.) This way you can release the riff to stop ahead of time, and have it stop in sync at the start of the playing riff or song’s loop. With RelSynTyp set to Stop, if there is already something playing to sync to, the current riff will wait for what is playing to stop before releasing. This way you can trigger the current riff to release ahead of time, and have it stop in sync at the release (stopping) of the riff, arpeggiator, or song that you are syncing to. With RelSynTyp set to StartWait, if there is nothing playing to sync to, the current riff will wait for something it can sync to to begin playing first before releasing. This is similar to DownBeatWait, but it will only release the riff the first time that whatever it is syncing to starts. This way you can trigger the riff to stop ahead of time, and have it stop in sync at the start of the riff, arpeggiator, or song that you are syncing to. If you restart the riff and try to release it again while the thing you are syncing to is already playing, StartWait will not stop the riff. With RelSynTyp set to LoopWait, if there is already a riff or song playing to sync to, the current riff will wait for the playing riff or song to restart its loop (if it is looped) before stopping (see Loop on page 7‐62 for looping riffs, and Loop on page 12‐11 for looping songs.) This way you can trigger the riff to stop ahead of time, and have it stop in sync at the start of the playing riff or ...
-
Page 196: Real-Time Control Of Riff Parameters
Setup Mode Riffs Duration (Dur) Duration changes the duration of each MIDI note. The original durations of the notes in the sequence are multiplied by the selected percentage. 100% will cause no change, values smaller than 100% will result in shorter durations, values larger than 100% will result in longer durations. Velocity Velocity changes the velocity of each MIDI note. The original velocities of the notes in the sequence are multiplied by the selected percentage. 100% will cause no change, values smaller than 100% will result in lower velocities, values larger than 100% will result in higher velocities. Offset You can fine tune the start time of your riff in ticks by using the Offset parameter. A positive value will delay the start time, while a negative value will speed up the start time. Real-time Control of Riff Parameters You can have real‐time control over several Riff parameters, by assigning physical controllers to special Riff Controller Destinations. Any input (or entry value) from a physical controller assigned to a Riff Controller Destination overrides the programmed values for the parameters of the riff on that controller’s zone. The override remains in effect until you select a different setup. Remember, each of the following Controller Destinations affects only the riff for the zone which your controller is assigned to. Controller Corresponding Operation Number Riff Parameter RiffOn Riff On. Any value triggers the zone’s Riff if Riff is set to On on RIFF1 page. -
Page 197: The Fx Pages: Fx, Auxfx1, Auxfx2, And Mastfx
The FX Pages: FX, AUXFX1, AUXFX2, and MASTFX The FX Pages: FX, AUXFX1, AUXFX2, and MASTFX The four Setup mode FX pages—FX, AUXFX1, AUXFX2, and MASTFX—work the same way as the Effects mode pages—CHANFX, AUXFX1, AUXFX2, and MASTER. See Chapter 9, Effects for information on editing these pages. You can use then Effect (FX Bypass) Mode button to bypass effects while editing. The Programmable Switch Pages: SWPRG1 to SWPRG8 The PC3K’s eight Programmable Switches are the eight Program Select buttons located above the program Category buttons. Each button has its own SWPRG page, but each page is essentially identical. The SWPRG page parameters are described in Switch Controller Parameters on page 7‐31 Parameter Range of Values Default... -
Page 198: Delete
Setup Mode The Utility Soft Buttons Delete This erases a setup from memory, freeing up space to store setups in other locations. (You can check the free memory in the PC3K at any time, on the top line of the Master‐mode page.) Press Delete, and use a data entry method to choose which setup you want deleted. Press Delete again, and an “Are You Sure?” message will appear (unless you have set a value of No for the Confirm parameter on the Master mode page). Press Yes to delete the setup, or No to cancel. As with programs, setups can be saved to and deleted from memory only. The names of all setups in RAM have an asterisk (*) next to them. If you try delete a setup from ROM, the PC3K will ignore the delete command, and the setup will remain in memory. New Zone (NewZn) Press NewZn to create a new zone with default parameters. The PC3K imports this zone from Zone 1 of 128 Default Setup. If there are parameters or entire pages you use often, you can create your own Default Setup and save it to location 128; pressing NewZn will then import zones from your custom Default Setup. Duplicate Zone (DupZn) This adds a new zone with the same parameters as the current zone. Import Zone (ImpZn) You can import, or “bring in,” any zone from any setup in memory. Press ImpZn, and use any data entry method to choose a setup to import from. Then use the Chan/Layer buttons to select one of that setup’s zones. Now press Import, and the zone you selected will be added to the current setup. Note: If you are using all 16 zones in a setup and you try to add, duplicate, or import a zone, a “No More Zones” message appears. You must delete an existing zone before you can add, duplicate, or import any new ones. Delete Zone (DelZn) This deletes the current zone from the setup. Use DelZn to free up zones so you can add or ... -
Page 199: Trigger Keys (Keytrg)
Setup Mode TRIGGER KEYS (KEYTRG) TRIGGER KEYS (KEYTRG) The TRIGGER KEYS page (see below) allows you to set a controller destination to be triggered by playing a specific key. In addition to generating a standard MIDI note on message, each key of the PC3K can be set to trigger a controller destination. TRIGGER KEYS can be set independently per Zone. By using Zones with overlapping key ranges, a single key can trigger multiple controller destinations. On the TRIGGER KEYS page, select the Key field and choose a note by holding the Enter button and playing the desired key (you can also use the Alpha Wheel, ‐/+ buttons or alphanumeric pad to choose a note.) With the desired note selected, use the Dest field to select a controller destination (see The Controller Destination List for details.) Set a value to send to the controller destination with the Value field. Once a destination and value are set, the playing the key will send the value to the controller destination on the Zone’s MIDI Channel (see Channel on page 7‐7 for details on setting each Zone’s MIDI channel.) This may also send a continuous controller message to the MIDI or USB out ports, depending on the Zone’s Destination parameter (see Destination on page 7‐7 for details.) Recording A Setup To Song Mode The MIDI output of a setup can be recorded to a song in Song mode. Each MIDI channel that is output from a setup is recorded into each track of a song (if the tracks have corresponding MIDI channels.) Programs from each zone of your setup are automatically assigned to tracks in Song mode. Follow these steps for proper recording of a new song from a setup: Enter Song mode by pressing the Song Mode button. On the Song mode MAIN page, select 0*New Song* in the CurSng field by entering 0 on ... - Page 200 Setup Mode Recording A Setup To Song Mode After saving your song, you will be returned to the Song mode MAIN page, where your saved song will be loaded. You can continue to record or edit the song in Song mode just as you would with any other song (see Song Mode and the Song Editor on page 12‐1.) Each program from each zone in your setup is automatically assigned to a track (change the RecTrk parameter in order to record to a single track.) You can also continue to record from Setup mode by going back to step 3, above. Remember to set the tempo (step 5 above) before recording, as the song tempo will change if your setup is saved with a different tempo. Notes About Recording A Setup To Song Mode Tempo: The tempo of a setup is set on the SetupMode:COMMON page (see The COMMON Page on page 7‐56.) If you plan to record a song from the same setup several times, it is convenient to set your desired tempo on the SetupMode:COMMON page and save it with your setup. By doing this, you will not need to reset your setup tempo to the desired song tempo every time you load your setup (as in step 5, above.) Riffs: If you are using Riffs in your setup, do the following to make each Riff play at your setup’s tempo (which also becomes your song’s tempo.) For each zone that has a riff, go to the SetupMode:RIFF2 page (see The RIFF2 Page on page 7‐61) and set the BPM parameter to Setup. Remember to save changes to your setup when exiting the Setup Editor.
- Page 201 Setup Mode Recording A Setup To Song Mode zones one and two have bend messages, even if zone three was not playing any notes at that time. For example, lets say zones one and two were bending during bar 1. If you want to separately record zone three during bars 1 and 2, you will probably want to delete the existing bend messages from zone three’s track. You can do this from the EditSong: Track page (see Song Editor: The TRACK Page on page 12‐21, and an example of its use in the Mono Pressure section, above.) Alternatively, if there is nothing to preserve on the track for zone three, you can record it with the song Mode parameter set to Erase, which will erase any existing events on the track during the time that you record. Just remember to change the RecTrk parameter in order to record to a single track. 7-71...
- Page 202 Setup Mode Recording A Setup To Song Mode 7-72...
-
Page 203: Chapter 8 Quick Access Mode
Quick Access Mode Chapter 8 Quick Access Mode In Quick Access mode, you can select programs or setups with a single press of an alphanumeric button (or with other data entry methods). The PC3K offers a number of ways to quickly make selections while performing, but only Quick Access mode lets you store programs and setups together for instant access. On the PC3K, we included several factory preset QA banks that are organized into useful groupings of sounds that we think you’ll find convenient. Below is the QA page: The top line of the page displays the current mode and the current QA bank. Using Quick Access mode involves selecting Quick Access (QA) banks from the list of factory preset or user‐programmed banks. Use the Chan/Zone buttons to scroll through the QA banks. You can also use the bank selection shortcut: press the +/– or Clear button on the alphanumeric pad, and you’ll be prompted to enter a bank number. Type the desired number on the alphanumeric pad, then press Enter. The bank is selected, and you return to the Quick Access mode page. Each bank contains ten memory slots, or entries, where you can store programs or setups in any combination. Any program or setup in the currently selected bank can be selected with the numeric buttons 0 through 9. If the highlighted entry contains a program, the bottom right‐hand field of the page displays the channel on which the program entries are transmitted (this channel is the current channel in Program mode). If the highlighted entry contains a setup, the bottom right‐hand field of the page displays the word “Setup.” The MIDI Program Change commands that the PC3K receives when in Quick Access mode can differ from those in Program or Setup mode. This depends on the setting you have for the PrgChgMode parameter on MIDI Receive page in Master mode. If PrgChgMode is set to Extended or K2600, the PC3K responds to Program Change commands as it would in Program or Setup mode. If PrgChgMode is set to QAccess, the PC3K responds to Program Change commands by calling up the corresponding entry in the current QA bank, not the actual program number of the entry. -
Page 204: Soft Buttons In Quick Access Mode
Quick Access Mode The QA Editor Soft Buttons In Quick Access Mode Use the Octav– and Octav+ soft buttons to transpose up or down by a full octave. Pressing both Octav buttons simultaneously returns the transposition to its original setting. Press the Info soft button to see all of the controller assignments of the current program. Scroll down the page using the Alpha Wheel, cursor or the ‐/+ buttons. The Xpose‐/Xpose+ buttons are a shortcut for quick transposition in semitone (half step) increments. You can use them to transpose the entire PC3K as much as three octaves up or down. The bottom line of the display shows the current amount of transposition (Xpose). Pressing both Xpose buttons simultaneously returns the transposition to zero. The Xpose buttons transpose the PC3K, as well as any MIDI devices connected to the PC3K’s MIDI Out port. Changing the transposition with the soft buttons also changes the Transpose setting on the Master mode MIDI Transmit page. The QA Editor Use the QA Editor to customize existing QA banks. Enter the QA editor from QA mode by pressing the Edit button. The top line gives you the usual mode reminder, the current QA bank, and the current entry (corresponding numeric button for the highlighted object.) The cursor highlights the object (program or setup) that’s stored in the current entry. Selecting A Quick Access Entry To Edit Pressing the Chan/Zone buttons scrolls through the ten entries—the number of the current entry is displayed in the top‐right corner. As the entry number changes, the highlighted objects ... - Page 205 Quick Access Mode The QA Editor Selecting A Setup For A Quick Access Entry If you want to store a setup in the current entry instead of a program, press the Type soft button—when you do this, notice that the Type field change from Program to Setup (also notice that the channel indicator disappears, since setups can transmit over several channels). The list of objects changes from the program list to the setup list. Just as with programs, the cursor highlights the setup’s ID and name. Use the Alpha Wheel or ‐/+ buttons to scroll through the setups. You can also use the alphanumeric pad followed by the Enter button to choose a Setup by ID#. Keep in mind that you can have both setups and programs in the same QA bank. Naming And Saving A Quick Access Bank When you’ve filled each entry with the object you want, press the Name soft button if you want to rename the bank, or press the Save soft button to begin the save procedure. Or, press the Exit button to exit the QA editor, and the “Save Changes?” dialog comes up.
- Page 206 Quick Access Mode The QA Editor...
-
Page 207: Chapter 9 Effects
Effects Basic Overview Chapter 9 Effects The PC3K boasts a powerful effects processor that puts the power of an entire studio at your fingertips. This chapter contains everything you’ll need to know to use the PC3K’s effects and Chain Editor to their fullest potentials. This chapter begins with a few preliminary descriptions of basic routing concepts and effects terminology. The section that follows contains a more in‐depth description of the workings of the PC3K effects processor, and instructions on how to configure the Effects mode pages. After that is a brief overview of using effects in Program mode. The penultimate and last sections contain instructions on how edit and create your own Chains, and a comprehensive glossary of the effects parameters you’ll encounter in the Chain Editor. Basic Overview This section gives a general, “big‐picture” overview of the effects routing in the PC3K, as well as descriptions of the fundamental concepts of effects stages and routing, effects allocation, Aux overriding, and master effects. Effects Stages and Routing There are three types of effects that are applied during different stages in a program’s signal path: Insert Effects, Auxiliary (Aux) Effects, and the global master EQ/compressor. Insert Effects are placed directly in the signal path at the output of a program—as described in the Program mode chapter, these Insert Effects can apply to either the whole program or only to selected layers within the program. Each program also has two stereo Aux Sends that go to the Aux 1 and Aux 2 Effects, both of which can be set to be applied either pre‐ or post‐Insert Effect. The master EQ/compressor are applied globally to the signal at the main outputs. The object used for Insert and Aux Effects is referred to as a “Chain.” A Chain is in turn a sequence of effect‐boxes cascaded in series, or is a single effect‐box. Each program can have one main Insert Chain and up to two Aux Chains. Also, individual layers within a program can have their own Insert Chain that will be used instead of the program’s main Insert Chain. You can select from the same set of Chains to use for both Aux and Insert Effects. The following figure shows the signal path for a program that does not use layer‐specific effects: Comp ² Program... -
Page 208: Processor Power Allocation
Send Levels Comp Output ² Program Insert Master FX Order Chain ZONE/TRACK 2 Comp Post Send Levels Etc. ² AUX 1 Chain ² AUX 2 Chain Processor Power Allocation Each Effect Chain is composed of an effect‐box or a series of effect‐boxes. Each effect‐box uses a certain amount of the PC3K’s effects processing power. The amount of processing power used by an effect‐box or Chain reflects how complex the effect’s algorithm is—more complex effects require more processing power. Accordingly, each Chain and effect‐box uses a certain number of “DSP units”—you can have up to 16 DSP units used at a time. In Program mode, the programs loaded on each of the 16 MIDI channels are normally considered active, so effects are loaded for as many as is possible. In addition to a pair of Aux Effects (whether they are the program’s or the overrides in Effects mode ‐ more on this later), the Insert Effect of each channel’s program is active. For the DSP units, the currently selected program will have priority, followed by lowest to highest MIDI channel. You can have up to 11 active Insert Effects. -
Page 209: A Note On Modes
The CHANFX page in Effects mode—or the FX page in either Setup or Song mode—provides per‐channel control over effects allocation. The channel with a box around its channel number is the current channel in Program mode, or the specified Aux Effect channel in Setup and Song mode. Each channel can be set to Y to allocate effects for that channel, or to N to not allocate effects for that channel. Some channels set to Y may be displayed as (Y). This means that effects resources are not available for that channel, and that channel’s effects are not loaded. Setting a channel to N does not disable that channel’s effects settings; rather it only specifies that no effects are allocated for that channel. As the cursor is moved from left to right, the Insert and (if its the current channel or specified Aux Effects channel) Aux Effects for that channel are displayed below the allocation line of the page. The number of DSP units required to load effects for the cursor‐highlighted channel is shown at the top of the page. A Note on Modes Be sure to read the section on using effects in Program mode, The Program FX (PROGFX) Page on page 6‐47. The configurations in Effect mode apply in every mode except for Setup mode and Song mode. In both Setup and Song mode, the configurations for each mode’s own four Effects pages prevail over the configurations in Effects mode. Aux Override In Effects mode, Setup mode, and Song mode, the AUXFX1 and AUXFX2 pages provide overrides for Aux Chain selection and other Aux Effects parameters. Normally, the Aux Effects Chains are specified by the program on the current channel—or, in Setup mode and Song mode, by the program on the specified Aux Effects channel. The Chain specified for the Aux override (as well as the send levels and other parameters) is applied to the program instead of the program’s Aux Effect. Also, send levels and other parameters normally specified within individual programs can be set to fixed values on the Aux Override pages. This is particularly useful in Setup mode and Song mode, which are multitimbral modes. If you wanted to apply an effect to all zones or tracks in the current setup or song, changing each program’s effects would not only be a long process but use up a lot of DSP units. By setting the Aux override Effect to your desired Chain, you can apply the same effect to up to 16 zones or tracks without having to use up any more DSP units. Notice that in Program mode, if an Aux effect is overriden in Effect mode, the top line of the PROGFX (or LYR_FX) page indicates that corresponding Chain does not use up any DSP units. Since the Chain is not applied, the PC3K does not allocate resources for it. -
Page 210: Master Effects
Effects Basic Overview Master Effects There are two Master Effects that are applied at the final stage of the signal path: an EQ and a Compressor. These are global effects, and apply to all signals routed to the PC3K’s primary outputs. Neither the EQ nor the Compressor use up any DSP units, so you needn’t account for them when allocating effects processing power. See Equalizers (EQ) on page 9‐13 and Compressors, Expanders, and Gates on page 9‐14 for explanations of the parameters for the Master EQ and Compressor. The Master Effects can be accessed in the MASTER page in Effects mode, or the MASTFX in Setup mode and Song mode. -
Page 211: Effects Mode
Effects Effects Mode Effects Mode Press the Effect mode select button to enter Effects mode. As stated previously, the configurations in Effect mode apply in every mode except for Setup mode and Song mode— these modes have their own Effects page (almost identical to those in Effects mode) whose configurations take precedence over those of Effect mode. The CHANFX Page NOTE: In Setup mode and Song mode, this page corresponds in appearance and function to the FX page, though the FX page works on a per setup/song basis. Pressing the CHANFX soft button calls up the CHANFX page. This page is where you’ll allocate effects processing power. See Processor Power Allocation on page 9‐2 for a description of reading and configuring the CHANFX page. The AUXFX1 and AUXFX2 Pages NOTE: In Setup mode and Song mode, these pages corresponds in appearance and function to the AUXFX pages, though they work on a per setup/song basis. Pressing the AUXFX1 soft button or the AUXFX2 soft button calls up, respectively, the AUXFX1 page or the AUXFX2 page. As stated above, in Effects mode, Setup mode, and Song mode, the AUXFX1 and AUXFX2 pages provide overrides for Aux Chain selection and other Aux Effects parameters. See Aux Override on page 9‐3 for a description of the Aux overrides. Each AUXFX page appears as shown below (the page shown below is the AUXFX1 page): Parameter Range of Values Default Override No, Yes Chain... -
Page 212: Override
Effects The AUXFX1 and AUXFX2 Pages If Override is set to No, the top line of the page displays the Aux 1 Chain that is loaded for the current program, as well as the current channel. In the case of the screenshot below, the Aux 1 Chain of the current program is 906 Medium Hall2, and the current channel is 6. Override This parameter switches on or off the Aux override. Set Override to Yes to select an override Aux Chain on this page. Set Override to No to allow the current program (or zone or track). Chain When Override is set to Yes, you can select an override Aux Chain for the page’s corresponding Aux bus. This parameter is not visible when Override is set to No. Output This parameter specifies the physical audio output pair for the page’s corresponding Aux Chain’s output. The settings Pri. and Sec. refer, respectively, to the primary (labeled “MAIN” on the back panel) and secondary (labeled “AUX” on the back panel) physical audio outputs of the PC3K. Setting Output to auto uses the output pair specified in the current program (or the program on the specified Aux Effects channel). Mod Override This parameter can be used to override the Mod Control source of the current program (or the program on the specified Aux Effects channel). A setting of None yields no override in Mod Control source, and uses the Mod Control source specified in the current program. Send Levels and Pre/Post Ins. There are two parameters for each of the 16 MIDI channels: Send Level (top row) and Pre‐/Post‐ Insert (bottom row). The setting for the parameter Send Level determines if the current program’s Aux Send Level is overridden, and if so, by what value. The setting for the parameter Pre‐/Post‐ Insert determines if the current program’s Aux routing is overridden, and if so, by what routing. Pre means that the Aux Send takes place before any Insert Effect is applied, whereas a setting of Pst means that the Aux Send takes place post‐Insert Effect. (Of course, if the program on the channel has no Insert Effects loaded, then this parameter will make no difference.) For both Send Level and Pre‐/Post‐ Insert, a value of [p] means “no override” (i.e., use the values specified in the program). -
Page 213: The Master Page
Effects The MASTER Page The MASTER Page NOTE: In Setup mode and Song mode, this page corresponds in appearance and function to the MASTFX page, though the MASTFX page works on a per setup/song basis. Pressing the MASTER soft button calls up the MASTER page. The MASTER page contains the settings for the master EQ and Compressor. The page appears as shown below: Parameter Range of Values Default Mode Master, Setup Master Order Compressor => EQ, Compressor => EQ EQ => Compressor Master FX Master FX Enabled, Master FX Enabled Master FX Bypassed The two boxes in the chain on the MASTER page are the master Compressor and EQ Effects. ... -
Page 214: The Chain Editor
The Chain Editor The Chain Editor Pressing the edit button while a Chain (other than 0 None) is highlighted—on any of the various effects pages—will call up the Chain editor. From the Program editor, the program’s Insert and Aux Chains can be edited from the PROGFX and LYRFX pages. In Setup, Song, and Effect mode, Chains selected for Aux overrides can be edited from the AUXFX1 and AUXFX2 pages. A Chain is made up of a number of effect‐boxes—of which you can have up to 16 in a Chain— that each have a single effect loaded. The settings for all of the parameters of each effect‐box are also stored within the Chain. There are 15 Mod Controls that allow for real‐time control over any parameter from any effect‐box in the Chain. Per Chain Control sources are also provided to be used as inputs to the effect Mods (two FXLFOs, two FXASRs, and four FXFUNs.) These work similarly to the LFOs, ASRs and FUNs in Program mode, but are only available for use with the effect Mods. The MAIN Page Pressing the MAIN soft button calls up the MAIN page. The MAIN page is where you configure the length of a Chain and select the individual effects that make up the Chain. The Chain editor MAIN page of the Chain 269 PnoEnhancRvb3 appears as shown below: At the top right of the display is the number of DSP units used by the currently selected effect‐ box, and by the Chain as a whole. 2/5 Units indicates that the current effect‐box is using two DSP units and the Chain is using a total of five DSP units for all of its effects. There are a total of 16 units available for all of the Chains that are currently loaded by programs and any active Aux overrides from Setup/Song/Effects mode. NOTE: In some configurations, not all 16 units are available for use with multi‐unit effects because of the way the DSP is allocated. Like all other representations of signal paths in the PC3K display, the program signal moves from left to right through the Chain. Pressing the Insert soft button adds a new effect‐box to the Chain in the currently selected block‐slot, and pushes the currently selected effect‐box down the Chain to the right. Pressing the Remove soft button takes the currently selected effect out of the Chain. The effect loaded into the selected effect‐box can be changed by numeric entry, with the Alpha Wheel, or with the +/– buttons; and can be changed with either the effect‐box or the Effect field at the bottom of the page highlighted. The +/‐ double button press will jump to the next effect “category.” Pressing the Effect Mode button will mute or unmute the selected effects box. The Effect Mode button’s LED will light when a muted effects box is selected, and unlight when an unmuted effects box is selected. -
Page 215: Editing Effect-Blocks
Effects The MOD Pages Editing Effect-blocks To edit the parameters of an effect, select its effect‐box on the MAIN page and press the Edit button. For each effect, there are one or more pages of parameters that are specific to that effect. Any parameter controlled by an effect Mod will display a value of FxMod and cannot be edited. To return to the MAIN page of the chain editor, press the Exit button. The MOD Pages There are three pages for configuring effects mods: MOD1, MOD2, and MOD3. All three pages are essentially identical in appearance and function. The MOD pages appear as shown below (the below MOD page screen shots is for the Chain 269 PnoEnhancRvb3): The Box parameter specifies which effect‐box in the Chain to which the Mod will be applied. Param The Param parameter selects which parameter of the specified box’s effect will be modulated. Adjust The Adjust parameter sets a fixed value for the specified parameter (Param) that is applied before any modulation. Source The Source parameter determines the Control source that will modulate the parameter (Param) in real‐time. This can be any of the normal channel Control sources (sliders, mod wheel, pedals, etc.) or one of the Chain‐specific Control sources (FXLFOs, FXASRs, and FXFUNs). Depth The Depth parameter determines the range of modulation that the Controller will apply. When the Control source has a value of 0, the parameter’s (Param’s) value will be the Adjust value. When the control source is all the way up, the parameter’s (Param’s) value will be the Adjust value plus the Depth value. FXLFO, FXASR, and FXFUN pages The FXLFO, FXASR, and FXFUN pages are the pages from which you edit the Effects‐only Control sources. These are Control sources that can be used by the effects Mods in the current Chain. The parameters on these pages work exactly like those of the corresponding Control sources in program mode (see The LFO Page, The ASR Page, and The Function (FUN) Page in Program Mode). -
Page 216: Infoedit Page (Info)
Effects INFOEDIT page (INFO) INFOEDIT page (INFO) Press the INFO soft button to go to the INFOEDIT page where you can edit the controller assignment info for the current Chain. On the INFOEDIT page, use the Chan/Layer buttons to scroll through the current Chain’s list of controller assignment info. Each assignment info entry has a MIDI controller number and a Text parameter to describe what the assignment controls. To edit the text of a controller assignment, press the Text soft button. To create a new controller assignment info entry, press the New soft button (you will be prompted for a MIDI controller number.) To create a new controller assignment info entry with the same text as the current info entry, press the Dup soft button (you will be prompted for a MIDI controller number.) To delete the current controller assignment info entry, press the Delete soft button (you will be prompted to confirm or cancel.) To return to the Chain editor press the Done soft button or the Exit button. See Export on page 13‐12 for details on exporting Chain info. Effects Parameters This section contains descriptions of the PC3K’s many effects parameters, and instructions on how to use them. Read through this chapter to get a good general understanding of the parameters. The descriptions here do not include all of the parameters associated with every effect, and some effects may not have some of the parameters described here for their category. A more complete reference, with every effect and the meaning and range of every parameter, arranged in the order they appear on the screen, can be found in the KSP8 Algorithm Reference Guide on the Kurzweil website, www.kurzweil.com. General Parameters There are a number of parameters that are common to all or almost all algorithms, and we’ll deal with those first. Wet/Dry balances the levels of the processed and unprocessed signals passing through the preset. The range is 0% wet (the signal is unprocessed) through 100% wet (no dry signal is present). A setting of 50% wet means the dry and processed signals are roughly equal in level. In some algorithms, separate Wet/Dry parameters are provided for the Left and Right input channels. In some cases, this parameters can have negative values, which indicate that the Wet ... - Page 217 Effects General Parameters A‐>B cfg (configuration). In combination algorithms that contain two (or more) components, and whose name uses “<>”, as in 719 “Reverb<>Compress”, the order in which the signal passes through the two components can be changed. For example, this algorithm can be configured so the signal passes through the reverb first and then the compressor, or through the compressor first and then the reverb. The cfg parameter determines the configuration, and its value is context‐sensitive—in this example, the choices would be “Rvb‐>Cmp” and “Cmp‐>Rvb”. A/Dry‐>B is also found in many combination algorithms, and controls the amount of signal that will pass dry (unprocessed) through the first component into the second component. Different combination algorithms use different variations on this parameter, depending on the context. The range is 0 to 100%. Reverbs Room Type changes the configuration of the algorithm to simulate a wide array of room types and sizes including booths, small rooms, chambers, halls and large spaces. Because this parameter changes the structure of the reverb algorithm, you need to be careful when assigning it a MOD—changing it in real time while signal is passing through it is likely to cause audible artifacts. Room types in different algorithms with similar names do not necessarily sound the same. Rvrb Time is the RT —the time it takes for the reverb to decay to 60 dB below its initial level— in seconds. It is accurate assuming that several other parameters (HF Damping, Diff Scale, Size Scale, and Density) are at their nominal levels. It is adjustable up to “Inf”, which creates an infinitely‐sustaining reverb. LateRvbTim adjusts the basic decay time of the late portion of the reverb after diffusion. L/R Pre Dly (Pre‐Delay) is the time between the start of a sound and the output of the first reverb reflections from that sound. Longer pre‐delays can help make larger spaces sound more realistic. Longer times can also help improve the clarity of a mix by separating the reverb signal from the dry signal, so the dry signal is not obscured. EarRef Lvl adjusts the mix level of the early‐reflection portion of algorithms which offer early reflections. Late Lvl adjusts the mix level of the late‐reverb portion of algorithms which offer early reflections. Diff Scale scales the “diffusion“ of the early reflections, that is, how spread out they are as a group over time. At very low settings, the early reflections start to sound quite discrete, and at higher settings the early reflections are seamless. It is adjustable from 0.00 to 2.00, with 1.00 being nominal for the given Room Type. Density controls how tightly the early reflections are packed in time. Low Density settings group the early reflections close together, while higher values spread the reflections for a smoother reverb. It is adjustable from 0.00 to 4.00, with 1.00 being nominal (and usually optimal) ...
-
Page 218: Delays
Delays There are two types of taps in the Multitap delays: The “Loop“ tap, which has a feedback loop back to its input, and the numbered taps. The numbered taps can be single iterations or they can repeat as part of a loop, but they do not have individual feedback paths. Fdbk (Feedback) Level controls the repeating function of the Loop Tap. A setting of 0% means there will only be a single delay, while a setting of 100% means the signal keeps repeating without ever stopping. Both types of taps are individually adjustable from 0 to 2.55 seconds. The Loop Crs and Tapn Crs (n being the number of the tap) parameters set the coarse value of the loop in 20‐ms increments, while the Loop Fine and Tapn Fine parameters set the fine value in 0.2‐ms increments. In Delay algorithms that use tempo to determine tap lengths, there is a Tempo parameter which can be set from 1 to 255 BPM or to “System”. The Loop Length and Tapn Delays are then expressed in beats relative to that overall Tempo. Hold is a switch that, when turned on, “locks” any signal currently in the delay and plays it until Hold is turned off. When Hold is on, no signal can enter the delay and Feedback is set to 100%. A good parameter to control with a footswitch. Dry Bal (Balance) is the left/right balance of the dry signal. At ‐100%, only the left dry signal goes to the left output, while at 100% only the right dry signal passes to the right output, and at 0%, equal amounts of the left and right dry signals pass to their respective outputs. Tapn Level is the level of each numbered tap, from 0% to 100%, relative to the overall output of the effect. Tapn Bal is the left/right balance of each of the numbered taps. At ‐100%, only the left channel of tap n goes to the left output, while at 100% only the right channel of tap n goes to the right output. At 0%, equal amounts of the left and right channels of the tap pass to their respective outputs. In some delays, pairs of taps (1 and 5, 2 and 6, etc.) are controlled together as stereo pairs. DelayScale lets you change the lengths of all the taps together. Its range is 0 to 10x. Note that it is possible for the PC3K to run out of delay memory with over‐generous settings of DelayScale or very slow Tempos. Some Delay algorithms will simply go to a maximum value and stay there, while in some, a calculation is made that automatically cuts the delay times in half, thereby maintaining a relationship with tempo. Complex Echo This algorithm has two feedback taps per channel as well as three independent taps, and also a feedback diffuser for “smearing” the delays. Feedback line 1 feeds the signal back to the delay input of the same channel, while feedback line 2 feeds the signal back to the opposite channel. 9-12... -
Page 219: Spectral Multitap Delays
Spectral Multitap Delays These 4‐ and 6‐tap delays have their feedback and output taps modified with shapers and filters. In the feedback path of each tap are a diffuser, hipass filter, lopass filter, and imager. Each delay tap has a shaper, comb filter, and balance and level controls. Fdbk Image sets the amount that the stereo image is shifted each time it passes through the feedback line. Range is ‐100 to 100%. Tap n Shapr adjusts the intensity of the shaper at each output tap. Range is 0.10 to 6.00 x. Tap n Pitch adjusts the frequency of the comb filter at each output tap. Range is C‐1 to C8, in semitones. Tap n PtAmt adjusts the intensity of the comb filter at each output tap. Range is 0 to 100%. Gated Ducking Delay This runs the last thing you played through a looping delay, but only when you arenʹt playing. Gated Ducking Delay is great for that announcer sound, sound, sound, so popular in Monster Truck radio spots. DegenRegen This one’s a big looping delay with lots of gain, distortion and filtering, and with a compressor to keep it all under control. Very cool. Equalizers (EQ) The PC3K has both Graphic and Parametric EQ algorithms. Parametric EQ sections are also found on a number of combination algorithms. The Graphic equalizer is available as stereo (linked parameters for left and right) or dual mono (independent controls for left and right). It has 10 bandpass filters per channel, each of whose gain is adjustable from ‐12 dB to +24 dB. Like all graphic equalizers, the filter response is not perfectly flat when all gains are set to the same level (except at 0 dB), but rather has ripple from band to band. To minimize this ripple, it is best to center the overall settings around 0 dB. The Parametric equalizer (“5‐Band EQ”) has two bands of shelving filters and three bands of true parametric EQ. Treb Freq and Bass Freq set the center frequencies for the shelving filters. Both of these are adjustable over the full range of 16 to 25088 Hz, in increments of a semitone. Treb Gain and Bass Gain control the amount of cut or boost above (Treb) or below (Bass) the center frequency. The range is ‐79 to +24 dB. 9-13... -
Page 220: Eq Morpher
Midn Width set the bandwidth of the filter on band n, with a range of 0.01 to 5 octaves. Enhancers Enhancers modify the spectral content of the input signal by boosting existing spectral content, or stimulating new ones. Two‐ and three‐band versions are provided. Drive adjusts the input into each band. Increasing the drive will increase the effects. Range is ‐79.0 to 24.0 dB. Xfer adjusts the intensity of the transfer curves. Range is ‐100 to 100%. EQ Morpher This algorithm uses two four‐band bandpass filters, A and B, and moves between them, which among other things, can produce a very convincing simulation of a human vocal tract. FreqScale offsets the filter frequencies for each set of filters. After setting the filter parameters (Freq, Gain, and Width), the FreqScale parameters will move each of the four filter frequencies together by the same relative pitch. Range is ‐8600 to 8600 cents. Morph A>B. When set to 0% the “A” parameters are controlling the filters, and when set to 100%, the “B” parameters control the filters. Between 0 and 100%, the filters are at interpolated positions. When morphing from A to B settings, the A filter #1 will change to the B filter #1, A filter #2 moves to B filter #2, and so on. Range is 0 to 100%. Compressors, Expanders, and Gates A wide range of Compression and Expansion effects is available in the PC3K. The various algorithms include different combinations of: • compressors with soft‐knee characteristic—the compression action comes in gradually as the signal level approaches the threshold • compressors with hard‐knee characteristic—the compression action comes in abruptly when the signal reaches the threshold • expanders • multiband compressors that break the signal up into three frequency bands and compress them all separately • sidechains or output EQs • reverbs and compressors in combination •... -
Page 221: Expansion
Effects Compressors, Expanders, and Gates SmoothTime smooths the output of the expander’s envelope detector by putting a lowpass filter in the control signal path. Smoothing will affect the Attack or Release times only when this parameter is longer than one of the other times. The range is 0.0 to 228.0 ms. Signal Dly (Delay) puts a small delay in the signal relative to the sidechain processing, so that the compressor (or gate) “knows” what the input signal is going to be before it has to act on it. This means the compression can kick in before an attack transient arrives. In the SoftKneeCompress and HardKneeCompress algorithms, delay is really only useful in feed‐ forward configuration (FdbkComprs is “Out”). For other compressors, the delay can be useful in feedback configuration (FdbkComprs is “In”). The range is 0 to 25 ms. Ratio is the amount of gain reduction imposed on the compressed signal, adjustable from 1.0:1 (no reduction) to 100:1, and Inf:1. Threshold is the level in dBFS (decibels relative to full scale) above which the signal begins to be compressed. Adjustable from ‐79.0 to 0 dB. MakeUpGain allows additional output gain to compensate for gain reduction in the compressor. It is essentially the same parameter as Out Gain, with which it is summed. The minimum is ‐79.0, and the maximum summed gain (MakeUpGain + Out Gain) is +24.0 dB. Expansion Algorithms containing Expanders have these controls: Atk or Exp Atk (Attack), how fast the expander turns off when the input signal rises above the threshold level, adjustable from 0.0 to 228.0 ms. Rel or Exp Rel (Release), how fast the expander turns back on after the signal drops below the threshold level, adjustable from 0 to 3000 ms. Ratio or Exp Ratio, how much the gain is reduced below the expansion threshold, adjustable from 1:1.0 (no expansion) to 1:17 (extreme downward expansion). Threshold or Exp Threshold, the level below which the signal is expanded, adjustable from ‐79.0 to 0 dB. In addition, the two‐segment compressors with expander have separate Ratio and Threshold controls for each of the compression segments. Multiband Compression The Multiband Compression algorithm has Attack, Release, Smooth, Signal Delay, Ratio, Threshold, and MakeUp Gain parameters for each of the three bands (“Low”, “Mid”, and “High”). In addition, it has: Crossover1 and Crossover2. These set the frequencies which divide the three compression frequency bands. The two parameters are interchangeable, so either may contain the higher frequency value. The range is 16 to 25088 Hz, in increments of a semitone. -
Page 222: Chorus
Effects Chorus Ducking reverses the action of the gate. Normally this if set to “Off”, and the gate opens when the input signal rises above the threshold. But when this is “On”, the gate closes when the input signal rises above the threshold. Atk (Attack) Time is the time for the gate to ramp from closed to open (reverse if Ducking is on) after the signal rises above threshold, adjustable from 0.0 to 228.0 ms. Rel(ease) Time is the time for the gate to ramp from open to closed (reverse if Ducking is on) after the gate timer has elapsed, adjustable from 0 to 3000 ms. Super Gate Super Gate is a more sophisticated gate that includes these two functions: Env Time is the amount of time it takes for the sidechain signal envelope to drop below the threshold. If this time is too short, the gate can close and open too quickly from amplitude modulation in the sidechain signal. If it is too long, the gate may stay closed until the envelope has a chance to fall, and some signals would not get through. This parameter is only in effect when Retrigger is Off. Retrigger determines whether the gate timer will reset itself each time the sidechain signal goes above the threshold. If it is “On”, the timer resets itself, and therefore the gate stays open as long as the signal is above the threshold, or keeps going above the threshold, within the interval specified by Gate Time. If it is “Off”, the gate closes down after Env Time has elapsed, regardless off the sidechain level, and the sidechain level must fall below the threshold and come back up again before the gate will open again. Chorus Chorus is an effect which gives the illusion of multiple voices playing in unison. The effect is achieved by detuning copies of the original signal and summing the detuned copies back with the original. Low frequency oscillators (LFOs) are used to modulate the positions of output taps from a delay line. The movement of the taps causes the pitch of the signal to shift up and down, producing the required detuning. The choruses are available as stereo or dual mono. The stereo choruses have the parameters for the left and right channels ganged, while the dual mono choruses have separate left and right controls. Fdbk Level is the level of the feedback signal from the LFO1 delay tap into the delay line. Negative values polarity‐invert the feedback signal. Tap Lvl sets the levels of the LFO‐modulated delay taps. Negative values polarity‐invert the signal. Setting any tap level to 0% turns it off. Tap Pan sets the stereo position for a given tap’s output. The range is ‐100% for fully left, to 100% for fully right. LFO Rate sets the speed of modulation of the delay lines with a range of 0.01 to 10 Hz. LFO Dpth sets the maximum detuning depth of the LFO‐modulated delay lines, with a range from 0 to 50 cents (= 1/2 semitone). -
Page 223: Flanger
Effects Flanger Flanger Flanging is the process of adding or subtracting a signal with a time‐displaced replica of itself, which results in a series of notches in the frequency spectrum, generally referred to as a comb filter. In the PC3K, the flanger is a multi‐tap delay line, all (but one) of whose taps can have their lengths modulated up and down by a low frequency oscillator (LFO). The rate of the LFO is expressed in Tempo (see Chapter 4). StatDlyLvl (Static Delay Level) is the level of the first, non‐moving tap. Negative values invert the polarity of the tap. The range is ‐100 to 100%; 0% turns the tap off. DlyCrs and DlyFin are the coarse and fine length controls for the Static delay (StatDly…) and for the minimum value of the moving delays (Dlyn…). The coarse range is 0 to 228 ms, and the fine range adjusts the coarse range in samples (= 1/48,000 sec = 20.8μsec) from ‐127 to 127. Xcurs Crs and Xcurs Fin determine how far the LFO‐modulated delay taps can move from the center of their ranges. The total range of the LFO sweep is twice the excursion. If the excursion is set to 0, the LFO does not move and the tap behaves like a simple delay line set to the minimum delay. The coarse range is 0 to 228 ms; the range 0 to 5 ms is most effective for flanging. The fine range adjusts the coarse range in samples from ‐127 to 127. Quantize + Flange The Quantize portion of this algorithm produces digital distortion known as quantization noise, by limiting the number of bits available to the signal. DynamRange (dynamic range) controls how many bits to remove from the signal data words. The lower the level, the greater the distortion. At 0 dB the hottest of signals will toggle between only two quantization levels, thereby producing a square wave. Every 6 dB added doubles the number of quantization levels, reducing the noise and getting closer to the original signal. If the signal has a lot of headroom (available signal level before digital clipping), then not all quantization levels will be reached. Range is 0 to 144 dB. Headroom sets the available signal level before digital clipping. Setting this properly prevents the signal from getting ridiculously loud at low levels of DynamRange. You want to have it match the amount of level still available above the input signal: this is done by finding the DynamRange level at which the signal starts getting louder, and setting Headroom to match the DynamRange value. Range is 0 to 144 dB. DC Offset adds a positive DC Offset to the input signal, which allows you to alter the position where digital zero is with respect to your signal. At low DynamRange settings, this can cause the output to “sputter”. Range is Off/‐79.0 to 0.0 dB. LaserVerb LaserVerb is a new kind of reverb which produces a delayed train of closely spaced reflections, or impulses. As time passes, the spacing between the impulses gets wider, which creates a ... -
Page 224: Filters
Effects Filters Spacing determines the starting pitch of the descending buzz and how fast it descends, by setting the initial separation of impulses and the subsequent rate of increasing impulse separation. The spacing between impulses is given in samples (20.8μs). At low values, the buzz starts at high frequencies and drops slowly, while at high values the buzz starts at a lower pitch and drops rapidly. Range is 0.0 to 40.0 samples, with a resolution of 0.2 sample. Contour controls the overall shape of the reverb. When set to a high value, sounds passed through the reverb start at a high level, and it slowly decays. As the control value is reduced, it takes more time for the effect to build up before decaying. At a value of around 34%, the reverb behaves like a reverse reverb, building up to a hit. When it is set to zero, the algorithm acts like a simple delay. Range is 0 to 100%. Filters There are four types of Resonant Filter algorithms in the PC3K. All of them have these parameters in common: Filter Type (or FiltType) can be Lowpass, Highpass, Bandpass, or Notch (band‐cut). Resonance is the resonance of the filter, adjustable from 0 to 50 dB. Resonant Filter Frequency (or Freq) is the fixed resonant frequency of the filter. Its range is 16 to 8372 Hz. Envelope Filter Envelope Filter is a resonant filter whose center frequency can be made to vary according to the level of the incoming signal. Filter Type can be Lowpass, Highpass, Bandpass, or Notch (band‐cut). Min Freq is the minimum resonant frequency of the filter, that is, the filter frequency when the input gain is below the triggering threshold. Its range is 16 to 8372 Hz. Sweep determines how far the resonant frequency moves when the input level increases. At positive levels it moves up in pitch, and at negative levels it moves down. The highest possible resonant frequency is 8372 Hz, the lowest is 0 Hz. This parameter’s range is ‐100% to +100%. Resonance is the resonance of the filter, adjustable from 0 to 50 dB. Atk Rate adjusts the upward slew of the attack portion of the envelope detector. Range is 0 to 300.0 dB/sec. Rel Rate adjusts the downward slew of the release portion. Range is 0 to 300.0 dB/sec. Smooth Rate slows down the envelope follower. If it is set to a lower rate than Atk Rate or Rel Rate, it can dominate those parameters. Range is 0 to 300.0 dB/sec. Triggered Filter The Triggered Filter is a sweeping resonant filter that triggers when a certain input threshold is reached, and then follows its own envelope, consisting of an instantaneous attack and an ... -
Page 225: Distortion
Distortion Trigger is the input‐signal threshold at which the envelope detector triggers. Range is ‐79 to 0 dB. Retrigger is the input‐signal threshold at which the envelope detector resets, so that it can trigger again. This parameter is only useful when it is set below the value of Trigger. Range is from ‐79 to 0 dB. Env Rate is the envelope detector decay rate. This can be used to prevent false triggering. When the signal envelope falls below the retrigger level, the filter can be triggered again when the signal rises above the trigger level. Since the input signal can fluctuate rapidly, it is necessary to adjust the rate at which the signal envelope can fall to the retrigger level. The range is 0 to 300.0 dB/sec. Rel Rate is the downward slew (release) rate of the triggered envelope generator. The range is 0 to 300.0 dB/sec. Smth Rate slows down the envelope follower. If set lower than the release rate, it will dominate it. You can also use the smoothing rate to lengthen the attack of the internal envelope. The range is 0 to 300.0 dB/sec. LFO Filter The LFO filter is continuously swept between two resonant frequencies over a period of time. The LFO frequency, expressed in BPM and beats, can be fixed or set to follow System tempo. (See Chapter 4 for information about tempo control of PC3K parameters.) Min Freq and Max Freq are the low and high limits of the resonant frequency as the filter is swept. You can set the Min Freq higher than the Max Freq, in which case the filter will sweep “upside down” relative to the controlling clock. The range for both is 16 to 8372 Hz. LFO Shape is the waveform type for the LFO. Choices are Sine, Saw+, Saw‐, Pulse, and Tri. LFO PlsWid (Pulse Width). When the LFO Shape is set to Pulse, this sets the pulse width as a percentage of the waveform period. When the width is set to 50%, the result is a square wave. This parameter has no effect if other waveform types are chosen. Range is 0 to 100%. LFO Smooth smooths (removes the higher harmonics from) the Saw+, Saw‐, and Pulse waveforms. A Sawtooth wave becomes more like a triangle wave, and a Pulse wave becomes more like a sine wave. Range is 0 to 100%. Distortion Distortion algorithms on the PC3K may also include a parametric equalizer or a cabinet simulator. Dist Drive applies a boost to the input signal to overdrive the distortion algorithm into soft clipping. This will tend to make the signal very loud, so you may have to reduce the Out Gain as this parameter is increased. Range is 0 to 96 dB. Warmth is a lowpass filter in the distortion control path. This filter may be used to reduce some of the harshness of some distortion settings without reducing the bandwidth of the signal. Range is 16 to 25088 Hz. -
Page 226: Polydistort
Effects Rotating Speakers Cab Bypass switches on and off the cabinet‐simulation part of the algorithm. When this is set to “In”, the cabinet simulation is active; when it is “Out”, there is no cabinet action. Cabinet HP and Cabinet LP are highpass and lowpass filters to set the frequency response limits of the cabinets. Range of both filters is 16 to 25088 Hz. Polydistort This is a more complex distortion algorithm that provides two, four, or six stages of distortion. Curve n controls the curvature of the individual distortion stages. 0% is no curvature (no distortion at all). At 100%, the curve bends over smoothly and becomes perfectly flat right before it goes into clipping. Maximum value is 127%. LP n Freq are shelving frequencies for one‐pole lowpass filters on each of the distortion stages. LP0þFreq handles the initial low pass prior to the first distortion stage. The other low pass controls follow their respective distortion stages. Range is 16 to 25088 Hz. Rotating Speakers An algorithm that includes Rotating Speakers breaks the signal into two frequency bands, “rotates” each band separately through a virtual speaker, and then combines the outputs with a pair of virtual “microphones” whose angle relative to the speakers is adjustable. A number of very sophisticated parameters have been included in the Rotating Speakers algorithm, to give the effect a great degree of realism. Because of the complexity of the algorithms, you might want to approach any parameters that seem a little obscure to you with caution. Roto InOut engages or bypasses the rotary speaker effect. There are four virtual microphones, with two each on the woofer (LoMic A and LoMic B) and on the tweeter (HiMic A and HiMic B). Each microphone has: Pos (position), the angle of the microphone from the front of the virtual speaker, from ‐180 to 180 degrees; Lvl (level) from 0 to 100%; and Pan, the left/right panning of the microphone’s output, from ‐100% (full left) to 100% (full right). Other parameters: Lo Beam W and Hi Beam W set the acoustic radiation patterns (“beam width”) of the two drivers in the rotating speaker. If you imagine looking down on the rotating speaker, this is the angle between the ‐6 dB levels of the beam. The range is from 45° to 360°. At 360°, the driver is omnidirectional. Xover (Crossover) is the frequency at which high and low frequency bands are split and sent to separate rotating drivers. The range is 16 to 25088 Hz. Lo Gain and Hi Gain are the gains of the signal passing through the rotating woofer or tweeter, respectively. The range is Off/‐79.0 to 24.0 dB. Lo Size and Hi Size are the effective sizes (radius of rotation) of the rotating speakers in millimeters. This affects the amount of Doppler shift or vibrato of the low frequency signal. The ... -
Page 227: Vibrato/Chorus
Effects Rotating Speakers LoResonate and HiResonate are simulations of cabinet resonant modes expressed as a percentage. For realism, you should use very low settings. The range is 0 to 100%. Lo Res Dly and Hi Res Dly are the number of samples of delay in each resonator circuit in addition to the rotation excursion delay. The range is 10 to 2550 samples. LoResXcurs and HiResXcurs are the number of samples of delay to sweep through the resonator at the rotation rate of each rotating speaker. The range is 0 to 510 samples. ResH/LPhs sets the relative phases of the high and low resonators. The angle value in degrees is somewhat arbitrary and you can expect the effect of this parameter to be rather subtle. The range is 0 to 360.0 degrees. Mic Angle is the angle of the virtual microphones in degrees from the “front” of the rotating speaker. For the left microphone the angle increases clockwise (when viewed from the top), while for the right microphone the angle increases counter‐clockwise. Assigning a MOD to this parameter should be done with caution: real‐time adjustments to it will result in large sample skips, which will cause clicks in the signal passing through. The range is 0 to 360.0 degrees. (In Distort + Rotary only.) The following parameters relate to rotation speed: Speed sets the rotating speakers to run at either the slow rate or the fast rate. Brake, when set to ʺOnʺ, slows the rotating speakers to a halt. Lo Mode, in the ʺNormalʺ setting, will give you full control of the low frequency speaker with the Speed parameter. The ʺNoAccelʺ setting will hold the low frequency speaker at the slow speed, and the Speed parameter will have no effect on its speed, though Brake will still work. In the ʺStoppedʺ position, the low frequency speaker will not spin at all. Lo Slow and Hi Slow are the rotation rates in hertz (Hz) of the speakers when Speed is set to ʺSlowʺ. Lo Fast and Hi Fast are the rotation rate in hertz (Hz) of the speakers when Speed is set to ʺFastʺ. LoSlow>Fst and HiSlow>Fst are the times for the speakers to accelerate from the slow speed to the fast speed. LoFst>Slow and HiFst>Slow are the times for the speaker to decelerate from the fast speed to the slow speed. LoAccelCrv and HiAccelCrv are the shapes of the acceleration curves for the speakers.þ0% is a constant acceleration. Positive values cause the speaker to speed up slowly at first then quickly reach the fast rate. Negative values cause a quick initial speed‐up then slowly settle in to the fast speed. If set to a low negative value, it will overshoot. LoSpinDir and HiSpinDir are the directions of rotation of the speakers. The choice is clockwise (CW) or counter‐clockwise (CCW). Vibrato/Chorus The Vibrato/Chorus algorithm (and also the KB3 Effects algorithm) simulates the vibrato and chorus effects on a tone wheel organ, and is used in conjunction with the Rotary Speaker. It has ... -
Page 228: Tremolo And Autopan
Effects Tremolo and AutoPan Tremolo and AutoPan Tremolo is amplitude modulation using an LFO. AutoPan moves the signal between the left and right channels, using an LFO. They have several parameters in common and several unique ones. LFO Rate is the rate of the LFO. The range is 0 to 10.00 Hz, or in Tremolo BPM algorithm, 0 to 12.00 x the tempo. Rate Scale multiplies the speed of the LFO rate into the audio range. The range is 1 to 25088 x. When above 16x, the values increment in semitone steps. When the LFO Rate is set to 1.00 Hz, the value of this parameter is equal to the LFO frequency in Hertz. LFO Shape is the waveform type for the LFO. Choices are Sine, Saw+, Saw‐, Pulse, and Tri. LFO PlsWid or Pulse Width. When the LFO Shape is set to Pulse, this sets the pulse width as a percentage of the waveform period. When the width is set to 50%, the result is a square wave. This parameter has no effect if other waveform types are chosen. Range is 0 to 100%. AutoPan Origin determines the axis for the panning motion. At 0%, the panning is centered between the speakers. Positive values shift the axis to the right, while negative values shift it to the left. At ‐100% or +100% (the range limits), there is no panning action. ImageWidth is the width of the original input program material before it is auto‐panned. At 0% (minimum), the input image is shrunk to a single point source, allowing maximum panning excursion. At 100% (maximum), the original width is maintained so no panning can occur. Pan Width controls the amount of pan excursion. It is the percentage of total panning motion available after Origin and ImageWidth are set. Range is 0 to 100%. CentrAtten (Attenuation) is the amount the signal level drops as it is panned through the center of the stereo image. For the smoothest tracking, a widely accepted subjective reference is ‐3dB. Values above ‐3dB will cause somewhat of a bump in level as an image passes through the center, while values below ‐3dB will cause a dip. Range is ‐12 to 0 dB. Tremolo Depth controls the amount of attenuation applied when the LFO is at its deepest excursion point. Range is 0 to 100%. LFO Phase shifts the phase of the tremolo LFO relative to the beat reference. Range is 0.0 to 360.0 degrees. 50% Weight is the relative amount of attenuation added when the LFO is at the ‐6dB point. This causes the LFO shape to bow up (positive values) or down (negative values). Range is ‐16 to 3 dB. L/R Phase sets the phase relationship of the channels. “In” flips the left channel’s LFO out of ... -
Page 229: Ring Modulation
Effects Ring Modulation Pitch. The fundamental pitch imposed upon the input, in MIDI note numbers from C‐1 to G9. Ptch Offst is an offset from the pitch frequency in semitones, from ‐12.0 to 12.0. It can be useful to assign pitch bend, a ribbon, or another continuous controller to this parameter through a MOD. Odd Wts, Pair Wts, Quartr Wts, Half Wts are parameters that control the shape of the frequency response of Pitcher. An exact description of what each one does is, unfortunately, impossible, since there is a great deal of interaction between them. For more information and examples, see the KSP8 Algorithm Reference Guide. Ring Modulation Ring modulation multiplies two signals (the “carrier” and the “modulator”) together to produce unusual, often non‐harmonic, overtones. The Ring Modulator algorithm in the PC3K has two modes: “L*R” in which two mono signals are modulated together; and “Osc”, in which the input is stereo, and it is modulated with the sum of five waveforms that are generated from oscillators within the algorithm itself. Four of these oscillators are sine waves, while one (Oscillator 1) offers a selection of waveforms. Wet/Dry. When the algorithm is in “L*R” mode, this controls how much of the left signal only is passed dry (the right signal isn’t passed dry at all). Mod Mode selects between the two modes. Osc1 Lvl is the level of Oscillator 1, from 0 to 100%. Osc1 Freq is the frequency of Oscillator 1, from 16 to 25088 Hz. Osc1 Shape is the waveshape of Oscillator 1, selectable from Sine, Saw+, Saw‐, Pulse, and Tri. Osc1PlsWid (Pulse Width). When Osc1 Shape is set to Pulse, this sets the pulse width as a percentage of the waveform period. When the width is set to 50%, the result is a square wave. This parameter has no effect if other waveform types are chosen. Range is 0 to 100%. Osc1Smooth smooths (removes the higher harmonics from) the Saw+, Saw‐, and Pulse waveforms. A Sawtooth wave becomes more like a triangle wave, and a Pulse wave becomes more like a sine wave. Range is 0 to 100%. The other four oscillators, Sine2 through Sine5, each have Lvl and Freq controls. Stereo Simulation The Mono to Stereo algorithm converts a monaural input to simulated stereo output. In Select selects the input signal to be “stereo‐ized”. It can be Left, Right, or both: (L+R)/2. CenterGain is the level of the summed left and right channels. Range is Off/‐79.0 to 24.0 dB. Diff Gain is the level of the difference signal produced, which is the spatial component of the stereo signal. Range is Off/‐79.0 to 24.0 dB. DiffBassG controls the gain of a bass‐shelf filter on the difference signal. By boosting the low ... -
Page 230: Stereo Image
Effects Stereo Analyze The processed signal is split into three frequency bands—Lo, Mid, and High—each of which can be delayed and panned separately. Crossover1 and 2 are the two Crossover frequencies at which the band‐split filters split the signal into three bands. The two parameters are interchangeable: either may have a higher frequency than the other. Range is 16 to 25088 Hz. Pan [High/Mid/Low] sets the pan position for each band. Range is ‐100% (fully left) to 100% (fully right.) Delay [High/Mid/Low] sets the delay for each band. Range is 0 to 1000 ms. Stereo Image This algorithm provides enhancement for a stereo signal. It also features a stereo correlation meter. It uses some parameters from Mono to Stereo and some from Stereo Analyze (following). Stereo Analyze In this algorithm you can look at the two channels of a stereo signal, and also their inversions, sums, and differences. You can adjust their gains, and apply small delays to either or both channels. L Invert and R Invert inverts the phase of the channels. L Out Mode and R Out Mode determines which signal is going to be metered and sent to the output of each of the channels. The choices for each are: “L” (left), “R” (right), “(L+R)/2” (normalized sum), “(L‐R)/2” (normalized difference), and polarity inverted versions of these. L/R Delay “time balances” the two signals. At negative values, the right channel is delayed, while at positive values, the left channel is delayed. The range is ‐500 to 500 samples. RMS Settle controls how fast the RMS (average‐reading) meters can rise or fall with changing signal levels. Range is 0 to 300 dB/second. FXMod Diagnostic This algorithm allows you to view the current levels of any data sliders, MIDI controls, switches, or internally generated VAST LFOs, ASRs, FUNs, etc. which are available as modulation sources. It has no effect on any signal being routed through it. Up to eight modulation sources may be monitored simultaneously. Meters #1 through #4 can monitor bipolar sources, meaning sources that can have both positive and negative values. The range of the bipolar meters is ‐1 to +1. Four monopolar meters #5 through #8 provide better resolution, but the range is limited to 0 though +1. Use the monopolar meters for sources which you do not expect to go negative. Eight parameters are provided to connect modulation sources to the meters. The parameter values are fixed at “NoDpth” and have no function except to connect sources to meters. -
Page 231: Mono Algorithms
Effects Mono Algorithms Monopole5 through Monopole8 attach monopolar modulation sources (can go positive only) to the monopolar meters. The parameters are not adjustable. Mono Algorithms Many stereo algorithms are also available in a mono configuration. Refer to the KSP8 Algorithm Reference Guide for complete information on Mono algorithm parameters. You can download a copy of this manual at the Kurzweil Music Systems web site: www.kurzweil.com. 9-25... - Page 232 Effects Mono Algorithms 9-26...
-
Page 233: Chapter 10 Midi Mode
MIDI Mode The TRANSMIT Page Chapter 10 MIDI Mode The PC3K sends and receives MIDI on traditional 5‐pin DIN connectors and through USB. MIDI can be sent and received on all ports at once. Press the MIDI mode button to enter MIDI mode. There are three pages in MIDI mode: • TRANSMIT (XMIT soft button) • RECEIVE (RECV soft button) • CHANNELS (CHANLS soft button) You’ll use these pages to determine what MIDI messages the PC3K transmits, and how it responds to the MIDI messages it receives—as well as how each MIDI channel behaves. When you enter MIDI mode, you’ll see one of the three available MIDI mode pages. The TRANSMIT Page Press the XMIT soft button, and the TRANSMIT page appears. Use the parameters on this page to control how the PC3K sends MIDI information to its USB or MIDI Out port. These settings to some extent affect the PC3K’s response to its own keyboard and controllers, but they primarily affect the responses of other MIDI devices that are receiving MIDI from the PC3K on the channel specified with the Channel parameter on this page. When a program is selected, either in Program mode or in Quick Access mode, all of the settings of the TRANSMIT page are in effect, except for ChgSetups, which only applies when loading a setup. If a setup is selected, in Setup mode or in Quick Access mode, all of the settings of the TRANSMIT page are in effect except for ControlSetup, Channel, and ProgChang (see below for details.) When sending MIDI to the USB or MIDI out port from Song mode, Song mode ignores all of the settings on the Transmit page except ControlSetup (see below for details.) 10-1... -
Page 234: Control Setup
1 Linear Pressure Map Pressure Map List 1 Linear Program Change Off, On Change Setups Immediate, KeyUp Immediate Control Setup This is where you select the current control setup, Zone 1 of which sets the physical controller assignments for all programs while you’re in Program mode. This parameter does not apply to Setup mode. Refer to The Control Setup on page 7‐2 for more information on the control setup. Destination The Destination parameter tells the PC3K which ports will carry MIDI information, and determines if the PC3K’s sound engine will receive MIDI data. Select the desired destination or any combination of destinations depending on your needs. For example, a value of Local disables the USB and MIDI Out ports. Use this setting when you want to play the PC3K, but not to send any MIDI information to other MIDI instruments (local control only.) Alternatively, you would set this parameter to MIDI or USB_MIDI if you only wanted to send MIDI data to other MIDI instruments from the MIDI port or USB port, and no MIDI data would be sent locally to the PC3K’s sound engine. A value of MIDI+Local would send MIDI data only to the MIDI out port and the PC3K’s sound engine. For Setup mode, this parameter acts as a final filter for which ports will send MIDI information. For example, if this parameter is set to MIDI_USB+MIDI, and a setup zone has its Destination parameter set to MIDI+Local on the SetupMode:CH/PRG page, MIDI data will be sent only through the traditional MIDI port. Both parameters, MIDI Xmit Destination and the setup Destination parameter in the SetupMode:CH/PRG page act as filters and both are active in Setup ... -
Page 235: Velocity Map (Transmit)
MIDI Mode The TRANSMIT Page Velocity Map (Transmit) Change the MIDI Transmit Velocity Map setting if you are triggering external MIDI gear which is producing notes that are too loud or too quiet based on your playing style (how light or heavy that you play the keys.) The default map provides the widest range of velocity expression, but you may want to choose a different map if the default does not suit your playing style. MIDI Sources MIDI In via MIDI In port or USB Computer port PC3K Keyboard VelocityMap Settings on MIDI Mode Receive Page KEY‐VEL page for current Control Setup (in Program Mode) or current Zone (in Setup Mode) Velocity Map Settings on Master Mode MAPS Page PC3K Song Mode VelocityMap Settings on MIDI Mode Transmit Page MIDI Destinations PC3K Sound Engine MIDI Out via MIDI Out port or USB Computer port to PC3K audio outputs The transmit Velocity Map affects the way the PC3K sends MIDI velocity values to its USB or MIDI Out port (see the circled box above for its location in the MIDI signal flow.) Different maps output different MIDI velocity values for the same received MIDI attack velocity. Each map applies a different curve to received MIDI attack velocities and remaps them to new velocities before transmitting them to the USB or MIDI Out port (this parameter has no effect on MIDI data sent from Song mode or to the PC3K’s sound engine.) The default map provides the widest range of velocity expression, but you may want to choose a different map if the default does not suit your playing style. See the diagram above for the other pages that affect the MIDI attack velocity before reaching the transmit Velmap. The default map, Linear, allows MIDI velocities to pass unchanged. Maps Light 1‐3 make it increasingly easier to produce high MIDI velocity values for the same key strike velocity (with Light 3 being the easiest,) so these maps may work better for users who play with a lighter touch. Hard 1‐3 make it increasingly harder to produce high MIDI velocity values for the same ... -
Page 236: Pressure Map (Transmit)
MIDI Mode The TRANSMIT Page Pressure Map (Transmit) Change the Transmit Pressure Map setting if you are triggering external MIDI gear which is producing MIDI pressure (aftertouch) values that are too high or too low based on your playing style (how soft or hard that you press the keys.) The default map provides the widest range of pressure expression, but you may want to choose a different map if the default does not suit your playing style. MIDI Sources PC3K Keyboard MIDI In via MIDI In port or USB Computer port PressureMap Settings on MIDI Mode Receive Page PRESS page for current Control Setup (in Program Mode) or current Zone (in Setup Mode) Pressure Map Settings on Master Mode MAPS Page PC3K Song Mode PressureMap Settings on MIDI Mode Transmit Page MIDI Destinations PC3K Sound Engine MIDI Out via MIDI Out port or USB Computer port to PC3K audio outputs The transmit Pressure Map affects the way the PC3K sends MIDI pressure (aftertouch) values to its USB or MIDI Out port (see the circled box above for its location in the MIDI signal flow.) Different maps output different MIDI pressure (aftertouch) values for the same received MIDI pressure (aftertouch) value. Each map applies a different curve to received MIDI pressure (aftertouch) values and remaps them to new values before transmitting them to the USB or MIDI Out port (this parameter has no effect on MIDI data sent from Song mode or to the PC3K’s sound engine.) The default map provides the widest range of pressure (aftertouch) expression, but you may want to choose a different map if the default does not suit your playing style. See the diagram above for the other pages that affect MIDI pressure (aftertouch) values before reaching the transmit Pressure Map. The default map, Linear, allows MIDI pressure (aftertouch) values to pass unchanged. Maps 2‐4 make it increasingly easier to produce MIDI pressure values for the same physical pressure ... -
Page 237: Program Change (Progchang)
MIDI Mode The RECEIVE Page Program Change (ProgChang) When ProgChang is set to On, the PC3K sends program change commands to its USB or MIDI Out port when you select programs or setups from the front panel or from your MIDI controller. Select a value of Off when you want to change programs on the PC3K but don’t want to send program change commands to the USB or MIDI Out port. This parameter doesn’t affect the type of program change command that’s sent; it just determines whether any command is sent at all. (The type of program change command is determined by the settings on the CH/PROG page in the Setup Editor of your control setup. See The Control Setup on page 7‐2 for more details.) Note: The ProgChang parameter applies to all modes except Song mode and Setup mode (or when a setup is loaded from Quick Access mode.) Setups disregard the ProgChang setting and instead use the EntryProgChg parameter on the SetupMode:CH/PROG page (See The Channel/Program (CH/PROG) Page on page 7‐6.) Songs disregard this ProgChang setting and instead use the ProgChang parameter on the Song:Event Filter Playback page, accessed from the PLYFLT soft button in Song mode. Change Setups (ChgSetups) This parameter determines the exact timing of setup changes when you select a different setup—either by a normal data entry method or via MIDI program change commands. Choose KeyUp to indicate that you want setup changes to take place only when you’ve released all currently held notes. Choose Immediate to indicate that you want such changes to happen immediately when you select the setup. The RECEIVE Page Press RECV to select the RECEIVE page, where you define the PC3K’s response to incoming MIDI signals (with one exception pertaining to Quick Access mode, which we’ll explain later). Parameter... -
Page 238: Basic Channel
MIDI Mode The RECEIVE Page Basic Channel The basic channel determines which channel will always be available to receive MIDI information. Depending on the MIDI receive mode (below), the Basic channel may be the only receiving channel, or one of several. MIDI Receive Mode (MIDI Mode) The MIDI Mode parameter determines the MIDI receiving capabilities of the PC3K. When set to Omni, the PC3K responds to incoming MIDI events on all MIDI channels, and plays them on the current channel. This is normally used for diagnostic purposes only. At a setting of Poly, the PC3K responds only to events that are sent on the same channel as the PC3K’s current MIDI channel (the one displayed on the top line of the Program mode page). In Poly mode, the currently selected channel is always the basic channel, so if you change channels, the basic channel changes accordingly. With a value of Multi (the default), the PC3K responds to events on all active channels. This is the mode you’ll use when you’re driving the PC3K with a sequencer, since you can play a different program on each channel. At this setting, you can turn individual channels on and off (on the CHANNELS page, described later in this chapter). All Notes Off If this parameter’s value is set to Normal, the PC3K responds to All Notes Off messages received over MIDI. Ignore causes these messages to be ignored. If you’re using a Roland product as a MIDI controller for your PC3K, you’ll want to set the value of this parameter to Ignore. This is because some older Roland products occasionally send an All Notes Off message when no keys are held down—even if you’re sustaining notes with a pedal. You might find all your sustains missing from your sequence, for example, if you’re driving your PC3K from one of Roland’s hardware sequencers. Setting this parameter to Ignore takes care of this problem. Regardless of the setting for this parameter, the PC3K always responds to its own Panic button by shutting off all active notes and controllers. Program Change Mode (PrgChgMode) This determines how the PC3K responds to program change commands received via MIDI. See ... -
Page 239: Velocity Map (Receive)
MIDI Mode The RECEIVE Page Velocity Map (Receive) Change the receive Velocity Map setting if you are triggering the PC3K with external MIDI gear which is producing notes that are too loud or too quiet. The default map provides the widest range of velocity expression, but you may want to choose a different map if the default does not suit your playing style. MIDI Sources MIDI In via MIDI In port or USB Computer port PC3K Keyboard VelocityMap Settings on MIDI Mode Receive Page KEY‐VEL page for current Control Setup (in Program Mode) or current Zone (in Setup Mode) Velocity Map Settings on Master Mode MAPS Page PC3K Song Mode VelocityMap Settings on MIDI Mode Transmit Page MIDI Destinations PC3K Sound Engine MIDI Out via MIDI Out port or USB Computer port to PC3K audio outputs The receive Velocity Map affects the way the PC3K receives MIDI velocity values from its USB or MIDI In port (see the circled box above for its location in the MIDI signal flow.) Different maps output different MIDI velocity values for the same received MIDI attack velocity. Each map applies a different curve to received MIDI attack velocities and remaps them to new velocities before letting them pass (this parameter has no effect on MIDI data sent from the PC3K’s keyboard.) The default map provides the widest range of velocity expression, but you may want to choose a different map if the default does not suit your playing style. See the diagram above for the other pages that affect the MIDI attack velocity before reaching the receive Velocity Map. The default map, Linear, allows MIDI velocities to pass unchanged. Maps Light 1‐3 make it increasingly easier to produce high MIDI velocity values for the same key strike velocity (with Light 3 being the easiest,) so these maps may work better for users who play with a lighter touch. Hard 1‐3 make it increasingly harder to produce high MIDI velocity values for the same ... -
Page 240: Pressure Map (Receive)
MIDI Mode The RECEIVE Page Pressure Map (Receive) Change the receive Pressure Map setting if you are triggering the PC3K with external MIDI gear which is producing MIDI pressure (aftertouch) values that are too high or too low based on your playing style (how soft or hard that you press the keys.) The default map provides the widest range of pressure (aftertouch) expression, but you may want to choose a different map if the default does not suit your playing style. MIDI Sources PC3K Keyboard MIDI In via MIDI In port or USB Computer port PressureMap Settings on MIDI Mode Receive Page PRESS page for current Control Setup (in Program Mode) or current Zone (in Setup Mode) Pressure Map Settings on Master Mode MAPS Page PC3K Song Mode PressureMap Settings on MIDI Mode Transmit Page MIDI Destinations PC3K Sound Engine MIDI Out via MIDI Out port or USB Computer port to PC3K audio outputs The receive Pressure Map affects the way the PC3K receives MIDI pressure (aftertouch) values from its USB or MIDI In port (see the circled box above for its location in the MIDI signal flow.) Different maps output different MIDI pressure (aftertouch) values for the same received MIDI pressure (aftertouch) value. Each map applies a different curve to received MIDI pressure (aftertouch) values and remaps them to new values before letting them pass (this parameter has no effect on MIDI data sent from the PC3K’s keyboard.) The default map provides the widest range of pressure (aftertouch) expression, but you may want to choose a different map if the default does not suit your playing style. See the diagram above for the other pages that affect MIDI pressure (aftertouch) values before reaching the receive Pressure Map. The default map, Linear, allows MIDI pressure (aftertouch) values to pass unchanged. Maps 2‐4 make it increasingly easier to produce MIDI pressure values for the same physical pressure applied to a key (with 4 “Easiest” being the easiest.) Maps 4‐7 make it increasingly harder to ... -
Page 241: System Exclusive Id (Sysexid)
MIDI Mode The RECEIVE Page System Exclusive ID (SysExID) The SysExID parameter differentiates between more than one MIDI device of the same model. You won’t need to change the default setting of 0 unless you have multiple PC3Ks (or K2600s, K2500s, or K2000s) receiving SysEx messages from a single source. In that case, make sure each instrument has a different SysExID. Then you can direct SysEx messages to the appropriate PC3K with the SysExID byte that’s included with every SysEx message. A value of 127 specifies “Omni Receive.” That is, at this value, a PC3K responds to a SysEx message regardless of the SysEx ID of the message. Bank Select BankSelect allows you to choose between having the PC3K respond to Controller 0 or Controller 32 or both. The reason for this is that various manufacturers have chosen one method or the other. The three possible values for this parameter are: Ctl 0 Responds to controller 0 only. Ctl 32 Responds to controller 32 only. Ctl 0/32 Responds to 0 or 32. 10-9... -
Page 242: Local Keyboard Channel (Localkbdch)
MIDI Mode The RECEIVE Page Local Keyboard Channel (LocalKbdCh) The Local Keyboard Channel parameter mainly affects how external MIDI devices interact with Setup Mode. When the LocalKbdCh parameter is set to match the channel on which the external MIDI device is transmitting, the setup will play on the external MIDI device as it does on the PC3K’s keyboard. When the LocalKbdCh parameter is set to Off, an external MIDI device will trigger a single program. The triggered program will be on a Zone that has a Channel parameter (on the Setup Editor CH/PROG page) which matches the channel on which the external MIDI device is transmitting. (If no Zone’s Channel parameter matches, the external device will trigger the program that was last used by that channel in Program or Setup Mode.) When the Program of a Setup Zone is triggered this way, Setup MIDI parameters (most noticeably key range and transposition) will not be applied. (See Input Channel on page 7‐8 for more external MIDI device options in Setup mode.) The Local Keyboard Channel parameter also affects how external MIDI devices interact with Program Mode. When the LocalKbdCh parameter is set to match the channel on which the external MIDI device is transmitting, the external MIDI device will play the program on the channel currently selected on the Program Mode main page. When the LocalKbdCh parameter is set to Off, an external MIDI device will trigger the program on the channel that it is transmitting, no matter which channel is currently selected on the Program Mode main page. Continuous Controller Messages From External MIDI Devices When using an external MIDI device with the PC3K, you can control many of the PC3K’s program parameters by sending MIDI Continuous Controller messages (CC’s) from the external MIDI device. Each parameter that you wish to control must have a CC number assigned. To control a parameter, you must send the correct CC number to the channel which contains the ... - Page 243 Source section above. To control an assigned parameter, send the correct CC number to the channel for the Setup zone which contains the program. Using External CCs In Setup Mode, Local Keyboard Channel On, Input Channel None To control a program parameter via external MIDI CC in Setup Mode, the parameter must first have a source assigned within the Program Editor, as described in the Assigning A CC Control Source section above. To control an assigned parameter with a Local Keyboard Channel set, send the correct CC number to the channel set for Local Keyboard Channel. (If the CC # is listed in the “External MIDI CC Remapping” table below, the CC will be remapped to the destination set for that physical controller in the Setup Editor. In this case, you must use the Setup Editor to assign that physical controller’s destination to the original CC number that you sent. For destinations that show a name, a corresponding MIDI CC number can be found by finding the name in The Controller Destination List (see page 7‐22.)) Within the Setup Editor, you can also set a PC3K physical controller to send a CC number to a program on a zone. If this is done with a Local Keyboard Channel set, you will also be able to control a parameter by sending the default CC number for that physical controller to the channel set for Local Keyboard Channel. The table below lists the default CC number used to control the assignments of PC3K physical controllers while in Setup Mode. Also, for each physical controller, if a CC# is listed in the “Additional MIDI CC# Which Always Controls The Parameter Assigned To Each PC3K Physical Controller In Setup Mode” column, then that physical controller’s assignment can always be controlled by the CC# listed in that column. For physical controllers where this is the case, the physical controller’s assignment will respond to the CC# listed in the “Additional MIDI CC# Which Always Controls The Parameter Assigned To Each PC3K Physical Controller In Setup Mode” column, as well as the physical controller’s default CC number. Using External CCs In Setup Mode, Local Keyboard Channel None, Input Channel On To control a program parameter via external MIDI CC in Setup Mode, the parameter must first ...
- Page 244 External MIDI CC Remapping Default MIDI CC# Which Additional MIDI CC# Controls The Parameter Which Always Controls PC3K Physical Controller Assigned To Each PC3K The Parameter Assigned Physical Controller In To Each PC3K Physical Setup Mode Controller In Setup Mode...
-
Page 245: The Channels Page
MIDI Mode The Channels Page The Channels Page Press the CHANLS soft button to select the CHANNELS page, where you can define numerous parameters for each MIDI channel independently. Use the Chan/Layer buttons to select the MIDI channel you wish to work on. The CHANNELS page is very useful when you’re doing multi‐timbral sequencing, with programs assigned to numerous MIDI channels. The CHANNELS page lets you set several control characteristics for each MIDI channel. This makes it easy to adjust the playback of the sequence without editing the sequence itself. For example, you might turn off the Enable parameter for one or more channels to mute the tracks on those channels. You could also set the VolLock parameter to On, to ignore any MIDI volume messages the PC3K receives on a given MIDI channel. Parameter Range of Values Default Enable Off, On Program Program list Program ID 1 0 to 127 64 (centered) Volume 0 to 127... -
Page 246: Pan
MIDI Mode The Channels Page This offsets the pan position of the current program as set on the OUTPUT page in the Program Editor. A value of 0 is maximum offset to the left, 64 is no offset, and 127 is maximum offset to the right. Changing the value of this parameter is like inserting a MIDI pan message. MIDI Pan (MIDI 10) messages will change the value of this parameter, unless the PanLock parameter (described below) is set to On. If the Mode parameter on the OUTPUT page in the Program Editor is set to Fixed, changing the value of Pan on the CHANNELS page in MIDI mode has no effect. Volume This sets the volume for any program assigned to the currently selected channel. A value of 0 is silence, and a value of 127 is full volume. The value of this parameter will change in response to MIDI Volume (MIDI 07) messages, unless the VolLock parameter (described below) is set to On. Program Lock, Pan Lock, Volume Lock When the parameter locks are set to On, the three parameters they control do not respond to their respective MIDI controller messages. In that case, you could change the Program, Pan, and Volume settings from the front panel, but not via MIDI. 10-14... -
Page 247: Program Change Formats
21 banks, from 0 to 20. For example, with MIDI out from a K2600 into the MIDI in of a PC3K, if you scroll or enter a number in the K2600 you will see the same numbers in the K2600 and in the PC3K if the programs exist. - Page 248 MIDI Mode Program Change Formats If your PC3K is already in the memory bank you want to use, you can send it single PCHs from 0 to 127, to select programs within that memory bank. The PC3K’s response depends on the setting for the Bank/Select parameter on the MIDI Mode RECV page. If you want to change the memory bank, the PC3K must receive either an MC 0 or 32 message with value 0–127. The next PCH in the range 0–127 will select the correspondingly numbered program in the newly selected bank. The following table of examples should help make it clear. Bank Change Program Change Result Command Received Command Received MC 0 or 32: value 0 PCH: value 99 Program 99 (Base1 bank, 99th program) MC 0 or 32: value 1...
- Page 249 MIDI Mode Program Change Formats The MC 0 or 32 messages selects the range of QA banks (0s through 70s), while the PCH selects the bank within that range, as well as the entry within that bank. Neither the MC 0 or 32 nor the PCH selects a different memory bank. In fact, you can’t change the memory bank via MIDI when using this format. All program and setup selections are made within the currently selected memory bank. You’ll know which memory bank is selected by looking at the ID of the currently selected Quick Access bank in the top line of the Quick Access mode page. QAccess and MIDI Transmission If you’re in Quick Access mode and you’re using the QAccess format for the program change type, selecting QA banks or bank entries from the PC3K (with the alphanumeric buttonpad, the cursor buttons, the Alpha Wheel, the Plus/Minus buttons, or the Chan/Layer buttons) also sends corresponding program change commands to the PC3K’s USB and MIDI Out port. The PC3K sends either an MC 0 or 32 message followed by a PCH. The following tables give specific examples. Commands Sent Current Entry From QA Bank Alphanumeric Pad MC 0 or 32 Table 10-1 QAccess Program Change Examples...
-
Page 250: The Soft Buttons In Midi Mode
MIDI Mode The Soft Buttons in MIDI Mode The Soft Buttons in MIDI Mode The first three soft buttons select the three MIDI mode pages. The PrgChg soft button lets you send a program change command on any MIDI channel. The RsetCh soft button lets you return all channel parameters to their default values. The Panic soft button sends an All Notes Off and an All Controllers Off messages to the PC3K and on all 16 MIDI channels. Program Change (PrgChg) When you press this soft button, a dialog appears that lets you send program changes out the USB or MIDI Out port, but does not change internal programs. The Chan/Layer buttons, the Up/ Down cursor buttons, and the Chan– and Chan+ soft buttons can all be used to change the channel on which the program change command will be sent. The Left/Right cursor buttons, the Plus/Minus buttons, the Alpha Wheel and the Prog– and Prog+ soft buttons can all be used to change the program change number that will be sent. When you’ve set the channel and the program change number, press the Send soft button to send the program change command. Or press the Cancel soft button if you don’t want to send it. You can change the channel and the program number as many times as you want before you press Send. You also can use the alphanumeric pad to select a program number directly. Reset Channels (RsetCh) When you press this soft button, the PC3K asks if you want to reset all channels. If you press Yes, all settings on the CHANNELS page will return to their default values. When the project’s over, you can reset the Channels to restore the audio routing to each individual program (a value of Prog), rather than selecting each channel’s page and setting the Pair parameter back to a value of Prog. Press No if you decide not to reset the channels. Panic Panic sends All Notes Off and All Controllers Off messages to the PC3K and all MIDI channels. -
Page 251: Chapter 11 Master Mode
Master Mode MAIN Chapter 11 Master Mode Press the Master mode button to enter Master mode, which contains parameters affecting the PC3K’s overall performance and system setup. You can set the system Clock so that the PC3K will time‐stamp your files correctly. You can use the Object tool to rename or delete selections of objects. You can also enter the Boot Loader to access a number of system and file utilities, or use Reset to delete all user objects and restore the PC3K’s memory to its original factory settings. When you exit Master Mode (or MIDI Mode) the PC3K saves a Master Table (unless MasterTableLock is On — more on this below.) The Master Table remembers the settings of the Master pages, as well as the state of the PC3K, such as which programs are assigned to each channel, settings for MIDI Mode Transmit and Receive pages, and Master FX settings. Explicit saving of the Master Table is also possible. MAIN On the Master Mode MAIN page you’ll find parameters for setting the overall tuning and transposition of the PC3K, overall FX settings, drum program remapping, clock source options, ID entry options, demo song options, as well as options for saving master mode settings and remote triggering of PC3K functions. Parameter Range of Values Default Tune ± 100 cents Transpose -128 to 127 semitones FX Mode Performance, Multitrack... -
Page 252: Tune
Master Mode MAIN Tune Adjusting the value of this parameter tunes every program in the PC3K by the amount you specify. Tuning can be adjusted up or down 100 cents (one semitone) in one‐cent increments. This parameter is useful for getting in tune with recordings and acoustic instruments. Adjusting the tuning in Master mode does not change the settings on the PITCH page of individual programs, but will be added to any adjustments you make there. Master mode tuning adjustments affect only the audio output of PC3K program notes, and not notes sent via MIDI. Transpose Like the Tune parameter above, Transpose affects every PC3K program, but not those notes sent to the MIDI Out port. You can adjust the MIDI transposition sent to the MIDI Out port on the TRANSMIT page in MIDI mode. FX Mode With FX Mode set to Performance, the PC3K minimizes disruption of existing effects when changing programs, and entry values will not disrupt sustained notes when changing programs in Program or Quick Access modes. When controlling the PC3K from an external sequencer in Program Mode, you will want to set FX Mode to Multitrack to minimize effect disruption. FX Mode is set to Performance as a default, with some exceptions. In Song mode, Multitrack mode is always used, despite how this parameter is set in Master Mode. Also, the FX Mode parameter does not affect Setup Mode because it uses its own FX mode. Drum Remap This parameter will remap all Drum programs to conform to the General MIDI (GM) drum map, a standard drum map used in many keyboards and synthesizers. The GM drum map isn’t optimally intuitive in terms of playability, so by default the PC3K uses a unique keymap that is more intuitive and lends better to performance. However, the GM drum map is so commonplace that many players feel more comfortable playing drum programs with the GM drum map. Because of this, the PC3K is designed such that you can remap drum programs to the GM drum map. When the Master Page Drum Remap is set to None, no remapping takes place in Program mode. When the Master Page Drum Remap is set to GM, the PC3K remaps Drum programs to the GM drum map. ID Entry Global means that any entry you make from the alphanumeric keypad will select the object indicated, regardless of the bank it is in. For example, in program mode type “36” of the alphanumeric keypad to select program 36. -
Page 253: Master Table Lock (Master Lock)
Master Mode MAIN Master Table Lock (Master Lock) With Master Lock set to Off, the PC3K will save the current Master mode configuration when you exit Master mode (or MIDI mode). This information is stored in a Master Table object (see Save on page 11‐16 below for more details on what is saved with a Master Table.) If you have a particular Master configuration that you would like to safeguard against the auto‐ saving feature, set Master Lock to On. With the Master Lock on, the PC3K does not save any changes unless you press the Save soft button. Note that if you would like Master Lock to stay on next time you turn on the PC3K, you must press the Save soft button to store the state of Master Lock to the Master Table. Demo Button The Demo Button parameter determines what pressing the Play/Pause button does in program mode. With the Demo button parameter set to On, the Play/Pause button plays a demo song for the current program. (To play a demo song, the Demo Song parameter must be set in the program editor for the current program, see page 6‐36 for details.) With the Demo button parameter set to Off, the Play/Pause button plays the last song that was selected in Song Mode. If a demo song is set for the current program, it can always be played from program mode by simultaneously pressing the up and down cursor buttons. Buttons Mode (Buttons) If you set the Buttons parameter to On, pressing any buttons on the PC3K will generate System Exclusive (SysEx) messages that are sent to the MIDI Out port. This enables you to do two things: control a remote PC3K, and/or record sequences of programming button presses to a sequencer or SysEx software package. If you have the MIDI In port of another PC3K connected to the first one’s MIDI Out port, the second instrument will respond to every button press on the first instrument, just as if you were pressing the buttons of the second one. Keep in mind that both devices must be in exactly the same state (the same page in the same mode, with identical lists of RAM objects) when you start. ... -
Page 254: Maps
Master Mode MAPS MAPS On the MAPS page you’ll find parameters for setting keyboard behavior for velocity, pressure, intonation, and key action maps. You can also set the default sequence for Song mode. Velocity Map (Master) Change the Master Velocity Map setting if you find that the PC3K is not producing the desired velocities (too loud or too quiet) based on your playing style (how light or heavy that you play the keys.) The default map provides the widest range of velocity expression, but you may want to choose a different map if the default does not suit your playing style. MIDI Sources PC3K Keyboard MIDI In via MIDI In port or USB Computer port VelocityMap Settings on MIDI Mode Receive Page KEY‐VEL page for current Control Setup (in Program Mode) or current Zone (in Setup Mode) Velocity Map Settings on Master Mode MAPS Page PC3K Song Mode VelocityMap Settings on MIDI Mode Transmit Page MIDI Destinations PC3K Sound Engine MIDI Out via MIDI Out port or USB Computer port to PC3K audio outputs The Master Velocity Map is an overall control for MIDI velocities used in the PC3K. MIDI velocities are values created for each note depending on how hard you strike a key. The Master Velocity Map affects MIDI velocity values for all MIDI sources and destinations used in the PC3K (see the circled box above for its location in the MIDI signal flow.) Different maps used for the Master Velocity Map generate different MIDI velocity values for the same physical key strike 11-4... - Page 255 Master Mode MAPS velocity. Each map applies a different curve to received MIDI attack velocities and remaps them to new velocities before letting them pass. The default map provides the widest range of velocity expression, but you may want to choose a different map if the default does not suit your playing style. See the diagram above for the other pages that affect the MIDI attack velocity before and after reaching the Master Velocity Map. The default map, Linear, allows MIDI velocities to pass unchanged. Light 1‐3 make it increasingly easier to produce high MIDI velocity values for the same key strike velocity (with Light 3 being the easiest,) so these maps may work better for users who play with a lighter touch. Hard 1‐3 make it increasingly harder to produce high MIDI velocity values for the same key strike velocity (with Hard 3 being the hardest,) so these maps may work better for users who play with a harder touch. Piano Touch simulates the general velocity response of an acoustic piano, and is best suited for playing acoustic piano programs. Easy Touch is similar to the Light settings, making high velocities easier to play, but it allows more sensitive control over playing high velocities by not boosting the MIDI velocity for fast strike velocities as much as it does for medium strike velocities. GM Receive mimics the velocity map commonly used by keyboards that use the General MIDI (GM) sound set. The GM Receive map makes medium strike velocities produce higher MIDI velocities compared to the Linear map. GM Receive effects notes from the PC3K’s keyboard as well as the MIDI in port. This map is automatically used when the PC3K is in GM mode (see General MIDI Mode (GM On, GM Off) below,) though users may want to use the GM Receive map when generating MIDI outside of GM mode which will later be played back by a GM system. 11-5...
-
Page 256: Pressure Map (Master)
Master Mode MAPS Pressure Map (Master) Change the Master Press Map setting if you find that the PC3K is not producing the desired MIDI pressure (aftertouch) values (too high or too low) based on your playing style (how soft or hard that you press the keys.) The default map provides the widest range of pressure expression, but you may want to choose a different map if the default does not suit your playing style. MIDI Sources PC3K Keyboard MIDI In via MIDI In port or USB Computer port PressureMap Settings on MIDI Mode Receive Page PRESS page for current Control Setup (in Program Mode) or current Zone (in Setup Mode) Pressure Map Settings on Master Mode MAPS Page PC3K Song Mode PressureMap Settings on MIDI Mode Transmit Page MIDI Destinations PC3K Sound Engine MIDI Out via MIDI Out port or USB Computer port to PC3K audio outputs The Master Press Map is an overall control for MIDI pressure (aftertouch) values used in the PC3K. MIDI pressure (aftertouch) values are created for each note depending on how hard you press on a key that is being held down. The Master Press Map affects MIDI pressure (aftertouch) values for all MIDI sources and destinations used in the PC3K (see the circled box above for its location in the MIDI signal flow.) Different maps used for the Master Press Map generate different MIDI pressure (aftertouch) values for the same physical key press value. Each map applies a different curve to received MIDI pressure (aftertouch) values and remaps them to new values before letting them pass. The default map provides the widest range of pressure (aftertouch) expression, but you may want to choose a different map if the default does not suit your playing style. See the diagram above for the other pages that affect MIDI pressure (aftertouch) values before and after reaching the Master Press Map. The default map, Linear, allows MIDI pressure (aftertouch) values to pass unchanged. Maps 2‐4 make it increasingly easier to produce MIDI pressure values for the same physical pressure applied to a key (with 4 “Easiest” being the easiest.) Maps 4‐7 make it increasingly harder to ... -
Page 257: Intonation
Master Mode MAPS Intonation Most modern western music uses what is known as equal temperament. This means that the interval between each semitone of the 12‐tone octave is precisely the same as every other semitone. However, many different intonation intervals have evolved over the centuries and across cultures and instruments, so equal temperament will not sound appropriate for certain styles of music. The PC3K supplies you with 17 different factory intonation maps which are useful for a range of different styles. By changing the value for this parameter, you select from among the intonation maps stored in the PC3K’s memory. You can further customize each map or create your own by editing a map (see Editing Intonation Maps below.) Each of these maps defines different intervals between each of the semitones in a single octave (used for all octaves) by setting pitch offsets for each note in cents. Scroll through the list of Intonation maps, and listen for the differences between semitones. Some of the intervals between semitones may be quite different from equal temperament, but you’ll notice that all notes are precisely tuned with notes that are an octave apart. This is because the intonation maps set the intervals within a single octave, and apply those intervals to each octave. Like many instruments before the adaptation of equal temperament, most of these intonation maps were designed to sound best in one specific key. Though some may have historically been in a different key, all of the PC3Ks factory intonation maps are set to root note C by default. You can change the root key of the current intonation map by using the Int.Key parameter (see the Intonation Key (Int.Key) section below.) List and Description of Intonation Maps 0 None No intonation map is used, intonation is equal but cannot be edited. -
Page 258: Key Action Map
Editing Intonation Maps To edit an intonation map or create a new map, select an existing map and press the Edit button to bring up the EditIntonationMap screen (see below.) Intonation maps are based around a root key, shown on the right of the top line of the screen. Use the chan up/down buttons to change the root key (this is the same as changing the Int.Key parameter (see Intonation Key (Int.Key) below.) Intonation Key is not saved with the intonation map.) Use the cursor to move between note steps, each of which is labeled by its difference in keyboard steps from the root. Each step can be shifted by ± 200 cents (100 cents=1 half‐step.) Use the alpha wheel, alphanumeric pad, or plus/minus buttons to enter the desired cent shift amount for each step. Press Delete to delete the map from memory. Press Rename to rename the map and save. Pressing Save gives you the option to save the map or rename and save. To create a new map, edit an existing map and choose Rename when saving. Press Exit to return to Master page 2. When exiting the editor, it will automatically give you the option to save the map if changes have been made. For more detailed instructions on these functions, see Saving and Naming on page 5‐3. Key Action Map The Key Action Map determines the default way the PC3K responds to key action for specific keyboard component models. Generally speaking, you will not want to alter the Key Action Map. This parameter is included for the rare occasion when a PC3K has been setup at the factory for a different keyboard component model than the one installed. A user may discover that they need to change the Key Action Map when they have tried all of the Velocity Map settings and still do not feel comfortable with the key response of their PC3K. Different maps result in different responses from the PC3K for the same physical key action, and each map corresponds to a different keyboard component model. If you have changed this parameter and want to change it back to the default map for your PC3K, simply enter a value of 0 in the Key Action Map parameter field. Intonation Key (Int.Key) This sets the tonic, or base note from which the currently selected intonation map calculates its intervals. If you select G as the intonation key, for example, and the intonation map you select tunes the minor 2nd down by 50 cents, then G will be a quartertone flat relative to equal intonation. If you change the intonation key to D, then D will be a quartertone flat. If you use ... -
Page 259: Default Sequence
Aux Out Pair Mode Normal, Mirror Primary Outputs Normal Clock Source Internal, External Internal Output Clock To send a MIDI clock pulse to the MIDI Out port, set this parameter to On. Otherwise, set it to Off. Digital Output Volume (Dig. out volume) The Digital Output Volume parameter specifies the behavior of the PC3K’s Digital Output. Setting this parameter to Variable makes the Digital Output respond to changes made on the volume slider. Setting this parameter to Fixed makes the Digital Output output a signal with a fixed volume. Digital Output (Dig. Out) This Digital Output parameter specifies the PC3Kʹs digital output sample rate. Internally clocked sample rates go from 44.1K up to 192K. Externally synced sample rates cover 20‐220KHz in 3 ranges. Be sure the external clock frequency is within the range you select. Aux Out Pair Mode The Aux Out Pair Mode parameter specifies the behavior of the Secondary Audio Outputs ... -
Page 260: Clock Source
Master Mode TEMPO Clock Source With the Clock Source parameter, you can set the PC3K to generate its own tempo by setting Clock Source to Internal, or you can set the PC3K to sync up with the tempo from another device—assuming the device is sending MIDI clock data to the PC3K via MIDI or USB—by setting Clock Source to External. See Important Note About External Sequencers: on page 12‐8 for related information. TEMPO Press the TEMPO soft button to go to the TEMPO page (see below.) When the Clock Source parameter is set to Internal (see Clock Source on page 11‐10,) the Tempo parameter on the TEMPO page sets the PC3K’s system tempo. The system tempo sets the tempo for all modes except Setup Mode, which has its own tempo settings. Also, in Song mode, changing to a new song will override the system tempo. The Tempo parameter values are in units of BPM (beats per minute). You can also call up the TEMPO page from any other page by pressing the left and right cursor buttons simultaneously. Set the Tempo parameter with the ‐/+ buttons, the Alpha Wheel, or the alphanumeric pad. You can also set the system tempo by tapping the Tap soft button at the desired speed. You need to tap at least twice for a tempo to be calculated, though tapping several times (like on each beat of one or more measures) works best. The newly tapped tempo is displayed in the tempo field, and along the bottom four Program Category Select buttons a lit LED moves from left to right at this tempo. Alternatively, a temporary controller can be set for use in the Temporary TAP controller field, instead of using the Tap soft button. The Temporary TAP controller field lists groups of PC3K controllers in order of their usefulness for tapping. Listed first are the foot switches and switch buttons (though it would be easier to use the Tap soft button than set a temporary switch button.) After these is Note On, which lets you tap the tempo with any keyboard key. Last are the MIDI controller numbers, which includes all of the continuous controllers, though continuous controllers (such as a slider) are not easy or recommended for tapping the tempo. The Temporary TAP controller works only while on the TEMPO page and will remain selected when accessing the TEMPO page from other modes, but the selection will return to OFF the next ... -
Page 261: General Midi Mode (Gm On, Gm Off)
Master Mode General MIDI Mode (GM On, GM Off) the tap tempo function. This would be best used with a programmable switch (or footswitch.) Configure the selected switch so that it is Toggled, has it’s On and Off Controls set to destination 168 (Tap Tempo,) and set the On and Off Values to any value other than None. Entry and Exit State should be set to None. General MIDI Mode (GM On, GM Off) This soft button enables or disables General MIDI (GM) mode. When GM mode is off (the default,) the buttons is labeled GM On. Press the GM On soft button to enter GM mode. The PC3K will prompt you to confirm or cancel. When GM mode is on the buttons is labeled GM Off. Press the GM Off soft button to exit GM mode. The PC3K will prompt you to confirm or cancel. You can not access Setup Mode or Quick Access Mode while in GM mode. Aside from what is noted in this section, all other PC3K functions operate normally while in GM mode. In GM mode, the PC3K complies specifically with the General MIDI (GM1) specification. An Overview of General MIDI General MIDI is a specification created by the MIDI Manufacturers Association which defines specific features that a MIDI instrument must have (see the MMA website at www.midi.org for more information.) Among other things, the GM specification sets a standard bank of program names and numbers, as well as a standard drum mapping layout, so that sequences created on any GM instrument will playback with the correct instrumentation on any other GM instrument, no matter the manufacturer. GM has many uses, for example it makes it easy for musicians who use MIDI files to share ideas and collaborate while using different sets of equipment. Also many instrumental versions of public domain songs can be found for free on the internet as GM compatible MIDI files. These, like all MIDI files, offer certain advantages over audio such as small file size, the ability to edit, orchestrate, or change tempo to easily learn from the sequences, or even convert note information to standard notation with a third party application. ... -
Page 262: Object
Master Mode OBJECT Replacing Default General MIDI Programs The PC3K’s GM sounds consist of PC3K programs tailored to work well in all GM sequences, but you can also edit or exchange these programs to suit your taste. The PC3K provides you with a GM sound set editor which allows you to replace the PC3K’s default GM programs with any other PC3K factory or user created program. For example, you could choose a different factory or user created piano program to replace the default GM program 1, Ac Grand Piano. This way, any GM sequence that uses GM program 1 would now use the new piano program that you selected. Alternatively, you could even choose a different instrument to replace the default GM program 1, such as PC3K program 47 Harpsichord. This way, any GM sequence that uses GM program 1 would now use the new harpsichord program that you selected. Using a PC3K program that does not resemble the instrument named in the current GM program would technically make the PC3K incompatible with GM, but some users may want to do this as a way to “remix” GM sequences. It is easy to replace default GM programs in order to make a custom GM sound set. Once in GM mode, the right side of Program Mode screen displays a list of the GM programs with their standard GM names. The left side of the screen shows you what PC3K program is being used for the selected GM program. Pressing left on the cursor moves you to this field. Use the cursor’s up/down buttons, the alphanumeric pad, the plus/minus buttons, or the alpha wheel if you wish to select a different PC3K program for the current GM program. Don’t use the program or category buttons because these will change the currently selected GM program. The newly selected PC3K program will be used by the current GM program, though the name of the GM program will not change. To save these settings you must save the master table (see Save below.) Saved settings can be recalled after powering off or leaving GM mode. To restore GM mode’s factory selected programs, press the Reset soft button (see below.) OBJECT Pressing the OBJECT soft button calls up the Objects page (see below.) From here you can choose one of two utility functions for renaming or deleting selections of user created (or edited) objects. Press the Rename or Delete soft button to access each function. Rename The Rename utility allows you to rename an object without entering the object’s editor. The Rename page shows a list of all user created objects, grouped by object type (see below.) Use the alpha wheel or plus/minus buttons to select an object from the list. Press Rename to bring up the object Rename screen and enter a new name by following the standard renaming procedure. For more information, see Saving and Naming on page 5‐3. ... -
Page 263: Delete
Master Mode OBJECT As in all naming dialogs on the PC3K, you can do a double‐press of the Left/Right cursor buttons to put the naming cursor on the last character of the string. This is helpful when putting unique characters at the ends of names. Left/Right cursor button double‐press ‐> Move cursor to the end of the name in any naming dialogue. Delete The object Delete utility is useful for deleting unwanted user created objects in order to increase free RAM space in your PC3K. On the main Delete page, for each object type you can select a bank of objects to delete, a range of objects to delete, or delete all objects. On the Delete advanced page, you can select a single object or multiple objects to delete. To delete a group or range of objects, use the main Delete page (see below.) Use the cursor to select the left column, then use the cursor, alpha wheel or plus/minus buttons to select one or more object types from the list. Use the Select soft button to make your selection(s), which will be marked with a star. Select “All Types” if you want to delete all user objects (this will select all object types and numbers automatically.) Next, use the cursor to select the right column, then use the cursor, alpha wheel or plus/minus buttons to select one or more ranges of object numbers from the list. You can select object numbers by bank grouping (groups of 128), by number range (select “1...100 Range” use the SetRng soft button and choose any range of 2048 objects) or select “Everything” to delete all objects of the selected type. Again, use the Select soft button to make your selection(s), which will be marked with a star. The Clear soft button will clear your selection(s) from the currently selected list. Press the Delete soft button to delete your selection, you will be given the choice to Delete or Cancel. The Cancel soft button on the main delete page will return you to the Objects page. 11-13... -
Page 264: Utils
Master Mode Utils To delete single or multiple objects, go to the Delete advanced page by pressing the Advnce soft button on the main Delete page (see below.) The right column shows you a list of all user created objects. The left column tells you what type each object is, and objects are grouped by type. Use the alpha wheel or plus/minus buttons to select one or more objects from the list. Use the Select soft button to make your selection(s), which will be marked with a star. Use the Type soft button to jump to the lowest numbered object of the next group of object types. You can use the alphanumeric pad to jump to an object of the selected type by number, or enter 0 to jump to the lowest saved object number of the currently selected type. To review which objects you have selected, press the Next soft button to move to the next selected object in the list. Press the Delete soft button to delete your selection, you will be given the choice to Delete or Cancel. The Cancel soft button on the Delete advanced page will return you to the main Delete page. For Delete and Delete advance, if any of the selected objects have dependents that were not selected, you will see the question: Delete dependent objects? If you answer Yes to this question, all dependent objects of the selected objects are deleted, unless they are being used as dependents of other objects that are to remain in memory. Answering No will delete only those objects that were selected and not their dependents. Utils Pressing the Utils soft button calls up the Utility page, which gives you access to two analytic and diagnostic tool. Additionally, pressing the two right‐most soft buttons will call up the Utility page from any mode or editor. The Utilities page appears as shown below: Pressing the MIDI soft button launches MIDIScope™, a useful subprogram that lets you monitor the MIDI messages from the PC3K and those received via MIDI. This is a good way to make sure you’re receiving MIDI from MIDI masters. It’s also good for making sure your controls are assigned as you want them, checking your attack velocities, checking your controller values, etc. 11-14... -
Page 265: Clock
Master Mode CLOCK Pressing the Voices soft button calls up the Voice Status page, which shows the PC3K’s active voice channels as you play. The Voice Status pages displays each active voice as a solid rectangular block—for mono voices—or displays stereo pairs of voices as a > for the left channel voice and a < for the right channel voice. Whatever symbol the page displays, when the key of a voice is released, that voice’s symbol on the Voices Status page turns into a dot during the release portion of that voice’s envelope. When the voice decays to silence, it is no longer active, and the dot disappears. The Voice Status symbols appears as shown below: The Voice Status page gives you an indication of the envelope level of each voice, though not necessarily the volume level. Nonetheless, this can give you a valuable indication of how your voices are being used. For example, if all or most of the voices are active, then there’s a good chance that when voice stealing takes place an audible voice will be reallocated. The Voices utility works a bit differently for KB3 programs. The PC3K uses one voice of polyphony for every two tone wheels in a KB3 program. In the Voices utility, the voices used by the tone wheels appear as solid rectangular block, meaning that the voices are used for the KB3 program. They don’t get reallocated at any time, since they’re always on, even if you’re not playing any notes. Any voices not dedicated to a KB3 program behave normally. So if you have a setup that contains a KB3 program in one zone, and VAST programs in one or more other zones, you can monitor the voice allocation of the non‐KB3 voices in the section of the display that isn’t constantly filled with solid rectangular blocks. CLOCK Pressing the CLOCK soft button allows you to view the PC3K’s System Clock (see below.) When objects are saved, they are time stamped with the date and time of this clock. This time stamp can be seen in the file properties when viewing the files with a computer. The Format soft button changes the view format of the date on this page. The Set soft button brings you to the Set clock page where you can set the system clock and date. Use the cursor to move between fields, use the alpha wheel or plus/minus buttons to change each field. On the Set page, press the Set soft button to save changes and return to the System Clock page, or the Cancel soft button to return to the System Clock page without saving changes. The Chrono soft button brings up the PC3K’s Chronometer (stop‐watch) page (see below.) This can be useful for timing the length of songs or performances. Press the Start soft button to begin timing. The Chronometer will continue running even if you exit to other screens or modes. Press the Stop soft button to stop timing, the Reset soft button to reset the Chronometer, or the Cancel soft button to return to the System Clock page. 11-15... -
Page 266: Reset
Master Mode Reset Reset Press the Reset soft button if you want to return your PC3K’s memory to the state it was in when you bought it. CAUTION: Resetting the PC3K system causes ALL parameters to be restored to default values and ALL user objects to be erased. The PC3K will ask you if you want to delete everything (meaning all RAM objects), and a pair of Yes/No soft buttons will appear. Press No if you want to keep any objects you have saved. Press Yes, and everything stored in RAM will be erased. After a few seconds, the PC3K will return to the Program mode page. Loader Pressing the Loader soft button calls up the Boot Loader. See Appendix B. About Pressing the About soft button calls up the general info page for the PC3K. On this page is the version of the installed OS and factory object. Press any key to leave this page. Save Pressing the Save soft button saves the Master Table object, which saves many important PC3K settings as defaults. Since the Master Table is always saved when exiting Master Mode (or MIDI mode,) the Save soft button is only needed in order to save when Master Table Lock is on (see Master Table Lock (Master Lock) on page 11‐3, above.) The Master Table saves the current configuration of the Master Pages (both 1 and 2.) The Master Table also saves default settings for which program is selected on each of the 16 channels in Program mode (note that these channel settings are often altered by loading a song in Song mode.) The current channel and program selected in Program mode when the Master Table is saved will be loaded by default the next time the PC3K is powered on. The Master Table saves settings from MIDI mode for the Transmit, Receive, and Channels pages. The Master Table also saves settings for “favorite” programs (see the User Interface Basics chapter, page 3‐4.) Lastly, the Master Table saves settings for the Master Effects page in Effect mode. Only one Master Table object can be saved in the PC3K’s internal memory, and this should be sufficient for most users. For users who wish to save alternate Master tables for quicker access to different system configurations, the object must be saved to an external device (see the Storage Mode chapter.) 11-16... -
Page 267: Sample Memory (Memory)
Master Mode SAMPLE MEMORY (MEMORY) SAMPLE MEMORY (MEMORY) Press the MEMORY soft button to go to the SAMPLE MEMORY page. The SAMPLE MEMORY page shows information about the PC3Ks flash memory, which is used to store user loaded samples. The Total Memory field shows the total user sample memory installed in the PC3K, 128 megabytes. The Used field shows how much of the available sample memory is currently being used by user samples. The Free field shows how much sample memory is available for use. The Fragmentation field shows the percent of the total memory available that can be reclaimed for use by running the Defrag function. Press the MAP soft button to view the SAMPLE MEM MAP page. The SAMPLE MEM MAP page shows a map representing the total available sample memory its usage. This is a visual representation of the information on the SAMPLE MEMORY page. White spaces represent used memory, while blue spaces represent available memory. Blue spaces within white spaces represent fragmented blocks of memory. Defragment (Defrag) Press the Defrag soft button to defragment the PC3K’s sample memory. Because this may take a long time, the PC3K will ask you to confirm or cancel defragmentation. Defragmentation can increase the available sample memory by reclaiming and grouping blocks of sample memory that have become “fragmented” and too small for use otherwise. Preview Sample (PRVIEW) Press the PRVIEW button to go to the PREVIEW page. The PREVIEW page can be used to automatically make a new keymap and program using any sample or group of sample roots. Programs created with the preview function are saved in Program Mode. This allows you to quickly hear what a sample or group of sample roots will sound like in a program. The preview function is also a quick way to begin making a new program which can be edited further if desired. The preview function works with both user and factory ROM samples. If a single sample is selected a single keyrange keymap will be created. If a group of sample roots is selected, the preview function will try to create a keymap with multiple keyranges based on each sample’s root key. If the sample or group of sample roots are stereo, the created program will be stereo. - Page 268 Master Mode Preview Sample (PRVIEW) 11-18...
-
Page 269: Chapter 12 Song Mode And The Song Editor
Song Mode and the Song Editor Getting Started with the Sequencer Chapter 12 Song Mode and the Song Editor Getting Started with the Sequencer The PC3K’s sequencer is a powerful and versatile tool for songwriters, composers, and anyone else who wants to record and play back songs. As with any tool, however, it’s best to start with the basics. If you are familiar with other sequencers, you will have no problem using Song mode in the PC3K. Read through this section, however, to learn about the features that make the PC3K’s sequencer unique. What is a Sequencer? A sequencer is similar in some ways to a multi‐track tape recorder: you can record and play back all sorts of music and sounds, layer sounds on top of other sounds, and change or manipulate things that you’ve previously recorded. Unlike a tape recorder, however, you do not actually record sounds with a sequencer. Rather, you are recording commands that cause sounds to be played. Nonetheless, we will sometimes explain sequencer features by drawing analogies to familiar tape recording techniques such as splicing and overdubbing. There are several advantages to recording a song by sequencing. For one thing, sequencer ... -
Page 270: Current Song (Cursong)
The Song Status, also on the top line of the display, is always one of the following: STOPPED The default sequencer status; also appears when you press the Stop or Pause button. PLAYING Appears when the Play button is pressed, but only if the following conditions are true: the Record was not pressed prior to pressing Play. REC. READY Appears when the Record button is pressed while Song Status is STOPPED. REC. READY flashes, indicating that the sequencer is waiting to start recording. Current Song (CurSong) This shows the ID and 16‐character name of the song currently selected for recording, playback, or editing. When a song is selected, Program Change, Volume, and Pan information is sent to all MIDI channels assigned to tracks that have data on them, and the internal clock is set to match the setting of the Tempo parameter. When looking for a previously saved song, you can scroll through songs while the sequencer is playing to quickly hear the beginning of each. Tempo The Tempo parameter determines the initial tempo for the selected song. The song will always start playback at the initial tempo. Whatever the tempo is set to when you record your first track will be the song’s initial tempo. During playback, the current tempo is shown in this field. During recording, tempos dialed in here get recorded in the Tempo Track. The initial tempo and other tempo changes can also be edited in the event list for the Tempo Track. The Tempo track also allows you to program more precise fractional tempos with two decimal places. To quickly change a song’s initial tempo, press Record (the Song Status will change to REC READY), set the tempo desired, then press Stop. The initial tempo can also be changed with the Tempo parameter on the COMMON page in the Song Editor, or at the top of the event list for the Tempo track on the EVENT page in the Song Editor. Note: You can also set the tempo using the tap tempo function. Press the left and right cursor buttons simultaneously to access the TEMPO page (see TEMPO on page 11‐10.) You can also set the tempo to be controlled by an external sequencer. Use the Alphanumeric Pad to enter “0” in the tempo field, and press enter. “EXT” will appear in the tempo field. Any MIDI Time Clock (MTC) signal received at the PC3K’s USB or MIDI in port will now set the Song playback tempo. 12-2... -
Page 271: Recording Track (Rectrk)
Song Mode and the Song Editor Song Mode: The MAIN Page Recording Track (RecTrk) The RecTrk parameter determines which track is record enabled. Set the record enabled track to Mult to record more than one channel simultaneously. When RecTrk is set to a single track (1–16), Record (R) is displayed for that track in the Track Status Indicator region (above the Track and Channels region). Conversely, with one exception, when any track’s Status Indicator is changed to Record (R), that track is shown as the value for the RecTrk parameter. The exception is when RecTrk is already set to Mult, you can select the record enabled tracks by toggling the Track Status Indicator to Record (R), and the RecTrk will remain set to Mult. When Mult is initially selected, all of the empty tracks will be record enabled. Tracks containing data will remain set to play (P), but you can manually set them to record (R). The parameter(s) below RecTrk change according to the value of RecTrk. If RecTrk is set to a single track (1–16), Prog is displayed and you can select the program to be assigned to that track. If you switch through the channels, the program also changes, showing the program currently assigned to that channel. If you change RecTrk to None or Multi, the display changes to show Trk:#. This field indicates which track is currently being triggered by the keyboard, and you can use this Trk:# field to select a track. Program (Prog) Use this field to scroll through the programs in memory and select a program before initially recording each track of your song. A program selected on the current RecTrk becomes the track’s initial program the first time that the track is recorded. An initial program is the program that will be used for a track when it is played from the start of bar 1 (or any other point if there are no program changes and Control Chase is turned on, see Control Chase on page 12‐17.) Programs selected in Program or Quick Access Mode are selected as the program on the current ... -
Page 272: Volume (Vol)
Song Mode and the Song Editor Song Mode: The MAIN Page Volume (Vol) You can set a volume level for each track as a value between 0 and 127. If the channel of the RecTrk (or the control channel, if RecTrk is set to Multi or None) contains any recorded volume change (controller 7), the change will be reflected as the Vol parameter’s value in real time, as well as on the MIXER page. Also, changing the Vol value while recording will write volume automation (controller 7 messages) to the current RecTrk’s event list. Initial Volume Settings Each song file does not automatically save your volume setting for each track. To make a song save your volume settings for each track, you must write an initial volume for each track. Initial volume is the volume setting that will be used when your song is played back from the start of bar 1. An initial volume setting is essentially a volume automation message that is written before the first tick of a track. Initial volume settings are not automatically written during recording because they make it harder to try out different volume settings for a track. For example, an initial volume will reset any volume adjustments that you make during playback each time the song is stopped and played from the start of bar 1, or if the song is stopped and played from any point if the Control Chase parameter set to On on the Song:MISC page (see Song Mode: The MISC Page on page 12‐17.) If you plan to try out different volume settings, it is easier if you write an initial volume after you have found the desired setting. Setting Initial Volume Per Track Follow these steps to change the current RecTrk’s initial volume. While the sequencer is ... -
Page 273: Pan
Song Mode and the Song Editor Song Mode: The MAIN Page ExitVolume of the highest numbered zone that uses that channel will set the volume for tracks that use that channel. If ExitVolume is set to NONE, the value for EntryVolume is used. If EntryVolume and ExitVolume are set to NONE, then the track for that channel uses the volume set for that channel in MIDI mode on the Channels page. If there is no zone that uses certain channels used by your song, then those channels in your song will use the volume setting of those channels in MIDI mode on the Channels page. You can set an initial pan position (the balance between the Left and Right audio channels) for the playback and recording of each track as a value between 0 and 127. A value of 64 is center. If the channel of the RecTrk or the control channel contains any panning data (controller 10), the change will be reflected as the Pan parameter’s value in real time, as well as on the MIXER page. Also, changing the Pan value while recording will write Pan automation (controller 10 messages) to the current RecTrk’s event list. Initial Pan Settings Each song file does not automatically save your Pan setting for each track. To make a song save your Pan settings for each track, you must write an initial Pan value for each track. Initial Pan is the Pan setting that will be used when your song is played back from the start of bar 1. An initial Pan setting is essentially a Pan automation message that is written before the first tick of a track. Initial Pan settings are not automatically written during recording because they make it harder to try out different Pan settings for a track. For example, an initial Pan setting will reset any Pan adjustments that you make during playback each time the song is stopped and played from the start of bar 1, or if the song is stopped and played from any point if the Control Chase parameter set to On on the Song:MISC page (see Song Mode: The MISC Page on page 12‐17.) If you plan to try out different pan positions, it is easier if you write an initial Pan after you have found the desired setting. Setting Initial Pan Per Track Follow these steps to change the current RecTrk’s initial Pan. While the sequencer is stopped, ... -
Page 274: Mode
Song Mode and the Song Editor Song Mode: The MAIN Page Pan settings without playing another song first, the Pan of the MIDI channel for each track is set depending on which mode you enter Song mode from. If you enter Song mode from MIDI mode, Program mode, or Quick Access mode, the Pan of each MIDI channel is set in MIDI mode on the Channels page. If you enter Song mode from Setup mode, the Pan of each MIDI channel is set if a zone uses the same MIDI channel on the SetupMode CH/PROG page (set with the Channel parameter.) If a zone does use a MIDI channel that one of the tracks in your song uses, the Pan of that track will be set by the ExitPan parameter of that zone (on the SetupMode:PAN‐ VOL page.) If multiple zones use the same MIDI channel, the ExitPan of the highest numbered zone that uses that channel will set the Pan for tracks that use that channel. If ExitPan is set to NONE, the value for EntryPan is used. If EntryPan and ExitPan are set to NONE, then the track for that channel uses the Pan setting of that channel in MIDI mode on the Channels page. If there is no zone that uses certain channels used by your song, then those channels in your song will use the Pan setting of those channels in MIDI mode on the Channels page. Mode If Mode is set to Merge you will be able to overdub when recording on a track containing previously recorded data. You’ll usually want to set Mode to Merge when RecMode (on the BIG page) is set to Loop. Otherwise, each time through the loop, the previously recorded information will be erased. If you set Mode to Erase, the previously recorded data on the record enabled track will be replaced with the new data only during the Bars and Beats you are actually recording, and the previously recorded data before and after the newly recorded Bars and Beats will be preserved. Location (Locat) The Bar and Beat displayed as the Locate value changes relative to current location of the song during playback and recording. You can set this to a negative Bar and Beat location to start playback a set length of time before the beginning of the song. Whenever you set the Locate point, that location will be used as the return point when Stop is pressed. Simply press Stop again to reset the song to the top (1 : 1). Mode Indicators (+ and x): Mode Indicators appear only for tracks that already contain data. -
Page 275: Track Channels
Track Channels Each track has a MIDI Channel that it uses to receive and transmit data. By default, tracks 1–16 of a new song are assigned to Channels 1–16 respectively, although a track can play or record on any channel and the same channel can be used for more than one track. Keep in mind, however, that only one program can be assigned to a channel at a time, so if you have more than one track assigned to the same channel, they’ll play the same program—the one on the higher‐numbered track, since that’s the most recent Program Change command received on that channel. Soft Buttons on the MAIN Page This section contains descriptions of the functions of the function soft buttons, that is, the buttons with labels not in all‐caps. As with all other modes, the soft buttons in Song Mode that have labels in all‐caps call up different pages. See the following sections for descriptions on how these pages work. The Rec, Play, and Stop Soft Buttons NOTE: These buttons are similar to the transport controls on a tape deck. Some of those decks require you to press Play and Record simultaneously to begin recording. The PC3K’s transport buttons aren’t like that, however. It’s important that you press only one of these soft buttons at a time to insure proper recording start points, and to always be sure of the current sequencer status. The Rec soft button changes the Song Status to REC. READY if the current Song Status is STOPPED. If the current Song Status is PLAYING, it will be switched to RECORDING when you press Rec. The Play soft button plays back any recorded data when pressed while the song status is STOPPED. Playback will begin from the bar and beat specified in the Locate parameter. When the Song Status is REC READY, pressing the Play soft button will begin recording. The Play soft button functions as a Pause button, but only when the Song Status is PLAYING or RECORDING. Pressing Play while the song is playing will stop the playback, and the location remains at the current bar and beat, allowing you to continue from that location by pressing Play again. Pressing Pause while recording will stop the recording process as if you had pressed Stop. -
Page 276: The Save Changes Dialog
Song Mode and the Song Editor Song Mode: The MAIN Page PC3K’s transport to control an external sequencer. This works from any mode, though in Program mode you will want to make sure that the Demo Button function is set to off. You can do this from Master Mode, Page 2. When Demo Button is set to off, you can still hear Program demos by pressing the cursor up and down buttons simultaneously. Important Note About External Sequencers: If using the PC3K transport controls to record to an external sequencer, you must be in Song mode with the RecTrk set to None. If this is not done, you will simultaneously record to the external sequencer and the selected RecTrk if in Song Mode, or activate the Quick Song Recording function from other modes. This will cause unwanted sequences to be recorded in the PC3K’s sequencer. If you are also triggering PC3K sounds from the external sequencer, you will run into the same issue when using the transport on the external sequencer (if it is sending MMC.) In this case, either turn off outgoing MMC on the external sequencer, or use the same precautions as above. The Load and Save Buttons The Load soft button calls up a scrolling list from which you can quickly locate and load a sequence. You can select a sequence using either the Alpha Wheel or ‐/+ buttons, or you can enter a sequence’s ID number. The Save button calls up the “Save As” dialog. The NewSng and ClrSng Soft Buttons The NewSng soft button creates a new song using the Default Sequence (specified on Page 2 of ... - Page 277 Song Mode and the Song Editor Song Mode: The MAIN Page Pressing PlyOld will play the current song, minus the performance that you just recorded. You can toggle between Play Old and Play New without restarting the song by pressing either button while the song is playing. This is useful to check if your last performance was better or worse than what was previously saved (if anything was previously saved.) The Locate field allows you choose a start time for the old or new playback. This is useful when you just want to hear a certain part of the song without listening to the whole thing. The Playing field displays whether to NEW or OLD data is playing. Stop halts the playback of either the Old or the New version of the song you are currently auditioning. This also resets the song’s start location to either the default Bar 1, Beat 1 value, or to whatever location you defined in the Locate field. Pressing Retry restarts recording from the same point you last started recording at. Yes saves the song with the performance you just recorded. Whatever was played back when you pressed PlayNew will be the version of the song saved when you press Yes. The “save as” dialog will be displayed: Use the Alpha Wheel, ‐/+ buttons, or Alphanumeric Pad to choose a free ID# location to save the song, or choose a used ID# location to overwrite a previously saved song with your new version. When overwriting a song file, the “save as” dialog displays “Replace” followed by the name of the file being replaced. Press Rename if you would like to change the song’s name. Press Save to save the song, or Cancel to return to the previous screen. If you decide not to save or rename, No returns you to the Song‐mode page in which you were last recording. Changes to the current song are not saved, though the sequencer will remember changes to certain settings from the MAIN and BIG pages. These settings are Tempo, Merge/ Erase Mode, Locate, track mute status, Time In, Time Out, Song End, Loop, Punch, and Metron. To permanently save these changes with the song, make sure to choose Save from the soft button menu before powering off or loading a new song. Alternatively, you will be prompted to save these changes upon loading a new song if the MAIN page settings were changed while recording or with recording armed, or if any of the BIG page settings were changed. For more detailed instructions, see Saving and Naming on page 5‐3. 12-9...
-
Page 278: Song Mode: The Big Page
Song Mode and the Song Editor Song Mode: The BIG Page Song Mode: The BIG Page On the BIG page, the PC3K displays—in a large font, the page’s name—the current time/location of the “playhead” of the sequencer in a Bar : Beat : Tick format (like the Riff time/location display). Also displayed is the current status of the sequencer, and the BIG page’s six parameters. Parameter Range of Values Default (Bar) (Current Position) (Beat) Depends on Time Signature (Tick) 0 to 959 (Bar) Time In... -
Page 279: Song End
Song Mode and the Song Editor Song Mode: The FX Pages Song End The Song End parameter determines the end point for the song. Note that when Time Out and Song End are set to the same location, changes made to Song End are reflected in Time Out. When recording beyond your initially specified Song End point, you’ll notice that the Song End location automatically moves and rounds to the next bar, so as to always be ahead of the playhead. It is possible to move the Song End point to a location before other MIDI events (i.e., in the middle of the current song)—the sequencer will ignore (but not delete) events after this point. Loop With the Loop parameter set to Loop, the sequencer will loop the segment of the song between Time In and Time Out. Punch With the Punch parameter set to Punch, the sequencer (in RECORDING mode) will record events only between Time In and Time Out. Metro The Metro parameter determines the recording modes in which the metronome will play. With Metro set to Rec, the metronome only plays while recording is in progress. With Metro set to Always, the metronome plays during playback and recording. With Metro set to Off, the metronome doesnʹt play at all. Song Mode: The FX Pages The four Song mode FX pages—FX, AUXFX1, AUXFX2, and MASTFX—work the same way as the Effects mode pages—CHANFX, AUXFX1, AUXFX2, and MASTER. See the Effects mode chapter for information on editing these pages. 12-11... -
Page 280: Song Mode: The Mixer Page
Song Mode and the Song Editor Song Mode: The MIXER Page Song Mode: The MIXER Page The MIXER page shows the current settings for the program number, panning, and volume of each track (in groups of 8). The selected track number, as well as the range of tracks displayed on the page, are displayed in the upper right‐hand corner of the screen. Use the Chan/Layer buttons or the cursor buttons to change the currently selected track. To get to other pages of tracks, continue scrolling past the first or last track on the page. The bottom part of the screen displays current settings for the selected track including program number and name, panning, and volume. Changing the settings for a track’s program, volume, or panning while the sequencer is recording will record these changes, viewable in the corresponding track’s EVENT page. Upon playback, these automated mixer parameters will display their changing values in real‐time on the MIXER page. Below is an example MIXER page: Parameter Range of Values Default Current Pan 0 to 127 None Current Volume 0 to 127 None Current Program... -
Page 281: Song Mode: The Metro Page
1 to 16 Strong Note 0 to 127 Strong Velocity 0 to 127 Soft Note 0 to 127 Soft Velocity 0 to 127 Metronome This parameter determines the recording modes in which the metronome plays. With Metronome set to Off, the metronome never plays. With Metronome set to Rec, the metronome only plays during recording. With Metronome set to Always, the metronome plays during playback and recording. CountOff This parameter determines the number of measures the PC3K will count off before recording. With StartOnly selected, the PC3K will only count off at the beginning of a sequence. With Always selected, the PC3K will count off from any point in a sequence. Program This parameter determines the program with which the metronome is played. If you wanted a piano for a metronome, for instance, you could set Program to a piano program. The default program is 998 Click Track. Channel This parameter determines the MIDI channel to which the metronome program and events are sent. 12-13... -
Page 282: Strong Note
Song Mode and the Song Editor Song Mode: The METRO Page Strong Note This parameter determines the MIDI number of the note played by the metronome for the downbeats (the “1” of each measure). Strong Vel This parameter determines the velocity of the note played by the metronome for the downbeats (the “1” of each measure). Soft Note This parameter determines the MIDI number of the note played by the metronome for the upbeats (the “2,” “3,” and “4” of each measure). Soft Vel This parameter determines the velocity of the note played by the metronome for the upbeats (the “2,” “3,” and “4” of each measure). The Rec, Play, and Stop Soft Buttons These soft buttons function as described in The Rec, Play, and Stop Soft Buttons on page 12‐7. The Done Soft Button If no changes were made in the METRO page, pressing the Done soft button calls up the MAIN ... -
Page 283: Song Mode: The Filter Pages (Recflt And Plyflt)
Song Mode and the Song Editor Song Mode: The Filter Pages (RECFLT and PLYFLT) Song Mode: The Filter Pages (RECFLT and PLYFLT) On the RECFLT and PLYFLT pages you can specify what event are ignored during, respectively, recording and playback. Both pages have the same parameters with the same ranges of values, but you would use the RECFLT page to configure recording event‐filtering, and the PLYFLT page to configure playback event‐filtering. Below is the RECFLT page. Parameter Range of Values Default Notes On, Off Low Key C -1 to G 9 C -1 Note Filter Hi Key... -
Page 284: Lovel
Song Mode and the Song Editor Song Mode: The Filter Pages (RECFLT and PLYFLT) LoVel LoVel determines the lowest note on/off velocity that is recorded/played back when Notes is set to On. The Hi to the right of LoVel determines the highest note on/off velocity that is recorded/played back when Notes is set to On. Controllers With Controllers set to Off, all controllers are ignored during recording/playback. With Controllers set to On, controller data only of the specified controller and only within the specified value range are recorded/played. Controller The Controller parameter determines which controller(s) is/are recorded/played back when Controllers is set to On. LoVal LoVal determines the lowest value for the specified controller that is recorded/played back when Controllers is set to On. The Hi to the right of LoVal determines the highest value for that specified controller that is recorded/played back when Controllers is set to On. PitchBend This parameter enables/disables pitch bend events to be recorded/played back. ProgChange This parameter enables/disables program changes to be recorded/played back—this includes Controllers 0 and 32 (bank change). MonoPress This parameter enables/disables monophonic key pressure events to be recorded/played back. PolyPress This parameter enables/disables polyphonic key pressure events to be recorded/played back. The Rec, Play, and Stop Soft Buttons These soft buttons function as described in The Rec, Play, and Stop Soft Buttons on page 12‐7. -
Page 285: Song Mode: The Misc Page
Song Mode and the Song Editor Song Mode: The MISC Page Song Mode: The MISC Page The MISC page contains five miscellaneous (but very important and useful) sequencer parameters. The MISC page appears below: Parameter Range of Values Default Control Chase On, Off Quantize Off, 1 to 100% Grid Resolution 1/1 to 1/480 Swing -100% to 125% Release Quantization Yes, No Key Wait... -
Page 286: Swing
Song Mode and the Song Editor Song Mode: The STATS Page Swing The Swing parameter determines the amount (in units of percent) of “swing” applied during quantization. Release The Release parameter determines whether or not note‐off events are quantized. Key Wait With Key Wait set to on, a key strike will trigger playback of a sequence (if the play/pause button is armed,) or trigger recording of a sequence (if the record button is armed.) Song Mode: The STATS Page The STATS page is a display‐only page that shows the status of the PC3K event pool. The event pool is used by all the sequences loaded at a given time in the system. These include: the current song, the compare song buffer, and up to 16 riffs. The STATS page shown below is the state of the PC3K event pool with 0*New Song* selected, and no other user objects loaded in any other modes: The events in the PC3K are similar to events of other sequencers with a single major difference: the Note events are stored as a single big event, i.e., one PC3K Note event is comprised of the note‐on and note‐off events. All other events are stored as single events on the PC3K. The fields on the STATS page are: • Max – the maximum number of notes/events in memory. • Used – the total number of notes/events being used. • Free – the number of notes/events that are free. -
Page 287: The Song Editor
Song Mode and the Song Editor The Song Editor The Song Editor In general, you’ll get to the Song editor pages by pressing the Edit button any time you’re in Song mode. There’s one exception: if the Program parameter is currently highlighted on the display, you’ll enter the Program editor when you press Edit. There are a few conventions shared by all of the Song editor pages. Displayed at the top of each Song editor page is the name of the page and the currently selected track (1–16, or all tracks). All of the values for the parameters found in any of the Song‐editor pages are saved in the song object. Song Editor: The COMMON Page Press the Edit button on the front panel of the PC3K to display the COMMON page and begin editing a song. This is where you will find parameters common to all tracks, such as tempo and time signature, control parameters for effects, and soft buttons for switching to other Song editor pages. Parameter Range of Values Default Tempo 0 (external), 20.00 to 400.00 BPM Time Signature (Numerator) -
Page 288: Fx Track
Song Mode and the Song Editor Song Editor: The COMMON Page FX Track The PC3K uses the channel of the track specified for FX Track as the Aux FX channel. DrumTrack Any of the song’s tracks can be defined as Drum Tracks so that their Note events do not get transposed when a transposition is applied when using the track as a riff in a setup (see Riffs on page 7‐58 and Transpose/Root Note on page 7‐60.) With tracks designated as drum tracks, you can transpose a whole song that is being used as a riff, but the drum tracks will continue to play the correct sounds that they played in the original key. Otherwise, the drum sounds would change with each transposition. Use the cursor buttons to select a track number. You can access 8 tracks at once, either tracks 1‐8 or 9‐16. Use the Chan/Layer buttons to the left of the display to select one of the tracks 1‐8 (viewed in the top right corner of the page) in order to access tracks 1‐8, or select one of the tracks 9‐16 to access tracks 9‐16. With the desired track number selected in the DrumTrk field, use the Alpha Wheel or ‐ /+ buttons to toggle between D, to designate the track as a drum track, or “‐” to designate the track as a non‐drum track. The Drum Tracks’ settings do not have any effect on edits made on the TRACK page in the Song Editor. Any tracks defined as Drum Tracks are transposed when a transposition is applied to these tracks from the TRACK page. MidiDst The MIDI data on each track has a destination assignment selectable with the TrackDest parameter. There are four possible indicators: L = Local. The track’s MIDI data will be transmitted locally only, to the PC3K’s internal sound ... -
Page 289: Soft Buttons On The Common Page
Song Mode and the Song Editor Song Editor: The TRACK Page Soft Buttons on the COMMON Page TRACK – calls up the TRACK page. This page accesses useful track based edit functions. There is a selectable edit function that can be applied to the selected track or all tracks in your song. The TRACK page is described on page 12‐21. EVENT – calls up the EVENT page, an event‐list style editor. On the EVENT page in the Song Editor, you can scroll through, modify, add, or delete any or all of the tracks’ MIDI events. The EVENT page is described on page 12‐31. Rec, Play, and Stop – function as described in The Rec, Play, and Stop Soft Buttons on page 12‐7. Save – calls up the “Save as” dialog. Song Editor: The TRACK Page This page allows you access to useful track‐based edit functions. These functions are: Erase Shift Copy Transpose Bounce Grab Insert... -
Page 290: Common Parameters For Edit Song: Track Functions
Song Mode and the Song Editor Song Editor: The TRACK Page Since these parameters are common to most Track functions, we will define them first. Then we’ll describe the individual functions along with the parameters specific to each, which are normally found on the left side of the page. The function Quantize has unique parameter in its Region/Criteria boxes. We’ll describe those parameters along with the functions. Once you’ve chosen a function and set the parameters to your liking, press Go. This executes the editing function. You can then play the sequence to hear the results of your edit. If you don’t like your edit, simply exit the editor and press No when you are asked if you want to save. If you do like your edit, you can press Done and then Save, or just exit the editor and save the changes. Or, you can go to another edit function. Keep in mind though, that if you choose to perform more than one edit without saving, and you are not satisfied with one of the changes you make, you will have to exit the editor without saving and then redo each of the changes you made. That’s why it’s usually best to save after each successful edit. Common Parameters for Edit Song: Track Functions Locate This parameter is available for every function on the TRACK page. It appears at the lower left hand corner of the page. The Locate bar, beat, and tick will change in real time during playback and recording to reflect the song’s current position. It can be set to any bar, beat, and tick, including negative values. Playback begins at, and Stop resets the song to the Locate bar, beat, and tick. Region/Criteria Box Parameters From and To From and To are available in most TRACK edit functions to define a range of time on the ... -
Page 291: Soft Buttons On The Track Page
When Events is set to Controller, the Controller(s) and a Controller value range can be set for Controller events. Controller The Controller parameter selects the Controller (if any) or all Controllers to be affected. LoVal You may further specify a particular range of values to edit by setting a high and low value. LoVal will define the lowest modifiable value in the selected controller’s recorded data. Value ranges are not definable when Ctl is set to All. Available Values are 0–127. High Value (Hi) Hi defines the highest modifiable value in the selected controller’s recorded data. Value ranges are not definable when Ctl is set to All. Available Values are 0–127. Soft Buttons on the TRACK Page FromTo is a quick way to define the region of time you intend to edit. There are a couple of ways to use this feature when the sequence is playing back in real time, and both ways will set the temporal boundaries of the region. One way is to first position the cursor over the From parameter in the Region/Criteria box and then press the Play soft button. During playback, every time you press FromTo, the PC3K updates the value of From to match the current playback location. Position the cursor over the To parameter to change the value of To in a similar fashion. If you haven’t selected either the From or To parameter, pressing FromTo during playback updates From or To—or both—depending on the current playback location (the value of the Locate parameter) at the time you press FromTo. If you press it while the Locate value is earlier in the song than the current To value, the PC3K updates the From value. If you press FromTo again (without stopping playback) while the Locate value is later than the current From value, the PC3K updates the To value. Play will start the playback of the song from the Bar and Beat set in the Locate parameter. When the song is playing, this soft button functions as a Pause button. Stop stops the playback of the song and return to the Bar and Beat set as the Locate value. Go performs any of the Track‐based edit functions described above. Done will return you to the EditSong : COMMON page. 12-23... -
Page 292: Song Editor: Track Functions
Song Mode and the Song Editor Song Editor: Track Functions Song Editor: Track Functions Erase This function erases specified events from a region of time, but it doesn’t delete the region of time. The result is like erasing a section of recording tape. If you want to completely remove a segment and shorten the length of the track, you can do it with the Delete function. Copy Use the Copy function to duplicate the selected events from the current track and place them in the same track or on another track, either merging with or overwriting existing data. If you do not want to copy all of the MIDI events in the defined range of time on the current track, use the Events parameter in the Region/Criteria box to select a specific MIDI event type you would like the edit function to affect. Some event types provide you more criteria selection parameters. It is often a good idea to set Events to Notes when copying, and then add any necessary controller or other data to the track at a later time. DstTrack: 1 to 16 / All Select a destination track for the copied events with the DstTrack parameter. All selected events described in the Region/Criteria box will be placed in the destination track(s) at any Bar and Beat you specify. If the currently selected track is All tracks then the destination track will be All tracks as well. No matter what channel the current track (source track) is set to when you use the copy function, the events will be played on the destination track’s channel. Location: Bars : Beats : Ticks Specify a bar, beat, and tick location in the destination track where the copied data will be placed with the Location parameter. If the length of the copied region extends from the Location point beyond the song’s existing End point, a new End point is defined. 12-24... -
Page 293: Bounce
Song Mode and the Song Editor Song Editor: Track Functions Mode: Merge/Erase/Slide The Mode setting determines whether the copied events merge with, or erase existing events on the destination track from the location point to the end of the copied region. With Mode set to Slide, the sequencer creates space for the new events, and slides the existing events to uniformly later times in the song. Times: 1 to 127 The value selected for the Times parameter determines how many copies of the selected region are placed, one after another, in the destination track. Bounce Use the Bounce function to move the selected events from the current track to another track, either merging with or overwriting existing data on the destination track. The Bounce function differs from the Copy function in that the original data is not preserved in the original track. As on a multi‐track tape recorder, Bounce will always put the data in the same timeline on the new track that it was on the old track. DstTrack: 1 to 16 Select a destination track for the events to be moved to with the DstTrack parameter. All selected events described in the Region/Criteria box will be placed in the destination track at the data’s original location. No matter what channel the current track (source track) is set to when you use the bounce function, the events will be played on the destination track’s channel. Mode: Merge/Erase The Mode setting determines whether the bounced events merge with, or erase existing events on the destination track from the location point to the end of the copied region. 12-25... -
Page 294: Insert
Song Mode and the Song Editor Song Editor: Track Functions Insert The Insert function is used to add blank time to the current song, modifying the song’s End point appropriately. The Insert function will affect all tracks. This is similar to splicing a piece of blank tape to an existing segment of recording tape. Location: Bars : Beats : Ticks The insertion point for the blank time being added is selected as a Bar and Beat Location value. Events that occurred at or after this Bar and Beat, before you insert time, are not erased when you perform this function, rather they are offset by the length of the blank time being added to a Bar and Beat later in the song. Amount: Bars : Beats : Ticks The length of the blank time being added is defined as a number of Bars and Beats in the Amount parameter. There are no Region/Criteria parameters available for the Insert function. Delete The Delete function is used to remove a region of time from the current song. This function is different from the erase function because not only does it remove the events from the selected time, it will delete the entire selected range of time from the song, modifying the song’s End point appropriately (on all tracks). This is similar to cutting a section out of a tape and splicing the ends. 12-26... -
Page 295: Quantize
Song Mode and the Song Editor Song Editor: Track Functions Quantize Use the Quantize function to adjust the timing of Note events. Keep in mind that only Note events are quantized; other types of events, such as controllers, are not quantized. Quant: Off/1 to 100% The Quantize parameter determines how much the selected Note events are moved towards grid locations. If set to Off, no aligning of previously recorded notes to grid locations will occur. If set to 100%, every recorded Note event will be aligned to the closest grid location, defined by the Grid setting. Notes will be moved to a position half way between the grid location and the original Note‐event location if Quant is set to 50%. Grid: 1/1 to 1/480 This setting determines the size of the Quantize grid, expressed as a fraction of a Bar with a 4/4 meter. Set Grid to 1/1 for whole note grid, 1/16 for sixteenth notes. All of the standard note durations and every fractional Bar divisions in between are available as the size of the Input Quantize grid. Swing: ‐100 to 125% The Swing percentage is applied to the quantize grid. 0% swing is straight time, 100% produces a swing feel (triplet feel). A positive Swing value determines how close every other grid location is moved to a point 1/3 of the way towards the next grid point. Negative Swing moves every other grid location closer to a point 1/3 of the way towards the previous grid point. Release: Yes/No Set the Release parameter to Yes if you would like each quantized Note event’s Note Off message to be aligned to the grid location nearest to the time the key was originally released. 12-27... -
Page 296: Shift
Song Mode and the Song Editor Song Editor: Track Functions Shift The Shift function allows you to offset the existing MIDI events forward or backward in time any number of ticks (1/480th of a Beat) and beats. This function only affects the End point if any of the shifted events are after the End point of the song. Events can not be shifted beyond the End point or before Bar 1 : Beat 1 : Tick 0. The events can be shifted only as far as these temporal boundaries. All events that can’t be shifted the full Ticks amount will be placed at the boundary location. Amount: Bars : Beats : Ticks The Ticks parameter specifies the number of bars, beats, and ticks that the MIDI events, from within the selected region, are moved forward (for positive values) or backward (for negative values) in time relative to their original locations. Mode: Merge/Erase The Mode setting determines whether the shifted events merge with, or erase existing events on the destination track from the location point to the end of the shifted region. Transpose Use the Transpose function to change the MIDI Note numbers of the selected Note events. Semitone: ‐128 to 127 semitones An increment of one semitone represents a change of one MIDI Note number. You can transpose Note events only within the range of MIDI Note numbers 0 to 127. 12-28... -
Page 297: Grab
Song Mode and the Song Editor Song Editor: Track Functions Grab Grab is similar to the Copy function, except that the Grab function allows you to copy selected data from tracks that exist in other songs in memory. SrcSong: Song List The Source Song parameter is set to the ID and name of the song in memory that contains the desired track data you wish to grab in order to use it in the current song. The source track is determined by the Track parameter displayed on upper right hand side of the page, selectable with the Chan/Layer buttons. DstTrack: 1 to 16/All Select a destination track for the grabbed events with the DstTrack parameter. All selected events from the source song and track described in the Region/Criteria box will be placed in the destination track(s) at any bar, beat, and tick you specify. If the currently selected track is All tracks then the destination track will be All tracks as well. No matter what channel the current track (source track in the source song) is set to when you use the grab function, the events will be played on the destination track’s channel. Location: Bars : Beats : Ticks Specify a bar, beat, and tick location in the destination track where the grabbed data will be placed with the Location parameter. If the length of the grabbed region extends from the Location point beyond the song’s existing End point, a new End point is defined. Mode: Merge/Erase/Slide The Mode setting determines whether the grabbed events merge with, or erase existing events on the destination track from the location point to the end of the grabbed region. With Mode set to Slide, the sequencer creates space for the new events, and slides the existing events to uniformly later times in the song. Times: 1 to 127 The value selected for the Times parameter determines how many copies of the selected region are placed, one after another, in the destination track. 12-29... -
Page 298: Change
Song Mode and the Song Editor Song Editor: Track Functions Change The Change function is used to modify attack velocities, release velocities, or the values of any existing controller data on the current track. A static change of values can be made as well as having the change take place over a region of time. Change can not modify or add data that doesn’t exist on the current track. If you hear Note events played back on a track, then you know there is an attack and release velocity value for each one, and the effect of the Change function can usually be easily detected. Controller values are sometimes more difficult to change since there can be inconsistent gaps of time between each controller event. Scale: 0% to 20000% The selected velocity or controller events’ values can be changed to a percentage of the original values determined by the Scale parameter. A setting of 100% has no affect. Values are scaled lower with a Scale percentage set from 0% to 99%. Low values can be set higher using a Scale percentage above 100% on up to 20,000%, although the maximum value of 127 can not be exceeded for any velocity or controller type. Offset: ‐128 to 127 Offset can be used alone or in conjunction with Scale to add or subtract a set amount to or from the original (or scaled) values. Values for velocities can not be less than 1 or greater than 127. Values for controllers can not be less than 0 or greater than 127. As an example, to set all Velocities to a value of 55, you would set Scale to 0% (multiplies all original values by zero) and set Offset to 55 (adds 55 to the product of the Scale parameter). Mode: Constant/PosRamp/NegRamp Set Mode to Constant to have values modified in a uniform fashion, as determined by the Scale and Offset settings, for the entire selected region of time and range of values. When the Change function is applied with Mode set to PosRamp, the selected velocity or controller values will gradually change over the region of time, defined by the locations set for the From and To parameters, from the original value to the new value determined by the Scale and Offset settings. The first events being modified within the region will have little or no change from their original values. The amount of Scale and Offset applied will increase as the song approaches the Bar and Beat defined in the To parameter, where the full amount of described change will occur. -
Page 299: Remap
Song Mode and the Song Editor Song Editor: The EVENT Page Remap Use the Remap function to apply the values of any one type of controller data, already recorded on a track, to another controller type. The effect the real time changes of the “Old” controller had will be replaced by the effect the “New” controller has by using the exact same controller values. Old: Control Source List (0 to 120) The “Old” Controller is set to the Controller type that you wish to remap. This Controller data must already exist on the current track in order to apply it to the “New” Controller type. New: Control Source List (0 to 120) The “New” parameter is set to the Controller code you wish to have use the existing values, once used by the “Old” Controller, to produce a different effect. Song Editor: The EVENT Page Every type of recorded MIDI event is visible from this page. You can view and change these events if necessary. Each track displays its initial program, volume, and pan at the top of its event list. You can also access the tempo track (instructions below.) Event Type and Value Location Bar:Beat:Tick Initial Program, Volume, The top line of the page displays the current song position in the center, and the currently selected track and corresponding channel on the right. Use the Chan/Layer buttons to select an active track to view and edit the MIDI events recorded on it. ... - Page 300 Song Mode and the Song Editor Song Editor: The EVENT Page To scroll through the events, make sure the location (Bar and Beat, in the first column) is highlighted. Use the Alpha Wheel, the Up and Down cursor buttons, or the Plus/Minus buttons. As you scroll through the events, each event is executed by the sequencer. In the case of Note events, you will hear the note played, although the duration will be short. If you have scrolled through a Sustain (MIDI Controller 64) message with an On value then you will hear the note sustain as if the sustain pedal was depressed. The note will continue to sustain until you scroll through a Sustain message with a value of Off. You can also jump directly to a specific bar and beat by typing the bar number and beat number, then pressing Enter. Keep in mind if you have controller or program data previous to the point that you jump to, those events may not have been executed and you may hear unexpected results. For example, if you have program changes at bar 1 and bar 8, and you jump from bar 1 to bar 9, any notes you scroll through will be played with the program change from bar 1. Initial Program, Volume, Pan At the top of the event list for each track, you can view and change the initial program, volume and pan settings for the current track. See Song Mode: The MAIN Page on page 12‐1 for details on initial settings for program, volume, and pan. Each of these parameters can be set to NONE by entering 0 on the alphanumeric pad and then pressing the minus button to find NONE. Location The first column represents the Bar and Beat Locations of the different events in a song. Scroll through the events on the selected track(s) with the Alpha Wheel or enter in a specific Bar and Beat on the alphanumeric button pad to jump to events occurring on that Beat. A quick way to jump to the End point in a track is to press 9999 and then Enter on the alphanumeric button pad. Bar, Beat, and Tick Bar, Beat, and Tick are editable parameters for each event. They determine when an event ...
-
Page 301: Tempo Track
Song Mode and the Song Editor Song Editor: The EVENT Page Note events have four editable values: Note Name, Attack Velocity (indicated by a “v”), Release Velocity (indicated by a “^”), and Note Duration. Note Number C -1 to G 9 MIDI Note Events (>) Attack Velocity v1 to v127... - Page 302 Song Mode and the Song Editor Song Editor: The EVENT Page 12-34...
-
Page 303: Chapter 13 Storage Mode
Storage Mode Storage Mode Page Chapter 13 Storage Mode Storage mode lets you use a USB device (such as a thumb drive) to load, save, back up, and copy files between the PC3K and the outside world. Storage mode in the PC3K allows flexibility to organize files and their contents. Its features can save you time by allowing you to select and organize files and directories. Here’s a summary of Storage mode functionality: • USB Storage port • USB Computer port • FAT‐32 file system compatibility • Support for song files (sequences) in MIDI Type 0 and Type 1 format Storage Mode Page To enter Storage mode, press the Storage button, and the Storage mode page will appear: In the center of the page you can select one of two storage destinations: USB device or USB PC connection. These refer to a USB device which you can plug into the appropriate type of USB port on the rear of the PC3K (Using USB Devices below for details.) When you select USB PC connection, any USB MIDI connection will be temporarily disconnected, and will not be restored until you select USB device or exit Storage mode. Use the cursor to select the destination that you wish to store your files to or load your files from. The status of the selected destination will be displayed as either ready or you will see a “No connection” message. The top right‐hand corner of the page displays the currently selected storage destination. If you are having trouble selecting a device that you have plugged in, try exiting Storage mode and then entering Storage mode again. The currently selected device will be read from or written to when you load, save, rename, or delete files. Use the soft buttons to start any of these operations. Use the more soft buttons to access additional pages of soft buttons. Here is a brief description of each of Storage mode’s soft buttons: STORE ... -
Page 304: Using Usb Devices
Storage Mode Storage Mode Page LOAD Load selected file(s) or object(s) from the current device into PC3K memory. UTILS Check the free space, find files, and view directory organization and sizes. USBDrv Select the virtual USB drive when the USB computer port is connected to a computer. EXPORT Export MIDI files created in Song mode or a list of Program info (controller assignments.) Format Format the USB device currently connected to the USB Storage port. Using USB Devices You can plug a USB mass storage device such as a “thumb drive” into the PC3K for backing up, archiving, sharing your work, and updating your software. Any size USB mass storage device will work, though thumb drives are recommended for their portability, durability, and low price. There is a USB Storage port on the back panel of the PC3K, but it is easily accessible from the front of the instrument (see below.) Caution: A USB connector will only fit into the port if oriented properly, so don’t force it into the port, as this may damage your PC3K or USB device. If you are having trouble inserting your USB connector into the port, try flipping the connector over. You can also transfer files directly to a computer that is equipped with a USB port by using the USB Computer port on the back panel of the PC3K (see above.) Connect a USB cable from the PC3K’s USB Computer port to a USB port on your computer. When you enter Storage mode and select USB PC Connection, a virtual drive named PC3K will appear on your computer’s desktop. Load files from your computer to your PC3K by putting files on the PC3K virtual drive, then selecting USB PC Connection in Storage mode to load the files. Save files from the PC3K to your computer by using this configuration with the Storage modes Store function. Saved files will temporarily appear on the PC3K virtual drive on your computers desktop, and you then must copy your saved files to another location on your computer. You must copy data from the PC3K virtual drive to your computer’s drive or else the data will be lost. Note: When transferring files to and from the PC3K via the USB Computer Port, the maximum size of files that can be transferred is approximately 1.6MB. This is suitable for most objects. ... -
Page 305: Directories
Storage Mode Directories Depending on your computer’s operating system, you may sometimes see a scary device removal warning on your desktop after using the PC3K virtual drive. You may disregard such a message without worries of damage to your PC3K or computer. Caution: Do not remove a USB device while the display says Loading... or Saving.. Removing a USB device during a file transfer can cause data corruption. Formatting a USB Device See Format on page 13‐12. Directories A directory lets you group files together as you might separate documents using folders in a file cabinet. You can create directories on a USB device. You can even create subdirectories within directories. Directories appear in the normal file list with the indicator <dir> to the right of the directory name. Directories are handy for organizing your song, and program files. The PC3K provides many operations for setting up and managing directories and the files within them. Path The Path field shows the current directory on the current device. This field is displayed upon returning to the Storage mode page after you have pressed one of the Storage mode soft buttons and viewed the file contents. It stays visible on the Storage mode page until you power down or do a soft reset. The PC3K always starts at the root (top‐level) directory when you power it up, or when you change the value of the CurrentDisk parameter. When you use the disk functions to view other directories, the Path field updates the current directory value to track your movements. The root directory is displayed as a backslash: Path:\ If you press the Load button and load a file from a subdirectory called SOUNDS, the Path field will appear as Path:\SOUNDS\ The backslash character is a directory separator, as in the following Path: Path: \NEWTUNE\SAMPLES\DOGS\ This represents the directory DOGS, which is a subdirectory of the SAMPLES directory, which is ... -
Page 306: Common Dialogues
Storage Mode Common Dialogues Common Dialogues These are dialogues that the PC3K calls up when about to perform certain storage functions. The Select Directory Dialogue When storing an object—or group of objects—the PC3K prompt’s you to select a directory in which to save that object or group. There are three navigating soft buttons on the left side of the bottom of the page: NewDir Create new directory. Calls up the New Directory dialogue (see the following section) Open Opens the highlighted directory. Parent Moves you up one level in the directory hierarchy. If the display is already at the root directory, this button has no effect. When you have chosen your directory, press the OK soft button to call up the File Name dialogue (see the following section) and completes the storing process. The File Name/New Directory/Rename Dialogue When you create a new file in Storage mode, create a new directory, or rename a file or directory, the PC3K prompts you to enter the object’s name. This File Name dialogue appears as shown below, although both the New Directory and Rename appear and function similarly to the File Name dialogue: New file names will default to either FILENAME (after a powerup), or the name will be that of the most recent file saved or loaded. New directory names will default to either DIRNAME (after a powerup), or the name will be that of the most recent file saved or loaded. Once you choose a name to start with (or the default), you can edit the name using the Left and Right cursor buttons, the Delete and Insert soft buttons, and the << and >> soft buttons. Pressed OK soft button saves the object in the current directory. The display shows that the PC3K has created or renamed the object, then the Storage mode page ... -
Page 307: The Store Page
The STORE Page The STORE Page Pressing the STORE soft button calls up the Store page, where you can select objects from RAM to store in the current storage device. The page appears as shown below: At the top right of the page, the display shows how much memory is available in the current storage device. Along the bottom of the page are the Store page’s six soft buttons. Below is a description of the function of each soft buttons: Select Select the highlighted Object/Type or Range/Bank. An asterix (*) appears to the left of selected entries. Clear Clear all selections in the current field. Note that if you press the Clear soft button while in the Range/Bank field, only selected Range/Bank entries are cleared; however, if press the Clear soft button while in the Object Type field, all selected entries in both fields are cleared. SetRng Set range. Note in the Range/Bank field that the second‐to‐last entry is Range with a range of numbers next to it. You can set this range in the Set Range dialogue by pressing the SetRng button. If you try to set an invalid range—such as 102–23— then the PC3K will inform you that the range is invalid. Advnce Call up Store Advanced page (see below). Store Store the selected objects to the current storage device. Pressing this soft button calls up the Select Directory dialogue. Cancel Exits the Store page and returns you to the Storage mode page. In the main body of the page are two fields: Object Type and Range/Bank. To select objects for storage, firstly, select an Object Type. If there are any user‐defined objects of the selected type, the symbol (u) will appear to the right of the Range/Bank entry in which they fall. These are the ranges whose objects you can store. You can store an entire bank of objects, or by pressing the Advnce soft button, select individual objects to be saved (see The Store Advanced Page). If you choose to store using the bank method, all RAM objects within that bank will be saved. (You cannot store ROM objects. If you wish to store a ROM object, such as a program, you must first save it internally as a RAM program.) If any objects within the selected bank have dependent RAM objects that exist in a different bank, you will be asked if you want to save dependent objects. 13-5... -
Page 308: The Store Advanced Page
Storage Mode The STORE Page Use one of the data‐entry methods to select a bank to be store. If you press the Cancel soft button, you’ll return to the Storage mode page. After you’ve selected the bank, press Store, and the File Name dialogue will appear. Name the file, and press OK. When the file is saved, the PC3K adds an extension (.P3K) to the filename. This enables the PC3K to recognize it as a Kurzweil file when it examines the directory. Note that although .P3K files are “collections” of objects, you can load individual objects if you want to. See Loading Individual Objects From a .P3K Or Compatible File Type on page 13‐8. Saving Master Files Among your choices in the Bank dialog are Master files. Master files consist primarily of the items on the two Master mode and MIDI mode pages. Saving Master files is a good way to configure your PC3K (or another PC3K) to your performance or sequencing needs. For example, you might save different Master files with every sequence you create using an external sequencer. Then, when you load the Master file, you would have all the correct programs assigned to the appropriate MIDI channels. The Store Advanced Page Pressing the Advnce soft button calls up the Store Advanced page, on which every user‐defined object—as well as its object type—on the PC3K is displayed and selectable for storage. On this page, you can select and store objects individually, rather than by range. The objects are organized by numerical ID and object type. There are five soft buttons on the Store Advanced page: Select Select the highlighted object. An asterix (*) appears between the ID and object type of selected objects. Next Scroll to next entry. Same function as pressing the Down or + buttons, or turning the Alpha Wheel one click clockwise. Type ... -
Page 309: The Load Page
Parent Moves you up one level in the directory hierarchy. If the display is already at the root directory, this button has no effect. Entering a new directory will deselect all files. Open Open selected directory or view objects within a .P3K file or other compatible Kurzweil file type for loading individual objects. See below for instructions on opening .P3K and other Kurzweil file types to view and load individual objects. Entering a new directory will deselect all files. Viewing objects within a .P3K file or other Kurzweil file will deselect any other files that had been selected. OK Load the selected .P3K file or other compatible Kurzweil file type, or the selected .WAV or .AIF file or files. See below for instructions on using the Load dialogue when loading a .P3K file or other compatible Kurzweil file type. See below for details on loading .WAV and .AIF files. Cancel Exits the Load page and returns you to the Storage mode page. Loading .WAV and .AIF Audio Files From the LOAD page, .WAV and .AIF audio files can be loaded and used with user created keymaps (see Building a Keymap on page 14‐7 and Editing Samples on page 14‐9.) Mono and stereo files can be loaded, 8 or 16 bit, with sample rates up to a maximum of 96000 Hz. Once samples are loaded to the PC3K’s user sample flash memory, samples remain in the PC3K even when the power is off, until they are manually deleted. Also, once samples are loaded to the PC3K’s user sample flash memory, there is no load time for those user samples when turning on the PC3K. 13-7... -
Page 310: Loading Individual Objects From A .P3K Or Compatible File Type
14‐1) loaded audio samples can be selected in the Sample field. On the EditKeymap page you can find an audio file with the highest ID# by selecting the Sample field, entering 0 on the alphanumeric keypad and pressing Enter, then press the minus (‐) button once (below the Alpha Wheel.) Loading Individual Objects From a .P3K Or Compatible File Type Since a .P3K file can contain over 3000 objects, it is often useful to load only a subset of the information contained in a file. You can select individual objects or groups of objects (programs, effects, songs) for loading from within a single .P3K, .PC3, .K26, .K25 or .KRZ file (see Appendix E for compatibility details.) The Load Object feature is accessible from the LOAD page. To activate it, scroll the file list until you have highlighted the file that you wish to load objects from. Press Open to begin the Load Object dialog. The PC3K then scans the file contents in order to present a list of all of the objects in the file. Sometimes this procedure can take a few moments, depending on how many objects are in the file. The objects in the list are usually grouped by type (program, setup, etc.). The list can be scrolled using the Alpha wheel or the Up or Down cursors. Each line in the scrollable list represents one object, and displays the object’s type, ID, and name. The ID numbers are the same numbers that were used to reference the objects when the file was last saved by the PC3K. These numbers will usually be different after the objects are loaded, depending upon the bank (for example, 128...255) and mode that is specified for loading. As with the file list, entering in a number from the alphanumeric buttonpad will jump to the indexed entry, and typing in a large number like 9999 will go to the end of the list. The soft buttons on this page are used for multiple selection of the objects in the list as well as for moving around the list when there are many items selected or listed. This same dialog is also used for many other functions in the PC3K, namely for saving selected objects and for several ... -
Page 311: Loading Methods
Storage Mode The LOAD Page The Next button will cause the index into the list to jump to the next selected object, forward in the list. When the end of the list is reached, the search will wrap around from the beginning. If you have more than one object selected, then if you repeatedly press Next you can easily cycle through all selected items. If there are no items selected, then this button doesn’t do anything. The Type button jumps to the next object of a different type from the one that is currently highlighted. This is a convenient way to find a particular type of object in the list. When you are all done selecting objects to load, press OK. As stated above, if only one object is to be loaded, it is implicitly selected if it is the currently highlighted object and there are no other selected objects in the list. Cancel returns to the file list dialog, highlighting the file you just opened. You can load the entire file after pressing Cancel by pressing OK when you return to the file list. Select All/Deselect All Selecting or deselecting all of the objects at once can be done with the same double‐presses as described for the file list dialog, namely: • Left/Right cursor double‐press: Select All Objects • Up/Down cursor double‐press: Clear All Selections If you want to load most but not all of the items from a file (for example, if there happens to be a Master table in the file that you don’t want to load), it may be fastest to first select all objects using the Left/Right double‐press, and then manually deselect any unwanted items. Loading Methods Once you have pressed OK to decide on what bank to use, you will see this dialog: The soft buttons control the mode for loading and renumbering of objects from the file. Here’s how they work: OvFill First deletes all RAM objects in the selected bank, and then loads objects using consecutive numbering. Overwrt First deletes all RAM objects in the selected bank, and then loads objects using the object ID numbers stored in the file. Merge Preserve the object ID numbers stored in the file for the objects to be loaded, ... - Page 312 Cancel Cancel the mode selection, and go back to choosing a bank. Scrolling to a different bank value will have the same effect as Cancel. Typically, you will just want to use the Fill method. Append, Merge, and Overwrt try to preserve the numbers stored with the objects in the file, but this should only really be necessary if you depend on program numbers or effect numbers to be at a certain MIDI program change number. OvFill is like Fill except the selected bank (or Everything) is cleared out before loading. Overwrt and OvFill operate in different ways after a selected bank has been filled up for a given object type (for example, after you have loaded more than 128 programs into a bank). Overwrt will continue to preserve the objectIDs stored in the file, and will individually overwrite objects in the bank following the just filled bank. OvFill does not overwrite past the end of the selected bank; it instead skips over object IDs that are in use, loading only into unused IDs. Because of this difference, it can sometimes be faster to load a file using OvFill rather than Overwrt. However, this applies only if the objects to be loaded would extend past the end of a selected bank. Note that when loading into a specific bank (as opposed to loading as “Everything”), the object IDs in the file are used as follows: The “bank” digit is ignored, and the remainder of the number is used when the PC3K rebanks the object ID into the bank that you specify. For example, if you save Program 453 into a file, and load it back into the 129...256 bank, the PC3K will use the number 69 (its bank‐specific ID in the 385...512 bank) when deciding upon a new object ID. If the 129...256 bank was previously empty, and the load mode is Append, then the program will end up with ID 197 (128 + 69). For loading as “Everything,” the ID number for an object stored in a file is taken literally, and not rebanked (except if Fill or OvFill mode is chosen). The following example shows how each different loading methods affect how four programs load into a bank that already contains programs. Example: Starting with the following objects already stored in the PC3K internal RAM: Program ID Program Name Piano Stack Ole Upright 1 WestCoastPno&Pad The Ancient DancePnoEchplex Suppose you were to load a file containing the following objects into the Base2 (129...256) bank:...
-
Page 313: The Utilities (Utils) Page
Deleted Deleted The Ancient Deleted Deleted DancePnoEchplex Deleted Deleted Brighter CP TouchRezSynthCP Inside Out CP Pianet Classic The Utilities (UTILS) Page Pressing the UTILS soft button calls up the Utilities page, where the PC3K displays the contents of the current directory, in an alphabetized scrolling list. If the current directory cannot be located (for example, if you’ve changed USB devices), the PC3K displays the current device’s root directory. The display shows the 3‐character extension of all files in the directory (except directories themselves). Extensions are created when the file is saved by the PC3K. You cannot modify the extensions on the PC3K. This is because the PC3K uses the extensions to tell it what kind of data the files contain. Directories created by the PC3K have up to 8‐character names, with no extension. A directory can have an extension if it is created on an external computer (more on this later). The .MID extension is used by the PC3K for MIDI Type 0 or Type 1 sequence files. When loading files, the PC3K will try to find out the type of file if it doesn’t recognize the extension. Soft Buttons on the Utilities Page NewDir Create a new directory. -
Page 314: Export
Storage Mode Export Parent Moves you up one level in the directory hierarchy. If the display is already at the root directory, this button has no effect. When you first open a directory for viewing, the index is 1 (the first file in the list). The PC3K remembers the index of the previous directory you were in before you pressed Open, so if you return to that directory by pressing Parent, the index changes accordingly. This index is remembered for one level down, and therefore is useful when stepping through a list of subdirectories from a single directory level. In the Load function, pressing Open for a standard file will start the Load Object feature. This allows selected individual objects from the file to be loaded into the PC3K. For example, pressing Open while in the Delete function will display the objects within the file in a scrollable list, however no delete action will be possible on the individual objects. Pressing the OK soft button will cause the PC3K to proceed with the selected function. After pressing OK, there may be further dialogs such as bank specification (for the Load function), confirmation (for Delete), or name entry (for Rename). One exception to this is in the Load function; when a directory is highlighted, pressing OK is the same as pressing Open (it displays the contents of the highlighted directory). Export Press the EXPORT soft button to go to the Export page. The Export page allows you to export MIDI files created in Song mode, or lists of controller assignment info that are automatically created for each Program and each Chain. To export a MIDI file created in Song mode, the song must be currently loaded in Song mode. Go to Song mode and load the desired song, then return to the Storage mode EXPORT page and press the Song soft button. You will be prompted first to choose a directory to save the file into, and then you will be prompted to name the MIDI file. When you name the file, you can use the Type field to choose to export either a Standard MIDI File type 1 (saves with multiple channels,) or Standard MIDI File type 0 (saves all channels as 1 channel.) To export a list of controller assignment info for all Programs, press the PrInfo soft button. You will be prompted to choose a directory to save into, and then you will be prompted to name the info file. A comma separated value file will be exported. To export a list of controller assignment info for all Chains, press the FXInfo soft button. You will be prompted to choose a directory to save into, and then you will be prompted to name the info file. A comma separated value file will be exported. Format USB devices come formatted and ready to use with the PC3K. If you ever need to format a device, however, you can use any computer with USB device formatting capability, or format it using the PC3K. -
Page 315: Chapter 14 Keymap And Sample Editing
Keymap and Sample Editing The Keymap Editor Chapter 14 Keymap and Sample Editing The Keymap Editor The Keymap Editor lets you customize the PC3K’s factory preset keymaps and save them to RAM. You can also build your own keymaps from scratch (see Building a Keymap on page 14‐7.) Keymaps are an integral part of every layer of a program. Each keymap contains a set of parameters determining which sample(s) the PC3K will play when you trigger a note. Each layer has at least one keymap, but it can have two keymaps when you’re working with stereo samples. Each of these stereo keymaps uses two of the 128 available voices. Each keymap consists of a set of key (note) ranges—C 4 to G 4, for example. The entire span of each keymap is from C 0 to G 10. Each range has a sample root assigned within the range. Each sample root is a distinct ROM or RAM sample. Within each key range, the sample root is transposed up and down to play on each of the range’s notes. You can view each range by changing the value of the Key Range parameter on the Keymap‐editor page. You can mix samples of different timbres within a single keymap, and even tune individual keys to any pitch by defining key ranges to single notes and assigning samples to each of those notes. When you trigger a note, the PC3K identifies the key range where the Note On event occurred. It also checks the attack velocity value of the note. It then addresses its memory, and retrieves the sample root that’s assigned to that key range and attack velocity value. If the note that’s triggered is not the note where the sample root is assigned, the sample is transposed to play at the correct pitch. The PC3K then generates the digital signal that represents the sound of the note. At this point the keymap’s job is done, and the signal proceeds through the layer’s algorithm and on to the audio outputs. You can assign as many key ranges to a keymap as you like, even creating a separate range for ... - Page 316 Keymap and Sample Editing The Keymap Editor layer using the LoKey and HiKey parameters on the LAYER page in the Program Editor. If each layer covers the entire range, then each note you played would trigger 20 voices (one for each layer). You would only hear one drum per note because all the other layers are triggering “Silence.” Because of the voice‐stealing algorithms in the PC3K, the voices would almost immediately become available again, since they have no amplitude. But for one brief instant, the voice would be triggered, which could cause other voices to be cut off. You can also create multi‐velocity keymaps—that is, keymaps that will play different timbres depending on the attack velocities of your Note On events. Program 6 Pop Power Piano, for example, uses a keymap with three velocity ranges. Each key range in a multi‐velocity keymap contains two or more distinct sample roots that the PC3K chooses between, according to the attack velocity of the note. See Velocity Ranges (VelRng) on page 14‐5 for details. The Keymap Editor is nested within the Program Editor. The first step in using the Keymap Editor is to select the keymap you want to edit. This is done on the KEYMAP page in the Program Editor, using the Keymap parameter. Once you’ve done this, just press the Edit button, and you’ll enter the Keymap Editor. If you want to edit a different keymap, press the Exit button to return to the KEYMAP page in the Program Editor and select the desired keymap. If you want to build a keymap from scratch, start with the keymap 999 Silence (see Building a Keymap on page 14‐7). This keymap template contains one key range from C 0 to G 10, and is a convenient starting point for adding key ranges and assigning sample roots. The Keymap‐editor page looks like this: Parameter Range of Values Sample Sample Root list...
-
Page 317: Keymap Editor Parameters
Key Range below.) Key Range A keyrange is a range of keyboard keys that plays one sample (per velocity range, see Velocity Range (VelRange) below for details.) Each sample in a key range (per velocity range) is transposed based on each sample’s RootKey parameter so that it plays at the correct pitch on the keyboard relative to its root key (see Editing Samples on page 14‐9 for details on the RootKey parameter.) Other keys within the key range transpose the sample chromatically relative to the root key. Sample pitch relative to the root key can also be offset using the Coarse Tune and Fine Tune parameters, see below.) The KeyRange parameter shows you which key range you’re currently viewing or editing (key ranges are named by their lowest and highest notes.) Changing the value of the KeyRange parameter selects from the available key ranges, and allows you to view or edit the sample assignment and other parameters of the selected key range. When the Key Range parameter is selected, you can also scroll through available key ranges using the Alpha Wheel or the ‐/+ buttons. Multiple key ranges are only shown if the current Keymap uses more than one key range. If the top line of the EditKeymap page displays KeyRange, you can scroll through the available key ranges with any parameter on the page selected using the Chan/Layer buttons. (Press the Toggle soft button to toggle the top line between displaying KeyRange and VelRange.) With the Keyrange parameter selected, keyranges can also be selected by holding the Enter button and playing a key. The keyrange assigned to that key will be selected. Low Key (Lo), High Key (Hi) With these parameters you can use any of the data entry methods to change the low and high notes of the current key range. You can extend a key range to the full capacity of the PC3K (C 0 to G 10). If you extend the current key range into another, the boundaries of the other key range will become shortened to accommodate the key range you are extending. If the keyrange you are extending covers another keyrange, the other key range will be deleted. The setting for the low key cannot be higher than the setting for the high key. Similarly, the setting for the high key cannot be lower than the setting for the low key. 14-3... - Page 318 Keymap and Sample Editing The Keymap Editor Velocity Range (VelRange) This parameter shows the keyboard velocity range (in dynamic levels) that will trigger a sample for the current KeyRange. In a key range with more than one velocity range, each velocity range can use a different sample, as well as different CoarseTune, FineTune, and VolumeAdjust settings. Velocity ranges are intended for use with instrument samples recorded at different velocities. This helps to make playing sampled instruments sound more realistic. Sample volumes are also scaled based on keyboard velocity within each velocity range. Velocity ranges for the current Keymap are set using the VelRng soft button (see Velocity Ranges (VelRng) on page 14‐5) or the Low Velocity (Lo), High Velocity (Hi) parameters (see below.) All keyranges in a Keymap share the same set of velocity ranges. Up to eight velocity ranges can be used. When the VelRange parameter is selected, you can scroll through available velocity ranges using the Alpha Wheel or the ‐/+ buttons. Multiple velocity ranges are only shown if the current Keymap uses more than one velocity range. If the top line of the EditKeymap page displays VelRange, you can scroll through the available velocity ranges with any parameter on the page selected using the Chan/Layer buttons. (Press the Toggle soft button to toggle the top line between displaying VelRange and KeyRange.) Low Velocity (Lo), High Velocity (Hi) Use these parameters to set the velocity range of the current key range. If you extend the current velocity range into another, the boundaries of the other velocity range will become shortened to accommodate the velocity range you are extending. If the velocity range you are extending covers another velocity range, the other velocity range will be deleted. Coarse Tune Coarse Tune allows you to transpose a sample for a given range. This is extremely useful when ...
-
Page 319: The Soft Buttons In The Keymap Editor
Chan/Layer buttons will scroll between the available key ranges in the key map (if the current key map has more than one key range.) The note range for each key range will also be displayed on the top line. If the top line of the page displays VelRange, then the Chan/Layer buttons will scroll between the available velocity ranges in the key map (if the current key map has more than one velocity range.) The dynamic range for each velocity range will also be displayed on the top line. Velocity Ranges (VelRng) Press the VelRng soft button to view the VEL RANGES page (see below.) Use the VEL RANGES page to add, edit or delete velocity ranges for the current keymap. The VEL RANGES page shows a chart of a keymap’s entire available dynamic range, from most quiet (ppp) to most loud (fff.) Velocity ranges can also be adjusted from the EditKeymap page, but the VEL RANGES page provides a chart as a visual aid. Each keymap can be split into a maximum of eight velocity ranges. Each key range in a keymap can use its own sample for each velocity range. All key ranges in a keymap share the same velocity ranges. Press the Split soft button to split the currently selected velocity range into two ranges (until the maximum of eight velocity ranges have been created.) Press the Delete soft button to delete the currently selected velocity range. Press the Exit soft button to return to the EditKeymap page. On the VEL RANGES page, the currently selected velocity range is highlighted in the chart, and its name is displayed in the VelRange field. With the VelRange field selected, you can use the Alpha Wheel or ‐/+ buttons to move between the available velocity ranges (if there is more than one velocity range available.) You can also use the Chan/Layer buttons at any time to move between the available velocity ranges. If there is more than one velocity range available, you can adjust the dynamic range of each using Lo and Hi parameters. These Hi and Lo parameters are the same as the Low Velocity (Lo) and High Velocity (Hi) parameters on the EditKeymap page (see Low Velocity (Lo), High Velocity (Hi) on page 14‐4 for details.) Changes made with either set of parameters are shown on both pages. New Range (NewRng) The NewRng button lets you define a new keyrange to edit, whether it’s to assign a different sample, or to adjust the pitch or volume. Just press NewRng, then play the note you want as the low note, then the high note. The PC3K will prompt you for each note. When you trigger the high note, you’ll return to the Keymap‐editor page, and the new keyrange you defined will be selected. The next change you make will affect only that edit range. 14-5... -
Page 320: Special Double Button Presses In The Keymap Editor
Assign The Assign soft button lets you select a sample, then specify the key range to which it’s assigned. This enables you to insert a new key range within the current keymap. When you press the Assign soft button, a dialog appears that prompts you to select a sample from the Samples list. Scroll through the list, then press the OK soft button. You’ll then be prompted to define the new key range by playing the notes you want to be the lowest and highest notes of the range. (Press the Cancel soft button if you change your mind.) When you trigger the low and high notes, the new key range is inserted. If the new key range partially overlaps an adjacent key range, the existing key range will be adjusted to accommodate the new range. If the new key range completely overlaps an existing key range, the original key range will be replaced. Rename Call up the page that enables you to change the name of the current keymap. Save Start the process of saving the current keymap. Delete Delete the current keymap from memory. Factory ROM keymaps cannot be deleted. Special Double Button Presses in the Keymap Editor Suppose you have a sample whose root key is C 4, and you want to assign it to A 0, because you don’t expect to play it often. If you want it to play back without transposition, you’ll have to adjust the Coarse Tune parameter. Calculating the right value for Coarse Tune can get tedious if you’re assigning a large number of samples. Fortunately, there’s a short cut. 1. Assign a sample root to a key range, either using the Lo, Hi, and Sample parameters or using the Assign soft button. 2. Highlight the value of the Coarse Tune parameter. 3. Press the Plus/Minus buttons at the same time. The value of Coarse Tune changes automatically. If the sample is assigned to one note, the PC3K sets Coarse Tune so that the note plays the sample without transposition. If the sample is assigned to a range of notes, the PC3K sets Coarse Tune so that the middle note of the range plays the sample without transposition. 14-6... -
Page 321: Building A Keymap
G 10 (the entire MIDI keyboard range). The Sample parameter will have a value of 999 Silence‐C 4. Now you’re ready to start assigning samples to key ranges within the keymap. We’ll assume that you’ve loaded samples with roots at C 1, C 2, C 3, etc. and that you plan to assign a root to each octave. To begin, press the Assign soft button. The display will prompt you to select a sample. Use the Alpha Wheel to scroll to one of your samples, or type its ID on the alphanumeric pad and press Enter. When you’ve found the sample you want to use, press the OK soft button. The display will say “Strike low key…” Trigger A 0 (MIDI note number 21, the lowest A on a standard 88‐note keyboard). The display will change to say “Strike High Key…”Now trigger F 1 (MIDI note number 29). The display will return to the Keymap‐editor page. The Key Range parameter will show A 0–F 1, and the Sample parameter will show the sample you selected when you started the range assignment. Each sample in a key range is automatically transposed based on each sample’s RootKey parameter so that it plays at the correct pitch on the keyboard relative to its root key (see Editing Samples on page 14‐9 for details on the RootKey parameter.) Other keys within the key range transpose the sample chromatically relative to the root key. Automatic transposition based on each sample’s RootKey is important if you want your sample to play in tune with other PC3K programs or other instruments. The PC3K makes this easy if your samples have the correct RootKey settings (as the PC3K’s factory samples do.) Generally you should set a keyrange so that the sample’s RootKey (displayed at the end of the sample name) is in the middle of the range. If you set a key range that does not cover the sample’s RootKey, the sample will have to automatically transpose by many semitones, and will likely not sound correct. Samples are also limited to an octave of upward transposition from the sample’s original pitch. If you set a keyrange too high based on the Root Key, some samples may not be able to transpose upward far enough to play in tune, and many keys may play the same note (the highest note that the sample can be transposed to.) Automatic transposition relative to the root key can be offset using the Coarse Tune and Fine Tune parameters on the EditKeymap page, (see Coarse Tune and Fine Tune on page 14‐4.) Continuing with the example, press the Assign soft button again. Select another sample root at the prompt, and press the OK soft button. Now trigger F# 1 for the Low Key prompt, and F 2 for the High Key prompt. At this point you’ve defined two key ranges, the first from A 0 to F 1, and the second from F# 1 to F 2. You can repeat the process as many times as you want, creating a ... - Page 322 Keymap and Sample Editing Building a Keymap Here’s a fairly important point that may or may not affect your keymap construction. Suppose you want to build a keymap that uses the same sample in several adjacent key ranges, and you plan to add a bit of detuning to the samples in each range. You might think that you could build the keymap first, then go into the Sample Editor and tweak the sample settings of each keyrange when the keymap is finished. Yes, but… Suppose you used the technique we described above to assign a vocal sample whose root was C 4 to a key range from A 3 to E 4. Then you assigned the same sample to a key range from F 4 to B 4. You might be surprised to find that when you finished the F 4–B 4 key range and the Keymap‐editor page reappeared, the current key range would not be F 4 to B 4, but A 3 to B 4! This is because the PC3K automatically merges adjacent key ranges that are identical (this is done to save memory). Therefore, some parameter must be different in each adjacent key range you create if you want to build keymaps using the technique we just described. So if you want to use the same samples in adjacent key ranges with, for example, minor pitch or volume modification, you should make those changes to the current sample on the Keymap‐editor page before assigning the next range. 14-8...
-
Page 323: Editing Samples
Keymap and Sample Editing Editing Samples Editing Samples To enter the Sample Editor, first select the program you wish to edit in Program mode. With the program selected, press the Edit button to enter the Program Editor. In the program editor the KEYMAP page will be selected (if not press the KEYMAP soft button.) With the KeyMap parameter selected on the KEYMAP page, press the Edit button again to enter the Keymap Editor. On the EditKeymap page, select the KeyRange parameter and use the Alpha Wheel or ‐/ + buttons to choose one of the available key ranges (if there is more than one keyrange.) You can edit the existing sample of a keyrange, or choose a new sample for the keyrange and edit that. When the Keymap parameter is selected you can hold the Enter button and trigger notes to select different key ranges. If you want to select a different sample, use the cursor buttons to select the Sample parameter. Use the Alpha Wheel to select a sample. Press the Edit button once more, and you’ll enter the Sample Editor. The sample will play through the effects of the current program. The name of stereo samples end with an S. To use a stereo sample, the Stereo parameter must be set to On in the Program Editor, and two keymaps must be selected, see The KEYMAP Page on page 6‐19 for details. There are two sample editing pages—MISC (Miscellaneous) and TRIM. The soft buttons for these pages are visible when you enter the Sample Editor. You can trigger notes at any time while you’re editing, to hear your changes as you make them. When you have finished editing your sample or samples, see the preview function on page 11‐17 for a way to automatically create a program and keymap using a sample or group of sample roots. The Miscellaneous (MISC) Page On the MISC page, you’ll set several parameters that affect the behavior of the current sample. These parameters affect the entire sample. The center of the top line displays the type of sample, either ROM BASE for factory samples or FLASH for user loaded samples. The right side of the top line displays the root number and RootKey of the sample. For stereo samples, L or R is displayed after the Root# parameter to indicate that you are viewing parameters for the left or ... - Page 324 Normal, Reverse Ignore Release Off, On Root Key The root key represents the keyboard key at which the sample will play back without transposition (that is, at the same pitch as the pitch of the original sample). Use the ‐/+ buttons or Alpha Wheel to select a RootKey note, or use the alphanumeric pad followed by the Enter button to enter a RootKey by MIDI note number. Pitch Adjust Use this parameter to change the pitch of the sample relative to the key from which it’s played. Setting a value of 100cts, for example, will cause the sample to play back one semitone higher than normal. This parameter is handy for fine tuning samples to each other if they’re slightly out of tune. Volume Adjust Uniformly boost or cut the amplitude of the entire sample. Alternative Start Volume Adjust (AltVolAdjust) This parameter sets the amplitude of the sample when the alternative start is used. See page 6‐21 for a discussion of AltSwitch. Decay Rate This parameter defines how long the sample takes to decay (fade) to zero amplitude (silence). Decay Rate affects each sample individually, and is in effect only when the amplitude envelope for the program (the Mode parameter on the AMPENV page in the Program Editor) is set to Natural. If Mode is User, the settings on the AMPENV page override the setting for DecayRate. DecayRate operates in two different ways, depending on the nature of the sample. If it’s a ROM sample or a Kurzweil‐format RAM sample, DecayRate takes effect in the loop portion of the sample, after all the attack stages of the amplitude envelope are complete. For non‐Kurzweil RAM samples, DecayRate takes effect as soon as the sample starts, regardless of the length of the attack stages. 14-10...
- Page 325 Keymap and Sample Editing Editing Samples Release Rate The release rate determines how long the sample will take to decay to zero amplitude when the note trigger is released. The higher the value, the faster the release rate.This release affects each sample individually, and is in effect only when the amplitude envelope for the program (the Mode parameter on the AMPENV page in the Program Editor) is set to Natural. In this case, the release begins as soon as the note is released.If Mode is User, the settings on the AMPENV page override the setting for ReleaseRate. To create an extended sample loop that will play data after the sample’s loop on key‐up, set the Alternative Start sample pointer after the sample end pointer, then set a relatively low value for the release rate. Loop Switch This parameter activates or deactivates the looping of the currently selected sample. When set to On, the sample will loop according to the settings on the TRIM page. When set to Off, the sample will play through to its End point and stop. Playback Mode (Playback) This parameter lets you modify the direction in which the sample is played. Set it to a value of Reverse if you want the sample to play from its End (E) point to its Start (S) point. Choose a value of Bidirectional to cause the sample to play from Start to End, then reverse direction and play again from End to Loop and back, repeating until the note trigger is released (this works only when the Loop Switch parameter is set to On). Alternative Sample Sense (AltSense) This provides a convenient way to activate the alternative start of a sample. When set to Normal, the alternative start will be used when the Alt Switch control is On (this is set on the KEYMAP page), or when the control source assigned to it is above its midpoint. When set to Reverse, the alternative start will be used when the Alt Switch control is Off, or when the control source assigned to it is below its midpoint. Ignore Release (IgnRelease) When set to a value of Off, the sample will release normally when the note trigger is released. ...
-
Page 326: The Trim Page
Keymap and Sample Editing Editing Samples The TRIM Page The TRIM page lets you set the Start, Alternative Start, Loop, and End points of the current sample. The top line indicates the Zoom and Gain settings. This Gain setting doesn’t affect the amplitude of the sample, just the view in the display. The right side of the top line displays the root number of the sample. If the sample is part of a group of sample roots, you can use the Chan/Layer buttons to scroll through each sample in the group. The four parameters on this page are Start (S), Alternative Start (A), Loop (L), and End (E). Selecting these parameters and adjusting their values enables you to modify how the sample plays back when notes are triggered. Each of these parameter points are expressed in individual samples. For example, a one second sample at a sample rate of 44,100Hz would have 44,100 values available to adjust for each of these parameters. There is a vertical line in the center of the display indicating the placement of the current parameter in the sample waveform. The sample waveform will move relative to the line when each parameter is selected or adjusted. The line remains in the center of the display, and the waveform shifts to indicate the new position of the point. Each parameter can be adjusted with the ‐/+ buttons, the Alpha Wheel, or the alphanumeric button pad followed by the Enter button. The Start (S) point determines the beginning of the current sample. You can truncate the beginning of the sample by increasing the value of the Start (S) parameter. You might do this to remove silence at the beginning of a sample, or to remove some or all of the attack. You can’t decrease the Start point of samples below zero. The Alternative Start (A) parameter lets you set a second, optional start or end point for the current sample. The Alternative Start will be used when the Alt Switch parameter on the KEYMAP page is set to On, or when it’s set to a specific control source and that control source is generating a value of more than +.5. (For example, if you assign MWheel as the control source for the Alt Switch parameter, the Alternative Start will be used when the Mod Wheel—or whatever control source you have set to send MWheel—is above its halfway point.) The Alternative Start can be set before, after, or at the same point as the Start or End. If you set the Alternative Start after the End, you can extend the play of looped samples. Normally, looped samples will play through to the End, then will loop back to the Loop point, and continue looping like this until the note is released, when they go into their normal release. If the Alternative Start is set after the End, looped samples will loop in the same way while notes are sustained. As soon as you release the notes, however, the samples will play through to the Alternative Start point before going into release. - Page 327 Keymap and Sample Editing Editing Samples the zero point of the display (the horizontal line in the middle of the waveform display.) Though adjusting these points visually is helpful, always listen to the sample and make the final settings based on what sounds best. You’ll notice an audible click in your sample loop if the ends of the waveform do not meet where the loop occurs. The closer you can get the two ends of the waveform, the better the sound quality of your loop will be. Using zero‐crossings for the Loop and End parameters may also help reduce clicks at the loop point, see Zero‐ and Zero+ below for details. The End (E) parameter sets the point at which the current sample will stop playback. Typically you’ll use this parameter to trim unwanted silence off the end of a sample, although you can use it to shorten a sample as much as you want. Note On Saving Samples: Trimmed portions of a sample are not saved. Trimmed portions before the Start (S), or Alternative Start (A) points (whichever has a lower value) will be lost upon saving, and whichever parameter had a lower value will have a value of zero the next time it is loaded (values for all other sample point parameters will be adjusted relatively.) Trimmed portions after the Alternative Start (A) or End (E) points (whichever has a higher value) will be lost upon saving. If you wish to save a copy of the original untrimmed sample, save the trimmed version under a different ID# (this will not use additional sample memory.) If you save a trimmed factory ROM sample at its original ID#, you can always restore the original version by deleting the modified version that you saved. To delete a sample, see OBJECT on page 11‐12, the Delete function. Zoom- and Zoom+ These buttons increase or decrease the resolution of the waveform display, enabling you to see a larger or smaller segment of the waveform of the currently selected sample. The top line of the display indicates the zoom position in terms of a fraction—for example, 1/256—which indicates the number of individual sample elements represented by each display pixel. A value of 1/256 means that each pixel represents 256 individual sample elements. The maximum zoom setting of 1 shows you a very small segment of the sample. The minimum setting of 1/16384 shows you the largest possible segment of the sample. Each press of a Zoom soft button increases or decreases the zoom by a factor of 4. Gain- and Gain+ These buttons increase or decrease the magnification of the currently displayed sample ...
- Page 328 Keymap and Sample Editing Editing Samples 14-14...
-
Page 329: Appendix A Specifications
Specifications MIDI Implementation Chart Appendix A Specifications MIDI Implementation Chart Model: PC3K Manufacturer: Date: 12/01/07 Young Chang Version 1.0 Digital Synthesizers Function Transmitted Recognized Remarks Default Memorized Basic Channel Changed 1 - 16 1 - 16 Default Mode 3 Mode 3... -
Page 330: Specifications
Specifications Specifications Specifications PC3K8 Height: (4.33") (11.00 cm) Depth: (13.98") (35.50 cm) Length: (54.33") (138 cm) Weight: (54 lb.) (24.50 kg) PC3K7 Height: (4.33") (11.00 cm) Depth: (13.98") (35.50 cm) Length: (47.75") (121.29 cm) Weight: (37.35 lb.) (16.94 kg) PC3K6 Height: (4.84") (12.30 cm) Depth: (13.98") (35.50 cm) Length: (39.37") (100 cm) -
Page 331: Appendix Bpc3K Bootloader
This appendix describes what the Bootloader can do and how you can use its functions. The first thing to understand is that PC3K executable programs and all object data reside on a file system contained inside the instrument. This file system is based on flash memory technology and will persist across power cycles. When the PC3K starts up, the Bootloader copies the synthesizer program into memory and executes it ‐ just like a PC “boots up” when you turn it on. The PC3K also stores its factory‐defined objects, and all of your own customized user objects on the file system. The Bootloader program itself is not found on the file system. Instead, it resides in a ROM chip that cannot be erased, and therefore is permanently installed in your PC3K. Using the Bootloader Menu Normally the Bootloader program will do its tasks and hand over control to the synthesizer program automatically. If you want to interact with the Bootloader itself, hold down the Exit button (to the right of the display) while turning the power on (while the message “Initializing Scanner” is displayed on the front panel). Instead of completing the boot process, the Bootloader will display its main menu page on the screen: PC3K Boot Loader Version 1.0 System System System PC3K Update Diags Reset Utilities Use the soft buttons underneath the display to choose an action. Press this soft button to run the PC3K from the Boot Loader without Run PC3K restarting the PC3K. Press this soft button to update the entire system (OS, objects, etc.) from a System Update .KUF file (Kurzweil update file.) You will be prompted to choose a USB ... -
Page 332: System Update (Pc3K Software, Objects, Etc.)
System Utilities This offers a menu of file system functions that can be useful in maintaining your system or diagnosing software problems. You can also enter the Bootloader menu from the Master Mode menu during normal operation. System Update (PC3K Software, Objects, Etc.) The most common use of the Bootloader menu is to update your PC3K using new versions of software and objects supplied by Kurzweil. Updates for the PC3K come in .KUF files (Kurzweil update files,) which can include updates to the PC3K operating system, factory objects, and firmware. New versions will be made periodically as we add new features or improve performance; download these free upgrades from our website at www.kurzweil.com. Press the System Update soft button to update the entire system (OS, objects, etc.) from a .KUF file. You will be prompted to choose a USB device and locate a .KUF file. Press the USB Device soft button to update from a USB device (such as a thumb drive) plugged into the USB storage port. Press the PC USB soft button to update from a USB cable connected to a computer to the PC3K’s USB Computer port. To use a USB device you’ll need a valid USB device and a computer with a USB type A port. Most modern Windows and MacOS computers support USB devices in a very straightforward way. You should be able to drag and drop the PC3K files right onto the USB device directory. After the files are copied, remove the device from the computer and place it in the USB storage port on the rear panel of the PC3K. A USB connector will only fit into the port if oriented properly, so don’t force it into the port, as this may damage your PC3K or USB device. If you are having trouble inserting your USB connector into the port, try flipping the connector over. To use the USB computer port, you should plug the USB cable into the PC3K’s USB computer port and to the computer. After you enter the bootloader menu, the computer should recognize that a new device is available having the name “KurzweilPC3K”. Files can be dragged and dropped directly to this device icon and will be immediately available on the PC3K. Once you have selected the desired USB type, use the PC3K’s file directory browser to find the .KUF file that you wish to use for the system update. With the file selected, press the OK soft button to install the update. When installation is complete, press the OK soft button to return to the Boot Loader main menu, then press the Run PC3K soft button to run the PC3K with the updated software. Run Diags - PC3K Diagnostics Utility The PC3K Diagnostics Utility can run specific hardware checks on PC3K systems. Most of the ... -
Page 333: System Utilities
System Utilities Format Flash Press the soft button labeled Format Flash to reinitialize the internal file system. This deletes all objects and the current OS. (If possible, remember to first save your work in the Storage menu. Once deleted, the files are completely removed from the PC3K and there is no way to retrieve them.)This will delete everything that was stored internally on the PC3K, and leave a clean, empty file system ready for use. It is possible (though not likely) that the PC3K file system can become corrupted due to hardware failure or power outage during certain operations. This will result in the Boot Loader being unable to bring up the PC3K system correctly. In such a circumstance, the Boot Loader will take over control and present its usual menu. If the file system is completely corrupted, it will not be possible to reconfigure without first formatting the internal flash memory. Install Module This soft button brings up the Update Image page, where you can install individual PC3K modules. Most of the time you won’t need this page, but Kurzweil support may advise you to install individual modules if you’re having problems with your PC3K. Restore Older If you have updated the PC3K software but wish to return to the earlier version, press the Restore Older soft button. You will be brought to the Restore Older page and asked to choose the image to restore. Note that only one version of the previous image is available to be restored. If you’ve restored once, another restore will bring back the most recently updated version. B--3... - Page 334 B--4...
-
Page 335: Appendix C Changing Pc3K Voltage
Appendix C Changing PC3K Voltage In most cases, you will not need to change the voltage on your PC3K. However, since different countries use different standard voltage settings, there may be times when you need to make the change. The PC3K’s fuse holder (where the power cable plugs in) is where you change the voltage. The marks on the fuse holder are 115 and 230. 115 should be used for voltages from 100 to 125. 230 should be used for 200 to 240. Generally, North America uses 115, and Europe and Asia/ Australia use 230, but there are exceptions to this general rule. The PC3K uses two 250 mA fast blow fuses for 230V or two 500 mA fast blow fuses for 115V. These can be either 1.25ʺ X 0.25ʺ size or 5 mm X 20 mm size fuses. Extra fuses are not provided, so you will need to acquire the correct fuse before you change the voltage. Removing the fuse holder Remove the power cord. Pry open the fuse holder cover. Use a thin tool inserted into the hole where the red voltage indicator shows through. C--1... - Page 336 Pull up gently to open the fuse holder cover. The cover is hinged next to the power cord connection. Pry out the fuse holder. C--2...
- Page 337 If there is only one fuse in the fuse holder, you must remove the metal clip on the empty side. The clip just pulls off: C--3...
- Page 338 The clip removed from the fuse holder: Remove the fuse. Install two 250 mA fast blow fuses for 230V or two 500 mA fast blow fuses for 115V, one on each side of the fuse holder. The fuse holder will accept either 1.25ʺ X 0.25ʺ size or 5 mm X 20 mm size fuses. If using 5 mm X 20 mm size fuses, install them towards the inside end of the fuse holder near the metal pins, as shown here: Replace the fuse holder in the power entry module with the indicator for the desired voltage towards the edge of the module, away from the power switch. Close the fuse holder cover, and check that the desired voltage indication shows through the hole. Replace the power cord. C--4...
-
Page 339: Appendix Dpc3K Objects (V 1.31)
PC3K Objects (V 1.31) Programs Appendix D PC3K Objects (V 1.31) Programs Press the Info soft button for controller information. Program Program Program Standard Grand Supertramp Wurly Lord’s B3 Mwheel Studio Grand FlydDarkside/Wah Ole Time Gospel RubensteinSWComp Whatʹd I SayWrly FooledAgnVox Horowitz Grand DeepFuzz Wurly Boston Screamer NYC Jazz Grand No Quarter Pnt Power Pop Horns Pop Power Piano MistyMountain EP Sax/Trumpet Sctn ColdPliano UK Pop CP70 BigBand/AMradio Grand ʺEvansʺ AcidJazzVelFlute MeanSalsaSection Blues Piano 1974... - Page 340 PC3K Objects (V 1.31) Programs Program Program Program Cathedral Vox NYC Kits Extreme Hardstrk Classic Comp LA Kits Fagen Phaser Fitty‐Fitty Lead Rock Kits RoyalScam Rhds Big Old Jupiter Roots/Indie Kit AustnCtyLmtsWrly 9Yards Bass Kikz/Snarz MW BrightDynamicWly BowhSaw Bass EarthKikz n Snrz 70sWahLeslieEP ARPesque Bass Anazlog Machine 3 Dog Pianet DaywalkerBassMW Produced Kit ʹ08 Classic DX Rhds Harpolicious Natural Perc Rich EP+Pad Slo QuadraPad Rhythm 4 Reel 90ʹs FM Shimmer Phase Shimmer New Marimba ...
- Page 341 PC3K Objects (V 1.31) Programs Program Program Program Doors Vox SynBell Morph 60s Rock&Soul Indagardenoveden Perc>Morph>Bass Headhunters Kit Animals Vox EvilOctaveWheel FranticHouseDrms Magic Wolf TranceRiff Dance/Marilyn Farfisa 1 SickoSynco Mellow Marimba VASTBars1‐3,8&9 Buzzy Strings Skullophonic 1‐Note PowerRiff VA1Saw/Sqr/Pulse Percussionist Miami Pop Horns Airy Impact Shiny Sparkles 80sPopOctaveSax Spiderʹs Web HybridTuned Perc BuenaVista Brass ARP Big Synth Dynamic Perc Tenor Express Class Pad Cageʹs Ensemble...
- Page 342 PC3K Objects (V 1.31) Programs Program Program Program VA1DstPulseWheel Disco Divebomb Dr.Johnʹs RMI NewOrderPulses MutronTweetyPerc Phase sw Organ VA1 DetunedPulse Disgusting Bass Spaced Out Bach VA1 Detuned Saws VA1ShaperSweeper Tobacco Road RMI VA1 Detuned Sqrs ElectroPercSynth Traffic EP VA1 Emerson Lead MWhlMayhemBass Tekno Tempo Echo MwhlClubsweeper ElectronicaSplit Trick of thʹTail Innervate HiPassMWhlBlips RMI Clav WAH ChemBrosBassLead Plasma Cannon Dream On Session UFO Pad 32 Layer Bass! LightYearStrings VA1SliderMorphSQ Yesesis Tron Str Funkensteinz ARP...
- Page 343 PC3K Objects (V 1.31) Programs Program Program Program Cosmic Sus Pedal Perc Atk Strings Ensemble WWinds DigitalMoonscape William Tell A BassClar/Clar/Fl FalgorʹsLament William Tell B Solo Fr Horn BPM BionicStrngs Orch w/ Bells On Ensemble Fr Horn Swell & Hold Winds & Esp Str Lead French Horn Bowie/Heroes Pad ʺHorns,Winds&Strʺ Dyn Orch Fr Horns MeanStereoSweep TripleStrikeOrch HornSect Layer PulseVowel Tutti Orchestra Solo BrtTrumpet Winds & Strings StBaroque Harpsi Hard Trumpet ʺWinds, Horn & Str ʺ String Continuo Lead Trumpet More Brass & Str VivaldiOrchestra Soft Trumpet...
- Page 344 PC3K Objects (V 1.31) Programs Program Program Program Solo Cello fast Bells Across Lead & Adagio Solo Cello slow CelesteGlockHarp Adagio Split Solo Basso 1 Chime Bell Adagio Bs/Vln I Solo Basso 2 slo Carillon TripleStrike Str String Quartet Adagio Strings AdagioTutti 8ves Solo Harp Adagio Divisi Str AdagioDiv 8ves Orch Harp 1 Lead Strings Adagio Octaves Delicate Harp Lead Divisi Str Lead & 8vaAdagio HarpArps & Gliss Fast Strings Dual Slow Split Slo Orch Chorus Fast Divisi Str LeadTuttiMix B Pipe Stops Aggresso Strings Lead Strings Split...
- Page 345 PC3K Objects (V 1.31) Programs Program Program Program Touch Thick Mix Fast Tremolo Ezra’s Burner More Viola Legato Violins I HotTubeGospel SloStr Prs Swell Legato Violins II B3 Midrange Rite of Strings Legato Violin div Blues & Gospel Adagio Violins I Legato Violas Prog B3 Perc 2 Adagio ViolinsII Legato Viola div Prog B3 Perc 3 AdagioViolin div Legato Celli Tube B3 Perc Adagio Violas Legato Celli div Prog B3 Perc 4 AdagioViolas div Legato Bassi BrightTubeScream Adagio Celli Legato Bassi div Zepelin Solo Adagio Celli div Legato Tremolo ...
- Page 346 PC3K Objects (V 1.31) Programs Program Program Program J’s Comper Fisher’s VAST B3 1007 The Way It Is Brother Jack Ripply Six 1008 AlphaCentauri Model One Ripple Siner 1009 SynOrcWhaleCall Thick Gospel Ripple Thump 1010 Downes Lead Growler B Ripple RevDrum 1011 Minipulse 4Pole Ready 2 Rock Dark RevDrum 1012 BPM Lead Thimmer SpacerLead 1013 GatedSqrSweepBPM The Real ABC Ripple Sine2 1014 BPMEchplexPad ...
-
Page 347: Setups
PC3K Objects (V 1.31) Setups Setups SETUP SETUP SETUP TeknoRiff Sw 1‐8 Latin Danzhall GrandPad & Magic BluesJam in G Metal TinklySweepySpcy Techno Substance Growth Pad Pulsing Anthem Acoustic Split Morriconeʹs Fall PedHold PnoSolo Slap/EP Split Strings Old&New Rhythm Pad SW Black Cow Split MonoBass & ArpSt The Wonders Some Loving Splt Jazz Bass/Piano Drops of Jupiter Piano & Pad Bass + KB3 Split No Complaints PedalsModeW/Beat Zep KB3/Pianet Brighton Lush AnaBanana ElectricBass/EP Nylon and Ivory Sanctuary ... - Page 348 PC3K Objects (V 1.31) Setups SETUP SETUP Mwhl Blips ARP Hazel Jam Mwheel DJ Arp Internal Voices Margarita Split Clear Setup Constant Gardener Default Setup Run Rago Run Get Berni Bionic Rock Pea Soup Walking Arps Eminence in C Vampire Nightclub Kurz Jacinto Music Bed Octavia Rosin Rhythm Insanity Bells LowChunkerGroove Hold Sum Notes Reich Piano AnaBouncer The Factory FattyFatFat Brass Bouncer Electric Dancer Treso‐Pulser Mellow Tripper SpacePulser Mood Arp C2 Strum Thurmond...
-
Page 349: Effect Presets With Algorithms
PC3K Objects (V 1.31) Effect Presets with Algorithms Effect Presets with Algorithms How to Use These Tables Each effect preset in the PC3K is based on an effect algorithm from the Kurzweil KSP8 effects processor. To make the fullest use of the PC3K’s effects, you will need to download a copy of the KSP8 Algorithm Reference from the Kurzweil Music Systems website. This book provides extensive detail on all effects parameters. For ease of use, the algorithms are indexed and linked by name and number. For example, to find information on the available parameters for PC3K effects preset “1 Small Wood Booth,” first refer to the chart below for the name and number of the preset’s underlying algorithm. In this case, the KSP8 algorithm is “4 Classic Place.” The description of the Classic Place algorithm begins on page 19 of the KSP8 Algorithm Reference, and its 3 pages of parameters are described starting on page 21 of the KSP8 Algorithm Reference. Reverbs Booth/ Small Wood Booth alg 4 Classic Place Ambience Natural Room alg 5 Classic Verb PrettySmallPlace alg 4 Classic Place NiceLittleBooth alg 1 MiniVerb Sun Room alg 5 Classic Verb Soundboard alg 7 TQ Verb... - Page 350 PC3K Objects (V 1.31) Effect Presets with Algorithms The Comfy Club alg 9 Diffuse Verb Spitty Drum Room alg 7 TQ Verb Stall One alg 7 TQ Verb Green Room alg 7 TQ Verb Tabla Room alg 12 Panaural Room Large Room alg 7 TQ Verb Platey Room alg 14 Grand Plate Bathroom alg 5 Classic Verb Drum Room alg 12 Panaural Room Small Dark Room alg 12 Panaural Room Real Room alg 5 Classic Verb Brt Empty Room alg 7 TQ Verb Med Large Room alg 12 Panaural Room Bigger Perc Room alg 7 TQ Verb Sizzly Drum Room alg 5 Classic Verb Chamber Live Chamber alg 11 OmniVerb...
- Page 351 PC3K Objects (V 1.31) Effect Presets with Algorithms Classic Chapel alg 5 Classic Verb Semisweet Hall alg 5 Classic Verb Pipes Hall alg 404 Chorus<>Reverb Reflective Hall alg 5 Classic Verb Smoooth Hall alg 5 Classic Verb Empty Stage alg 7 TQ Verb...
- Page 352 PC3K Objects (V 1.31) Effect Presets with Algorithms Bloom Plate alg 9 Diffuse Verb Clean Plate alg 9 Diffuse Verb Plate Mail alg 11 OmniVerb RealSmoothPlate alg 9 Diffuse Verb Classic Plate alg 5 Classic Verb Weighty Platey alg 5 Classic Verb...
-
Page 353: Delays
PC3K Objects (V 1.31) Effect Presets with Algorithms Diffuse Gate alg 9 Diffuse Verb Acid Trip Room alg 10 OmniPlace Ringy Drum Plate alg 104 Gated LaserVerb Oil Tank alg 104 Gated LaserVerb Wobbly Plate alg 104 Gated LaserVerb Pitcher Hall... - Page 354 PC3K Objects (V 1.31) Effect Presets with Algorithms Wide Slapbk 76ms alg 191 Dual MovDelay TiteSlapAmb 50ms alg 191 Dual MovDelay 33ms Ambience alg 191 Dual MovDelay 17ms Ambience alg 191 Dual MovDelay Stereo Delay ms alg 151 4‐Tap Delay StereoFlamDelay alg 191 Dual MovDelay Cheap Tape Echo alg 154 Spectral 4‐Tap Better Tape Echo alg 171 Degen Regen Stereo Tape Slap alg 171 Degen Regen Dub Delay ms alg 190 Moving Delay 4‐Tap Delay BPM alg 150 4‐Tap Delay BPM 4‐Tap Dly Pan ms alg 151 4‐Tap Delay SemiCircle 4‐Tap alg 151 4‐Tap Delay 8‐Tap Delay BPM alg 152 8‐Tap Delay BPM Multitaps ms alg 156 Complex Echo Diffuse Slaps alg 156 Complex Echo OffbeatFlamDelay alg 150 4‐Tap Delay BPM...
- Page 355 PC3K Objects (V 1.31) Effect Presets with Algorithms Ducked Delay alg 174 Gated Delay Drum+Bass Zapper alg 174 Gated Delay 3BandDly Drums=! alg 173 3 Band Delay Warped Echoes alg 191 Dual MovDelay Ween‐vox alg 190 Moving Delay L:Flange R:Delay alg 191 Dual MovDelay 2Dlys 1Chr 1Flng alg 192 Dual MvDly+MvDly Chorus CHORUS Basic Chorus alg 202 Dual Chorus 1 Smooth Chorus alg 202 Dual Chorus 1 Chorusier alg 202 Dual Chorus 1 Ordinary Chorus alg 202 Dual Chorus 1 SlowSpinChorus alg 202 Dual Chorus 1 Chorus Morris alg 202 Dual Chorus 1 Everyday Chorus alg 202 Dual Chorus 1 Thick Chorus alg 202 Dual Chorus 2 Soft Chorus...
-
Page 356: Flange
PC3K Objects (V 1.31) Effect Presets with Algorithms Flange FLANGE Big Slow Flange alg 225 Flanger 1 Squeeze Flange alg 225 Flanger 1 Sweet Flange alg 225 Flanger 1 Throaty Flange alg 225 Flanger 1 PseudoAnaGtrFlng alg 225 Flanger 1 Flanger Double alg 225 Flanger 1 Wetlip Flange alg 225 Flanger 1 Simply Flange alg 225 Flanger 2 Analog Flanger alg 225 Flanger 2 Soft Edge Flange alg 225 Flanger 2 Ned Flangers alg 225 Flanger 1 Wispy Flange alg 225 Flanger 1 Crystal Flange alg 456 St Flange+Delay NarrowResFlange alg 452 Flange<>4Tap TightSlapFlange alg 450 Flange+Delay Flanged Taps... -
Page 357: Trem / Panner / Spatial
PC3K Objects (V 1.31) Effect Presets with Algorithms Fast&Slow Phaser alg 250 LFO Phaser Wawawawawawawawa alg 253 SingleLFO Phaser Slow Swish Phase alg 253 SingleLFO Phaser Slippery Slope alg 385 Frequency Offset Static Phaser 1 alg 255 Manual Phaser Static Phaser 2 alg 255 Manual Phaser Static Phaser 3 alg 255 Manual Phaser Static Phaser 4 alg 255 Manual Phaser Static Phaser 5 alg 257 Allpass Phaser 4 Slow Riser alg 258 Barberpole Comb BarberPole Notch alg 258 Barberpole Comb BarberPole Peak alg 258 Barberpole Comb All The Way Down alg 258 Barberpole Comb Westward Waves alg 385 Frequency Offset Trem / Panner / Spatial TREM/ Tremolo BPM... - Page 358 PC3K Objects (V 1.31) Effect Presets with Algorithms DirtyRotors fast alg 292 VC+Dist+HiLoRotr DirtyRotors slow alg 292 VC+Dist+HiLoRotr MoreDistRotor f alg 293 VC+Dist+1Rotor 2 MoreDistRotor s alg 293 VC+Dist+1Rotor 2 HeavyDistRotor f alg 294 VC+Dist+HiLoRot2 HeavyDistRotor s alg 294 VC+Dist+HiLoRot2 Res Rotor1 fast alg 295 Rotor 1 Res Rotor1 slow alg 295 Rotor 1 FullRotors4 fast alg 296 VC+Dist+Rotor 4 FullRotors4 slow alg 296 VC+Dist+Rotor 4 MegaVCRotors8 f alg 298 Big KB3 Effect MegaVCRotors8 s alg 298 Big KB3 Effect Distortion DIST Classic Gtr Dist alg 310 Gate+TubeAmp Crunch Guitar alg 310 Gate+TubeAmp SaturatedGtrDist alg 310 Gate+TubeAmp Mean 70ʹsFunkGtr...
-
Page 359: Dynamics
PC3K Objects (V 1.31) Effect Presets with Algorithms Shaper‐>Flange alg 321 Flange<>Shaper Shaper‐>Reverb alg 322 Shaper<>Reverb Aliaser alg 308 Quantize+Alias Dynamics DYNAMICS HKCompressor 3:1 alg 330 HardKneeCompress HKCompressor 5:1 alg 330 HardKneeCompress SK FB Comprs 6:1 alg 331 SoftKneeCompress SKCompressor 9:1 alg 331 SoftKneeCompress SKCompressr 12:1 alg 331 SoftKneeCompress Compress w/SC EQ alg 332 Compress w/SC EQ Compress/Expand alg 341 Compress/Expand Comprs/Expnd +EQ alg 342 Comp/Exp + EQ Expander alg 340 Expander Simple Gate alg 343 Gate Gate w/ SC EQ alg 344 Gate w/SC EQ 3Band Compressor alg 336 3 Band Compress 3Band Compress2... - Page 360 PC3K Objects (V 1.31) Effect Presets with Algorithms Phunk Env Filter alg 360 Env Follow Filt Synth Env Filter alg 360 Env Follow Filt Bass Env Filter alg 360 Env Follow Filt EPno Env Filter alg 360 Env Follow Filt LFO Sweep Filter alg 362 LFO Sweep Filter DoubleRiseFilter alg 362 LFO Sweep Filter Circle Bandsweep alg 362 LFO Sweep Filter TripFilter alg 362 LFO Sweep Filter Resonant Filter alg 363 Resonant Filter Dual Res Filter alg 364 Dual Res Filter 2 Band Enhancer alg 370 2 Band Enhancer 3 Band Enhancer alg 371 3 Band Enhancer Extreem Enhancer alg 371 3 Band Enhancer HF Stimulator alg 372 HF Stimulate 1 Ring Modulator alg 380 Ring Modulator PitcherA alg 381 Pitcher Pitcher B...
-
Page 361: Chorus / Combi
PC3K Objects (V 1.31) Effect Presets with Algorithms Contact alg 387 WackedPitchLFO Drum Frightener alg 387 WackedPitchLFO Mad Hatter alg 387 WackedPitchLFO Fallout alg 387 WackedPitchLFO Ascension alg 387 WackedPitchLFO Chorus / Combi CHORUS BasicChorusDelay alg 400 Chorus+Delay COMBI Chorus PanDelay alg 400 Chorus+Delay Chorus & Echo alg 400 Chorus+Delay CDR Lead alg 403 Chor+Dly+Reverb CDR Lead 2 alg 403 Chor+Dly+Reverb Chorus Delay 2 alg 400 Chorus+Delay Doubler & Echo alg 400 Chorus+Delay Chorus Booth alg 403 Chor+Dly+Reverb ChorusSmallRoom alg 403 Chor+Dly+Reverb... -
Page 362: Flange / Combi
PC3K Objects (V 1.31) Effect Presets with Algorithms SpeeChorusDeep alg 400 Chorus+Delay Chorus Room alg 404 Chorus<>Reverb Chorus Smallhall alg 404 Chorus<>Reverb Chorus Med Hall alg 404 Chorus<>Reverb Chorus Big Hall alg 404 Chorus<>Reverb Chorus Echoverb alg 402 Chorus<>4Tap Chorus Bass Room alg 404 Chorus<>Reverb New Chorus Hall alg 404 Chorus<>Reverb Floyd Hall alg 404 Chorus<>Reverb Into The Abyss alg 403 Chor+Dly+Reverb BroadRevSlapback alg 403 Chor+Dly+Reverb Carlsbad Cavern alg 403 Chor+Dly+Reverb Chr‐>GtrDst‐>Chr alg 317 TubeAmp<>MD>Chor Thatʹs No Moon!! alg 403 Chor+Dly+Reverb Laser Amalgam alg 405 Chorus<>LasrDly Cut it out!! CDR alg 403 Chor+Dly+Reverb Chor‐Delay Booth... - Page 363 PC3K Objects (V 1.31) Effect Presets with Algorithms Flange Hall alg 454 FlangeDlyBigHall alg 453 Flan+Dly+Reverb Flange Theatre alg 454 FlangeTap Synth alg 452 Flange<>4Tap Flange Room alg 453 Flan+Dly+Reverb Flange Echo alg 452 Flange<>4Tap Flange 4 Tap alg 452 Flange<>4Tap Flange Hall 2 alg 454 Flange‐Dly Hall alg 453 Flan+Dly+Reverb Flange Delay alg 450 Flange+Delay Mecha‐Godzilla alg 451 Flange+4Tap Industro‐Flange alg 453 Flan+Dly+Reverb Panning FDRoom alg 453 Flan+Dly+Reverb Drum&Bass FlgDly alg 451 Flange+4Tap Laserflange alg 455 Flange<>LasrDly Pewter FlangeVrb alg 454 ...
-
Page 364: Effect Chains
PC3K Objects (V 1.31) Effect Chains Effect Chains Chain Chain Chain Little Booth Stereo Chorus Ring Modulation Soundboard Dense Chorus Frequency Offset Small Dark Room Soft Flange Lazer Tag Flange Sax Chamber Wetlip Flange Fallout PitchLFO Small Hall Flanged Taps Reverse Reverb Medium Hall Slow Deep Phaser Reverse Reverb 2 Green Room Fast&Slow Phaser Oil Tank Reverb Opera House Phaser EGT Laser Reverb Real Nice Verb Thin Phase Sweep Gated Laserverb Empty Stage Tremolo BPM ... - Page 365 PC3K Objects (V 1.31) Effect Chains Chain Chain Chain Live Room gshot vrb Hot Leslie 122e String Chamber deep part1 Hot Leslie 122f Fife Stage DblSloFlangeCmp Soul Leslie122 4 Live RecitalHall alphacentauri1 Leslie B 122 AbbeyBrasHall2 Timbered Taps 2 Joey Leslie 122 Smooth Long Hall GospelDistLeslie Hot Leslie 122g kickcmp3 GimmeSomeLeslie Hot Leslie 122h kickcmp4 DF OrganRoom TapChorus Leslie snarcmp4 GimmeSomeLesl SlowPhasedLeslie kickcmp5 GimmeSomeLesl2 Nonkb3 A Bright Hat Room AcceleratorLes 2...
- Page 366 PC3K Objects (V 1.31) Effect Chains Chain Chain Chain Cathedral Vx SynthLead HeavyBuckers BurningTubes5 SynthBassAmp ProBassComp PunchBassAmp MosqueySwirl NYCTripStrings RevverLeslie PadFX2 ProBassComp2 Bradleyʹs Barn 1 PadFX1 DirtLordAmp Bradleyʹs Barn 2 Chr & Echo Setup Aux Verb LA2A for Strings Vocals w FX Setup Aux DDL ChrsDly DrySynthCDR Early Reflection RealDrmComp WetSynthCDR Pad Depth Pt1 RealDrmComp2 VibesRoom Gunshot Verb TiteDrmComp ...
- Page 367 PC3K Objects (V 1.31) Effect Chains Chain Chain Chain Small Dark Room Deep FuzzBass 1 ShortPnoRvb31 Snarcmp12 Eber Bass St CHDly Kickcmp13 SynFatener& Ech2 Synphase1 BeastieDrums CP80Enhanc1 St CHDly Clunker13 FisherʹsHarm Mic Walrus EP Funksnare9 AbbeyPianoHall2 EPChr16 Funksnare8 Medium Hall 2 Siberia EPDistPhase1 Fagen Phaser Deep Fuzz 5 RayEP 1 SmallWurly Flange Echo 2 Deep Fuzz 1 Basic WurlyEP ARPMosque Room Deep Fuzz 31 Cheese Horns...
- Page 368 PC3K Objects (V 1.31) Effect Chains Chain Chain Chain BassFleaCompMu Elton1 EPChr6 Chr & Echo 2 Aux Chamber PnoEnhanc3 BasicCDR2 BowiePno1 SynEnhancement ShaperFuzzLead 2 BluesPnoCmpRvb 1 CompKik11 AM Big Band New Gtr 31 VintChamber Clunker20 Soundboard 3 SmallWurly2 PadFX3 OmniStage Deep FuzzPnt 1 SynFatener& Ech5 MedPlateJazFlute Comp70 MarleyClav1 MistyMntn EP 2 FooldAgainVox Flange Echo 4 PnoEnhanc22 CompKik111 Deep Fuzz Clav 3 ClavPhase1 ...
- Page 369 PC3K Objects (V 1.31) Effect Chains Chain Chain Chain Aux Echplex Snarcmp112 RayEP 1 Farfisa1 Snarcmp113 EnhanceComp121 Good Leslie33 EnvKickcmp1 Clunker IIa Zep Leslie Kickcmp602 Pad Depth Pt1 Snarcmp801 Snarcmp112 AuxChorusHall kickcmp401 HipHop Drms101 TechnoSyn1 Deep Fuzz 6 PnoCmpSndBoard10 Synphase102 SynEnv4 Epicsnare1 CompDelay SmallComp9 JumpSynth CompMeltrn KickComp201 Funksnare88 ARP GoodLeslie 9 Kickcmp441 Triplet delay...
- Page 370 PC3K Objects (V 1.31) Effect Chains D-32...
-
Page 371: Appendix E Pc3K Legacy File Conversion
PC3K Legacy File Conversion Object Types and Conversion Details Appendix E PC3K Legacy File Conversion The PC3K can load objects from older Kurzweil K series products, as well as objects from the PC3. Loaded objects are converted to object types native to the PC3K (see below for object types that can be converted.) Some object parameters cannot be converted and must be adjusted by the user after conversion (see object types below for details.) Objects that use the K series ROM soundset can be converted after installation of the optional K2661 ROM compatibility file (available as a free download from www.kurzweil.com.) Only legacy objects ending with the file extension .K26, .K25, .KRZ or .PC3 can be loaded and converted. Object Types and Conversion Details Soundblock (Sample Objects) All K series sample objects can be loaded. The PC3K is unable to convert the sample skipping parameter (SmpSkp,) so samples converted for use in the PC3K can only be transposed upward by one octave. Keymap Objects All K series Keymap objects can be loaded, all parameters will be used or converted to PC3K specific parameters. Program Objects Most K series Program objects can be loaded, but FX are not converted and must be set by the ... - Page 372 PC3K Legacy File Conversion Object Types and Conversion Details...
- Page 373 Index Attack parameter (ASR) 6‐40 Attack Portamento parameter (Common) 6‐35 Attack Time and Level parameters (AmpEnv) 6‐42 Audio cables 2‐2 Numerics AutoPan 9‐22 50% Weight 9‐22 Bank Buttons 3‐2 Bank Select A/Dry‐>B parameter 9‐11 MIDI Receive page 10‐9 A‐>B cfg parameter 9‐11 Banks 3‐2 About 11‐16 Basic editing 5‐1 Adding layers 6‐51 Basic MIDI channel 10‐6 additional sounds 1‐5 Bass Freq 9‐13 Adjust parameter (EnvCtl) 6‐45 Bass Gain 9‐13 Adjusting sample volumes 14‐4 Battery 1‐4 Bipole 9‐24 Automatic Preview in a Program 11‐17 Boot Loader 1‐4 Algorithms D‐11 Bootloader B‐1 Editing 6‐18 Bottom line of display 3‐6 All Controllers Off 10‐6 Bounce All Notes Off 10‐6 Song Mode TRACK Page 12‐25 Alpha Wheel 2‐7, 3‐9 Brake 9‐21 Alphabetic entry 3‐9, 5‐3 Breath 2‐4 Alphanumeric pad 3‐9 breath 1‐5 Alt Input for Algorithms 6‐17 Brightness 2‐5...
- Page 374 Clock 11‐15 Dialogs setting 2‐7 Save 5‐3 Source 11‐10 diamond icon 5‐4 COMMON Page Diff Amt 9‐13 Song Mode 12‐19 Diff Gain 9‐23 Common parameters 6‐34–6‐61 Diff Scale 9‐11 Compare 5‐7 DiffBassF 9‐23 Compatibility DiffBassG 9‐23 K Series Objects E‐1 Digital audio output 2‐3 Complex Echo 9‐12 Digital Output Mode 11‐9 Compressors 9‐14 Digital Output Volume 11‐9 Configuring control sources 6‐9 Directories 13‐3 Connecting MIDI 2‐3 Disk Drive Information 13‐3 continuous pedals 1‐5 Disk format requirements 13‐1 Contour 9‐18 Disk Mode 5‐6, 13‐1 Contrast 2‐5 Disk mode 4‐3 Control Setup 6‐9 Display 3‐6 Setup Editor 7‐2 Dist Drive 9‐19 Control sources Distortion 9‐19 Configuring 6‐9 Dly Coarse 9‐17 FUNs 6‐40 Dly Fine 9‐17 Key tracking 6‐15...
- Page 375 Effects button 5‐7 Fine adjust 6‐15 Effects bypass 5‐7 Flanger 9‐17 Effects mode 4‐3 Formatting a USB Device 13‐3, 13‐12 Effects Parameters 9‐10 Freeze Pedal parameter (Layer) 6‐25 Electrical grounding 2‐2 FreqScale 9‐14 Enable MIDI channels 10‐13 Front panel navigation 3‐6 Enable parameter (Layer) 6‐24 FUN page (Program Editor) 6‐40 Enable Sense parameter (Layer) 6‐24 Function soft buttons 6‐51 Enhancers 9‐14 fuses C‐1 Env Rate 9‐19 FX bypass 5‐7 Env Time 9‐16 FX Mode on Master Mode MAIN page 11‐2 ENV2 and ENV3 pages (Program Editor) 6‐43 FXMod Diagnostic 9‐24 ENVCTL page (Program Editor) 6‐44 Envelope control 6‐44 Envelope control parameters 6‐45 Envelope Filter 9‐18 Gate Time 9‐15 Envelopes 6‐41, 6‐43 Gated Ducking Delay 9‐13 EQ Morpher 9‐14 Gates 9‐14 EQ page (Program Editor) 6‐70 General MIDI 11‐11 EQs 9‐13 Drum Remap 6‐32, 11‐2 Equalizers 9‐13 Globals parameter (Common) 6‐35, 6‐61 Erase Grab Song Mode TRACK Page 12‐24 Song Mode TRACK Page 12‐29...
- Page 376 Import Layer soft button 6‐51 Layers Importing layers 6‐51 Adding 6‐51 In Select 9‐23 Deleting 6‐51 In/Out parameter 9‐10 Duplicating 6‐51 InfinDecay 9‐12 Importing 6‐51 Info moving between in multi‐layer programs 3‐11 Export 13‐12 Muting 5‐7 INFO Editor 6‐52 LCD 3‐6 INFO soft button Legacy object conversion E‐1 Program Editor 6‐52 Legato play parameter (Common) 6‐34 Info soft button 2‐8, 6‐10, 8‐2 Leslie effect 9‐20 Insert LFO Dpth 9‐16 Song Mode TRACK Page 12‐26 LFO Filter 9‐19 Intonation key 11‐8 LFO LRPhs 9‐16 Intonation tables 11‐7 LFO page (Program Editor) 6‐37 Introduction to editing 5‐1 LFO parameters 6‐38 Intuitive data entry 3‐11 LFO Phase 9‐22 LFO PlsWid 9‐19, 9‐22 LFO Rate 9‐16, 9‐22 LFO Shape 9‐19, 9‐22 LFO Smooth 9‐19 K series object conversion E‐1 LFOs 6‐37, 6‐39 K2600 Line cord 2‐2 bank mode 7‐9...
- Page 377 Master Transpose 11‐2 MPressure 7‐21 Max Freq 9‐18, 9‐19 MTC 12‐2 Maximum delay parameter (Layer) 6‐24 Multiband Compression 9‐15 Maximum Rate parameter (LFO) 6‐38 Multitap delays 9‐12 Memory objects 5‐4 Multi‐velocity keymaps 14‐4 Merge soft button 13‐9 Mute Effects Box 5‐7, 9‐8 Mic Angle 9‐21 MuteZn 7‐25 MID extension 13‐11 Muting layers 5‐7 Mid Freq 9‐14 Muting Setup zones 5‐7 Mid Gain 9‐14 Mid Width 9‐14 MIDI All Notes Off 10‐6 Name soft button 6‐51 Basic channel 10‐6 Naming objects using the keyboard 5‐5 Channel enable 10‐13 Natural amplitude envelope 6‐41 Pan 10‐14 Navigation 3‐6 Parameter locks 10‐14 New Layer soft button 6‐51 Program change formats 10‐15 Noise generator 6‐21 Receive mode 10‐6 Non‐harmonic overtones Reset channels 10‐18 creating with ring modulator 9‐23 Transmit parameters 10‐1 Note triggering 6‐23 Utilities 11‐14 Number of loops parameter (AmpEnv) 6‐43 Volume 10‐14 Numeric Entry...
- Page 378 AMPENV (Amplitude envelope) 6‐41 Polyphony 6‐2, 11‐15 ASR (Attack, Sustain, Release) 6‐39 KB3 6‐61 DRAWBR 6‐62 Portamento click 6‐34 ENV2 and ENV3 (Envelopes) 6‐43 Portamento parameter (Common) 6‐34 ENVCTL (Envelope control) 6‐44 Portamento Rate parameter (Common) 6‐35 EQ 6‐70 Pos 9‐20 FUN (Attack, Sustain, Release) 6‐40 Power cable 2‐2 KEYCLK 6‐66 Pre Dly 9‐11 KEYMAP 6‐19 Pre‐Delay 9‐11 LAYER 6‐22 Pressure (Press) Page LFO 6‐37 Setup Mode 7‐36 MIDI CHANLS 10‐13 Pressure Map MIDI RECV 10‐5 Master 11‐6 MIDI XMIT 10‐1 MIDI Receive 10‐8 MISC 6‐68 MIDI Transmit 10‐4 OUTPUT (KB3) 6‐70 Preview Sample (PRVIEW) 11‐17 PERC 6‐64 PrgChgMode 10‐6 PERC2 6‐65 Program buttons 3‐4, 5‐7 PITCH (KB3) 6‐63 Program change formats 10‐15 TONEWL 6‐60 Program change mode 10‐6 Pair Wts 9‐23 Program changes Pan 9‐20, 9‐24...
- Page 379 selecting 2‐7 Position Mode (PosMode) 7‐41 VAST 2‐8, 6‐2 Ribbon Configuration (RIBCFG) Page 7‐41 Ptch Offst 9‐23 Spring 7‐42 Pulse Width 9‐19, 9‐22 Riffs 7‐58 Punctuation 5‐3 Ring Modulation 9‐23 RMS Settle 9‐24 ROM objects 5‐4 ROM objects, saving 5‐2 Room Type 9‐11 Quantize Root Key Song Mode TRACK Page 12‐27 Sample Editor 14‐10 Quantize + Flange 9‐17 Rotating Speakers 9‐20 Quartr Wts 9‐23 Roto InOut 9‐20 Quick Access bank program changes 10‐16 Rvrb Time 9‐11 Quick Access button 5‐7 Quick Access Editor 8‐1 Quick Access mode 2‐9, 4‐3 Sample Automatic Preview in a Program 11‐17 Sample Editor 14‐7, 14‐9 R Diff Dl 9‐13 Samples R Invert 9‐24 Adjusting volume 14‐4 R Out Mode 9‐24 Assigning to keymaps 14‐3 RAM objects 5‐2, 5‐4 Playback mode 6‐21 Rate Control parameter (LFO) 6‐38 Tuning 14‐4 Rate Scale 9‐22 Save dialog 5‐3 Ratio 9‐15...
- Page 380 Pressure (Press) Page 7‐36 Sliders 3‐3, 7‐21 Ribbon Configuration (RIBCFG) Page 7‐41 Smooth 9‐15 RIBBON Page 7‐41 Smooth Rate 9‐18 WHEEL Page 7‐33 SmoothTime 9‐15 Setup mode 4‐2, 7‐1 Smth Rate 9‐19 Setups 2‐9, D‐9 Soft buttons 3‐7 Aux Bend 1 7‐20 Keymap Editor 14‐5 Aux Bend 2 7‐20 MIDI mode 10‐18 BEND Page 7‐19 in Program Editor 6‐11 Bend Range 7‐19 in Program Mode 6‐10 COMMON Page 7‐56 Sample Editor 14‐11 Continuous Control Pedal (CPEDAL) Page 7‐35 Setup Editor 7‐67 Continuous Controller Parameters 7‐30 Special functions 6‐51 Controllers 7‐20 Software Upgrades 2‐10 Curve (Curv) 7‐30 Soloing a zone 7‐5 Destination 7‐7 Song Destination (Dest) 7‐30 Export 13‐12 Entry (Ent) and Exit States 7‐32 Song button 5‐7 Entry Pan, Exit Pan 7‐18 Song Editor 12‐19 Entry values 7‐31 TRACK Page 12‐21 Entry Volume, Exit Volume 7‐18 Song Mode 12‐1 Footswitch (FOOTSW) Page 7‐37...
- Page 381 Tapn Level 9‐12 USB Storage Mode 2‐6 Tempo Voice allocation 11‐15 Master 11‐10 Voice channels 6‐2 Song mode ‐ Tempo Track 12‐33 Voltage Tap Tempo 11‐10 changing C‐1 Threshold 9‐15 Voltage levels 2‐2 Thru/Out switch 2‐3 Volume Timbre Shift parameter (Keymap) 6‐21 MIDI 10‐14 Time Stamp 11‐15 Volume lock 10‐14 Toggle switch type 7‐31 TONEWL page (Program Editor) 6‐60 Top line of display 3‐6 Warmth 9‐19 TRACK Page Song Editor 12‐21 Automatic Preview in a Program 11‐17 Transpose Waveform display 14‐12 Master 11‐2 Wet Bal 9‐12 MIDI 10‐2 Wet/Dry 9‐23 Song Mode TRACK Page 12‐28 Wet/Dry parameter 9‐10 Transpose parameter (Keymap) 6‐19 WHEEL Page Transposing setups 7‐1 Setup Mode 7‐33 Treb Freq 9‐13 World‐Wide Web 2‐10 Treb Gain 9‐13 Tremolo 9‐22 Trig Filt 9‐18...