Table of Contents
Advertisement
Quick Links
Advertisement
Table of Contents

Related Manuals for Kurzweil PC4 SE


Summary of Contents for Kurzweil PC4 SE
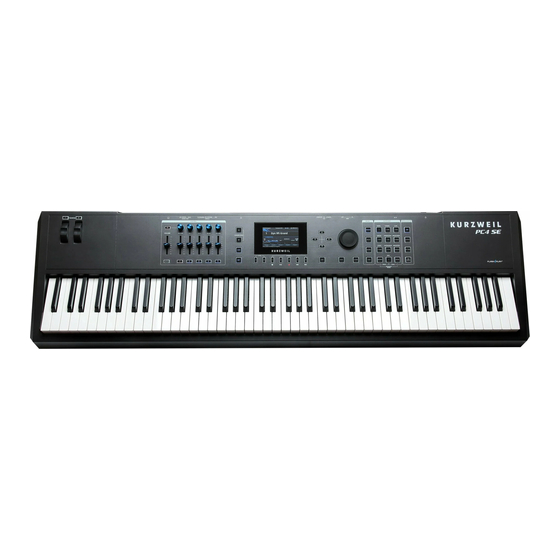
- Page 1 ® It’s the sound. ® Part Number 910591-001 Rev. 001...
- Page 2 CAUTION The lightning flash with the arrowhead symbol, within an equilateral triangle is intended to alert the user to the presence of uninsulated RISK OF ELECTRIC SHOCK "dangerous voltage" within the product's enclosure that may be of sufficient magnitude to constitute a risk of electric shock to persons. DO NOT OPEN CAUTION: TO REDUCE THE RISK OF ELECTRIC SHOCK, The exclamation point within an equilateral triangle is intended...
- Page 3 ©2021 Young Chang Co., Ltd. All rights reserved. Kurzweil® is a product line of Young Chang Co., Ltd. Kurzweil®, Young Chang®, V. A. S. T.®, and PC4 SE® are trademarks of Young Chang Co., Ltd. All other trademarks and copyrights are property of their respective compa- nies.
- Page 4 Kurzweil International Contacts Contact the Kurzweil office listed below to locate your local Kurzweil representative. Customers outside the US: US Customers: HDC YOUNG CHANG American Music & Sound 196, Bongsu-daero, Seo-gu 925 Broadbeck Dr #220 Newbury Park, CA 91320 Incheon, Korea Post Code: 22840...
-
Page 5: Table Of Contents
Table of Contents Table of Contents Getting Started ..............1-1 Features of the PC4 SE ....................1-1 Quick Start ........................1-2 The Front Panel ......................1-5 The Rear Panel......................1-10 PC4 SE Sounds ......................1-13 Modes .......................... 1-16 Double Button Presses ....................1-18 Program Mode .............. - Page 6 Table of Contents Multi Mode ................. 4-1 Selecting Multis ......................4-1 The Display ........................4-2 FAVORITES Buttons ..................... 4-3 BANK Buttons ....................... 4-4 Controllers ........................4-4 SPLIT and LAYER Buttons ..................4-7 Save User Multis ......................4-11 PANIC ........................... 4-13 Multi Edit Mode ..............5-1 Overview Page ......................
- Page 7 Troubleshooting ............... 8-1 Maintenance ........................8-1 Power On Problems ..................... 8-1 Audio Problems ......................8-2 MIDI Problems ....................... 8-3 Pedal Problems......................8-4 Kurzweil Support ......................8-6 Service Centers ......................8-6 Restoring Factory Defaults ..................8-6 MIDI Implementation ............A-1 Physical Specifications............B-1 Index ................Index-1...
-
Page 8: Getting Started
Chapter 1 Getting Started This chapter will give you a quick overview of the PC4 SE. Be sure to keep this manual on hand as you familiarize yourself with the features and functions of the PC4 SE. Features of the PC4 SE Sounds •... -
Page 9: Quick Start
Setting Up the PC4 SE 1. If your PC4 SE keyboard has been out in the cold during shipping, give it time to warm up to room temperature before powering it on, since condensation may have formed inside. - Page 10 (If you have a CC pedal plugged into the CC (VOLUME) jack, make sure it is set to the maximum volume position). 4. If you are using speakers and the PC4 SE is not loud enough, turn up the volume on your amplifier or mixer.
- Page 11 PC4 SE to power off after 8 hours of inactivity. A count down timer warning will be shown in the display a few minutes before the PC4 SE is powered off. At any time, touching any PC4 SE control or playing a note will cause the PC4 SE to remain powered on, until the PC4 SE has been inactive for the set Power Off Time.
-
Page 12: The Front Panel
The VOLUME Slider controls the volume level of the AUDIO OUT and HEADPHONE jacks. Display The display is the main user interface for the PC4 SE. Use the display to view Program and Multi names, controller assignments, and editing functions. - Page 13 Getting Started The Front Panel ALPHA WHEEL In Program and Multi Mode, use the ALPHA WHEEL to navigate through the Program or Multi list. In Program Edit or Multi Edit Mode, use the ALPHA WHEEL to scroll through the list of values for the currently selected parameter.
- Page 14 The Front Panel TRANSPOSE Buttons The TRANSPOSE buttons can be used to change the tuning of notes played on the PC4 SE keyboard in semitones (also known as half steps). The current transpose amount is shown in the display. Press both TRANSPOSE buttons simultaneously to reset the transposition to 0.
- Page 15 Turn the knob up to enable the compressor and increase the compression amount. Note: To set your Master FX settings as default settings to be applied when the PC4 SE is powered on, you must enter and exit Global Mode, or select the desired settings on the Global Mode Master FX page, then exit Global Mode to save the settings as defaults.
- Page 16 Getting Started The Front Panel SPLIT and LAYER Buttons Use the SPLIT button to quickly create a Multi where keys in different ranges of the keyboard play different instrument sounds. Use the LAYER button to quickly create a Multi where different instrument sounds are layered in the same key range, so that keys in one range of the keyboard play multiple instrument sounds at the same time.
-
Page 17: The Rear Panel
Plug the included power adaptor into the DC Power jack. USB Ports Use the USB ports to connect the PC4 SE to a computer/tablet or USB hard drive in order to do the following: • Use the PC4 SE as a MIDI controller to play software instruments on a computer/ tablet. - Page 18 Note: Switch pedals must be plugged in before powering on the PC4 SE. Do not to step on the switch pedals when powering on the PC4 SE, as the state of the pedals is detected as part of the start up sequence.
- Page 19 Use the HEADPHONE jack located on the left rear panel of the instrument to listen to the PC4 SE on stereo headphones. You will need a 1/8-inch-to-1/4-inch adapter in order to use headphones that have a smaller mini plug connector.
-
Page 20: Pc4 Se Sounds
Getting Started PC4 SE Sounds PC4 SE Sounds The PC4 SE contains Programs and Multis. A Program is typically a single instrument sound such as a Piano, Organ, or Synth. Programs are organized by instrument type in 10 categories. A Multi is a combination of Programs arranged as layers and/or splits across the keyboard. - Page 21 The Knobs, Sliders, Buttons, Wheels, and Pedals can control each of the Factory Programs and Multis, to produce variations to the sound. Don’t forget to try these out as you explore the Factory sounds on the PC4 SE. Generally, each control will perform the assignment labeled on the front panel, although some controls may have different assignments per Program or Multi.
- Page 22 Getting Started PC4 SE Sounds Favorites Use the FAVORITES buttons to quickly store and recall a set of 5 favorite Programs and/or Multis while in Program or Multi Mode. To recall a favorite Program or Multi, simply press one of the FAVORITES buttons. The FAVORITES buttons work from both Program or Multi Mode, and pressing a FAVORITES button will automatically bring you to Program Mode or Multi Mode if required.
-
Page 23: Modes
Modes Modes Program Mode The PC4 SE always powers up in Program Mode, where single instrument sounds can be played directly from the keyboard, or multitimbrally via MIDI. Saving Programs If you make changes to the current Program using any of the controllers (Knobs, Sliders, Buttons, Wheels), the SAVE button turns on to indicate that a change has been made to that Program. - Page 24 Info The Info Page shows the currently installed operating system and sound object versions. Use this page to check if your PC4 SE is up to date with the most recent software and sounds posted at www.kurzweil.com. Reset You can return the PC4 SE to the Factory default state by doing a Reset.
-
Page 25: Double Button Presses
In Program Mode, to hear a Program Demo song for the current Program, press the KEYPAD and ENTER buttons simultaneously. Song Demo To hear the capabilities of the PC4 SE, you can play the multi-channel demo songs. Press the KEYPAD and 0/MISC buttons simultaneously to listen to a multi-channel demo song. Panic Pressing the 0/MISC and ENTER buttons simultaneously deactivates all sounding notes by sending an “all notes off”... - Page 26 Getting Started Double Button Presses Search The Search page allows you to find any term or series of characters within the currently selected list or range of values. Hold the ENTER button and press one of the numeric buttons 0-9 to view the Search page. On the search page, use the category buttons to type the term you want to find, then press the ENTER button to search.
-
Page 27: Program Mode
Mode, press and turn on the PROGRAM Mode button, or press the EXIT button repeatedly until you reach Program Mode. The PC4 SE powers on with Program 1 selected, or the Program that was selected the last time Global Mode was exited. -
Page 28: Program Demo
Program Mode Program Demo Select a Previously Saved User Program Press and turn on the USER button, then use the ALPHA WHEEL or NAVIGATION buttons to browse only User Programs. To return to browsing Factory and User Programs, press and turn off the USER button. Select a Program by ID Number Press and turn on the KEYPAD button. -
Page 29: The Display
Program Mode The Display The Display In Program Mode, the top line of the display shows the current Mode, MIDI transposition, MIDI In/Out activity indicators, and MIDI channel. The currently selected Program ID number and name are shown in the center of the display. If the selected program is a user program, a KB3 organ program, or if the program contains an FM layer or FM operator function, the USER, KB3, FM or FMOP icons are displayed next to the program name. -
Page 30: Favorites Buttons
“I” for “in” and “O” for “out”). These indicators briefly light up when MIDI has been recently sent to or received by the PC4 SE’s MIDI/USB ports. If the symbol is green, this indicates there has been MIDI activity on that port in the last few seconds. If the symbol is red, this indicates there has been communication with the external software editor on that port in the last few seconds. -
Page 31: Controllers
Program Edit Mode. TRANSPOSE Buttons The TRANSPOSE buttons can be used to change the tuning of notes played on the PC4 SE keyboard in semitones (also known as half steps). This is a convenient way to change the key of a song without learning to play it in a different key. - Page 32 Program Mode Controllers PITCH WHEEL Use the PITCH WHEEL to perform pitch bends. The Bend Up and Bend Down amount can be adjusted for each Program in Program Edit Mode. MODULATION WHEEL In Factory Programs, the MODULATION WHEEL will typically control vibrato or an effect amount.
- Page 33 The SW1 (SUSTAIN) jack is also compatible with continuous switch pedals (Half-Damper) that use a 1/4 inch tip-ring-sleeve plug (such as the Kurzweil KP-1H). When connected to the SW1 (SUSTAIN) jack, a Half Damper pedal enables finer control of Sustain than a standard switch pedal.
- Page 34 Program Mode Controllers CC (VOLUME) Pedal The CC (VOLUME) pedal defaults to control Program volume (pre-FX). For KB3 Organ Programs, the CC (VOLUME) pedal controls organ swell. Organ swell is similar to Program volume, except volume can not be turned all the way down to silence. The display shows “KB3”...
-
Page 35: Split And Layer Buttons
Program Mode SPLIT and LAYER Buttons SPLIT and LAYER Buttons Press the SPLIT or LAYER button to access the Split or Layer functions, which allow you to split or layer multiple Programs across the keyboard. The Split and Layer functions have identical parameters, but produce different results. - Page 36 Program Mode SPLIT and LAYER Buttons 3. On the Split Page, Zone 2 is selected with a default Bass Program selected for the left hand of the Split. Use the ALPHA WHEEL or CATEGORY buttons to select a different Program for the left hand of the Split. 4.
- Page 37 Program Mode SPLIT and LAYER Buttons Split and Layer Parameters The following parameters are available for each of the 5 Zones. On the Split and Layer pages, the left hand Zone column indicates the Zone number associated with each of the 5 rows of parameters. Status Use the Status column to set each Zone to Active or Muted.
- Page 38 Program Mode SPLIT and LAYER Buttons The Pan parameter sets the panning (left/right stereo placement) of each Zone. To change the panning of a Zone: 1. Select a Pan parameter for the desired Zone by using the NAVIGATION buttons. 2. Change the panning by using the ALPHA WHEEL, or use the keypad function of the CATEGORY buttons to type a pan value (0-127) followed by pressing the ENTER button.
-
Page 39: Save User Programs
Program Mode Save User Programs Save User Programs If you make changes to the current Program using any of the controllers (Knobs, Sliders, Buttons, Wheels), the SAVE button turns on to indicate that a change has been made to that Program. - Page 40 Program Mode Save User Programs To change the ID number, use the ALPHA WHEEL, or use the keypad function of the CATEGORY buttons to type an ID number (4096 to 8191) followed by pressing the ENTER button. If you select an ID number that is already used by another Program, the bottom of display will show a message to warn that you are going to replace a Program.
-
Page 41: Multichannel Midi In Program Mode
Program Mode Multichannel MIDI in Program Mode Saving a User Program To save a User Program, select the Program Save Page and press the SAVE button, (or press the EXIT button to exit without saving). The display will show a brief message to confirm that the Program was saved. -
Page 42: Panic
Program Mode, this can cause the FX of your song to change when changing Channels on the PC4 SE to record different tracks. In this case, setting the Global Mode “FX Mode” parameter to “Multitrack” can help Program FX to remain loaded consistently on multiple Channels. - Page 43 Program Mode PANIC 2-17...
-
Page 44: Program Edit Mode
Parameters Page The Parameters page shows all Program and FX parameters for the current program. These parameters can be controlled by the PC4 SE’s physical controllers, or by MIDI CCs from an external MIDI device. Use the Parameters page to set an initial value for each parameter, and change controller and... - Page 45 The Control column determines which physical controller (or external MIDI CC number) will control the parameter in the selected row. To quickly assign one of the PC4 SE’s physical controllers to a parameter, select the control column in the row of the desired parameter, hold the ENTER button and move the desired controller.
- Page 46 Program Edit Mode Parameters Page Value Column To change the value of a parameter, use the NAVIGATION buttons to highlight the right column. In the value column, use the ALPHA WHEEL or the keypad function of the Category buttons followed by the ENTER button to enter a MIDI value from 0-127. You can also select a value of None by scrolling below 0.
-
Page 47: Fx Page
Chain, as well as the order of effects in the Chain (signal flows from left to right). The PC4 SE’s Chains include different types of reverb, chorus, delay, flanger, phaser, tremolo, panner, rotary, distortion, EQ, compression, filter, envelope following filter, frequency stimulator, ring modulator, frequency offset, pitch LFO, and stereoizer. - Page 48 FX Resources and DSP FX Units The PC4 SE has 32 “units” of DSP (digital signal processing) effects resources that can be used to load effects chains. Each FX chain requires a certain number of FX units in order to load, depending on its complexity.
- Page 49 Program Edit Mode FX Page Send The Aux Send parameters determine how much of the Program’s signal is sent to each Aux FX Chain. Depending on the Type parameter, the send values are set either in dB or wet/dry percent. Pre/Post The Aux Pre/Post parameters determine whether or not the output of the Insert chain is sent to each Aux Chain (the “pre”...
-
Page 50: Common Page
Program Edit Mode Common Page Common Page Use the Common Page to control overall settings of the current Program. BendRange Up & BendRange Down Use these parameters to define how much the pitch will change when you move the Pitch Wheel. - Page 51 Program Edit Mode Common Page Out Pan Use the Out Pan parameter to adjust the left/right balance of the entire Program output signal (post-FX). Negative values pan the audio signal to the left channel, positive values to the right, and a value of zero pans to the center. Out Pan Mode When the Out Pan Mode is set to Fixed, the Out Pan position remains as defined with the Out Pan parameter, ignoring MIDI pan messages.
- Page 52 Program Edit Mode Common Page Tuning Map Program Tuning Maps are primarily used to emulate stretched tuning techniques, which are commonly used for acoustic pianos and other acoustic keyboard instruments. Stretched tunings generally tune notes in the lowest octave increasingly flat, and notes in the highest octave increasingly sharp.
- Page 53 When applying portamento to programs that use multiple samples (Acoustic Guitar, for example), the PC4 SE will play more than one sample root as the pitch glides from the starting pitch to the ending pitch. This may cause a small click at each sample root transition.
- Page 54 Program Edit Mode Common Page Common Page KB3 Parameters The following parameters appear on the Common page for KB3 Organ programs. Leakage This parameter controls the level of the simulated crosstalk and signal “bleed” of adjacent tone wheels in the model. This is provided to help “dirty up” the sound to make it a bit more realistic.
-
Page 55: Arpeggiator Page
Program Edit Mode Arpeggiator Page Arpeggiator Page Use the Arpeggiator page to adjust settings for the Program’s Arpeggiator. The Arpeggiator takes note input from the keyboard (or via MIDI) and outputs a rhythmic and/or melodic pattern of MIDI notes. The Arpeggiator can affect both the internal programs and external MIDI instruments. - Page 56 Program Edit Mode Arpeggiator Page You can save your current settings as an Arp Preset by pressing the FAVORITES 1 button. If you select a different Arp Preset before saving your current Arpeggiator settings, the current Arpeggiator settings will be replaced by the settings from the preset without showing a warning.
- Page 57 Program Edit Mode Arpeggiator Page Arp Mode The two Arpeggiator modes, Classic and Step Sequencer, offer different means of shaping and editing Arpeggiator patterns. Depending upon this mode, the Arpeggiator page will provide access to different options and editable patterns. In Classic mode, the Arpeggiator page will offer algorithmic options, as well as independent note-Shift, Velocity and Duration patterns.
- Page 58 Program Edit Mode Arpeggiator Page each Zone by the front panel LATCH button, by another controller, or by one of the Global Mode SW Override parameters. In each Multi, the LATCH button or other controller must be assigned on the Multi Edit Controls page of each Zone using Destination 157 (Latch Sustain) or 158 (Latch2 Sost) with On Value 127 and Off Value 0.
- Page 59 Program Edit Mode Arpeggiator Page Autohold is similar to Auto. Holding at least one arpeggiated note on and playing other notes latches those notes. Unlike in Auto mode, if you stop holding at least one arpeggiated note on, the arpeggiation continues playing (although you can’t latch any more notes). In this case, if you strike another key within the arpeggiation range, you start a new arpeggiation sequence.
- Page 60 Program Edit Mode Arpeggiator Page Here’s a very simple example. Suppose that the only note in the Arpeggiator cycle is C4, Shift Amount is 4 (a third), and Shift Limit is 7 (so notes won’t get shifted above G4). The Arpeggiator plays C4, then E4. The next note should be G 4, but that’s above the shift limit—so the Arpeggiator calculates the difference between that G 4 and the shift limit (G4):...
- Page 61 Program Edit Mode Arpeggiator Page Shift Mode Use the Shift Mode parameter to set how the arpeggiator will shift the pitch of played notes. The Alg (algorithm) setting will let you create note sequences based upon a fixed Shift Amount. When you select Patt (pattern), the Shift Pattern parameter will appear, allowing you to select a preset or user defined shift pattern.
- Page 62 Program Edit Mode Arpeggiator Page Editing Shift Patterns You can edit the highlighted pattern by pressing the EDIT button. You can create a new user pattern by editing an existing pattern and saving it to a user ID. In the Shift Pattern editor, pressing the BANK - button removes the last step in the list, pressing the BANK + button inserts a new note step at the end of the list.
- Page 63 Program Edit Mode Arpeggiator Page Play Order When the Shift Mode is set to Alg, Play Order appears. Play Order determines the order in which the arpeggiator plays notes. Played causes them to play back in the chronological order in which you played them. Upwards means that notes play in ascending pitch order.
- Page 64 Program Edit Mode Arpeggiator Page With Velocity set to Fixed, all notes play with the same velocity. The Velocity Fixed field appears, which allows you to set a specific velocity. In Multi Mode, you can control the velocity in real-time by assigning a controller to destination 175 VelFixed. When you select Pattern, the Velocity Patt parameter will appear, allowing you to select a preset or user defined velocity pattern.
- Page 65 Program Edit Mode Arpeggiator Page Velocity Modes MissNotes1 through MissNotes9 make the PC4 SE randomly miss playing a percentage of inputted notes. See the table below for percentages and their equivalent settings. Each of these settings also randomly changes some of the inputted velocities in a range of ±...
- Page 66 Program Edit Mode Arpeggiator Page Editing Velocity Patterns You can edit the highlighted pattern by pressing the EDIT button. You can create a new user pattern by editing an existing pattern and saving it to a user ID. Each pattern can have up to 48 steps, and each step can shift velocities by ± 127 steps. You can insert a step with a value of “none”...
- Page 67 Program Edit Mode Arpeggiator Page Duration Duration determines how long each arpeggiated note plays based on the current arpeggiator Beats value. 100% means that a note sustains until the next one sounds—very legato. 50% means that the note fills half the space between itself and the next note. The lowest value is 0%—stacattissimo.
- Page 68 Program Edit Mode Arpeggiator Page Arpeggiator Step Sequencer Mode Parameters In Step Sequencer mode, the Arpeggiator page will give you the ability to create a unique Arpeggiator pattern step-by-step. Select a parameter using the NAVIGATION Up/Down buttons. To change steps, select the Step# parameter, then press the NAVIGATION Left/Right buttons.
- Page 69 Program Edit Mode Arpeggiator Page Note Note values create the shift pattern for the Step sequence. Notes are specified in half-steps from the last latched note (represented as 0). Thus, this series of notes: 0, 4, 7 will play a triad in sequence.
-
Page 70: Midi Cc Step Sequencer Page
Program Edit Mode MIDI CC Step Sequencer Page MIDI CC Step Sequencer Page The CC Sequencer allows you to rhythmically modulate up to 4 program parameters (such as filter frequency) based on preset or user patterns. CC is short for continuous controller, which is a type of MIDI message that can be used to control assigned parameters. - Page 71 Program Edit Mode MIDI CC Step Sequencer Page Save CC Seq Preset If you have adjusted any CC Sequencer settings, you have the option of saving a new CC Seq Preset to a User location, where it will be available to use with other Programs and Multis. All settings on the CC Sequencer page are saved as part of the CC Seq preset (except for the State parameter, which is stored with the Program/Multi).
- Page 72 The MIDI Dest parameter sets the MIDI destination for the CC messages generated by the CC Sequencer. You can send CC messages to a PC4 SE Program, to the MIDI Out ports, to the USB port, or to any combination of these destinations.
- Page 73 Program Edit Mode MIDI CC Step Sequencer Page Sequence The CC Sequencer can play four simultaneous sequences which can each control a different parameter or CC number. Use the Sequence parameter to select one of four sequences to edit. Each of the four sequences uses the same settings for the State, Number Steps, Sync, Note Value, and MIDI Dest parameters.
-
Page 74: Save User Programs
Program Edit Mode Save User Programs Add Mod Use the Add Mod parameter to change the range of CC values sent by the sequence using a physical controller (in combination with the Scale, Scale Mod, and Add parameters). The selected physical controller will use values 0-127 to add -127 through 127 to the CC values sent from the sequence. -
Page 75: Multi Mode
USB cable. To enter Multi Mode from another Mode, press and turn on the MULTI Mode button. The PC4 SE powers on with Multi 1 selected, or the Multi that was selected the last time Global Mode was exited. -
Page 76: The Display
“I” for “in” and “O” for “out”). These indicators briefly light up when MIDI has been recently sent to or received by the PC4 SE’s MIDI/USB ports. If the symbol is green, this indicates there has been MIDI activity on that port in the last few seconds. If the symbol is red, this indicates there has been communication with the external software editor on that port in the last few seconds. -
Page 77: Favorites Buttons
Multi Mode FAVORITES Buttons Zone Info When the Global Mode Display parameter is set to Favorites, the display shows the following information below the Multi ID and name for each of the 5 Zones: • Zone Solo status: The Solo icon turns red for any soloed Zone. •... -
Page 78: Bank Buttons
Zone/MIDI Channel in the display. TRANSPOSE Buttons The TRANSPOSE buttons can be used to change the tuning of notes played on the PC4 SE keyboard in semitones (also known as half steps). This is a convenient way to change the key of a song without learning to play it in a different key. - Page 79 Multi Mode Controllers MODULATION WHEEL In Factory Multis, the MODULATION WHEEL will typically control vibrato or an effect amount. The name and value of the current assignment for each Zone/MIDI Channel is shown in the Display when the wheel is moved. The assignment can be adjusted for each Zone in Multi Edit Mode.
- Page 80 The SW1 (SUSTAIN) jack is also compatible with continuous switch pedals (Half-Damper) that use a 1/4 inch tip-ring-sleeve plug (such as the Kurzweil KP-1H). When connected to the SW1 (SUSTAIN) jack, a Half Damper pedal enables finer control of Sustain than a standard switch pedal.
-
Page 81: Split And Layer Buttons
Multi Mode SPLIT and LAYER Buttons SPLIT and LAYER Buttons Press the SPLIT or LAYER button to access the Split or Layer functions, which allow you to split or layer multiple Programs across the keyboard. The Split and Layer functions have identical parameters, but produce different results. - Page 82 Multi Mode SPLIT and LAYER Buttons 4. You may wish to adjust additional Split parameters, described in Split and Layer Parameters on page 2-9. Use the NAVIGATION buttons to select each parameter, and the ALPHA WHEEL or CATEGORY buttons to change the value of each parameter. 5.
- Page 83 Multi Mode SPLIT and LAYER Buttons Split and Layer Parameters The following parameters are available for each of the 5 Zones. On the Split and Layer pages, the left hand Zone column indicates the Zone number associated with each of the 5 rows of parameters. Status Use the Status column to set each Zone to Active or Muted.
- Page 84 Multi Mode SPLIT and LAYER Buttons A value of 0 is full left, 64 is center, and 127 is full right. Other values will move the stereo placement in between these positions. A value of “None” can also be selected, which will use the last pan value used by the Zone’s MIDI channel.
-
Page 85: Save User Multis
Multi Mode Save User Multis Save User Multis Press the SAVE button to view the Save Dialog, which allows you to save a Split or Layer Multi as a User Multi, or to save a Multi with its current Zone On/Off status. To save the changed state of Multi controllers which have other assignments, you must set an entry value for each controller on the Multi Edit Mode Controls Page. - Page 86 Multi Mode Save User Multis To change the ID number, use the ALPHA WHEEL, or use the keypad function of the CATEGORY buttons to type an ID number (4096 to 8191) followed by pressing the ENTER button. If you select an ID number that is already used by another Multi, the bottom of display will show a message to warn that you are going to replace a Multi.
-
Page 87: Panic
Multi Mode PANIC Saving a User Multi To save a User Multi, select the Multi Save Page and press the SAVE button, (or press the EXIT button to exit without saving). The display will show a brief message to confirm that the Multi was saved. - Page 88 Multi Mode PANIC 4-14...
-
Page 89: Multi Edit Mode
Multi Edit Mode Chapter 5 Multi Edit Mode Multi Edit Mode allows you to edit and customize Multis. Any Multi can be edited in Multi Edit Mode and saved to one of the 4096 User IDs. To enter Multi Edit Mode from another Mode, press and turn on the MULTI Mode button to enter Multi Mode, then press and turn on the EDIT button. -
Page 90: Overview Page
Multi Edit Mode Overview Page Overview Page Use the Overview Page to select a Program, Volume, and Panning for each of the 5 Zones. Status The Status parameter determines whether the currently selected Zone is Active or Muted. Program The Program parameter determines the Program for the currently selected Zone. Use any of the methods below to select a Program for each Zone. - Page 91 Multi Edit Mode Overview Page Browse All Programs Make sure the USER button is off, then use the ALPHA WHEEL to select a Program from all of the available Programs. Select a Program by Category Make sure the KEYPAD button is off, then press one of the CATEGORY buttons to select the first Program of a category (or the current Category Default Program).
- Page 92 A value of “None” can be selected by using the ALPHA WHEEL to scroll below 0. This is useful if you wish to manually set Zone volumes with the PC4 SE knobs, rather than using default values when the Multi is selected. A value of “None” will use the last volume value used by the Zone’s MIDI channel (a MIDI channel from the previously selected Multi, or...
-
Page 93: Velocity Page
Multi Edit Mode Velocity Page Velocity Page LoVel / HiVel The LoVel and HiVel parameters set the playable velocity range of each Zone by setting the lowest and highest playable velocity of each Zone. Velocities within this range will trigger a note for the selected Zone. - Page 94 Multi Edit Mode Velocity Page Curve The Curve parameter lets you taper the velocity response. The default setting is Linear, which means that the output velocity changes directly proportionally to the played velocity. Expand produces a curve that is less steep than the linear curve at keystrike velocities below 64, and steeper than the linear curve at keystrike velocities above 64.
- Page 95 The Note Map parameter includes various alternating note maps (1 of 2 through 4 of 4). If you are using two or more MIDI devices (including the PC4 SE), you can expand polyphony by assigning each zone to a different alternating note map.
-
Page 96: Miscellaneous Page
The Destination parameter determines whether MIDI data generated by the keyboard and physical controllers of each Zone is sent to a PC4 SE Program, through the MIDI Out/USB ports, or all three. You can set this parameter to any of the eight combinations for the three destinations for this parameter. - Page 97 Multi Edit Mode Miscellaneous Page Xpose The Xpose parameter sets the transposition of each Zone. The Xpose parameter changes the pitches generated by each Zone, without changing the Key Low and Key High range on the keyboard. This is done by changing the MIDI note numbers generated by the keys in the Zone.
-
Page 98: Fx Page
Multi Edit Mode FX Page FX Page The FX Page allows you to set Aux send levels for each channel, and enable or disable FX resources for each channel, which is useful for managing Insert FX resources. Enable Use the FX Page to enable or disable the FX of the Program in each Zone. Each Zone can be set to Y to enable effects, or to N to disable effects. - Page 99 Multi Edit Mode FX Page Aux FX Channel The Aux FX Channel determines the MIDI channel that will be used for the Aux 1 and Aux 2 FX Chains. For example, if the Program in channel 2 uses the Chain “25 Basic Delay 1/8” as an Aux 1 Chain, then setting the Aux FX Channel to 2 allows the programs in all channels to send their signal to the Aux FX Chain “25 Basic Delay 1/8”.
- Page 100 Multi Edit Mode FX Page Aux1 Override, Aux2 Override Normally, the Aux Effects Chains are specified by the program on the specified Aux Effects channel. When Aux1/2 Override is set to Yes, the Chain parameter can be selected, allowing you to choose a different Aux effect Chain. Set Aux1/2 Override to Yes to select an override Aux Chain on this page.
-
Page 101: Arpeggiator, Cc Seq And Riff Page
Multi Edit Mode Arpeggiator, CC Seq and Riff Page Arpeggiator, CC Seq and Riff Page Arpeggiator The Arpeggiator parameters set whether the Arpeggiator is On or Off for the Program in each Zone. Arpeggiator On/Off can also be controlled in each Zone by the front panel ARP button. In each Multi, the ARP button must be assigned for the desired Zones on the Multi Edit Controls page. - Page 102 Multi Edit Mode Arpeggiator, CC Seq and Riff Page Edit Arpeggiator Settings To edit the Arpeggiator settings, select the Arpeggiator parameter for the desired Zone, set the parameter to On, then press the EDIT button to view the Arpeggiator page. The Arpeggiator in Multi Mode is very similar to the Program Mode arpeggiator.
- Page 103 Multi Edit Mode Arpeggiator, CC Seq and Riff Page CC Sequencer The CC Sequencer parameters set whether the CC Sequencer is On or Off for the Program in each Zone. CC Sequencer On/Off can also be controlled in each Zone by the front panel CC SEQ button.
- Page 104 The Riff parameters set whether the Riff is On or Off for the Program in each Zone. Riffs are full songs or individual tracks of a song created in the PC4 SE’s Song mode that you can trigger in Multi mode. Standard MIDI files may also be imported to Song mode and then used as riffs in Multis.
- Page 105 Multi Edit Mode Arpeggiator, CC Seq and Riff Page Song Use the Song parameter to select the song that you wish to use for the Riff of the currently selected Zone. Start, Stop Use the Start and Stop parameters to specify the riff start and stop points. The time format is Bar : Beat : Tick.
- Page 106 Multi Edit Mode Arpeggiator, CC Seq and Riff Page Re-Channel Song Track numbers and Multi Zone numbers have matching MIDI channel numbers by default. When the current zone’s MIDI channel and the channel of the riff’s selected Source Track do not match, it can make the riff play programs from other Zones. To prevent this you can use the Re-Channel parameter.
- Page 107 Multi Edit Mode Arpeggiator, CC Seq and Riff Page Local When Local is set to Off, notes will only be played by the riff. When Local is set to On, notes in the current zone can be played normally by the keyboard, and by the riff. Loop When Loop is set to Off, the riff will play once until it is retriggered.
- Page 108 Multi Edit Mode Arpeggiator, CC Seq and Riff Page Trigger Type The Trigger Type parameter allows you to choose how your riff will sync to other riffs and arpeggiators (in combination with the Trigger Master parameter). With Trigger Type set to None, the riff will start playing as soon as it is triggered. It will not sync to anything.
- Page 109 Multi Edit Mode Arpeggiator, CC Seq and Riff Page With Trigger Type set to Loop Wait, if there is already a riff playing to sync to, the current riff will wait for the playing riff to restart its loop (if Loop is set to On) before starting (see “Loop”...
- Page 110 Multi Edit Mode Arpeggiator, CC Seq and Riff Page With Release Type set to Loop, if there is already a riff playing to sync to, the current riff will wait for the playing riff to restart its loop (if Loop is set to On) before starting (see “Loop”...
- Page 111 Multi Edit Mode Arpeggiator, CC Seq and Riff Page Velocity Velocity changes the velocity of each MIDI note. The original velocities of the notes in the sequence are multiplied by the selected percentage. 100% will cause no change, values smaller than 100% will result in lower velocities, values larger than 100% will result in higher velocities.
-
Page 112: Controls Page
Controls Page Controls Page Use the Controls Page to adjust controller settings for each Zone. The PC4 SE has 2 types of controllers, switch controllers and continuous controllers. Each type of controller has different parameters, see each section below for details. - Page 113 Multi Edit Mode Controls Page Switch Controllers This section describes parameters for the following switch controllers: • SW pedal jacks 1 and 2 (Up to 2 pedals per jack: Sw.Pedal 1a, 1b, 2a, 2b) • VARIATION button • ARP button (Arp On/Off) •...
- Page 114 CC numbers that are assigned to Program parameters will show the parameter name next to the CC number. These CC numbers will control the Program in the current Zone. Destinations 128 and greater can be used to control PC4 SE Program and Multi functions. For details see “Controller Destination List”...
- Page 115 CC numbers that are assigned to Program parameters will show the parameter name next to the CC number. These CC numbers will control the Program in the current Zone. Destinations 128 and greater can be used to control PC4 SE Program and Multi functions. For details see “Controller Destination List”...
- Page 116 Multi Edit Mode Controls Page Scale Use the Scale parameter to change the range of CC values sent by the controller (in combination with the Add and Curve parameters). The Scale parameter multiplies the CC values sent, changing the lowest and highest values sent by the controller. MIDI controllers are limited to sending values from 0-127, even if the Scale and Add parameters are set to produce values outside of this range.
- Page 117 Multi Edit Mode Controls Page When Scale is set to 50%, the controller sends CC values 0-63, 0 at its lowest position, and 63 at its highest position. With the Add parameter set to 64, the controller sends CC values 64-127, 64 at its lowest position, and 127 at its highest position.
- Page 118 Multi Edit Mode Controls Page If the Global Mode “Multi Controllers” parameter is set to Pass Entry, and the physical controller is above or below the Entry value when the Multi is selected, moving the controller will have no effect until it is moved past the Entry value. Exit The Exit parameter determines the value of a continuous controller when the current Multi is exited by selecting another Multi or Program.
- Page 119 The table below contains the available values for the MIDI CC (continuous controller) destinations. The PC4 SE’s physical controllers can send MIDI values to these destinations in order to control the parameters of PC4 SE Programs, Multis, PC4 SE system parameters, or external MIDI equipment.
- Page 120 Registered Parameter Most Significant Byte 102–109 MIDI 102–109 MIDI Controllers 102–109 110-119 MIDI 110–119 Reserved - Not available for use in the PC4 SE. Sound Off Stops all sound in the corresponding channel. RstCtls Resets Controllers to defaults in the corresponding channel. Local Reserved for use by MIDI specification.
- Page 121 Multi Edit Mode Controls Page Controller Controller Description Number Destination TransDown Transpose Down (ST) Arp On/Off Values 0-63 turn the Arpeggiator Off, Values 64-127 turn the Arpeggiator On CC Seq On/Off Values 0-63 turn the CC Sequencer Off, Values 64-127 turn the CC Sequencer On. Mute Zone –...
- Page 122 Multi Edit Mode Controls Page Controller Controller Description Number Destination Selects one of the 128 patterns in the current Arpeggiator VelPatt Bank. (See VelPatt Velocity Patt on page 3-22) A controller value selects the corresponding Velocity Patt Bank for the Arpeggiator VelPBank page of a controller’s zone.
- Page 123 Multi Edit Mode Controls Page Shift Key Number, Shift Key (ShKeyNum, ShiftKey) These controller destinations allow you to play musical scales and single note patterns on any programmable continuous controller in a Multi, without the need of playing the physical keys of the keyboard.
- Page 124 Multi Edit Mode Controls Page Notes triggered by Shift Key Number will be played with the last received KeyVel velocity. One note triggered by these controllers sounds until another note is triggered or until a KeyVel message with velocity 0 is sent. Selecting Key (Root Note) Shift Key (ShiftKey, controller destination 177) allows the user to select the key (root note) of the Shift Pattern triggered by Shift Key Number.
- Page 125 Since the lowest octave of a program is often too low to be musically useful, the PC4 SE will automatically start triggering notes from longer shift patterns in higher octaves. This saves room in the controller’s range of values for triggering more useful octaves.
-
Page 126: Common Page
Multi Edit Mode Common Page Experiment by adjusting the scale value until the highest desired note is triggered at the top of the controller’s physical range. See Scale on page 5-28 for more details on the Scale parameter. For shift patterns with more than 12 steps, you will run out of controller values before your shift pattern triggers in every octave. -
Page 127: Save User Multis
Multi Edit Mode Save User Multis KB3 Channel If KB3 Organ Programs are selected for more than one Zone, this parameter specifies which MIDI Channel has priority to load a KB3 Program. Only one KB3 Program can be loaded at a time. - Page 128 5-40...
-
Page 129: Global Mode
Global Mode Main 1 Page Chapter 6 Global Mode Global Mode allows you to adjust performance settings which affect all Programs and Multis. Global Mode also allows you to Store, Load, and Delete Programs and Multis, or restore factory defaults by performing a Reset. Navigate to each page by using the CHANNEL/PAGE buttons. - Page 130 Global Mode Main 1 Page Transpose The Transpose parameter allows you to tune the pitch of the unit in semitones. Display The Display parameter allows you to change the way that Programs and Multis are displayed on the Program and Multi Mode main pages by selecting one of two different “views”. The default view is Favorites, which displays the Program or Multi name with large text, along with the category name and background image.
- Page 131 USB MIDI activity. Power Off Time If the Auto Power Off parameter is set to On, then the PC4 SE will power off after the time selected by the Power Off Time parameter has elapsed. The PC4 SE will display a warning before powering off.
- Page 132 When the Drum Remap is set to None, no remapping takes place. When the Drum Remap is set to GM, the PC4 SE remaps Drum programs to the GM drum map.
-
Page 133: Main 2 Page
Global Mode Main 2 Page Pedal Noise Some piano Programs have a Pedal Noise feature programmed into the sound. This parameter allows you to turn the Pedal Noise off if you prefer not to use it. If it is on, it will only activate noise on those Programs that have been programmed to use it. - Page 134 The PC4 SE supplies you with 18 different factory intonation maps which are useful for a range of different styles. Each of these maps defines different intervals between each of the semitones in a single octave (used for all octaves) by setting pitch offsets for each note in cents.
- Page 135 Though some may have historically been in a different key, all of the PC4 SE’s intonation maps are set to root note C by default. You can change the root key of the current intonation map by using the Intonation Key parameter (see the Intonation Key section below.)
- Page 136 Favorites spot when you depress the pedal. If you do not have a Favorites spot selected, Favorite Inc and Favorite Dec will select the first Favorites spot, or the last spot that was selected since turning on the PC4 SE. Use the Arp On/Off and Arp Latch assignments to easily control arpeggiator functions.
- Page 137 Global Mode Main 2 Page CC Pedal Overrides In a similar manner to Switch Pedal Overrides, the CC Override parameters allows the Continuous Control Pedal assignment to be changed for all Programs and Multis. The alternative assignments available for the CC Pedal Override include Mod Wheel (MIDI CC 1), Foot/Wah (MIDI CC 4), Volume (MIDI CC7), Expression (MIDI CC11) and Pressure.
-
Page 138: Midi Page
If you want to use the PC4 SE strictly as a MIDI controller for the other modules in your MIDI chain using the MIDI port, then select MIDI. If you want to make use of the PC4 SE’s sounds as well as use it as a MIDI controller (MIDI port), then select MIDI+LOCAL. - Page 139 Global Mode MIDI Page If you want make use of the PC4 SE‘s sounds and use it as a MIDI controller for the other modules in your MIDI chain using the MIDI port and the USB (Computer) port, then select USB+MIDI+LOCAL.
- Page 140 The Local Keyboard Channel enables an external MIDI keyboard to function as if it is the PC4 SE’s keyboard and physical controllers. This allows all Channels/Zones of a Multi to be played simultaneously from an external MIDI keyboard transmitting on a single MIDI channel (or a single MIDI channel of a sequencer), with split and layered Zones laid out across the external MIDI keyboard.
- Page 141 If you do have multiple PC4 SEs receiving Sysex messages from a single source, make sure each PC4 SE has a different Sysex ID. This will allow you to direct Sysex messages to the appropriate PC4 SE by specifying which unit with the Sysex ID byte that’s included with every Sysex message.
- Page 142 When Xmit Transport is set to Off, the PC4 SE will not send System Real-Time and MMC transport messages. When Xmit Transport is set to On, the PC4 SE’s front panel Play and Stop buttons will send System Real-Time and MMC transport Play and Stop messages. This allows you to use the PC4 SE to start or stop an external sequencer (if it is able to receive these messages).
-
Page 143: Master Fx Page
Note: When you exit Global Mode, the current Master FX settings will be saved as default settings to be applied when the PC4 SE is powered on. To save Master FX settings set in Program or Multi Mode as default settings, you must enter and exit Global Mode. -
Page 144: Enter Storage Page
Global Mode Enter Storage Page Enter Storage Page The Storage pages lets you use a USB device (such as a thumb drive) to store or load files. While using the Storage pages, the playing of notes is disabled. To view the Storage pages, select the Enter Storage page, plug a USB storage device into the rear panel STORAGE port, then press the ENTER button to view the Storage Load page. - Page 145 Global Mode Enter Storage Page When viewing a page that has the Path field, if there are any directories available in the root directory you can select one using the ALPHA WHEEL or NAVIGATION Up/Down buttons. Press the FAVORITES 2 button to open the selected directory. The name of the directory will be displayed in the Path field.
- Page 146 Global Mode Enter Storage Page Load Page Select the Load page to load compatible files from a storage device. Use the NAVIGATION Up/Down buttons or the ALPHA WHEEL to browse the files in the storage device. Press the FAVORITES 2 button to open the selected directory. Press the FAVORITES 1 button to move one level back from the current directory.
- Page 147 The following example shows how each loading method affects how programs are loaded into the User bank when it already contains programs. Example: Starting with the following objects already stored in the PC4 SE User bank: Programs currently in PC4 SE...
- Page 148 EXIT button to return to the file list dialog. Loading Compatible Object File Types Aside from loading objects from its own .P4S files, the PC4 SE can load sounds and objects from other instruments with the following file types: .K27, .PC4, .SP6, .FSE, .FOR, .ASE, .ART, .P3A, .PC3, .P3K, .PLE, .SPX, .K26, .K25, .KRZ, and .SYX.
- Page 149 Enter Storage Page Loading Legacy K2 Series Object Files (K26, .K25, .KRZ) When loading objects from K26, .K25, or .KRZ files, objects are converted to PC4 SE object types. Some object parameters cannot be converted, and some objects may not be compatible if they use user samples.
- Page 150 Select the Store All page to store all user objects into a single file, or press the EXIT button to return to the previous page. On the Store All page, you must select a directory and file name with the Select Directory dialogue, see below for details. The PC4 SE stores files using the file extension .P4S.
-
Page 151: Enter Song Page
Global Mode Enter Song Page Enter Song Page On the Enter Song page, press the ENTER button to enter Song Mode. Song Mode allows you to record MIDI songs with up to 16 tracks. You can also jump directly to Song Mode from Program or Multi Mode by doing a double button press of the NAVIGATION Left/ Right buttons. -
Page 152: Objects Utils Page
Global Mode Objects Utils Page Objects Utils Page Use the Global Object Utils page to move or delete User objects. Caution: Deleted User objects can not be restored. All User objects that you wish to save should be saved to an external USB device before deleting, see Store Pages on page 6-22 details. -
Page 153: Mixer Pages
Global Mode Mixer Pages Mixer Pages The Mixer pages allow you to view and control the current state of the PC4 SE’s 16 MIDI channels. Select Mixer page 1 or 2 to view channels 1-8 or 9-16. Use the Enable parameter to enable or disable the Program on each MIDI channel. -
Page 154: Midi Out And Midi In Scope Pages
MIDI Out or In ports. The MIDI Out Scope page allows you to view MIDI messages sent from the PC4 SE, while the MIDI In Scope page allows you to view MIDI messages received by the PC4 SE. The MIDI Out Scope page is useful for making sure controls are assigned as you want them, checking note velocities, and checking controller values or other MIDI messages. -
Page 155: Midi State Page
MIDI State Page MIDI State Page The MIDI State page shows the state of the MIDI CCs in each PC4 SE MIDI channel. For example, if a channel is not making any sound, you can check the values for MIDI CC 7 (Volume) and MIDI CC 11 (Expression). -
Page 156: Reset Page
User objects. Press the ENTER button to perform a hard reset. When the hard reset is completed, the PC4 SE will enter System Mode. In System Mode, select RUN PC4 SE and press ENTER to return to Program Mode. -
Page 157: Song Mode
Song Mode Chapter 7 Song Mode To access Song Mode, press the GLOBAL Mode button, then select the Song Enter page and press the ENTER button. You can also jump directly to Song Mode from Program or Multi Mode by doing a double button press of the NAVIGATION Left/Right buttons. Use Song Mode to record and play multi-track songs sequenced by MIDI. -
Page 158: Transport Buttons
Song Mode Transport Buttons Transport Buttons In Song Mode, the Favorite Buttons below the display can be used to control playback and recording. PLAY/PAUSE Button When the song status is Stopped, press the PLAY/PAUSE button to play the song from the bar and beat specified by the Locate parameter. - Page 159 Song Mode Transport Buttons LOCATE FORWARD Button Press the LOCATE FORWARD button to add one Bar to the current value of the Locate parameter. Controlling Song Mode with External Sequencers You can control the PLAY/PAUSE, and STOP buttons from an external sequencer sending System Real-Time or MIDI Machine Control (MMC) messages.
-
Page 160: Save Changes Dialog
Song Mode Save Changes Dialog Save Changes Dialog The following dialog appears after you have recorded a track and pressed STOP. Press the SAVE button to save the song with the performance you just recorded. The Save Dialog will be displayed. Use the Save Dialog to save the Song by selecting a User ID to save to, and renaming the Song if desired. -
Page 161: Main Page
Song Mode Main Page Main Page Use the Song mode Main page to select a Song, and view and edit the tracks’ channel, program, volume and pan settings, and other parameters. Song Status The Song Status is shown on the top line of the display: Stopped The default status;... - Page 162 Song Mode Main Page Recording Track (Rec Track) The Rec Track parameter determines which track is record enabled. You can select a single track, or set Rec Track to Mult to record more than one channel simultaneously. See the Track Status section below for details on arming multiple tracks. The parameter(s) below Rec Track change according to the value of Rec Track.
- Page 163 Song Mode Main Page Track Number (Track) This parameter is available only when Rec Track is set to None or Mult (replacing the Program parameter). It indicates which track is currently being triggered by the keyboard, and you can use this field to select a track. Tempo The Tempo parameter determines the initial tempo for the selected song.
- Page 164 Song Mode Main Page Initial Volume Settings Each song file does not automatically save your volume setting for each track. To make a song save your volume settings for each track, you must write an initial volume for each track. Initial volume is the volume setting that will be used when your song is played back from the start of bar 1.
- Page 165 Song Mode Main Page by the MIDI channel volumes in the previously played song. If you are in Song mode and you load a song that does not have initial volumes without playing another song first, each MIDI channel will have the volume settings last used in Program mode (set by any MIDI volume messages (CC 7) received while in Program Mode).
- Page 166 Song Mode Main Page pressing the ENTER button you must save your song to save these settings. Pressing the ENTER button stores the current value of each track’s Program, Volume and Pan settings as initial settings. Be sure that these values on each track are set to the value that you wish to store, as the settings may have changed if you have written any automation.
- Page 167 Song Mode Main Page Song End The Song End parameter determines the end point for the song. Note that when Time Out and Song End are set to the same location, changes made to Song End are reflected in Time Out. When recording beyond your initially specified Song End point, you’ll notice that the Song End location automatically moves and rounds to the next bar, so as to always be ahead of the Locate time.
- Page 168 Song Mode Main Page Loop With the Loop parameter set to On, the sequencer will loop the segment of the song between Time In and Time Out. Set Loop to Off for regular playback. Metronome The Metronome parameter determines the recording modes in which the metronome will play.
- Page 169 Song Mode Main Page The Track Status row is most useful for muting previously recorded tracks, or arming multiple tracks when recording to more than one track at a time. When recording a single track, you may find it easier to use the Rec Track parameter to arm a single track at a time. When an empty track (–) is selected, you can change the status to Record (R) by using the ALPHA WHEEL.
-
Page 170: Misc Page
Song Mode Misc Page Misc Page The Misc page contains miscellaneous sequencer parameters. The Misc page appears below: Quantize and Miscellaneous Parameters Control Chase A common shortcoming of many sequencers is that when you start a sequence at some point in the middle of sequence, the controllers remain at their current levels until the sequencer comes across a controller event. - Page 171 This parameter determines the number of measures the PC4 SE will count off before recording. With Start Only selected, the PC4 SE will only count off at the beginning of a sequence. With Always selected, the PC4 SE will count off from any point in a sequence.
- Page 172 Song Mode Misc Page Channel This parameter determines the MIDI channel to which the metronome program and events are sent. Strong Note This parameter determines the MIDI number of the note played by the metronome for the first beat of each measure. Strong Velocity This parameter determines the velocity of the note played by the metronome for the first beat of each measure.
- Page 173 An Event is a note, CC message, or other MIDI message that can be recorded into the tracks of a PC4 SE song. Each song in the PC4 SE can use up to 50,000 Events. Some of these Events may also be used by other functions such as Riffs. 50,000 Events is more than enough for most songs, and most users will never run out of events.
-
Page 174: Mixer Pages
Song Mode Mixer Pages Mixer Pages The Mixer pages show the current settings for the Program number, panning, volume, and MIDI destination of each track. Select Mixer page 1 or 2 to view Tracks 1-8 or 9-16. Pan, Vol, Prog Use the Pan, Vol, and Prog parameters to view or change the Panning (left/right stereo placement), Volume, or Program of each track. - Page 175 L = Local. The track’s MIDI events will be transmitted locally only, to the PC4 SE’s internal sound generator. None of the track’s MIDI events will be sent to the USB or MIDI Out port.
-
Page 176: Event Page
Song Mode Event Page Keeping the Mixer Settings Press the ENTER button to view the Keep dialog, which allows you to capture the current values for each track’s program, panning, and volume as the initial values. After using the Keep dialog, remember to save the song if you want these changes to be permanent. If you don’t use the Keep dialog, tracks will not have initial program, panning, and volume values unless they are manually set for each track. - Page 177 Song Mode Event Page You can also jump directly to a specific bar and beat by typing the bar number and beat number, then pressing the ENTER button. Keep in mind if you have controller or program events previous to the point that you jump to, those events may not have been executed and you may hear unexpected results.
- Page 178 Song Mode Event Page Event Type and Value The Event Type and Value region displays the MIDI event type (and related information) at each Event-list location in the song. Different event types display different kinds of information, and have different editable values. The event type is the left-most field.
- Page 179 Song Mode Event Page Tempo Track To access the tempo track, use the BANK -/+ buttons to navigate to track 1, then press the BANK - button. The tempo track functions the same as the other tracks, except the only event type available is tempo change.
-
Page 180: Track Functions Page
Song Mode Track Functions Page Track Functions Page Use the Track Functions page to perform track-based edit functions such as Erase, Copy, Bounce, Insert, Delete, Quantize, Shift, Transpose, Grab, Change, and Remap. For each function, there is a set of parameters to control how the function operates, and on what region of the selected track(s). - Page 181 Song Mode Track Functions Page Common Parameters for Track Functions Locate This parameter is available for every function on the Track page. It appears at the lower left hand corner of the page. The Locate bar, beat, and tick will change in real time during playback and recording to reflect the song’s current position.
- Page 182 Song Mode Track Functions Page Controller The Controller parameter selects the Controller (or All Controllers) to be affected. Value Range The left and right Value Range fields respectively determine the lowest and highest values in a range of MIDI Continuous Controller (CC) values that will be affected by the selected Track Function.
- Page 183 Song Mode Track Functions Page Copy Use the Copy function to duplicate the selected events from the current track and place them in the same track or on another track, either merging with or overwriting existing events. If you do not want to copy all of the MIDI events in the defined range of time on the current track, use the Events parameter to select a specific MIDI event type you would like to copy.
- Page 184 Song Mode Track Functions Page Bounce Use the Bounce function to move the selected events from the current track to another track, either merging with or overwriting existing events on the destination track. The Bounce function differs from the Copy function in that events on the source track are deleted. As on a multi-track tape recorder, Bounce will always put the copied events at the same place in time on the Destination Track that they were on the source track.
- Page 185 Song Mode Track Functions Page Insert The Insert function is used to add blank time to the current song, modifying the song’s End point appropriately. The Insert function will affect all tracks. This is similar to splicing a piece of blank tape to an existing segment of recording tape. Location: Bars : Beats : Ticks Use the Location parameter to specify a bar, beat, and tick location in the destination track where the blank time will be inserted.
- Page 186 Song Mode Track Functions Page Delete The Delete function is used to remove a region of time from the current song. This function is different from the erase function because not only does it remove the events from the selected time, it will delete the entire selected range of time from the song, modifying the song’s End point appropriately (on all tracks).
- Page 187 Song Mode Track Functions Page Quantize Use the Quantize function to adjust the timing of Note events. Keep in mind that only Note events are quantized; other types of events, such as controllers, are not quantized. Quantize Amount: 0 to 100% The Quantize Amount parameter determines how much the selected Note events are moved towards grid locations.
- Page 188 Song Mode Track Functions Page Shift The Shift function allows you to offset the existing MIDI events forward or backward in time any number of bars, beats and ticks. Events can not be shifted before Bar 1 : Beat 1 : Tick 0. Amount: Bars : Beats : Ticks The Amount parameter specifies the number of bars, beats, and ticks that the selected MIDI events are moved forward or backward in time.
- Page 189 Song Mode Track Functions Page Transpose Use the Transpose function to change the MIDI Note numbers of the selected Note events. Semitone: -128 to 127 semitones An increment of one semitone represents a change of one MIDI Note number. You can transpose Note events only within the range of MIDI Note numbers 0 to 127.
- Page 190 Song Mode Track Functions Page Grab Grab is similar to the Copy function, except that the Grab function allows you to copy selected events from tracks that exist in other songs in memory. Source Song: Song List Use the Source Song parameter to select a song to Grab. The source track is determined by the Track parameter displayed on upper right hand side of the page, selectable with the CHANNEL/PAGE buttons.
- Page 191 Song Mode Track Functions Page Times: 1 to 127 The value selected for the Times parameter determines how many copies of the selected region are placed, one after another, in the destination track. Change The Change function is used to modify existing velocities, controller events, or other MIDI events on the current track.
- Page 192 Song Mode Track Functions Page When the Change function is applied with Mode set to PosRamp, the selected velocity or controller values will gradually change over the region of time, defined by the locations set for the From and To parameters, from the original value to the new value determined by the Scale and Offset settings.
-
Page 193: Fx Page
Song Mode FX Page FX Page The Song mode FX page works the same way as the FX page in Multi Edit mode, with the following exception: Song Mode does not have an AuxFX Ch parameter. Instead, in Song Mode the Aux 1 and 2 Chains are determined by the “FX Track” parameter on the Song Mode Main page (see “FX Track”... - Page 194 7-38...
-
Page 195: Troubleshooting
Use this chapter to learn how to maintain your PC4 SE and solve operational problems. Maintenance Clean the PC4 SE with a soft cloth dampened with water. Never use abrasives or solvents as they may damage the PC4 SE. Power On Problems This is the normal power on sequence: 1. -
Page 196: Audio Problems
NOTE: When solving audio problems, playing the PC4 SE Demo Songs is an easy way to test if the audio is working properly. To play the PC4 SE Demo Songs, press the KEYPAD and 0 buttons simultaneously. Problem... -
Page 197: Midi Problems
“USB+MIDI+LOCAL”. If using a MIDI cable, make sure the MIDI cable is plugged into the PC4 SE MIDI OUT port and the external MIDI device MIDI IN port. Make sure the USB or MIDI cable being used is securely plugged in at both ends. -
Page 198: Pedal Problems
Sustain or Sostenuto pedals are stuck “on”, or functioning backwards (“on” when up instead of down) Solution Always plug pedals in before powering on the PC4 SE, and do not press the pedals before the PC4 SE has powered on. Turn power off, then on, if necessary. - Page 199 A continuous control pedal should have an impedance between 5,000 and 100,000 ohms. An impedance less than 5,000 may overload the reference voltage source in the PC4 SE and interfere with operation of other controls. An impedance more than 100,000 may result in electrically noisy operation, which may cause your PC4 SE to send unwanted MIDI controller messages.
-
Page 200: Kurzweil Support
Troubleshooting Kurzweil Support Kurzweil Support For additional help, contact Kurzweil support at kurzweil.com/support. You may also find unofficial help at some of the internet communities listed at kurzweil.com/community. Service Centers To contact the nearest Kurzweil service representative, see Kurzweil International Contacts on page iv in the front of this manual for contact information. -
Page 201: Midi Implementation
MIDI Implementation Appendix A MIDI Implementation Function Transmitted Recognized Remarks Default Basic Channel Memorized Changed 1–16 1–16 Default Mode 3 Mode 3 For details on multi-timbral use of Program Mode Messages Mode, see Multichannel MIDI in Program Mode Altered on page 2-15.) 0–127 Note Number... -
Page 202: Physical Specifications
Physical Specifications Appendix B Physical Specifications RPHA: Real Piano Hammer Action. 88-key, fully-weighted hammer-action with velocity sensitive Keyboard: adjustable keys Display: 480 x 272 pixel high resolution color LCD with adjustable brightness Polyphony: 256 Voice Polyphony, dynamically allocated Multitimbral: 16 parts (one per MIDI channel) Quick Split / Layer: Easy access with adjustable volume and panning Programs:... -
Page 203: Index
Index Index Contrast Knob B-1 Control 3-2 Controller 5-23, 5-31, 5-32, 6-10, 6-11 Add parameter 5-37 Controller Parameter 5-27 Add Parameter 5-28 Controllers ALPHA WHEEL 1-6 in Program Mode 2-5 Arpeggiator Crossfade 5-6, 5-29 Arp Mode 3-14 Curve Parameter 5-29 Preset 3-12 Auto Power Off 6-3 Aux 1 3-5... - Page 204 Index Mode Parameter 5-25, 5-27 MODULATION WHEEL 1-7 General MIDI Mod Wheel 5-31 Velocity Map 6-6 Momentary 5-25 Global Mode 6-10 Mono Pressure 5-32 Global Parameters 5-8 Multi Controllers 6-3 Multi Edit Mode 2-12 Multis Saving 2-12, 4-10, 4-11 Half-Damper Pedal 1-12, 2-7, 4-6 Headphones 1-12 HiVel Parameter 5-5 Naming 4-12...
- Page 205 Index Rvrs Expand 5-6 Rvrs Linear 5-6 Save 4-10, 4-13 SAVE Button 1-9 Saving arpeggiator patterns 3-13 Scale Parameter 5-28, 5-37 Select Directory Dialogue 6-22 Selecting Multis 4-1 Selecting Programs 2-1 Shift Key 5-35, 5-36 Shift Pattern 5-35 Soft Pedal 5-31 Song Demo 1-18 Sostenuto 5-31 Split 2-12, 4-10...
- Page 208 ® It’s the sound. ®...