Raymarine hsb2 series Owner's Handbook Manual
Hide thumbs
Also See for hsb2 series:
- User manual (8 pages) ,
- Quick reference card (2 pages) ,
- Owner's handbook manual (231 pages)

Related Manuals for Raymarine hsb2 series


Summary of Contents for Raymarine hsb2 series
- Page 1 Series Fishfinders Owner’s Handbook Document number: 81195_1 Date: July 2001...
-
Page 3: Emc Conformance
This unit should not be relied upon as a substitute for such prudence and judgement. EMC Conformance All Raymarine equipment and accessories are designed to the best industry standards for use in the recreational marine environment. The design and manufacture of Raymarine equipment and accessories... - Page 4 Note: The combined Fishfinder/Chartplotter display units include a cartridge holder assembly which contains two slots for C-MAP NT chart cards. Fishfinder systems require an appropriate Raymarine transducer unit and in- ter-connecting cable. Details for selecting and installing the transducer are...
-
Page 5: Warranty
England PO3 5TD Telephone: +44 (0) 23 9269 3611 Fax: +44 (0) 23 9269 4642 Or, you may contact us on the World Wide Web at www.raymarine.com. Warranty To register your Series display unit ownership, please take a few minutes to fill out the warranty registration card found at the end of this handbook. - Page 6 Pathfinder Plus is a trademark of Raymarine Limited. This product contains technology provided under license by Acorn Group plc. The copyright of this intellectual property is acknowledged by Raymarine, Inc. as are Acorn’s trademarks and patents. Acorn’s world wide web address is http://www.acorn.com.
-
Page 7: Table Of Contents
Contents Contents EMC Conformance ................. iii Warranty ..................v Chapter 1: Overview ..................1-1 1.1 Introduction .................. 1-1 General ..................1-4 Introduction to Systems ............1-5 Display Unit Features ..............1-5 Operating Modes ................1-6 1.2 The Fishfinder Display ..............1-8 Fishfinder Options ................ - Page 8 viii Series Fishfinders 2.5 Mounting the Display Unit ............2-12 2.6 System Connections ..............2-14 Display Unit Connection ............2-15 EMC Conformance ..............2-18 2.7 Integrated Systems ..............2-18 High Speed Bus ( ) ..............2-19 SeaTalk and NMEA In ..............2-21 Using the SeaTalk Auxiliary Junction Box .........
- Page 9 Contents Moving Around the Chart ............3-26 Chapter 4: Fishfinder Operations ..............4-1 4.1 Introduction .................. 4-1 4.2 Interpreting and Adjusting the Fishfinder Image ......4-1 Fish Indications ................4-2 Bottom Indications ............... 4-3 Using White Line ................4-4 Adjusting Display Gain (Sensitivity) ........... 4-4 4.3 Fishfinder Data Window ...............
- Page 10 Series Fishfinders Clearing the Current Route ............5-22 Retrieve a Route From the Database ........... 5-22 Displaying Route Information ............ 5-23 Using the Route List to Erase and Name a Route ....... 5-25 Editing a Route ................5-26 5.5 Following Routes and Going to Points ........5-28 Follow a Route ................
- Page 11 Contents Chapter 7: Setting Up the System Defaults ..........7-1 7.1 Introduction .................. 7-1 7.2 Changing the Set Up Parameters ..........7-2 7.3 System Set Up Parameters ............7-4 Data Boxes ..................7-6 Bearing Mode ................7-6 Cursor Reference ................7-6 Cursor Readout ................
- Page 12 Cleaning Instructions ..............8-1 EMC Servicing and Safety Guidelines ......... 8-2 8.2 Resetting the System ..............8-3 8.3 Problem Solving ................8-4 How to Contact Raymarine (US) ..........8-5 How to Contact Raymarine (Europe) ........... 8-6 Worldwide Support ............... 8-7 Appendix A: Specifications ................A-1...
-
Page 13: Chapter 1: Overview
Use the High Speed Bus ( ), SeaTalk, and NMEA interfaces to provide an integrated system with additional devices, such as Pathfinder Plus Radar, Raymarine Autopilot, and Raystar Wide Area Augmentation System (WAAS) GPS products. Connecting an Series Fishfinder to an... - Page 14 Series Fishfinders How to Use This Handbook If you are installing the display system yourself, you should read Chapter 2 before you start the installation. This chapter also provides information that will be useful if you are connecting your Series system to other equipment.
- Page 15 Chapter 1: Overview Appendix C defines the chart features shown on the chart display. Appendix D defines the SeaTalk and NMEA data that is transferred on integrated systems. A List of Abbreviations, Index and warranty information are included at the end of the handbook.
-
Page 16: General
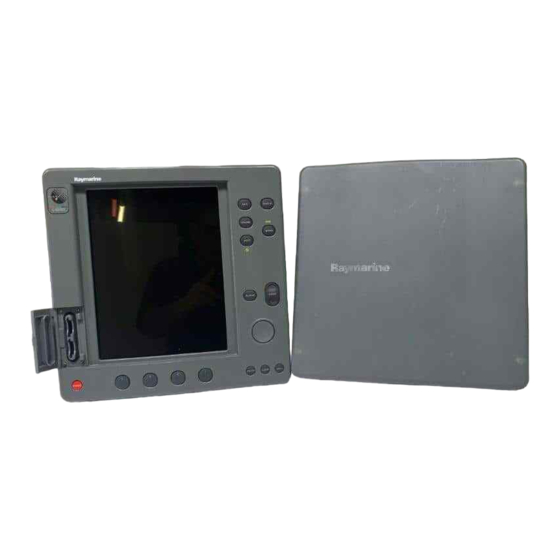
Series Fishfinders General Series Fishfinder system, illustrated below, is comprised of the 7" or 10.4" LCD display unit, fishfinder transducer, and associated cables. D4866-2 Figure 1-1: Fishfinder System Display Unit Series LCD display unit is waterproof to CFR46 and can be installed either above or below deck. -
Page 17: Introduction To Hsb Systems
Earlier HSB (non-Plus) Display units with can be upgraded to provide compatibility. Please contact your authorized Raymarine dealer for details. system can include several chartplotter displays, each with two chart cartridge slots. Each display can access two local and up to six remote chart cartridges. -
Page 18: Operating Modes
Series Fishfinders The following are features of the combined Fishfinder/Chartplotter units: ® • Displays chart information from the C-MAP NT chart cards (C-Cards) • Three full-screen operating modes: Fishfinder, Chart, Data Log (if appro- priate data is available) • View fishfinder and chart simultaneously •... - Page 19 Chapter 1: Overview • Depth/temp graph (Fishfinder mode): This shows a plot water tempera- ture and depth against time. • Data (Fishfinder mode): This option splits the fishfinder vertically. The left hand window displays data boxes; there are three different sets of data (A, B and C) that you can select for display.
-
Page 20: The Fishfinder Display
Series Fishfinders 1.2 The Fishfinder Display When you first turn the display unit on and select fishfinder mode, the scrolling bottom graph is displayed. This is a graphical representation of the echoes seen by the Fishfinder. As time passes, this display scrolls from right to left and becomes a record of the echoes seen. -
Page 21: Fishfinder Options
Chapter 1: Overview 50kHz AUTO GCRZFH Figure 1-2: Typical Fishfinder Display Fishfinder Options The fishfinder provides controls to select additional modes: • Frequency – you can select the transducer frequency, 50 kHz for wide cov- erage and deep water, 200 kHz for a detailed view, both frequencies simul- taneously or auto-frequency. -
Page 22: Fishfinder Functions
1-10 Series Fishfinders • A-Scope – displays a real-time image of the bottom structure and fish directly below the transducer. The A-Scope window also displays the pat- ented Bottom Coverage width indication. • Zoom – enlarges all or part of the bottom graph display. You can select x2, x4 or x6 magnification and the zoom area can be automatically or manu- ally adjusted. - Page 23 Chapter 1: Overview 1-11 SPLIT SPLIT AUTO G Z AUTO G Z 200kHz 200kHz 50kHz 50kHz 52.3 SPLIT 200kHz AUTO G Z AUTO G 200kHz 50kHz Figure 1-3: Fishfinder Display Options...
-
Page 24: The Chartplotter Display
1-12 Series Fishfinders 1.3 The Chartplotter Display The L755RC, L760RC, and L1250RC Plus Fishfinders include a Chartplotter. The chartplotter includes a small-scale world map and detailed navigation information is displayed when a cartographic chart card is installed. A plotter mode is provided to enable route plotting and tracking at large scales even when a chart card is not installed A typical chartplotter screen is shown in Figure 1-4. -
Page 25: Chartplotter Display Options
Chapter 1: Overview 1-13 Chartplotter Display Options Set up options allow you to customize the chart by choosing what is displayed (including cartographic features), how it is displayed (including language and units), heading mode and how the chartplotter operates with other units. -
Page 26: Chartplotter Functions
1-14 Series Fishfinders The chartplotter set up options include a sub-menu to customize the cartographic features. This menu allows you to switch features On, Off, or control them using the CUSTOM soft key. The factory default settings for the Custom chart options are as follows: Chart text, chart boundaries, depth contours, navigation marks and land features. -
Page 27: Operating Controls
Chapter 1: Overview 1-15 1.4 Operating Controls You operate the fishfinder and chart systems using a variety of controls: • A trackpad providing up, down, left, right and diagonal control of an on screen cursor • Eleven dedicated (labeled) control keys •... -
Page 28: Trackpad And Cursor
1-16 Series Fishfinders Figure 1-6: 10.4" LCD Display Control Keys Trackpad and Cursor The trackpad has several functions: • To move the cursor around the screen • To select an item from a pop-up menu • To adjust a variable soft key control The cursor is used to: •... -
Page 29: Dedicated Keys
Chapter 1: Overview 1-17 The cursor is normally displayed as a crosshair. However, in chart mode, if you have not moved the cursor for more than five seconds, when you next move it the cursor is outlined by a circle so it is easier to locate on the screen. Context-Sensitive Cursor Control The cursor is context-sensitive. -
Page 30: Soft Keys
1-18 Series Fishfinders • Press: Press the key momentarily and then release it. This method is used for most key operations. • Press and hold: Press the key and hold it down for the length of time stated (for example, 3 seconds), and then release it. When you press a dedicated key, one of the following happens: i. -
Page 31: Pop-Up Menus
Chapter 1: Overview 1-19 Pop-Up Menus Pop-up menus usually provide set up options. When a pop-up menu is on- screen, a set of associated soft keys is also displayed as shown in Figure 1-7. ALARMS SET UP D4265-1 Figure 1-7: Typical Pop-up Menu You use the trackpad to select an option from the menu, then use the appropriate soft key to set the option. - Page 32 1-20 Series Fishfinders WAYPOINT LIST POSITION BRG _186° RNG _21.0nm TEMP DEPTH ---° D4262-2 Figure 1-8: Typical Database List As with pop-up menus, when a database list is on-screen, a set of associated soft keys is also displayed; you use the trackpad to select an item from the list, then use the appropriate soft key to edit the item.
-
Page 33: Chapter 2: Installation
Chapter 2: Installation Chapter 2: Installation 2.1 Introduction This chapter provides installation instructions for the Series Fishfinders. Simple systems such as that in Figure 2-1 below, or integrated systems such as that in Figure 2-2 are explained (see Section 2.7). Details for mounting the Series LCD Display and connecting the equipment are included. - Page 34 Series Fishfinders Series Fishfinder Display (master) Series Repeater Display Transducer Compass SeaTalk Distribution Panel Junction NMEA 12/24V Supply 12V Supply 12V Supply D5442-2 Figure 2-2: Fishfinder in an Integrated System Note: If you wish to practice using the display before installation, use the sim- ulator mode, as described in Chapter 3.
-
Page 35: Planning The Installation
Section 2.4. EMC Installation Guidelines All Raymarine equipment and accessories are designed to the best industry standards for use in the recreational marine environment. Their design and manufacture conforms to the appropriate Electromagnetic Compatibility (EMC) standards, but correct installation is required to ensure that performance is not compromised. - Page 36 Typical Suppression Ferrites Connections to Other Equipment If your Raymarine equipment is to be connected to other equipment using a cable not supplied by Raymarine, a suppression ferrite MUST always be attached to the cable near to the Raymarine unit.
-
Page 37: Unpacking And Inspecting The Components
Chapter 2: Installation 2.2 Unpacking and Inspecting the Components Unpack your system carefully, to prevent damage to the equipment. Save the carton and packing, in case you need to return a unit for service. Check that you have all the correct system components. These depend on your system package, as follows: Table 2-1: Parts and Accessories... - Page 38 Series Fishfinders Table 2-1: Parts and Accessories Item Part No. Supplied with: Option for: cable assy R55001 — 3 ft 3 in (1 m) R55002 — 10 ft (3 m) R55003 — 20 ft (6 m) R55004 — 30 ft (10 m) E55010 —...
-
Page 39: Selecting The Equipment Location
Chapter 2: Installation 2.3 Selecting the Equipment Location Display Unit Mounting Location The display unit can be mounted using the mounting bracket supplied, or console mounted using the optional flush-mounting kit. The dimensions of the display units, including the bracket, are shown below in Figure 2-4, Figure 2-6, and Figure 2-5. - Page 40 Series Fishfinders 0.95 in (24.3 mm) 6.89 in (175 mm) 10.51 in (267 mm) 8.8 in (223.6 mm) GAIN DISPLAY VRM/EBL MARKS MULTI ALARMS RANGE POWER ENTER CLEAR MENU 4.53 in (115 mm) 1.42 in (36 mm) 6.9 in (176 mm) cable cleareance 3.15 in (80 mm)
- Page 41 Chapter 2: Installation 0.95 in 0.95 in (24 mm) (24 mm) 6.89 in (175 mm) 10.54 in (267.7 mm) 8.76 in (222.5 mm) GAIN DISPLAY VRM/EBL MARKS MULTI ALARMS RANGE POWER ENTER CLEAR MENU 3.2 in (81 mm) 1.45 in (37 mm) 6.9 in (176 mm) cable cleareance 3.15 in...
- Page 42 2-10 Series Fishfinders 3.82 in (97 mm) 11.5 in (292 mm) 6.38 in (162 mm) cable clearance 12.9 in (328 mm) 9.7 in (246 mm) 0.87 in (22.1 mm) Compass Safe Distance: 39 in (1 m) 7.88 in (200 mm) 1.7 in (43 mm) 11.26 in (286 mm) D5066-3...
-
Page 43: Cable Runs
Chapter 2: Installation 2-11 2.4 Cable Runs Consider the following before installing the system cables: • You need to attach the power cable and the transducer cable. Additional cables will be required if you are installing an integrated system. • All cables should be adequately secured, protected from physical damage and protected from exposure to heat. -
Page 44: Hsb 2 Series Fishfinders
2-12 Series Fishfinders 2.5 Mounting the Display Unit Series LCD display unit is waterproof to CFR46 and can be installed either above or below deck. The display unit can be mounted using the mounting bracket supplied, or console mounted using the optional flush- mounting kit (see Section 2.2). -
Page 45: Console Mounting
2-13 Console Mounting The display unit can be console mounted if required, using the optional flush- mounting kit (Raymarine part number M92708 for 7” Fishfinder displays and E55033 for 10.4” Fishfinder displays). CAUTION: Make sure there are no hidden electrical wires or other items behind the location before proceeding. -
Page 46: System Connections
The power connection to the display should be made at either the output of the battery isolator switch, or at a DC power distribution panel. Raymarine recommends that power is fed directly to the display via its own dedicated cable system and MUST be protected by a thermal circuit breaker or fuse, installed close to the power connection. -
Page 47: Display Unit Connection
Chapter 2: Installation 2-15 Display Unit Connection The rear of the Series LCD display provides the following connection sockets: • Transducer connection. • HSB, in/out connector for connecting to another Series display (such as a chartplotter, radar, or second fishfinder display). •... - Page 48 Series Fishfinders • Combined speed/temperature transducers have a 3 pin female connector that requires the use of an additional Y-shaped cable (Raymarine part num- ber E66022) to attach to the 7 pin connector on the display. This Y-cable is included with your speed/temperature transducer.
- Page 49 Chapter 2: Installation 2-17 Power and NMEA Input Connection The DC power and NMEA input should be connected at the rear Power/ NMEA seven-pin connector. The connector (viewed from the outside) and pin functions are shown in the following diagram and table. The NMEA Input is detailed in Section 2.7.
-
Page 50: Emc Conformance
2-18 Series Fishfinders EMC Conformance Always check the installation before going to sea to make sure that it is not affected by radio transmissions, engine starting, etc. 2.7 Integrated Systems Series displays can be linked to other equipment to transfer data as follows: •... -
Page 51: High Speed Bus (Hsb )
Chapter 2: Installation 2-19 High Speed Bus (hsb The High Speed Bus ( ) provides extremely rapid transfer of data between master and repeater displays. With an and a SeaTalk connection, most data available can be controlled and displayed by any unit. Master functionality is provided by the display with the appropriate transducer/scanner connected as defined in Table 2-3 . - Page 52 2-20 Series Fishfinders Note: Earlier HSB (non-Plus) Display units with can be upgraded to provide compatibility. Please contact your authorized Raymarine dealer for de- tails. RL80C PLUS Radar L1250 PLUS Fishfinder L760 PLUS Fishfinder RC530 Chartplotter Note: HSB (non-PLUS) di...
-
Page 53: Seatalk And Nmea In
Chapter 2: Installation 2-21 HSB connector HSB connector Pin name Function CGND Screen HSVB_POS SeaTalk HSB Pin 1, screen HSVB_NEG SeaTalk HSB Pin 3, blue Pin 2, white Rear of Display Unit D4253_2 Figure 2-12: HSB Connector The display unit is supplied with a blanking plug. This should be attached to the HSB cable port if the HSB port is not used. - Page 54 2-22 Series Fishfinders Note: The Fishfinder uses its own depth data, rather than any other depth data on SeaTalk. If there is no other depth data on SeaTalk, Fishfinder depth is transmitted. If speed and temperature data are available on SeaTalk the Fish- finder uses this data;...
- Page 55 SeaTalk The SeaTalk standard was originally developed by Autohelm (part of the Raymarine group), and allows compatible instruments to be connected by a single cable carrying power and data in/out. This means that additional instruments and functions can be added to a SeaTalk system, simply by plugging them into the network.
- Page 56 2-24 Series Fishfinders SeaTalk In/Out 1. Red (No internal connection) 2. Screen (0V) 3. Yellow (Data) D3232-4 Figure 2-15: SeaTalk Connector Table 2-5: Sea Talk Connections Pin No. Function Color +12 V Shield Data Yellow Note: 1. The display does not supply 12 V via the SeaTalk connector, nor does the SeaTalk connector require 12 V to operate.
-
Page 57: Nmea 0183
(Channel 2). Refer to Power and NMEA Input Connection on page 2-17 for further details. For example, to connect a Raymarine Heading Sensor to the NMEA Channel 1 input, connect the cables and power supply using a suitable connector block, as shown in the diagram below. -
Page 58: Using The Seatalk Auxiliary Junction Box
Ensure correct polarity of the 12 V supply before applying SeaTalk power. Use a multimeter to check the connections. Figure 2-17 shows how to connect the junction box; Appendix B provides connection details for specific Raymarine, Apelco and Autohelm GPS and Beacon Receiver systems. -
Page 59: Data Output
Chapter 2: Installation 2-27 To GPS To Display Unit Power Out: 1 & 2 SeaTalk Socket Power In: 1 & 3 Spare Power Input Supply Fused Cable Core Terminal Function SeaTalk Black (screen) +12v Yellow SeaTalk Power Black (screen) +12V Black (screen) +12V Yellow... -
Page 60: Data Conversion
2-28 Series Fishfinders NMEA OUT connector NMEA OUT connector Pin name Function NMEA_GND NMEA ground NMEA_SIG NMEA data output Pin 2, white Pin 3, blue CGND Screen Pin 5, screen Pin 4, not connected *Pin 1 does not exist on this connector Rear of display NMEA out D4254_1... -
Page 61: Integrated System Checks
Chapter 2: Installation 2-29 2.8 Integrated System Checks Chart Display When you have connected your display unit to the required equipment ensure that position data is available at the display via NMEA or SeaTalk. To confirm your chartplotter is operating correctly, perform the following checks: 1. - Page 62 2-30 Series Fishfinders...
-
Page 63: Chapter 3: Getting Started & Adjusting The Display
Chapter 3: Getting Started & Adjusting the Display Chapter 3: Getting Started & Adjusting the Display 3.1 Introduction This chapter provides information, instructions to get you started using the Series Fishfinder displays. It will help you to become familiar with the display and the functions of the controls before you start using the unit. -
Page 64: Switching The Display On And Off
Series Fishfinders 3.2 Switching the Display On and Off The factory default power-up mode is full-screen fishfinder. Once you have used the display unit it powers-up in the last used mode. The following sections describe the power-up sequence in fishfinder and chart modes, how to adjust the lighting and color controls, and how to select simulator mode. - Page 65 Chapter 3: Getting Started & Adjusting the Display • Range adjustment can be made on either master or repeater display, but any changes made are used on both displays. • Simulator mode is repeated from the master, but cannot be selected on the repeater display.
- Page 66 Series Fishfinders Chart Mode (Raychart Models only) To switch the display on in chartplotter mode, press and hold the POWER key until the unit beeps. The keys light up, the Raychart graphic is displayed, followed by the caution: CAUTION: Raychart chart displays are based on cartographic data that C-MAP believes to be accurate.
-
Page 67: Simulator Mode
Chapter 3: Getting Started & Adjusting the Display To switch the display unit off, press and hold the POWER key for three seconds. A countdown timer is displayed as shown below: GAIN DISPLAY VRM/EBL MARKS MULTI Countdown timer: POWER OFF IN number of seconds to power off RANGE... -
Page 68: Changing The Lighting & Contrast (Monochrome Lcd)
Series Fishfinders Changing the Lighting & Contrast (Monochrome LCD) On the L755RC, you can change the level of backlighting and contrast for the screen and keys. The key lighting is set the same as the screen lighting, except that it remains switched on at its lowest level even when the screen lighting is turned off, so that you can always find the keys. - Page 69 Chapter 3: Getting Started & Adjusting the Display The key lighting is automatically adjusted as you alter the screen lighting, so that you can always find the keys. If you set the backlight to a high level, the key lighting is dimmed; if you set the backlight to a low level, the key lighting level is increased.
- Page 70 Series Fishfinders To change the background color: MULTI 1. Press the MULTI key to display the soft key controls, then press COLOR SET- TINGS. 2. Press the BGROUND COLOR soft key. The background color soft keys are displayed below a pallet of available colors. The selected color is high- lighted.
-
Page 71: Controlling The Display
Chapter 3: Getting Started & Adjusting the Display Selecting the Color Set To change the color palette: MULTI 1. Press the MULTI key to display the soft key controls, then press COLOR SET- TINGS. 2. Press the COLOR SET soft key; this toggles between color set 1, bolder col- ors and color set 2, softer colors. -
Page 72: Selecting The Mode Of Operation
3-10 Series Fishfinders Selecting the Mode of Operation You use the DISPLAY key to select the full-screen mode. If the data is available on your system, the following modes (described in Operating Modes on page 1-6) can be selected: • Chart •... - Page 73 Chapter 3: Getting Started & Adjusting the Display 3-11 Selecting a Half-Screen Window for Display Note: Windows can only be used with Fishfinder or Chart screens, they are not available on the data log screen. To select a window for display: 1.
- Page 74 3-12 Series Fishfinders Fishfinder: D5013-1 Chart: D5025_1 To change the active window, press the CHRT SNR soft key to toggle control between the fishfinder and chart display. The current active display is highlighted in gray (monochrome LCD) or red (color LCD) on the CHRT SNR label and the cursor appears in that window.
- Page 75 Chapter 3: Getting Started & Adjusting the Display 3-13 CDI Window BDI Window 50kHz 50kHz AUTO G RZ AUTO G RZ 0.28 1.45 351° 351° 26.8 23.1 STEER PORT STEER STARBOARD 03 :59 01 :13 WAYPOINT 001 WAYPOINT 001 Depth/Temperature Window Chart Window 50kHz 50kHz...
-
Page 76: Fishfinder Display Control Functions
3-14 Series Fishfinders 3.4 Fishfinder Display Control Functions The Fishfinder automatically locates the bottom and displays the information using an appropriate scroll speed and range. However, controls are provided so you can adjust scroll speed and range. You can also select the transducer frequency and select certain data for display. - Page 77 Chapter 3: Getting Started & Adjusting the Display 3-15 Figure 3-7: Effect of the Scroll Speed The Fishfinder automatically adjusts the scroll speed, based on depth. Alternatively you can manually adjust the speed. If you select automatic adjustment, the scroll speed is related to boat speed as follows: •...
-
Page 78: Changing The Fishfinder Range
3-16 Series Fishfinders Changing the Fishfinder Range The Fishfinder automatically adjusts the display range. Alternatively, the RANGE key lets you select the maximum depth displayed on the scrolling bottom and A-Scope displays. You can also set the shift value to move the image window up or down within the current range. -
Page 79: Selecting The Power Setting
Chapter 3: Getting Started & Adjusting the Display 3-17 Note: 1. Range detection below 3000 ft (1000 m) is only available with the L1250 Plus and L1250RC Plus displays after you have fixed the Depth Range set- ting to 5000 ft. See Depth Range (L1250 Plus and L1250RC Plus only) on page 7-13 for details. -
Page 80: Selecting The Frequency
3-18 Series Fishfinders Selecting the Frequency Series Fishfinders use dual frequency sonar. The two frequencies used are 50 kHz and 200 kHz. The Fishfinder automatically selects the appropriate frequency. Alternatively, you can manually select either frequency, or both frequencies simultaneously. Each is suitable for a particular purpose: 50 kHz Frequency When using this frequency, the transducer scans a wide area. -
Page 81: Using Bottom Lock
Chapter 3: Getting Started & Adjusting the Display 3-19 Using Bottom Lock The scrolling bottom display provides a top-down view, referenced from the surface of the water. Bottom Lock shows a water column of fixed height, referenced from the bottom, that appears flat. It removes bottom detail to provide an image of objects directly above the bottom, and is useful when you are looking for fish that feed close to the bottom. - Page 82 3-20 Series Fishfinders 200kHz AUTO G Z D5015-2 Figure 3-8: Bottom Lock Display 3. Press the BTM. LOCK FULL SPLIT soft key to toggle between a full window bottom lock image or split windows. The bottom lock image is displayed. If you select split windows, the fishfinder display is split vertically, with the bottom lock image in the left hand window and the scrolling bottom display in the right hand window.
-
Page 83: Using A-Scope
Chapter 3: Getting Started & Adjusting the Display 3-21 To reposition the bottom lock image: 1. Use the trackpad to move the cursor to the bottom image until the text BL is displayed near the cursor. 2. Press ENTER, a horizontal line appears, indicating the cursor is active. Use the trackpad to move the line to the required bottom lock image position. -
Page 84: Using Zoom
3-22 Series Fishfinders 50kHz AUTO G Z 52.3 52.3 52.3 52.3 Figure 3-9: The Three Modes of A-Scope Using Zoom Zoom enlarges all or part of the scrolling bottom display. You can select automatic zoom so the fishfinder selects a zoom level that keeps the bottom in the lower half of the display window. - Page 85 Chapter 3: Getting Started & Adjusting the Display 3-23 To reposition the zoom window: If manual zoom is selected, you can reposition the area of the image that is zoomed. 1. Use the trackpad to place the cursor in the zoom window, the text ZOOM is displayed near the cursor.
-
Page 86: Chart Display Control Functions (Raychart Models Only)
3-24 Series Fishfinders 3.5 Chart Display Control Functions (Raychart Models) Customizing the Screen Presentation Options The SCREEN soft key lets you set the following screen presentation options on or off: D4177-1 Switching the Cursor Data Box On and Off The cursor data box provides the cursor’s position in latitude/longitude and/or bearing/range. - Page 87 Chapter 3: Getting Started & Adjusting the Display 3-25 At any time, you can switch the group of data boxes on or off using the SCREEN soft key. When first installed, the boxes are all OFF. When the display unit is switched off and on again, the data boxes return to their last-used states (ON or OFF) and positions.
-
Page 88: Moving Around The Chart
3-26 Series Fishfinders Moving Around the Chart You will normally operate the chartplotter with the chart showing your vessel’s current location. The default orientation is North-Up, and the vessel moves across the screen. You will need to move the chart if your vessel moves out of the area currently displayed, or if you wish to examine or place waypoints in another area. - Page 89 Chapter 3: Getting Started & Adjusting the Display 3-27 D4278-1 Figure 3-10: Changing the Chart Center 3. Use the trackpad to move the cursor to the required position. 4. Press ENTER to select the position and return to normal cursor control. The chart is redrawn with the vessel position at the cursor.
- Page 90 3-28 Series Fishfinders Changing the Chart Scale The RANGE key allows you to change the chart scale so that you can see a smaller or larger area on the screen. Plotter mode is available to allow you to zoom into a smaller area, even when no chart data is available for that scale.
- Page 91 Chapter 3: Getting Started & Adjusting the Display 3-29 Chart Boundary - indicates further detail is available inside D4279-2 Figure 3-11: Chart Boundaries 4. When no further chart detail is available, as you press the bottom of the RANGE key, the effect depends on whether Plotter Mode is on or off as follows: •...
- Page 92 3-30 Series Fishfinders...
-
Page 93: Chapter 4: Fishfinder Operations
Chapter 4: Fishfinder Operations Chapter 4: Fishfinder Operations 4.1 Introduction Basic Fishfinder operation, including a description of the different display options, was given in Chapter 3. This chapter helps you the get the most from your Fishfinder. It describes how to fine-tune the image and use the controls to get additional information. -
Page 94: Fish Indications
Series Fishfinders The Fishfinder provides a White Line feature which helps to distinguish between the bottom and fish (or other items such as weed) that are close to the bottom. Fish Indications When the Fishfinder detects a fish, it displays an arch-shaped mark. In general, a larger arch indicates a larger fish, though this rule is not always true. -
Page 95: Bottom Indications
Chapter 4: Fishfinder Operations Effect of Frequency and Boat Speed The return from a fish has a different appearance depending on the frequency used: 50kHz produces a wide beam, so a fish spotted by this frequency gives a broad arch; the 200 kHz beam is narrower so the same fish produces a narrower arch. -
Page 96: Using White Line
Series Fishfinders An uneven bottom which is covered with rocks or coral produces a complex display; the bottom image is irregular, with long tails pointing upward. A wreck produces a similar image. A softer bottom or a bottom covered with seaweed produces a wide line, as the sound waves reflect from different layers of the bottom. -
Page 97: Color Gain
Chapter 4: Fishfinder Operations The color bar on the right hand side of the display, when set to ON in the Fishfinder Set Up menu (see Section 7.4), shows the colors being used, with strongest echo color at the top and the weakest echo color at the bottom. The height of each bar indicates the range of signal strengths displayed in that color. - Page 98 Series Fishfinders Note: The color LCD Fishfinder also provides a COLOR THRESHOLD control to reduce the number of colors displayed. You can use COLOR THRESHOLD with COLOR GAIN to determine how echoes are displayed. The Fishfinder provides automatic or manual COLOR GAIN adjustment. Automatic adjustment displays colors based on current conditions, with as many colors as possible, while minimizing noise and clutter.
-
Page 99: Fishfinder Data Window
Chapter 4: Fishfinder Operations 4.3 Fishfinder Data Window The Fishfinder can display various measurements in large format data boxes. Use the DISPLAY key options to select a data window that is vertically split with the full-screen fishfinder display. Three data windows are available, each window provides several large-format data boxes for specific information as follows: 50kHz... -
Page 100: Using Alarms
Series Fishfinders 4.4 Using Alarms The ALARMS key is used to set up alarms; three alarms are available to alert ALARMS MULTI you of fish, shallow water and deep water. Each alarm can be toggled ON and OFF, and you set the depth at which shallow and deep water alarms are triggered (between the ranges 2–3000 feet/0.5–500 fathoms/1–1000 meters). -
Page 101: Using Vrm To Determine Depth & Distance From Boat
Chapter 4: Fishfinder Operations To set an alarm 1. Press the ALARMS key. The alarms soft keys are displayed. ALARMS D5031-1 2. For the shallow or deep alarms, press the SHALLOW ALARM or DEEP ALARM soft key then use the up or down soft keys to change the alarm limit. Press the up arrow (right) soft key to select deeper water;... - Page 102 4-10 Series Fishfinders The distance-from-boat continues to update as your boat moves. However, the vertical line does not scroll with the scrolling fishfinder image. If the display range changes, the VRM maintains the same position and may, therefore, move out of the visible display area. When you switch on the VRM, it is displayed at its last position (unless off screen, then it is displayed on-screen).
-
Page 103: Waypoints
Chapter 4: Fishfinder Operations 4-11 4.6 Waypoints The MARKS key lets you to place up to 998 waypoints. A waypoint is a MARKS position, normally entered on a chart as a reference, or as a place to go to. However, the Series units with Raychart functionality (L755RC Plus, L760RC Plus, and L1250RC Plus) let you place waypoints in Fishfinder mode as well as Chartplotter mode. - Page 104 4-12 Series Fishfinders To place a waypoint using the Waypoint List: 1. Press MARKS, followed by the WAYPOINT LIST soft key. The Waypoint List MARKS and associated soft keys are displayed. WAYPOINT WAYPOINT LIST LIST POSITION BRG _186° RNG _21.0nm TEMP DEPTH ---°...
-
Page 105: Mob
Chapter 4: Fishfinder Operations 4-13 4.7 MOB If you lose a person or object overboard, and need to return to the location, you should use the Man Overboard (MOB) function. You can select the type of data used for the MOB position using the set up menus (see Section 7.3). - Page 106 4-14 Series Fishfinders...
-
Page 107: Chapter 5: Standard Chart Operations
Chapter 5: Standard Chart Operations Chapter 5: Standard Chart Operations 5.1 Introduction This chapter explains how to navigate using the chart functions that are available with the L755RC Plus, L760RC Plus, and L1250RC Plus Combined Fishfinder/Chartplotter Displays. Chart functions are also available on L1250 Plus and L760 Plus fishfinder-only units, when connected to an Series device with chartplotter functionality (see Section 2.7, Integrated Systems). -
Page 108: Using Chart Cards
Series Fishfinders CAUTION: The equipment should not be used as a substitute for good navigational practice nor for official government paper charts. 5.2 Using Chart Cards The chartplotter has a built-in world map; most areas are displayed on a scale of 4000 nm from the top to the bottom of the screen, and can be zoomed in to 150 nm. -
Page 109: Removing A Chart Card
Chapter 5: Standard Chart Operations 5. Close the card cover until it clicks shut, to prevent water entering the dis- play unit. D4158-2 Figure 5-1: Inserting the Chart Card Removing a Chart Card To remove a chart card: 1. Open the card cover, at the lower left of the display front panel. 2. -
Page 110: Displaying Object Information
Series Fishfinders The boundary of each chart digitized in the current card is defined by a box or rectangle. (You can switch off the chart boundaries display if you wish, as part of the chartplotter set up described in Section 7.5.) To zoom in: 1. - Page 111 Chapter 5: Standard Chart Operations To obtain chart source data, move the cursor so that is not over a symbol, then press ENTER. An object information pop-up is displayed, providing source information for the selected land or depth area. Port Area At large chart scales port area information is indicated by the symbol .
- Page 112 Series Fishfinders Tide Data The symbol indicates tide height data is available for that position on the chart. When you select the tide height option, a graph of predictions for maximum and minimum tide heights is displayed, data for sunrise and sunset is also provided as illustrated Figure 5-3.
- Page 113 Chapter 5: Standard Chart Operations To select a time, use the trackpad to move the cursor to the required time. To change the day press PREV. DAY, DAY or TODAY, as required. Alternatively, press SET DAY; to change date, use the trackpad to move the cursor left/right to select the character and up/down to increase/decrease the value.
-
Page 114: Working With Waypoints
Series Fishfinders 5.3 Working with Waypoints Introduction Series Chartplotter enables you to place up to 998 waypoints. A waypoint is a position entered on a chart as a reference, or as a place to go to. All waypoints placed on the chartplotter or fishfinder are stored in a waypoint database list which includes symbol, position, bearing, range and additional data. -
Page 115: Placing A Waypoint
Chapter 5: Standard Chart Operations Placing a Waypoint The scenario Place and Goto a Waypoint on page 5-42 provides a simple example of how to place a waypoint. To access the place waypoint soft keys, press MARKS: PLACE WPT PLACE WPT WAYPOINT PLACE WPT PLACE WPT... - Page 116 5-10 Series Fishfinders 2. Press the MAKE NEW WAYPOINT soft key followed by the LAT/LONG soft key; the WPT POSITION (LAT/LONG) screen is displayed, with it’s associated soft keys. The waypoint is placed at the current vessel position, or if not available, the cursor position.
-
Page 117: Selecting A Waypoint
Chapter 5: Standard Chart Operations 5-11 WPT POSITION (LORAN TDs) ii. The ASF1/ASF2 soft key, which presents two soft keys for editing ASF 1 and ASF 2 parameters independently: iii. The SET TD 1 and SET TD 2 soft keys, which enable editing of each TD’s parameters independently. -
Page 118: Waypoint Data Display
5-12 Series Fishfinders To select a waypoint using the cursor: 1. Move the cursor over the waypoint, until the letters WPT are displayed. The Waypoint Data box (see Waypoint Data Display on page 5-12) and the following soft keys are displayed: D4163-1 The selected waypoint can be edited via these soft keys. -
Page 119: Editing The Waypoint Details
Chapter 5: Standard Chart Operations 5-13 To remove the waypoint data box and soft keys either: Move the cursor away from the waypoint, or press CLEAR. To display the waypoint details from the waypoint list: Select the waypoint in the list as described above. MARKS The details for the selected waypoint are displayed in the lower half of the window. -
Page 120: Erasing A Waypoint
5-14 Series Fishfinders Using the ST80 Navigator Keypad to edit the name: i. Use the left or right arrows of the Navigator’s keypad to move the cur- sor to the character you wish to change. ii. Use the up and down arrow keys to scroll through the characters. Use the alphanumeric keypad to change the character, as described in Using the ST80 Navigator Keypad on page 5-16 When you have finished editing the name, to remove the window, press... -
Page 121: Moving A Waypoint
Chapter 5: Standard Chart Operations 5-15 To delete a waypoint using the cursor: 1. Move the cursor over the waypoint, until the letters WPT are displayed. The waypoint soft keys are displayed. 2. Press the ERASE WAYPOINT soft key. The waypoint is removed from the ERASE WAYPOINT screen and the Waypoint List is updated. -
Page 122: Using The St80 Navigator Keypad
5-16 Series Fishfinders Using the ST80 Navigator Keypad If connected, you can use an ST80 Navigator Keypad to name or edit your waypoints, tracks, or routes. The keypad can also be used to select entries in the Waypoint List. The Navigator, connected via SeaTalk, provides 10 dedicated alphanumeric keys, a multidirectional cursor control pad, plus Insert and Delete keys. - Page 123 Chapter 5: Standard Chart Operations 5-17 Press the alphanumeric key that contains the first letter or number of the desired waypoint name. The selection bar moves to the entry starting with that letter or number. If more than one entry begins with that character, the selection bar moves to the first one in the list.
-
Page 124: Working With Routes
5-18 Series Fishfinders 3. Use the arrow keys and alphanumeric keys to input the remainder of the characters required to complete the editing. 4. When done, press the ins key to enter your changes. 5.4 Working with Routes A route is made up of a series of waypoints (maximum 50). To make a route you place a series of waypoints on the chart. -
Page 125: Creating A New Route
Chapter 5: Standard Chart Operations 5-19 • Clearing the current route. • Retrieving a route from the database list as the current route. • Displaying route information, including the route leg data and waypoint details. Use the waypoint details to review your passage plans for different speeds. -
Page 126: Saving The Current Route
5-20 Series Fishfinders The waypoint appears on the screen at the cursor position. The number displayed alongside the waypoint identifies its position in the route. The new waypoint is temporarily added to the waypoint list with the first avail- able waypoint number. The waypoints in the current route are re-num- bered to identify the new positions. - Page 127 Chapter 5: Standard Chart Operations 5-21 3. The next available entry on the route list is highlighted. (If required, you can use the trackpad to select another position in the list; this can be a blank slot, or an existing route that you no longer require). SAVE ROUTE EMPTY EMPTY...
-
Page 128: Clearing The Current Route
5-22 Series Fishfinders Clearing the Current Route You can clear the current route from the screen. When you select CLEAR ROUTE if the current route has not been saved, you have the option of saving it and, if you are following the current route, you have the option to stop. To clear the current route: 1. -
Page 129: Displaying Route Information
Chapter 5: Standard Chart Operations 5-23 ROUTE LIST CURRENT EMPTY EMPTY EMPTY EMPTY SHOW ERASE ROUTE NAME ROUTE ROUTE INFO ROUTE D4263-1 Figure 5-7: Route List Window Displaying Route Information You can display the following information that relates to your route: •... - Page 130 5-24 Series Fishfinders Using Route Information to Review Your Passage Plan You can view data for all the waypoints in the current route, or any saved route. You select the route from the database list and the information is displayed in a Route Information pop-up;...
-
Page 131: Using The Route List To Erase And Name A Route
Chapter 5: Standard Chart Operations 5-25 INFO FOR ROUTE-CURRENT ROUTE WPT POSITION BRG DISTANCE TOTAL TIME °T 50°21^97N --- 0.0 --:-- 001°15^80W 50°21^97N 090 4.4 --:-- 001°08^75W 50°27^48N 000 10.0 --:-- 001°08^75W ACTUAL TIME PLANNED SOG ETA TOTAL 1.0kn 0.0kn D4264-1 Figure 5-8: Route Information Window... -
Page 132: Editing A Route
5-26 Series Fishfinders 3. If you NAME a route: NAME ROUTE Use the trackpad to move the cursor right or left to the character you wish to edit. Then use the top or bottom of the trackpad to increase or decrease the letter or number. - Page 133 Chapter 5: Standard Chart Operations 5-27 Note: If you Clear the route before it is Saved, the new waypoint is removed. Adding Waypoints at the End of the Route To add waypoints at the end of the route: 1. Press the ROUTE soft key, followed by the EDIT ROUTE soft key. ROUTE The Make Route soft keys are displayed and the cursor is connected to the EDIT...
-
Page 134: Following Routes And Going To Points
5-28 Series Fishfinders 5.5 Following Routes and Going to Points The default soft key GOTO accesses the functions to FOLLOW a route and GOTO a waypoint or cursor. When you select the target destination, the chartplotter calculates bearing, distance and cross track error; this information is passed to a helmsman or autopilot. - Page 135 Chapter 5: Standard Chart Operations 5-29 You should always check the target waypoint before initiating a follow route. To follow the current route: GOTO 1. Press the GOTO default soft key. The Goto/Follow soft keys are displayed. 2. Press the FOLLOW ROUTE soft key. FOLLOW ROUTE Alternatively, to follow a route:...
-
Page 136: Target Point Arrival
5-30 Series Fishfinders Target Point Arrival You can set up target alarms (see Section 6.3) to alert you when the vessel is approaching the target point. The arrival alarm is defined as a circle (not visible on the screen), with a specified radius around the target. The alarm is triggered when either of the following conditions is met: •... -
Page 137: Going To An Individual Target Point
Chapter 5: Standard Chart Operations 5-31 Advancing to a Waypoint Once you are following a route, you can advance to the next waypoint, even if you have not reached the current target waypoint: 1. If necessary, press the GOTO default soft key to display the Goto/Follow GOTO soft keys. -
Page 138: Stop Follow Or Stop Goto
5-32 Series Fishfinders 2. Press the GOTO WAYPOINT soft key. GOTO WAYPOINT Navigation to the selected waypoint begins. The soft key STOP GOTO is dis- played. 3. To return to the default soft key display, move the cursor away from the waypoint or press ENTER or CLEAR. -
Page 139: Transferring Waypoints And Routes
Chapter 5: Standard Chart Operations 5-33 5.6 Transferring Waypoints and Routes Displayed SeaTalk Waypoints In an integrated system, when a route is made current on any SeaTalk equipment it is sent to all SeaTalk instruments, including this chartplotter; this route will override any other current route. When GOTO waypoint or GOTO cursor is in operation it is considered a route. - Page 140 5-34 Series Fishfinders To save waypoints to, or load waypoints from a user cartridge: CAUTION: Loading waypoints from a user cartridge overwrites any existing waypoint and route lists. 1. Insert a C-MAP User Card into the lower of the two cartridge slots. 1.
- Page 141 Chapter 5: Standard Chart Operations 5-35 USER CARD MENU To receive incoming waypoints on SeaTalk or NMEA: 1. To display the waypoint list, press MARKS followed by the WAYPOINT LIST MARKS soft key. WAYPOINT LIST 2. Press the WAYPOINT TRANSFER soft key. 3.
- Page 142 5-36 Series Fishfinders To receive the waypoint and route lists via , you must set-up the transfer on both display units - one unit will send waypoints, the other will receive them. CAUTION: Receiving waypoints from another instrument overwrites any existing waypoint and route lists.
-
Page 143: Using Tracks
Chapter 5: Standard Chart Operations 5-37 5.7 Using Tracks The Track function is used to mark on-screen the trail that your vessel has followed, as if it had left a visible fixed wake. While the track is turned on, it is recorded in the display unit’s memory. You specify the interval at which track points are made, a line is drawn on-screen between each point. -
Page 144: Setting Up A Track
5-38 Series Fishfinders Setting Up a Track You use the track soft keys to switch the track on and to specify the interval at which track points are saved. The interval default is a distance of 0.1nm. The maximum track length is 500 points, when the track has reached this length, the first points are overwritten. - Page 145 Chapter 5: Standard Chart Operations 5-39 Saving and Naming a Track You can save up to 5 named tracks in the Track List. These tracks can be re- displayed at a later date. To save and name the current track: 1.
- Page 146 5-40 Series Fishfinders Use the trackpad to move the cursor right or left to the character you wish to edit. Then use the top or bottom of the trackpad to edit the letter or num- ber. Use the arrow keys and alphanumeric keys on the ST80 Navigator keypad to input or edit the characters, as described in Using the ST80 Navigator Keypad on page 5-16.
-
Page 147: Typical Chart Scenarios
Chapter 5: Standard Chart Operations 5-41 5.8 Typical Chart Scenarios The following illustrations provide operating guidelines for typical navigation scenarios. These scenarios can be used as a training guide; they show you how to perform a particular operation and they introduce many of the chartplotter functions. -
Page 148: Place And Goto A Waypoint
5-42 Series Fishfinders Place and Goto a Waypoint 1. Press MARKS 2. Position Cursor as required Press the soft key Press the soft key to go to the waypoint selected by the cursor. D4267-1... - Page 149 Chapter 5: Standard Chart Operations 5-43 The vessel navigates towards the target waypoint See Sections: 5.3 Working wth Waypoints 5.5 Following Routes and Going to Points D4267-2c...
-
Page 150: Make And Follow A Route
5-44 Series Fishfinders Make and Follow a Route Press the soft key Press the soft key 1. Position Cursor - in this example over an existing waypoint 2. Press the soft key Position Cursor for next waypoint, then press soft key. Repeat to plot all waypoints in sequence. - Page 151 Chapter 5: Standard Chart Operations 5-45 See Sections:...
-
Page 152: Review Your Passage Plan
5-46 Series Fishfinders Review Your Passage Plan Press the soft key Press the soft key Press the soft key 1. Use the trackpad to move selection bar over required route. 2. Press the soft key Time defaults to ETA - and assumes the current time is the start time. - Page 153 Chapter 5: Standard Chart Operations 5-47 See Section: 5.4 Working with Routes Change the TIME to HOURS - the display indicates it will take 32 minutes to reach the destination. You can change the PLANNED SOG; the display updates to indicate TIME required at the planned speed.
- Page 154 5-48 Series Fishfinders...
-
Page 155: Chapter 6: Further Chart Operations
Chapter 6: Further Chart Operations Chapter 6: Further Chart Operations 6.1 Introduction This chapter explains how to use the additional functions that are provided with the L755RC Plus, L760RC Plus, and L1250RC Plus Combined Fishfinder/Chartplotter Displays. Chart functions are also available on L1250 Plus and L760 Plus fishfinder-only units, when connected to an Series device with chartplotter functionality (see Section 2.7, Integrated Systems). -
Page 156: Measuring Distances Using The Vrm/Ebl Key
Series Fishfinders 6.2 Measuring Distances Using the VRM/EBL Key You can obtain an accurate measurement of the distance and bearing between two points by using the VRM/EBL key. To place a ruler line and Ruler data box: 1. Position the cursor on the starting point from which you wish to measure. VRM/EBL 2. - Page 157 Chapter 6: Further Chart Operations To re-position one end of the ruler line: 1. Move the cursor over the ruler line towards the end that you want to re- position, until the letters A B are displayed. 2. Press ENTER to take cursor control of the ruler. The ruler end moves to the cursor which changes to a four-headed arrow.
-
Page 158: Alarms And Timers
Series Fishfinders 6.3 Alarms and Timers Alarm Reporting The chartplotter reports the following alarms, that are set using the ALARMS ALARMS key: Alarm Indicates: Arrival Your vessel has arrived at the active waypoint: it has either reached the arrival circle (the radius of which is specified) or, has reached its closest point of approach (defined by a line passing through the waypoint and perpendicular to the route leg). - Page 159 Chapter 6: Further Chart Operations ALARMS SET UP D4265-1 Figure 6-2: Alarms Set Up List 3. Use the up or down soft keys to change the alarm setting. For example, for the arrival alarm you can adjust the radius from the waypoint at which the arrival alarm will be triggered.
-
Page 160: Man Overboard (Mob)
Series Fishfinders 6.4 Man Overboard (MOB) If you lose a person or object overboard, and need to return to the location, you should use the Man Overboard (MOB) function. You can select the type of data used for the MOB position using the set up menus (see Section 7.3). -
Page 161: Cursor Echo
Chapter 6: Further Chart Operations To cancel the MOB, press and hold the MARKS key for 2 seconds. The chart is re-drawn at its previous scale, and the MOB symbol and data box MARKS are removed. Note: The MOB procedure can also be initiated or cancelled if the appropri- ate SeaTalk message is received by the display unit. -
Page 162: Gps Setup
Series Fishfinders 6.6 GPS Setup GPS set up page provides you with information and the status of the tracked navigation satellites for a SeaTalk GPS. It also enables you to SET UP a SeaTalk Differential GPS, by manually retuning it to a different differential beacon. Note: The satellite information is not available when you use an NMEA GPS. -
Page 163: Data Log Mode
Chapter 6: Further Chart Operations 6.7 Data Log Mode You can set the chartplotter to log course data every thirty minutes. Up to 48 log entries are held, when 48 entries have been made, the chartplotter will start overwriting the first entries. You start the log using soft keys provided in Data Log Mode. - Page 164 6-10 Series Fishfinders TIME POSITION D4284-1 Figure 6-5: Data Log Window To stop recording log entries: Press the STOP LOG soft key. STOP LOG To clear the log entries: Press the CLEAR LOG soft key, you are prompted “Are You Sure”. To cancel the CLEAR LOG CLEAR LOG operation press the NO soft key.
-
Page 165: Chapter 7: Setting Up The System Defaults
Chapter 7: Setting Up the System Defaults Chapter 7: Setting Up the System Defaults 7.1 Introduction Once you have installed your display unit and are familiar with its basic operation (described in Chapter 1 and Chapter 3), you need to set it up so that it obtains the correct information from the equipment you have connected it to, operates according to your requirements, and displays information according to your preferences. -
Page 166: Changing The Set Up Parameters
Series Fishfinders 7.2 Changing the Set Up Parameters The set up parameters are divided into three sections: • System, to control the aspects of the system that are not specific to the fish- finder or chart. • Fishfinder, to control the fishfinder display preferences, including HSB mode, calibration and simulator. - Page 167 Chapter 7: Setting Up the System Defaults • Some parameters are controlled by a slider that is displayed above two of the soft keys. • For some parameters, a soft key provides access to a sub-menu of fur- ther options. 4.
-
Page 168: System Set Up Parameters
Series Fishfinders 7.3 System Set Up Parameters The following table lists the System menus and their options, shows the factory default setting, and provides a space for you to make a note of your new default setting. Each parameter is described in the following subsections. Table 7-1: System Set Up Parameters Menu... - Page 169 Chapter 7: Setting Up the System Defaults Table 7-1: System Set Up Parameters Menu Options Factory Default Default TEMPERATURE UNITS CENTIGRADE or FAHRENHEIT FAHRENHEIT VARIATION SOURCE AUTOMATIC or MANUAL AUTO BRIDGE NMEA HEADING OFF or ON NMEA-OUT SET UP OFF or ON OFF or ON OFF or ON OFF or ON...
-
Page 170: Data Boxes
Series Fishfinders Data Boxes Press the SELECT BOXES soft key to display the data box sub-menu. This allows you to select up to 6 data boxes that you can display on the fishfinder. Note: 1. A fixed set of sixteen (nine in the L755RC Plus) of these data items are available for display in the Nav Data half-screen window (see Chapter 3). -
Page 171: Day/Night (L755Rc Plus Monochrome Display)
Chapter 7: Setting Up the System Defaults You can also turn the cursor readout box(es) on and off during normal operation, via the SCREEN default soft key (see Switching the Cursor Data Box On and Off on page 3-24). Day/Night (L755RC Plus Monochrome Display) This option allows you to change the target presentation between day and night modes. -
Page 172: Units
Series Fishfinders This setting does not affect the default soft key labels, which are controlled by the Soft Keys option (see above). Units You can set the units for speed, depth and temperature. The units you set will be used to display all data, including information received from other instruments on the system. -
Page 173: Bridge Nmea Heading
Chapter 7: Setting Up the System Defaults In Manual mode, incoming NMEA variation is ignored. However, if the variation is changed on another SeaTalk instrument, the new value is used and the manual value that is displayed is updated. Note: The Manual variation value defaults to 0°, so it is important to set up a value if variation is not available from an external source. -
Page 174: Cursor Echo (Systems With Hsb Radar)
7-10 Series Fishfinders Table 7-2: NMEA Sentences Sentence Meaning Water Temperature Recommended Minimum Navigation Information Radar System Data Routes Tracked Target Message Water Speed and Heading Distance Travelled through the Water Waypoint Location Global Positioning System Fix Data Geographic Position – Latitude/Longitude Recommended Minimum Specific Loran-C Data Recommended Minimum Specific GPS/TRANSIT Data Course Over Ground and Ground Speed... -
Page 175: Date And Time Settings
Chapter 7: Setting Up the System Defaults 7-11 • Chart Cursor In: displays the cursor from another or chartplotter on the radar display or radar window (default - OFF). Note: The remote display must have SeaTalk Cursor Out enabled. • SeaTalk Cursor Out: enables the output, onto SeaTalk, of the display’s own cursor (default - OFF). -
Page 176: Fishfinder Set Up Parameters
7-12 Series Fishfinders 7.4 Fishfinder Set Up Parameters The SONAR SET UP option allows you to set up the fishfinder according to your system configuration and your personal preferences. The following table lists the Sonar Set Up parameters and their options, shows the factory default setting, and provides a space for you to make a note of your new default setting. -
Page 177: Sonar Hsb Mode
Chapter 7: Setting Up the System Defaults 7-13 Sonar HSB Mode You need to specify if the Fishfinder display is a master display (directly connected to the transducer), or a repeater display (connected via to a Fishfinder master display). Depth data is sourced from a master display. Depth Offset The depth offset is added to the measured depth value before it is displayed. -
Page 178: Chart Set Up Parameters (Raychart Option Only)
7-14 Series Fishfinders 7.5 Chart Set Up Parameters (Raychart Models) For Fishfinders with the Raychart feature installed, the CHART SET UP option allows you to set up the chartplotter according to your system configuration and your personal preferences. The following table lists the Chart set up parameters and their options, shows the factory default setting, and provides a space for you to make a note of your new default setting. -
Page 179: Plotter Mode
Chapter 7: Setting Up the System Defaults 7-15 The following features can be set using Customize Chart, factory default settings are shown in bold type: • chart text (on, off, custom) • chart text size (small, normal, large) • chart boundaries (on, off, custom) •... -
Page 180: Hsb 2 Series Fishfinders
7-16 Series Fishfinders To update the Course Up reference while Course Up is the current mode, re-select Course Up from the set up menu. • Head Up: The chart is displayed with the vessel’s current heading upwards. As the heading changes the chart will rotate. Object Information You can set Object Information ON or OFF. -
Page 181: Position Offset
Chapter 7: Setting Up the System Defaults 7-17 CAUTION: Changing the chart datum does not cause any waypoint or routes stored in the chartplotter to move. Waypoints and routes may therefore appear to be at different positions when you change the datum. When adding waypoints numerically to the waypoint list, or via SeaTalk, NMEA, or , it is important that they are referenced to the same... - Page 182 7-18 Series Fishfinders...
-
Page 183: Chapter 8: Maintenance And Problem Solving
Chapter 8: Maintenance and Problem Solving Chapter 8: Maintenance and Problem Solving This chapter provides information on routine maintenance and on possible causes of problems you may experience with your Series display unit. 8.1 Maintenance WARNING: The display unit contains high voltage. Adjustments require specialized service procedures and tools only available to qualified service technicians - there are no user serviceable parts or adjustments and the operator should not attempt to service the equipment. -
Page 184: Emc Servicing And Safety Guidelines
Harsh cleaning solvents such as acetone may damage the transducer. EMC Servicing and Safety Guidelines • Raymarine equipment should be serviced only by authorized Raymarine service technicians. They will ensure that service procedures and replace- ment parts used will not affect performance. There are no user serviceable parts in any Raymarine product. -
Page 185: Resetting The System
Chapter 8: Maintenance and Problem Solving 8.2 Resetting the System There are three types of reset available for the Fishfinder display: • Factory Reset: This resets all values back to their original factory settings. CAUTION: The factory reset clears the Marks database, the chartplotter Waypoints and Routes databases, the sonar depth offset, and speed and temperature calibrations. -
Page 186: Problem Solving
Series Fishfinders 8.3 Problem Solving All Raymarine products are, prior to packing and shipping, subjected to comprehensive test and quality assurance programs. However, if this unit should develop a fault, please refer to the following table to identify the most likely cause and the corrective action required to restore normal operation. -
Page 187: How To Contact Raymarine (Us)
For Accessories and Parts Many Raymarine accessory items and parts can be obtained directly from your authorized Raymarine dealer. However, if you are in need of an item not available from the retailer, please contact Raymarine Technical Services at: 800-539-5539 ext. 2333, or 603-881-5200. -
Page 188: How To Contact Raymarine (Europe)
We will do everything possible to make the repair and return your unit as quickly as possible. How to Contact Raymarine (Europe) In Europe, Raymarine support, service and accessories may be obtained from your authorized dealer, or contact: Raymarine Ltd... -
Page 189: Worldwide Support
Installation chapter of this manual, and have the Raymarine part number ready when speaking with your dealer. If you are uncertain about what item to choose for your Raymarine unit, please contact our Customer Services Department prior to placing your order. - Page 190 Series Fishfinders...
-
Page 191: Appendix A: Specifications
Appendix A: Specifications Appendix A: Specifications Series Fishfinder Displays General Approvals: CE - conform to 89/336/EEC (EMC), EN60945:1997 FCC - conforms to Part 80 (47CFR) and Part 2 (47CFR) Size: L755RC 8.8" x 8" x 4.65" (223 x 204 x 118 mm), excluding bracket L760, L760RC 8.8"... - Page 192 Series Fishfinders Mono LCD Contrast 64 levels, selectable via soft keys. Languages UK English, US English, Danish, French, German, Dutch, Italian, Ice- landic, Norwegian, Portuguese, Spanish, Swedish, Finnish Connectors 7 pin transducer 3 pin HSB input/output 3 pin SeaTalk input/output 7 pin power including 2 NMEA input channels 4 pin NMEA output Interfaces...
- Page 193 Appendix A: Specifications Chartplotter Features (Units with Raychart) Cartography C-MAP® NT micro cartridges available from C-MAP® Chart of the world built in Display Windows Chart, Radar, Data Log, BDI, CDI, Navdata Chart Scaling 1/64 nm (if cartographic data is available) to 4000 nm Presentation Modes North up (selectable True or Magnetic) Head up or Course up Waypoints...
- Page 194 Series Fishfinders...
-
Page 195: Appendix B: Using The Auxiliary Junction Box
Appendix B: Using the Auxiliary Junction Box Appendix B: Using the Auxiliary Junction Box The SeaTalk Auxiliary Junction Box is used to connect SeaTalk GPS and Differential beacon receivers to your Series Fishfinder. Note: With the exception of the Raystar 114, when you use the following Dif- ferential Beacon Receiver configurations, the receiver must be set to AUTO MODE in the GPS Set-Up page. -
Page 196: Raystar 112, 105, Apelco 182 And 182Xt
Series Fishfinders Raystar 112, 105, Apelco 182 and 182XT In order to connect your GPS to your Fishfinder, you must first cut off the 6- pin connector and strip back the insulation on all the wires. Connect to the Auxiliary Junction Box as shown in the first illustration below. To connect your Differential Beacon Receiver, you must cut off the 5-pin connector, strip back the insulation on all the wires, and connect to the Auxiliary Junction Box as shown in the second illustration below. -
Page 197: Autohelm Gps, Z260 And Z273
Appendix B: Using the Auxiliary Junction Box Autohelm GPS, Z260 and Z273 To connect your GPS to your Fishfinder connect the wires as shown in the first illustration below. To connect your Differential Beacon Receiver, you must cut off the 5-pin connector, strip back the insulation on all the wires, and connect to the Auxiliary Junction Box as shown in the second illustration below. -
Page 198: Raystar 112Lp (Seatalk Version
Series Fishfinders Raystar 112LP (SeaTalk version) To connect your Raystar 112LP to your Fishfinder, refer to the first illustration below or follow the instructions in Chapter 2. To connect the Raystar 112LP and your Differential Beacon Receiver, cut off the 5-pin connector and strip back the red, black, and green wires. Remove the sleeve from the end of the Raystar 112LP cable to expose the green and brown wires, then connect to the Auxiliary Junction Box as shown in the second illustration below. -
Page 199: Raystar 114 Combined Gps And Differential Beacon Receiver
Appendix B: Using the Auxiliary Junction Box Raystar 114 Combined GPS and Differential Beacon Receiver To connect your Raystar 114 Combined GPS and Differential Beacon Receiver to your Fishfinder, cut off the 5-pin connector, strip back the insulation on all the wires and connect to the Auxiliary Junction Box as shown in the illustration below. -
Page 200: Raystar 120 Waas Satellite Differential Receiver
Series Fishfinders Raystar 120 WAAS Satellite Differential Receiver To connect your Raystar 120 WAAS Satellite Differential Receiver to your Fishfinder, connect to the Auxiliary Junction Box as shown in the illustration below. Optional connections to RTCM are also shown. Note that the green wire is not used. -
Page 201: Appendix C: C-Map Chart Card Features
Appendix C: C-MAP Chart Card Features Appendix C: C-MAP Chart Card Features The C-MAP chart cards display cartographic features which are derived from a library of symbols. The library includes a set of 16 x 16 pixel bitmaps which provide realistically shaped icons for many chart objects. However, these complex icons can overlap and clutter the display at some scales, so it possible for the user to select smaller, simple icons. - Page 202 Series Fishfinders Menu Option Chart Features CAUTION & ROUTING Caution Areas Tracks and Routes DATA Caution area Deep water route part Fishing facility Deep water route cen- Marine farm/cul- terline ture Fairway Cable, submarine Ferry route Cable area Navigation line Offshore prod’n Precautionary area area...
- Page 203 Appendix C: C-MAP Chart Card Features Menu Option Chart Features LAND FEATURES Natural Features Cultural Features Building, religious Coastline Airport area Building, single Dune Built-up area Cemetery Hill Railway Fortified Structure Land elevation Road crossing Siloway route part Land region Road part Tank Land...
- Page 204 Series Fishfinders The following chart features are always displayed: Menu option Chart features PORTS Ports: Services Port Information Berthing facility Coastguard station Port area Causeway Pilot boarding Harbour master Checkpoint place Coast Guard Crane Rescue station Police Signal station, traf- Customs Distance mark Health emergency...
- Page 205 Appendix C: C-MAP Chart Card Features The following chart features are always displayed: Menu option Chart features ROCKS Underwater Rock WRECKS Wrecks DEPTHS 1 Depth area DEPTHS 2 Dredged area DEPTHS 3 Intertidal area PORTS Mooring/Warping facility CAUTION AREAS Fish haven OFFSHORE INSTALLA- Diffuser TIONS...
- Page 206 Appendix C: C- MAP Chart Card Features...
- Page 207 Appendix D: SeaTalk and NMEA Data Appendix D: SeaTalk and NMEA Data The following table defines the data received on the NMEA/SeaTalk ports. Data sources are listed in order of priority except where indicated. Data Received Source Position (LAT/LON) SeaTalk, GGA, RMC, RMA, GLL Position (Loran C TD’s) GLC, RMA, GTD Speed and Course Over Ground...
- Page 208 Series Fishfinders Series display unit transmits the following data, if available, on SeaTalk: Data Output SeaTalk NMEA Out Position (LAT/LON) GGA, GLL, RMC , RMA Position (Loran C TD’s) Speed Over Ground and RMC, VTG , RMA Course Over Ground Waypoint Data RMB, APB, BWC, BWR Depth...
-
Page 209: Appendix E: Abbreviations
Appendix E: Abbreviations Appendix E: Abbreviations ANSI American National Standards Institute American Wire Gauge Bearing and Distance Indicator Bearing CCFL Cold Cathode Fluorescent Lamp Course Deviation Indicator Code of Federal Regulations Course Made Good Course Over Ground Cathode Ray Tube Center deciBels Direct Current... - Page 210 Series Fishfinders latitude pounds Liquid Crystal Display lon/long longitude Magnetic meters MARPA Mini Automatic Radar Plotting Aid Main Bang Suppression millimeter Man OverBoard Mark nautical mile NMEA National Marine Electronics Association Position (of vessel) Raychart (chartplotter) Radio Frequency Range Revolutions Per Minute Single Side Band Ships Heading Marker Speed Over Ground...
- Page 211 Index Index Source 5-4 Tide 5-4 Definition 1-3 Mode 1-6 Full Screen 3-10 Moving 3-26 Accessories 2-5 Orientation 7-14 7-15 Adding Course Up 7-15 a Waypoint to a Route 5-19 5-27 Head Up 7-16 Alarm Clock Alarm 6-4 North Up 7-15 Alarms 4-8 Scale 3-26 5-19...
- Page 212 Series Fishfinders Conventions Used 3-1 Tide 5-4 Countdown Timer Alarm 6-4 Fishfinder 4-7 Course Up 7-15 Route 5-19 Creating Data from other Equipment 2-28 4-13 a Route 5-18 COG 6-1 Cross Track Error - See XTE Heading 4-13 Current Route 5-18 NMEA 6-1 Altering 5-28 Position 4-13...
- Page 213 3-21 Heading Data Box 7-4 Bottom Lock 3-19 Heading Vector 7-14 7-16 White Line 4-2 Help 7-4 Zoom 1-10 3-22 Help from Raymarine Echoes 1-8 Europe 8-6 Features 1-8 US 8-5 Functions 1-10 High Voltage iii HSB Mode 7-12 7-13...
- Page 214 Series Fishfinders HSB Mode - Fishfinder 7-12 7-13 hsb2 1-3 Maintenance 8-1 Connection 2-20 Make and Follow a Route Scenario 5-44 Data 6-1 Man Overboard (MOB) - See MOB System Diagram 2-22 Managing Tracks 5-37 Marks 5-8 MARKS Key 1-17 4-11 4-13 5-12...
- Page 215 Index Window Options 1-6 3-13 Radar Display Object Information - Chart 7-14 7-16 Definition 1-3 Displaying 5-4 Radar Master 1-3 Off Track Alarm 6-4 Radar Mode 1-6 Offsetting the Center 1-12 Radar Repeater 1-3 Operating Controls Radar/Chart Synch 1-12 7-14 Cursor 1-15 1-16 Range...
- Page 216 Series Fishfinders Scenarios Symbol Make & Follow a Route 5-44 MOB 4-13 Place & Goto a Waypoint 5-42 Waypoint 5-8 5-13 7-14 7-16 Review Your Passage Plan 5-46 Synchronize Chart and Radar 7-14 Scroll Speed - Fishfinder 3-14 System Scrolling Bottom Graph 1-8 Connections 2-14 SeaTalk 1-5 2-23...
- Page 217 Index Variation Source 7-5 Vectors 7-14 7-16 VMG Data Box 7-4 VRM/EBL Key 1-17 WAAS 1-1 Warranty v Waypoint 6-6 7-14 7-16 Adding to a Route 5-19 5-27 Data Box 4-7 Data Display 5-8 5-12 5-24 Database List 4-11 4-12 5-20 5-31 Editing 5-8...
- Page 218 viii Series Fishfinders...