Ricoh DSm415pf Manuals
Manuals and User Guides for Ricoh DSm415pf. We have 5 Ricoh DSm415pf manuals available for free PDF download: Operating Instructions Manual, Service Manual, Copy Reference Manual
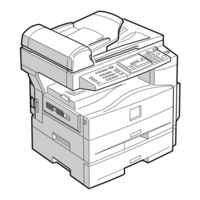
Ricoh DSm415pf Operating Instructions Manual (1171 pages)
General Settings Guide
Brand: Ricoh
|
Category: All in One Printer
|
Size: 27 MB
Table of Contents
-
-
Other Items
23 -
-
Display27
-
-
System Reset30
-
-
Multi-Access
31 -
Address Book
52 -
-
Keys93
-
7 Security
95 -
Main Unit
99 -
Other Items
102 -
Copy Paper
104 -
Index
107-
Copy Reference113
-
-
-
Notice
119 -
Control Panel
125-
Display126
-
Number Keys126
-
Scroll Keys127
-
Selection Keys127
-
-
-
Originals
131 -
Basic Procedure
137 -
2 Copying
137 -
Copier Functions
143-
Zoom145
-
Number Keys145
-
Sort146
-
Duplex147
-
B Loading Paper
155-
Loading Paper155
-
-
D Adding Toner
156-
Handling Toner156
-
Toner Storage156
-
Used Toner156
-
-
Removing Toner
157 -
Inserting Toner
158 -
-
Orientation162
-
Duplex Margin163
-
Do's and Don'ts
165 -
5 Remarks
165 -
-
Moving167
-
Power Connection167
-
6 Specifications
171 -
Index
175
-
-
-
Control Panel
189 -
-
Auto Run199
-
Quick Install200
-
-
Index
226
-
-
-
-
-
List/Test Print264
-
Paper Input264
-
Maintenance267
-
System269
-
Host Interface271
-
PCL Menu271
-
PS Menu273
-
-
4 Appendix
275-
Collate275
-
Specifications278
-
Options279
-
-
-
-
Outline
293-
E-Mail293
-
-
Control Panel
296 -
-
Scanner Features299
-
Scan Settings302
-
Send Settings304
-
-
-
E-Mail Screen322
-
-
7 Appendix
355 -
Troubleshooting
357 -
Specifications
362
-
-
-
Symbols373
-
-
Control Panel
375 -
-
Number Keys376
-
Operation Switch376
-
-
2 Faxing
381 -
Scan Settings
395 -
Reception
410 -
-
Programming428
-
Editing429
-
Deleting430
-
-
4 Programming
427 -
Solving Problems
440
-
-
-
-
Symbols455
-
-
E-Mail Options
461 -
Fax Header Print
462 -
Label Insertion
463 -
-
Journal474
-
-
E-Mail Reception
476 -
-
Chain Dial477
-
Redial478
-
-
On Hook Dial
479 -
Manual Dial
480 -
Printed Report
485 -
Reception
487 -
Printing Options
494-
Checkered Mark494
-
Centre Mark494
-
Reception Time495
-
-
Before Use500
-
-
Function List
515 -
-
Counters526
-
Forwarding526
-
Memory Lock529
-
User Parameters530
-
Home Position535
-
Fax Header536
-
G3 Analog Line547
-
-
9 Appendix
553 -
Specifications
554 -
Maximum Values
558
-
Advertisement
Ricoh DSm415pf Service Manual (329 pages)
Table of Contents
-
-
Installation
10-
Copier13
-
Postscript 340
-
Wireless Lan42
-
Bluetooth45
-
-
Precautions48
-
General48
-
-
-
Platen Cover50
-
Rear Cover50
-
Copy Tray51
-
Reassembling51
-
Scale Plate51
-
Bypass Tray53
-
Right Door53
-
-
Scanner Unit55
-
Fusing59
-
-
Pcu66
-
-
-
Exhaust Fan69
-
Main Motor69
-
-
Paper Feed70
-
Laser Unit79
-
-
-
-
SP1-XXX (Feed)101
-
SP2-XXX (Drum)103
-
SP5-XXX (Mode)111
-
SP1-XXX (Feed)120
-
SP2-XXX (Drum)122
-
SP5-XXX (Mode)131
-
Exceptions160
-
Memory Clear160
-
Overview165
-
Test Patterns168
-
User Tools176
-
-
-
Paper Path177
-
Drive Layout178
-
-
Overview183
-
Hot Roller Drive184
-
Mechanism184
-
Pressure Release185
-
Pressure Roller185
-
Separation185
-
Control Process186
-
-
Duplex Unit188
-
-
Paper Feed199
-
-
Mfp Model (B130)203
-
Adf204
-
Paper Feed Unit204
-
-
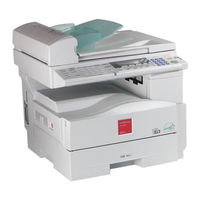
Ricoh DSm415pf Operating Instructions Manual (112 pages)
Brand: Ricoh
|
Category: All in One Printer
|
Size: 2 MB
Table of Contents
-
Other Items
23 -
-
Display27
-
-
-
System Reset30
-
-
Multi-Access
31 -
Address Book
52
Advertisement
Ricoh DSm415pf Operating Instructions Manual (112 pages)
General Settings Guide
Brand: Ricoh
|
Category: All in One Printer
|
Size: 6 MB
Table of Contents
-
Other Items25
-
-
Display28
-
-
Multi-Access33
-
Address Book54

Ricoh DSm415pf Copy Reference Manual (68 pages)
Ricoh Aficio 1515: Operating Instruction
Brand: Ricoh
|
Category: All in One Printer
|
Size: 2 MB
Table of Contents
-
Notice
9 -
-
Copy Key16
-
Display17
-
Number Keys17
-
On Indicator17
-
-
-
Originals
23 -
2 Copying
29