Sign In
Upload
Manuals
Brands
Milnor Manuals
Controller
MilTouch
Milnor MilTouch Manuals
Manuals and User Guides for Milnor MilTouch. We have
4
Milnor MilTouch manuals available for free PDF download: Operator's Manual, Manual
Milnor MilTouch Operator's Manual (178 pages)
Brand:
Milnor
| Category:
Controller
| Size: 13 MB
Table of Contents
English
9
Table of Contents
9
Chapter 1. How to Use the Miltouch Control
12
Using the Miltouch Control
12
The Home Display
12
The Wash Formula Maintenance Display
13
To Change an Existing Wash Formula
14
To Add a New Wash Formula
15
The Configuration Display
16
The Machine Configure Decisions
16
To Erase a Wash Formula
16
The Data Transfer Display
18
The Default Formulas by Laundry Type
18
Controller
20
Data Transfer with the Miltouch Programmer Software
20
How to Mount a USB Flash Drive to the Machine
20
How to Save and Transfer Wash Formulas
20
How to Save Machine Configuration Files
20
How to Transfer Machine Configuration Files to a Miltouch Machine
20
The Data Log Displays
21
The Date Selection Display
21
The Production Display
21
The Configuration and Programming Display
22
The Errors Display
22
The Inputs and Outputs Displays
23
The Run Display
25
The Names and Timers on the Run Display
25
The Machine Operations
26
The Machine Status Data
26
The Pop-Up Controls on the Run Display
27
Chapter 2. How to Update the Machine Software
28
Miltouch Update: WUMTGUI/2.1
28
Does My Machine Need this Update
28
How Do I Save My Formulas and Machine Configuration
29
How Do I Update the Machine Software
30
How Do I Restore My Formulas and Configuration Data
31
Chapter 3. Miltouch Wash Formulas
32
3.1. How to Use the Miltouch Formula Tables
32
Sample Formula Table
32
Definitions of Step Decision Symbols
32
Type = Type of Step
32
Cold = Cold Water Valve
33
Hot = Hot Water Valve
33
Level = Bath Level
33
Steam (Optional)
33
Temp = Commanded Bath Temperature (Optional)
33
Third Water Valve (Optional)
33
Time = Step Duration
33
C = Chemicals
34
Chemical Dose = Chemical Injection Duration
34
Drain Type
34
Signal with Chemical Injection
34
W = When to Inject Chemicals
34
Wash Speed
34
How to End Formula
35
Re-Use Drain (Optional)
35
Rinsave Commercial Laundry Formulas
36
Table 2: Commercial Laundry Formula
36
Chapter 4. Troubleshooting
40
Inputs and Outputs for the Miltouch ® Controller
40
Outputs
41
Label
41
Inputs
43
Components of the Miltouch ® Controller Circuit Boards
43
Processor Board (P/N: 08BHPAR91_)
44
Input/Output Board (P/N: 08BHF120A_)
45
Français
91
Contrôle Miltouch
95
Utilisation de L'appareil de Contrôle Miltouch
95
L'écran Accueil
95
L'écran Maintenance de la Formule de Lavage
96
Pour Modifier une Formule de Lavage Existante
97
Pour Ajouter une Nouvelle Formule de Lavage
99
Pour Effacer une Formule de Lavage
99
L'écran Configuration
100
Les Décisions de Configuration de la Machine
100
Les Formules Par Défaut Par Type de Laverie
102
L'écran Transfert de Données
103
Transfert de Données Avec le Logiciel de Programmation Miltouch
104
Comment Enregistrer les Fichiers de Configuration de la Machine
104
Comment Monter une Clé USB à Mémoire Flash Dans L'appareil de Contrôle de la Machine
104
Comment Enregistrer et Transférer des Formules de Lavage
105
Comment Transférer les Fichiers de Configuration de la Machine Vers une Machine Miltouch
105
Le Journal de Données S'affiche
105
L'écran Sélection de la Date
105
L'écran Configuration et Programmation
106
L'écran Production
106
Les Écrans Entrées et Sorties
107
L'écran Exécuter (Document BICLJO01)
109
Les Noms et les Minuteurs Sur L'écran Exécuter
110
Les Données Sur L'état de la Machine
110
Les Opérations de la Machine
111
Les Commandes Contextuelles Sur L'écran Exécuter
111
Chapitre 2. Comment Mettre à Jour le Logiciel de la Machine
113
Mise à Jour Miltouch : WUMTGUI/2.1
113
Ma Machine A-T-Elle Besoin de Cette Mise à Jour
113
La Machine
113
Comment Mettre à Jour le Logiciel de la Machine
113
Comment Restaurer Mes Formules et les Données de Configuration
116
3.1. Comment Utiliser les Tableaux de Formules Miltouch
118
Exemple de Tableau de Formules
118
Définitions des Symboles de Décision D'étape
118
Type = Type D'étape
118
Temps = Durée de L'étape
119
Chaud = Robinet D'eau Chaude
119
Froid = Robinet D'eau Froide
119
Niveau = Niveau du Bain
119
Vapeur (en Option)
119
C = Produits Chimiques
120
W = à Quel Moment Injecter des Produits Chimiques
120
Dose de Produits Chimiques = Durée D'injection de Produits Chimiques
120
Vitesse de Lavage
121
Type de Vidange
121
Réutiliser la Vidange (en Option)
121
Chapitre 3. Formules de Lavage Miltouch
118
Formules de Laverie Commerciale Rinsave
122
4.1. Entrées et Sorties pour L'appareil de Contrôle Miltouch
127
Chapitre 4. Dépannage
127
Deutsch
139
Kapitel 1. Verwendung der Miltouch-Steuerung
143
Verwenden der Miltouch ® -Steuerung
143
Die Home Anzeige
143
Die Wash Formula Maintenance Anzeige
144
So Ändern Sie eine Bestehende Waschformel
145
Zum Hinzufügen einer Neuen Waschformel
146
Zum Löschen einer Waschformel
147
Die Konfigurations-Azeige
148
Die Maschinenkonfigurations-Entscheidungen
148
Die Standardformeln nach Wäschereityp
150
Die Data Transfer Anzeige
150
Datentransfer mit der Miltouch Programmier-Software
152
So Speichern Sie Dateien mit Maschinenkonfigurationen
152
So werden Waschformeln Gespeichert und Übertragen
152
So Übertragen Sie Maschinenkonfigurationsdaten auf eine Miltouch Maschine
152
Wie ein USB-Flashdrive an die Maschinensteuerung Angeschlossen wird
152
Die Datenauswahl-Anzeige
153
Die Produktions-Anzeige
153
Die Anzeige Konfiguration und Programmierung
154
Die Fehler-Anzeige
154
Die Anzeige Inputs and Outputs
155
Die Run Anzeige (Dokument BICLJO01)
157
Die Bezeichnungen und Timer auf der Run Anzeige
157
Die Maschinenstatus-Daten
158
Die Betriebszustände der Maschine
158
Das Popup-Steuerelemente in der Anzeige Run
159
Aktualisierung Miltouch: WUMTGUI/2.1
160
Braucht meine Maschine diese Aktualisierung
160
Wie kann ich meine Formeln und Maschinenkonfigurationen Speichern
161
Wie Aktualisiere ich die Maschinensoftware
163
Wie kann ich meine Formeln und Konfigurationen wieder Herstellen
163
Kapitel 2. Wie wird die Maschinensoftware Aktualisiert
160
3.1. Benutzung der Miltouch Formel-Tabellen
164
Beispiel für eine Formeltabelle
164
Definition der Symbole der Schrittentscheidungen
164
Type = Typ des Schrittes
164
Time = Schrittdauer
165
Temp = Angewiesene Badtemperatur (Optional)
165
Hot = Heißwasserventil
165
Cold = Kaltwasserventil
165
Drittwasser-Ventil (Option)
165
Level = Laugen-Füllhöhe
165
Dampf (Optional)
165
C = Chemikalien
166
W = Wann die Chemikalie Eingespritzt wird
166
Chemical Dose = Einspritzdauer der Chemikalie
166
Signal bei Chemikalien-Einspritzung
166
Wash Speed
166
Art des Entleerens
167
Re-Use Drain (Optional)
167
Beenden einer Formel
167
Kapitel 3. Miltouch-Waschformeln
164
Rinsave ™ Formeln für Gewerbliche Wäschereien
168
Ein- und Ausgänge der Miltouch ® Steuerung
173
Ausgänge
174
Eingänge
175
Kapitel 4. Fehlersuche
173
Advertisement
Milnor MilTouch Manual (120 pages)
Brand:
Milnor
| Category:
Controller
| Size: 2 MB
Table of Contents
Table of Contents
3
Preface
8
About Miltouch™ Machines, the Miltouch™ Controller, and this Manual
8
When the Machine Is Idle (the Home Display)
9
Table 1 Examples of Specialist Activity
9
About Automatic Mode
10
Figure 1 the Home Display
10
When a Formula Is in Progress (the Run Display)
11
The Miltouch-EX™ WTB Display Hierarchy
11
Figure 2 Example Loading State
11
Figure 3 the Run Display
11
Table 2 the Miltouch-EX™ WTB Display Hierarchy
12
Configuration
14
Machine Configuration
14
The Main Configuration Display
14
How to Make Configuration Changes
15
Figure 4 the Main Configuration Display
15
Main Configuration Decisions
16
Figure 5 Processor Board Revisions
17
WTB (Automated Chute) Configuration
21
Figure 6 Configure WTB Display
22
System Settings
25
Enable and Define Lockout Passwords
25
Figure 7 System Settings Display
25
Figure 8 Password Area of the System Settings Display
25
Figure 9 User Password Window
26
Recalibrate the Touchscreen
27
Set the System Date and System Time
27
Figure 10 Sample Encrypted Password
27
Enable an Ethernet Connection
28
Formula Maintenance
29
Formula Creation and Modification
29
The Wash Formula Maintenance Display
29
To Add a New Wash Formula
29
Figure 11 the Wash Formula Maintenance Display
29
To Copy a Wash Formula
30
To Delete a Wash Formula
30
To Change the Number of a Wash Formula
31
To Change a Wash Formula
31
To Add a Step
32
To Copy a Step
32
Figure 12 the Steps in a Wash Formula Display
32
To Delete a Step
33
To Modify a Step
34
Figure 13 the Step Decisions Display
34
Miltouch-EX™ Wash Formula Decisions
35
Figure 14 the Chemical Display
37
Post-Wash Codes
39
How to Add a New Post-Wash Code
40
How to Use Cooldown
40
Configure Your Machine for Cooldown
40
Program a Cooldown
41
The Cooldown Sequence
41
How to Modulate Water Valves to Regulate Incoming Water Temperature
42
The Sequence of Actions in a Staged Extract (Miltouch-EX™)
43
Troubleshooting
44
Types of Troubleshooting and Analysis Information
44
Data Logs
44
Date Selection
45
Production History
46
Configuration and Programming History
46
Error History
47
Production Reports
48
How to Generate a Production Report
48
How to Export Production Reports as Text Files
50
Errors
51
Error Messages for Miltouch-EX™ Controller with Automated Loading and Discharge
51
Formula Errors
51
Loading and Discharging Errors
55
Error Correction
56
Manual Mode
58
Manual Functions
59
Fault Recovery
61
The Loading Recovery Sequence
61
The Discharging Recovery Sequence
62
To Return the Machine to Automatic Operation
62
Batch Data
63
Formula Intervention
64
Modify Step Timer
65
Modify Water Valves
66
Modify Drain Valves
66
Modify Steam and Cooldown
67
Modify Cylinder Speed
67
Modify Water Temperature
67
Modify Water Level
68
Troubleshooting Inputs and Outputs
68
The Diagnostics Display and Available Views
68
Digital Inputs
69
Digital Outputs
70
Digital Outputs- Machine Idle
71
Digital Outputs- Formula in Progress
71
Analog Channels (A/D Inputs and D/A Outputs)
71
The Miltouch-EX™ WTB Input/Output Boards
72
Status Lights on Boards
73
How to Determine the Position of an Output or Input
74
About the Yellow Light and Serial Communication
75
List of Inputs and Outputs
76
Inputs
76
Table 3 Inputs on 8-Output 16-Input Board #1
77
Table 4 Inputs on 8-Output 16-Input Board #2
78
Table 5 Inputs on 8-Output 16-Input Board #3 (WTB+ Only)
78
Outputs
81
Table 6 Inputs on 8-Output 16-Input Board #4 (WTB+ Only)
81
Table 7 Outputs on 8-Output 16-Input Boards #1 and #2
82
Table 8 Outputs on 24-Output Board #1
82
Table 9 Outputs on 24-Output Board #2
84
Table 10 Outputs on 8-Output 16-Input Boards #3 and #4 (for WTB+ Only)
86
Table 11 Outputs on 24-Output Board #4 (WTB+ Only)
87
Table
87
External Use Input and Output Specifications
89
Troubleshooting Examples
91
Example: the Machine will Not Extract
91
Example: Desired Temperature Is Not Achieved
92
Data Transfer
94
Data Transfer Purposes, Components, and Best Use
94
Data Backup
94
Formula Sharing
95
About the Miltouch™ Programmer Application for Windows Pcs
95
Formula Creation and Data Transfer with Formula Groups
96
The USB Flash Drive Formatting Requirement
97
Data Directory Structure and Files
97
Data Transfer with the Miltouch™ Controller
98
Table 13 Example of Directory and File Structure after Data Transfer
98
How to Mount a USB Flash Drive to the Miltouch™ Controller
99
How to Export Files from the Miltouch™ Controller
100
How to Import Files to the Miltouch™ Controller
101
Data Transfer with the Miltouch™ PC Programmer Application
103
How to Export Files from the PC Programmer Application
104
How to Import Files to the PC Programmer Application
106
How to Export Formula and Configuration Data as Text Files
109
Supplemental Information
111
Out-Of-Balance Detection and Balancing for Washer-Extractors
111
Out-Of-Balance Detection with a Vibration or Excursion Switch
111
Miltouch-EX™ and Miltouch-EX™ WTB Models Without Balancing
111
If the Extract Step Is an Intermediate Extract
111
If the Extract Step Is a Final Extract
112
If the Excursion Switch Trips
112
If the Excursion Switch Does Not Trip
112
Miltouch-EX™ and Miltouch-EX™ WTB Models with Balancing
112
If the Extract Step Is an Intermediate Extract
113
If the Extract Step Is a Final Extract
113
If the Excursion Switch Trips
113
If the Excursion Switch Does Not Trip
114
About the Mildata ® Product
114
Software Update Procedure
114
Format Your USB Flash Drive
115
Save and Copy the Update File to the USB Flash Drive
117
Apply the Update File to the Machine Controller
119
How to Contact Milnor
119
Table 14 Pellerin Milnor ® Corporation Contact Information
119
Milnor MilTouch Manual (95 pages)
Brand:
Milnor
| Category:
Controller
| Size: 1 MB
Table of Contents
Table of Contents
3
Preface
7
About the Miltouch™ Single Stage Press Controller
7
The Miltouch™ Press Hierarchy of Displays
8
Figure 18 Press Main Menu Display
8
Figure 24 Analog Data
8
Figure 29 Operate Individual Functions
8
Table
8
Table 2 the Miltouch™ Press Display Hierarchy
8
Manufacturer Data for Non-Milnor
9
Machine Components
9
How to Contact Milnor
10
Safety Alert for Owners/Managers and Maintenance Personnel: Using the Door in
11
Terlock Bypass Key Switch
11
Figure 1 Door Interlock Bypass Key Switch and Safety Placard
11
Configuration
12
Machine Configuration
12
The Program Menu Display
13
The Configure Controls Display
14
Figure 2 Program Menu Display
14
How to Make Configuration Changes
15
Figure 3 Configure Controls Display
15
Figure 4 Example Configuration Window
15
The Configuration Decisions
16
Small Load Detection
22
Configure PID Gains
22
Figure 5 Typical Small (Eccentric) Load Which Can Require a Lower Press
22
Network Configuration
23
Figure 6 Configure Gains Display
23
Lockout Password
24
Enable and Define a Lockout Password
24
Figure 7 Network Configuration Display
24
Figure 8 Create Password Window
24
Change or Disable the Lockout Password
25
Recover a Lost Password
25
Figure 9 Password Recovery Key
25
Press Codes and Press Code Maintenance
26
Press Code Maintenance
26
Figure 10 Add/Change Press Code Display
26
To Add a Press Code
27
To Change a Press Code
27
Figure 11 Modify Press Code Display
27
The Press Code Decisions
28
About the End Codes
29
About the Optional RAM Command™ (Soft Squeeze) Feature
30
Figure 12 Comparison of Normal and Slow Programs
30
Figure 13 RAM Command™ Options
30
To Enter or Change the Name of a Press Code
31
To Delete a Press Code
31
To Copy a Press Code
31
Typical Goods and Press Code Values
32
Figure 14 Copy Press Code Display
32
Table 4 Typical Press Code for Walk-Off Mats
32
Table 5 Typical Press Codes for Towels and Uniforms
33
Operation
34
Physical Controls
34
Figure 15 Typical Miltouch™ Press Control Panel
34
Main Controls
35
Reuse Pump (Press Return Pump) Controls
35
Additional Controls
36
Emergency Stop Switch (Locking Push Button)
36
Figure 16 Lamp Test Button
36
Automatic Mode
37
Figure 17 Emergency Stop Switch
37
The Automatic Operation Display
38
Figure 19 Automatic Operation Display
38
Names and Progress Area (A)
39
Performance Analysis Tools (B)
39
Cake Data Display
39
Figure 20 Names and Progress Area
39
Figure 21 Performance Analysis Tools
39
Performance Data Display
40
Figure 22 Cake Data Display
40
Analog Data
41
Figure 23 Performance Data Display
41
Diagnostics Tools (C)
42
Figure 25 Diagnostic Tools
42
Machine Status Area (D)
43
About the Optional Steam Disinfect Feature
43
Figure 26 Machine Status Area
43
Figure 27 Steam Disinfect Mode
44
Manual Mode
45
Figure 28 Parts of the Press
45
Manual Functions
46
The Press Cycle Summarized
49
Monitor Inputs and Outputs Related to Manual Functions
50
Press State Messages
50
Figure 30 Manual Functions Input and Output Status
50
Press Receiving a Load
51
Press Discharging
52
Operation
53
Other Press States
53
Error-Related
53
Evening Shutdown-Related
54
Deprecated
54
Initialization and Shutdown
55
Initialization
55
Power Loss or Safety (Three-Wire) Circuit Disabled Condition
55
Press Initialization Steps
56
Goods on Belt" Steps
57
When Cake Data Must be Confirmed
58
Cake Data Confirmation Procedure
58
Evening Shutdown
59
Evening Shutdown Procedure
59
Troubleshooting
61
Troubleshooting Inputs and Outputs
61
Digital Inputs
61
Digital Outputs
62
Figure 31 Page 2 of the Input Status Displays
62
Lists of Inputs and Outputs
63
Figure 32 Page 0 of the Output Status Displays
63
Inputs
64
Table 6 Page 0 - Standard Inputs (I/O Board #1)
64
Table 7 Page 1 - Standard Inputs (I/O Board #2)
65
Table 8 Page 2 - Standard Inputs (Q7 Processor Board)
66
Table 9 Page 3 - Extra Data Pass Inputs (I/O Board #3)
67
Table 10 Page 4 - Allied Weight Inputs (I/O Board #4)
68
Outputs
69
Table 11 Page 0 - Standard Outputs (I/O Board #1)
69
Table 12 Page 1 - Standard Outputs (I/O Board #2)
70
Errors
72
Table 14 Page 3 - Allied Weight Inputs and Additional Outputs (I/O Board #4)
72
Error Messages and Corrective Actions
73
Mechanical and Processing Faults
73
Switch Faults
81
Miscellaneous Faults
82
Identification and Location of Switches, Sensors, and Photoeyes
83
Proximity Switches
84
Figure 33 Ram and Can Proximity Switches
84
Figure 34 Discharge Door Proximity Switches
84
Water Probe Sensors
85
Photoeyes
85
Figure 35 Load Chute Water Probe Sensors
85
Figure 36 Discharge End Photoeye
85
Data Transfer
86
Memory Backup
86
The USB Flash Drive Formatting Requirement
86
How to Save Data to a USB Flash Drive for Backup
86
How to Restore Backup Data to the Controller from a USB Flash Drive
87
Figure 37 Memory Transfer Display
87
Data Sharing
88
Clear Memory
88
Figure 38 Clear Memory Window
89
Supplemental Information
90
Software Update Procedure
90
Format Your USB Flash Drive
90
Figure 39 Typical View of USB Flash Drive in File Explorer
91
Figure 40 Typical File Explorer Context Menu
92
Figure 41 Format Removable Disk Main Window
92
Save and Copy the Update File to the USB Flash Drive
93
Apply the Update File to the Machine Controller
95
Advertisement
Milnor MilTouch Operator's Manual (40 pages)
Side-Loaded, Barrier Washer-Extractor
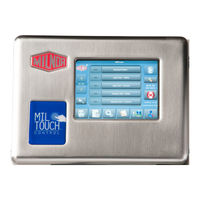
Brand:
Milnor
| Category:
Washer
| Size: 1 MB
Table of Contents
Table of Contents
3
1 Preface
5
About this Operator Guide and this Miltouch™ Washer-Extractor
5
2 Controls
6
Physical Controls
6
Figure 1 Clean-Side Control Panel
6
Figure 2 Flush Button
7
Figure 3 Heating Switch
7
Main Controls
7
Clean-Side Controls
8
Emergency Stop Switch (Locking Push Button)
8
Figure 4 Emergency Stop Switch
8
About the Miltouch™ Controller Virtual Controls
9
3 Load and Unload
10
About Outer and Inner Doors
10
How to Open the Outer (Shell) Doors
10
How to Unlock the Outer (Shell) Door
10
How to Lock the Outer (Shell) Door
11
How to Open and Close the Inner Cylinder Doors
11
How to Open the Inner (Cylinder) Door(S)
11
Figure 5 Inner (Cylinder) Door Lock Mechanism
11
How to Close the Inner (Cylinder) Door(S)
13
Safety and Best Practice When Loading and Unloading
13
Loading and Unloading Safety
13
Load Size Best Practice
14
Weighing Goods
14
Loading the Machine
15
How to Load the Machine (Separate Laundry Scale)
15
How to Load the Machine with a Weighing System
16
Figure 6 Confirmation Dialogue Box
16
Figure 7 Weighing System Window
17
The Unloading Sequence
18
4 Run and Monitor Formulas
20
How to Use the Miltouch™ Controller
20
The Home Display
20
About the Liquor Ratio Control Feature
21
Figure 8 the Home Display
21
To Run a Wash Formula Locally
21
Figure 9 Load Weight Window
22
How to Run a Local Wash Formula with Liquor Ratio Control
22
Figure 10 Remote Formula Window
23
To Run a Wash Formula from the Mildata Computer
23
How to Monitor a Wash Formula
24
The Run Display
24
Figure 11 the Three Information Areas of the Run Display
24
Figure 12 the Names and the Timers Area
24
The Names and Timers Area (A)
24
Figure 13 the Machine Status Area
25
Figure 14 Chemicals from Valves 1 and 2 Injecting
25
How to Monitor Automatic Liquid-Chemical Injections
25
Manual Control and Diagnostics Area (C)
25
The Machine Status Area (B)
25
Figure 15 Standard Controls
26
5 Troubleshooting
27
Operator Intervention
27
Chemical Supplies Intervention
27
Error Intervention
28
Manual Intervention
28
Figure 16 Chemical Injection Dialog Box
28
Figure 17 Manual Control Areas
29
Figure 18 Pop-Up Controls for Step Timer
29
Modify Step Timer
29
Figure 19 Pop-Up Controls for Water Valves
30
Figure 20 Pop-Up Controls for Drain Valves
30
Modify Drain Valves
30
Modify Water Valves
30
Figure 21 Pop-Up Controls for Steam and Cooldown Valves
31
Figure 22 Pop-Up Controls for Cylinder Speed
31
Figure 23 Pop-Up Controls for Water Temperature
31
Modify Cylinder Speed
31
Modify Steam and Cooldown
31
Modify Water Temperature
31
Modify Water Level
32
Cancel a Formula
32
Figure 24 Pop-Up Controls for Water Level
32
Figure 25 Resume or Cancel the Formula
32
Errors
33
Figure 26 Sample Error Code Dialog Box
33
Figure 27 Error Causes/Solutions Display
34
The Error Messages
35
Figure 28 Transducer Tube
37
Figure 29 Schematic of Typical Drain Circuit
37
6 Contact Us
39
How to Contact Milnor
39
Pellerin Milnor ® Corporation Contact Information
39
Advertisement
Related Products
Milnor Miltrac
Milnor MilTouch-EX
Milnor MilTouch-EX WTB
Milnor MilTouch MWF27Z8 Series
Milnor MilTouch MWF45Z8 Series
Milnor MilTouch MWF63Z7 Series
Milnor MilTouch MWF77Z7 Series
Milnor MilTouch MP1540
Milnor MilTouch MP1A50
Milnor MILRAIL
Milnor Categories
Washer
Industrial Equipment
Controller
Laundry Appliance
Dryer
More Milnor Manuals
Login
Sign In
OR
Sign in with Facebook
Sign in with Google
Upload manual
Upload from disk
Upload from URL