Sign In
Upload
Manuals
Brands
Kenmore Manuals
Dryer
Oasis 110.77086600
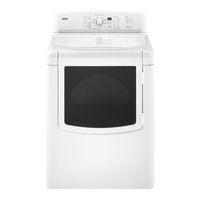
Kenmore Oasis 110.77086600 Manuals
Manuals and User Guides for Kenmore Oasis 110.77086600. We have
1
Kenmore Oasis 110.77086600 manual available for free PDF download: Manual
Kenmore Oasis 110.77086600 Manual (111 pages)
ELECTRIC & GAS DRYER
Brand:
Kenmore
| Category:
Dryer
| Size: 20.79 MB
Table of Contents
Table of Contents
2
Section 1
3
General
3
Dryer Safety
3
Model & Serial Number Designations
4
Model & Serial Number Label & Tech Sheet Locations
5
Kenmore Elite Appliance Warranty
6
Section 2
7
Installation Information
7
Installation Instructions
7
Tools and Parts
7
Parts Supplied
7
Location Requirements
8
Installation Clearances
8
Dryer Dimensions
8
Mobile Home - Additional Installation Requirements
9
Mobile Home Installations Require
9
Electrical Requirements
10
Electrical Connection
10
If Using a Power Supply Cord
10
Grounding Instructions
11
If Your Outlet Looks Like this
11
Power Supply Cord
12
Direct Wire
12
Install Strain Relief
12
Direct Wire Strain Relief
13
Electrical Connection Options
13
4-Wire Connection: Power Supply Cord
14
4-Wire Connection: Direct Wire
15
3-Wire Connection: Power Supply Cord
16
3-Wire Connection: Direct Wire
17
Optional 3-Wire Connection
18
Gas Supply Requirements
20
Gas Supply Line
20
Gas Supply Connection Requirements
20
Gas Type
20
Burner Input Requirements
21
Flexible Stainless Steel Gas Connector
21
Gas Supply Pressure Testing
21
Dryer Gas Pipe
21
Venting Requirements
22
Rigid Metal Vent
22
Flexible Metal Vent
22
If Using an Existing Vent System
22
Elbows
23
Clamps
23
Exhaust
23
Plan Vent System
24
Recommended Exhaust Installations
24
Optional Exhaust Installations
24
Special Provisions for Mobile Home Installations
25
Determine Vent Path
25
Vent System Chart
25
Install Vent System
26
Install Leveling Legs
26
Make Gas Connection
26
Connect Vent
27
Level Dryer
27
Reverse Door Swing
28
Remove the Door Assembly
28
Reverse the Strike
28
Reinstall the Door
29
Complete Installation
30
Section 3
31
Product Operation
31
Customer Directions
31
Starting the Dryer
32
To Use a Timed Cycle
32
To Use an Auto Dry Cycle
32
To Make Changes During an Auto Dry Cycle
32
Drying and Cycle Tips
33
Drying Tips
33
Cycle Tips
33
Status Lights
34
Check Lint Screen
34
Indicator Lights
34
Cycles
34
Bulky/Bedding
35
Casual
35
Ultra Delicate/Delicate
35
Timed Cycles
35
Modifiers
36
Auto Dry Cycle Modifiers
36
Air Dry
36
When Using Air Dry
36
Cycle Signal
37
Damp Dry Signal
37
Wrinkle Guard
37
Changing Cycles after Pressing Start
37
Dryer Rack
38
Changing Modifiers and Options after Pressing Start
38
Changing the Preset Dryness Level Settings
38
Section 4
41
Component Access
41
Component Locations
41
Console & Top Cabinet Components
41
Lower Cabinet Components
41
Removing the User Interface Board, the Machine Control, & Motor Control
42
Removing the Moisture Sensor
45
Removing the Cabinet Front and Door Switch
46
Door Switch Connector
46
Removing the Drum Light Assembly
48
Removing the Thermal Fuse & Outlet Thermistor
49
Removing the High-Limit Thermostat & Inlet Thermistor, Thermal Cutoff, and Electric Heater (Electric Models Only)
50
Heater Terminal Block
51
To Remove the Electric Heater
51
Top Heater Housing
51
Heater Housing Tab
51
Removing the High-Limit Thermostat, Thermal Cutoff, Flame Sensor
52
And Gas Burner Assembly (Gas Models Only)
52
To Remove the Burner Assembly
53
To Remove the Coils from the Burner Assembly
54
To Remove the Ignitor from the Burner Assembly
54
Removing the Belt, Drum, & Rollers
55
To Remove a Front Roller
56
To Remove a Rear Roller
56
Removing the Blower Fan (Single Motor Models)
57
Removing the Blower Motor and the Blower Fan (Dual Motor Models)
59
To Remove the Blower Fan
60
Removing the Drive Motor and Belt Switch
61
To Remove the Belt Switch
62
Section 5
63
Component Testing
63
Door Switch
63
Thermal Fuse & Outlet Thermistor
63
High-Limit Thermostat, Inlet Thermistor, & Thermal Cutoff
64
(Electric Models Only)
64
Electric Heater
64
Gas Burner Coils
65
Burner Ignitor
65
Flame Sensor
66
High-Limit Thermostat & Thermal Cutoff (Gas Models Only)
66
Blower Motor (Dual Motor Models)
67
Belt Switch
67
Drive Motor, Thermal Overload, & Centrifugal Switch
68
Section 6
69
Diagnostics & Troubleshooting
69
Electric Dryers
69
Display Fault Codes
69
Diagnostic Guide
70
Unsuccessful Entry
70
Saved Fault Codes
70
Diagnostic Tests
70
Door Switch
71
Moisture Sensor
71
Motor, Heater, and Console ID
71
Displaying Inlet Air Flow
72
Activating the Manual Load Test
72
Displaying Line Voltage
72
Troubleshooting Guide
73
Troubleshooting Tests
73
Drive Motor Circuit
74
Machine Control Functionality
74
Blower Motor
76
Accessing the Blower Motor
76
Blower Motor Location
76
Heater
77
Dryer Does Not Heat
77
Heat will Not Shut off
78
Exhaust Thermistor
78
Inlet Thermistor
79
Exhaust Thermistor Resistance
79
Thermal Cut-Off
80
Thermal Fuse
80
Buttons and Indicators
81
None of the Indicators Light up
81
Some Buttons Do Not Light Indicators
82
No Beep Sound Is Heard
82
Adjusting Customer-Focused Drying Modes
83
Removing the Front Panel/Drum Assembly
83
Reinstalling the Front Panel/Drum Assembly
83
Accessing & Removing the Electronic Assemblies
84
Removing the User Interface Assembly
84
Removing the Machine Control Electronics
84
Removing the Back Panel
85
Remove Screws
85
Gas Dryers
86
Activating the Diagnostic Test Mode
87
Console Diagnostics
88
Section 7
103
Wiring Diagrams & Strip Circuits
103
Single Element
103
Strip Circuits
104
Drive Motor
104
Blower Motor & Control (Dual Motor Model)
104
Heater—Dual Element
105
Advertisement
Advertisement
Related Products
Kenmore Elite Oasis 110.7703 Series
Kenmore Elite Oasis 110.7704 Series
Kenmore Elite Oasis 110.7705 Series
Kenmore Oasis 110.7706
Kenmore Oasis 110.7707
Kenmore Oasis 110.7708
Kenmore Oasis 110.7709
Kenmore Oasis 110.77032600
Kenmore Oasis 110.77042600
Kenmore Oasis 110.77052600
Kenmore Categories
Ranges
Refrigerator
Dishwasher
Washer
Vacuum Cleaner
More Kenmore Manuals
Login
Sign In
OR
Sign in with Facebook
Sign in with Google
Upload manual
Upload from disk
Upload from URL