Sign In
Upload
Manuals
Brands
Compuprint Manuals
Printer
L03
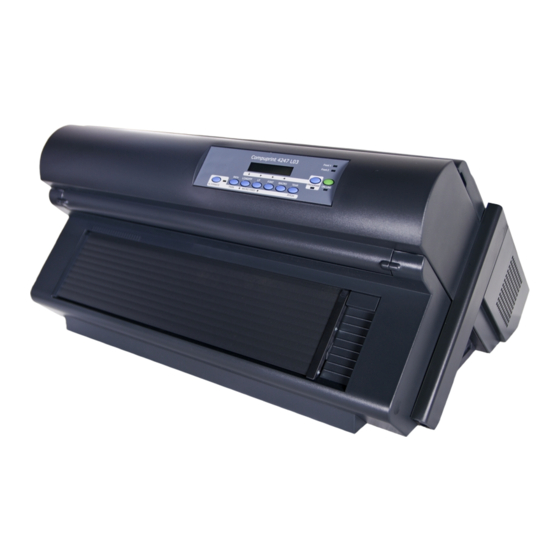
Compuprint L03 Dot Matrix Printer Manuals
Manuals and User Guides for Compuprint L03 Dot Matrix Printer. We have
2
Compuprint L03 Dot Matrix Printer manuals available for free PDF download: User Manual, Quick Setup Manual
Compuprint L03 User Manual (142 pages)
Serial Matrix Printers
Brand:
Compuprint
| Category:
Printer
| Size: 9 MB
Table of Contents
Table of Contents
3
Figures
5
Tables
7
Attention Notices
9
Safety and Environmental Notices
9
Safety Notices
9
Danger Hazard Level
9
Caution Hazard Level
9
Safety Precautions
10
Electrical Safety
10
Approved Power Cord and Receptacle
10
Electrical Safety and Portable Power Strip Receptacles
11
Connecting or Disconnecting a Communication Port, a Teleport, or an Attachment Connector
11
Servicing During an Electrical Storm
11
Chapter 1. Getting to Know Your Printer
13
Unpacking Your Printer
14
Printer Parts
15
Chapter 2. Setting up Your Printer
17
Choosing a Suitable Location
17
Printer Dimensions
17
Printer Assembly
18
Removing the Shipment Locks
18
Installing the Operator Panel Overlay
18
Removing the Shipment Locks from the Printer
18
The Operator Panel
18
Installing the Ribbon Cartridge
19
The Ribbon Cartridge
19
Opening the Top Cover Using the Small Handles on Either Side of the Top Cover
19
Aligning the Right and Left Cartridge Pins with the Printer Locking Points
20
Turn the Ribbon-Winding Knob in the Arrow Direction
21
Correct Ribbon Placement between the Print Head and the Ribbon Guide Mask
21
Clipping the Cartridge into Place
21
Installing the Controller Board
23
Handling the Controller Board
23
Inserting the Controller Board
23
Removing the Two Screws on the Metal Plate
24
Sliding the Board in the Slot
25
Attaching the Controller Board
25
Host Computer Connection
26
Software Driver Selection
26
Power Connection
27
Power Switch in the 0 Position (OFF)
27
Power Switch in the I Position (ON)
29
Selecting the Display Language
30
Chapter 3. Configuring the Printer
31
Operator Panel Presentation
31
Display Messages
31
Operator Panel
31
Unlit on LINE Indicator
31
Lit on LINE Indicator
31
Load Front1 Indicator
33
Online Indicator
33
Indicators
36
Function Keys
37
ON LINE Key
37
PROGRAM Key
38
MACRO Key
38
FONT Key
38
LF Key
38
LOAD/FF Key
39
ALTERNATE Key
39
TEAR/PITCH Key
39
PATH/PARK Key
39
Key Combinations
40
PATH/PARK Key
40
Printer Setups
41
Entering the Printer Setups
41
Moving Within the Printer Setups
41
Leaving the Printer Setups
41
Power-On Configuration
42
Entering the Power-On Configuration
42
Emulation Options Menu
44
Parallel Interface Parameters
59
Interface Type
60
Serial Interface Parameters
61
Interface Type
62
Setting the Serial Interface Parameters
62
Interface Type
65
Lan Interface
65
Program Setup
74
Entering the Program Setup
74
Main Structure
74
User Macro Parameters
76
User Macro Parameters (Continued)
77
PROGRAM Key
90
How to Select the Paper Path
91
How to Use the Tear-Off Function
91
Selection of the Paper Size
91
Adjusting the Tear-Off Position
92
Selection of the Tear-Off Mode
92
How to Lock/Unlock the Printer Setups
93
How to Handle the Paper Parking
94
Tear Normal Options Path
95
Tear Automatic Options Path
96
Label Options Path
97
Chapter 4. Paper Handling
99
Paper Paths
99
Paper Specifications
99
Fanfold Paper
99
Loading Fanfold Paper
100
Opening the Push Tractor Cover
101
Sliding the Left Sprocket to the First Printing Column
101
Opening the Left and Right Sprocket Covers
102
Inserting the Paper Perforation on the Left Sprocket Pins
102
Inserting the Paper on the Right Sprocket Pins
103
Matching the Left Sprocket for the First Printing Position
104
Adjusting the Right Sprocket
105
Moving the Sprocket Levers to the Lock Position
105
Printing a Configuration Sheet
107
Chapter 5. Printer Maintenance and Troubleshooting
109
Cleaning the Printer
109
Cleaning Inside the Printer
109
Cleaning the Outside Covers
109
Replacing the Ribbon Cartridge
109
Printing the Self Test
111
Removing the Used Ribbon Cartridge by Lifting It up
111
Error Handling
112
Problem List Index
113
Forms Problems
114
Print Quality and Ribbon Problems
116
Configuration Problems
117
Miscellaneous Problems
117
Clearing Forms Jams
118
Gripping the Bail Assembly
118
Inserting the Left and Right Paper Bail End Cap
118
Appendix A. Options
121
The Front2 Push Tractor
121
Installing the Front2 Push Tractor
121
Pin Front2 Push Tractor Option
121
Aligning the Hooks
121
Pushing the Front2 Tractor until It Is Fully Engaged
122
Inserting the Connector Cable
122
Removing the Front2 Push Tractor
123
Rotating the Front2 Push Tractor Onto the Front1 Push Tractor
123
Disconnecting the Connector Cable
123
Options
123
Loading Paper Using the Front2 Push Tractor (Option)
124
Opening the Push Tractors Cover
124
Moving the Sprocket Lever down
125
Opening the Sprocket Covers
125
Inserting the Paper on the Right Sprocket Pins
126
Positioning the Left Sprocket for Printing
126
Moving the Sprocket Lever to the Locked
128
Loading the Paper into the Printer
128
Loading Paper Using the Front1 Push Tractor When the Front2 Push Tractor (Option) Is Installed
129
Rotating the Front2 Push Tractor Option
129
Inserting the Fanfold Paper
129
Repositioning the Front2 Push Tractor
130
The Printer Stand
131
Appendix B. Printer Specifications
133
Printing Characteristics
133
Paper Handling
135
Physical and Electrical Characteristics
136
Index
139
Advertisement
Compuprint L03 Quick Setup Manual (38 pages)
Serial Matrix Printers
Brand:
Compuprint
| Category:
Printer
| Size: 4 MB
Table of Contents
Table of Contents
3
Safety and Environmental Notices
5
Safety Notices
5
Danger Hazard Level
5
Caution Hazard Level
5
Attention Notices
5
Safety Precautions
6
Electrical Safety
6
Approved Power Cord and Receptacle
6
Electrical Safety and Portable Power Strip Receptacles
7
Connecting or Disconnecting a Communication Port, a Teleport, or an Attachment Connector
7
Servicing During an Electrical Storm
7
Setting up Your Printer
9
Step 1 - Unpacking Your Printer
9
Printer Parts
10
Choosing a Suitable Location
11
Removing the Shipment Locks
12
Installing the Operator Panel Overlay
12
Step 2 - Installing the Ribbon Cartridge
13
Replacing the Ribbon Cartridge
15
Step 3 - Installing the Controller Board
16
Handling the Controller Board
16
Inserting the Controller Board
16
Step 4 - Starting the Printer
19
Host Computer Connection
19
Software Driver Selection
20
Power Connection
20
Step 5 - Selecting the Display Language
22
Step 6 - Loading Fanfold Paper
23
Printing a Default Configuration Sheet
28
Configuring the Printer
28
Maintenance & Troubleshooting
29
Cleaning the Printer
29
Printing the Self Test
29
LCD Display Messages
30
Error Messages
32
Options
33
Notices
35
Advertisement
Related Products
Compuprint 10200
Compuprint 10300
Compuprint 3046
Compuprint 3056
Compuprint 30X6
Compuprint Categories
Printer
Label Maker
Software
More Compuprint Manuals
Login
Sign In
OR
Sign in with Facebook
Sign in with Google
Upload manual
Upload from disk
Upload from URL