Sign In
Upload
Manuals
Brands
Bernina Manuals
Sewing Machine
570 QE
Bernina 570 QE Manuals
Manuals and User Guides for Bernina 570 QE. We have
8
Bernina 570 QE manuals available for free PDF download: Instructions Manual, Service And Maintenance Manual, User Manual, Workbook, Manual
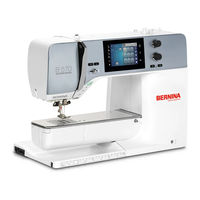
Bernina 570 QE Instructions Manual (254 pages)
Brand:
Bernina
| Category:
Sewing Machine
| Size: 29 MB
Table of Contents
Table of Contents
4
Important Safety Instructions
13
1 My BERNINA
17
Introduction
17
Welcome to the World of BERNINA
17
Key to Signs
18
Overview Machine
19
Overview Front Controls
19
Overview Front
20
Overview Sideways
21
Overview Back
22
Supplied Accessories
22
Overview Accessories Machine
22
Use of the Power Cable (Only Usa/Canada)
24
Overview Presser Feet
25
Accessory Box
27
Overview User Interface
28
Overview Functions/Visual Information
28
Overview System Settings
28
Overview Selection Menu Sewing
29
Overview Icons
29
Needle, Thread, Fabric
30
Overview Needles
30
Example for Needle Description
32
Thread Selection
32
Needle/Thread Combination
33
2 Sewing Preparation
34
Accessory Box
34
Removing and Attaching the Accessory Box
34
Storing Accessories
34
Connection and Switching on
35
Connecting the Foot Control
35
Connecting the Machine
35
Attaching the Knee Lifter of the Free Hand System
35
Fixing the Touchscreen Pen
36
Switching the Machine on
36
Foot Control
36
Regulating the Speed Via the Foot Control
36
Raising/Lowering the Needle
37
Programming the Foot Control Individually
37
Spool Pin
37
Retractable Spool Pin
37
Horizontal Spool Pin
38
Free Arm
39
Feed Dog
39
Adjusting the Feed Dog
39
Slide-On Table
40
Using the Slide-On Table
40
Presser Foot
41
Adjusting the Presser Position Via the Knee Lifter of the Free Hand System
41
Adjusting the Presser Foot Position Via the Button «Presser Foot Up/Down
41
Changing the Presser Foot
41
Selecting the Presser Foot in the User Interface
42
Adjusting the Presser Foot Pressure
42
Adjusting the Feed Dog
43
Needle and Stitch Plate
43
Changing the Needle
43
Selecting the Needle in the User Interface
43
Select the Needle Type and the Needle Size
43
Adjusting the Needle Position Up/Down
44
Adjusting the Needle Position Left/Right
44
Needle Stop Up/Down (Permanent)
44
Changing the Stitch Plate
45
Selecting the Stitch Plate in the User Interface
45
Threading
46
Threading the Upper Thread
46
Threading the Double Needle
48
Threading the Triple Needle
49
Winding the Bobbin Thread
49
Threading the Bobbin Thread
50
Indicating Fill Level of Bobbin Thread
52
3 Setup Program
54
Sewing Settings
54
Adjusting the Upper Thread Tension
54
Adjusting the Maximum Sewing Speed
54
Programming Securing Stitches
54
Adjusting the Hovering Height of the Presser Foot
55
Programming the Button «Pattern End
55
Programming the Button «Thread Cutter
56
Adjusting the Presser Foot Position with Needle Stop down
57
Programming the Button «Quick Reverse
57
Programming the Foot Control
58
Embroidery Settings
58
Adjusting the Upper Thread Tension
58
Adjusting the Maximum Embroidering Speed
59
Centering the Embroidery Motif or Opening in Original Position
59
Calibrating the Hoop
60
Entering the Fabric Thickness
60
Function Thread Away On/Off
61
Programming Securing Stitches (Smart Secure)
61
Adjusting the Thread Cut
62
Changing the Measuring Unit
63
Selecting Personal Settings
63
Monitoring Functions
64
Activating the Upper Thread Indicator
64
Activating the Bobbin Thread Indicator
64
Activating the Audio Signals
65
Machine Settings
65
Selecting a Language
65
Adjusting the Brightness of the Display
66
Adjusting the Sewing Light
66
Checking the Firmware Version
66
Reviewing the Total Number of Stitches
67
Registering Details of the Dealer
67
Saving Service Data
68
Back to Basic Setting
69
Deleting User Data
69
Deleting Motifs on the BERNINA USB Stick
70
Calibrating the Buttonhole Foot No. 3A
70
Updating the Machine Firmware
71
Recovering Saved Data
71
Cleaning the Thread Catcher
72
Lubricating the Machine
72
Packing the Embroidery Module
73
4 System Settings
74
Calling up the Tutorial
74
Calling up the Creative Consultant
74
Using Eco Mode
74
Calling up the Embroidery Consultant
75
Calling up the Help
75
Cancelling any Alterations with «Clr
75
5 Creative Sewing
76
Overview Selection Menu Sewing
76
Selecting a Stitch Pattern
76
BERNINA Dual Feed
76
Application of the BERNINA Dual Feed
77
Regulating the Speed
78
Adjusting the Upper Thread Tension
78
Editing Stitch Patterns
79
Changing the Stitch Width
79
Changing the Stitch Length
79
Correcting the Balance
80
Programming Pattern Repeat
80
Programming Long Stitch
80
Mirror Image of Stitch Patterns
81
Editing Stitch Pattern Length
81
Programming the Stitch Counter Function
81
Sewing Stitch Patterns Using the Triple Stitch
82
Quick Reverse
82
Permanent Quick Reverse
82
Backstepping
82
Combining Stitch Patterns
83
Overview Combi Mode
83
Creating Stitch Pattern Combinations
83
Saving a Stitch Pattern Combination
83
Loading a Stitch Pattern Combination
83
Overwriting a Stitch Pattern Combination
84
Deleting a Stitch Pattern Combination
84
Editing a Single Stitch Pattern
84
Deleting a Single Stitch Pattern
85
Adding a Single Stitch Pattern
85
Aligning the Stitch Length and Width
86
Mirroring a Stitch Pattern Combination
86
Stitch Pattern Combination Subdivider 1
87
Stitch Pattern Combination Subdivider 2
87
Securing a Stitch Pattern Combination
87
Programming Pattern Repeat
88
Administering Stitch Patterns
88
Saving Settings of Stitch Patterns
88
Saving Stitch Patterns in Personal Memory
88
Overwriting Stitch Patterns from the Personal Memory
89
Loading Stitch Patterns from the Personal Memory
89
Deleting Stitch Patterns from the Personal Memory
89
Uploading a Stitch Pattern from the BERNINA USB Stick
89
Deleting Stitch Patterns from the BERNINA USB Stick
90
Securing
90
Securing Via the Icon «Securing
90
Securing with the Button «Pattern End
90
Height Compensation of Uneven Layers
90
Sewing Corners
91
Advertisement
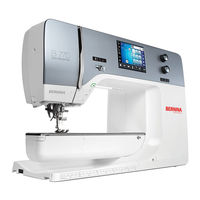
Bernina 570 QE User Manual (214 pages)
Brand:
Bernina
| Category:
Sewing Machine
| Size: 20 MB
Table of Contents
Table of Contents
4
Important Safety Instructions
9
Important Information
12
My BERNINA
14
Introduction
14
BERNINA Quality Control
14
Welcome to the World of BERNINA
14
Overview Machine
16
Overview Front Controls
16
Overview - Front
17
Overview - Side Panel
18
Overview - Back Panel
19
Supplied Accessories
20
Overview Accessories Machine
20
Overview Presser Feet
22
Accessories Box
23
Overview User Interface
24
Overview Functions/Visual Information
24
Overview System Settings
24
Overview Selection Menu Sewing
25
Software Operation
25
Needle, Thread, Fabric
27
Overview Needles
27
Example for Needle Description
30
Thread Selection
30
Needle/Thread Combination
31
Sewing Preparation
32
Before Using the Machine for the First Time
32
Accessories Box
32
Removing and Mounting the Accessory Box from Machine
32
Storing Accessory
32
Connection and Switching on
33
Connecting the Foot Control
33
Connecting the Machine
33
Attaching the Knee Lifter of the Free Hand System
34
Fixing the Touch Screen Pen
34
Switching the Machine on
34
Foot Control
35
Regulating the Speed Via the Foot Control
35
Activate/Deactivate Additional Function
35
Spool Pin
35
Retractable Spool Pin
35
Horizontal Spool Pin
36
Feed Dog
37
Adjusting the Feed Dog
37
Slide-On Table
37
Using the Slide-On Table
37
Using the Seam Guide
38
Presser Foot
38
Adjusting the Presser Foot Position Via the Knee Lifter of the Free Hand System
38
Adjusting the Presser Foot Position Via the Button "Presser Foot Up/Down
39
Changing the Presser Foot
39
Selecting the Presser Foot in the User Interface
39
Setting the Presser Foot Pressure
40
Adjusting the Feed Dog
40
Needle and Stitch Plate
40
Changing the Needle
40
Selecting the Needle in the User Interface
41
Selecting the Needle Type and the Needle Size
41
Adjusting the Needle Position Up/Down
41
Adjusting the Needle Position Left/Right
41
Needle Stop Up/Down (Permanent)
42
Changing the Stitch Plate
42
Selecting the Stitch Plate in the User Interface
43
Threading
43
Threading the Upper Thread
43
Threading the Twin Needle
46
Threading the Triple Needle
46
Winding the Bobbin Thread
47
Threading the Bobbin Thread
48
Indicating Fill Level of Bobbin Thread
50
Setup Program
51
Sewing Settings
51
Adjusting the Upper Thread Tension
51
Adjusting the Maximum Sewing Speed
51
Setting Securing Stitches (Smart Secure)
51
Adjusting the Hovering Height of the Presser Foot
52
Programming the Button "Pattern End
52
Programming the Button "Thread Cutter
53
Adjusting the Presser Foot Position with Needle Stop down
54
Programming the Button "Quick Reverse
54
Programming the Foot Control
55
Embroidery Settings
55
Adjusting the Upper Thread Tension
55
Adjusting the Maximum Embroidering Speed
56
Setting the Embroidery Design Position When Opening
56
Calibrating the Embroidery Hoop
57
Entering the Fabric Thickness
57
Activating/Deactivating the Function Thread Away
58
Programming Securing Stitches (Smart Secure)
58
Adjusting the Thread Cut
59
Changing the Measuring Unit
60
Selecting Personal Settings
60
Monitoring Functions
60
Activating the Upper Thread Indicator
60
Activating the Bobbin Thread Indicator
61
Activating the Audio Signals
61
Machine Settings
62
Selecting a Language
62
Adjusting the Brightness of the Display
62
Adjusting the Sewing Light
62
Reviewing the Total Number of Stitches
63
Registering Details of the Dealer
63
Saving Service Data
64
Back to Basic Setting
64
Deleting User Data
65
Deleting Designs on the BERNINA USB Stick
65
Calibrating the Buttonhole Foot #3A
66
Packing the Embroidery Module
66
System Settings
67
Calling up the Tutorial
67
Calling up the Creative Consultant
67
Using Eco Mode
67
Calling up the Help
67
Cancelling any Alterations with "Clr
67
Creative Sewing
68
Overview Selection Menu Sewing
68
Selecting a Stitch Pattern
68
BERNINA Dual Feed
68
Regulating the Speed
69
Adjusting the Upper Thread Tension
69
Editing Stitch Patterns
70
Changing the Stitch Width
70
Changing the Stitch Length
70
Correcting the Balance
70
Programming Pattern Repeat
71
Mirror Image of Stitch Patterns
71
Edit Stitch Pattern Length
71
Programming the Stitch Counter Function
72
Sewing Stitch Patterns Using the Triple Stitch
72
Quick Reverse
72
Permanent Quick Reverse
72
Backstepping
73
Combining Stitch Patterns
73
Overview Combi Mode
73
Creating Stitch Pattern Combinations
73
Saving a Stitch Pattern Combination
74
Loading a Stitch Pattern Combination
74
Overwriting a Stitch Pattern Combination
74
Deleting a Stitch Pattern Combination
74
Editing a Single Stitch Pattern
75
Deleting a Single Stitch Pattern
75
Adding a Single Stitch Pattern
75
Adapting the Stitch Pattern Length and Stitch Pattern Width
76
Mirroring a Stitch Pattern Combination
77
Stitch Pattern Combination Subdivider 1
77
Stitch Pattern Combination Subdivider 2
78
Securing a Stitch Pattern Combination
78
Programming Pattern Repeat
78
Administering Stitch Patterns
79
Saving Settings of Stitch Patterns
79
Saving Stitch Patterns in Personal Memory
79
Overwriting Stitch Patterns from the Personal Memory
79
Loading Stitch Patterns from the Personal Memory
79
Deleting Stitch Patterns from the Personal Memory
80
Bernina 570 QE User Manual (208 pages)
Brand:
Bernina
| Category:
Sewing Machine
| Size: 36 MB
Table of Contents
Table of Contents
4
Important Safety Instructions
10
Important Information
12
Explanation of Symbols
13
1 My BERNINA
14
Introduction
14
BERNINA Quality Control
14
Welcome to the World of BERNINA
14
Overview Machine
16
Overview Front Controls
16
Overview Front
17
Overview Sideways
18
Overview Back
19
Supplied Accessories
20
Overview Accessories Machine
20
Use of the Power Cable (Only Usa/Canada)
21
Overview Presser Feet
21
Accessory Box
23
Overview User Interface
23
Overview Functions/Visual Information
23
Overview System Settings
24
Overview Selection Menu Sewing
24
Overview Icons
24
Needle, Thread, Fabric
25
Overview Needles
25
Example for Needle Description
27
Thread Selection
27
Needle/Thread Combination
28
2 Sewing Preparation
29
Accessory Box
29
Removing and Attaching the Accessory Box
29
Storing Accessories
29
Connection and Switching on
30
Connecting the Foot Control
30
Connecting the Machine
30
Attaching the Knee Lifter of the Free Hand System
30
Fixing the Touchscreen Pen
31
Switching the Machine on
31
Foot Control
31
Regulating the Speed Via the Foot Control
31
Raising/Lowering the Needle
32
Programming the Foot Control Individually
32
Spool Pin
32
Retractable Spool Pin
32
Horizontal Spool Pin
33
Free Arm
34
Feed Dog
34
Adjusting the Feed Dog
34
Slide-On Table
35
Using the Slide-On Table
35
Using the Edge Guide
36
Presser Foot
36
Adjusting the Presser Foot Position Via the Knee Lifter of the Free Hand System
36
Adjusting the Presser Foot Position Via the Button «Presser Foot Up/Down
36
Changing the Presser Foot
37
Selecting the Presser Foot in the User Interface
37
Adjusting the Presser Foot Pressure
38
Instruction for Adjusting the Feed Dog
38
Needle and Stitch Plate
38
Changing the Needle
38
Selecting the Needle in the User Interface
39
Selecting the Needle Type and the Needle Size
39
Adjusting the Needle Position Up/Down
39
Adjusting the Needle Position Left/Right
39
Needle Stop Up/Down (Permanent)
40
Changing the Stitch Plate
40
Selecting the Stitch Plate in the User Interface
41
Threading
41
Threading the Upper Thread
41
Threading the Double Needle
44
Threading the Triple Needle
44
Winding the Bobbin Thread
45
Threading the Bobbin Thread
46
Indicating Fill Level of Bobbin Thread
48
3 Setup Program
49
Sewing Settings
49
Adjusting the Upper Thread Tension
49
Adjusting the Maximum Sewing Speed
49
Programming Securing Stitches
49
Adjusting the Hovering Height of the Presser Foot
50
Programming the Button «Pattern End
50
Programming the Button «Thread Cutter
51
Adjusting the Presser Foot Position with Needle Stop down
51
Programming the Button «Quick Reverse
52
Programming the Foot Control
52
Embroidery Settings
53
Adjusting the Upper Thread Tension
53
Adjusting the Maximum Embroidering Speed
54
Setting the Embroidery Motif Position When Opening
54
Calibrating the Hoop
54
Entering the Fabric Thickness
55
Function Thread Away On/Off
56
Programming Securing Stitches (Smart Secure)
56
Adjusting the Thread Cut
57
Changing the Measuring Unit
58
Selecting Personal Settings
58
Monitoring Functions
59
Activating the Upper Thread Indicator
59
Activating the Bobbin Thread Indicator
59
Activating the Audio Signals
60
Machine Settings
60
Selecting a Language
60
Adjusting the Brightness of the Display
61
Adjusting the Sewing Light
61
Checking the Firmware Version
61
Reviewing the Total Number of Stitches
62
Registering Details of the Dealer
62
Saving Service Data
63
Back to Basic Setting
63
Deleting User Data
64
Deleting Motifs on the BERNINA USB Stick
64
Calibrating the Buttonhole Foot No. 3A
65
Updating the Machine Firmware
65
Recovering Saved Data
66
Cleaning the Thread Catcher
67
Lubricating the Machine
67
Packing the Embroidery Module
68
4 System Settings
69
Calling up the Tutorial
69
Calling up the Creative Consultant
69
Using Eco Mode
69
Calling up the Help
69
Cancelling any Alterations with «Clr
69
5 Creative Sewing
70
Overview Selection Menu Sewing
70
Selecting a Stitch Pattern
70
BERNINA Dual Feed
70
Regulating the Speed
71
Adjusting the Upper Thread Tension
71
Editing Stitch Patterns
72
Changing the Stitch Width
72
Changing the Stitch Length
72
Correcting the Balance
72
Programming Pattern Repeat
73
Mirror Image of Stitch Patterns
73
Editing Stitch Pattern Length
73
Programming the Stitch Counter Function
74
Sewing Stitch Patterns Using the Triple Stitch
74
Quick Reverse
74
Permanent Quick Reverse
75
Backstepping
75
Combining Stitch Patterns
75
Overview Combi Mode
75
Creating Stitch Pattern Combinations
75
Saving a Stitch Pattern Combination
76
Loading a Stitch Pattern Combination
76
Overwriting a Stitch Pattern Combination
76
Deleting a Stitch Pattern Combination
76
Editing a Single Stitch Pattern
77
Deleting a Single Stitch Pattern
77
Adding a Single Stitch Pattern
78
Adapting the Stitch Pattern Length and Stitch Pattern Width
78
Mirroring a Stitch Pattern Combination
79
Stitch Pattern Combination Subdivider 1
79
Stitch Pattern Combination Subdivider 2
79
Securing a Stitch Pattern Combination
80
Programming Pattern Repeat
80
Administering Stitch Patterns
80
Saving Settings of Stitch Patterns
80
Saving Stitch Patterns in Personal Memory
81
Overwriting Stitch Patterns from the Personal Memory
81
Loading Stitch Patterns from the Personal Memory
81
Deleting Stitch Patterns from the Personal Memory
82
Saving Stitch Patterns on the BERNINA USB Stick
82
Uploading a Stitch Pattern from the BERNINA USB Stick
82
Deleting Stitch Patterns from the BERNINA USB Stick
83
Securing
83
Securing Via the Icon «Securing
83
Securing with the Button «Pattern End
83
Height Compensation of Uneven Layers
83
Sewing Corners
84
Advertisement
Bernina 570 QE User Manual (180 pages)
Brand:
Bernina
| Category:
Sewing Machine
| Size: 16 MB
Table of Contents
Safety Instructions
3
Environmental Protection
4
Table of Contents
5
Key to Signs
11
Glossary
11
Accessory
12
Standard Accessory
12
Presser Feet
13
Accessory Box Free Standing
14
Storage Example
14
Overview Sewing Computer
15
Front View
15
Detail View
15
Important Sewing Information
17
Thread
17
Cotton Threads
17
Polyester Threads
17
Rayon Threads
17
Needle, Thread and Material
17
Needles, Threads
18
Correct Needle/Thread Combination
18
Too Thin Thread or too Thick Needle
18
Too Thick Thread or too Fine Needle
18
Guidelines
18
Overview Needles
19
Sewing Preparation
21
Power Switch/Power Cable
21
Foot Control
21
Slide-On Table
22
Attaching the Slide-On Table
22
Removing the Slide-On Table
22
Seam Guide
22
Presser Foot Lifter
22
Attaching the Presser Foot Lifter
22
Raising and Lowering the Presser Foot
22
Vertical Spool Pin
23
Winding a Bobbin
24
Appropriate Spool Disc
24
Bobbin Winding While Sewing
24
Inserting a Bobbin/Threading Lower Thread
25
Exchanging Bobbin Case
25
Removing the Bobbin Case
25
Insert the Bobbin Case
25
Bobbin Thread Cutter
25
Threading the Upper Thread
26
Appropriate Spool Disc
26
Changing the Needle
26
Removing the Needle
26
Inserting the Needle
26
Threading the Double Needle
27
Threading the First Thread
27
Threading the Second Thread
27
Threading the Triple Needle
27
Thread Needle
28
Changing the Presser Foot
28
Removing the Presser Foot
28
Attaching the Presser Foot
28
Stitch Plate
29
Markings on the Stitch Plate
29
Removing the Stitch Plate
29
Replacing the Stitch Plate
29
Thread Tension
30
The Basic Setting
30
Perfect Stitch Formation
30
Upper Thread Tension too Tight
30
Upper Thread Tension too Loose
30
Adjusting Presser Foot Pressure
31
Pressor Foot Pressure
31
Increasing the Presser Foot Pressure
31
Reducing Pressor Foot Pressure
31
Display Pressor Foot Pressure
31
Feed Dog Lowered/Ready to Sew
32
Feed Dog and Fabric Feed
32
Functions
33
Overview «Function»-Buttons Sewing Computer
33
Quick Reverse»-Button
33
Start/Stop»-Button
33
Pattern End»-Button
33
Speed Control
33
Needle Stop»-Button
33
Pattern Begin»-Button
33
Needle Position»-Buttons
34
Stitch Width and Stitch Length Knobs (Multifunction)
34
Display
35
Overview Main Display
35
System Settings
35
Menu Selection
35
Selection
36
Stitch Pattern Selection
36
Stitch Pattern Display
36
Functions - Display
37
Overview Sewing Functions
37
General Functions
37
Needle Stop Position up and «Quick Reverse»-Button
37
Needle Stop Position down and «Quick
37
Reverse»-Button
37
Needle Stop Up/Down
37
Securing
37
Pattern Repeat
37
Needle Position
38
Mirror Image Left/Right
38
Security Program
38
Mirror Image Up/Down
38
Overview Functions Buttonholes
39
Buttonhole Slit Width
40
Overview Functions Alphabets
41
Mirror Image Left/Right
42
Overview Functions Combi Mode
43
Security Program
44
Combination Subdivider (1)
45
Deleting
46
Setup Program
47
Changing Display Settings
48
Selecting the Display Color
49
Adjusting Embroidery Settings
50
Calibrating the Display
51
Altering the Acoustic Signals
51
Monitoring
52
Update
53
Calibrating the Buttonhole Foot No. 3A
53
Reset/Delete User Data
54
Information
55
Dealer Details
56
Tutorial
57
Creative Consultant
59
Help Program
60
Balance
61
Eco Description
62
Practical Stitches
63
Universal Stitch
64
Stitch Pattern Selection
65
Customizing Stitch Pattern Individually
66
Temporary Altered Stitch Memory
66
Return to Basic Settings
66
Altering Stitch Width and Stitch Length
67
Altering Needle Position
67
Examples of Application Practical Stitches
68
Straight Stitch
68
Triple Straight Stitch
68
Triple Zig-Zag
69
Zipper
70
Manual Darning
71
Automatic Darning
72
Reinforced Darning, Automatic
73
Finishing Edges
73
Double-Overlock
74
Top Stitching Edges
75
Blind Hem
76
Visible Hem
76
Securing Program
77
Basting Stitch
77
Flat Joining Seam
78
Height Compensation of Uneven Layers
79
Sewing Corners
79
Bernina 570 QE Service And Maintenance Manual (218 pages)
Brand:
Bernina
| Category:
Sewing Machine
| Size: 10 MB
Table of Contents
Table of Contents
2
Chapter 1 - General Information
7
Safety Regulations
7
Warning: Dangerous Voltage Levels
8
ESD-Related Note: Electrostatic Discharge (ESD)
9
Tools and Gauges
10
Handling Adjustments
13
Abbreviations/Names Used
13
Cleaning
14
Technical Specifications of 4 & 5 Series
15
Chapter 2 - Electronics and Wiring
18
Block Diagram BERNINA B 590 (BERNINA 4 and 5 Series Equipement and Function Depend on Model Type)
18
PCBA-Power
19
PCBA-CPU-Module (ARM9) General Information
20
PCBA-CPU-Module/Arm9
20
PCBA-Base General Information
21
PCBA-Base with Feed-Dog Drop Detection
21
PCBA-Position Hall
22
PCBA-Threader
22
PCBA-Cover Including Display and Touch Screen
23
Pcba
23
PCBA-Stitching Head (PCBA-RET)
24
PCBA-Lower-Thread Observer (LTO)
25
ABC Sensor Support (Presser-Foot Recognition)
25
PCBA Embroidery Module Detection
26
Handling of Electronic Components
27
Returning Defective Electronic Components
27
Repairs of Electronic Components (Pcba's)
27
Chapter 3 - Troubleshooting
28
Symptoms Overview
28
General Information
28
How Does the Position Sensor Work
28
Information about the Three Main Pcbas
29
PCBA Base
29
Indication Lights
29
Circuit Board Labelling
30
PCBA CPU Module
30
Indication Lights
31
Circuit Board Labelling
32
PCBA Power Supply
33
Circuit Board Labelling
33
Errors
34
Gears Error in Sewing Mode
34
Possible Causes
34
Stepper Error: Short to Ground Phase A/B
35
Possible Causes and Solutions
35
Error Loading Application ECC or CRC
35
Troubleshooting
36
Symptoms and Repair Approach
36
Gears Error Is Displayed
36
Stepper Error Is Displayed
36
Machine Not Booting/ "No Power"/ "Dead
36
Nothing Is Displayed, Stepper Motors Are Initializing
36
Display Shows Lines or Wrong Colours
37
No/Irregular Presser Foot Detection
37
Machine Is Stuck in a Boot Loop/ Only Starts up to BERNINA Logo
37
Flow Charts
38
How to Read Flow Charts
38
The Basic Elements of a Flow Chart
38
Overview
39
Not Booting to Black Start Screen
40
Application Not Starting
41
Errors and Warnings
42
Touch Not Working
43
SS Slider
44
Buttons
45
Stepper Motors
46
Main Drive Not Working
47
Applications (Service Program)
48
Applications 2 (Service Program)
49
Applications 3 (Service Program)
50
Peripherals (Service Program)
51
Thread Cutter: Possible Faults
52
If the Machine Is Mechanically Blocked after the Thread Cut
52
Only One Thread Is Cut During a Thread Cut
52
Sewing Fault after Thread Cut
52
Excessive Sources of Noise
53
Upper-Thread Sensor
54
Lower-Thread Sensor
55
Touch Screen Calibration
56
EEPROM Is Missing or Is Incorrectly Programmed
56
Machine Doesn't Start after Repair
57
Pop-Up Messages Upon Starting the Machine in Customer Mode
58
The Machine Needs to be Cleaned/Lubricated
58
Cleaning the Thread Cutter
58
Machine Requires Maintenance
59
Error Message Even Though Embroidery Module Is Connected
59
Update Failed
60
Error Messages During Firmware Update
60
Other Reasons for Faulty FW Update
60
Case 2: the EEPROM Needs to be Replaced
61
Case 3: Machine Repeatedly Requests a FW Update
61
Case 4: the EEPROM Is Replaced and the Wrong Machine Identification Has Been Loaded
62
Case 5: Wrong FW on PCBA CPU Module
62
Sewing-Off Guidelines
63
Straight Stitch (Default Settings)
63
Zigzag Stitch (Default Settings)
64
Chapter 4 - Removal and Refitting of Components
67
Covers
67
Service Cover
67
Front Cover
68
Rear Cover
71
Freearm Cover
72
Base-Plate Cover
73
Electronics, Sensors, Switches, Magnets
74
PCBA-Power Including PCB Housing
74
PCBA-CPU-Module (ARM9) General Information
76
PCBA-CPU-Module (ARM9)
77
PCBA-Base - with Feed-Dog Drop Detection
78
EEPROM (Electrically Erasable Programmable Read-Only Memory)
78
PCBA-Position Hall
79
PCBA-Threader
80
PCBA-Front Cover Including Display and Touchscreen
81
PCBA-Head
82
PCBA-Lower Thread Sensor (LTO)
83
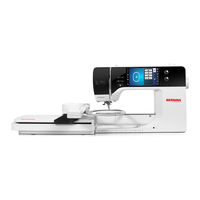
Bernina 570 QE Service And Maintenance Manual (187 pages)
Embroidery Module
Brand:
Bernina
| Category:
Sewing Machine
| Size: 9 MB
Table of Contents
Table of Contents
2
Chapter 1 - General Information
6
Safety Regulations
6
Warning: Dangerous Voltage Levels
7
ESD-Related Note: Electrostatic Discharge (ESD)
8
Tools and Gauges
9
Handling Adjustments
12
Abbreviations/Names Used
12
Cleaning
13
Technical Specifications of 4 & 5 Series
14
Chapter 2 - Electronics and Wiring
17
BERNINA B 590 (BERNINA Series 4 & 5) Block Diagram
17
PCBA-Power
18
PCBA-CPU-Module (ARM9) General Information
19
PCBA-CPU-Module/Arm9
19
PCBA-Base General Information
20
PCBA-Base with Feed-Dog Drop Detection
20
PCBA-Position Hall
21
PCBA-Threader
21
PCBA-Cover Including Display and Touch Screen
22
Pcba
22
PCBA-Stitching Head (PCBA-RET)
23
PCBA-Lower-Thread Observer (LTO)
24
ABC Sensor Support (Presser-Foot Recognition)
24
PCBA Embroidery Module Detection
25
Handling of Electronic Components
26
Returning Defective Electronic Components
26
Repairs of Electronic Components (Pcba's)
26
Chapter 3 - Troubleshooting
27
General Troubleshooting Flow Chart
27
Operating Voltage Functional Test
28
Use and Functions of Leds
28
Upper-Thread Sensor
30
Lower-Thread Sensor
31
Touch Screen Calibration
32
EEPROM Missing or Misprogrammed
32
Machine Doesn't Start after Repair
32
Update Failed
33
Sewing-Off Guidelines
35
Personal Notes Regarding Troubleshooting
39
Chapter 4 - Removal and Refitting of Components
40
Covers
40
Service Cover See ESD-Related Note
40
Front Cover
41
Rear Cover
44
Freearm Cover
45
Base-Plate Cover
46
Electronics, Sensors, Switches, Magnets
47
PCBA-Power Including PCB Housing
47
PCBA-CPU-Module (ARM9) General Information
49
PCBA-CPU-Module (ARM9)
50
PCBA-Base - with Feed-Dog Drop Detection
51
EEPROM (Electrically Erasable Programmable Read-Only Memory)
51
PCBA-Position Hall
52
PCBA-Threader
53
PCBA-Front Cover Including Display and Touchscreen
54
PCBA-Head
55
PCBA-Lower Thread Sensor
56
Sensor Support ABC (Presser Foot Recognition)
57
Head Frame and Frame Arm LED Sewing Light
58
PCBA-Embroidery Module Detection
60
Electromechancial/Mechanical Components
61
Hook and Hook Driver
61
Main Feed-Dog
64
Replacing the Hook Driver Belt
65
Stitch Plate Carrier with Integrated Thread-Cutting Unit
66
Replacing the Knife of Integrated Thread-Cutter Unit
68
Base Shaft
70
Crank Shaft and Stitch Length Stepping Motor
71
Replacing Base Shaft and Upper Shaft Connecting Belt
72
Feed-Dog Carrier and Advance Link
73
Upper Feed Crank
74
Upper Feed (Dual Feed)
74
Clutch Carriage
75
Upper-Thread Tension Unit with Thread Take-Up Cover
77
Toothed Rack, Machines with Stepper Motor Presser Foot Pressure
78
Toothed Rack, Machines with Manual Presser Foot Pressure
80
Presser Foot Bar
81
Assembly Unit BERNINA Dual Feed BDF
82
Needle-Bar Support
84
Needle Bar
85
Needle Clamp
86
Threading Mechanism
87
Thread Tension
89
Thread Take-Up Lever and Thread Regulator Spring
90
Thread Regulator Spring
91
Main Motor
91
Presser-Foot Pressure Stepping Motor
92
Bernina 570 QE Workbook (70 pages)
Brand:
Bernina
| Category:
Sewing Machine
| Size: 41 MB
Table of Contents
Table of Contents
2
Introduction
4
Preparing to Stitch
5
Personalize the Screen
6
Activate/Deactivate Beginning Tie off
6
Program Thread Cutter and Securing Stitches
6
Breadcrumbs
7
Program Pattern End
7
Program Needle Stop down and Hover
8
Program the Foot Control
8
Stitch Selection
9
Presser Foot Selection
10
Bernina Dual Feed
11
Fine Tune Adjustment-B 880 Plus Only
11
Security Program-Needle
12
Security Program-Stitch Plate Selection
12
Creative Consultant
13
THE 'I' MENU
14
Needle Stop Up/Down-Free Hand System
15
Securing Stitches
16
Permanent Reverse/Backstepping
17
Mirror Image/Pattern Repeat
18
Pattern Functions - Pattern Begin/End
19
Elongation
20
Altered Stitches
21
Temporary Altered Memory
22
Permanently Altered Stitch Memory
22
Saving Stitches in Personal Program
23
Triple Straight Stitch
24
Vari-Overlock Stitch
25
Long Stitch
26
Blind Hem
27
Stretch Stitch
28
Balance
29
Automatic Buttonhole Program
30
Memory Buttonholes
31
Manual Buttonholes
32
Attaching Buttons
33
Creative Consultant-Zipper Information
34
Combi Mode-Stitch Patterns
35
Combi Mode-Lettering
36
Free-Motion Stitching
37
Bernina Stitch Regulator #42
38
Bernina Stitch Regulator Practice
39
Sideways Motion Patterns
40
Multi-Directional Stitching
41
All-Over Directional Stitching
43
Connecting Stitches
44
Connecting Stitches and Move Multiples
45
Stitch Designer Overview
46
Bernina 570 QE Manual (15 pages)
Brand:
Bernina
| Category:
Sewing Machine
| Size: 7 MB
Table of Contents
Safety Instructions
3
Servicing Double- Insulated Products
4
Environmental Protection
4
Setup Program
6
Creative Consultant
6
Help Program
6
Edit»-Display
9
Key to Signs
11
Standard Accessory
12
Presser Feet
13
Accessory Box Free Standing
14
Advertisement
Related Products
Bernina 530
Bernina BERNETTE 50
Bernina 500 E
Bernina 590
Bernina 540
Bernina 560 QE
Bernina 555 QE
Bernina 535
Bernina 532-2
Bernina bernette 5
Bernina Categories
Sewing Machine
Sewing Machine Accessories
Industrial Equipment
Accessories
Software
More Bernina Manuals
Login
Sign In
OR
Sign in with Facebook
Sign in with Google
Upload manual
Upload from disk
Upload from URL