Table of Contents
Advertisement
Advertisement
Table of Contents

Related Manuals for Hangar 9 Phoenix 7 ARF


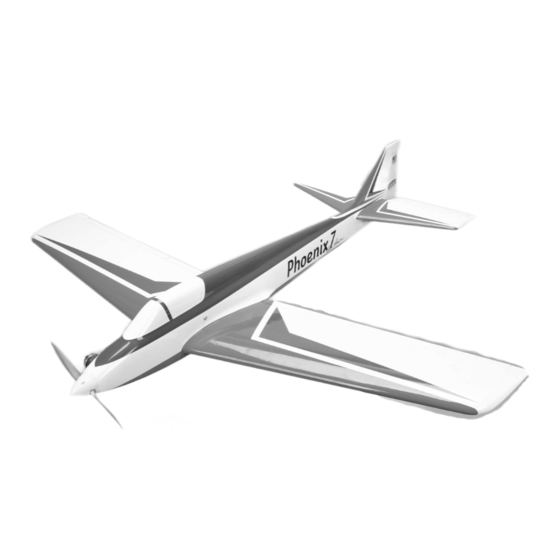
Summary of Contents for Hangar 9 Phoenix 7 ARF
- Page 1 Phoenix 7 ARF Assembly Manual...
-
Page 2: Table Of Contents
Important Information Regarding Warranty ..... 5 Meaning of Special Language Using the Manual ............. 5 We at Hangar 9 are honored to have had the opportunity to work with Don Lowe to bring an accurate recreation Aircraft Specifications and Requirements ....5–6... -
Page 3: Included Parts Listing
-inch aluminum anodized blk tube 1 Stab joiner tube Copper crimp Nose gear steering 17oz (500cc) pre-assembled fuel tank Engine Hex wrench: 1.5mm 19mm x 13mm x 40mm hardwood block Nose wheel spacers Hangar 9 Phoenix 7 ARF Assembly Manual... -
Page 4: Contents Of Kit And Parts Layout
6. HAN475506 Fixed Landing Gear without Wheels result. 7. HAN475507 Pushrods 8. HAN475512 Fuel Tank 17 oz (500cc) 9. HAN4049 -inch Spinner (White) 10. HAN304 Wheel, Main 2 -inch (63mm) 11. HAN302 Wheel, Nose 2-inch (51mm) Hangar 9 Phoenix 7 ARF Assembly Manual... -
Page 5: Radio Equipment Requirements
Remember to take your time and follow the directions. Robart Spring Down Retracts with Air Installation Kit (HAN500) Robart Air Pump (ROB164G) DS821 Digital Sport Servo (JRPS821) The Spektrum trademark is used with permission of Bachmann Industries, Inc. Hangar 9 Phoenix 7 ARF Assembly Manual... -
Page 6: Field Equipment Required
Pin vise Rotary tool Rubbing alcohol Ruler Sanding Drum Medium grit sandpaper Side cutter Small clamp (2) Square Drill bit: 1/16-inch (1.5mm), 5/64-inch (2mm), 3/32-inch (2.5mm), 3/16-inch (5mm) Optional Long drill bit: 11/64-inch (4.5mm) Hangar 9 Phoenix 7 ARF Assembly Manual... - Page 7 6. Place the aileron servo in the opening in the wing with the output of the servo facing the aileron. Use a pencil to transfer the locations for the four mounting screws onto the servo mounts in the wing. Hangar 9 Phoenix 7 ARF Assembly Manual...
-
Page 8: Main Gear Installation-Fixed
Note: The servo has an odd number of splines. You may need to rotate the horn 180-degrees so it aligns with the hinge line. Try not to use the sub-trim function when installing the servo horn. Hangar 9 Phoenix 7 ARF Assembly Manual... - Page 9 Assemble both the left and right assemblies at this the top of the wing. time. Hangar 9 Phoenix 7 ARF Assembly Manual...
-
Page 10: Main Gear Installation-Retracts
You will also need the retract mechanisms as well as the associated hardware for those retracts. 10. Repeat Steps 7 through 9 to assemble the remaining main landing gear. Hangar 9 Phoenix 7 ARF Assembly Manual... - Page 11 Hangar 9 Phoenix 7 ARF Assembly Manual...
- Page 12 Using a drill press for drilling these holes is recommended so they are drilled straight through the wheel. 10. Repeat Steps 6 through 9 to prepare the remaining landing gear mount for the landing gear block. Hangar 9 Phoenix 7 ARF Assembly Manual...
- Page 13 Place the strut back in the retract and tighten the setscrews. 16. Repeat Steps 12 through 15 to prepare the remaining wheel assembly. Hangar 9 Phoenix 7 ARF Assembly Manual...
- Page 14 cylinder. Make sure the loop is not too tight, as it could kink 29. Repeat Steps 16 through 28 for the remaining retract and damage the airline. strut and wheel. Hangar 9 Phoenix 7 ARF Assembly Manual...
-
Page 15: Stabilizer Installation
8. Slide the tube and stabilizer into the hole in the fuselage. The stabilizer will fit tightly against the fuselage. 5. Repeat Steps 2 through 4 to prepare the opposite side of the fuselage. Hangar 9 Phoenix 7 ARF Assembly Manual... - Page 16 15. Brush a thin layer of epoxy on the exposed wood of the remaining stabilizer. Make sure to apply a small amount of epoxy in the hole for the stabilizer tube as well. Hangar 9 Phoenix 7 ARF Assembly Manual...
-
Page 17: Rudder And Elevator Linkage Installation
The retracts will have the connectors at the steeting arm adn will not need this adjustment at the rudder servo. Hangar 9 Phoenix 7 ARF Assembly Manual... - Page 18 6. Slide the rudder pushrod into the tube in the fuselage. 8. Use a pencil to mark the locations for the servo mounting screws on the servo tray. Hangar 9 Phoenix 7 ARF Assembly Manual...
- Page 19 7 inches (178mm) from the end of the pushrod. This will line the wires up with the elevator control horns. 7 inches (178mm) -inch (45mm) -inch (45mm) 7 inches (178mm) Hangar 9 Phoenix 7 ARF Assembly Manual...
-
Page 20: Engine Installation
Rotary tool with sanding drum Drill bit: 1/16-inch (1.5mm), 9/64-inch (3.5mm), 11/64-inch (4.5mm), 7/32-inch (5.5mm) 1. Locate the items necessary to install the engine in your model. You will also need the fuselage for this installation. Hangar 9 Phoenix 7 ARF Assembly Manual... - Page 21 This will leave material so you can fit the opening in the fuselage to your specific engine application. This template will fit the recommended Evolution engine after enlarging the opening roughly 1/8-inch (3mm). Hangar 9 Phoenix 7 ARF Assembly Manual...
- Page 22 10. Use a drill and 7/32-inch (5.5mm) drill bit to drill the correctly position the engine in the mounts. holes in the engine mount rails. hint: Using a drill press for drilling these holes is recommended so they are drilled straight through the mount. Hangar 9 Phoenix 7 ARF Assembly Manual...
- Page 23 (3mm) of the pushrod tube forward of the firewall. Use mount rails to teh firewall. rmember to use threadlock ont eh medium CA to glue the tube to the firewall and standoff. screws so they don’t vibrtate loose. Hangar 9 Phoenix 7 ARF Assembly Manual...
- Page 24 Tighten the screws that secure the engine to CA in each hole to harden the surrounding wood. 3-inches (76mm) of the wire behind the clevis will need to the rails using a 1/8-inch hex wrench. be stiffened. Hangar 9 Phoenix 7 ARF Assembly Manual...
-
Page 25: Nose Gear Installation-Fixed Gear
Make sure to use threadlock on the screw to keep it from position the block evenly on both rails. With the block slid as vibrating loose. far forward as possible, use a pencil to transfer the locations for the mounting screws onto the rails. Hangar 9 Phoenix 7 ARF Assembly Manual... - Page 26 Once the top collar is installed, tighten the 3mm x 3mm setscrew to secure the steering arm. Check that the gear can move freely in the block. If not, reposition the steering arm lower to remove any binding. Hangar 9 Phoenix 7 ARF Assembly Manual...
-
Page 27: Nose Gear Installation-Retracts
You will also need the fuselage for this installation. 4. Use a drill and 3/32-inch (2.5mm) drill bit to drill the holes for the mounting screws. Hangar 9 Phoenix 7 ARF Assembly Manual... - Page 28 Install both connectors at this time. to secure the wire. Tighten the setscrew on the steering arm from the end of the wire. Make each flat 1/4-inch (6mm) and check that the gear steers without binding. wide. Hangar 9 Phoenix 7 ARF Assembly Manual...
- Page 29 Hangar 9 Phoenix 7 ARF Assembly Manual...
- Page 30 Place a drop of light machine oil on the axle before sliding it into the wheel so it rolls smoothly during takeoff and landing. Hangar 9 Phoenix 7 ARF Assembly Manual...
-
Page 31: Fuel Tank And Muffler/Header Installation
Important: Make sure to seal the carburetor and exhaust on your engine so fiberglass dust does not enter the engine while sanding the opening for the nose gear. Hangar 9 Phoenix 7 ARF Assembly Manual... -
Page 32: Steering Linkage Installation-Fixed Gear
You will also need to have the fuselage at this time. Note: A pressure fitting may be required on your header. If so, install the fitting before attaching the header to the engine. Hangar 9 Phoenix 7 ARF Assembly Manual... -
Page 33: Retract Servo And Valve Installation
Use the screws vibrating loose. provided with the servo and a #1 Phillips screwdriver to secure the servo. Hangar 9 Phoenix 7 ARF Assembly Manual... - Page 34 It will only take a few percent in both directions to Left Landing operate the valve. Gear Cylinder 6. Attach the clevis to the retract valve. Hangar 9 Phoenix 7 ARF Assembly Manual...
-
Page 35: Steering Linkage Installation-Retract Gear
6. Use medium CA to glue the pushrod tube where it crosses the front wing bolt plate. Glue the plywood standoff to the servo tray, and the pushrod tube to the standoff using medium CA. Hangar 9 Phoenix 7 ARF Assembly Manual... -
Page 36: Receiver And Receiver Battery Installation
Note: If using a Li-Po receiver pack, make sure to use a regulator. Read the instructions for the regulator to make sure it is installed correctly. Hangar 9 Phoenix 7 ARF Assembly Manual... -
Page 37: Wing Installation
8. Place a piece of foam over the receiver and receiver battery. Use a flexible adhesive to secure supports to keep the radio components from moving in the fuselage. 1-inch (25mm) -inch (66mm) Hangar 9 Phoenix 7 ARF Assembly Manual... -
Page 38: Center Of Gravity
After the first flights, the CG position can be adjusted for your personal preference. Hangar 9 Phoenix 7 ARF Assembly Manual... -
Page 39: Preflight
If any critical switches are on without your knowledge, the transmitter alarm will sound a warning at this time. • 6. Check that all trim levers are in the proper location. • 7 . All servo pigtails and switch harness plugs should be secured in the receiver. Make sure the switch harness moves freely in both directions. Hangar 9 Phoenix 7 ARF Assembly Manual... -
Page 40: Warranty And Repair Policy
Repair or replacement by anyone other than Horizon. Return of any goods by Purchaser decisions are at the sole discretion of Horizon Hobby. must be approved in writing by Horizon before shipment. Hangar 9 Phoenix 7 ARF Assembly Manual... -
Page 41: Compliance Information For The European Union
Please call +33 (0) 1 60 47 44 70 with any questions or concerns regarding this product or warranty. Please call 877-504-0233 or e-mail us at productsupport@ horizonhobby.com with any questions or concerns regarding this product or warranty. Hangar 9 Phoenix 7 ARF Assembly Manual... -
Page 42: 2010 Official Academy Of Model Aeronautics Safety Code
In the case of airshows demonstrations straight line must be established. An area away from the line must be maintained for spectators. Intentional flying behind the line is prohibited. Hangar 9 Phoenix 7 ARF Assembly Manual... - Page 43 Wing Joint Bridge gap on fuselage Centerline Wing Joint Centerline Hangar 9 Phoenix 7 ARF Assembly Manual...
- Page 44 This page was intentionally left blank as the back for the nose gear retract template Hangar 9 Phoenix 7 ARF Assembly Manual...
- Page 45 This page was intentionally left blank as the back for the rear section of the engine template Hangar 9 Phoenix 7 ARF Assembly Manual...
- Page 46 Note: This template is intended to provide the location to start cutting the opening in the fusealge for the engine installation. It has been left undersized to fit a variety of different engines and to allow for differences in template alignment. Hangar 9 Phoenix 7 ARF Assembly Manual...
- Page 47 Spinner C\L Cut on dotted line when not using a remote needle Engine Cutout Hangar 9 Phoenix 7 ARF Assembly Manual...
- Page 48 © 2010 Horizon Hobby, Inc. horizonhobby.com Hangar9.com Printed 05/2010 16284...
Need help?
Do you have a question about the Phoenix 7 ARF and is the answer not in the manual?
Questions and answers