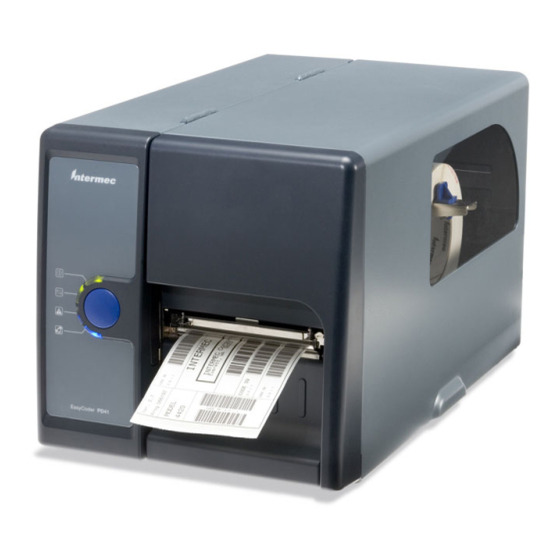
Intermec EasyCoder PD41 Service Manual
Hide thumbs
Also See for EasyCoder PD41:
- Manual (163 pages) ,
- User manual (108 pages) ,
- Programmer's manual (38 pages)
Table of Contents
Advertisement
Quick Links
Advertisement
Table of Contents

Subscribe to Our Youtube Channel
Related Manuals for Intermec EasyCoder PD41


Summary of Contents for Intermec EasyCoder PD41
- Page 1 Service Manual EasyCoder® PD41/PD42 Printer...
- Page 3 Service Manual EasyCoder® PD41/PD42 Printer...
- Page 4 The information contained herein is provided solely for the purpose of allowing customers to operate and service Intermec-manufactured equipment and is not to be released, reproduced, or used for any other purpose without written permission of Intermec Technologies Corporation.
-
Page 5: Table Of Contents
Media Supply Post ..........32 EasyCoder PD41/PD42 Printer Service Manual... - Page 6 Parallel IEEE1284 Interface (Option) ........86 EasyCoder PD41/PD42 Printer Service Manual...
- Page 7 Schematics ............93 EasyCoder PD41/PD42 Printer Service Manual...
- Page 8 Contents EasyCoder PD41/PD42 Printer Service Manual...
-
Page 9: Before You Begin
Safety Summary Your safety is extremely important. Read and follow all warnings and cautions in this document before handling and operating Intermec equipment. You can be seriously injured, and equipment and data can be damaged if you do not follow the safety warnings and cautions. -
Page 10: Erste Hilfe
Safety Information Your safety is extremely important. Read and follow all warnings and cautions in this document before handling and operating Intermec equipment. You can be seriously injured, and equipment and data can be damaged if you do not follow the safety warnings and cautions. -
Page 11: Global Services And Support
Global Services and Support Warranty Information To understand the warranty for your Intermec product, visit the Intermec web site at www.intermec.com click Support > Returns and Repairs > Warranty. -
Page 12: Service Location Support
Outside the U.S.A. and Canada, contact your local Intermec representative. To search for your local representative, from the Intermec web site, click About Us > Contact Us. Service Location Support For the most current listing of service locations, click Support > Returns and Repairs >... -
Page 13: Who Should Read This Manual
This document provides you with information about the features of the EasyCoder PD41/PD42 printer, and how to install, configure, operate, maintain, and troubleshoot it. Before you work with the EasyCoder PD41/PD42 printer, you should be familiar with your network and general networking terms, such as IP address. - Page 14 Before You Begin EasyCoder PD41/PD42 Printer Service Manual...
-
Page 15: Troubleshooting The Pd41/Pd42
Troubleshooting the PD41/ PD42 This chapter describes how to troubleshoot the EasyCoder PD41/PD42 printer and how to identify and replace faulty parts. Do not attempt to repair the power supply or any circuit boards. EasyCoder PD41/PD42 Printer Service Manual... -
Page 16: Error Handling
Chapter 1 — Troubleshooting the PD41/PD42 Error Handling The EasyCoder PD41/PD42 printer communicates errors to the user via the red Error LED and the blue Ready-to-Work LED on the front panel. When an error condition occurs, these two will be turned on or flash depending on the cause of the error. - Page 17 Press Testfeed ( Cutter not found. A cut-command has been sent but the printer cannot find the cutter. Check that the cutter is installed properly. Cutter not Check that the cutter is installed properly. responding. EasyCoder PD41/PD42 Printer Service Manual...
- Page 18 When printing, label is jammed or • Clear the media jam, and if label is stuck User’s Guide tangled up on thermal printhead, remove it using a soft cloth soaked with isopropyl alcohol or a cleaning card. EasyCoder PD41/PD42 Printer Service Manual...
- Page 19 When using Label Taken Sensor, • Check if LTS sensor is working “Label Taken Sensor (LTS)” on abnormal function occurs page 59 • Check if media is loaded properly User’s Guide EasyCoder PD41/PD42 Printer Service Manual...
-
Page 20: No Reaction At Power Up
• Check to see if a bad command was sent Fingerprint Command Reference to the printer via Fingerprint or direct Manual (P/N 937-005-xxx protocol • Check the Fingerprint application or the last issued instruction in Direct Protocol EasyCoder PD41/PD42 Printer Service Manual... - Page 21 • Connect the cable to a replacement console board without actually installing it (mind the risk of electrostatic discharges). If the trouble seems to be the console board, replace the entire panel module. • Check the console board • Check with some other electrical device EasyCoder PD41/PD42 Printer Service Manual...
- Page 22 “To adjust printhead balance” on either the inner or outer part of the media, page 53 the printhead balance may need to be readjusted. This is most likely to occur when switching between media of different widths. EasyCoder PD41/PD42 Printer Service Manual...
- Page 23 • Check if the platen roller is slippery, worn out, or dry and hard. Clean or replace if “Platen Module” on page 44 necessary. EasyCoder PD41/PD42 Printer Service Manual...
- Page 24 Chapter 1 — Troubleshooting the PD41/PD42 EasyCoder PD41/PD42 Printer Service Manual...
-
Page 25: Models And Options
Models and Options This chapter contains general information about the EasyCoder PD41 and PD42 printers, including available options and technical specifications. EasyCoder PD41/PD42 Printer Service Manual... -
Page 26: Models
Chapter 2 — Models and Options Models The EasyCoder PD41/PD42 printer is available with a 200 or 300 dpi printhead. The label taken sensor is installed into all printers. The Real Time Clock module is in the PD42 only and is supported by the Fingerprint firmware. -
Page 27: Options
• Cutter kit • Internal rewinder (for peel-off and batch takeup operation) • EasyLAN Ethernet adapter • Parallel 1284 interface • Thermal printhead (200/300 dpi) Instructions for installing these options are covered in Chapter 3. EasyCoder PD41/PD42 Printer Service Manual... -
Page 28: Technical Specifications
Firmware (Fingerprint) Operating system Fingerprint v10.x.x Includes Direct Protocol Smooth fonts TrueType and TrueDoc fonts Resident scalable fonts Character sets • 23 single-byte character sets standard. • UTF-8 support as standard. Resident bar codes EasyCoder PD41/PD42 Printer Service Manual... - Page 29 Label gap/black mark/out of media Printhead lifted Label taken Ribbon end Controls LED indicators Power, Data/Ready, Error, Ready-to-Work™ Keys 1 Print Button + 5 Soft Keys Electronics Microprocessor ARM 9 Standard memory 4 MB flash, 8 MB SDRAM. EasyCoder PD41/PD42 Printer Service Manual...
- Page 30 Print Length Max. Fingerprint 8 dots/mm (203 dpi) 1270 mm (50 in) 600 mm (23 in) 11.8 dots/mm (300dpi) 558.2 mm (22 in) 406.4 mm (16 in) Modes of Operation Tear-off (straight-through) Cut-off Option with cutter EasyCoder PD41/PD42 Printer Service Manual...
- Page 31 Ribbon roll diameter (outer) 76 mm (2.99 in) equivalent to 450 m (1471 ft) of ribbon. Inner core diameter 25.2 to 25.6 mm (1 in) Sensors Label gap/black mark/out of media Printhead lifted Label taken Ribbon end EasyCoder PD41/PD42 Printer Service Manual...
- Page 32 8 MB flash, 16 MB SDRAM. Interfaces RS-232 serial Ethernet Option IEEE 1284 parallel Option CompactFlash USB host Accessories and Options Internal rewinder and batch takeup Cutter Printhead 203/300 dpi EasyLAN ethernet interface Parallel IEEE 1284 interface Real time clock EasyCoder PD41/PD42 Printer Service Manual...
-
Page 33: Replacing Parts
• Front Panels • Side Panels • Chassis • Media Supply • Transfer Ribbon Mechanism • Print Mechanism • Rewinder Module • Label Taken Sensor • Cutter • Power Supply • Main Board • Upgrading Firmware EasyCoder PD41/PD42 Printer Service Manual... -
Page 34: Front Panels
P38 (“LTS”), also on the main board. Console PCB Screw (4 places) Screw Flat cable to (2 places) main board Print button switch LEDs (green-green-red-blue) Print button Light guide E-ring Label Taken Sensor Front Panel Overlay PD41 Front Panel: Exploded View EasyCoder PD41/PD42 Printer Service Manual... -
Page 35: Front Panel (Pd42)
P38 (“LTS”), also on the main board. Console PCB Screw (4 places) Screw Flat cable to (4 places) main board Print button switch LEDs (green-green-red-blue) Print button Light guide E-ring Label Taken Sensor Front Panel Overlay PD42 Front Panel: Exploded View EasyCoder PD41/PD42 Printer Service Manual... -
Page 36: Bottom Right Panel
57) is installed. It must be permanently removed before installing an optional cutter (For help, see “Cutter” on page 61). The panel is held in place by a knurled screw inserted beneath the bottom plate. Bottom Right Panel With Thumbscrew EasyCoder PD41/PD42 Printer Service Manual... -
Page 37: Console Pcb
Chapter 3 — Replacing Parts Console PCB The same console PCB is used on both the PD41 and PD42 printers. It has four LEDS and a Print button. Console PCB: Components EasyCoder PD41/PD42 Printer Service Manual... - Page 38 Chapter 3 — Replacing Parts Console PCB: Schematics EasyCoder PD41/PD42 Printer Service Manual...
-
Page 39: Side Panels
(not included). To remove the right-hand door Remove the four screws that attach the hinges to the center section. Window Right-hand Top/Right Panel Door Right-Hand Door EasyCoder PD41/PD42 Printer Service Manual... -
Page 40: Left-Hand Panel
Niemals den Drucker ohne angebrachte linke Seitenwand betreiben, da dies zu RF-Störungen führen kann. Zulassungen sind nur bei angebrachter Abdeckung gültig. Take standard precautions against ESD (Electrostatic Discharges) before touching any electronics components inside the electronics compartment. EasyCoder PD41/PD42 Printer Service Manual... - Page 41 To remove the left-hand panel 1 Disconnect the power cord. 2 Open the right-hand door. 3 Remove the screw located on the left side of the front hinge and the screw on the right side of the rear hinge. EasyCoder PD41/PD42 Printer Service Manual...
- Page 42 DO NOT attempt to pry it loose. Protect the paint by inserting a thin piece of cardboard or similar between the plate and the screwdriver. 7 Remove the panel from the printer. EasyCoder PD41/PD42 Printer Service Manual...
-
Page 43: Chassis
It consists of three main parts: • Bottom plate with four rubber feet and two dampeners for the right- hand door • Center section • Rear plate EasyCoder PD41/PD42 Printer Service Manual... -
Page 44: Rear Plate
The rear plate contains the On/Off switch, the AC power cord socket assembly, the serial and USB port connectors, and the CompactFlash card slot. It also has slots for the optional parallel interface and Ethernet connectors, which are fitted on the main board. EasyCoder PD41/PD42 Printer Service Manual... - Page 45 Machine labels Rear View of the PD41/PD42 Ethernet RJ-45 port USB port MAC address label RS-232 serial port IEEE 1284 parallel port CompactFlash socket Power switch AC power cord socket Rear Connectors on the PD41 EasyCoder PD41/PD42 Printer Service Manual...
-
Page 46: Media Supply
The supply post is fitted to the center section using three screws. It runs through a square hole in the triangular guide plate, which is attached to the center section from inside the electronics compartment using three screws. EasyCoder PD41/PD42 Printer Service Manual... - Page 47 1 Unhook the coil spring from the hook at the bottom of the plastic edge guide underneath the post. 2 Remove the coil spring and the washer, then pull up the edge guide and save it for possible later use. Edge Guide Hook Washer Coil Spring Post EasyCoder PD41/PD42 Printer Service Manual...
- Page 48 Sicherstellen, dass die Führung mit der hohen Kante in die vertikale Stellung gebracht wird, bevor die Seitenklappe geschlossen wird. Andernfalls könnte die Führung beschädigt werden. EasyCoder PD41/PD42 Printer Service Manual...
-
Page 49: Transfer Ribbon Mechanism
To replace the ribbon module 1 Disconnect the power cord and remove the left-hand panel (For help, “To remove the left-hand panel” on page 27). EasyCoder PD41/PD42 Printer Service Manual... -
Page 50: Ribbon Module Belt
3 Remove the E-rings and the washer from the ends of the ribbon supply and rewind shafts. 4 Remove the four screws that hold the inner bracket to the main body of the ribbon module and pull out the bracket. EasyCoder PD41/PD42 Printer Service Manual... -
Page 51: Ribbon Supply And Rewind Units
At the outer end of each unit is a knob for adjusting the ribbon tension, see below. Replacing the Ribbon Core Spring Blade The ribbon core spring blade is held by a single screw. Screw Ribbon core spring blade Ribbon Core Spring Blade EasyCoder PD41/PD42 Printer Service Manual... -
Page 52: Adjusting Ribbon Tension
Also disconnect and connect the cable to the main board a few times to remove any oxide. 1 Disconnect the power cord and remove the left-hand panel (For help, “To remove the left-hand panel” on page 27). EasyCoder PD41/PD42 Printer Service Manual... - Page 53 4 From inside the electronics compartment, remove the single screw and washer that holds the sensor PCB to the center section. 5 Pull out the sensor and the isolating sheet. Cable Screw Washer Sensor Assembly Isolating sheet Ribbon Out Sensor Exploded View EasyCoder PD41/PD42 Printer Service Manual...
-
Page 54: Ink Position Knob
2 Disconnect the spring from the ink position knob inside the electronics compartment using tweezers or a pair of narrow-tipped pliers. 3 Move the knob to the center of the slot, rotate it a quarter of a turn, and pull it out into the media compartment. EasyCoder PD41/PD42 Printer Service Manual... -
Page 55: Print Mechanism
However, this requires that the printhead PCB is also exchanged. When ordering the Print Unit Assembly, the Printhead module is not included. Use Intermec-approved printheads only. Using a printhead that is incompatible with the printer will void the warranty and is likely to damage the main board beyond repair. -
Page 56: Motor, Pulleys, And Belts
The stepper motor module is attached to the bottom plate using four screws. The motor is connected by a four-wire cable harness to connector P31(“MOTOR”) on the main board. EasyCoder PD41/PD42 Printer Service Manual... - Page 57 5 Install the motor in reverse order. If the printer is equipped with a rewinder, fit the platen roller belt on the inner pulley (the pulley closest to the motor housing) and the rewinder belt to the outer pulley. EasyCoder PD41/PD42 Printer Service Manual...
-
Page 58: Platen Module
The silicone rubber is subject to wear and requires the platen roller to be replaced, usually with long intervals. EasyCoder PD41/PD42 Printer Service Manual... - Page 59 3 Remove the E-ring from the inner end of the platen roller shaft and remove the motor belt and pulley. 4 Remove the ribbon rewinder belt and pulley. 5 Remove the E-rings and washers from either end of the platen roller shaft. EasyCoder PD41/PD42 Printer Service Manual...
-
Page 60: Media Guides
By comparing the detection of light/no light with the paper type setup (black mark/gap paper/plain paper), the firmware can determine the position of the labels or similar along the media path and also detect out-of-media conditions. EasyCoder PD41/PD42 Printer Service Manual... - Page 61 For more information, see the printer user’s guide. You can also adjust the sensor with Fingerprint commands. For help, see the Intermec Fingerprint Command Reference Manual (937-005-xxx). To replace the label gap sensor module Note: Before replacing the module, check that there is no dirt, dust, adhesive residue, or stuck labels that blocks the light between the two sensors.
-
Page 62: Headlift Sensor
The microswitch is activated by an arm connected to the printhead lever. If attempting to print while the headlift sensor indicates that the printhead is open, Error 11 “printhead lifted” occurs. EasyCoder PD41/PD42 Printer Service Manual... -
Page 63: Printhead Module
(direct thermal) media, or on other face materials via a thermal transfer ribbon. The spots can be combined into bitmap patterns, which make up characters, bar codes, images, lines, and boxes. EasyCoder PD41/PD42 Printer Service Manual... - Page 64 Information on how to switch between direct thermal and thermal transfer printing is provided in the user’s guide of each respective printer. The EasyCoder PD41/PD42 printer can be fitted with two printheads with different densities: • In a 203.2 dpi printhead (8 dots/mm), each dot under standardized conditions will produce a black spot which has a diameter of 4.92 mils...
- Page 65 (for instance, going from 203 dpi to 300 dpi). If you are just replacing a worn-out printhead, proceed to step 10. 203 dpi Printhead PCB (left) and 300 dpi Printhead PCB (right) 6 To facilitate the removal of the PCB, center the balance boxes. EasyCoder PD41/PD42 Printer Service Manual...
-
Page 66: Extending The Life Of The Printhead
• When using preprinted labels or labels with some type of varnish or non-standard top coating for direct thermal printing, use original Intermec labels or inks recommended by leading manufacturers of direct thermal media. The labels must not contain any aggressive substances such as chloride or grinding substances such as titanium dioxide. -
Page 67: Adjusting The Printhead
Adjusting the Printhead The printer is factory-adjusted for full-size media width. When using media less than full width, Intermec recommends that you adjust the position of the printhead balance boxes so an even pressure is applied across the media. A poorly adjusted printhead pressure may be detected by a weaker printout on either side of the media path. - Page 68 (a full turn corresponds to 0.55 mm, which is a lot). Be sure to make identical adjustments on both screws! If you are unsure, tighten both screws by turning them counterclockwise as far as they go and start over. EasyCoder PD41/PD42 Printer Service Manual...
- Page 69 3 Unscrew screws C and D 5 full turns (200 dpi printhead) or 1 ½ turns (300 dpi printhead). 4 Tighten screws A and B. EasyCoder PD41/PD42 Printer Service Manual...
- Page 70 1 Tighten screws A and B (see above) so that the springs are fully compressed. Be careful not to overdo it, as it may damage the threads. 2 Unscrew screws A and B 4 ½ turns. EasyCoder PD41/PD42 Printer Service Manual...
-
Page 71: Rewinder Module
This section describes the optional internal rewinder required for peel-off (self-strip) and batch takeup operation. The rewinder module is an optional device for the EasyCoder PD41/PD42 printer. The printer is prepared with belt, pulley, and gear train for driving the rewinder using the same stepper motor that also drives the platen roller and transfer ribbon rewinder. -
Page 72: Installing The Rewinder
5 For batch takeup operation only: Attach the liner retention guide. 6 Install media as described in the printer user’s guide. EasyCoder PD41/PD42 Printer Service Manual... -
Page 73: Label Taken Sensor (Lts)
Label Taken Sensor (LTS) This section describes the Label Taken Sensor, which is a standard feature on the EasyCoder PD41/PD42 printer. The purpose of the Label Taken Sensor is to detect if a label has been removed after printing and—if not—hold the printing of the next label. It works equally well when the media is manually torn off after printing as when the labels are automatically separated from the liner. - Page 74 3 Remove the E-ring that holds the LTS and pull it away. The LTS is only available as a complete unit. 4 Assemble in reverse order. E-ring Label Taken Sensor Front Panel (PD41) Label Taken Sensor EasyCoder PD41/PD42 Printer Service Manual...
-
Page 75: Cutter
The cutter is controlled from the software application, such as Fingerprint, InterDriver, or LabelShop). For more information, see the printer user’s guide. Screws (x6) Cutter PCB Screws, Plastic (x2) Bracket Cutter Spring Cutter Mechanism Front Cover EasyCoder PD41/PD42 Printer Service Manual... -
Page 76: Installing The Cutter
3 After the media jam is cleared, switch on the power to the printer, and the cutter blade will go back to its original position. Note: It is recommended to use labels with a minimum length of 30 mm (1.2 in). EasyCoder PD41/PD42 Printer Service Manual... -
Page 77: Power Supply
Das Netzteilmodul enthält Kabel und Schaltkreise, die gefährliche Spannungen führen. Aus Sicherheitsgründen ist es streng untersagt, ein Netzteilmodul zu reparieren oder eine durchgebrannte Sicherung auszutauschen. Falls eine Sicherung durchbrennt, muss das gesamte Netzteilmodul ausgetauscht werden. EasyCoder PD41/PD42 Printer Service Manual... - Page 78 Nachdem das neue Antriebsmodul eingesetzt ist, muss sichergestellt werden, dass es korrekten Kontakt mit der unteren Platte hat, da nur so die ausreichende Kühlung der Einheit gewährleistet werden kann. EasyCoder PD41/PD42 Printer Service Manual...
-
Page 79: Components
Chapter 3 — Replacing Parts Components Components on PD41/PD42 Power Supply Schematics Schematic forPD41 only EasyCoder PD41/PD42 Printer Service Manual... - Page 80 Chapter 3 — Replacing Parts EasyCoder PD41/PD42 Printer Service Manual...
- Page 81 Chapter 3 — Replacing Parts EasyCoder PD41/PD42 Printer Service Manual...
-
Page 82: Main Board
• 2 kbits serial EEPROM for part and serial numbers and identification • A/D converter for sensor adjustment • Compact flash memory card expansion (up to 2 GB) • CompactFlash Type II (5.0 mm thickness) cannot be used • CF+ cards may not work EasyCoder PD41/PD42 Printer Service Manual... - Page 83 Option brd 1284 FLASH IEEE1284 Option brd CompactFlash B-Addr** Sensors B-Data Dig. Pot. 3.3V EEPROM (Part No, Serial No, ** B-Addr is low order bits only etc) 24-to-5V 5-to-3.3V 1.5V 5-to-1.5V Main Board Block Diagram (PD41) EasyCoder PD41/PD42 Printer Service Manual...
-
Page 84: Replacing The Main Board
3 Remove any CompactFlash memory card. 4 Remove any Ethernet and parallel interface option boards. 5 Remove the five screws and washers that hold the main board. 6 Lift out the main board and install in reverse order. EasyCoder PD41/PD42 Printer Service Manual... -
Page 85: Circuits Overview
Fuse Flash 24V to 5V CPLD Stepper motor converter Main Board, Interfaces Blackmark Ethernet Headlift Real-time Ribbon sensor board sensor clock sensor sensor LCD (PD42 only) Serial Console IEEE1284 Printhead board Power Cutter Stepper Motor EasyCoder PD41/PD42 Printer Service Manual... -
Page 86: Main Board, Components And Reference Points
R156 C116 R322 R284 R148 R286 R288 R212 R287 R243 R337 R242 R326 R50 R205 C115 C113 C114 R145 R323 C144 C140 R101 R103 R102 R104 R105 C143 R274 R275 R276 R277 C142 R282 C117 EasyCoder PD41/PD42 Printer Service Manual... -
Page 87: Selected Test Points
Overcurrent on 5VE, low when short circuit on 5VE CUT1, CUT2 Cutter control, Outputs ({CUT1;CUT2}): {0;1} – Forward {1;0} – Reverse {1;1} – Brake {0;0} – Stop (high impedance) CUTHOME Cutter status, high level in home position EasyCoder PD41/PD42 Printer Service Manual... - Page 88 Chapter 3 — Replacing Parts Test points on Main Board EasyCoder PD41/PD42 Printer Service Manual...
- Page 89 VDDC8 GPIO62 GPIO61 GPIO60 GPIO59 VDDC7 GPIO58 GPIO57 GPIO56 GPIO55 GPIO54 GPIO53 VDDC6 GPIO65 GPIO64 GPIO63 VSS33 X2_SYS_OSC X1_SYS_OSC SYS_OSC_VDD VDDS10 SYS_PLL_DVDD SYS_PLL_DVSS SYS_PLL_AVSS VDDS9 PLL_LPF SYS_PLL_AVDD GPIO52 GPIO51 TX_CLK VSS32 VSS31 Processor and Memory EasyCoder PD41/PD42 Printer Service Manual...
- Page 90 Chapter 3 — Replacing Parts Flash and CPLD EasyCoder PD41/PD42 Printer Service Manual...
- Page 91 Chapter 3 — Replacing Parts TPH and Sensors EasyCoder PD41/PD42 Printer Service Manual...
- Page 92 Chapter 3 — Replacing Parts ‘ Communication Interfaces EasyCoder PD41/PD42 Printer Service Manual...
- Page 93 Chapter 3 — Replacing Parts Power EasyCoder PD41/PD42 Printer Service Manual...
- Page 94 Chapter 3 — Replacing Parts Pull-ups and Debug EasyCoder PD41/PD42 Printer Service Manual...
- Page 95 Chapter 3 — Replacing Parts Bypass/Decoupling EasyCoder PD41/PD42 Printer Service Manual...
-
Page 96: Upgrading Firmware
1 Go to www.intermec.com. 2 Click Support > Downloads. 3 In the Select a Product field, choose EasyCoder PD41 or PD42. The Downloads page appears with a list of available firmware. 4 Download the latest firmware version to your computer. -
Page 97: Interfaces
This chapter describes the communication interfaces of the EasyCoder PD41/PD42, and contains the following sections: • Communication Interfaces • RS-232 Serial Interface • USB Serial Interface • USB Host Interface (PD42 only) • Parallel IEEE1284 Interface (Option) • EasyLAN Ethernet Interface (Option) EasyCoder PD41/PD42 Printer Service Manual... -
Page 98: Communication Interfaces
Interface Connectors RS-232 Serial Interface As a standard, the EasyCoder PD41/PD42 printer is equipped with an RS- 232 communication port. The circuitry is fitted on the CPU board and has a fixed set of signals in a DB-9pin socket, which protrudes through a slot in the printer’s rear plate. -
Page 99: Usb Serial Interface
Clear to send Request to send USB Serial Interface The EasyCoder PD41/PD42 printer supports USB v1.1 (also called USB 2.0 full speed). To use the USB interface for printing from a PC, the Intermec InterDriver needs to be installed on the PC. -
Page 100: Usb Host Interface (Pd42 Only)
The Centronics parallel interface is essentially a one-way protocol for short distances. There is no setup for the parallel interface. Handshake: DSTB connects to the printer, BUSY connects to the host Interface cable: Parallel cable compatible to PC EasyCoder PD41/PD42 Printer Service Manual... -
Page 101: Installing The Parallel Ieee1284 Interface
3 Remove the small plate that covers the slot for the Parallel board on the back of the printer. Keep the screws. 4 Use the screws that were removed in Step 3 to secure the Parallel board in the slot. Parallel IEEE 1284 interface board EasyCoder PD41/PD42 Printer Service Manual... - Page 102 Chapter 4 — Interfaces 5 Connect the I/O bus cable to the printer main board. EasyCoder PD41/PD42 Printer Service Manual...
-
Page 103: Components
Chapter 4 — Interfaces Components EasyCoder PD41/PD42 Printer Service Manual... -
Page 104: Schematics
Chapter 4 — Interfaces Schematics EasyCoder PD41/PD42 Printer Service Manual... -
Page 105: Easylan Ethernet Interface
“To remove the left-hand panel” on page 27). 2 Put the printer back in upright position. 3 Locate the screw in the upper left corner of the electronics compartment that holds the main board in place. Remove the screw. EasyCoder PD41/PD42 Printer Service Manual... -
Page 106: Components
6 Reattach the left-hand panel. 7 Attach the MAC address label just below the EasyLAN port on the rear plate of the printer. When you turn on the printer, it automatically recognizes the EasyLAN board. Components EasyCoder PD41/PD42 Printer Service Manual... -
Page 107: Schematics
Chapter 4 — Interfaces Schematics VDDC 2_5VPLL TXER TXC/REF_CLK TXEN TXD0 TXD1 2_5VA TXD2 TXD3 COL/RMII CRS/RMII_BTB 2_5VA GND3 VDDIO2 EasyCoder PD41/PD42 Printer Service Manual... - Page 108 Chapter 4 — Interfaces EasyCoder PD41/PD42 Printer Service Manual...
- Page 110 Corporate Headquarters 6001 36th Avenue West Everett, Washington 98203 U.S.A. tel 425.348.2600 fax 425.355.9551 www.intermec.com EasyCoder PD41/PD42 Printer Service Manual *939-010-001* P/N 939-010-001...
Need help?
Do you have a question about the EasyCoder PD41 and is the answer not in the manual?
Questions and answers