Table of Contents
Advertisement
Quick Links
Advertisement
Table of Contents

Summary of Contents for Dataton PICKUP
- Page 1 DATATON PICKUP PRODUCTION GUIDE P I C K U P P R O D U C E R ' S G U I D E...
-
Page 2: Table Of Contents
CONTENTS 1. AT FIRST GLANCE ....................... 5 2. AUDIO TECHNOLOGY ......................7 3. PICKUP AS A DIGITAL AUIO PLAYER ..................11 4. PICKUP AS AN AUDIO GUIDE ....................19 5. PREPARING AUDIO FILES IN ITUNES................... 23 6. DOWNLOADING AUDIO FILES TO PICKUP ................ 39 7. - Page 3 P I C K U P – P R O D U C T I O N G U I D E...
-
Page 4: At First Glance
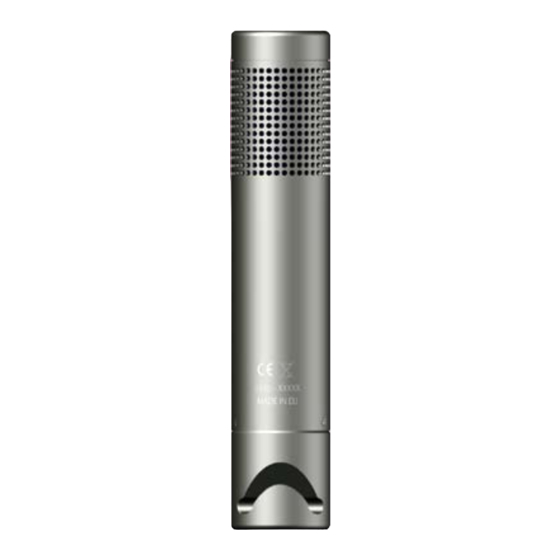
Connect a headphone splitter if you want to use two pairs of headphones on the same PICKUP. The USB cable, shipped with PICKUP, plugs into the base of the PICKUP and con- nects to a USB port on your computer. Use the USB connection to transfer audio files and charge the audio guide. - Page 5 GP1051L35 350 mAh P I C K U P – P R O D U C T I O N G U I D E...
-
Page 6: Audio Technology
PICKUP and the relevant sound segment starts playing. The basic features in PICKUP are similar to a regular digital audio player, as described in the next few pages. Get to know these well and you’ll find it is a smooth transi- tion to creating audio tours. - Page 7 When PICKUP is used as an audio guide the information in the ID3 tag plays a major role. The producer of a PICKUP installation has to be able to edit the content of the tag, as described later in this manual.
- Page 8 PICKUP is also equipped with an FM receiver. In addition to listening to stored MP3 audio files, PICKUP users can listen to FM broadcast radio channels. In 2006, local FM transmitters with a range of 5-10 m were made legal in Europe. This kind of local transmitter has been permitted in other parts of the world for many years.
- Page 9 1 0 | P I C K U P – P R O D U C T I O N G U I D E...
-
Page 10: Pickup As A Digital Auio Player
PICKUP can work as a straightforward digital audio player with FM radio. As such, PICKUP is in effect a simple audio guide with all the files played in a set order, but without the possibility of interaction with the transponders. - Page 11 Artists and albums are arranged in alphabetical order, and tracks in numerical order. If an artist or an album begins with a digit it will be listed first, before titles starting with letters. The information used for sorting is stored in the ID3 tag, please refer to chapter 4: PICKUP start AS AN AUDIOGUIDE.
- Page 12 When you pause an audio file, the center light is illuminated. The center light glows gently if you have played an audio file to its end or whenever PICKUP has entered its low-power hibernation mode.
- Page 13 StationS If you have not previously used the FM radio in the PICKUP, there will be no channel settings stored. Use the action button to tune to the channel of your choice and store the settings.
- Page 14 2) Exit the FM radio by turning the action button anti-clockwise after the one o’clock station has been selected. PICKUP is now ready to start playing MP3 files from its internal memory. cHanGe a preSet 1) Turn the action button until you reach the channel indicator you wish to change.
- Page 15 1) Press the action button. The light at the center of the button indicates that you have paused (just like pausing MP3 files in the internal memory). In this state, the PICKUP will turn itself off after a few minutes to save power.
- Page 16 2) Turn the action button anti-clockwise. The button display shows a semi-circle which indicates a straight frequency curve. This means all sound frequencies are played with the same strength as recorded. 3) Turn the button anti-clockwise once again. A brighter light on the left indicates that you have selected a frequency curve with enhanced bass.
- Page 17 1 8 | P I C K U P – P R O D U C T I O N G U I D E...
-
Page 18: Pickup As An Audioguide
4… PICKUP AS AN AUDIOGUIDE The audio guide function is what sets PICKUP apart from other digital audio players on the market. The PICKUP audio guide offers numerous benefits for visitors and museums. Visitors will appreciate its straightforward one-button interface and sleek good looks, while features like wireless transponders, easy production and onsite upgrades will appeal to the installer. - Page 19 This number is received by the PICKUP and triggers one or more related sound files stored on the PICKUP. The principle is simple and reliable, requiring the minimum of installation and infra- structure.
- Page 20 2 1 | 4 . P I C K U P A S A N A U D I O G U I D E...
- Page 21 General announcements can be made simultaneously to all PICKUP users, for example at closing time. The PICKUP system can also be complemented with human guides: real guides equipped with transponders can broadcast to the built-in FM receiver in the PICKUP, equipped with head- phones.
-
Page 22: Preparing Audio Files In Itunes
PICKUP audio guide. This means converting them to a suitable file format (MP3) and assign- ing the right info in their ID3 tag. The files are then ready to copy to your master PICKUP. Once you have tested your audio tour works correctly with the master PICKUP, you can then use it to clone all the PICKUP audio guides for your installation. - Page 23 Open iTunes, then choose Preferences, and Advanced from the iTunes menu. Choose General. Check the top two boxes to create the best basic structure for your PICKUP files. Click on Importing. Choose Import Using MP3 Encoder and 160 kbps quality. This will not automatically con- vert the content to MP3 files, however.
- Page 24 Note > Tagging files is not just a cosmetic feature – tagging provides essential information for the PICKUP and is the backbone of the audio guide installation. find all fileS for an eXHiBition Locate all the files you will be using in an exhibition. If you are unsure of their content, listen to them again by double-clicking the file in the list.
- Page 25 The iTunes Artist name is the name of the exhibition audio tour. ituneS: artiSt picKup: eXHiBition 2 6 | P I C K U P – P R O D U C T I O N G U I D E...
- Page 26 Album field. If you have several files for the same transponder simply put the same ID in the Album field for the files. PICKUP considers all files with the same Album name to be associated with the same transponder.
- Page 27 aSSiGn name and tracK numBer to fileS Once you have entered the correct transponder number to each file, it’s time to assign names and track numbers to the individual files. Names are used to make it easier to recognize files when you add more instructions later on.
- Page 28 To ensure that the PICKUP acts as an audio guide instead, the first file has to contain information instructing the unit how to behave.
- Page 29 It can also be a silent file, solely for the purpose of setting the PICKUP into audio guide mode. Alternatively, an embedded file command can be added to prevent the file playing (see LOCAL COMMANDS).
- Page 30 PICKUP to the current exhibition environment. General commands are listed below. PICKUP only reads the bold characters – the rest is optional. The initial letters are combined with a value or specific characters. These values in PICKUP remain at the factory settings until you deliberately change a value in the Comments field.
- Page 31 Values: [0-1]. Visitors listening to the loudspeaker on the audio guide may need time to lift the PICKUP to ear level. This command inserts a delay of up to one second before a sound file starts playing. A decimal point or comma may be used to specify tenths of seconds.
- Page 32 Values: [Genre]. This is a powerful command which lets you limit access to sound files of the same language, tour level, tour segment, etc. After this is issued, PICKUP will only play files whose Genre matches the Genre specified in the command. Genre is set in the ID3 tag info.
-
Page 33: Default Setting
Usually this field is used to specify the music genre, like Pop, Classic, HipHop. But you can specify Genres that are relevant to PICKUP, such as English, French, Advanced English. If you specify * as the value, you will be able to access all file types, regardless of their Genre. - Page 34 Other commands remain at the factory settings. Once the visitor has listened to the welcome file, the PICKUP will be governed by the specified command set- tings. This can be changed later on by using other files triggered with a transponder.
- Page 35 local commandS These commands only affect individual files. Loop Values [–/number]. Usually set to – (no value). This means the sound file plays in a loop, until the user presses the action button and stops it. In other words, the file will keep playing until the user actively chooses a different sound file, by point-clicking on a new transponder, for example.
- Page 36 Example > R 91.2 plays FM radio on 91.2MHz. If you enter Radio on its own, without any value, the PICKUP will simply use the most recent frequency setting. Note >...
-
Page 37: Downloading Audio Files To Pickup
5) When all the sound files have been copied, the light will stop flashing. If the light contin- ues to flash but more slowly, it means that your PICKUP is not fully charged. If you want to charge the PICKUP, leave it plugged in until the indicator stops flashing and shows a steady light. -
Page 38: 8 . C L O N I N G T H E M A S T E R P I C K U P
7… CLONING CONTENT FROM A MASTER PICKUP You can easily clone the contents of a single master PICKUP to a further 25 PICKUP units via the charger/storage unit. 1) Plug in and power the charger using the power adapter shipped with the charger. A red light glows on the DC cable port. - Page 39 The purpose of this is to avoid accidental cloning of PICKUP units. The switch has to be set before the charger will start cloning a master PICKUP. Gently insert a straightened paper clip into the hole until it clicks. Keep the paper clip in place for approximately two seconds, then remove it.
-
Page 40: Pickup Audio Guide - Product Overview
The PICKUP is shipped with 1 GB memory which gives approximately 16 hours top quality stereo audio. May be upgraded to 4 GB (around 70 hours top quality sound). PICKUP also operates as a standalone MP3 player with an FM radio receiver. Audio files are transferred via USB. - Page 41 HeadpHone Splitter art nO 2011 Use the splitter to connect two sets of headphones to the same PICKUP audio guide. Ideal for parents with small children, or visitors accompanied by an assistant or carer. picKup cHarGer art nO 3548 Used to charge, update and store 25 PICKUP units at a time.
- Page 42 DATATON WATCHOUT. By pointing and clicking at the transponder, a visitor can start WATCHOUT visuals with the soundtrack played on PICKUP, or sync straight into the sound- track of a running show. Dimensions: diameter 47 mm, depth: 21 mm. 4 3 |...
-
Page 43: Global Commands - Summary
10… GLOBAL COMMANDS – SUMMARY GLOBAL COMMANDS VALUES DEFAULT SETTINGS UNITS EarphoneVolume [X-Y] 0–100 EarphoneEQ [1, 2, 3, 4, 5] number in list SpeakerVolume [X–Y] 0–100 SpeakerEQ [1, 2, 3, 4, 5] number in list SpeakerDelay [0.0–1.0] seconds TurnRight [OFF/FF/FM] function TurnLeft [OFF/RW/EQ/]... -
Page 44: Local Commands - Summary
Use a semi-colon to separate a list of several commands in the same field. Example: TA ON; TR OFF Use a regular hyphen to indicate a range of parameters. Example: TA ON; TR OFF; EV 10-50 PICKUP commands are subject to continuous development by means of firmware updates. Check www.dataton.com/pickup/firmware... - Page 45 Dataton and the Dataton logo are registered trademarks of DATATON UTVECKLINGS AB. WATCHOUT and PICKUP are trademarks of DATATON UTVECKLINGS AB. All other company or product names (referred to indirectly or directly) are trademarks or registered trademarks of their respective owners. Use of a term in this publication should not be regarded as affecting the validity of any trademark.
Need help?
Do you have a question about the PICKUP and is the answer not in the manual?
Questions and answers