Table of Contents
Advertisement
Quick Links
• 4, 8, 16, or 32 Channel Stand-alone Real-time IP Network Video Recorders
• Full HD (720/1080p) Real-time recording
• Panorama (Thumbnail) Search
• HDMI, VGA, and BNC Outputs
• H.264 & MPEG4 Dual Streaming Compression Method
• Plug and Play & Auto configuration for ONVIF compliant and many leading IP
Camera models
• P2P (Peer to Peer) camera connection supported by internal Hub
• Health monitoring: Temperature, Fan speed, HDD S.M.A.R.T
• Alarm In/Out
• Per channel Image Adjustment
• Internal PoE Switch
• 1 Gigabit LAN Port / 1 Gigabit WAN Port
• Video Analytics with Search Feature (Camera dependant)
• Linear Digital zoom / Automatic sequencing / Freezing
• Quadplex (Live / Record / playback / network)
• Remote Viewing via CMS Software, Internet Explorer, and Mobile Phones (iOS/
Android)
• Web-based remote configuration
• Supports up to 4TB Hard Drives
• eSATA for storage extension of up to 5 more HDD (does not apply to VT-NV400S)
• Bidirectional Audio Support
• Dual Recording and/or RAID 5 for data integrity
• RS485 Communication port
• Linear digital zoom for live and playback
• Embedded Web Server for Remote Setup & Viewing
• Up to 8 Simultaneous Network/
Remote Connections
• 64 Camera Remote Viewing via CMS
Software
• RS485 Communication port
VT-NV Series
4, 8, 16, and 32 Channel
Network Video Recorders
Advertisement
Table of Contents

Related Manuals for Vitek VT-NV1600P


Summary of Contents for Vitek VT-NV1600P
-
Page 1: Network Video Recorders
VT-NV Series 4, 8, 16, and 32 Channel Network Video Recorders • 4, 8, 16, or 32 Channel Stand-alone Real-time IP Network Video Recorders • Full HD (720/1080p) Real-time recording • Panorama (Thumbnail) Search • HDMI, VGA, and BNC Outputs •... -
Page 2: Table Of Contents
VT-NV Series – On Cue IP TABLE OF CONTENTS BEFORE INSTALLING ........................3 UPDATING SYSTEM F/W ......................3 1.1.1 WITH THE USB THUMB DRIVE ..................3 1.1.2 UPDATING FROM THE WEB MENU ................5 DESCRIPTION OF FRONT PANEL ..................8 DESCRIPTION OF REAR PANEL ..................... - Page 3 VT-NV Series – On Cue IP CONFIGURING NETWORK ....................61 6.8.1 IP SETUP ......................... 61 6.8.2 LOCAL PORT ........................62 6.8.3 DDNS ..........................63 6.8.4 E-MAIL ..........................63 REMOTE ............................65 WEB SERVER ......................... 65 7.1.1 CONNECT TO WEB SERVER ..................66 7.1.2 WEB CONFIGURATION PAGE ..................
-
Page 4: Before Installing
VT-NV Series – On Cue IP 1. BEFORE INSTALLING • Installation should be carried out only by qualified personnel and in accordance with electrical regulations in force. • The NVR must be placed on a stable surface or mounted in an approved cabinet. Adequate ventilation must be provided, taking particular care not to block any of the air vents on the NVR. - Page 5 VT-NV Series – On Cue IP Check the F/W version at http://vitekcctv.com/Downloads.asp NVR_FW_1.11H_UI_1.2.F_9016P.TGZ The ‘1.11H UI 1.2.F in the file name means the F/W version. Please avoid updating if the version number of the F/W file is lower than the current F/W version.
-
Page 6: Updating From The Web Menu
VT-NV Series – On Cue IP Click OK and the firmware will start to load The whole upgrading process can take several minutes. DO NOT remove the USB thumb driver during upgrade. DO NOT turn off power to system during upgrade. When the firmware upgrade is finished, system will auto re-boot. - Page 7 VT-NV Series – On Cue IP Click the button ‘UPGRADE’ and the update page will open. In the update page, click the ‘BROWSE’ button and open the folder where the file was saved. Choose the F/W file which has the file extension ‘tar.gz or tgz’. Click the ‘UPLOAD’...
- Page 8 VT-NV Series – On Cue IP System shows [COMPLETED] when finished and will reboot automatically. When the whole update is completed, the NVR will restart. Turning off the power in any process of f/w updating may cause damage to the system.
-
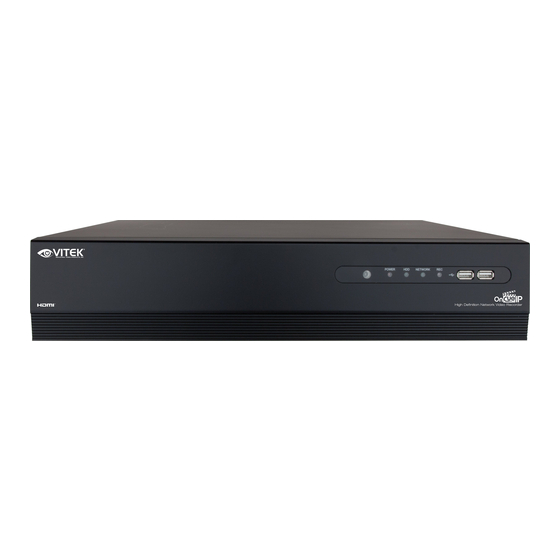
Page 9: Description Of Front Panel
VT-NV Series – On Cue IP DESCRIPTION OF FRONT PANEL [Front panel of NV-400S & 800S / 1600S] 1.CUSTOMER’S BRAND LOCATION 3.IR RECEIVER Infrared signal receiver for the IR remote cont Front Panel roller. 2.STATUS LED 4.FRONT USB 2.0 PORT Displays the information of the DVR (Stand –By), USB 2.0 ports. - Page 10 VT-NV Series – On Cue IP [Rear panel of 8 & 16 & 32P NVR] 1.Power Switch(Only the 4CH NVR) 9.RJ-45 Network Port( 1G Base-T) Switch to turn the DVR ON & OFF. WAN Network Port 10.RJ-45 Local Port( 1G Base-T) 2.VGA Output (Video Graphic Array) LAN Network Port 15-pin D-sub connector for the analogue VGA...
-
Page 11: Getting Started
VT-NV Series – On Cue IP 2. GETTING STARTED Controlling and programming of the NVR is limited with IR remote, it is recommended to use a mouse for all functions. CONNECT AND SWITCH ON " Connect all IP Cameras to NVR. Connect one or more monitors to NVR using Digital Video output (HDMI), VGA and CVBS. - Page 12 VT-NV Series – On Cue IP After start-up diagnostics are completed, the operator must log-in to the system. You need to type the default user name as “ADMIN” and the default password as “1234” and press the enter button. Logging in with IR remote controller Using direction buttons, move to user’s selected menu, press “enter”...
-
Page 13: Tool Bar
VT-NV Series – On Cue IP [live mode of 4 channels] [live mode of 16 channels] 3. TOOL BAR To view the Tool-Bar move mouse pointer to the bottom of the screen and the following will appear. The Tool-Bar display will disappear after pre-defined time set in Display settings or exit with exit button Network connection status Back up storage connection status Automatic screen sequencing... -
Page 14: Log Off
VT-NV Series – On Cue IP Digital zoom System log LOG OFF There are two ways to logoff. One is manual logoff and the other one is automatic log off after configured time. [Log-Off by using TOOL BAR] Once Logoff selected as above, current account can be logged off. Once user logs out, you can view the login window . -
Page 15: Quick Copy Menu Pop-Up
VT-NV Series – On Cue IP VCA EVENT RECORD: Configure record schedule once VA event is activated from IP camera. VCA ONLY: NVR records only VA event. VCA OFF: NVR doesn't recognize VA event as real event. VCA+MD: NVR recognize VA event and motion event both as real event. SEND E-MAIL: NVR sends email once VA event recognized. -
Page 16: Display Pop-Up
VT-NV Series – On Cue IP DISPLAY POP-UP Configure display mode by pressing display button of Tool bar. You can select Quad / Single/ Auto sequence by selecting item in pop-up menu. : Single Screen Mode : Quad Screen Mode. : 9-split Mode. -
Page 17: Digital Zoom
VT-NV Series – On Cue IP 3: Number to configure Preset. 4: Save current screen as Preset. 5: Move to configured Preset Number. 6: Control the value of Zoom/ Focus/ Iris. 7: Move the PTZ camera Left/ Right/Tom/Bottom 8: Move to the Home position of PTZ camera. 9: Number to configure Tour 10: Start to configured Tour Number 11: Stop to configure Tour. - Page 18 VT-NV Series – On Cue IP [Zoom by using Mouse] At full screen mode, you can select the area to zoom in/out by clicking left button of Mouse and drag, Clicking on the zoomed screen, the display returns to the original screen. Digital Zoom supported in Live / Playback mode Digital Zoom supported in Full screen mode only.
-
Page 19: Log List
VT-NV Series – On Cue IP LOG LIST View the log list by selecting log list button in Tool bar. 1 : Display number from currently triggered ( Max 10,000 list can be recorded) 2 : Date / Time 3 : Log list Items listed in log list. - Page 20 VT-NV Series – On Cue IP Logout Menu Change Network Menu Change DDNS Menu Change Alarm In Menu Change Alarm Out Menu Change Buzzer Out Menu Change E-Mail Notification Menu Change Disk Management Menu Change Record Configuration Change Record Schedule Change IP Camera Menu Change Firmware Upgrade Success Firmware Upgrade Fail...
- Page 21 VT-NV Series – On Cue IP Sequence Menu Changed by Remote Date & Time Menu Changed by Remote System Management User Management Menu Changed by Remote Authority Menu Changed by Remote To Logout Menu Changed by Remote Network Menu Changed by Remote DDNS Menu Changed by Remote E-Mail Menu Changed by Remote Alarm input Menu Changed by Remote...
-
Page 22: Search & Playback
VT-NV Series – On Cue IP 4. SEARCH & PLAYBACK TIME / CALENDAR SEARCH Search the recorded data by a calendar and timeline for quick access to recorded footage. 1: Select Search Mode: TIME: The recorded data can be searched using the calendar. PANORAMA: If you select a channel for panorama view, search mode will be changed to PANORAMA Mode EVENT: The recorded data can be searched using the event list. - Page 23 VT-NV Series – On Cue IP : 16-split screen playback mode : Playback at full screen mode In playback mode control playback speed and direction. In single screen, digital zoom function can be used. : Return to Search menu. : Close playback screen and return to live screen 5: PLAY CONTROL: Playback speed and direction control.
-
Page 24: Panorama Search
VT-NV Series – On Cue IP 9: HOUR SELECT LINE: Select the data by hour. If certain time has recorded data, blue color will be displayed. 10: Minutes / seconds display information for the unit: Minutes / seconds for display to help in selection. -
Page 25: Event Search
VT-NV Series – On Cue IP by minutes, will then move back to HOUR search) : If you select MIN, minutes will be displayed (ex: if currently playback is by hour, will then move back to minute search) : If you select SEC, seconds will be displayed (ex: if currently playback is by minutes, will then move to second search) : Shows previous panorama. - Page 26 VT-NV Series – On Cue IP 1. Select date which you want to search. 2: Preview: Event selected in the list (#3) displays a preview of the video. 3. Search result: Event list displayed. NO: Event number, most recent event display as No.1 DATE/TIME: Event triggered time.
- Page 27 VT-NV Series – On Cue IP 5. Search condition of VCA event set up in detail. 1: TYPE: Select which Type of VA will be displayed in VA list. 2: STATUS: Select start/end time of VA events. 3: ZONE: Select the zone of VA events. 4: INEQUALITY: Select the range of the value of VA events.
-
Page 28: Copy
VT-NV Series – On Cue IP COPY FROM: Select the stat time to copy. TO: Select the end time to copy. TAG NAME: Name the video clip. TYPE: Select .avi or .nvr for file type. CHANNEL: Select the channel to copy. : You can select Start/ End Time at Calendar search on Time line to copy by right clicking the time and selecting start or end time. -
Page 29: Quick Menu
VT-NV Series – On Cue IP 5. QUICK MENU If you are using a USB mouse to control the NVR, pressing the right button of mouse will bring up the Quick Menu. Here you can use display pause, PTZ control, zoom control, IP camera scan and ALARM RESET. FREEZE ON: If you press Freeze button, the live display will stop. - Page 30 VT-NV Series – On Cue IP PTZ: Selecting PTZ will bring up PTZ control screen. PTZ can only be controlled by an authorized user. PTZ mode will be activated in the channel you selected. ZOOM: This will execute digital zoom control screen. Zoom mode will be activated in the channel you selected.
- Page 31 VT-NV Series – On Cue IP...
-
Page 32: How To Configure
VT-NV Series – On Cue IP 6. HOW TO CONFIGURE To view the setup menu in each section, press menu button on toolbar. Following screen will be displayed. CONFIGURING CAMERA To set-up the various camera options, highlight CAMERA and press ENTER. 6.1.1 TITLE TITLE:... -
Page 33: Adjust
VT-NV Series – On Cue IP 6.1.2 ADJUST The ADJUST menu is for adjusting the BRIGHTNESS, CONTRAST, SHARPNESS and SATURATION per camera 6.1.3 There are two ways to control a PTZ camera. RS-485 port. Network. If you use Network to control PTZ, there is no additional configuration in NVR... -
Page 34: Cam Port
VT-NV Series – On Cue IP ADDRESS: The unique ID of the PTZ camera. PROTOCOL: The protocol of the PTZ camera. BAUD RATE: The baud rate of the PTZ camera. PTZ properties can also be adjusted for each channel by selecting DETAIL. Auto Focus, Auto IRIS, P/T speed, zoom speed, focus speed, IRIS speed Note: that some settings, such as AUTO FOCUS, may not be compatible with particular PTZ cameras. -
Page 35: Vt-Nv Series – On Cue Ip
VT-NV Series – On Cue IP TYPE: You can select AUTO, MANUAL or RTSP to make a connection between the NVR and the IP Camera. AUTO: When you try to make a connection between IP Camera and NVR through peer to peer by using the built in HUB, user can use this menu. - Page 36 VT-NV Series – On Cue IP ’ to configuration IP cameras. RTSP URL: Use RTSP URL to make a connection with IP camera which is not listed in supported IP cameras of NVR. IP ADDRESS: Input IP address of IP camera. RTSP PORT: Input the info of RTSP port of IP camera.
- Page 37 NVR. SCAN: User can scan IP cameras currently installed on the Local network. NVR currently supports (VITEK/UDP/SAMSUNG/SHANY/TRUEN/CNB/COMART/EOC) Note) a few models from the same IP camera manufacturer may not be compatible. Scan the info of IP cameras already installed on the local network which NVR is connected to.
-
Page 38: Virtual Port
VT-NV Series – On Cue IP Assign To: Assign channel number of scanned IP camera. 6.1.5 VIRTUAL PORT This menu is to set up IP cameras on channels 9~16 of NVR. Before connection IP cameras to NVR, configure IP set up menu. Virtual port menu is same as the cam port menu. - Page 39 VT-NV Series – On Cue IP TOOLBAR DISPLAY TIME: Set the time for Toolbar to be displayed LIVE TIME DISPLAY: Live time display On / Off CAMERA TITLE: Determines whether the camera title is displayed. RECORDING MODE ICON: Determines whether the recording status is shown at the top right of each channel display window.
-
Page 40: Monitor
VT-NV Series – On Cue IP 6.2.2 MONITOR ALARM POP-UP MODE: When set to ON, an alarm input will cause the associated channel to display full screen. ALARM POP-UP DWELL: Determines how long the full screen popup is displayed after an alarm input. -
Page 41: Sequence
VT-NV Series – On Cue IP 6.2.3 SEQUENCE SEQUENCE DWELL: The time that each screen is displayed in a sequence operation. SPOT SEQUENCE DWELL: Set sequence interval time for spot monitor (5/10/15/20/30/40/60 seconds) -
Page 42: Configuring Disk
VT-NV Series – On Cue IP CONFIGURING DISK 6.3.1 SETUP You can configure DISK operation like Recording Time Limit / Overwrite / HDD Type / HDD Configuration. OVERWRITE: IF you select “ON”, overwrite mode will be activated. RECORDING TIME LIMIT: You can configure the data from current time to configured time (12hr –... - Page 43 VT-NV Series – On Cue IP RECORD: You can select HDD as record HDD. MIRRORING: You can select HDD as mirroring HDD. S.M.A.R.T: View HDD health condition GOOD: It shows current HDD condition is good. BAD: It shows current HDD condition is bad. HDD’s S.M.A.R.T information may not be supported, depending on HDD Mfg.
-
Page 44: Format
VT-NV Series – On Cue IP 6.3.2 FORMAT HDD TYPE: Select HDD type to format. RECORD: will format all HDD’s assigned to record. MIRRORING: will format all HDD’s assigned to mirror. FORMAT: Start formatting selected HDD type Formatting HDD time on NVR will differ depending on size of HDD. Device: Format device connected to USB. -
Page 45: Configuring System
VT-NV Series – On Cue IP CONFIGURING SYSTEM 6.4.1 DATE/TIME DATE&TIME: Allows the operator to set or modify the current date & time. After changing data/ time, be sure to press ( ) to confirm After setting Date & Time formatting HDD is recommended. DATE FORMAT: Determines how the date is displayed. -
Page 46: Management
VT-NV Series – On Cue IP date in spring and autumn FROM: D.S.T Start time of DST End : D.S.T End Time of DST 6.4.2 MANAGEMENT SYSTEM INFORMATION: Select INFO to display following window. F/W VERSION: Shows the firmware version of the NVR. H/W VERSION: Shows the hardware version of the NVR. - Page 47 VT-NV Series – On Cue IP NVR display two IP addresses one for Ethernet and one for Local port. Do not use same IP address range for Local Port and Ethernet Port. MAC address 1(Ethernet port): shows Mac address configured by manufacturer. Mac address 2 (local port): shows Mac address configured by manufacturer.
-
Page 48: Sound
VT-NV Series – On Cue IP 6.4.3 SOUND LIVE AUDIO: Select “on”, Audio output is available in live mode. DEFAULT AUDIO CHANNEL: Specify which one of the AUDIO INPUTS is routed to the AUDIO OUTPUT when the NVR is in multi-screen mode. KEYPRESS: This setting will turn the IR Remote confirmation beep on or off. -
Page 49: Configuring Event / Sensor
VT-NV Series – On Cue IP CONFIGURING EVENT / SENSOR 6.5.1 ALARM INPUT Configure Alarm input . OPERATION: Configure activation when Sensor is triggered. DISABLE: When Sensor input is triggered, Event is not working. ENABLE: When Sensor input is triggered, Event is working. TYPE: If the operation is enabled. -
Page 50: Alarm Output Setup
VT-NV Series – On Cue IP 6.5.2 ALARM OUTPUT SETUP Configure activation of Relay output. ALARM OUT : Select Relay for the operation to be configure 4ch NVR : 1 relay , 8/16ch NVR: 2 relays OPERATION: Configure output status of Relay. DISABLE: Relay is not working ENABLE: Relay is working once event is triggered. -
Page 51: Buzzer Output Setup
VT-NV Series – On Cue IP 6.5.3 BUZZER OUTPUT SETUP Configure Buzzer output when event is triggered. OPERATION: Configure the output status of Buzzer. DISABLE: Buzzer is not working when event is triggered. ENABLE: Buzzer is working when event triggered. HDD EVENT: If HDD related event is triggered, Buzzer output will be started. -
Page 52: E-Mail Setup
VT-NV Series – On Cue IP 6.5.4 E-MAIL SETUP Configure E-mail notificatin when event is triggered. NOTIFICATION: Select “ON”, E-mail will be sent when event triggered. SETUP CHANGE: Select “ON”, E-mail will be sent when menu configuration is changed. HDD EVENT: Select “ON”, E-mail will be sent when HDD related event is triggered. BOOT EVENT: Select “ON”, E-mail will be sent when NVR boots-up. -
Page 53: Configuring User
VT-NV Series – On Cue IP CONFIGURING USER To set-up the User Authority options, highlight USER and press ENTER 6.6.1 USER REGISTER By default, the NVR is configured with a USER ID of ADMIN belonging to the ADMIN group and with a password of 1234. -
Page 54: User Authority
VT-NV Series – On Cue IP USER ID: Edit the user ID using the virtual keyboard. (Max 10 characters). PASSWORD: Change the password using the virtual keyboard. (Max 8 characters) Note: To delete the existing password, use “ ”on the virtual keyboard. E-MAIL: Enter the user’s email address if email notifications are required. - Page 55 VT-NV Series – On Cue IP Power OFF : Right to Power Off...
-
Page 56: Log-Out
VT-NV Series – On Cue IP 6.6.3 LOG-OUT AUTO LOGOUT: Select if auto log-out is ON or OFF. DURATION: If auto log is set to ON, this determines the time. (in 1 - 10 Min) -
Page 57: Configuring Record
VT-NV Series – On Cue IP CONFIGURING RECORD To set-up the various recording options, highlight RECORD and press ENTER. 6.7.1 SETUP Recording configuration is set up here. Only direct connection (plug and play) between NVR and IP cameras can be set. SIZE: Select what resolution of video will be recorded. -
Page 58: Sub Stream
VT-NV Series – On Cue IP According to H.264 profile format, maximum bit rate is recommended. High profile: 4Mbps/ Main profile: 4M bps, Baseline profile: 6M bps. 6.7.2 SUB STREAM “Manual”/”RTSP” mode stream configuration needs to be setup in camera interface directly by PC. -
Page 59: Schedule
VT-NV Series – On Cue IP 6.7.3 SCHEDULE Configure schedule recording mode either Day / Week. Daily: set up one schedule and apply to every day. Weekly: set up 7 schedules from Monday to Sunday, and use it for every week. Select daily ,weekly in menu(record->... -
Page 60: Option
VT-NV Series – On Cue IP 6.7.4 OPTION SCHEDULE MODE: Either DAILY (one schedule will apply to every day of the week) or WEEKLY (each day of the week has its own schedule). PRE-EVENT RECORDING TIME: When the NVR is not in continuous recording mode, this setting determines the amount of footage that is always recorded before an event occurs (VA, motion detection, alarm input etc.) POST-EVENT RECORDING TIME: When the NVR is not in continuous recording mode,... - Page 61 VT-NV Series – On Cue IP...
-
Page 62: Configuring Network
VT-NV Series – On Cue IP CONFIGURING NETWORK To set-up the Network options, highlight NETWORK and press ENTER. Configure the network. 6.8.1 IP SETUP IP set up menu is used when you use PC software and mobile software which NVR support. DHCP: When selected the NVR will obtain an Ethernet IP address automatically if connected to a DHCP server or router. -
Page 63: Local Port
VT-NV Series – On Cue IP When connecting more than one NVR to the internet, make sure the NVR and the WEB port are different on each unit. MAX TX SPEED: Specifies the maximum bandwidth that the NVR can use during a remote connection. -
Page 64: Ddns
VT-NV Series – On Cue IP 6.8.3 DDNS DDNS: When enabled the NVR can be accessed through a dynamic DNS server. Commonly used if a broadband connection does not have a static IP address. DDNS SERVER: DDNS server Name. AUTO DDNS: Set to on to use Auto DDNS. 6.8.4 E-MAIL USE DEFAULT SERVER: Select On or OFF. - Page 65 VT-NV Series – On Cue IP PORT: The outbound email port number. SECURITY: Set to OFF if the SERVER does not require a username and password to connect. USER: Enter a username to identify the NVR in email messages. PASSWORD: If SECURITY is set to ON, enter the password here. FROM: Input an email address or text.
-
Page 66: Remote
VT-NV Series – On Cue IP 7. REMOTE WEB SERVER This server consists of two services. One is for the remote configuration of NVR setup and the other is for the client viewer based on Active-X. Using the remote configuration, you can configure all feature sets of NVR. And the live preview, search and PTZ control can be served by the ‘Web Viewer’. -
Page 67: Connect To Web Server
VT-NV Series – On Cue IP 7.1.1 CONNECT TO WEB SERVER Enter the IP address of NVR into the ULR bar referring to the below picture. LOCAL NETWORK ACCESS: To find the IP address of the DVR, go to the ‘INFO’ section under the SYSTEM/MANAGEMENT of the DVR’s menu. -
Page 68: Web Configuration Page
VT-NV Series – On Cue IP 7.1.2 WEB CONFIGURATION PAGE In the web configuration page, you can set the NVR operations remotely. Tested Web Browser List " Microsoft Internet Explorer " Mozilla Firefox " Google Chrome Browser " Opera Browser "... -
Page 69: Web Viewer (Active-X)
VT-NV Series – On Cue IP For detail description of the NVR configuration, please refer the ‘5.HOW TO CONFIGURE’ section of this manual. Clicking the following link will guide you to the proper section which explains each setup. CAMERA DISPLAY SYSTEM USER NETWORK... - Page 70 VT-NV Series – On Cue IP NOTE) if new updated version of ‘Web Viewer’ is found, updating starts automatically before execution. [Google Chrome] In order to execute the ActiveX plug-in, you have to install the ‘IE TAB’ from Google web store referring the following steps.
- Page 71 VT-NV Series – On Cue IP Click the ‘Add to Firefox’ will enable supporting Active-X plug-in. Way to execute the ‘Web Viewer’ from the Firefox Enter the IP of NVR into the URL bar of Firefox. Right-click the link ‘AcitveX WEB Viewer’ will show the pop-up menu such as below. Select the ‘Open Link in IE TAB’.
- Page 72 VT-NV Series – On Cue IP : Enter the USER name registered in the NVR : Enter the password for the selected user. The user authority and allowed functions, live preview, search & playback, PTZ control and etc., are controlled by the setting USER AUTHORITY setting of NVR setup...
-
Page 73: Live Preview
VT-NV Series – On Cue IP 7.1.3.4 Live Preview After login, the live preview screen will be shown such as below. Features User log-in/out feature (RECONNECT) Monitoring the live preview Snapshot and save as JPEG (Admin Only) Control the resolution and quality for transferred video stream directly The yellow rectangle around video shows the currently selected camera 1: IP of NVR connected remotely 2: display split mode selection... - Page 74 VT-NV Series – On Cue IP : Exit the ‘Web Viewer’ 4: Reconnect/Live & Play/Full Screen : Log out and Reconnect : Switching between the live preview and search & playback screen : Full screen video view. Press ‘ESC’ to return : Configuration menu for Web Viewer.
- Page 75 VT-NV Series – On Cue IP 7.1.3.5 JPEG Snapshot/ PTZ control / Video Configuration /Live Audio In the Web Viewer, you can save a snapshot as a JPEG file, control the PTZ camera and hear audio from the NVR. You can configure and transfer video directly from the viewer. Right-click on the video window shows the pop-up menu such as following picture.
- Page 76 VT-NV Series – On Cue IP : Select stream for Live view (Main or Sub stream) : This function is for two way audio. If you press the ‘live audio send’ audio will be sent from the PC to NVR. 7.1.3.6 Search &...
- Page 77 VT-NV Series – On Cue IP : 16 split view 3: Playback speed control : Reverse Fast : Reverse Slow : Reverse Normal Speed : Pause : Forward Normal Speed : Forward Slow : Forward Fast Steps for fast playback : x2, x4, x8, x16,x30, x60, x120 Steps for slow playback : 1/2, 1/4, 1/8, 1/16, 1/30, 1/60, 1/120 4: Fast Playback Speed &...
- Page 78 VT-NV Series – On Cue IP TAG name: Folder name where the copied AVI file to be saved. Channel: Choose the channel required to be copied From: The start time of the recorded data to be copied To: The end time of the recorded data to be copied Copy Start: executing the copy operation TAG name and Channel have to be defined in order to copy.
- Page 79 VT-NV Series – On Cue IP menu. : Clicking ‘COPY START TIME’ from the selected time cell and input it into the ‘From’ of COPY control panel. : Clicking ‘COPY END TIME’ from the selected time cell and input it into the ‘To’ of COPY control panel. : Taking the time for ‘EVENT SEARCH start time’.
-
Page 80: Android Viewer / Ios Viewer
VT-NV Series – On Cue IP Android Viewer / iOS Viewer On Cue Viewer is the name of smart phone viewer for Android iOn Cue Viewer is the name of smart phone viewer for IOS. You can access the NVR system through 3G/4G phone or Wi-Fi connection. Main feature Live View Full-Screen... - Page 81 VT-NV Series – On Cue IP Press Quick Connect button, the above image will be displayed. NVR Address : input IP Address of NVR Port Number: input NVR port number that you configured in Network menu of NVR. User ID: input ID that you configured in NVR. ( default password of Admin is 1234) Password : input password ( default password of Admin is 1234) Connect: Connect to NVR to view the video by pressing Connect button.
- Page 82 VT-NV Series – On Cue IP Edit: edit list currently stored. Delete: delete currently selected NVR stored. Close : close NVR list menu Connect: connect to selected NVR. Menu: You can connect to Web menu of NVR after selecting one of the NVR’s from the List.
- Page 83 VT-NV Series – On Cue IP Select one from the list that you what to view to make a connection. Then press Connect...
-
Page 84: Ddns Server
VT-NV Series – On Cue IP DDNS SERVER Domain Name Service through DDNS server. 7.3.1 HOW TO REGISTER You need to input at URL in Web Brower. http://oncueddns.com LOGIN ID: Input USER ID PASSWORD: Input Password. Logon: Press Log-in button to log-in Register: Create user account. -
Page 85: Input Nvr Information
VT-NV Series – On Cue IP 7.3.3 Input NVR information. 1 : List number of registered NVR 2 : Mac address of registered NVR 3: Domain name of registered NVR. 4: IP address of registered NVR. 5: Last time NVR sent info to DDNS server. 6: Modify NVR info 7: Delete Domain name registered in DDNS server. -
Page 86: Oncue Viewer
VT-NV Series – On Cue IP OnCue Viewer OnCue Viewer is a ‘Remote Client NVR Viewer’ which can provide the functions such as ‘Monitoring live video’, ‘Search & Playback for Recorded Video in NVR’ and ‘Download the Recorded Video in NVR (Remote COPY). The following table shows the PC requirement for this application S/W. -
Page 87: Execution
VT-NV Series – On Cue IP : Complete Message Window 7.4.2 EXECUTION The shortcut of ‘OnCue Viewer’ is created after the successful installation. Clicking this icon executes the OnCue Viewer. : Shortcut and icon of OnCue Viewer 7.4.3 LIVE VIDEO MONITORING The initial window of OnCue Viewer is composed of the picture below. -
Page 88: Connection Manager
VT-NV Series – On Cue IP FOLDER SELECT: Choose or make a folder for the data which is copied from the NVR remotely. LANGUAGE: Select Language EVENT POPUP TIME: Selectable time for Event POP-UP EVENT SOUND: If Event is Detected a voice will say “Event detected” SAVE: Apply and save the current modification. - Page 89 VT-NV Series – On Cue IP DVR Name: The name which you give to the NVR which has the following connection information. DVR Address : specify the IP address of the NVR DVR Port: The port number programmed into the NVR. USER : user ID to be used to login PASSWORD: password for the selected user.
-
Page 90: Live Video Window
VT-NV Series – On Cue IP 7.4.5 LIVE VIDEO WINDOW Features of LIVE VIDEO WINDOW Monitoring live camera video Swap the position of two cameras Snapshot and save it into the PC as JPEG file. PAN/TILT Control remotely Configure the quality and resolution for live video.(ADMIN account only) Live audio from NVR Digital Zoom In 7.4.5.1 Monitoring live video stream... - Page 91 VT-NV Series – On Cue IP The swapped camera position will go back to the original location in case that the OnCue Viewer restarts or the connection is re-established. 7.4.5.3 Digital Zoom on the Live View When in full screen mode on selected channel right click and drag to create a box to zoom in Clicking anywhere in image will return to previous screen.
- Page 92 VT-NV Series – On Cue IP : Saves the current selected channel as a JPEG snapshot : Open the PTZ control panel, which controls the PTZ camera of the selected channel. 1: Camera Channel number which is currently selected. PRESET OPERATION OF PTZ ZOOM/FOCUS/IRIS CONTROL DIRECTION CONTROL (PAN &...
- Page 93 VT-NV Series – On Cue IP : Select stream for Live view (Main or Sub stream) : Hear audio from the selected camera. : This function is ‘two way audio function’. If you press the ‘live audio send’ send audio from the PC to NVR. 7.4.5.5 NVR List The ‘NVR List’...
-
Page 94: Player
VT-NV Series – On Cue IP 7.4.6 PLAYER The Player supports the features such as followings. Features of Player Live video monitoring for the connected NVR Remote search and playback for the connected NVR Download the recorded data from the NVR(remote copy) Control a PAN/TILT camera movement... - Page 98 Max.Bitrate (Per Camera) 8Mbps (720/1080p) @ 30fps 6Mbps (720/1080p) @ 30fps IP Camera Support Vitek / Samsung / UDP / CNB / Comart / Truen / Shany / SecuBest / OnViF Video Output 120 fps @ 1080p 120 fps @ 1080p...
- Page 99 6Mbps (720/1080p) @ 30fps 4Mbps (720p) / 4Mbps (1080p) @ 15fps IP Camera Support Vitek / Samsung / UDP / CNB / Comart / Truen / Shany / SecuBest / OnViF Video Output 240 fps (D1 / 720P / 1080P)
- Page 100 VITEK warrants to the purchaser that products manufactured by VITEK are free of any rightful claim of infringement or the like, and when used in the manner intended, will be free of defects in materials and workmanship for a period of three (3) years, or as otherwise stated above, from the date of purchase by the end user.
Need help?
Do you have a question about the VT-NV1600P and is the answer not in the manual?
Questions and answers