Table of Contents
Advertisement
Quick Links
VT-DVR Series
4, 8, & 16 Channel
Digital Video Recorders
FEATURES:
• Remote Access & Management from Client PC
• Embedded Linux Operating System
• Built-in Multiplexer
• Quadplex Function
• High Resolution
• Hidden/ Covert Camera Function
• Built-in Web Server for LAN/WAN/ Internet
• Automatic E-mail Notification: External Alarm, Video Loss, Power Loss, HDD Failure
• Dedicated Multi-Site/ Enterprise Client Software or Plug-In for Internet Explorer 6.0
• External Back-up Devices(USB-2): CD-RW, DVD-RW, HDD, USB Flash Memory Stick(1.1)
• Mini Player: Auto Install when backing up files into CD or DVD
• Up to 800GB of Internal Storage
• Jog/Shuttle Operation
• IR Remote Control - Control Upto 99 DVRs
• Optional P.O.S. Interface
• Optional VGA Output
Advertisement
Table of Contents

Related Manuals for Vitek VT-DVR16000


Summary of Contents for Vitek VT-DVR16000
- Page 1 VT-DVR Series 4, 8, & 16 Channel Digital Video Recorders FEATURES: • Remote Access & Management from Client PC • Embedded Linux Operating System • Built-in Multiplexer • Quadplex Function • High Resolution • Hidden/ Covert Camera Function • Built-in Web Server for LAN/WAN/ Internet •...
-
Page 2: Content Verification
2. NVAC-RC110 Remote Controller 3. DVR Client Software CD 4. Power Cable 5. Two AAA Batteries 6. This Instruction Manual If any of these materials are missing, please contact the vendor or the customer help desk immediately. VITEK VT-DVR Series... -
Page 3: Disclaimer
Explorer are either registered trademarks or trademarks of Microsoft Corporation in the United States and/or other countries. Other names and products not mentioned above may be registered trademarks or trademarks of their respective companies. Copyright © 2005. All rights reserved. VITEK VT-DVR Series... - Page 4 If such changes or modifications should be made, you could be required to stop operation of the equipment. Canadian Radio Interference Regulations THIS CLASS B DIGITAL APPARATUS MEETS ALL REQUIREMENTS OF THE CANADIAN INTERFERENCE CAUSING EQUIPMENT REGULATIONS. Operation is subject to the VITEK VT-DVR Series...
-
Page 5: Test Sessions
The Privacy act of 1974 (5 U.S.C. § 552a) Please note that the Digital Video Recorders are intended for recording of surveillance use and should never be used in a manner that invades other people’s privacy or contravenes international or domestic privacy act and its regulations. -
Page 6: Safety Precautions
DVR’s Power off or unplug the power cord from the power outlet. Continued use of the equipment may result in fire or electrical shock. Please consult the DVR distributor or the closest customer help desk. Contact a qualified service personnel VITEK VT-DVR Series... - Page 7 It could lead to overheating, burns and other injuries. The supplied power supply and power cord are designed for exclusive use with the Digital Video Recorder. Do not use it with other products or battery. There is a risk of fire and other hazards. VITEK VT-DVR Series...
-
Page 8: Caution
Continued use may damage the equipment. Remove the power cord from the power outlet and wait until the moisture evaporates completely before resuming use. Never place the DVR in close proximity to Stop using the VITEK VT-DVR Series... -
Page 9: Table Of Contents
1. PLAY / STILL / STOP... 34 2. JOG DIAL / SHUTTLE RING / SHUTTLE HOLD ... 35 3. AUDIO PLAYBACK..37 III. ADVANCED OPERATION... 38 1. LOCK ...38 VITEK VT-DVR Series TABLE OF CONTENTS ) ...4 S ... 7 ...22... - Page 10 3. ALARM BUZZER... 61 4. ALARM OUT... 61 5. CAMERA SELECT ... 61 MOTION GRID ...62 MOTION LEVEL ...62 ALARM INPUT...62 5. SCHEDULE SETUP ...63 DAYS OF THE WEEK (D/W) ... 63 START - END ... 63 GROUP ... 64 VITEK VT-DVR Series...
- Page 11 13. DATE AND TIME... 105 14. DVR STATUS... 105 15. SCHEDULE STATUS... 105 16. LOCK STATUS... 105 17. HARD DRIVE INFORMATION ... 105 18. CAMERA NUMBER / TITLE... 105 3. DVR LOCAL PLAYER ...106 1. MAIN MENU ... 106 VITEK VT-DVR Series...
- Page 12 17. DVR SET LIST MANAGER ... 121 18. VIRTUAL DVR SET LIST MANAGER... 123 19. POWER ... 125 4. DVRPLAYER – LIVE MODE ...126 INDIVIDUAL DVR MONITORING ... 126 VIRTUAL DVR MONITORING ... 127 DUAL DISPLAY... 129 5. DVRPLAYER – PLAYBACK MODE ...132 VITEK VT-DVR Series...
- Page 13 Display Setup ... 138 Group Selection... 138 Record Setup... 139 Event Setup ... 139 Schedule Setup ... 139 System Setup ... 140 VIII. SPECIFICATION ... 142 IX. FREQUENTLY ASKED QUESTIONS (FAQ) ... 143 X. TECHNICAL SUPPORT... 148 INDEX ... 149 VITEK VT-DVR Series...
-
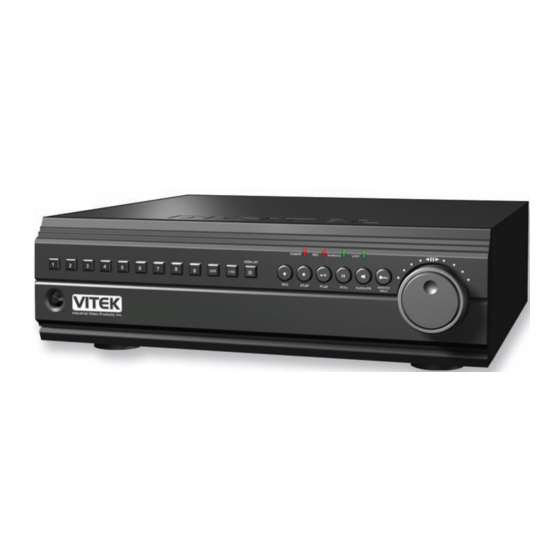
Page 14: Digital Video Recorder Layout
This button is used to start the playback of recorded data. By default, the playback starts from the earliest recording in the storage device. 7) STILL This button is used to pause during playback. 20 21 23 24 25 VITEK VT-DVR Series... - Page 15 18) INFO This button displays system information screen: USB device, USB vendor, USB disk size, internal HDD size, system version, firmware version, host name and IP address. Press this button once more to access the system log. VITEK VT-DVR Series...
- Page 16 The Jog / Shuttle is used to adjust playback speed, advance field by field, forward and to rewind the images. The shuttle ring may also be used to navigate through various menus instead of the directional buttons. VITEK VT-DVR Series In Zoom mode,...
-
Page 17: Rear Panel Layout
2. REAR PANEL LAYOUT 4 CHANNEL DVR 8 CHANNEL DVR 16 CHANNEL DVR VITEK VT-DVR Series 11 12 11 12 11 12 13 14 13 14... - Page 18 9-Pin port connector to connect an external modem or RS-232C/RS-485 converter 11) S-VIDEO OUTPUT 12) COMPOSITE VIDEO OUTPUT BNC connector for video output to a monitor 13) AC POWER SOCKET 14) 115V / 230V VOLTAGE SWITCH 15) POWER FAN VITEK VT-DVR Series...
-
Page 19: Remote Controller
BACK UP DVR ID ZOOM RESTORE ENTER / CH SELECT CANCEL / OSD OFF MENU ALARM SEARCH TIME SEARCH RECORDING FIELD BY FIELD STOP REWIND FAST FORWARD PLAY NUMBERS & ALPHABET DISPLAY MODE INFORMATION AUDIO-PB SCHEDULE REC ON/OFF VITEK VT-DVR Series... -
Page 20: Installation And Connection
4. INSTALLATION AND CONNECTION ϖ Example of a normally open alarm circuit. VITEK VT-DVR Series... -
Page 21: Ptz Camera Connection
5. PTZ CAMERA CONNECTION CAMERA AUDIO CAM1 RS485 to RS232C Converter RS-232c to RS-485 Converter VITEK VT-DVR Series COMPOSITE VIDEO OUT S-VIDEO A9 A10 A11 A12 A13 A14 A15 A16 G AO ETHERNET RS-232C PTZ CAMERA CAM2 CAM3 CAM4 CONTROL LINE... -
Page 22: Using This Manual
Use 10+ button in combination with single digit buttons to enter or channels higher than 10. Use the menu or enter key to confirm the settings. Use the OSD/CANEL button to revert back to previous settings. VITEK VT-DVR Series... -
Page 23: Basic Settings
Enter “000000” as the default password. Screen Position Adjustment The screen position is adjustable during live view or playback. Use the directional buttons to adjust the screen position to best fit the monitor. Default Position Up position bottom right corner position VITEK VT-DVR Series... -
Page 24: Basic Operation
Finally, this section will also include the information screen where all the basic information about the DVR is displayed as well as the log screen where all the activities of the DVR are compiled. 1. MAIN SCREEN 10 11 12 VITEK VT-DVR Series... - Page 25 Displays the current date in mm/dd/yyyy format 9. TIME Displays the current time in dd/hh/mm/ss format in 24 hour format. 10. MOTION RECORDING Displayed when recording with motion detection. 11. ALARM RECORDING Displayed when recording with alarm trigger. VITEK VT-DVR Series...
- Page 26 0 and the DVR will continue to write on to the hard drive from the beginning. The counter will remain 0 as long as the hard drive is full with previously recorded data, and will display its original size once the hard drive is formatted. VITEK VT-DVR Series...
-
Page 27: Information & Log List
Displays the remaining and the maximum capacity of the external hard drive when attached to the DVR. HDD SIZE Displays the remaining and the maximum capacity of the internal hard drive(s). SYSTEM VERSION Displays the DVR’s system version. FIRMWARE VERSION Displays the DVR’s firmware version. VITEK VT-DVR Series... - Page 28 Browse through the pages using the directional buttons. Press the menu button to exit to the main screen. Menu Set Play Record Stop Alarm Trigger Motion Detection Video Loss Power Loss Power On Connect VITEK VT-DVR Series...
-
Page 29: Live View
8 CHANNEL DVR), 13 (16 CHANNEL DVR) and 16 channel view (16 CHANNEL DVR). The following illustrations display the order of live view mode sequence. Live view sequence of 4 CHANNEL DVR Live view sequence of 8 CHANNEL DVR VITEK VT-DVR Series... -
Page 30: Live View Switch Sequence Of 16 Channel Dvr
Live view sequence of 16 CHANNEL DVR VITEK VT-DVR Series... -
Page 31: Automatic Sequence
DVR), it is possible to reposition the camera from the bigger window with the one from a smaller one. The following illustration demonstrates the procedure. VITEK VT-DVR Series From 6, 8 or 13 channel view mode (13 channel view mode selected here), press ENTER/CH SEL... -
Page 32: Zoom
Camera 9 is pressed in this example, and it is switched with camera 1. Press the zoom button to bring up the zoom window. Use the directional buttons to move the zoom window to the desired location. VITEK VT-DVR Series... - Page 33 Press the zoom button once more to zoom into the selected area on the screen. Use the directional buttons to move the zoomed window around the screen. Press the cancel/OSD off button to return to normal view. VITEK VT-DVR Series...
-
Page 34: Basic Recording
Audi o Recor d of f of f of f of f Audi o Recor d of f of f of f of f Audi o Recor d of f of f of f of f VITEK VT-DVR Series... -
Page 35: Basic Playback
16 times normal speed, or move field by field using the jog shuttle. Please refer to the following illustrations for a detailed description. VITEK VT-DVR Series Press the play button and the play icon will be displayed. The DVR will start the playback from the earliest data. -
Page 36: Jog Dial / Shuttle Ring / Shuttle Hold
Turn the jog dial (or the step buttons on the remote controller) counter-clockwise to play in reverse and view recorded data one field at a time. If the jog dial is stopped, the playback will return to still mode while displaying the field-by- field mode icon. VITEK VT-DVR Series... - Page 37 VITEK VT-DVR Series During the playback or still mode, turn the shuttle ring clockwise (or the fast forward buttons on the remote controller) to fast forward to the desired location. Each increment on the shuttle ring represents each additional arrow on the screen.
-
Page 38: Audio Playback
When any camera is selected, the audio playback icon will appear as the audio is being played. When the audio-PB button is pressed, the icon will blink as it attempts to synchronize to video. VITEK VT-DVR Series... -
Page 39: Advanced Operation
Backup process to the CD-RW and the DVD-RW only works on manual method due to the limited capacity of the medium. On average, a blank CD will contain up to 700MB of VITEK VT-DVR Series The buttons on the DVR can be locked by pressing the lock button and then entering the administrator’s password. -
Page 40: External Hard Drives
When finished, the wheel will stop spinning and the arrow will disappear, and then eject the media. The following is a list of compatible external hard drives Iomega Press the If there is not VITEK VT-DVR Series... -
Page 41: Usb 2.0 Memory Stick
Please note that the backup icon will blink if the memory stick is below 1 GB. VITEK VT-DVR Series Verify that the backup mode has been set to auto prior to proceeding with the automatic back up. - Page 42 Pause the playback, and then press Backup. SNAP SHOT will be displayed, and the current screen will be saved onto the memory stick as .picture format file. The files can be retrieved and displayed using the Local Player in snapshot folder. VITEK VT-DVR Series...
-
Page 43: Pan / Tilt / Zoom Control
Please have the remote controller handy when using the PTZ camera. 1. PAN AND TILT CONTROL 2. FOCUS CONTROL VITEK VT-DVR Series Please read the PTZ Use the directional buttons to pan and tilt the PTZ camera. -
Page 44: Zoom Control
The time search button enables auto iris and cancel/OSD off button disables auto iris. Auto Pan, Auto Tilt and Auto P/Tilt are activated by pressing the P/T/Z/Focus button and are deactivated using the cancel/OSD off button. VITEK VT-DVR Series... -
Page 45: Limiting The Camera Position
Tour allows the PTZ camera to follow preset paths in an automated fashion. 6. LIMITING THE CAMERA POSITION VITEK VT-DVR Series After moving the PTZ camera to the desired position, move the arrow to preset then press the P/T/Z/Focus button. The number will start flashing. -
Page 46: Advanced Recording
DVR will record for the duration of the post recording duration. If the alarm buzzer is set to on, then the alarm buzzer will sound for the duration of the Record Duration. Please refer to page 60 for configuring the Record Duration. VITEK VT-DVR Series... -
Page 47: Motion Recording
The record setup allows the DVR to use a combination of both features. VITEK VT-DVR Series Press the record button and the record icon will appear as shown on the left. The record LED will start blinking as it is set to the standby mode until motion detection is triggered. -
Page 48: Advanced Playback
Use the directional buttons to navigate to the desired camera and minute slot. Press the alarm search button to start the playback. The DVR will initially start to play back all recorded channels simultaneously. VITEK VT-DVR Series... -
Page 49: Advanced Settings
IV. ADVANCED SETTINGS Press the menu button to access the main menu for the advanced settings of the DVR. The menu will display the following categories: VITEK VT-DVR Series... -
Page 50: Display Setup
Select the Channel to display in the background. b. PIP Display Select the channel to display in the foreground. c. PIP Size Select between large and small size PIP window. d. PIP Position Select from the four corners of the screen. VITEK VT-DVR Series... -
Page 51: Auto Sequence Mode
Display button to switch to any other channel view modes to stop the automatic sequence mode. 3. SEQUENCE INTERVAL 4. CAMERA SELECT VITEK VT-DVR Series This option enables the automatic sequencing of cameras connected to the DVR. The default is off. -
Page 52: Camera Title
Select the appropriate channel for the PTZ Camera. For example, PTZ Camera ID 01 is channel 1, PTZ Camera ID 02 is channel 2 and so on (Camera ID also means Camera address). press appropriate Refer to the following VITEK VT-DVR Series... -
Page 53: Ptz Camera Model
PTZ cameras. Please refer to the PTZ manufacturer’s instruction manual for proper jumper settings to match the protocols to the DVR. VITEK VT-DVR Series Select the appropriate camera manufacturer and camera model. Refer to the chart for the appropriate PTZ camera model number per manufacturer’s models... -
Page 54: Brightness
COLOR Highlight Color, then press the right directional button to access the color adjustment screen. Adjust the color using the left or the right button, then press menu to save and exit to previous menu. VITEK VT-DVR Series... -
Page 55: Covert Mode
Select between covert mode (on) and normal mode (off). If covert mode is activated, the activated camera’s display will be hidden on both the monitor and the DVR web client, yet the video will still be recorded. VITEK VT-DVR Series... -
Page 56: Group Selection
This option selects the audio input method. MIC is for microphone input and LINE is for line input such as stereo, an amplifier, or a microphone with a RCA jack. The default audio input is LINE. VITEK VT-DVR Series... -
Page 57: Hdd Overwrite
3. HDD OVERWRITE This option determines whether the DVR writes over old files when the hard drive become full. By default, the HDD overwrite is off. VITEK VT-DVR Series... -
Page 58: Record Setup
It also activates and deactivates motion trigger and alarm trigger. Use the left or the right directional buttons to select from eight different picture qualities: Super+: 32KB Super: 28KB High+: 26KB High: 21KB Mid+: 18KB Mid: 15KB Low+: 12KB Low: VITEK VT-DVR Series... -
Page 59: Audio Record
C am er a 13 C am er a 14 C am er a 15 C am er a 16 VITEK VT-DVR Series Select the audio recording on or off. The default is off. Please note that surreptitious third-party interception of conversation is ILLEGAL under the federal law. -
Page 60: Motion & Alarm
1’s alarm feature. Press the same numeric button once more to activate both motion and alarm features. Press the same numeric button one last time to disable both the motion and alarm features. The camera VITEK VT-DVR Series... -
Page 61: Event Setup
1. RECORD DURATION 2. PRE-RECORD VITEK VT-DVR Series Record duration determines the amount of time the DVR records after the initial motion or alarm detection. The user may choose from 0, 20, 40, 60, 80, 100, 120, 180 and 240 seconds. -
Page 62: Alarm Buzzer
It adjusts the motion sensitivity level and alarm input type. Use the left and right directional buttons to select each camera or the numeric buttons to jump directly to the desired camera. Stopping the VITEK VT-DVR Series... -
Page 63: Motion Grid
MOTION LEVEL c. ALARM INPUT VITEK VT-DVR Series Use the left or the right directional buttons to adjust the motion sensitivity level. Sensitivity level 1 is the lowest setting and level 15 is the highest setting. -
Page 64: Schedule Setup
The ending time may not precede the starting time. Use the numeric buttons to enter the time. Refer to example A at the end of this section for a sample schedule. Thursday Friday Saturday All Days VITEK VT-DVR Series... -
Page 65: Group
9am until 4pm on Tuesdays (example entered after All days recording. It was entered to demonstrate overnight recording procedure). VITEK VT-DVR Series The recording group preconfigured under record setup may be selected in conjunction with specific days of the week and the time frame. - Page 66 Press the Menu button to save and exit to the main menu screen. Press the right directional button to access the schedule setup once more, and the selected entry will be deleted from the schedule. VITEK VT-DVR Series...
-
Page 67: Time And Date Setup
DVR’s internal storage. When the user plays back the data from the hard drive, the DVR will playback the older data with the same date and time first, then the newer data second. VITEK VT-DVR Series... -
Page 68: System Setup
The administrator’s password grants access to all the functions of the DVR. Highlight the user or the administrator’s password then press the right directional button to enter the password modification screen. VITEK VT-DVR Series... -
Page 69: Format Hdd
Format HDD should only be used when the content of the internal storage needs to be wiped out or when the user wishes to record from scratch as new. VITEK VT-DVR Series Enter the current password. Enter the new password. -
Page 70: Backup Device
The DVR is currently recording or was recording prior to formatting. b. The DVR was playing back the recorded data. Highlight the backup device and then press the right directional button to access the backup device submenu. If the internal VITEK VT-DVR Series... -
Page 71: Auto Key Lock
DVR through the USB port. The default setting is internal. 4. AUTO KEY LOCK The DVR locks all the buttons after three minutes of inactivity. The buttons can be unlocked with the user password. The default is on. VITEK VT-DVR Series... -
Page 72: Key Tone
DVR ID button. While holding the DVR ID button, press the appropriate DVR ID number. For example, enter 05 for DVR ID 05, enter 43 for DVR ID 43, and such. VITEK VT-DVR Series... -
Page 73: Network Setup
DNS servers. The following is an example of a configuration provided by such services: IP address range: Subnet Mask: Gateway: DNS servers: VITEK VT-DVR Series Though most internet service 64.128.92.26 ~ 64.128.92.30 255.255.255.248 64.128.92.25 20.19.154.97 20.19.154.98 20.19.154.99... - Page 74 Internet Service Provider. If the network address and the host address have blocks of single-digit or double digit numbers instead of the full three-digit numbers, then make sure that the zero replaces the non-existent digit. VITEK VT-DVR Series...
-
Page 75: Configuring The Dvr With A Router Into A Local Area Network
DVR in case the Internet Service Provider is blocking Port 80. Port 1104 is the data streaming port through which the DVR transmits the video data. Over the next pages, D-Link’s DI-604 was used to illustrate a sample procedure. VITEK VT-DVR Series... - Page 76 Open Internet Explorer then type in http://192.168.0.1 to access the router. Enter the User Name and Password to access the router. You will then be taken to the main menu. VITEK VT-DVR Series...
- Page 77 Click on Advanced tab to access port forwarding (Virtual Server for D-Link) configuration page. VITEK VT-DVR Series...
- Page 78 In the following examples, DVR80 was used to label port 80, DVR7777 for port 7777 and DVR1104 for port 1104. Make sure you enable the port forwarding and that it is turned on permanently if scheduling is involved. VITEK VT-DVR Series...
- Page 79 The three ports are added as shown. VITEK VT-DVR Series...
-
Page 80: Configuring The Dvr With A Cable Modem
1. The DVR and the modem should be powered off. 2. Connect the network cable from the DVR to the modem. 3. Power on the modem. 4. Power on the DVR. 5. Enter the menu and go into the Network Setup Submenu 6. Select Dynamic: Cable VITEK VT-DVR Series... -
Page 81: E-Mail
IP address from the ISP (Internal IP address shown below). 4. E-MAIL VITEK VT-DVR Series At the same time, the IP address should The DVR sends notifications to one designated e-mail address when the following events... -
Page 82: Configuring The Dvr With A Crossover Cable
The following illustration was based on a computer system running Windows XP Professional. On the PC, click on Start, Settings, then Control Panel to open the Control Panel. Double-Click on Network Connections to open the network settings window. VITEK VT-DVR Series... - Page 83 VITEK VT-DVR Series Right-Click on the Local Area Connection icon to drop a pull-down menu, then click on Properties to enter the Local Area Connection Properties. Double-Click on the Internet Protocol (TCP/IP) to edit the IP address information.
- Page 84 (1) and the DVR’s host address (52). Click OK button to save settings. Click OK on the Properties window to apply the saved settings. VITEK VT-DVR Series...
-
Page 85: Modem Connection
The modems must be external modems with a serial interface and must be connected to the RS-232C outlet in the back of the DVR. 1) CREATING MODEM CONNECTION IN WINDOWS XP VITEK VT-DVR Series Start by clicking on Start, Programs, Accessories, Communication, then Network Connections to open the Network Connections window. - Page 86 Click Next to continue. Select Connect to the Internet and click Next to continue. Select Set up my connection manually and click Next to continue. Select Connect using a dial-up modem and click Next to continue. VITEK VT-DVR Series...
- Page 87 VITEK VT-DVR Series Enter the ISP name as preferred. In this example, DVR was entered as the ISP name. Click on Next to continue. Enter the phone number of DVR’s location. Depending on the computer’s modem settings, a “1” may need to be entered in front of the phone number.
-
Page 88: Connecting To The Dvr Using Dial-Up Modem
Dial: section. It may be needed to add a 1 in front of the number and make the changes permanent. Click Dial and the computer will dial the modem to connect to the DVR. VITEK VT-DVR Series... -
Page 89: Disconnecting From The Dvr
3) DISCONNECTING FROM THE DVR VITEK VT-DVR Series Once the connection is established, the user name and the password will be verified for connection. Once the user name and the password has been verified, a connection confirmation balloon will pop up at the bottom right corner of the monitor by the system tray. -
Page 90: Client Program
Before installing the DVR web client, please verify that the computer onto which the program is being installed meets the minimum requirements: CPU: Intel Pentium III 800Mhz or equivalent RAM: 128 MB Video Card: 32MB Operating System: Microsoft Windows 98SE/ME/2000/XP Internet Explorer version 6.0 10/100 Base-T Ethernet Port VITEK VT-DVR Series... -
Page 91: Installing The Dvr Web Client By Connecting To A Dvr
YYMMDD represent the release date of the DVR web client. Double-click on the file, which opens the setup dialog. VITEK VT-DVR Series A small icon will appear on the upper left corner of the... -
Page 92: Connecting To The Dvr Using The Web Client
It will also list the option to install the DVR local player. Click on Install and the program will be installed onto the computer. After the installation procedure has completed, click on Close to end the setup dialog. http://24.168.44.180 http://192.168.0.52 http://q00c32a.dvrhost.com VITEK VT-DVR Series... - Page 93 Internet Explorer to connect to the DVR. If it is necessary to redirect the connection to another DVR location, modify the IP address under this section. If multiple DVRs are present, adjust the port settings accordingly. VITEK VT-DVR Series http://192.168.0.60 on the...
-
Page 94: Dvr Web Client
2. DVR WEB CLIENT VITEK VT-DVR Series... -
Page 95: Camera Display Selection
Configures the background color and the grid color of the DVR web client. d. Enables automatic disconnection from the DVR after one hour. e. Switch to UDP protocol transmission (for customized applications only). VITEK VT-DVR Series... -
Page 96: Dvr Settings
DVR settings. After the selection has been made, an access verification window will open prompting for the administrator’s password. If the correct password was entered, then the six submenus will be available to adjust the DVR settings remotely. VITEK VT-DVR Series... -
Page 97: General
1) GENERAL 2) DISPLAY SETUP VITEK VT-DVR Series a. Start/Stop Recording or Schedule On/Off. b. Change user password. c. Change administrator password. a. Select camera. b. Enter camera title. c. Select PTZ channel and manufacturer. d. Adjust brightness, Contrast and Color. -
Page 98: Group Selection
Select Record Group to record with. b. Select audio source. c. HDD overwrite On/Off. a. Select Record Group to define. b. Adjust picture quality. c. Audio Record on/off. d. Adjust field rate, activate motion and/or alarm feature on/off. VITEK VT-DVR Series... -
Page 99: Event Setup
5) EVENT SETUP 6) SYSTEM SETUP VITEK VT-DVR Series a. Adjust post-record duration. b. Pre-Record on/off. c. Alarm Buzzer on/off. d. Select alarm output voltage. e. Select camera for motion sensitivity and alarm input signal circuit type. Adjust motion sensitivity. -
Page 100: Download Manager
After the selection has been made, an access verification window will open prompting for the administrator’s password. If the correct password was entered, the download manager window will be available to browse through the content of the DVR’s internal hard drive(s). VITEK VT-DVR Series... -
Page 101: Previewing Recorded File
Year → Month → Day → Hour → Time (starting minute and seconds of the file). b. Click on Add to add the file to the list of files to be previewed or downloaded. c. Click on Preview which will open up the preview window as shown below. VITEK VT-DVR Series... -
Page 102: Downloading Data File
Year → Month → Day → Hour → Time (starting minute and seconds of the file). b. Click on Add to add the file to the list of files to be previewed or downloaded. c. Choose a folder to save the download the files into. VITEK VT-DVR Series... - Page 103 Download Done will pop up once the file preview has been completed, as shown below. Click on OK to return to the file download manager. VITEK VT-DVR Series...
-
Page 104: Log
DVR. When the Log button is pressed, the file download manager will open a new text file, DvrLogFile.txt, which has a list of all the events since the initial power on procedure of the DVR. VITEK VT-DVR Series... -
Page 105: P/T/Z Camera Control
Click on Yes to stop the remote monitoring and start the DVR local player. Click on NO to maintain the remote connection and start the DVR local player. 11. PICTURE QUALITY Selects the picture quality of live remote monitoring. The higher the resolution (picture quality) the slower the field rate becomes. VITEK VT-DVR Series... -
Page 106: Fields Per Second
Displays the status of the Scheduled recording. 16. LOCK STATUS Displays the status of button lock of the DVR. 17. HARD DRIVE INFORMATION Displays the remaining space of the internal and the external hard drives. 18. CAMERA NUMBER / TITLE VITEK VT-DVR Series... -
Page 107: Dvr Local Player
These buttons will be automatically enabled or disabled depending on the number of channels stored on the playback data. 3. CAMERAS Just like on the DVR’s numerical buttons, click on each camera to directly switch to the desired camera and view it in full screen mode. VITEK VT-DVR Series... -
Page 108: Picture Quality
Snapshot files are the files that have been saved onto a memory stick. a. Save file location. b. File name. c. File type. d. File format: JPG, BMP, PCX and PNG e. Image resolution and number of copies. VITEK VT-DVR Series... -
Page 109: Date And Time
Rplay: Still: Still Forw: Still Back: Play 2X ~ 16X: RPlay 2X ~ 16X: VITEK VT-DVR Series No files have been opened to play back. Opening of stream file successful. Playing in forward direction. Playing in reverse direction. Playback paused. -
Page 110: Mini Player
The data can be paused and moved forward or in reverse field by field. 5. FAST FORWARD / FAST REVERSE The playback speed can be increased up to 16 times the normal speed in forward and in reverse directions. VITEK VT-DVR Series... -
Page 111: Progress Slider
Choose from the following picture quality settings. High: 720 x 486 Mid: 360 x 243 Low: 180 x 122 9. REGION SETTING PULL-DOWN MENU Click to select the playback format according to the regional settings from the pull down menu. VITEK VT-DVR Series... -
Page 112: Central Management Software
Pentium IV 1.30 GHz 128MB 16MB 30MB 1024x768x16 DirectX 6.0 None Ethernet 10/100B-TX Port 9999 TCP Recommended Windows XP Pentium 2.8 GHz 512MB RAM 64MB 2 GB 1024x768x32 DirectX 9.0 Overlay YUY2 Surface Ethernet 10/100B-TX Port 9999 TCP VITEK VT-DVR Series... - Page 113 VITEK VT-DVR Series The setup dialog displays the installation options: the DvrPlayer, Start Menu Shortcuts and Desktop Shortcuts. The Start Menu Shortcuts and Desktop Shortcuts may be unchecked if desired. Click on Next to continue. Select the folder in which the program will be installed.
-
Page 114: Dvrplayer
16 channel, 25 channel, 36 channel, 49 channel and 64 channel view modes. All display modes are accessible no matter how many DVRs are connected or how many cameras are being displayed. 3. MODE DISPLAY Displays whether the program is in live or playback mode. 17 18 19 VITEK VT-DVR Series... -
Page 115: Time And Date
Toggles On Screen Display on or off. 9. SETUP The general settings for the CMS. Options for the OSD, overlay and the folder can be accessed by pressing this button. VITEK VT-DVR Series OSD Setup Select the On Screen Display options for the cameras:... -
Page 116: Playback Control Buttons
Slide the bar to the left to fast rewind at 2X, 4X and 8X. Up Right Pan Right Down Right Zoom Out Function Focus Far Focus Near Auto Focus Switch to Compact Interface VITEK VT-DVR Series... -
Page 117: Audio Volume
Control the volume of the audio in playback mode. 13. HEALTH Displays the name of the last five DVRs with an event or a problem. The color will change appropriately based on the event or problems reported from the DVRs. VITEK VT-DVR Series Function Iris Open Iris Close... -
Page 118: Warning Colors
2) Health report Health report can be accessed at any time by double-clicking on the warning led. Health report allows a quick glance of all DVRs’ status. Maximum of 300 DVRs’ status can be displayed simultaneously. recording started, VITEK VT-DVR Series... - Page 119 Not used at this time. REC LED INDICATOR Displays the status of the recording LED from the DVR. Switches to yellow if inoperative. VITEK VT-DVR Series Definition An event or a problem had occurred Current event or a problem Current status of the DVR...
- Page 120 If the icon is double-clicked while the connection is in progress, “Connecting… please stand by.” pop-up window will appear. Click on Retry to reinitiate the connection process or Cancel to return to the main window. VITEK VT-DVR Series...
- Page 121 Click on OK at the lower right corner of the screen to exit the CMS log and to clear the icon status. 5) Live Monitoring VITEK VT-DVR Series If the icon is double-clicked while the DVR is disconnected or if the password has been changed on the DVR, “Network connection error.”...
-
Page 122: Virtual Dvr Window
The icon color changes to dark blue when the camera signal is lost. 3) Recording. The icon color changes to red when the DVR or the channel is in recording mode. 17. DVR SET LIST MANAGER VITEK VT-DVR Series The Virtual DVR... - Page 123 Auto Scan scans for any DVRs connected within the Local Area Network. As it adds DVRs automatically, it will ignore DVRs already on the list. By default, Auto Scan will enter the Set Name, IP address, Port, and the password with the default DVR settings. Add To List VITEK VT-DVR Series...
-
Page 124: Virtual Dvr Set List Manager
Property displays general information about a DVR, such as DVR name, IP address, connection port, Model number, CPU and MICOM version, number of cameras and the compression method. 18. VIRTUAL DVR SET LIST MANAGER Virtual DVR Set List Manager is used to add or remove Virtual DVRs. Set Name VITEK VT-DVR Series... - Page 125 Del Virtual Set. Property Property displays general information about a Virtual DVR, such as Virtual DVR name, total number of cameras and IP address information of individual DVRs in the Virtual DVR. VITEK VT-DVR Series...
-
Page 126: Power
19. POWER Terminates and exits from the CMS. VITEK VT-DVR Series... -
Page 127: Dvrplayer - Live Mode
Connection in progress or Video Loss Close Disconnected from DVR Alarm Alarm Recording Motion Motion Recording Playback mode for individual channels Live Live monitoring only; no recording c. Time Displays the local time of the DVR’s location. VITEK VT-DVR Series Status... -
Page 128: Virtual Dvr Monitoring
DVR window to select the cameras to add onto Virtual DVR. The cameras will appear on the Camera Bar. Please note that the number of channels to be displayed may be changed at any time if necessary. VITEK VT-DVR Series... - Page 129 In the example to the left, all available 12 cameras are displayed starting at channel 7. Individual cameras can be added onto the Virtual DVR by click-and-dragging individual cameras. These processes can be repeated to add and rearrange the cameras in desired locations. VITEK VT-DVR Series...
-
Page 130: Dual Display
DVRs and Virtual DVRs. 1) Select a channel for playback. In the example below, channel 16 was selected for dual display playback. 2) Right-click on the selected channel, and a context menu will appear on the screen. VITEK VT-DVR Series... - Page 131 3) Left-click on Search. Remote Search window will open. The DVR in which the camera belongs to will be highlighted. 4) Select the date and the time, and then click on Play. VITEK VT-DVR Series...
- Page 132 5) The selected channel will begin playback in Dual Display Mode. 6) Right-click on the same channel, and then select Live to revert back to the live mode. VITEK VT-DVR Series...
-
Page 133: Dvrplayer - Playback Mode
During remote or local playback, available hour and minute slots are displayed in the slots. Clip displays the beginning and the ending time of the video playing back. Search Remote Search Window is access by clicking on Search button. VITEK VT-DVR Series... -
Page 134: Remote Search
It will also list any cameras with recorded video for the appropriate hour and minute slot. Recorded Video Category Displays different types of recording for each hour and minute slot: recording in red, motion recording in green, and normal recording in orange. Download VITEK VT-DVR Series alarm... -
Page 135: Remote Playback
The file selection process is just as selecting a file for remote playback. To download the file, click on Download instead of Play. VITEK VT-DVR Series Select a DVR from the DVR Set List then select the date and the time. -
Page 136: Local Playback
Play. Once the playback begins, the video can be manipulated using the playback controls. The video can be fast forwarded, fast rewound, paused, move field by field in either direction. Click on OK to VITEK VT-DVR Series... -
Page 137: Context Menu
In single channel view mode, the picture quality is high, in 4 channel view mode, the picture quality is medium, and low picture quality in any other view modes. b. HIGH: always display in high quality (720 X 486) VITEK VT-DVR Series... -
Page 138: Dvr Context Menu
Displays general information of the DVR. CMS Log List Displays logs of all events while CMS is running. DVR Log List Displays logs of all events from the DVR from the first power on. Setup Enters the setup dialog for the DVR. VITEK VT-DVR Series... -
Page 139: Virtual Dvr Context Menu
DVR setup can be accessed through the context menu from any DVRs, or through the DVR Set List Manager. 1) Display Setup 2) Group Selection VITEK VT-DVR Series a. Select a camera to adjust b. Adjust Brightness, Contrast and Color c. Enter up to 8 letters and numbers for camera title. -
Page 140: Record Setup
Post-Event Recording Duration b. Select alarm buzzer on or off c. Select alarm out high or low d. Adjust the motion sensitivity e. Select the alarm sensor input type Select/deselect motion grid VITEK VT-DVR Series... -
Page 141: System Setup
Schedule setup is similar to entering the schedule from the DVR’s schedule menu. 6) System Setup VITEK VT-DVR Series Select the day to enter a schedule recording time frame. In the example to the left, Wednesday was selected for a sample schedule recording. - Page 142 Select Backup Mode b. Select the playback disk c. Enter an e-mail address for notifications and alerts from the DVR d. Start recording e. Stop recording Run schedule recording / stop schedule recording VITEK VT-DVR Series...
-
Page 143: Specification
Network External Telephone Modem Support Remote Client Software Dynamic IP Support over Cable IR Remote Power Dimensions Weight VITEK VT-DVR Series SPECIFICATION 4 CHANNEL 8 CHANNEL 1 Monitor, 1 S-Video 1, 4, PIP 1, 4, 6, 8 1, 4 1, 4, 6, 8... -
Page 144: Frequently Asked Questions (Faq)
DVR was purchased. 7. How many different schedules can I set on the DVR? Up to 32 different individual schedules may be set. 8. Why do I get motion recording though nothing has moved on the screen? VITEK VT-DVR Series... - Page 145 On the DVR, it is possible to take a snapshot of the screen only during playback and single channel mode. Please refer to page 40 for more information. On the CMS, it is possible to take a snapshot of the screen at any time. Please refer to page 114 for more information. VITEK VT-DVR Series...
- Page 146 There are no “best” routers to use with the DVR. D-Link’s router was provided as an example because the default host address (192.168.0) is the same as the DVR’s host and IP address (192.168.0.52). Any router may be used with the DVR. VITEK VT-DVR Series...
- Page 147 All options and features can be modified using the Web Client Viewer except for the motion grid settings and the schedule recording. However, all option settings can be modified using the CMS. 4. Could I set various users to have different passwords when logging to the web client? VITEK VT-DVR Series...
- Page 148 The only device that controls the DVR besides the front panel is the included remote controller. The USB port is used to connect external backup devices. 2. Would the picture quality be better if I used Vitek cameras and monitors? Vitek cameras, monitors and DVRs have been tuned to produces the best video quality when used in conjunction with each other.
-
Page 149: Technical Support
X. TECHNICAL SUPPORT Please read the manual and the FAQ thoroughly before contacting the vendor where the DVR was purchased, or the manufacturer directly. VITEK VT-DVR Series... -
Page 150: Index
D/W ... See Days of the Week Date ...132 DATE ...24 DATE AND TIME ...105, 108 Daylight Savings Time ...66 DAYS OF THE WEEK...63 default Internet connection...86 DEFINE GROUP...57 Del From List...123 Del Virtual Set ...124 dial-up modem ...84, 85, 92 VITEK VT-DVR Series... - Page 151 Focus ...14, 42, 43, 44, 115 FORMAT HDD ...68 Free Space ...111 Full Screen ...135 general password...67 GROUP...64 Group Selection ...138 VITEK VT-DVR Series GROUP SELECTION...55 HARD DRIVE INFORMATION ...105 HDD FAIL...118 HDD OVERWRITE...56 HDD SIZE ...26 HEALT ...116 Health report ...117 host name ...
- Page 152 SCHEDULE ...14 Schedule Setup...139 SCHEDULE SETUP...63 SCHEDULE STATUS ...105 Screen Position ...22 SDSL...72 Search... 129, 131, 134, 135, 141 secondary port ...91 SELECT DVR ID ...71 SEQUENCE ...28 SEQUENCE BYPASS...51 SEQUENCE INTERVAL ...50 Set Name ...122, 124 VITEK VT-DVR Series...
- Page 153 TCP/IP ...82 Telnet ...74 TEMPERATURE ...118 TILT...42, 43, 115 Time ...125, 132 TIME ...24 Time & Date ...22, 141 VITEK VT-DVR Series TIME AND DATE ...114 TIME AND DATE SETUP ...66 TIME SEARC ...15 TIME SEARCH...47 Tour...44, 116 UDP protocol...94 USB 2.0 PORT...17...
- Page 154 Notes VITEK VT-DVR Series...
Need help?
Do you have a question about the VT-DVR16000 and is the answer not in the manual?
Questions and answers