Winnebago Journey Owner's Manual
Hide thumbs
Also See for Journey:
- Service manual (197 pages) ,
- Manual (181 pages) ,
- User manual (161 pages)
Table of Contents
Advertisement
Quick Links
Congratulations! We welcome you to the exciting world of motor home travel and camping. You will
find it convenient and enjoyable to have all the comforts of home and still enjoy the great outdoors wher-
ever you choose to go.
Your Winnebago Journey motor home has been carefully designed, engineered and manufactured to
provide dependability as well as safety. Before sliding into the driver's seat, take a few minutes to become
familiar with operations and features. This manual was prepared to aid you in the proper care and operation
of the vehicle and equipment. We urge you to read it completely. In addition, spend some time with the
dealer when you take delivery, you will want to learn all you can about your new motor home.
Your new motor home is covered by a factory warranty against defects in material and workmanship.
This warranty should be validated at once and returned to the factory by your dealer.
About Safety Messages Used in This Manual
Throughout this manual, certain items are labeled Note, Caution, Warning or Danger. These terms alert
you to precautions that may involved damage to your vehicle or a risk to your personal safety. Read and
follow them carefully.
This SAFETY ALERT SYMBOL is used to draw your attention to issues which could involved
potential personal injury. This symbol is used throughout this manual and/or on labels affixed
on or near various equipment in this motor home.
DANGER
DANGER indicates a directly hazard-
ous situation which, if not avoided,
will result in death or serious personal
injury.
.
WARNING
WARNING indicates a potentially
hazardous situation which, if not
avoided, could result in death or seri-
ous personal injury.
January 2003
TO THE OWNER
132000-09-003
Advertisement
Table of Contents

Related Manuals for Winnebago Journey


Summary of Contents for Winnebago Journey
- Page 1 Your Winnebago Journey motor home has been carefully designed, engineered and manufactured to provide dependability as well as safety. Before sliding into the driver’s seat, take a few minutes to become familiar with operations and features.
- Page 2 CAUTION CAUTION indicates a potentially hazardous situation which, if not avoided, could result in damage mainly to equipment or property, but in some cases may also result in minor or moderate personal injury. NOTE: A ‘Note’ is not necessarily safety related but indicates a recommendation or special point of information that could assist in understanding the use or care of a feature item.
- Page 3 OWNER’S NAME STREET ADDRESS CITY AND STATE (OR PROVINCE IN CANADA) MOTOR HOME SERIAL NUMBER VEHICLE CHASSIS IDENTIFICATION NO. (VIN) DATE OF DELIVERY TO FIRST RETAIL PURCHASER VEHICLE MILEAGE AT TIME OF DELIVERY SELLING DEALER NAME AND ADDRESS TANK CAPACITIES Diesel Fuel Tank ...................90 gals.
- Page 5 WARRANTY COVERAGE TO OWNER ITEMS NOT SUBJECT TO WARRANTY COVERAGE. Winnebago Industries, Inc. of Forest City, Iowa warrants each new Chassis* Winnebago Industries motor home to the owner for use in the U.S.A. Wheels* and Canada as follows: Tires* Service Items, such as Windshield Wiper Blades, Lubricants, Fluids &...
- Page 6 ADDRESS ZIP CODE WINNEBAGO INDUSTRIES VEHICLE MILEAGE DATE IDENTIFICATION NUMBER CHASSIS IDENTIFICATION NEW OWNER SIGNATURE IMPORTANT: THIS NOTICE IS TO BE USED ONLY FOR RECORD KEEPING BY WINNEBAGO INDUSTRIES The completed form does not constitute an actual change of ownership...
-
Page 7: Table Of Contents
TABLE OF CONTENTS Electronic Compass & Outside INTRODUCTION About This Manual ........0- 1 Thermometer..........2- 9 Freightliner Chassis Operating Guide... 0- 1 Remote Controlled Spot/Flood Light ..2- 10 Diesel Engine Manual........0- 1 Seats ............2- 11 Owner’s InfoCase ......... 0- 2 Seat Belts ............ - Page 8 TABLE OF CONTENTS Effects of Prolonged Occupancy ....4- 7 Microwave/Convection Oven ....... 8- 7 Humidity and Condensation ......4- 7 Range Hood ..........8- 7 SECTION 5: LP GAS SYSTEM OnePlace Systems Monitor Panel....8- 7 LP Gas Supply ..........5- 1 LP Gas Level ..........
- Page 9 TABLE OF CONTENTS Automotive 12-Volt Fuses and Circuit Breakers ........9- 8 SECTION 10: STORING YOUR MOTOR HOME Preparing Vehicle for Storage..... 10- 1 Cold Weather Storage Procedure (Winterizing)........... 10- 1 RV Antifreeze Water Line Winterization Systems ........... 10- 4 Removal from Storage ........
-
Page 11: Introduction
Congratulations on the purchase of your new This manual should be kept in the vehicle at all times for personal reference. The operator’s Winnebago Journey motor home, which has been manual, I and chassis operating guide carefully designed, engineered and quality built are to be considered permanent components of by Winnebago Industries, Inc. -
Page 12: Owner's Infocase
WARRANTY proper clearance for maneuvering. If necessary, have a passenger help guide you out of a difficult Your new Journey is covered by a factory parking space. warranty against defects in material and work- Although your coach features automotive manship. -
Page 13: Reporting Safety Defects
National Highway Traffic Safety Administration (NHTSA) in addition to notifying Winnebago Industries, Inc. If NHTSA receives similar complaints, it may open an investigation, and if it finds that a safety defect exists in a group of vehicles, it may order a recall and remedy campaign. -
Page 14: Vehicle Certification Label
5. Gross Axle Weight Rating: Total permissi- signifies a Multi-purpose Passenger Vehicle. ble weight allowed for the front and rear 13. Model: Lists the Winnebago product model axles (listed in pounds and kilograms). number of your vehicle. 6. Suitable Tire Choice: Tires recommended to 14. -
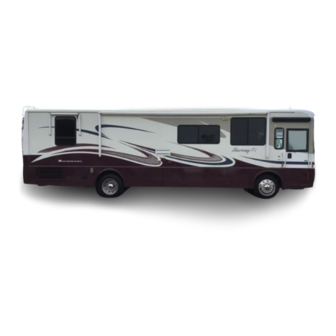
Page 15: Exterior Feature Identification
INTRODUCTION EXTERIOR FEATURE IDENTIFICATION Actual locations of features depends on coach model and options. NOTE: Some equipment shown may be optional. **Also contains diesel fuel filter/water separator. *Also contains optional freezer unit if equipped. *Also contains Cable TV and Phone hookups and engine block heater plug-in. !Be Careful! Exhaust outlet surface may become HOT while using furnace or water heater. -
Page 17: Section 1: Safety Precautions
SECTION 1 SAFETY PRECAUTIONS About Safety Messages Used in This Manual The following pages provide safety precau- Throughout this manual, certain items are la- tions that must be adhered to. These precautions beled Note, Caution, Warning or Danger. These as well as others that involve possible injury or terms alert you to precautions that may involved damage to equipment are also displayed in the damage to your vehicle or a risk to your personal... -
Page 18: Driving
SECTION 1 SAFETY PRECAUTIONS · Avoid inhaling exhaust gases produced by should also be done before beginning a vaca- burned gasoline, diesel fuel or LP gas in tion or any extended trip. items such as the range, chassis engine, gen- erator engine, refrigerator, furnace and water heater. -
Page 19: Lp Gas Leaks
SECTION 1 SAFETY PRECAUTIONS · The following warning label is located in the cooking area to remind you to provide an ad- LP GAS ALARM equate supply of fresh air for combustion. Your coach is equipped with an LP gas detec- tor which sounds an alarm if an unsafe amount of WARNING LP gas is present inside the coach. -
Page 20: Electrical
SECTION 1 SAFETY PRECAUTIONS If the coach batteries become extremely drained, an amber light on the face of the alarm ELECTRICAL will come on and in some cases the LP alarm may begin to sound on its own. This condition typical- ·... -
Page 21: Maintenance
SECTION 1 SAFETY PRECAUTIONS NOTE: Your motor home’s load capacity is des- ignated by weight, not by volume, so you IMPORTANT cannot necessarily use all available To aid in dissipation, ventilate the vehicle by opening all windows and circulating the air with space when loading your motor home. -
Page 22: Emergency Exits
SECTION 1 SAFETY PRECAUTIONS · Battery operation provides protection 100% 1. Set fan to medium or high speed and vent of the time. Low battery signal alerts consum- control to air. er of need to replace battery. 2. On vehicles equipped with air conditioning, ·... -
Page 23: Fire Extinguisher
SECTION 1 SAFETY PRECAUTIONS releasing these two latches and then pushing out- We recommend that you become thoroughly ward on the lower part of the window. familiar with the operating instructions displayed on the side of the fire extinguisher or in the infor- mation supplied in your Owner’s InfoCase. - Page 24 SECTION 1 SAFETY PRECAUTIONS smoke in a careful, fire-safe manner into your smoke alarm. Press to Test 2. Your smoke alarm will not work without power. Never remove the battery to quiet the alarm. When your smoke alarm “beeps” about once a minute the battery is weak. Install a new battery immediately.
-
Page 25: Driving Your Motorhome
SECTION 2 DRIVING YOUR MOTORHOME (See also Safety Precautions, Section 1 of this manual.) WARNING NOTE: See your Freightliner chassis operator's manual for information on starting the The engine should be shut off unless engine, operating the transmission, specifically required for a certain pro- steering column controls, descriptions of cedure. -
Page 26: Fuel Selection
The key number for your coach is registered in Diesel Fuel Tank Capacity... 90 gal. diesel our factory database, so if you ever lose your keys, any Winnebago Industries dealership can easily order a new key for you. They are also STARTING AND... -
Page 27: Engine Block Heater
SECTION 2 DRIVING YOUR MOTOR HOME See also “Engine Block Heater” elsewhere in To Use the Engine Heater this section. With the shoreline cord plugged into a shore- line hookup, turn on the engine heater power Cold Weather Starting: Please note the follow- switch. -
Page 28: Engine Exhaust Braking System
SECTION 2 DRIVING YOUR MOTOR HOME left of the ignition switch. Push the knob in to re- lease the brakes. Exhaust Brake Switch How It Works: The exhaust brake generates “braking” power by controlled restriction of the Parking Brake Knob engine’s exhaust gas flow. -
Page 29: Entrance Door Lock And Handle
SECTION 2 DRIVING YOUR MOTOR HOME To lock the door from inside, rotate the lock levers as indicated. The deadbolt lock is for add- ed security and should be used as a security night lock. Door Handle Lock Hazard Light Switch Pull On/Push Off ENTRANCE DOOR LOCK AND HANDLE... -
Page 30: Electric Entrance Step
SECTION 2 DRIVING YOUR MOTOR HOME Lock: When you leave the coach, simply press same direction (+/-) as old battery. the “lock” button on the remote transmitter 5. Close case and replace case screws. attached to your key ring. The entrance door will The compact 12 volt battery used in these lock. -
Page 31: Stepwell Cover
SECTION 2 DRIVING YOUR MOTOR HOME door is opened or closed. This is done by means of a magnetic door switch attached to the lower WARNING hinged edge of the screen door section of the entrance doors. The steps will extend when the screen door is opened, and retract when the Do not use steps unless it is fully screen door is closed. -
Page 32: Luggage Compartment Doors
SECTION 2 DRIVING YOUR MOTOR HOME Select the mirror to be adjusted by pushing the switch in the middle of the control to the right or CAUTION left. Then press the arrow buttons as necessary to obtain the best view. Stay clear of entrance step area when When mirrors are adjusted to preference, stepwell is being extended or retract-... -
Page 33: Sony Rearview Tv Monitor System
SECTION 2 DRIVING YOUR MOTOR HOME ELECTRONIC COMPASS & OUTSIDE THERMOMETER COMPASS OPERATION The compass has two (2) buttons - MODE and °F/°C - which are used to change the unit between the various operating modes. Ignition On Operation: 1. Unit displays outside temperature and com- Lock Screws pass heading. -
Page 34: Remote Controlled Spot/Flood Light
SECTION 2 DRIVING YOUR MOTOR HOME 2. Unit displays temperature and heading for mended to change the zone setting when traveling to a new zone in the U.S. To change the ten (10) seconds; the display stays ‘on’ if zone setting, follow steps (1.) through (3.) of the you continue to push either button and then CALIBRATION ROUTINE, at which point the returns to SLEEP MODE ten (10) seconds... -
Page 35: Seats
SECTION 2 DRIVING YOUR MOTOR HOME Directional Spot/Flood On/Off Lift to Recline Controls Focus Button L-R/Up-Down To Swivel Seat: Pull swivel release paddle out- ward. Paddle is located on lower right side of seat. 6-Way Power Seat Controls SEATS The power seat controls are located on the lower right hand side of the driver seat base. - Page 36 SECTION 2 DRIVING YOUR MOTOR HOME • Lift the recliner lever and let the seat back tilt forward to clear the steering wheel. • Swivel the seat the rest of the way to face the living area. • Position the tilt wheel down and the column all the way in to provide maximum clearance to recline the seat.
-
Page 37: Seat Belts
SECTION 2 DRIVING YOUR MOTOR HOME THREE-POINT LAP- SEAT BELTS SHOULDER BELTS Seats intended for occupancy while the vehi- The driver and co-pilot seat belts in your cle is in motion are equipped with seat belts for coach are equipped with automatic locking re- the protection of the driver and passengers. -
Page 38: Child Restraints
SECTION 2 DRIVING YOUR MOTOR HOME Check for cuts, frays, and loose parts. Dam- aged parts should be replaced. Do not remove or modify the belt system. • Keep belts clean and dry. If the belts need cleaning, use only a mild soap and water solution. - Page 39 SECTION 2 DRIVING YOUR MOTOR HOME 4. Review the instructions for installation and use of the restraint. Be sure that you under- stand them fully and can install the restraint properly and safely in your vehicle. 2-15...
- Page 40 SECTION 2 DRIVING YOUR MOTOR HOME INSTRUMENT PANEL 12. Cigarette Lighter/12V Socket 1. Rearview Monitor Speaker 13. Radio/Cassette CD Player 2. Windshield Wiper/Washer Switch 14. Automotive Heater/AC Controls 3. Aux. Start Switch 15. TV Antenna Check Light 4. Fog Lamps Switch 16.
-
Page 41: Multi-Function Signal Lever
SECTION 2 DRIVING YOUR MOTOR HOME MULTI-FUNCTION SIGNAL LEVER The multi-function signal lever controls the turn signals, high/low beam changing, and the electronic speed control (cruise). See your chassis operating guide for complete operating information. Pull to Tilt Push to Telescope To Adjust Telescoping Column: Push the lever toward the dash. -
Page 42: Windshield Wash/Wipe Switch
SECTION 2 DRIVING YOUR MOTOR HOME WINDSHIELD WASH/WIPE SWITCH Wash: Press the control knob to pump washer solution onto the windshield. The wiper will also begin operating. The wiper will continue for 5 wipes after you release the washer knob. Fan Speed Temp Mode... -
Page 43: Antenna Check Light
SECTION 2 DRIVING YOUR MOTOR HOME ellite dish are lowered completely into the roof cradle for travel storage. VENTILATION A. To vent outside air into the vehicle when nei- ther heating or cooling is required. 1. Turn the mode selection knob to vent. 2. -
Page 44: Compact Disc Changer
SECTION 2 DRIVING YOUR MOTOR HOME tons and using this full-featured radio/audio sys- tem. COMPACT DISC CHANGER - Radio Power Switch Optional The radio power switch lets you connect the dash radio to the coach batteries with the ignition The remote CD changer is located out of sight switch turned off for listening while parked. -
Page 45: Auxiliary Battery (Aux. Batt) Switch
SECTION 2 DRIVING YOUR MOTOR HOME CB Wires (in plastic sheath) Press while turning ignition key for emergency starting power if engine battery is dead. SWR Adjustment To adjust CB antenna SWR (standing wave AUXILIARY BATTERY (Aux. Batt) ratio), turn the adjusting rings of the antenna to SWITCH achieve the lowest SWR reading. -
Page 46: Hydraulic Coach Leveling System
SECTION 2 DRIVING YOUR MOTOR HOME Leveling System Control Panel CAUTION The CB radio could become damaged if CB antenna SWR is not adjusted before operating CB radio. NOTE: When parking at an uneven site, always park the front of the motor home to the downhill side. -
Page 47: Slideout Room Extension
SECTION 2 DRIVING YOUR MOTOR HOME CAUTION Do not try to drive vehicle unless ‘TRAVEL’ light is glowing with igni- tion switch on. Do not try to drive the vehicle until the air suspension system has built up sufficient pressure if you have used the coach leveling system or have used the DUMP button to manually exhaust the air suspension system. - Page 48 SECTION 2 DRIVING YOUR MOTOR HOME Your coach is equipped with a galley/living room slideout extension to enlarge your living area at the push of a button. The slideout room extends and retracts by hydraulic mechanisms with an electronic control system. The lounge slideout switch is located on the lower right dash bezel.
- Page 49 SECTION 2 DRIVING YOUR MOTOR HOME · Level the coach. · Set the Parking Brake. An interlock relay system will then provide power to the slide- out control switches. · Release travel straps (galley). · Press slide-out switch and hold until room is fully extended, then release switch.
- Page 50 SECTION 2 DRIVING YOUR MOTOR HOME Front Slideout Room Emergency Crank-In See the HWH Operator’s manual includ- Procedure (Use only when slideout room will ed in your InfoCase for specific instruc- not retract using control switch) tions on which valves to open for front or If a failure occurs in the slideout electrical or rear slideout rooms and what additional hydraulic systems, and the room will not retract...
- Page 51 SECTION 2 DRIVING YOUR MOTOR HOME · See an authorized Winnebago Industries Step 2A - Attach Winch and Crank Room dealer for service of the room extension sys- Inward (Models with Standard Riser Slide- outs) tem before using again. · Remove the winch from its storage area and Step 2B - (For Models with Flat Floor Slide- hook onto lip of top entrance step as shown.
- Page 52 If an apparent cause is not found, call the number on your Winnebago Industries Premium Roadside Assistance card. They will dispatch a service vehicle to your location to push the room extension in so the coach may be driven to your dealer for service of the slideout control system.
- Page 53 SECTION 2 DRIVING YOUR MOTOR HOME See your Authorized Winnebago Industries Dealer for service of the slideout system before using again. NOTE: When the system has been corrected, check hydraulic fluid level and refill res- ervoir as necessary. Press the Retract switch for 15 to 20 seconds before at- tempting to extend the room.
-
Page 55: Section 3: In Case Of Driving Emergency
When it is necessary to leave the vehicle, the Winnebago Industries does not assume re- flasher system will continue to operate with the sponsibility for damage incurred while towing ignition key removed. -
Page 56: Jump Starting
SECTION 3 IN CASE OF DRIVING EMERGENCY NOTE: Know and obey all state and local towing CONNECTING JUMPER regulations. Tow at reduced speed. CABLES 1. Make sure that the other vehicle has a 12- JUMP STARTING volt battery and negative ground compatible If your coach will not start from the automo- with your vehicle’s electrical system. -
Page 57: Connecting A Battery Charger
SECTION 3 IN CASE OF DRIVING EMERGENCY 9. Reverse the above sequence EXACTLY when removing the jumper cables. Start by WARNING removing the cable from the ground location on the engine first, then continue in reverse Operating a vehicle under a severe sequence. - Page 58 SECTION 3 IN CASE OF DRIVING EMERGENCY necessary. Make sure there are no broken belts, pulleys or hoses before adding any coolant to the coolant reservoir. For further information about overheating, consult your Freightliner chassis operating guide and Caterpillar Diesel Engine manual.
-
Page 59: Loading The Vehicle
SECTION 4 TRAVELING WITH YOUR MOTORHOME (See also SAFETY PRECAUTIONS, Section 1 of this manual.) CAUTION The weight of the loaded vehicle LOADING THE (including options, attachments, pas- VEHICLE sengers, water, fuel, luggage and all other cargo) must not exceed the NOTE: Your motor home’s load capacity is des- GVWR or GAWR of either axle. -
Page 60: Maximum Occupancy
Net Carrying Capacity (NCC) in the U.S. or Cargo Carrying Capacity (CCC) in Can- ada. To calculate the NCC or CCC, Winnebago uses vehicle sleeping capacity, however your coach may be equipped with more belted seat- ing positions than sleeping positions to give pas- sengers a choice of seating arrangements. -
Page 61: Car Or Trailer Towing
SECTION 4 TRAVELING WITH YOUR MOTOR HOME Weight added to both the roof and the trailer hitch contribute to the gross vehicle weight, WARNING which must not exceed the vehicle’s GVWR. For safety towing and vehicle hand- ling, maintain proper trailer weight distribution. -
Page 62: Travel Tips
SECTION 4 TRAVELING WITH YOUR MOTOR HOME - Drive Belts - Check for proper condition and may contain an undesirable taste. Do not use tension (not cracked, frayed, or loose, etc.) a new hose to fill the water tank. It can leave - 110-Volt Generator (Optional) - Check oil a distinct rubber or vinyl taste. -
Page 63: Severe Weather Information
SECTION 4 TRAVELING WITH YOUR MOTOR HOME · If heavy rain occurs, move to high ground im- good parking spot once you have arrived at your destination. mediately (at least 30-40 feet above the can- 16. When you sit over the front wheels while yon floor or bottom of dry wash). -
Page 64: Nighttime Driving
SECTION 4 TRAVELING WITH YOUR MOTOR HOME sary, the weather service will ‘break-in’ with DESCENDING A HILL storm watches and warnings and live reports When going down a long grade, you may need when the situation demands. to manually shift to a lower gear, rather than See the RV Radio manufacturer’s operating keeping your foot on the brake pedal. -
Page 65: Effects Of Prolonged Occupancy
SECTION 4 TRAVELING WITH YOUR MOTOR HOME The refrigerator is installed level at the inside the coach. factory. So, if the refrigerator is level, the motor home is level. A small bubble-level sight is Minimize moisture released inside the coach: included in the refrigerator to help you determine Run the range hood fan while cooking, and open refrigerator leveling. -
Page 67: Section 5: Lp Gas System
SECTION 5 LP GAS SYSTEM (See also Safety Precautions, Section 1 of this at each tank filling. Also inspect before and manual.) after each trip, and any time trouble is sus- pected. · Turn the LP supply valve off when not using the LP gas system. -
Page 68: Selecting Lp Fuel Types
SECTION 5 LP GAS SYSTEM SELECTING LP FUEL TYPES LP TANK SYSTEM We recommend using straight propane in your The storage reservoir for the LP gas system is LP tank. Propane gas is commonly available at a horizontally mounted tank which is permanent- all LP gas outlets in the U.S. -
Page 69: Air In The Lp Gas Tank
SECTION 5 LP GAS SYSTEM NOTE: The LP tank is equipped with an auto- the tank. matic 80% stop-fill device. TRAVEL WITH LP GAS It is illegal for vehicles equipped with LP LP Gas Tank Capacity: tanks to travel on certain roadways or through certain tunnels in the U.S. -
Page 70: Regulator
SECTION 5 LP GAS SYSTEM REGULATOR Be sure vent hole is not blocked The pressure regulator is protected from the elements by a plastic cover which should be left in place at all times. Only your dealer or a quali- fied LP gas service should remove the regulator cover for adjustments. -
Page 71: Winter Use Of Lp Gas
SECTION 5 LP GAS SYSTEM tank is emptied. Nearly twice as many BTU’s are available from a full tank than one that is one- DANGER fourth full. IF YOU SMELL GAS BTU’s Available at 0° F. EXTINGUISH ANY OPEN FLAME, PILOT LIGHTS AND Tank Level BTU’s ALL SMOKING MATERIALS. -
Page 73: Section 6: Electrical Systems
SECTION 6 ELECTRICAL SYSTEMS (See also Safety Precautions, Section 1 of this manual.) Your coach is equipped with an electrical sys- tem consisting of two separate voltages; a 12-volt DC system and a 110-volt AC system. The 12- volt system consists of two internal power sources, while the 110-volt system is operated from an outside power source, or from the optional 110-volt generator or 110-volt inverter... -
Page 74: Connecting The Shoreline
SECTION 6 ELECTRICAL SYSTEMS CONNECTING THE SHORELINE To connect to an external source, remove the cord from the storage compartment and plug it into a suitable 50-amp power receptacle to pro- vide external power to the coach and converter/ charger system. NOTE: Some parks do not have 50-amp service available, so you will need to connect to a standard 30-amp service pole using an... -
Page 75: Powerline Energy Management System (Ems)
SECTION 6 ELECTRICAL SYSTEMS Park Fuses or Breakers Most campgrounds are equipped with a fuse or circuit breaker at the receptacle. This protects POWER CONVERTER the park’s wiring, as well as the power cord on your vehicle, from electrical damage. If electrical SYSTEM power fails, contact the park attendants and have The power converter changes 110-volt AC... -
Page 76: 110-Volt Circuit Breakers
SECTION 6 ELECTRICAL SYSTEMS AC input source from overloads. See the Heart Interface operation information for complete explanation and instructions on this system. House 12V Breakers (below refrigerator) Inverter Charger Unit Location *Typical view of breaker panel. Actual fuse or breaker labels may vary according to appliance and equipment op- tions. -
Page 77: Charging Section
SECTION 6 ELECTRICAL SYSTEMS for an extended period of time or by obstruction of ventilation to unit. NOTE: 12-volt lights and motors will automati- cally draw from battery power in this event. The thermal breaker will reset itself after a cool-down period, and the lights and motors will resume operating from the converter. -
Page 78: Auxiliary 110-Volt Generator
SECTION 6 ELECTRICAL SYSTEMS equipped outlet. AUXILIARY 110-VOLT If the GFCI keeps tripping, have the electrical GENERATOR system checked and repaired if necessary before using again. Consult the generator manufacturer’s infor- The GFCI outlets are located in the bath and mation provided in your Owner InfoCase for galley areas of the vehicle. - Page 79 SECTION 6 ELECTRICAL SYSTEMS switches in two locations inside the coach; in manufacturer’s manual. Then see the follow- addition to the switch on the generator itself: ing electrical load chart to estimate your typ- ical loads. · Instrument Panel · Systems Monitor Panel (One Place) Stopping The generator starter circuit does not rely on •...
-
Page 80: Operation Warnings And Cautions
SECTION 6 ELECTRICAL SYSTEMS OPERATION WARNINGS AND CAUTIONS 12-VOLT DC SYSTEM WARNING The DC voltage system consists of the auto- motive batteries and the 12-volt coach auxiliary The exhaust of all internal combus- batteries. tion engines contains carbon monox- ide (CO). This poisonous gas is 12-VOLT FUSES AND CIRCUIT colorless, odorless, tasteless, and BREAKERS... -
Page 81: Solar Charger Panel
SECTION 6 ELECTRICAL SYSTEMS NOTE: The solar battery charger is not intended to make the coach battery system “main- Auto Chassis 12-Volt Breaker Panel tenance free.” The solar panel will not completely compensate for continuous low amperage draw from components such as the LP gas leak detector, the clock in the dash radio and the radio sta- tion memory circuitry, for example. -
Page 82: House Batteries
SECTION 6 ELECTRICAL SYSTEMS or sulfating, and prevents the battery from either releasing or accepting a charge. If this condition occurs, the battery must be replaced. If a battery does not contain at least 80% charge during freezing temperatures, the electro- lyte can freeze and crack the battery case. -
Page 83: Battery Condition Meter
SECTION 6 ELECTRICAL SYSTEMS · Clean and tighten battery terminals and have BATTERY CONDITION METER the specific gravity checked at least once a See related item under “Monitor Panel” in sec- year. tion 8, Appliances. · Every two months, or more often in hot AUX. -
Page 85: Section 7: Plumbing Systems
SECTION 7 PLUMBING SYSTEMS FRESH WATER SYSTEM FRESH WATER TANK FILLING PROCEDURES: Always fill the fresh water tank at an approved Fresh Water Tank..86 gal. potable water filling facility or a known purified drinking water source. The fresh water system provides water to the galley sink, shower, bathroom lavatory, toilet and To Pressure Fill Water Tank from City Water water heater. -
Page 86: Water Pump
SECTION 7 PLUMBING SYSTEMS connect in-line between the supply hose Pump Strainer Filter and the city water input on the coach. The pump is equipped with a cleanable strain- er filter to capture any possible tank borne parti- We recommend a regulator that controls cles that could damage pump components. -
Page 87: Accumulator Tank
SECTION 7 PLUMBING SYSTEMS While any pump switch is in the “ON” posi- tion, the pump will automatically supply water pressure as it is needed. It is recommended that the pump switch be turned off whenever you are away from the vehicle or not using the water sys- tem. -
Page 88: External Water Supply (City Water)
SECTION 7 PLUMBING SYSTEMS INSTRUCTIONS FOR DISINFECTION OF FRESH WATER SYSTEMS ON RECREATION EXTERNAL WATER VEHICLES SUPPLY (“City Water”) (As approved by the U.S. Public Health Service) To connect to an external source: To assure complete disinfection of your fresh 1. -
Page 89: Water Purifier (Filter) System
SECTION 7 PLUMBING SYSTEMS individual faucets and toilet. A check valve built Replacing the water filter cartridge: into the pump prevents water from entering the Replace the filter cartridge when water flow from pump and filling the storage tank. the purifier faucet is too slow for convenience. ·... -
Page 90: Waste Water System (Holding Tanks)
SECTION 7 PLUMBING SYSTEMS tank. Grey water also rinses any black water solids from the drain hose. Exterior Shower 3. Close sewage valve and open waste (grey) water dump valve with a quick pull. Close valve handle as soon as tank is empty. WASTE WATER SYSTEM 4. -
Page 91: Using On-Site Sewer Hook-Ups
SECTION 7 PLUMBING SYSTEMS 2. Leave black water dump valve open while When using a sewer hook-up, keep the dump flushing tank. valves closed until a tank becomes full or when 3. Attach a garden hose from a city water preparing to leave the site. - Page 92 SECTION 7 PLUMBING SYSTEMS Drain Plug Water Line Drain Valves Water Heater (in water center compartment) Service Access The fresh water tank drain valve is operated by pulling on a T-handle for a cable that is located in in the waste dump valve compartment. •...
-
Page 93: Holding Tank Capacities
SECTION 7 PLUMBING SYSTEMS HOLDING TANK CAPACITIES Black Water Holding Tank Models 32T & 36C ........................52 gal. Models 34H & 36L ........................48 gal. Grey Water Holding Tank Model 32T..........................42 gal. Model 34H & 36L........................52 gal. Model 36C ..........................48 gal. -
Page 95: Refrigerator
SECTION 8 APPLIANCES & INTERIOR FEATURES (See also Safety Precautions, Section 1 of A small round bubble level is provided with your refrigerator. Place the bubble level on the this manual.) bottom surface of the refrigerator and watch the NOTE: Some items described in this section may position of the bubble in relation to the circle in be optional and, therefore, may not be in top of the level. - Page 96 SECTION 8 APPLIANCES & INTERIOR FEATURES Normal vehicle leveling to provide comfort for the occupants is satisfactory for refrigerator operation. This will be well within the operation limits of 3° off-level side-to-side and 6°off-level front-to-back. OPERATING INSTRUCTIONS The ON/OFF button turns the refrigerator on or off.
- Page 97 SECTION 8 APPLIANCES & INTERIOR FEATURES During operation in the AUTO mode, when operating controls will select an alternate power a higher priority power source becomes avail- source (AUTO Mode) or MANUAL mode, will able, the operating controls will cease using the revert to a stand-by mode in which an alarm will current power source and will switch to the sound and code A1 will be displayed in the cen-...
- Page 98 SECTION 8 APPLIANCES & INTERIOR FEATURES and humidity heater and allows the refrigerator Operating the Ice Maker door to be left open for airing without draining 1. Connect the coach shoreline to a 110VAC the battery. source and switch the refrigerator to AUTO (AC electric) mode.
- Page 99 SECTION 8 APPLIANCES & INTERIOR FEATURES bin to the freezer, remember to lower the 5. Let the ice maker cycle and dump the first shut-off arm (on). If the arm is up, the ice batch of ice. maker will not operate. Troubleshooting the Ice Maker 1.
-
Page 100: Lp Gas Cooktop
SECTION 8 APPLIANCES & INTERIOR FEATURES 9. Water over-filling molds: A. Excessive water pressure. B. Faulty water solution - stuck on. 10. Water not freezing: A. Refrigerator problem. 11. Ice not ejecting: A. 110VAC power not connected. B. Mold heater not working - replace ice maker. -
Page 101: Microwave/Convection Oven
SECTION 8 APPLIANCES & INTERIOR FEATURES WARNING IT IS NOT SAFE TO USE COOKING APPLIANCES FOR COMFORT HEATING Cooking appliances need fresh air for safe operation. Before operation 1. Open overhead vent or turn on exhaust fan. 2. Open window FAILURE TO COMPLY COULD RESULT IN DEATH OR SERIOUS INJURY. -
Page 102: Oneplace Systems Monitor Panel
SECTION 8 APPLIANCES & INTERIOR FEATURES See the manufacturer’s information in your Owner InfoCase for instructions on replacement of light bulbs and grease filter elements. One Place Monitor Panel Generator Start/Stop Switch See Section 6, Electrical Systems for genera- SYSTEMS MONITOR LACE tor start-up and shut-down instructions. -
Page 103: Lp Gas Level
SECTION 8 APPLIANCES & INTERIOR FEATURES The approximate water levels are measured by For your convenience, additional switches are sets of electronic probes in the sides of the tanks, located in the bathroom and in the water center so the water must be touching a probe to register compartment. -
Page 104: Washer Dryer
SECTION 8 APPLIANCES & INTERIOR FEATURES • A 12-volt battery typically registers any- where from 12.5V to 13V when adequately charged. • Voltage below 12.5V indicates a discharged condition; 12V or less is dead. • Voltage above 13V typically indicates that the battery is being charged by the inverter charger system. - Page 105 • If you cannot reach a Winnebago Industries dealer or a local gas supplier, call the fire department. • Have the source of the leak corrected before using the LP gas system again.
- Page 106 SECTION 8 APPLIANCES & INTERIOR FEATURES you don’t smell gas, go to the next step. 5. Turn on LP gas main tank valve. 6. Turn on the water heater switch on the moni- tor panel. You may hear a clicking noise as the ignition element begins working.
-
Page 107: Motor Aid
SECTION 8 APPLIANCES & INTERIOR FEATURES 2. Open a faucet in the motor home to relieve water pressure. CAUTION 3. Pull the handle of the P-T valve straight out and allow water to flow until it stops. Any leak in the heat exchanger or its supply or return lines could cause loss of coolant and subsequent engine fail- ure. -
Page 108: Lp Gas Furnace (Suburban)
SECTION 8 APPLIANCES & INTERIOR FEATURES Temperature Selector LP GAS FURNACE (SUBURBAN) To Start Up: 1. Open the LP gas tank valve by turning fully counterclockwise 2. Move FAN MODE switch to Auto and place FAN SPEED switch in desired position - Lo or Hi. -
Page 109: Heat Pump
SECTION 8 APPLIANCES & INTERIOR FEATURES On/High: A/C compressor cycles on and off with the thermostat while fan runs continu- ously at high speed. Auto/Low: Fan runs at low speed and cycles on and off with the A/C compressor as con- trolled by the thermostat. -
Page 110: Central Air Conditioner
SECTION 8 APPLIANCES & INTERIOR FEATURES tures begin to reduce the efficiency of the heat pump. The heat pump will not operate when the outside temperature falls below 36 degress F. To Operate the Heat Pump: • Slide the thermostat switch to electric heat mode. - Page 111 SECTION 8 APPLIANCES & INTERIOR FEATURES (See “Condenser Coils”) The cooled air is forced through ducts in the ceiling of the coach. Inside air returns to the air conditioner through a filter system beneath the rear bed. (See “Air Condi- tioner Filters”.) Air Conditioner Filter The disposable furnace type filter is located in...
-
Page 112: Tv Antenna
SECTION 8 APPLIANCES & INTERIOR FEATURES TV ANTENNA The TV antenna on your motor home can be easily raised, rotated a full 360° and lowered from inside the vehicle by simply turning a crank Lowering Antenna to Travel Position - or rotating knob. -
Page 113: Digital Satellite Television System
SECTION 8 APPLIANCES & INTERIOR FEATURES To operate amplifier, turn on power switch. mitted in digital format so the quality is equal to A red indicator light will glow while the signal laser disc or CD. amplifier is in use. See your Winegard RV Digital Satellite Antenna System Owner’s Manual for instruc- tions about aiming the satellite antenna dish. -
Page 114: Exterior Entertainment Center
SECTION 8 APPLIANCES & INTERIOR FEATURES Signal Inputs: ANT - Press to connect selected TV or VCR to the roof antenna. AUX - Press to connect selected TV or VCR to cable TV input or Satellite TV system. VCR - Press to connect selected TV to the video- cassette recorder/player. -
Page 115: Bedroom Radio
SECTION 8 APPLIANCES & INTERIOR FEATURES Rear Phone Jack: In the bedroom, near the radio on the nightstand. BEDROOM RADIO - Optional The bedroom may be optionally equipped with a built-in stereo radio system in the left rear nightstand cabinet. This radio features AM/FM stereo radio with electronic seek/scan tuning and a full featured alarm clock mode. -
Page 116: Rest Easy Multi-Position Lounge
SECTION 8 APPLIANCES & INTERIOR FEATURES Grasp the end of the table firmly and pull away from the wall, exposing the leaf. WARNING Pull the leaf upward out of the pocket using the handle provided. Be sure all loose items are secured or stored properly while the vehicle is in motion. - Page 117 SECTION 8 APPLIANCES & INTERIOR FEATURES To Recline: Press the switch on the front of the armrest. Press ‘down’ to recline; ‘up’ to return upright. CAUTION Do not recline the lounge completely flat unless the footrest section is extended. The gap between the footrest and seat pro- vides ample room to enter and exit the lounge.
-
Page 118: Swivel Glider Lounge Chair
SECTION 8 APPLIANCES & INTERIOR FEATURES Reverse steps to revert to lounge. Glide Lock Hoop Chair Mount The hoop base of lounge swivel glider is CAUTION mounted to the floor with a clamp as shown. To not recline the lounge completely flat unless the footrest trundle section is extended. -
Page 119: Fresh Water Toilet
SECTION 8 APPLIANCES & INTERIOR FEATURES 2. To flush the toilet, press the flush pedal down until sewage leaves the toilet and bowl CAUTION is rinsed clean. 3. Release the flush pedal. A small amount of The chair must be clamped back into water should remain in the bowl. -
Page 120: Power Roof Vent
SECTION 8 APPLIANCES & INTERIOR FEATURES 3. Add odor control chemical in amount speci- Fan On/Off Fuse Fan Speed Switch Selector fied after cleaning and every few days during use. 4. Remove the water line from the base of the toilet and clean the screen. - Page 121 SECTION 8 APPLIANCES & INTERIOR FEATURES and gently free the glass with your fingers. A pe- riodic light dusting of talcum powder on the gas- ket should prevent this from recurring. SLIDER WINDOWS Swing the latch handle straight out from the window.
-
Page 123: Roof
Appropri- to-roof seams, etc., should also receive immedi- ate compounds are sold at Winnebago and Itasca ate attention. Delaying these repairs may allow dealers, and the materials are quickly and easily water leakage and result in damage to interior applied. -
Page 124: Care Of Stripes And Decals
This will enhance the gelcoat’s gloss and color and prevent stains. It is COMPARTMENT DOORS best to let your Winnebago Industries RV dealer Apply powdered graphite lubricant to com- evaluate the situation before using an automotive partment door latches periodically as necessary polishing compound. - Page 125 SECTION 9 CARE & MAINTENANCE can detract from the appearance and shorten the ceive immediate attention. Consult a professional lift of carpet and fabrics. carpet and upholstery cleaner for assistance. Upholstery Leather Upholstery - Driver/Co-Pilot Seats & Sofa - (Optional) Some fabrics used in this motor home may The optional leather seats are made of top contain fire retardant and lightfastness additives...
- Page 126 SECTION 9 CARE & MAINTENANCE response is the best, especially when done in con- Care of Ceiling Fabric While using your coach, your ceiling fabric junction with the proper cleaner from the type of may become soiled and require spot cleaning stain.
-
Page 127: Cabinetry
SECTION 9 CARE & MAINTENANCE NOTE: In many cases listed above, repeated NOTE: Cabinetry and furniture items through- steps may be required to fully extract out this motor home are constructed ei- contaminant from material. Items listed ther partially or completely of real above with (*) may also be removed hardwoods. -
Page 128: Range And Refrigerator
SECTION 9 CARE & MAINTENANCE trouble-free operation and to protect against freeze-up. RANGE AND REFRIGERATOR For care and appearance maintenance of the range and refrigerator, refer to the operation and VEHICLE maintenance manual for each of the individual MAINTENANCE appliances included in your Owners InfoCase. (See also Safety Precautions, Section 1 of this manual). -
Page 129: Engine Top Cover
SECTION 9 CARE & MAINTENANCE Unlock the service panel and swing it upward. ENGINE TOP COVER The engine top cover is located beneath the rear bed. This cover is only removed for replace- ment of engine parts or if a complete view of the engine is needed for inspection. -
Page 130: Suspension Alignment And Tire Balance
SECTION 9 CARE & MAINTENANCE WINDSHIELD WASHERS AND WARNING WIPERS See your chassis operating guide for recom- Make sure all replacement tires are of mendations, precautions and replacement infor- the same size and ply rating as those mation on washers and wipers. installed as original equipment. - Page 131 SECTION 9 CARE & MAINTENANCE The circuit breakers will pop outward if they are tripped. Simply push in to reset. Always replace plug-in type fuses with those of the same amperage size. Twist Locks to Remove Cover Automotive Fuse/Breaker (Behind “Hood” Panel) GOOD FUSE BAD FUSE PLUG-IN FUSES...
-
Page 133: Section 10: Storing Your Motor Home
SECTION 10 STORING YOUR MOTOR HOME Close dump valves and refit the dust cap PREPARING VEHICLE FOR onto the drain outlet. STORAGE 2. Level the motor home and drain the entire plumbing system as described in the follow- Properly preparing your vehicle for storage ing steps. - Page 134 SECTION 10 STORING YOUR MOTOR HOME NOTE: If your coach is equipped with the refrig- NOTE: Before using again the following erator ice maker option, the ice maker spring: water lines must also be drained. See “Winterizing the Ice Maker” on page •...
- Page 135 (A “blow-out” plug can sink drain and shower drain. This prevents be purchased at any Winnebago or Itasca any holding tank odors from entering the dealer. P/N 701705-01-000.) coach during storage.
-
Page 136: Rv Antifreeze Water Line Winterization Systems
SECTION 10 STORING YOUR MOTOR HOME tem. This product is available from and lubricated. Be sure radiator antifreeze your dealer and from most RV supply protection level is sufficient for the lowest stores. Follow directions on the con- anticipated temperatures. tainer to determine the correct 24. - Page 137 SECTION 10 STORING YOUR MOTOR HOME partment near the rear wheels on the driver side of the coach. RV Antifreeze Draw Tube (in water center or near water pump) Winterizing System Siphon Tube (Typical) To Fill Lines with RV Water Line Antifreeze: •...
-
Page 138: Removal From Storage
SECTION 10 STORING YOUR MOTOR HOME 2-6 above) to remove and rinse the RV after the draining the water heater at the ser- antifreeze from the machine. vice panel on the outside of the coach. If you should wish to fill the water heater tank with antifreeze solution, leave this switch off. - Page 139 SECTION 10 STORING YOUR MOTOR HOME pounds are available from your dealer. Also inspect weather seals around doors, etc., and if necessary, have a dealer replace immedi- ately. 10-7...
- Page 141 INDEX 110-Volt AC System........6- 1 Chassis (Starting) Battery ......6- 9 110-Volt Circuit Breakers......6- 4 Chassis Service & Maintenance ....9- 6 110-Volt Receptacles ........6- 5 Child Restraints........... 2- 14 12-Volt Chassis Circuit Breakers ....6- 8 Cold Weather Storage Procedure 12-Volt DC System........
- Page 142 INDEX Formaldehyde Information ......1- 5 LP Gas Leaks ..........5- 4 Freightliner Chassis Operating Guide... 0- 1 LP Gas Output ..........5- 2 Fresh Water System ........7- 1 LP Gas Supply ..........5- 1 Fresh Water Toilet ........8- 25 LP Gas Tank Capacity ........
- Page 143 INDEX RV Radio ............ 2- 18 Waste Water System (Holding Tanks) ..7- 6 Water Drain Valves ........7- 7 Water Heater By-Pass Valve ...... 8- 13 Safe Use of the LP Gas System ....5- 1 Water Heater Switch and "Pilot Out" Seat Belts ............
- Page 145 IMPORTANT SERIAL NUMBERS Motor Home (Coach): Year _________ Model ___________________ Serial _____________ Chassis: Make ___________________ Serial (VIN) ______________ Roof Air Conditioner: Brand ___________ Model ____________ Serial _ ___________ Furnace: Brand ___________ Model ____________ Serial _ ___________ Water Heater: Brand ___________ Model ____________ Serial _ ___________ Power Converter: Brand ___________ Model ____________ Serial _ ___________ 110-Volt Generator:...
- Page 146 MAINTENANCE RECORD Odometer Date Mileage Description of Service Cost...
- Page 147 FUEL & OIL RECORD Odometer Fuel Odometer Fuel Date Mileage Gal. Qts. Cost Date Mileage Gals. Qts. Cost...
- Page 148 FUEL & OIL RECORD Odometer Fuel Odometer Fuel Date Mileage Gal. Qts. Cost Date Mileage Gals. Qts. Cost...
Need help?
Do you have a question about the Journey and is the answer not in the manual?
Questions and answers