
Related Manuals for Ricoh K-C1


Summary of Contents for Ricoh K-C1
-
Page 1: Service Manual
Model K-C1 (Machine Code: B039/B040/B043) SERVICE MANUAL February 20th, 2001 Subject to change... -
Page 2: Important Safety Notices
IMPORTANT SAFETY NOTICES PREVENTION OF PHYSICAL INJURY 1. Before disassembling or assembling parts of the copier and peripherals, make sure that the power cord is unplugged. 2. The wall outlet should be near the copier and easily accessible. 3. Note that some components of the copier and the paper tray unit are supplied with electrical voltage even if the main power switch is turned off. - Page 3 LASER SAFETY The Center for Devices and Radiological Health (CDRH) prohibits the repair of laser-based optical units in the field. The optical housing unit can only be repaired in a factory or at a location with the requisite equipment. The laser subsystem is replaceable in the field by a qualified Customer Engineer.
-
Page 4: Table Of Contents
TABLE OF CONTENTS 1 INSTALLATION ................1-1 1.1 INSTALLATION REQUIREMENTS ............1-1 1.1.1 ENVIRONMENT ................1-1 1.1.2 MACHINE LEVEL ................1-2 1.1.3 MINIMUM SPACE REQUIREMENTS..........1-3 1.1.4 POWER REQUIREMENTS ..............1-3 1.2 COPIER INSTALLATION ................1-4 1.2.1 POWER SOCKETS FOR PERIPHERALS ........1-4 1.2.2 ACCESSORY CHECK..............1-4 1.2.3 INSTALLATION PROCEDURE ............1-5 1.3 PLATEN COVER INSTALLATION ............1-8 1.3.1 ACCESSORY CHECK..............1-8 1.3.2 INSTALLATION PROCEDURE ............1-8... - Page 5 3.1.4 LASER UNIT ..................3-2 3.1.5 FUSING UNIT...................3-2 3.1.6 PAPER FEED...................3-2 3.1.7 IMPORTANT ..................3-2 3.2 SPECIAL TOOLS AND LUBRICANTS ............3-2 3.3 EXTERIOR COVERS & OPERATION PANEL ..........3-3 3.3.1 REAR COVER..................3-3 3.3.2 REAR LOWER COVER (TWO-TRAY MODELS ONLY)....3-3 3.3.3 COPY TRAY..................3-4 3.3.4 LEFT UPPER COVER..............3-4 3.3.5 FRONT UPPER LEFT COVER AND OPERATION PANEL .....3-4 3.3.6 RIGHT UPPER COVER ..............3-4 3.3.7 TOP REAR COVER................3-4...
- Page 6 3.6.5 CHARGE ROLLER AND CLEANING BRUSH........3-24 3.6.6 CLEANING BLADE.................3-24 3.6.7 DEVELOPER..................3-25 3.6.8 AFTER REPLACEMENT OR ADJUSTMENT.........3-26 3.7 TONER SUPPLY MOTOR ..............3-27 3.8 PAPER FEED SECTION.................3-28 3.8.1 PAPER FEED ROLLER..............3-28 3.8.2 FRICTION PAD ................3-28 3.8.3 PAPER END SENSOR..............3-28 3.8.4 EXIT SENSOR ................3-29 Non-duplex Models ................3-29 Duplex Models ..................3-29 3.8.5 BY-PASS FEED ROLLER AND...
- Page 7 3.12.3 IMB (MEMORY BOARD) ..............3-45 3.12.4 BICU (BASE-ENGINE IMAGE CONTROL UNIT) ......3-45 3.12.5 IOB (I/O BOARD)................3-46 3.12.6 MAIN MOTOR ................3-46 3.12.7 REAR EXHAUST FAN..............3-46 3.12.8 LEFT EXHAUST FAN..............3-47 3.12.9 PSU (POWER SUPPLY UNIT).............3-47 3.12.10 GEARBOX..................3-48 Replacement Procedure ..............3-48 Gear Arrangement Within the Gearbox..........3-49 3.13 COPY ADJUSTMENTS: PRINTING/SCANNING ........3-50 3.13.1 PRINTING ..................3-50 Registration - Leading Edge/Side-to-Side...........3-50...
- Page 8 5.1.3 INPUT CHECK (SP5-803) ..............5-32 5.1.4 OUTPUT CHECK (SP5-804) ............5-36 Output Check Table ................5-36 5.1.5 COPY JAM HISTORY (SP7-903) ...........5-37 5.1.6 SMC PRINTING (SP5-992) ............5-38 5.1.7 ORIGINAL JAM HISTORY DISPLAY (SP7-905) ......5-38 5.1.8 MEMORY ALL CLEAR (SP5-801) ..........5-39 Using a Flash Memory Card ...............5-39 Without Using a Flash Memory Card ..........5-40 5.1.9 PROGRAM UPLOAD/DOWNLOAD ..........5-41 Program Download (SP5-827)............5-41...
- Page 9 By Original Type .................6-15 6.5.4 IPU (IMAGE PROCESSING UNIT)..........6-16 Overview.....................6-16 Image Processing Modes ..............6-17 Image Processing Path...............6-18 Original Modes..................6-19 SP Modes for Each Image Processing Step ........6-19 Auto Shading ..................6-21 White Line Erase ................6-22 Black Line Erase .................6-22 Scanner Gamma (γ) Correction ............6-23 Main Scan Magnification..............6-24 Mirroring for ADF Mode ..............6-24 Filtering ....................6-25...
- Page 10 6.9.7 TONER SUPPLY IN ABNORMAL SENSOR CONDITIONS...6-48 ID Sensor....................6-48 TD Sensor...................6-48 6.9.8 TONER NEAR END/END DETECTION AND RECOVERY....6-49 Toner Near End Detection ..............6-49 Toner Near End Recovery ..............6-49 Toner End Detection ................6-49 Toner End Recovery ................6-49 6.10 DRUM CLEANING AND TONER RECYCLING........6-50 6.10.1 DRUM CLEANING................6-50 6.10.2 TONER RECYCLING ..............6-50 6.11 PAPER FEED..................6-51...
- Page 11 6.15.1 OVERVIEW ..................6-72 6.15.2 LOW POWER MODE ..............6-73 Entering Low Power Mode..............6-73 What Happens in Low Power Mode............6-73 Returning to Stand-by Mode ...............6-74 6.15.3 NIGHT/OFF MODE...............6-74 Entering Night/Off Mode ..............6-74 What Happens in Night/Off Mode ............6-75 Returning to Stand-by Mode ...............6-75 PERIPHERALS AUTO REVERSE DOCUMENT FEEDER (B379) 1 OVERALL MACHINE INFORMATION ........
- Page 12 3.6 SEPARATION ROLLER ..............B379-23 3.7 ORIGINAL SET/ORIGINAL REVERSE SENSORS......B379-24 3.8 ORIGINAL L/W SENSOR, TRAILING EDGE SENSOR ....B379-25 3.9 FEED CLUTCH, PICK-UP SOL, TRANSPORT MOTOR, FEED MOTOR.................. B379-26 Exterior ..................B379-26 DF Feed Clutch................B379-26 Pick-up Solenoid ................B379-26 Transport Motor ................
- Page 13 3.9 DF COVER OPEN SENSOR/FEED CLUTCH/ROM/ DF DRIVE BOARD ................B387-19 Exterior ..................B387-19 Feed Cover Open Sensor ............B387-19 Feed Clutch ................. B387-19 ROM .................... B387-19 DF Drive Board ................B387-19 3.10 REGISTRATION SENSOR............. B387-21 3.11 PICK-UP SOLENOID ..............B387-21 3.12 STAMP SOLENOID................
- Page 14 2 DETAILED DESCRIPTIONS ..........B385-4 2.1 PAPER FEED AND SEPARATION ............ B385-4 2.2 PAPER LIFT MECHANISM ..............B385-5 2.3 PAPER END DETECTION ..............B385-7 2.4 PAPER HEIGHT DETECTION ............B385-8 2.5 PAPER SIZE DETECTION..............B385-9 2.6 SIDE AND END FENCES ..............B385-10 Side Fences.................
-
Page 15: Installation
20 February, 2001 INSTALLATION REQUIREMENTS 1. INSTALLATION CAUTION Before installing options, please do the following: 1. If there is a fax unit in the machine, print out all messages stored in the memory, the lists of user programmed items, and the system parameter list. -
Page 16: Machine Level
INSTALLATION REQUIREMENTS 20 February, 2001 1. Temperature Range: 10°C to 32°C (50°F to 89.6°F) 2. Humidity Range: 15% to 80% RH 3. Ambient Less than 1,500 lux (do not expose to direct sunlight). Illumination: 4. Ventilation: Room air should turn over at least 30 m /hr/person 5. -
Page 17: Minimum Space Requirements
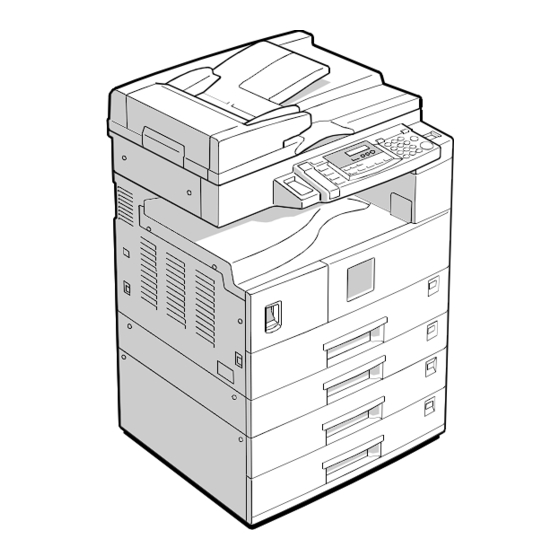
20 February, 2001 INSTALLATION REQUIREMENTS 1.1.3 MINIMUM SPACE REQUIREMENTS Place the copier near the power source, providing clearance as shown: A: Front > 750 mm (29.6") B: Left > 10 mm (0.4") C: Rear > 10 mm (0.4") D: Right > 10 mm (0.4") B039I145.WMF NOTE: 1) The recommended 750 mm front space is sufficient to allow the paper tray to be pulled out. -
Page 18: Copier Installation
COPIER INSTALLATION 20 February, 2001 1.2 COPIER INSTALLATION 1.2.1 POWER SOCKETS FOR PERIPHERALS CAUTION Rated voltage for peripherals Make sure to plug the cables into the correct sockets. ADF/ARDF Rated voltage output connector for accessory Max. DC24 V Paper Tray Unit Rated voltage output connector for accessory Max. -
Page 19: Installation Procedure
20 February, 2001 COPIER INSTALLATION 1.2.3 INSTALLATION PROCEDURE CAUTION When installing the copier, make sure that the copier is unplugged. 1. Remove the strips of tape. B039I102.WMF 2. Open the front door and remove the toner bottle holder [A]. B039I107.WMF 3. - Page 20 COPIER INSTALLATION 20 February, 2001 4. Separate the PCU into two sections as shown (5 screws). B039I114.WMF 5. Distribute one pack of developer [A] evenly across the width of the development unit, into all openings. NOTE: 1) To prevent foreign material from getting on the sleeve rollers, place a sheet of paper under the...
- Page 21 20 February, 2001 COPIER INSTALLATION 11. Install the optional ARDF, ADF, or platen cover (☛ 1.3/1.4/1.5). 12. Plug in the main power cord and turn on the main switch. Perform TD Sensor Initialization (SP2-214). 13. Select the correct display language using UP Mode (Language). 14.
-
Page 22: Platen Cover Installation
PLATEN COVER INSTALLATION 20 February, 2001 1.3 PLATEN COVER INSTALLATION 1.3.1 ACCESSORY CHECK Check that you have the accessories indicated below. Description Q’ty Stepped Screw 1.3.2 INSTALLATION PROCEDURE CAUTION Unplug the machine power cord before starting the following procedure. 1. Install the platen cover [A] (2 screws). B039I120.WMF... -
Page 23: Ardf Installation
20 February, 2001 ARDF INSTALLATION 1.4 ARDF INSTALLATION 1.4.1 ACCESSORY CHECK Check the quantity and condition of the accessories against the following list. Description Q’ty Scale Guide DF Exposure Glass Stud Screw Knob Screw Original Size Decal Screwdriver Tool B379I500.WMF 1.4.2 INSTALLATION PROCEDURE 1. - Page 24 ARDF INSTALLATION 20 February, 2001 2. Remove the left scale [A] (2 screws). 3. Place the DF exposure glass [B] on the glass holder. NOTE: When installing the DF exposure glass, make sure that the white point [C] is face down. 4.
-
Page 25: Adf Installation
20 February, 2001 ADF INSTALLATION 1.5 ADF INSTALLATION 1.5.1 ACCESSORY CHECK Check the quantity and condition of the accessories against the following list. Description Q’ty Scale Guide DF Exposure Glass Stud Screw Fixing Screw Original Size Decal Screwdriver Tool B387I500.WMF 1.5.2 INSTALLATION PROCEDURE 1. - Page 26 ADF INSTALLATION 20 February, 2001 2. Remove the left scale [A] (2 screws). 3. Place the DF exposure glass [B] on the glass holder. NOTE: When installing the DF exposure glass, make sure that the white point [C] is face down. 4.
-
Page 27: Two-Tray Paper Tray Unit Installation
20 February, 2001 TWO-TRAY PAPER TRAY UNIT INSTALLATION 1.6 TWO-TRAY PAPER TRAY UNIT INSTALLATION 1.6.1 ACCESSORY CHECK Check the quantity and condition of the accessories against the following list. Description Q’ty Screw – M4x10 Unit Holder Adjuster Unit Holder B384I500.WMF 1.6.2 INSTALLATION PROCEDURE B384I158.WMF B384I001.WMF... - Page 28 TWO-TRAY PAPER TRAY UNIT INSTALLATION 20 February, 2001 3. Remove the cover [A] (1 rivet). B384I109.WMF 4. Set the copier on the paper tray unit. NOTE: When installing the copier, be careful not to pinch the connecting harness. B384I117.WMF 5. One-tray copier model (B039): Remove the 1st tray cassette [B].
- Page 29 20 February, 2001 TWO-TRAY PAPER TRAY UNIT INSTALLATION 8. Install the two brackets [A] (1 stepped screw each). 9. Connect the connecting harness [B] to the copier. NOTE: There are cutouts in the plug on both sides. The left side has one cutout, and the right side has two.
-
Page 30: One-Tray Paper Tray Unit Installation
ONE-TRAY PAPER TRAY UNIT INSTALLATION 20 February, 2001 1.7 ONE-TRAY PAPER TRAY UNIT INSTALLATION 1.7.1 ACCESSORY CHECK Check the quantity and condition of the accessories against the following list. Description Q’ty Screw – M4x10 Stepped Screw – M4x10 Unit Holder B385I500.WMF 1.7.2 INSTALLATION PROCEDURE B385I159.WMF... - Page 31 20 February, 2001 ONE-TRAY PAPER TRAY UNIT INSTALLATION 2. Remove the cover [A] (1 rivet). B385I109.WMF 3. Set the copier on the paper tray unit. NOTE: When installing the copier, be careful not to pinch the connecting harness. B385I112.WMF 4. One-tray copier model (B039): Remove the 1st tray cassette [B].
- Page 32 ONE-TRAY PAPER TRAY UNIT INSTALLATION 20 February, 2001 5. Install the two screws [A]. 6. Reinstall the tray cassette. B385I118.WMF 7. Install the two brackets [B]. (1 stepped screw each). 8. Connect the connecting harness [C] to the copier. NOTE: There are cutouts in the plug on both sides.
-
Page 33: Imb Installation
20 February, 2001 IMB INSTALLATION 1.8 IMB INSTALLATION 1.8.1 ACCESSORY CHECK Click the quantity and condition of the accessory against the following list: Description Q’ty Screw – M3x6 1.8.2 INSTALLATION PROCEDURE B039I934.WMF B039I928.WMF 1. Remove the rear middle cover [A] (2 rivets). 2. -
Page 34: Dram Installation
DRAM INSTALLATION 20 February, 2001 1.9 DRAM INSTALLATION B039I934.WMF B039R942.WMF NOTE: The IMB must be installed before installing the DRAM. 1. Remove the rear middle cover [A] (2 rivets). 2. Install the DRAM [B]. 3. Reinstall the rear middle cover. 1-20... -
Page 35: Anti-Condensation Heater Installation
20 February, 2001 ANTI-CONDENSATION HEATER INSTALLATION 1.10 ANTI-CONDENSATION HEATER INSTALLATION B039I127.WMF 1. Remove the exposure glass (☛ 3.4.1). 2. Remove the left cover (☛ 3.3.8). 3. Pass the connector [A] through the opening [B]. 4. Install the anti-condensation heater [C], as shown. 5. -
Page 36: Tray Heaters
TRAY HEATERS 20 February, 2001 1.11 TRAY HEATERS 1.11.1 UPPER TRAY HEATER B039I909.WMF B039I020.WMF B039I121.WMF B039I126.WMF 1. Remove the 1st tray cassette [A]. 2. Remove the rear cover (☛ 3.3.1). 3. Remove the high voltage power supply board [B] with bracket (5 screws and 3 connectors). -
Page 37: Lower Tray Heater (Two-Tray Model Only)
20 February, 2001 TRAY HEATERS 1.11.2 LOWER TRAY HEATER (TWO-TRAY MODEL ONLY) B039I129.WMF B039I125.WMF B039I122.WMF 1. Remove the 2nd tray cassette [A]. 2. Remove the rear lower cover (☛ 3.3.2). 3. B043 model only: Remove the DCB [B] with bracket (4 screws and 3 connectors). 4. -
Page 38: Tray Heaters For The Optional Paper Feed Units
TRAY HEATERS 20 February, 2001 1.11.3 TRAY HEATERS FOR THE OPTIONAL PAPER FEED UNITS 1. Remove the rear cover for the paper tray unit [A] (2 screws). B039I202.WMF - One-tray paper feed unit - 2. Two-tray unit only: Remove the cable guide [B] (1 screw). - Page 39 20 February, 2001 TRAY HEATERS - One-tray paper feed unit - 4. Pass the connector [A] through the opening [B]. 5. Install the tray heater [C] (1 screw). B039I009.WMF - Two-tray paper feed unit - B039I005.WMF 1-25...
- Page 40 TRAY HEATERS 20 February, 2001 - One-tray paper feed unit - 6. Clamp the cables [A], as shown. 7. Join the connectors [B]. 8. Two-tray unit only: Reinstall the cable guide. 9. One-tray copier model (B039): Remove the 1st tray cassette. Two-tray copier models (B040/B043): Remove the 2nd tray cassette.
-
Page 41: Key Counter Installation
20 February, 2001 KEY COUNTER INSTALLATION 1.12 KEY COUNTER INSTALLATION B039I128.WMF B039I100.WMF 1. Remove the left cover (☛ 3.3.8). 2. Remove the rear cover (☛ 3.3.1). 3. Remove the cap [A] with nippers. 4. Punch out the small hole [B] using a screwdriver. 5. - Page 42 KEY COUNTER INSTALLATION 20 February, 2001 B039I130.WMF B039I131.WMF 8. Clamp the relay cable [A] with the clamps [B], as shown. NOTE: The relay cable [A] is not included in the key counter bracket accessories. 9. Connect the connector [C] to CN306 on the IOB. 10.
-
Page 43: Preventive Maintenance Schedules
20 February, 2001 PM TABLES 2. PREVENTIVE MAINTENANCE SCHEDULES 2.1 PM TABLES NOTE: 1) After carrying out PM, clear the PM counter (SP7-804). 2) PM intervals (60k, 80k, and 120K) indicate the number of prints. Key: AN: As necessary C: Clean R: Replace L: Lubricate I: Inspect 120k NOTE OPTICS... - Page 44 PM TABLES 20 February, 2001 120k NOTE Paper feed guides Clean with water or alcohol. Paper-dust Mylar Clean with water or alcohol. FUSING UNIT Hot roller Pressure roller Hot roller bushings Pressure-roller bushing Hot roller stripper Dry cloth pawls Thermistor Dry cloth NOTE ADF, ARDF...
-
Page 45: How To Clear The Pm Counter
20 February, 2001 HOW TO CLEAR THE PM COUNTER 2.2 HOW TO CLEAR THE PM COUNTER After PM, clear the PM counter (SP7-804). 1. Access SP mode 7-804. 2. Press the Original Type key and the OK or ! key at the same time to reset the counter. -
Page 46: Replacement And Adjustment
20 February, 2001 GENERAL CAUTIONS 3. REPLACEMENT AND ADJUSTMENT 3.1 GENERAL CAUTIONS Do not turn off the main switch while any of the electrical components are active. Doing so may result in damage to units (such as the PCU) as they are pulled out or replaced. -
Page 47: Laser Unit
SPECIAL TOOLS AND LUBRICANTS 20 February, 2001 3.1.4 LASER UNIT 1. Do not loosen or adjust the screws securing the LD drive board on the LD unit. Doing so will throw the LD unit out of adjustment. 2. Do not adjust the variable resistors on the LD unit. These are adjusted at the factory. -
Page 48: Exterior Covers & Operation Panel
20 February, 2001 EXTERIOR COVERS & OPERATION PANEL 3.3 EXTERIOR COVERS & OPERATION PANEL 3.3.1 REAR COVER 1. Unplug the DF cable [A]. 2. Rear cover [B] (! x 6) B039R991.WMF 3.3.2 REAR LOWER COVER (TWO-TRAY MODELS ONLY) 1. Rear cover (☛ 3.3.1) or tray harness cover [C] (1 rivet). -
Page 49: Copy Tray
EXTERIOR COVERS & OPERATION PANEL 20 February, 2001 3.3.3 COPY TRAY 1. Duplex models only: Inverter tray [A] 2. Copy tray [B] (! x 2) B039R152.WMF 3.3.4 LEFT UPPER COVER 1. Rear cover (☛ 3.3.1) 2. Left upper cover [C] (! x 2) B039R002.WMF 3.3.5 FRONT UPPER LEFT COVER AND OPERATION PANEL 1. -
Page 50: Left Cover
20 February, 2001 EXTERIOR COVERS & OPERATION PANEL 3.3.8 LEFT COVER 1. Copy tray (☛ 3.3.3) 2. Rear cover (☛ 3.3.1) 3. Left cover [A] (! x 2) B039R924.WMF 3.3.9 FRONT LONG COVER 1. Open the front door [B]. 2. Pull out the (top) paper tray. 3. -
Page 51: Front Right Cover
EXTERIOR COVERS & OPERATION PANEL 20 February, 2001 3.3.10 FRONT RIGHT COVER 1. Open the front door [A]. 2. Front right cover [B] (! x 1) B039R905.WMF 3.3.11 RIGHT REAR COVER 1. Right upper cover (☛ 3.3.6) 2. Right rear cover [C] (! x 1) B039R914.WMF... -
Page 52: Right Door
20 February, 2001 EXTERIOR COVERS & OPERATION PANEL 3.3.12 RIGHT DOOR B039R915.WMF 1. Undo the strap [A] and lower the right door. NOTE: On non-duplex models (shown in the drawing above), hold the door open part way and push the strap toward the door so that it comes loose from the peg [B] on the door. -
Page 53: By-Pass Tray
EXTERIOR COVERS & OPERATION PANEL 20 February, 2001 3.3.13 BY-PASS TRAY B039R803.WMF 1. Rear cover (☛ 3.3.1) 2. Right rear cover (☛ 3.3.11) 3. Open the two clamps (see [C] on preceding page) and disconnect the connector coming from the by-pass tray (5-pin connector with colored wires). Move the connector clear of the other wires, so that it will come out without snagging when you take off the by-pass tray. -
Page 54: Left Lower Cover (Two-Tray Models Only)
20 February, 2001 EXTERIOR COVERS & OPERATION PANEL 3.3.14 LEFT LOWER COVER (TWO-TRAY MODELS ONLY) 1. Left lower cover [A] (! x 2) B039R936.WMF 3.3.15 RIGHT LOWER COVER (TWO-TRAY MODELS ONLY) 1. Open the right lower cover [B]. 2. Right lower cover (1 rivet) B039R937.WMF 3.3.16 PLATEN COVER SENSOR 1. -
Page 55: Scanner Section
SCANNER SECTION 20 February, 2001 3.4 SCANNER SECTION 3.4.1 EXPOSURE GLASS/DF EXPOSURE GLASS B039R001.WMF Exposure Glass 1. Left scale [A] (! x 2) 2. Rear scale [B] (! x 3) 3. Exposure glass [C] NOTE: When reinstalling, be sure that the mark is at the rear left corner, and be sure to set the exposure glass so that its left edge is aligned flush against the small support ridge on the frame. -
Page 56: Lens Block
20 February, 2001 SCANNER SECTION 3.4.2 LENS BLOCK 1. Exposure glass (☛ 3.4.1) 2. Lens cover [A] (! x 5) 3. Disconnect the flat cable [B]. 4. Lens block [C] (! x 4). NOTE: Do not loosen the paint- locked screws holding the lens unit in place. -
Page 57: Original Width Sensor
SCANNER SECTION 20 February, 2001 3.4.4 ORIGINAL WIDTH SENSOR 1. Exposure glass (☛ 3.4.1) 2. Original width sensor [A] (! x 1, " x B039R004.WMF 3.4.5 ORIGINAL LENGTH SENSOR 1. Exposure glass (☛ 3.4.1) 2. Lens block (☛3.4.2) 3. Original length sensor [B] (! x 1, " x 1) Sensor Positions B039R304.WMF B039R303.WMF... -
Page 58: Changing The Original Sensor Positions (8K/16K)
20 February, 2001 SCANNER SECTION 3.4.6 CHANGING THE ORIGINAL SENSOR POSITIONS (8K/16K) This procedure is for China models only. To enable detection of the following original sizes, the original sensors must be moved from their factory-set positions to the locations indicated in the drawing below right. •... -
Page 59: Procedure
SCANNER SECTION 20 February, 2001 Procedure B039R004.WMF B039R012.WMF 1. Set the machine to detect 8K/16K originals as follows. • If the machine is equipped with the platen cover: Access SP mode 5-955-1, and set the setting to 1 (=Yes). The machine will now detect 8K/16K rather than B4/B5. -
Page 60: Scanner Motor
20 February, 2001 SCANNER SECTION 3.4.7 SCANNER MOTOR 1. Rear cover (☛ 3.3.1) 2. Right upper cover (☛ 3.3.6) 3. Rear scale and exposure glass (☛ 3.4.1) 4. Operation panel (☛ 3.3.5) 5. Top rear cover (☛ 3.3.7) 6. Detach the belt [A]. 7. -
Page 61: Adjustment Of 2Nd Scanner Position
SCANNER SECTION 20 February, 2001 3.4.9 ADJUSTMENT OF 2ND SCANNER POSITION Do this procedure after replacing a scanner belt. If you replaced the second scanner belts, go onto the next section (‘Adjustment of 1st and 2nd Scanner Alignment’.) B039R011.WMF 1. Remove the A(R)DF or platen cover. 2. -
Page 62: Adjustment Of 1St And 2Nd Scanner Alignment
20 February, 2001 SCANNER SECTION 3.4.10 ADJUSTMENT OF 1ST AND 2ND SCANNER ALIGNMENT For how to use this procedure, see the previous section, ‘Adjustment of 2nd Scanner Position’. B039R007.WMF 1. Remove the A(R)DF or platen cover. 2. Remove the operation panel (☛ 3.3.5). 3. -
Page 63: Laser Unit
LASER UNIT 20 February, 2001 3.5 LASER UNIT WARNING Laser beam can seriously damage your eyes. Be absolutely sure that the main power switch is off and that the machine is unplugged before accessing the laser unit. 3.5.1 LOCATION OF “CAUTION” DECAL B039R110.WMF B039RLW.WMF 3-18... -
Page 64: Toner Shield Glass
20 February, 2001 LASER UNIT 3.5.2 TONER SHIELD GLASS 1. Open the front door. 2. Lift the toner cartridge latch [A]. 3. Press the toner shield glass cover [B] to the left and pull it out. 4. Pull out the toner shield glass [C]. B039R151.WMF 3.5.3 LASER UNIT 1. -
Page 65: Ld Unit
LASER UNIT 20 February, 2001 3.5.4 LD UNIT 1. Laser unit (☛ 3.5.3) 2. LD unit [A] (! x 1) NOTE: Do not screw the LD unit in too tightly when installing it. B039R155.WMF 3.5.5 POLYGONAL MIRROR MOTOR 1. Laser unit (☛ 3.5.3) 2. -
Page 66: Laser Unit Alignment Adjustment
20 February, 2001 LASER UNIT 3.5.6 LASER UNIT ALIGNMENT ADJUSTMENT WARNING Be absolutely sure to reinstall the copy exit tray before making printouts. The laser beam can seriously damage your eyes. B039R156.WMF Turning the lever Turning clockwise counter-clockwise alters the trim pattern as shown above alters the trim pattern as shown above... -
Page 67: Pcu Section
PCU SECTION 20 February, 2001 3.6 PCU SECTION 3.6.1 PCU 1. Toner bottle holder (☛ 1.2.3, step 2) 2. Open the right door. 3. Press in on the latch, and pull out the PCU. (☛ 1.2.3, step 3) NOTE: Do not touch the OPC drum surface with bare hands. 4. -
Page 68: Opc Drum
20 February, 2001 PCU SECTION 3.6.4 OPC DRUM B039R201.WMF B039R206.WMF 1. PCU (☛ 3.6.1) 2. Remove the front side piece [A] (! x 1) and rear side piece [B] (! x 2, 1 coupling), and separate the PCU top part (drum section) [C] from its bottom part (developer section) [D]. -
Page 69: Charge Roller And Cleaning Brush
PCU SECTION 20 February, 2001 3.6.5 CHARGE ROLLER AND CLEANING BRUSH B039R204.WMF 1. OPC Drum (☛ 3.6.4) 2. Remove holding pin [A] and 1 stepped screw [B]. 3. Turn the gear [C] as necessary so that the rear end piece can come out. 4. -
Page 70: Developer
20 February, 2001 PCU SECTION 3.6.7 DEVELOPER B039R202.WMF B039R203.WMF 1. PCU (☛ 3.6.1) 2. Tap the top of the PCU with a screwdriver at eight evenly spaced locations (two or three taps at each spot) so as knock the recycled toner down into the development section. -
Page 71: After Replacement Or Adjustment
PCU SECTION 20 February, 2001 3.6.8 AFTER REPLACEMENT OR ADJUSTMENT IMPORTANT: After replacing or adjusting any of the PCU components, please do the following procedure. It is not needed after replacing the PCU with a new one. 1. Take 5 sample copies. 2. -
Page 72: Toner Supply Motor
20 February, 2001 TONER SUPPLY MOTOR 3.7 TONER SUPPLY MOTOR 1. Copy tray (☛ 3.3.3) 2. Open the front door. 3. Toner bottle holder (☛ 1.1.3, step 2) 4. Toner supply motor [A] (" x 1) B039R917.WMF 3-27... -
Page 73: Paper Feed Section
PAPER FEED SECTION 20 February, 2001 3.8 PAPER FEED SECTION 3.8.1 PAPER FEED ROLLER 1. Pull out the appropriate paper tray. 2. Clip [A] 3. Push the shaft back through the opening, and tilt it up. NOTE: If the black plastic bushing [B] comes off, be sure to remount it when reinstalling the shaft. -
Page 74: Exit Sensor
20 February, 2001 PAPER FEED SECTION 3.8.4 EXIT SENSOR Non-duplex Models 1. Open the right door. 2. Front right cover (☛ 3.3.10) 3. Guide [A] (! x 2) 4. Exit sensor [B] (" x 1) B039R601.WMF Duplex Models 1. Open the right door. 2. -
Page 75: By-Pass Feed Roller And By-Pass Paper End Sensor
PAPER FEED SECTION 20 February, 2001 3.8.5 BY-PASS FEED ROLLER AND BY-PASS PAPER END SENSOR B039R804.WMF 1. By-pass tray (☛ 3.3.13) NOTE: If you wish, you can just detach the tray and rest it on the ground without disconnecting the connector (but be careful to avoid placing too much load on the wires). -
Page 76: Registration Roller
20 February, 2001 PAPER FEED SECTION 3.8.6 REGISTRATION ROLLER B039R951.WMF B039R950.WMF 1. PCU (☛ 3.6.1) 2. Front long cover (☛ 3.3.9) 3. Right door (☛ 3.3.12) 4. Rear cover (☛ 3.3.1) 5. High-voltage power supply (☛ 3.12.2) 6. Registration clutch (☛ 3.8.8) 7. -
Page 77: Registration Clutch
PAPER FEED SECTION 20 February, 2001 3.8.7 BY-PASS PAPER SIZE SWITCH 1. By-pass tray (☛ 3.3.13) 2. Tray lever [A] (! x 1, 1 pin) 3. Lift the upper tray [B] 4. By-pass paper size switch [C] (" x 1) NOTE: When reinstalling the switch: Move the paper guides to their middle position (about... -
Page 78: Registration Sensor
20 February, 2001 PAPER FEED SECTION 3.8.9 REGISTRATION SENSOR 1. Open the right door. 2. Registration sensor [A] (" x 1) B039R920.WMF 3.8.10 UPPER PAPER FEED CLUTCH AND BY-PASS FEED CLUTCH 1. Rear cover (☛ 3.3.1) 2. Clutch cover [B] (# x 2, 2 bushings, ! x 2 ) 3. -
Page 79: Relay Clutch
PAPER FEED SECTION 20 February, 2001 3.8.11 RELAY CLUTCH 1. Rear cover (☛ 3.3.1) 2. Relay clutch [A] (! x 1) B039R912.WMF 3.8.12 RELAY SENSOR 1. Relay clutch (☛ 3.8.11) 2. Sensor bracket [B] (" x 1) 3. Relay sensor [C] (! x 1) B039R923.WMF 3.8.13 LOWER PAPER FEED CLUTCH (TWO-TRAY MODELS ONLY) -
Page 80: Vertical Transport Sensor
20 February, 2001 PAPER FEED SECTION 3.8.14 VERTICAL TRANSPORT SENSOR (TWO-TRAY MODELS ONLY) 1. Open the right lower cover. 2. Metal plate [A] (! x 3) 3. Vertical transport sensor [B] (" x 1) B039R938.WMF 3.8.15 PAPER SIZE SWITCH 1. Open the appropriate paper tray. 2. -
Page 81: Image Transfer
IMAGE TRANSFER 20 February, 2001 3.9 IMAGE TRANSFER 3.9.1 IMAGE TRANSFER ROLLER 1. Open the right door. 2. Pry open the plastic holders [A] at each end of the roller, and lift off the image transfer roller [B]. NOTE: 1) Leave the springs under the roller in their original position. -
Page 82: Fusing
20 February, 2001 FUSING 3.10 FUSING 3.10.1 FUSING UNIT CAUTION The fusing unit can become very hot. Be sure that it has cooled down sufficiently before handling it. 1. Turn off the main switch, and unplug the machine. 2. Front right cover (☛ 3.3.10) 3. -
Page 83: Fusing Lamp
FUSING 20 February, 2001 3.10.3 FUSING LAMP B039R503.WMF B039R504.WMF 1. Fusing unit (☛ 3.10.1) 2. Separate the fusing unit (! x 4) into two sections: the hot roller section [A], and the pressure roller section [B]. 3. Front metal holding plate [C] (! x 1) 4. -
Page 84: Thermofuse And Thermostat
20 February, 2001 FUSING 3.10.5 THERMOFUSE AND THERMOSTAT 1. Hot roller (☛ 3.10.4) 2. Thermofuse [A] (! x 2) 3. Thermostat [B] (! x 2) B039R507.WMF 3.10.6 HOT ROLLER STRIPPER PAWLS 1. Hot roller (☛ 3.10.4) 2. Metal holders [C] (1 holder for each pawl) 3. -
Page 85: Pressure Roller And Bushings
FUSING 20 February, 2001 3.10.7 PRESSURE ROLLER AND BUSHINGS B039R508.WMF 1. Fusing unit (☛ 3.10.1) 2. Separate the fusing unit into two sections: the hot roller section and the pressure roller section (☛ 3.10.3, Step 2). Carry out the remaining steps on the pressure roller section. -
Page 86: Nip Band Width Adjustment
20 February, 2001 FUSING 3.10.8 NIP BAND WIDTH ADJUSTMENT NOTE: 1) The fusing unit must be at operating temperature when this adjustment is carried out. 2) Place an OHP sheet on the by-pass feed table before starting this procedure. 3) Use only A4/LT LEF. (Other OHP sheet sizes may cause a paper jam.) B039R302.WMF [A]: Pressure roller [B]: Hot roller... -
Page 87: Duplex Unit (Duplex Models Only)
DUPLEX UNIT (DUPLEX MODELS ONLY) 20 February, 2001 3.11 DUPLEX UNIT (DUPLEX MODELS ONLY) 3.11.1 DUPLEX EXIT SENSOR 1. Open the right door. 2. Sensor bracket [A] and bracket [B] (! x 1) 3. Duplex exit sensor [C] (" x 1) B039R801.WMF 3.11.2 DUPLEX ENTRANCE SENSOR 1. -
Page 88: Duplex Transport Motor
20 February, 2001 DUPLEX UNIT (DUPLEX MODELS ONLY) 3.11.4 DUPLEX TRANSPORT MOTOR 1. Open the right door, detach the strap from the main body (! x 1), and lower the door. 2. Cover [A] (! x 1) 3. Open the two clamps securing the motor cable, and remove the motor bracket [B] (! x 3, "... -
Page 89: Other Replacements
OTHER REPLACEMENTS 20 February, 2001 3.12 OTHER REPLACEMENTS 3.12.1 QUENCHING LAMP 1. PCU (☛ 3.6.1) 2. Quenching lamp [A] (" x 1) B039R921.WMF 3.12.2 HIGH-VOLTAGE POWER SUPPLY BOARD 1. Rear cover (☛ 3.3.1) 2. High-voltage power supply board [B] (! x 3, 2 standoffs, all connectors) B039R959.WMF 3-44... -
Page 90: Imb (Memory Board)
20 February, 2001 OTHER REPLACEMENTS 3.12.3 IMB (MEMORY BOARD) NOTE: The IMB is optional on B039 machines outside North America. It is included as standard equipment on all other models. 1. IMB (together with bracket) [A] (! x 3) NOTE: Be sure to remove the bracket together with the IMB. -
Page 91: Iob (I/O Board)
OTHER REPLACEMENTS 20 February, 2001 3.12.5 IOB (I/O BOARD) 1. BiCU (☛3.12.4) 2. IOB [A] (all connectors, ! x 6, 1 ribbon cable) B039R910.WMF 3.12.6 MAIN MOTOR 1. Rear cover (☛ 3.3.1) 2. Main motor [B] (! x 4, " x 1) B039R908.WMF 3.12.7 REAR EXHAUST FAN 1. -
Page 92: Left Exhaust Fan
20 February, 2001 OTHER REPLACEMENTS 3.12.8 LEFT EXHAUST FAN 1. Rear cover (☛ 3.3.1) 2. Copy tray (☛ 3.3.3) 3. Left cover (☛ 3.3.8) 4. 5 screws [A] 5. Lift up [B], [C] and [D] together and pull the assembly toward the front side of the machine until the hooked harnesses [E] are accessible. -
Page 93: Gearbox
OTHER REPLACEMENTS 20 February, 2001 3.12.10 GEARBOX Replacement Procedure 1. BiCU (☛ 3.12.4) 2. BiCU bracket [A] (! x 3) 3. Main motor (☛ 3.12.6) 4. Exhaust fan (☛ 3.12.7) 5. Remove the IOB with bracket (☛ 3.12.5) 6. Crosspiece [B] (! x 4) 7. -
Page 94: Gear Arrangement Within The Gearbox
20 February, 2001 OTHER REPLACEMENTS Gear Arrangement Within the Gearbox B039R933.WMF The gears are numbered 1 to 12 in the order in which they are to be installed in the gear box. These numbers appear both on the gearbox and on the front (exposed) surface of each gear. -
Page 95: Copy Adjustments: Printing/Scanning
COPY ADJUSTMENTS: PRINTING/SCANNING 20 February, 2001 3.13 COPY ADJUSTMENTS: PRINTING/SCANNING NOTE: 1) You need to perform these adjustment after executing a Memory All Clear, and after replacing or adjusting any of the following parts. • First or second scanner • Lens Block •... -
Page 96: Blank Margin
20 February, 2001 COPY ADJUSTMENTS: PRINTING/SCANNING Blank Margin NOTE: If the leading edge or side-to-side registration cannot be adjusted to within the specification, then adjust the leading-edge blank margin or the left-side blank margin. 1. Check the trailing edge and right side edge blank margins, and adjust them using the following SP modes. -
Page 97: Scanning
COPY ADJUSTMENTS: PRINTING/SCANNING 20 February, 2001 3.13.2 SCANNING NOTE: 1) Before doing the following scanner adjustments, check and adjust the printing leading-edge and side-to-side registrations and the printing blank margins (as described above). 2) Use an A3 test chart to perform the following adjustments. Registration: Platen Mode 1. -
Page 98: Magnification
20 February, 2001 COPY ADJUSTMENTS: PRINTING/SCANNING Magnification A: Main scan magnification B: Sub-scan magnification B039R517.WMF Main Scan Magnification 1. Place the A3 test chart on the exposure glass and make a copy from one of the feed stations. 2. Check the magnification ratio. If necessary, adjust the magnification using the following SP mode. -
Page 99: Standard White Density Adjustment
COPY ADJUSTMENTS: PRINTING/SCANNING 20 February, 2001 Standard White Density Adjustment This procedure adjusts the standard white density level. Carry out this adjustment after doing any of the following: • After replacing the standard white plate. • After replacing the NVRAM on the BiCU. (But note that you do not need to carry out this adjustment if you have replaced the BiCU itself but retained the previous NVRAM board [by moving it over onto the new BiCU].) •... -
Page 100: Adf Image Adjustment
20 February, 2001 COPY ADJUSTMENTS: PRINTING/SCANNING 3.13.3 ADF IMAGE ADJUSTMENT Registration and Blank Margin A: Leading edge registration B: Side-to-side registration B039R516.WMF B039R515.WMF NOTE: Make a temporary test chart as shown above, using A3/11" x 17" paper. 1. Place the temporary test chart on the ADF and make a copy from one of the feed stations. -
Page 101: Troubleshooting
20 February, 2001 SERVICE CALL CONDITIONS 4. TROUBLESHOOTING 4.1 SERVICE CALL CONDITIONS 4.1.1 SUMMARY There are 2 levels of service call conditions. Level Definition Reset Procedure To prevent the machine from being Enter SP 5-810 (SC code reset) and damaged, the SC can only be reset by a select “1”. -
Page 102: Sc Code Descriptions
SERVICE CALL CONDITIONS 20 February, 2001 4.1.2 SC CODE DESCRIPTIONS Symptom Possible Cause Definition Exposure Lamp Error • Exposure lamp defective The standard white level was not • Exposure lamp stabilizer defective detected properly when scanning the white plate. • Exposure lamp connector defective •... - Page 103 20 February, 2001 SERVICE CALL CONDITIONS Symptom Possible Cause Definition Communication Error between BiCU and SBU • The flat cable between the BiCU The BiCU board cannot detect the SBU connect signal. board and the SBU has a poor connection •...
- Page 104 SERVICE CALL CONDITIONS 20 February, 2001 Symptom Possible Cause Definition Laser synchronization error • Poor connection between the LD unit The main scan synchronization detector board cannot detect the laser and the BICU board • Damaged cable between BiCU and synchronization signal for more than 5 consecutive 100 ms intervals.
- Page 105 20 February, 2001 SERVICE CALL CONDITIONS Symptom Possible Cause Definition Lower paper tray lift motor malfunction (optional two-tray paper tray unit) The paper lift sensor fails to activate • Paper lift sensor defective twice continuously after the tray lift • Tray lift motor defective motor has been on for 18 seconds.
- Page 106 SERVICE CALL CONDITIONS 20 February, 2001 Symptom Possible Cause Definition Communication error between BiCU and fax controller • Poor connection between the BiCU The BiCU board cannot communicate with the fax controller. board and the fax controller • BiCU board defective •...
- Page 107 20 February, 2001 SERVICE CALL CONDITIONS Symptom Possible Cause Definition IMB non-connected error • IMB is not connected IMB is not connected. This SC only • Poor connection between BiCU and appears with B040 and B043 version machines. • IMB defective •...
-
Page 108: Electrical Component Defects
ELECTRICAL COMPONENT DEFECTS 20 February, 2001 4.2 ELECTRICAL COMPONENT DEFECTS 4.2.1 SENSORS Component Condition Symptom Registration The Paper Jam message will appear whenever Open a copy is made (paper hasn't reached the 312-2 sensor). (IOB) The Paper Jam message appears even if there Shorted is no paper at the sensor. -
Page 109: Switches
20 February, 2001 ELECTRICAL COMPONENT DEFECTS Component Condition Symptom Scanner H.P. Open SC120 is displayed. 304-2 (IOB) Shorted Platen Cover APS and Auto Reduce/Enlarge do not function Open correctly. 304-5 If the Start button is pressed with the platen (IOB) Shorted cover or A(R)DF closed, “Cannot detect original size”... -
Page 110: Blown Fuse Conditions
BLOWN FUSE CONDITIONS 20 February, 2001 Component Condition Symptom Right Door The Cover Open indicator is lit even if the right Open door is closed. 331-5 (IOB) The Cover Open indicator is not lit even if the Shorted right door is open. Front/Right The Cover Open indicator is lit even if doors are Open... -
Page 111: Service Tables
20 February, 2001 USING SERVICE PROGRAM MODES 5. SERVICE TABLES 5.1 USING SERVICE PROGRAM MODES Use the service program modes (SP modes) to check electrical data, change operating modes, and adjust values. Accessing SP Modes How to Enter SP Mode 1. -
Page 112: How To Select A Program Number
USING SERVICE PROGRAM MODES 20 February, 2001 How to Select a Program Number C1(1)Feed C2 105 ∗ Fusing Temp Adjustment B039M003.WMF Each program number consists of two or three levels (“classes”). To select a program, you need to enter each class number in sequence. 1. -
Page 113: Sp Mode Tables
20 February, 2001 USING SERVICE PROGRAM MODES 5.1.1 SP MODE TABLES NOTE: In the Function/[Setting] column: • The related pop-up screen name and function name (if any) appear in parenthesis following the function description. • Comments are in italics. • The setting range is enclosed in brackets, with the default setting written in bold. - Page 114 USING SERVICE PROGRAM MODES 20 February, 2001 Mode Number/Name Function/[Setting] By-pass Paper Size Display Displays the by-pass paper width sensor output. Press ! to exit the display. 103* Fusing Idling Selects whether or not fusing idling is performed. [0 = No / 1 = Yes] Normally disabled in this machine.
- Page 115 20 February, 2001 USING SERVICE PROGRAM MODES Mode Number/Name Function/[Setting] 903* Feed Clutch Boost By-pass tray Adjusts the amount of extra push that the feed clutch gives to the paper after the skew has been corrected at registration. [0 ~ 10 / 6 / 1 mm/step] This feature helps the registration roller feed certain types of paper (such as thick paper).
-
Page 116: Sp2-Xxx (Drum)
USING SERVICE PROGRAM MODES 20 February, 2001 SP2-XXX (Drum) Mode Number/Name Function/[Setting] 001* Charge Roller Bias Adjustment Printing Adjusts the voltage applied to the charge roller when printing. [–2100 ~ –1500 / –1700 / 1 V/step] The actually applied voltage changes automatically as charge roller voltage correction is carried out. - Page 117 20 February, 2001 USING SERVICE PROGRAM MODES Mode Number/Name Function/[Setting] 213* Outputs after Near End Sets the number of copy/print/fax pages that can be made after toner near-end has been detected. [0 = 50 pages / 1 = 20 pages] Reduce the number of pages if the user normally makes copies with a high image ratio.
- Page 118 USING SERVICE PROGRAM MODES 20 February, 2001 Mode Number/Name Function/[Setting] 301* Duplex Adjusts the current applied to the transfer roller when carrying out a duplex job. [–2 = –4 µA / –1 = –2 µA / 0 = 0 µA / 1 = 2 µA / 2 = +4 µA] Use this SP if there is poor image transfer on the rear side of duplex copies.
- Page 119 20 February, 2001 USING SERVICE PROGRAM MODES Mode Number/Name Function/[Setting] 921* Toner Supply Mode Selects the toner supply mode. [0 = Sensor 1 / 1 = Sensor 2 (DFU) / 2 = Fixed 1 (DFU) / 3 = Fixed 2] Under normal conditions this should be set to “0”.
- Page 120 USING SERVICE PROGRAM MODES 20 February, 2001 Mode Number/Name Function/[Setting] Toner End Clear Clears the toner end condition without adding new toner. Select “1” then press the ' key to clear the condition. [0 = No / 1 = Yes] Setting this to “1”...
-
Page 121: Sp4-Xxx (Scanner)
20 February, 2001 USING SERVICE PROGRAM MODES SP4-XXX (Scanner) Mode Number/Name Function/[Setting] 008* Main Scan Magnification (Scanner) Adjusts the magnification along the main scan direction, for scanning. [–1.0 ~ +1.0 / 0.0 / 0.1%/step] IAJ • Use the ! key to select “+” or “–” before entering the value •... - Page 122 USING SERVICE PROGRAM MODES 20 February, 2001 Mode Number/Name Function/[Setting] 015* White Plate Scanning Start position Adjusts the scanning start position on the white plate for auto shading. [–3.0 ~ +6.0 / 0.0 / 0.1 mm/step] The base value stored in the machine is 15.2 mm toward the white plate from the scanner H.P..
- Page 123 20 February, 2001 USING SERVICE PROGRAM MODES Mode Number/Name Function/[Setting] ODD result Displays the value from the most recent ODD channel black level adjustment. [0 ~ 255 / 0 / 1/step] DFU Number of attempts Displays the number of times SBU black level adjustment was performed before the target values in 4-904-1 and 2 were reached.
- Page 124 USING SERVICE PROGRAM MODES 20 February, 2001 Mode Number/Name Function/[Setting] SBU Auto Adjustment Display Set value This is the reference value for SBU Auto-Adjustment (white plate scanning). Use this mode to re-input the previous value after performing memory all clear (SP5-801). Result Displays the value from the most recent SBU Auto- Adjustment.
- Page 125 20 February, 2001 USING SERVICE PROGRAM MODES Mode Number/Name Function/[Setting] 925* Sharpness Adjustment Edge Adjusts the clarity of line images and of solid-image edges. Higher settings provide greater clarity. [–2 ~ 2 / 0 / 1/step] • This setting is applied to all image processing modes of SP4-921.
- Page 126 USING SERVICE PROGRAM MODES 20 February, 2001 Mode Number/Name Function/[Setting] 941* White Line Erase Selects the white line erase level. [0 ~ 5 / 2 / 1/step] None Weak Strong 1 – 2 – 3 – 4 –5 • This setting is effective only Photo 1, Photo 3, Special 3 or Special 4 mode.
-
Page 127: Sp5-Xxx (Mode)
20 February, 2001 USING SERVICE PROGRAM MODES SP5-XXX (Mode) Mode Number/Name Function/[Setting] All Indicators On Blinks all indicators on the operation panel. Press OK or ! to cause all LEDs to begin blinking at a 3- second cycle. After checking that LEDs are all blinking, press "... - Page 128 USING SERVICE PROGRAM MODES 20 February, 2001 Mode Number/Name Function/[Setting] 501* PM Alarm Mode Interval Sets the base PM interval. [1 ~ 255 / 60 / 1K copies/step] The value stored in this SP is used when the value of SP5-501-2 is “1”.
- Page 129 20 February, 2001 USING SERVICE PROGRAM MODES Mode Number/Name Function/[Setting] SC Code Reset Resets all level-A service call conditions, such as fusing errors. (To reset SC 547, switch the machine off/on.) [0 = No / 1 = Yes] • After selecting “1”, press the Original Type key and the ' key (or OK key) at the same time to execute the reset.
- Page 130 USING SERVICE PROGRAM MODES 20 February, 2001 Mode Number/Name Function/[Setting] Program Download Downloads the system program from a flash memory card to the flash memory on the BICU board. [0 = No / 1 = Yes] This SP can be used when a flash memory card has been plugged into the machine’s card slot.
- Page 131 20 February, 2001 USING SERVICE PROGRAM MODES Mode Number/Name Function/[Setting] 909* NV-RAM Auto Backup Selects whether or not to back up the data written to the NV-RAM at power off (see conditions below). [0 = Disabled / 1 = Enabled] When enabled, this function creates a back up of the data if it has been 24 hours since the power was turned on or since the machine last wrote to the NV-RAM.
- Page 132 USING SERVICE PROGRAM MODES 20 February, 2001 Mode Number/Name Function/[Setting] Fax Forwarding Mode Selects whether the machine will accept changeover to fax mode following occurrence of an SC error. [0 = No / 1 = Yes] When an SC occurs while there are received fax messages in the SAF memory, change the value to “1”.
- Page 133 20 February, 2001 USING SERVICE PROGRAM MODES Mode Number/Name Function/[Setting] 955* 8K/16K Detection Platen cover Selects whether the machine will detect 8K/16K instead of B4/B5 in platen cover mode. [0 = No / 1 = Yes] • For China models only •...
-
Page 134: Sp6-Xxx (Peripherals)
USING SERVICE PROGRAM MODES 20 February, 2001 SP6-XXX (Peripherals) Mode Number/Name Function/[Setting] 006* ADF Registration Side-to-Side/Front Adjusts the side-to-side registration for the front side of the original, for ADF mode. [–7.0 ~ +9.5 / 0.0 / 0.1 mm/step] IAJ Use the ! key to select “+” or “–” before entering the value. - Page 135 20 February, 2001 USING SERVICE PROGRAM MODES Mode Number/Name Function/[Setting] ADF/Printer Free Run Performs a free run for the ADF and printer using a special ROM. [0 = No / 1 = Yes] DFU 911* Binding Hole Range Selects the diameter of the binding holes in the original that the sensors will ignore.
-
Page 136: Sp7-Xxx (Data Log)
USING SERVICE PROGRAM MODES 20 February, 2001 SP7-XXX (Data Log) Mode Number/Name Function/[Setting] 001* Total Operation Time Displays the total operation time (total drum rotation time). 002* Counter – Original Total Displays the total number of scanned originals (total). Copier Displays total number of scanned originals (copy mode only). - Page 137 20 February, 2001 USING SERVICE PROGRAM MODES Mode Number/Name Function/[Setting] 301* Counter – Magnification 50% ~ 99% Displays the total number of copies by reproduction ratio or magnification mode. Full size 101% ~ 200% Auto reduce/enlarge Fixed magnification 304* Counter – Mode Text Displays the total number of copies by copy mode.
- Page 138 USING SERVICE PROGRAM MODES 20 February, 2001 Mode Number/Name Function/[Setting] Memory/Version/PN Main P/N Displays the P/N and suffix of the copier firmware. Main version Displays the version of the BiCU board Fax P/N Displays the P/N and suffix of the fax firmware. Printer P/N Displays the P/N and suffix of printer firmware.
- Page 139 20 February, 2001 USING SERVICE PROGRAM MODES Mode Number/Name Function/[Setting] Reset – Total Counter Resets the electrical total counter. [0 = No / 1 = Yes] • Usually, this is performed at installation. This SP mode is effective only once, while the counter still has a negative value.
- Page 140 USING SERVICE PROGRAM MODES 20 February, 2001 Mode Number/Name Function/[Setting] 908* Display – Developer Counter Display the total number of prints made since the last Developer Initialization (SP2-214). Note that this counter does not double count, even for A3 and 11" x 17". Developments are counted up at paper exit.
-
Page 141: Test Pattern Printing (Sp5-902)
20 February, 2001 USING SERVICE PROGRAM MODES 5.1.2 TEST PATTERN PRINTING (SP5-902) 1. Input the class-3 number for the test pattern you need. 2. Press & to access the copy mode display. 3. Select the required copy features such as paper size, image density, and reproduction ratio. -
Page 142: Input Check (Sp5-803)
USING SERVICE PROGRAM MODES 20 February, 2001 5.1.3 INPUT CHECK (SP5-803) Input Check Code: B039M005.WMF 1. Access SP mode 5-803. 2. Select the number that will access the switch or sensor you wish to check (see the table below). 3. Check the status of the sensor or switch. 4. - Page 143 20 February, 2001 USING SERVICE PROGRAM MODES Reading Number Description Lower paper end sensor Paper not detected. Paper detected. Upper paper size switch See Table 1. Lower paper size switch See Table 1. 35, 36 Not used Upper paper end sensor Paper not detected.
- Page 144 USING SERVICE PROGRAM MODES 20 February, 2001 Reading Number Description Original set sensor Paper not detected. Paper detected. (Optional ADF) Registration sensor Paper not detected. Paper detected. (Optional ADF) Original trailing edge sensor Paper not detected. Paper detected. (Optional ADF) Optional exit sensor Paper not detected.
- Page 145 20 February, 2001 USING SERVICE PROGRAM MODES Table 2: Paper Size Switch (Optional Paper Tray Unit) SW No. 1 B039M502.WMF Number SW 1 SW 2 SW 3 SW 4 SP Value Paper Size — A4 LEF A4 SEF 11" x 17" 39, 40 11"...
-
Page 146: Output Check (Sp5-804)
USING SERVICE PROGRAM MODES 20 February, 2001 5.1.4 OUTPUT CHECK (SP5-804) Output Check Code: Data: 0 B039M007.WMF CAUTION: To prevent mechanical or electrical damage, do not keep an electrical component on for a long time. 1. Access SP mode 5-804. 2. -
Page 147: Copy Jam History (Sp7-903)
20 February, 2001 USING SERVICE PROGRAM MODES 5.1.5 COPY JAM HISTORY (SP7-903) After entering the SP mode, select “1” and press OK or !. The LCD panel displays the following message, Jam No01 1001:06:58:43 122 B 2 A4" 1107645 B039M008.WMF 1. -
Page 148: Smc Printing (Sp5-992)
USING SERVICE PROGRAM MODES 20 February, 2001 5.1.6 SMC PRINTING (SP5-992) NOTE: To use this feature on B039 models outside of North America, the optional 16MB must be installed. 1. Access SP mode 5-992 and select the number corresponding to the list that you wish to print. -
Page 149: Memory All Clear (Sp5-801)
20 February, 2001 USING SERVICE PROGRAM MODES 5.1.8 MEMORY ALL CLEAR (SP5-801) NOTE: Memory All Clear mode resets all the settings and counters stored in the NVRAM to the defaults, except for the following: • Electrical total counter values (SP7-003) •... -
Page 150: Without Using A Flash Memory Card
USING SERVICE PROGRAM MODES 20 February, 2001 Without Using a Flash Memory Card If there is no flash memory card, follow the steps below. 1. Print out all SMC data lists (SP5-992). NOTE: For B039 models outside N. America, these lists cannot be printed without the IMB installed. -
Page 151: Program Upload/Download
20 February, 2001 USING SERVICE PROGRAM MODES 5.1.9 PROGRAM UPLOAD/DOWNLOAD The BiCU software for this machine is upgraded using a flash memory card. There are two program download procedures. • SP5-826: Upload from the BiCU to a flash memory card. •... -
Page 152: Program Upload (Sp5-826)
USING SERVICE PROGRAM MODES 20 February, 2001 Display during writing. Program Download Load status:2-161402 B039M010.WMF Display when the download is Program Download complete. End sum=2A74 0.29EU B039M011.WMF Display if writing has failed. Program Download Loading error!!! B039M012.WMF NOTE: To view the current firmware version, check SP7-801-1. Program Upload (SP5-826) NOTE: Be sure to turn off the main switch before inserting or removing the flash memory. -
Page 153: Nvram Data Upload/Download
20 February, 2001 USING SERVICE PROGRAM MODES 5.1.10 NVRAM DATA UPLOAD/DOWNLOAD The “memory all clear” procedure will reset all NVRAM settings back to their defaults. It is therefore necessary to upload the NVRAM data before starting the clear, and then to download the data back after completing the clear. •... -
Page 154: Nvram Data Upload (Sp5-824)
USING SERVICE PROGRAM MODES 20 February, 2001 6. The machine erases the current settings, then writes the new settings onto the NVRAM on the BiCU board. This takes about 1 second. If downloading fails, an error message appears (☛ “5.1.9 Program Download”). If the error message appears, repeat the download procedure. - Page 155 20 February, 2001 USING SERVICE PROGRAM MODES 5.1.11 APS AND PLATEN/DF POSITION SENSOR OUTPUT DISPLAY (SP4-301) B039M512.WMF A4 ! 0 0 1 1 B039M513.WMF 1. Platen cover/DF position sensor status 1 = Opened 2. APS sensor status 1 = Paper detected 3.
-
Page 156: Adf Aps Sensor Output Display (Sp6-901)
USING SERVICE PROGRAM MODES 20 February, 2001 5.1.12 ADF APS SENSOR OUTPUT DISPLAY (SP6-901) B039M600.WMF Large Small 0 0 1 0 11" x 17"* B039M552.WMF 1. Original set sensor status 1 = Paper detected 2. APS sensor status 1 = Paper detected 3. -
Page 157: Serial Number Input (Sp5-811)
20 February, 2001 USING SERVICE PROGRAM MODES 5.1.13 SERIAL NUMBER INPUT (SP5-811) Used to input the machine’s serial number (this is normally done at the factory). The numeric keypad has 12 buttons. Use the first 11 buttons " to +, ! and # to input the serial number (' is not used). -
Page 158: Id Sensor Error Analysis (Sp2-221)
USING SERVICE PROGRAM MODES 20 February, 2001 5.1.14 ID SENSOR ERROR ANALYSIS (SP2-221) VG:3.84,VP:0.27,PW:139 VSDP:3.57,VT:2.09 B039M013.WMF A defective ID sensor does not generate an SC condition, but does cause the image quality to become worse (e.g., dirty background on the copy). If these conditions occur, check the ID sensor output using this SP mode. -
Page 159: User Tools
20 February, 2001 USER TOOLS 5.2 USER TOOLS The User Tools are accessed by users and key operators and by sales and service staff. User Tools are used to input or change the copier’s default settings. 5.2.1 HOW TO ENTER AND EXIT USER TOOLS Press the User Tools button, then select the User Tools program. -
Page 160: Copy Features Table
USER TOOLS 20 February, 2001 Copy Features Table 1. APS Auto Reduce/Enlarge 2. Max. Copy Q'ty 3. Adjust Original Mode 1. Text 2. Photo 4. Set Ratio 5. Copy Reset Timer 6. SADF Auto Reset 7. Rotate Sort Auto Continue 8. -
Page 161: Detailed Section Descriptions
20 February, 2001 OVERVIEW 6. DETAILED SECTION DESCRIPTIONS 6.1 OVERVIEW 6.1.1 COMPONENT LAYOUT B039D253.WMF NOTE: The above illustration is the B043 model. B039: No duplex unit, one paper tray B040: No duplex unit, two paper trays... - Page 162 OVERVIEW 20 February, 2001 1. 2nd Mirror 21. Registration Sensor 2. Exposure Lamp 22. By-pass Tray 3. 1st Mirror 23. Lower Transport Roller 4. Exposure Glass 24. Upper Relay Roller 5. Original Width Sensors 25. Relay Sensor 6. Original Length Sensors 26.
-
Page 163: Paper Path
20 February, 2001 OVERVIEW 6.1.2 PAPER PATH B039D104.WMF The B043 model has a duplex unit mounted on the right side of the machine. All models have a by-pass tray. -
Page 164: Drive Layout
OVERVIEW 20 February, 2001 6.1.3 DRIVE LAYOUT B039D107.WMF B039D106.WMF 1. Scanner Motor 6. Relay Clutch 2. Main Motor 7. Lower Paper Feed Clutch 3. Hot Roller 8. By-pass Feed Clutch 4. OPC Drum 9. Upper Paper Feed Clutch 5. Development Roller 10. -
Page 165: Board Structure
20 February, 2001 BOARD STRUCTURE 6.2 BOARD STRUCTURE 6.2.1 BLOCK DIAGRAM : Standard Options Printer : Option LD Unit Fax Unit BiCU Optional (See Note) DRAM Paper ADF/ Operation Tray Unit ARDF Panel Fusing High Lamp Duplex Polygon Lamp Sensors Clutches Motors Voltage... -
Page 166: Bicu (Base Engine And Image Control Unit)
BOARD STRUCTURE 20 February, 2001 1. BiCU (Base Engine and Image Control Unit) The main board controls the following functions: • Engine sequence • Timing control for peripherals • Image processing, video control • Operation control • Various application boards (fax, printer) •... -
Page 167: Copy Process Overview
20 February, 2001 COPY PROCESS OVERVIEW 6.3 COPY PROCESS OVERVIEW B039D353.WMF B039D251.WMF 1. EXPOSURE A xenon lamp exposes the original. Light reflected from the original passes to the CCD, where it is converted into an analog data signal. This data is converted to a digital signal, processed and stored in the memory. - Page 168 COPY PROCESS OVERVIEW 20 February, 2001 3. LASER EXPOSURE The processed data scanned from the original is retrieved from the memory and transferred to the drum by a laser beam, which forms an electrical latent image on the drum surface. The amount of charge remaining as a latent image on the drum depends on the laser beam intensity, which is controlled by the BiCU board.
-
Page 169: Scanning
20 February, 2001 SCANNING 6.4 SCANNING 6.4.1 OVERVIEW B039D353.WMF 1. Exposure Lamp 5. Scanner Motor 2. 1st Scanner 6. Original Length Sensor 3. Exposure Glass 7. Original Width Sensors 4. Lens Block 8. Scanner H.P. Sensor The original is illuminated by the exposure lamp (a xenon lamp). The image is reflected onto a CCD (charge coupled device) on the lens block via the 1st, 2nd, and 3rd mirrors, and through the lens on the lens block. -
Page 170: Scanner Drive
SCANNING 20 February, 2001 6.4.2 SCANNER DRIVE B039D014.WMF A stepper motor drives the 1st and 2nd scanners [A,B]. The 1st scanner is driven by the scanner drive motor [C], drive gear through the timing belt [D], scanner drive pulley [E], scanner drive shaft [F], and two timing belts [G]. The 2nd scanner is driven through the 1st scanner and two timing belts [H]. -
Page 171: Original Size Detection In Platen Mode
20 February, 2001 SCANNING 6.4.3 ORIGINAL SIZE DETECTION IN PLATEN MODE B039D012.WMF In the optics cavity for original size detection, there are four reflective sensors. The original width sensors [A] detect the original width, and the original length sensors [B] detect the original length. These are the APS (Auto Paper Select) sensors. Each APS sensor is a reflective photosensor. - Page 172 SCANNING 20 February, 2001 B039D006.WMF Original Size Length Sensors Width Sensors SP4-301 A4/A3 LT/DLT display version version 11" x 17" 11110000 8.5" x 14" 11010000 8.5" x 13" — 11000000 A4-SEF 8" x 13" 01000000 A4-LEF 11" x 8.5" 00110000 B5-LEF 8.5"...
-
Page 173: Image Processing
20 February, 2001 IMAGE PROCESSING 6.5 IMAGE PROCESSING 6.5.1 OVERVIEW Optional Memory DRAM Control DRAM Drum Fax Controller Driver Printer Controller BiCU B039D002.WMF The CCD generates an analog video signal. The SBU (Sensor Board Unit) converts the analog signal to a 6-bit digital signal, then it sends the digital signal to the BiCU board. -
Page 174: Sbu (Sensor Board Unit)
IMAGE PROCESSING 20 February, 2001 6.5.2 SBU (SENSOR BOARD UNIT) BiCU Digital Analog A/D 1 6 bit data Processing 1 Processing 1 Analog Digital A/D 2 6 bit data Processing 2 Processing 2 Analog Processing Digital Processing IC Circuit B039D004.WMF The CCD converts the light reflected from the original into an analog signal. -
Page 175: Auto Image Density (Ads)
20 February, 2001 IMAGE PROCESSING 6.5.3 AUTO IMAGE DENSITY (ADS) 0.5mm 15mm 75mm Sub scan direction B039D007.WMF In the SBU ADS prevents the background of an original from appearing on copies. The copier scans the auto image density detection area [A] as shown in the diagram. -
Page 176: Ipu (Image Processing Unit)
IMAGE PROCESSING 20 February, 2001 6.5.4 IPU (IMAGE PROCESSING UNIT) Overview BiCU Fax Controller Printer Controller Optional Memory DRAM Controller DRAM B039D005.WMF The image data from the SBU goes to the IPU (Image Processing Unit) on the BiCU board, which carries out the following processes on the image data: 1. -
Page 177: Image Processing Modes
20 February, 2001 IMAGE PROCESSING Image Processing Modes The user can select Text, Photo and Special original types. However, each of these original types has a range of different choices (such as “sharp”, “photographs”, etc), which are listed in the table below. •... -
Page 178: Image Processing Path
IMAGE PROCESSING 20 February, 2001 Image Processing Path This diagram shows the various stages of image processing and where they are performed. Image Correction • ADS Image Correction • Auto Shading • White/Black Line Erase Correction • Scanner Gamma Correction •... -
Page 179: Original Modes
20 February, 2001 IMAGE PROCESSING Original Modes The machine has 10 original modes. There are two text modes, three photo modes, and five “special” modes. The original mode key on the operation panel has two settings, text and photo. With the default settings, the machine uses “Normal Text (Text 1)” when the Text indicator is lit, and uses “Photo Priority (Photo 1)”... - Page 180 IMAGE PROCESSING 20 February, 2001 B039D999.WMF 6-20...
-
Page 181: Auto Shading
20 February, 2001 IMAGE PROCESSING Auto Shading Overview There are two auto shading methods: black level correction and white level correction. Auto shading corrects errors in the signal level for each pixel. Unlike previous machines, white level correction is only done when SP4-941 is set to 0, and not by default. -
Page 182: White Line Erase
IMAGE PROCESSING 20 February, 2001 White Line Erase Since this machine does not apply white level correction as default, white lines are automatically minimized (the reason is explained above). However, with no white level correction, the images on the edges of the copy would always appear darker than those in the center. -
Page 183: Scanner Gamma (Γ) Correction
20 February, 2001 IMAGE PROCESSING Scanner Gamma ( γ) γ) γ) γ) Correction The CCD output is not proportional to the quantity of light received. Scanner γ correction corrects the CCD output so that grayscale data is proportional to the quantity of light received. -
Page 184: Main Scan Magnification
IMAGE PROCESSING 20 February, 2001 Main Scan Magnification Changing the scanner speed enables enlargement and reduction along the sub scan direction. However, enlargement and reduction along the main scan direction is handled by the IPU (KT-ONE) chip. The processing for main scan enlargement/reduction is the same as in previous digital machines. -
Page 185: Filtering
20 February, 2001 IMAGE PROCESSING Filtering Overview There are several software filtering processes for enhancing the desired image qualities of the selected original mode. There are three MTF filters, a smoothing filter, independent dot erase, and line width correction. Each can be used only when certain modes are selected (details below) and are automatically applied. -
Page 186: Id Gamma (Γ) Correction
IMAGE PROCESSING 20 February, 2001 Smoothing Filter Adjustment The machine will apply the smoothing filter when the user selects Special 3 or 4 (Dithering), using the value in SP4-925-001. Note that this SP is also used when the machine applies the MTF Filter for Edges (see above). The higher the setting, the sharper the image. -
Page 187: Gradation Processing
20 February, 2001 IMAGE PROCESSING Gradation Processing Overview There are three types of gradation processing (listed below). Refer to the “Default Image Processing Mode for Each Original Type” section for more details on which processes are used for each original mode. •... -
Page 188: Imb (Memory Controller And Dram)
IMAGE PROCESSING 20 February, 2001 6.5.5 IMB (MEMORY CONTROLLER AND DRAM) The functions of the these two IMB component devices are as follows: Memory Controller: Compression of the 1-bit image data Image rotation Image data transfer to the DRAM DRAM (16MB): Stores the compressed data Processing area The data goes to the memory controller after binary picture/grayscale processing. -
Page 189: Video Control Unit (Vcu)
20 February, 2001 IMAGE PROCESSING 6.5.6 VIDEO CONTROL UNIT (VCU) Fine Character and Image (FCI) The FCI performs image smoothing. This functions only affects binary picture processed images for certain original modes. Main Scan Direction Sub Scan Direction Fig. A Fig. -
Page 190: Laser Exposure
LASER EXPOSURE 20 February, 2001 6.6 LASER EXPOSURE 6.6.1 OVERVIEW B039D101.WMF [A]: LD unit [G]: 2nd mirror [B]: Synchronization detector lens [H]: F-theta lens [C]: Double toroidal lens [I]: Polygon mirror [D]: Shield glass [J]: Cylindrical lens [E]: OPC drum [K]: Synchronization detector mirror [F]: 1st mirror •... -
Page 191: Auto Power Control (Apc)
20 February, 2001 LASER EXPOSURE 6.6.2 AUTO POWER CONTROL (APC) +5VLD M61880 XLDENB Video Data (1 bit) APC_SH +5VLD XDETP Sync Detector LD Drive Board B039D013.WMF The LD driver IC drives the laser diode. To prevent the intensity of the laser beam from changing because of the temperature, the machine monitors the current passing through the laser diode (LD). -
Page 192: Ld Safety Switch
LASER EXPOSURE 20 February, 2001 6.6.3 LD SAFETY SWITCH Front/Right Cover Safety Switches LDD: LDD Drive Board +5VLD +24V BiCU Laser Beam Optical Path LD Driver IC Drum B039D906.WMF To ensure technician and user safety and to prevent the laser beam from inadvertently switching on during servicing, there are safety switches at the front and right covers. -
Page 193: Photoconductor Unit (Pcu)
20 February, 2001 PHOTOCONDUCTOR UNIT (PCU) 6.7 PHOTOCONDUCTOR UNIT (PCU) 6.7.1 OVERVIEW B039D203.WMF The PCU consists of the components shown in the above illustration. An organic photoconductor (OPC) drum (diameter: 30 mm) is used in this machine. 1. Cleaning Blade 6. -
Page 194: Drive
PHOTOCONDUCTOR UNIT (PCU) 20 February, 2001 6.7.2 DRIVE B039D202.WMF The main motor [A] drives the drum [B] through a series of gears and the drum drive shaft [C]. The main motor assembly includes a drive controller, which outputs a motor lock signal when the rotation speed is out of the specified range. 6-34... -
Page 195: Drum Charge
20 February, 2001 DRUM CHARGE 6.8 DRUM CHARGE 6.8.1 OVERVIEW B039D205.WMF This copier uses a drum charge roller to charge the drum. The drum charge roller [A] always contacts the surface of the drum [B] to give it a negative charge of –950 The high voltage supply board gives a negative charge of –1700 V to the drum charge roller through the screw [C] and terminal plate [D]. -
Page 196: Charge Roller Voltage Correction
DRUM CHARGE 20 February, 2001 6.8.2 CHARGE ROLLER VOLTAGE CORRECTION Correction for Environmental Conditions 4.0 cm 1.5 cm 2 cm ID Sensor Pattern Sub Scan Direction Charge Voltage –1700 V –1400 V Laser Diode Drum Potential –950 V –650 V Development Bias –600 V –350 V... -
Page 197: Id Sensor Pattern Production Timing
20 February, 2001 DRUM CHARGE If the humidity drops, the drum potential goes up (to a higher –ve voltage) even if the charge roller voltage supply stays the same (efficiency of voltage transfer is higher with lower humidity). As a result, less toner is transferred to ID sensor pattern [B]. -
Page 198: Drum Charge Roller Cleaning
DRUM CHARGE 20 February, 2001 6.8.4 DRUM CHARGE ROLLER CLEANING B039D201.WMF Because the drum charge roller [A] always contacts the drum, it gets dirty easily. So, the cleaning brush [B] also contacts the drum charge roller all the time to clean the surface of the drum charge roller. -
Page 199: Development
20 February, 2001 DEVELOPMENT 6.9 DEVELOPMENT 6.9.1 OVERVIEW B039D301.WMF The development unit consists of the following parts. 1. Development roller 4. Mixing auger 1 2. Mixing auger 2 5. Doctor blade 3. TD sensor This machine uses a single-roller development system. Two mixing augers mix the developer. -
Page 200: Drive
DEVELOPMENT 20 February, 2001 6.9.2 DRIVE The main motor [A] drives the development roller [B] and mixing augers [C] through a train of gears and the development drive shaft [D]. When the PCU is pushed in, the development drive shaft engages the development roller gear. -
Page 201: Development Bias
20 February, 2001 DEVELOPMENT 6.9.4 DEVELOPMENT BIAS B039D303.WMF This machine uses a negative-positive development system, in which black areas of the latent image are at a low negative charge (about –154 ± 50 V) and white areas are at a high negative charge (about –950 V). To attract negatively charged toner to the black areas of the latent image on the drum, the high voltage supply board applies a bias of –650 volts to the development rollers throughout the image development process. -
Page 202: Toner Supply
DEVELOPMENT 20 February, 2001 6.9.5 TONER SUPPLY Toner Bottle Replenishment Mechanism B039D305.WMF When a toner bottle is placed in the bottle holder unit [A] and the unit is pushed in completely, toner shutter [B] moves against the side [C] of the PCU. When the toner bottle holder lever [D] is put back in the original position, the cap [E] on the toner bottle is pulled away and kept in place by the chuck [F]. -
Page 203: Toner Supply Mechanism
20 February, 2001 DEVELOPMENT Toner Supply Mechanism B039D508.WMF B039D306.WMF The toner supply motor [A] drives the toner bottle [B] and the mylar blades [C]. First, the toner falls down into the toner bottle holder. The toner supply mylar blades transfer the toner to the slit [D]. When the PCU is installed in the machine, the shutter [E] above the PCU is opened by the toner bottle holder. -
Page 204: Toner Density Control
DEVELOPMENT 20 February, 2001 6.9.6 TONER DENSITY CONTROL Overview There are four modes for controlling toner supply as shown in the following tables, which can be changed with by SP2-921. The factory setting is sensor control 1 mode. Basically, the toner concentration in the developer is controlled using the standard TD sensor voltage (Vts), toner supply reference voltage (Vref), actual TD sensor output voltage (Vt), and ID sensor output data (Vsp/Vsg). - Page 205 20 February, 2001 DEVELOPMENT The four toner density control modes are as follows. Mode Sensor control 1 (SP2-921, “0”): Normally use this setting only Toner supply decision Compare Vt with a reference voltage (Vts or Vref) Toner control process Toner is supplied to the development unit when Vt is higher than the reference voltage (Vts or Vref).
-
Page 206: Toner Density Sensor Initial Setting
DEVELOPMENT 20 February, 2001 Toner Density Sensor Initial Setting The TD sensor initial setting (SP2-214: Developer Initialize) procedure must be done after replacing the developer. During TD sensor initial setting, the TD sensor is set so that the TD sensor output is the value of SP2-926 (default: 2.4 V). This value will be used as the standard reference voltage (Vts) of the TD sensor. -
Page 207: Toner Supply Motor On Time Determinations
20 February, 2001 DEVELOPMENT Toner Supply Motor On Time Determinations For fixed control mode, the toner supply motor on time is specified by the setting of SP2-925, and does not vary. The default setting is 200 ms for each copy. The toner supply motor on time for each value of SP2-925 is as follows. -
Page 208: Toner Supply In Abnormal Sensor Conditions
DEVELOPMENT 20 February, 2001 6.9.7 TONER SUPPLY IN ABNORMAL SENSOR CONDITIONS ID Sensor Readings are abnormal if any of the following conditions occur: • Vsg ≤ 2.5V • Vsg < 3.5V when maximum power (979) is applied • Vsp ≥ 2.5V •... -
Page 209: Toner Near End/End Detection And Recovery
20 February, 2001 DEVELOPMENT 6.9.8 TONER NEAR END/END DETECTION AND RECOVERY The toner near end and end conditions are detected using the Vt and Vref values, in a similar way to toner density control. This is done in all toner supply modes except for fixed mode 2, when toner end is not detected. -
Page 210: Drum Cleaning And Toner Recycling
DRUM CLEANING AND TONER RECYCLING 20 February, 2001 6.10 DRUM CLEANING AND TONER RECYCLING 6.10.1 DRUM CLEANING The cleaning blade [A] removes any toner remaining on the drum after the image is transferred to the paper. This model uses a counter blade system. -
Page 211: Paper Feed
20 February, 2001 PAPER FEED 6.11 PAPER FEED 6.11.1 OVERVIEW B039D701.WMF There are one or two paper trays, each of which can hold 250 sheets. The paper tray feed stations use a friction pad system. To prevent paper from getting caught inside the machine when the tray is pulled out, the paper feed roller and shaft do not separate from the tray when the tray is pulled out. -
Page 212: Paper Feed Drive Mechanism
PAPER FEED 20 February, 2001 6.11.2 PAPER FEED DRIVE MECHANISM The main motor [A] drives the pick-up and feed mechanism of both the first and second paper trays. The paper feed clutches [B] transfer drive from this motor to the paper feed rollers [C]. When the paper feed clutch turns on, the feed roller starts to feed the paper. -
Page 213: Paper Lift Mechanism
20 February, 2001 PAPER FEED 6.11.4 PAPER LIFT MECHANISM When the paper tray [A] is closed, projection [B] on the copier frame pushes slider [C] (on the bottom part of the paper tray) off the bottom plate hook [D]. After the release slide comes off, compressed springs lift the bottom plate. -
Page 214: Paper Size Detection
PAPER FEED 20 February, 2001 6.11.6 PAPER SIZE DETECTION Paper Tray Size ❍ ❍ ❍ A3, 11" x 17" ❍ A4 LEF A4 SEF, ❍ ❍ " x 11" A5 LEF, ❍ " x 14" ❍ " x 13" ❍ ❍... -
Page 215: By-Pass Tray
20 February, 2001 PAPER FEED By-pass Tray B039D710.WMF The by-pass feed paper size switch [A] monitors the paper width. The side fence is connected to the terminal plate gear. When the side fences move to match the paper width, the circular terminal plate rotates over the wiring patterns on the rectangular part of the paper size switch. -
Page 216: Side Fences
PAPER FEED 20 February, 2001 6.11.7 SIDE FENCES If the tray is full of paper and it is pushed in strongly, the fences may deform or bend. This may cause the paper to skew or the side-to-side registration to be incorrect. To correct this, each side fence has a stopper [A] attached to it. -
Page 217: Image Transfer And Paper Separation
20 February, 2001 IMAGE TRANSFER AND PAPER SEPARATION 6.12 IMAGE TRANSFER AND PAPER SEPARATION 6.12.1 OVERVIEW B039D307.WMF B039D401.WMF B039D308.WMF The transfer roller [A] touches the surface of the drum [B]. The high voltage supply board supplies a positive current to the transfer roller, which attracts the toner from the drum onto the paper. -
Page 218: Image Transfer Current Timing
IMAGE TRANSFER AND PAPER SEPARATION 20 February, 2001 6.12.2 IMAGE TRANSFER CURRENT TIMING There are two transfer current levels: low and high. The image transfer procedure is as follows: 1. When the CPU receives the image writing start signal, the CPU instructs the high voltage supply board to supply +10µA (low transfer current level) to the roller. -
Page 219: Transfer Roller Cleaning
20 February, 2001 IMAGE TRANSFER AND PAPER SEPARATION 6.12.3 TRANSFER ROLLER CLEANING If the paper size is smaller than the image, or if a paper jam occurs during printing, toner may be transferred to the roller surface. To prevent the toner from transferring to the back side of the printouts, the transfer roller requires cleaning before the next printing run. -
Page 220: Image Fusing And Paper Exit
IMAGE FUSING AND PAPER EXIT 20 February, 2001 6.13 IMAGE FUSING AND PAPER EXIT 6.13.1 OVERVIEW The fusing unit and paper exit area consist of the following parts. 1. Paper exit roller 2. Exit sensor 3. Hot roller strippers 4. Pressure roller 5. -
Page 221: Fusing Entrance Guide Shift
20 February, 2001 IMAGE FUSING AND PAPER EXIT 6.13.3 FUSING ENTRANCE GUIDE SHIFT The entrance guide [A] is adjustable for paper thickness to prevent creasing. The outer screw holes [B] on each side are used as the default setting. If creasing occurs frequently in the fusing unit, adjust the entrance guide to the right, by securing it with the inner holes [C]. -
Page 222: Fusing Temperature Control
IMAGE FUSING AND PAPER EXIT 20 February, 2001 6.13.5 FUSING TEMPERATURE CONTROL Overview B039D506.WMF The fusing temperature is controlled using the fusing thermistor [A]. The CPU checks the output from the fusing thermistor once a second. The CPU compares the current and previous temperature, then decides the power-on ratio for the next second. - Page 223 20 February, 2001 IMAGE FUSING AND PAPER EXIT Copying (North America Model) Sampling cycle: 1 second Soft start setting: 3 cycles Current minus Target –2° ° ° ° C or +1° ° ° ° C or –3° ° ° ° C or +3°...
-
Page 224: Fusing Lamp Control
IMAGE FUSING AND PAPER EXIT 20 February, 2001 Fusing Lamp Control Turning on and off the fusing lamp power causes fluorescent light in the room to flicker. To reduce the flickering, use the following SP modes. Fusing temperature detection cycle (SP1-108) The CPU checks the output from the fusing thermistor once a second (default setting). -
Page 225: Fusing Temperature Control For Thick Paper At The By-Pass Tray
20 February, 2001 IMAGE FUSING AND PAPER EXIT Fusing Temperature Control for Thick Paper at the By-pass Tray When thick paper mode is selected, the machine changes the target fusing temperature from 175°C to 185°C. When the by-pass tray is selected, the machine detects that the paper is thick. -
Page 226: Overheat Protection
IMAGE FUSING AND PAPER EXIT 20 February, 2001 6.13.6 OVERHEAT PROTECTION If the hot roller temperature becomes greater than 230°C for more than 1 second, the CPU cuts off the power to the fusing lamp. At this time, the LCD will display SC543. -
Page 227: Duplex Unit
20 February, 2001 DUPLEX UNIT 6.14 DUPLEX UNIT 6.14.1 OVERALL B039D901.WMF The printed page from the fusing unit goes straight through to the exit tray, or upward to the inverter section, depending on the position of the junction gate. If the user selects duplex mode, the page is directed to the inverter tray, then reversed through the duplex unit, and back into the machine for printing the second side. -
Page 228: Drive Mechanism
DUPLEX UNIT 20 February, 2001 6.14.2 DRIVE MECHANISM B039D802.WMF 1. Duplex Inverter Roller 4. Duplex Transport Motor 2. Duplex Inverter Motor 5. Lower Transport Roller 3. Upper Transport Roller 6. Middle Transport Roller 6-68... -
Page 229: Basic Operation
20 February, 2001 DUPLEX UNIT 6.14.3 BASIC OPERATION To increase the productivity of the duplex unit, copies are printed as follows. Larger than A4 Short-edge/LT Short-edge The paper feed path can hold only one sheet of copy paper at a time. Example: 8 pages. -
Page 230: Up To A4 Short-Edge/Lt Short-Edge
DUPLEX UNIT 20 February, 2001 Up to A4 Short-edge/LT Short-edge The paper feed path can hold two sheets of copy paper. Example: 8 pages. The number [A] in the illustration shows the order of pages. The number [B] in the illustration shows the order of sheets of copy paper (if black, this indicates the second side). -
Page 231: Feed In And Exit Mechanism
20 February, 2001 DUPLEX UNIT 6.14.4 FEED IN AND EXIT MECHANISM B039D903.WMF B039D902.WMF During duplex copying, the inverter gate solenoid [A] switches on and the junction gate [B] switches over to direct the paper to the inverter. When the paper trailing edge reaches the duplex inverter sensor [C], the inverter roller [D] reverses its rotation direction and the paper goes to the duplex unit. -
Page 232: Energy Saver Modes
ENERGY SAVER MODES 20 February, 2001 6.15 ENERGY SAVER MODES 6.15.1 OVERVIEW System Reset Timer (UP: System 3-2) The machine returns to the preferred application mode (fax, printer, copier) that was selected with UP 2-1. Preferential Application (UP2-1) - Energy Saver Timer (UP: System 4) - Default: 15 min (NA), 1 min (Others) -
Page 233: Low Power Mode
20 February, 2001 ENERGY SAVER MODES 6.15.2 LOW POWER MODE Entering Low Power Mode The machine enters low power mode when: • The energy saver timer has expired following the last time engine components or sensors were active (e.g. end of a copy job, platen cover lifted, key pressed, etc). -
Page 234: Returning To Stand-By Mode
ENERGY SAVER MODES 20 February, 2001 Returning to Stand-by Mode If one of the following is done, the machine returns to standby mode: • Operation switch is pressed • An original is placed in the ADF • The platen cover or ADF is lifted •... -
Page 235: What Happens In Night/Off Mode
20 February, 2001 ENERGY SAVER MODES What Happens in Night/off Mode When the machine enters night/off mode, the fusing lamp and the operation panel indicators are turned off except for the main power LED. If there is no fax or printer option, the main power switch is turned off immediately (this is the same as the Auto Off Mode in previous models). -
Page 236: Specifications
20 February, 2001 SPECIFICATIONS SPECIFICATIONS 1. GENERAL SPECIFICATIONS Configuration: Desktop Copy Process: Dry electrostatic transfer system Originals: Sheet/Book Original Size: Maximum A3/11" x 17" Copy Paper Size: Maximum A3/11" x 17" Minimum A5 LEF/8 " x 5 " (Paper tray) A6 SEF/5 "... - Page 237 SPECIFICATIONS 20 February, 2001 Power Consumption: Mainframe Only Full System 120 V 220 ~ 240 V 120 V 220 ~ 240 V Maximum Not above Not above Not above Not above 1.1 kW 1.0 kW 1.2 kW 1.2 kW Copying Not above Not above Not above...
- Page 238 20 February, 2001 SPECIFICATIONS Copying Speed in Multicopy Mode (copies/minute): A4 LEF/ A3 / 11" × × × × 17" B4 / 8 " x 14" 11" x 8 " Non-memory copy mode B039: Memory copy mode B039*: B040/B043: DF 1-to-1 B039*: B040/B043: 1-sided →...
-
Page 239: Duplex Unit (B043 Only)
SPECIFICATIONS 20 February, 2001 Copy Paper Capacity: Paper Tray: 250 sheets (B039) 250 sheets x 2 (B040/B043) Optional Paper Tray Unit: 500 sheets x 1, or 500 sheets x 2 Bypass Tray: 100 sheets (sheets up to 432 mm [17"] ) 10 sheets (sheets longer than 432 mm [17"]) 40 postcards 10 envelopes... -
Page 240: Machine Configuration
20 February, 2001 SPECIFICATIONS 2. MACHINE CONFIGURATION B039V501.WMF Version Item Machine Code Letter. Copier Copier (1-tray model) B039 Copier (2-tray non-duplex model) B040 Copier (2-tray with duplex) B043 Platen Cover (optional) B406 ADF (optional) B387 ARDF (optional) B379 Paper Tray Unit – 1 tray (optional) B385 Paper Tray Unit –... -
Page 241: Optional Equipment
SPECIFICATIONS 20 February, 2001 3. OPTIONAL EQUIPMENT ARDF Original Size: Standard sizes Single-sided mode: A3 to A5, 11" x 17" to " x 8 " Double-sided mode: A3 to A5, 11" x 17" to " x 8 " Non-standard sizes (Single-sided mode only) Max. - Page 242 20 February, 2001 SPECIFICATIONS Original Size: Standard sizes (Single-sided mode only): A3 to A5, 11" x 17" to 5 " x 8 " Non-standard sizes (Single-sided mode only): Max. width 297 mm Min. width 105 mm Max. length 1,260 mm Min.
-
Page 243: One-Tray Paper Tray Unit
SPECIFICATIONS 20 February, 2001 ONE-TRAY PAPER TRAY UNIT A5 to A3 Paper Size: " x 8 " SEF to 11" x 17" Paper Weight: 60 – 105 g/m , 16 – 28 lb. Tray Capacity: 500 sheets (80 g/m , 20 lb. ) x 1 tray Paper Feed System: Feed roller and friction pad Paper Height Detection:... -
Page 244: Two-Tray Paper Tray Unit
20 February, 2001 SPECIFICATIONS TWO-TRAY PAPER TRAY UNIT A5 to A3 Paper Size: " x 8 " SEF to 11" x 17" Paper Weight: 60 – 105 g/m , 16 – 28 lb. Tray Capacity: 500 sheets (80 g/m , 20 lb.) x 2 trays Paper Feed System: Feed roller and friction pad Paper Height Detection:... - Page 245 Power Pack Y1 Y2 Lamp -BCT/CL Stabilizer (PP1) Board (PCB8) I/O Board (PCB1) CN301 CN108 Operation Panel Board (PCB3) (PCB4) BiCU (PCB2) SOL1 CN200 (PCB5) Tray Main Board (PCB1) CN701 CN111 CN101 <CN108> Pin No. Signal Pin No. Signal Pin No. Signal Pin No.
-
Page 246: Electrical Component Layout
ELECTRICAL COMPONENT LAYOUT (B039/B040/B043) B039V203.WMF B039V201.WMF B039V202.WMF B039V204.WMF B039V205.WMF B039V301.WMF Symbol Description Index No. P-to-P Symbol Description Index No. P-to-P Symbol Description Index No. P-to-P Symbol Description Index No. P-to-P Sensors Vertical Transport Door Duplex Inverter PCB3 Operation Panel Board (OPU) Registration Lower Paper Size Duplex Transport... -
Page 247: Stamp
ELECTRICAL COMPONENT LAYOUT (B379) B379D202.WMF Symbol Name Index No. P-to-P Motors DF Feed DF Transport Sensors Original Exit Original Reverse Registration Original Set DF Position Feed Cover Open Original Length - 1 Original Length - 2 Original Trailing Edge Solenoids SOL1 Stamp SOL2... - Page 248 ELECTRICAL COMPONENT LAYOUT (B387) B387V101.WMF Symbol Name Index No. P-to-P Motors DF Transport Sensors Registration Original Set DF Position Feed Cover Open Original Width 1 Original Width 2 Original Trailing Edge Original Length 1 Original Length 2 Solenoids SOL1 Stamp SOL2 DF Pick-up Magnetic Clutches...
- Page 249 ELECTRICAL COMPONENT LAYOUT (B384) B384V102.WMF Symbol Name Index No. P-to-P Motors Paper Feed Lower Lift Upper Lift Sensors Lower Paper Height 2 Lower Paper Height 1 Upper Paper Height 2 Upper Paper Height 1 Vertical Transport Lower Paper End Upper Paper End Lower Lift Upper Lift Switches...
- Page 250 ELECTRICAL COMPONENT LAYOUT (B385) B385V102.WMF Symbol Name Index No. P-to-P Motors Lift Paper Feed Sensors Lift Paper Height 2 Paper Height 1 Paper End Switches Paper Size Tray Cover PCBs PCB1 Tray Main G9-10 Others Optional Tray Heater...
Need help?
Do you have a question about the K-C1 and is the answer not in the manual?
Questions and answers