
Related Manuals for Avaya one-X 9610


Summary of Contents for Avaya one-X 9610
- Page 1 ® Avaya one-X Deskphone Edition for 9600 Series IP Telephones Installation and Maintenance Guide Release 3.1 Service Pack 4 16-300694 Issue 8 March 2012...
- Page 2 Avaya support Avaya provides a telephone number for you to use to report problems or to ask questions about your product. The support telephone number is 1-800-242-2121 in the United States. For additional support telephone numbers, see the Avaya Web site: http://www.avaya.com/support...
-
Page 3: Table Of Contents
Contents Chapter 1: Introduction ......About This Guide ........Intended Audience. - Page 4 Contents View Multi-Language Strings ......Reset System Values ....... . . Restart the Telephone .
- Page 5 Contents Appendix C: Related Documentation ....IETF Documents ........ITU Documents.
- Page 6 Contents 6 9600 Series IP Telephones Release 3.1 SP4 Installation and Maintenance Guide...
-
Page 7: Chapter 1: Introduction
All 9600 Series IP Telephones support the H.323 signaling protocol and work natively as of Avaya Communication Manager (CM) Release 4.0; when operating under earlier CM releases the telephones can be aliased as 4600 Series IP Telephone sets as described in the Avaya ®... -
Page 8: Document Organization
LAN administrator. Chapter 4: Maintaining Describes maintenance actions like downloading telephone 9600 Series IP Telephones software from the Avaya support Web site and customizing system values. Chapter 5: Troubleshooting Describes error conditions and messages that might occur Guidelines during the installation of the 9600 Series IP Telephones. -
Page 9: What's New In This Release
Internet Engineering Task Force (IETF) and the International Telecommunication Union (ITU). Customer Support For 9600 Series IP Telephone support, call the Avaya support number provided to you by your Avaya representative or Avaya reseller. Issue 8 March 2012... - Page 10 Introduction Information about Avaya products can be obtained at the following URL: http://www.avaya.com/support 10 9600 Series IP Telephones Release 3.1 SP4 Installation and Maintenance Guide...
-
Page 11: Chapter 2: 9600 Series Ip Telephone Installation
Ethernet (GigE) interface, which speeds data transmission. The 9670G also has an integrated ® Bluetooth™ interface; setup of a Bluetooth device is described in the Avaya one-X Deskphone Edition for 9670G IP Telephone User Guide (Document Number 16-602638). Telephone models appended with "C"... -
Page 12: Software
HTTP server might be initiated. The software download gives the telephone upgraded functionality. For subsequent downloads of software upgrades, the Avaya Media Server provides the capability for a remote restart of the IP telephone. As a consequence of restarting, the telephone automatically starts reboot procedures which result in a download if new software is available. - Page 13 Pre-Installation Checklist Verify These Network Requirements (continued) Avaya supports 9600 Series IP Telephones running Software Release 3.0 only on Avaya Communication Manager (CM) 3.1 and later switches. CM Release 3.1 software supports 9600 Series IP Telephones only when aliased as 4600 Series IP Telephones. Specifically, the 9610 and 9620 have to be aliased as a 4610SW and the 9630/9630G, 9640/9640G, and 9650/9650C have to be aliased as a 4620SW.
-
Page 14: Assembling The 9600 Series Ip Telephone
Note: For sites using headsets, the 9600 Series IP Telephones support only the HIS Note: headset cords. See your Avaya representative for information. Assembling the 9600 Series IP Telephone CAUTION: Be careful to use the correct jack when plugging in the telephone. The jacks are... - Page 15 Assembling the 9600 Series IP Telephone Note: The 9610 and 9620L are PoE Class 1 devices and do not have an IEEE power Note: switch. Table 1: Impact of Additional Devices on Telephone Power over Ethernet Power Class Telephone Combinations Resulting in Power Combinations Resulting in Power Model Class 2...
- Page 16 GigE (Gigabit Ethernet) adapter and/or a Bluetooth adapter. Installation options for those devices are not shown in the illustrations that follow, but are boxed with the device and are also available on the Avaya support Web site. 16 9600 Series IP Telephones Release 3.1SP4 Installation and Maintenance Guide...
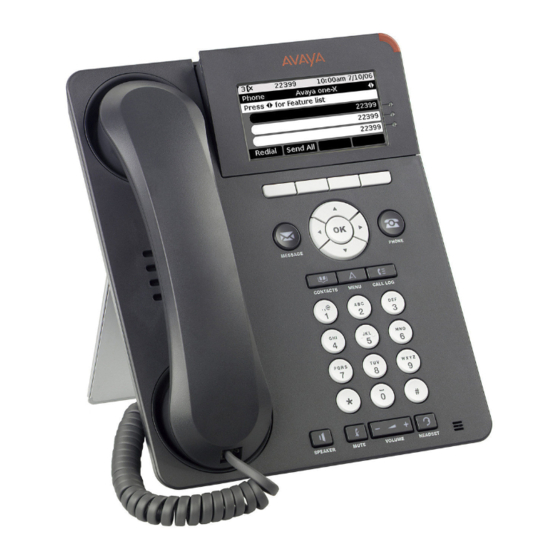
- Page 17 Assembling the 9600 Series IP Telephone Figure 1: Connection Jacks on a 9610 IP Telephone Issue 8 March 2012...
- Page 18 9600 Series IP Telephone Installation Figure 2: Connection Jacks on a 9620L IP Telephone 18 9600 Series IP Telephones Release 3.1SP4 Installation and Maintenance Guide...
- Page 19 Assembling the 9600 Series IP Telephone Figure 3: Connection Jacks on a 9620 or 9620C IP Telephone IEEE Issue 8 March 2012...
- Page 20 9600 Series IP Telephone Installation Figure 4: Connection Jacks on a 9630, 9640, or 9650/9650C IP Telephone IEEE Note: The SBM24 Button Module shown in the lower left corner can also be Note: attached to the telephone housing with the connector packaged with the module.
- Page 21 Assembling the 9600 Series IP Telephone Figure 5: Connection Jacks on a 9630G or 9640G or, 9670G IP Telephone IEEE Note: The SBM24 Button Module shown in the lower left corner can also be attached Note: to the telephone housing with the connector packaged with the module. CAUTION: When providing auxiliary power for the 9630G and 9640G, do not plug the aux CAUTION:...
-
Page 22: Dynamic Addressing Process
Note: Before starting this process you must have an extension number for the IP Note: telephone and the Avaya Communication Manager security code (password) for that extension, unless the telephone will use unnamed registration. For more information, see Unnamed Registration on page 27. - Page 23 1. During hardware initialization, the system initialization values NVCONTRAST and ® NVBRIGHTNESS are checked for non-null values, and set accordingly. The Avaya one-X name and logo display on sets with bit-mapped displays. 2. The system initialization value for NVLANGFILE is checked for a non-null value, in which case the text strings in the language file named by that value are used for text display.
- Page 24 9600 Series IP Telephone Installation Important: As of Software Release 1.5, pressing * (asterisk) whenever a “* to program“ Important: message displays or whenever the initialization process can support an interrupt invokes the Craft Access entry procedure to allow manual settings, but only if the PROCSTAT (local dialpad procedure status) system value is “0.”...
- Page 25 14. The telephone contacts the Avaya Media Server and attempts to log in. All IP telephones display a version of the following prompts for an extension:...
- Page 26 9600 Series IP Telephone Installation Enter Extension Enter Extension and press Enter or OK 26 9600 Series IP Telephones Release 3.1SP4 Installation and Maintenance Guide...
-
Page 27: Unnamed Registration
“Hot-desking” environments where there is a period of time between one user logging out ● and another user logging in on the same telephone. Using the Avaya Softphone application in “road warrior” mode, which allows a traveller to ● invoke the telephony features and functionality by taking over the office telephone extension. - Page 28 UNNAMEDSTAT, as indicated in Chapter 7 of the Avaya one-X for 9600 Series IP Telephones Administrator Guide. Unnamed registration appears to the end user like Avaya Communication Manager TTI Mode, and is similar from an administration perspective. For more information about TTI, see your Avaya Communication Manager documentation.
-
Page 29: Chapter 3: Local Administrative Options
Chapter 4: Maintaining 9600 Series IP Telephones and “9600 Series IP ® Telephone Scripts and Application Files” in Chapter 4 of the Avaya one-X Deskphone Edition for 9600 Series IP Telephones Administrator Guide. CAUTION: Only trained installers or technicians should perform local (craft) procedures. -
Page 30: Accessing Local (Craft) Procedures
Local Administrative Options Accessing Local (Craft) Procedures Note: In addition to the procedures listed here, the administrator may allow access to Note: only the VPN procedure, by setting the VPNPSWD parameter in the settings file. For more information on access to VPN-only Local Administrative Options, see the VPN Setup Guide for 9600 Series IP Telephones (Document 16-602968). - Page 31 Accessing Local (Craft) Procedures 3. Press # when password entry is complete. The entry is compared to the PROCPSWD value. If they match, the telephone displays the Craft Local Procedure screen, "Select procedure and press Start." 4. For all 9600 Series IP Telephones except the 9670G, use the navigation arrows to scroll to and highlight the local procedure you want, then press Start or OK.
- Page 32 Local Administrative Options 3. Use the navigation arrows to scroll to and highlight the local procedure you want, then press Start or OK. Or scroll to the procedure you want and press the corresponding line button. 32 9600 Series IP Telephones Release 3.0 Installation and Maintenance Guide...
-
Page 33: Entering Data For Administrative Options
The 9670G presents an onscreen keyboard that allows you to "type" the data you ® Note: want to enter on the display. See the Avaya one-X Deskphone Edition for 9670G IP Telephone User Guide for information on using the onscreen keyboard. -
Page 34: About Local Administrative Procedures
Local Administrative Options About Local Administrative Procedures Craft procedures allow you to customize the 9600 Series IP Telephone installation for your specific operating environment. This section provides a description of each local administrative option covered in this guide, with references to the pages on which the option appears. Note: Due to its smaller display size, the 9610 IP Telephone does not present the Note:... - Page 35 About Local Administrative Procedures Shown As (this value always displays in English) Craft Procedure Purpose DEBUG Enable/disable Debug Mode Disable/Enable Debug Mode page 43. GROUP Set the Group Identifier Group Identifier on page 43. Interface Control Interface Control on page 44. Enable/disable Event Logging Disable/Enable Event Logging page 45.
-
Page 36: Set The 802.1X Operational Mode
Local Administrative Options Set the 802.1X Operational Mode Use the following procedure to set or change the operational mode. Note: When updating local (Craft) procedures from a 9670G IP Telephone, touching the Note: line you want to change or the applicable softkey produces the same result as selecting a line and pressing the applicable softkey on other 9600 Series IP Telephones. -
Page 37: Pre-Installation Checklist For Static Addressing
Static addressing is necessary when a DHCP server is unavailable. CAUTION: Because of the increased opportunities for text entry errors associated with static addressing, Avaya strongly recommends that a DHCP server be installed and static addressing avoided. Issue 8 March 2012... - Page 38 Local Administrative Options Use the following procedure to invoke manual address information programming. 1. When you select ADDR from the Craft Local Procedure Screen, the Static Addressing Local Procedure screen displays as follows with the prompt “Select address to change.”: Line Description and (System Value) Static Addressing screen Telephone IP Address (IPADD)
-
Page 39: Disable/Enable Automatic Gain Control
Disable/Enable Automatic Gain Control 4. Press Save to store the new setting and redisplay the Craft Local Procedure screen or Cancel to return to the Craft Local Procedure screen without saving the value entered. Once the new values are stored, the telephone is reset. If a new boot program is downloaded from the HTTP server after you enter static addressing information, you must reenter your static addressing information. -
Page 40: Calibrating The 9670G Touch Screen
Local Administrative Options Calibrating the 9670G Touch Screen Screen calibration properly aligns the touch screen but should only be used for a significant problem with the touch screen. Important: Use a stylus rather than your finger to touch the calibration points precisely. Important: Note: The CLEAR Craft procedure clears any calibration data set using the... -
Page 41: Manually Setting The Dhcp Client Hardware Address
Manually Setting the DHCP Client Hardware Address Manually Setting the DHCP Client Hardware Address Use this procedure to manually set or change the DHCP Client Hardware Address, if you use static addressing rather than DHCP. 1. When you select CHADDR from the Craft Local Procedure Screen, the following text displays: Current setting: New Setting:... -
Page 42: Adjusting Contrast On Sbm24 Button Modules And Non-Color Ip Telephones
Local Administrative Options 2. If you do not want to clear all values, press Cancel to terminate the procedure and retain the current values. Press Clear to clear all values to their initial default values. The telephone displays the following text: Clearing values... -
Page 43: Disable/Enable Debug Mode
Disable/Enable Debug Mode Disable/Enable Debug Mode Note: When updating local (Craft) procedures from a 9670G IP Telephone, touching the Note: line you want to change or the applicable softkey produces the same result as selecting a line and pressing the applicable softkey on other 9600 Series IP Telephones. -
Page 44: Interface Control
Local Administrative Options Use the following procedure to set or change the Group Identifier. Note: Perform this procedure only if the LAN Administrator instructs you to do so. Note: For more information about groups, see The GROUP System Value on page 57. 1. -
Page 45: Disable/Enable Event Logging
Disable/Enable Event Logging "1000 Mbps full" when PHY1STAT = 6 ● The PHY2STAT text strings are: "Disabled" when PHY2STAT = 0 ● "Auto" when PHY2STAT = 1 ● "10Mbps half" when PHY2STAT = 2 ● "10Mbps full" when PHY2STAT = 3 ●... -
Page 46: Logoff
Local Administrative Options "Emergencies" when NVLOGSTAT = 1 ● "Alerts" when NVLOGSTAT = 2 ● "Critical" when NVLOGSTAT = 3 ● "Errors" when NVLOGSTAT = 4 ● "Warnings" when NVLOGSTAT = 5 ● "Notices" when NVLOGSTAT = 6 ● "Information" when NVLOGSTAT = 7 ●... -
Page 47: View Multi-Language Strings
View Multi-Language Strings 2. Press Cancel to return to the Craft Local Procedure screen without logging off the telephone. Press Log Out to unregister the telephone from the call server. View Multi-Language Strings Note: When updating local (Craft) procedures from a 9670G IP Telephone, touching the Note: line you want to change or the applicable softkey produces the same result as selecting a line and pressing the applicable softkey on other 9600 Series IP... -
Page 48: Restart The Telephone
Local Administrative Options Use the following procedure to reset all system initialization values to the application software default values. CAUTION: This procedure erases all static information, without any possibility of recovering CAUTION: the data. 1. When you select RESET VALUES from the Craft Local Procedure Screen, the telephone displays the following text: Press Reset to confirm. -
Page 49: Signaling Protocol Identifier
Signaling Protocol Identifier 2. Press Cancel to return to the Craft Local Procedure screen without restarting the telephone. Press Restart to proceed with the registration steps covered in the Dynamic Addressing Process on page 22. A restart does not affect user-specified data and settings like Contacts data or the telephone login and password. -
Page 50: Site-Specific Option Number Setting
Local Administrative Options 3. Press Save to store the new setting and redisplay the Craft Local Procedure screen. The remainder of this procedure depends on the status of the boot and application files. For information, see Appendix A: Restart Scenarios. Site-Specific Option Number Setting CAUTION: Do not perform this procedure if you are using static addressing. - Page 51 Self-Test Procedure Note: When updating local (Craft) procedures from a 9670G IP Telephone, touching the Note: line you want to change or the applicable softkey produces the same result as selecting a line and pressing the applicable softkey on other 9600 Series IP Telephones.
- Page 52 Local Administrative Options 52 9600 Series IP Telephones Release 3.0 Installation and Maintenance Guide...
-
Page 53: Chapter 4: Maintaining 9600 Series Ip Telephones
This chapter covers the maintaining the 9600 Series IP Telephones, for example, downloading a new telephone software version from the Avaya support Web site. Note that the recommended configuration is the latest call server software and the latest IP telephone firmware. -
Page 54: Download File Content
The Avaya-provided upgrade script files and the binaries included in the zip files upgrade the Avaya IP Telephones. You should not need to modify them. It is essential that all the binary files be together on the file server. When downloading a new release onto a file server with an existing release already on it, we recommend that you: Stop the file server. - Page 55 However, you might want to open the default file and administer the options to add useful functionality to your Avaya IP Telephones. This file must reside in the same directory as the upgrade script file, and must be called 46xxsettings.scr or 46xxsettings.txt.
-
Page 56: Contents Of The Settings File
This optional file is under your control and is where you can identify non-default option settings, application-specific parameters, etc. You can download a template for this file from the Avaya support Web site. An example of what the file could look like follows. Note: The following is intended only as a simple example. -
Page 57: Downloading Voice Dialing Language Files
The user can select the language he or she wants to speak to dial Contacts using a voice command as long as the Voice Dialing option on the Avaya Menu, Options & Settings, Call Settings menu is set to "On" (the default). Although Voice Dialing language files are automatically downloaded with other application and binary files, the Voice Dialing Language default value is null. - Page 58 Maintaining 9600 Series IP Telephones The simplest way to separate groups of users is to associate each of them with a number. Use the GROUP system value for this purpose. The GROUP system value cannot be set in the 46xxsettings file. The GROUP system value can only be set on a telephone-by-telephone basis. To do so, first identify which telephones are associated with which group, and designate a number for each group.
-
Page 59: Chapter 5: Troubleshooting Guidelines
HTTP/HTTPS server. See The View Administrative Option on page 60 for more information. Check the Avaya Web site to verify whether the correct files are being used. Use the ADDR option to verify IP Addresses. See Static Addressing Installation ●... -
Page 60: Dtmf Tones
If so administered through OPSTAT, end users can access the Network Note: Information option from the Avaya Menu’s Phone Settings option to view (but not change) most of the parameters associated with Craft Local Procedures. For more information about this option, see the applicable user guide(s). - Page 61 The View Administrative Option Table 2: Parameter Values Name System Value Format Model 96ccDccc Up to 8 ASCII characters: MODEL serial number. Phone SN cccccccccccccccccc Telephone Serial Number, up to 18 ASCII characters. PWB SN cccccccccccccccccc Printed Wiring Board (circuit board) Serial Number, up to 18 ASCII characters.
- Page 62 Troubleshooting Guidelines Table 2: Parameter Values (continued) Name System Value Format Bluetooth ccccccccccccccccccccc Up to 32 ASCII characters. Software Adapter ccccccccccc version (including CSR) for the Bluetooth® adapter, if applicable. Proxy Server WMLPROXY Proxy server used for WML functions. Voice Language NVVOXFILE Language file (NVVOXFILE) designated for File...
- Page 63 The View Administrative Option Table 2: Parameter Values (continued) Name System Value Format Scroll Right to see the following additional parameters/values: L2 Audio L2QAUD; layer 2 audio priority value. L2 Signaling L2QSIG; layer 2 signaling priority value. L3 Audio DSCPAUD; Differentiated Services Code Point for audio.
-
Page 64: Installation Error And Status Messages
DHCP file for GIPADD. RESOLUTION: Use static addressing to specify a router address, or ® change administration on DHCP, as indicated in the Avaya one-X Deskphone Edition for 9600 Series IP Telephones Administrator Guide. 1 of 5 64 9600 Series IP Telephones Release 3.1 SP4 Installation and Maintenance Guide... - Page 65 CAUSE: Downloaded application file was not downloaded or saved EEPROM error, correctly. repair required RESOLUTION: The telephone automatically resets and attempts to re-initialize. CAUSE: Incompatible emergency option. Emergency Option RESOLUTION: This should never happen. Contact Avaya. 2 of 5 Issue 8 March 2012...
- Page 66 RESOLUTION: Contact Avaya to upgrade your license. CAUSE: The call server has reached its limit of IP stations. Limit Error RESOLUTION: Unregister telephones not in use, or contact Avaya to upgrade your license. CAUSE: A device between the telephone and the call server is invoking...
- Page 67 CAUSE: The call server has an unspecified problem. System Error RESOLUTION: Consult your Avaya Media Server administration and troubleshooting documentation. CAUSE: The call server has rejected registration for an unspecified Undefined Error reason.
-
Page 68: Operational Errors And Status Messages
HTTP, as appropriate. CAUSE: This might be a firmware fault because the MAC address in memory is corrupted. RESOLUTION: Return the telephone to Avaya for repair. The message light on the telephone turns CAUSE: This is a hardware fault. - Page 69 AND power to the CAUSE: Loss of path to Avaya Media Server, telephone is fine (and DHCP Lease expired, or DHCP server not the telephone might...
- Page 70 RESOLUTION: You can have the user provide as gaps in speech, or diagnostic data by invoking the Network static, clipped or Information feature under the A (Avaya) button garbled speech, etc. on the telephone. One or more Quality of Service (QoS) features should be implemented...
- Page 71 RESOLUTION: Download a clean copy of the 96xxupgrade.txt file from the Avaya support Web site at http://www.avaya.com/support, and do not edit or rename it. Customize or change only the 46xxsettings file, as discussed in Chapter 4: Maintaining 9600 Series IP Telephones.
- Page 72 RESOLUTION: Verify that the first telephone created a backup file by checking that the appropriate administration was done in accordance with Chapter 7 of the Avaya ® Deskphone Edition for 9600 Series IP one-X Telephones Administrator Guide. Then verify...
-
Page 73: Lldp Troubleshooting
.jpg format or are too Pictures" causes login. large for the given telephone to display. the default (Avaya) RESOLUTION: Check the file format and verify or administered that height/width limits as specified in the User (custom) Guide are followed. -
Page 74: Lldp Setup/Troubleshooting Steps
If system value “STATIC” is set to “0” (the default), static addresses may be Note: overwritten by DHCP or the 46xxsettings file. Note: ® See the Avaya one-X Deskphone Edition for 9600 Series IP Telephones Note: Administrator Guide for details on how to set “STATIC” to use manually programmed IP Addresses. - Page 75 Activate the switch the telephone is connected to for LLDP. This is currently only possible with Extreme switches. Activating the switch for LLDP enables the switch to send appropriate IP Addresses using Avaya/Extreme Proprietary File Server and/or Call Server TLVs.
- Page 76 Troubleshooting Guidelines 76 9600 Series IP Telephones Release 3.1 SP4 Installation and Maintenance Guide...
-
Page 77: Appendix A: Restart Scenarios
Appendix A: Restart Scenarios Scenarios for the Restart Process The sequence of the restart process depends on the status of the boot and application files. This appendix explains the different scenarios possible. Note: The file names used in this appendix are examples only. Your particular file Note: names are likely to be different. -
Page 78: Boot File Needs To Be Upgraded
1. During hardware initialization, the system initialization values NVCONTRAST and ® NVBRIGHTNESS are checked for non-null values, and set accordingly. The Avaya one-X name and logo display on sets with bit-mapped displays. 2. The system initialization value for NVLANGFILE is checked for a non-null value, in which case the text strings in the language file named by that value are used for text display. - Page 79 Scenarios for the Restart Process 4. The telephone activates the Ethernet line interface, the PC Ethernet jack, and dial pad input to allow the invocation of procedures. The activation occurs as soon as possible after power-up or a reset. This message counts the seconds as the application file (replboot_v3.app in this example) is being written into RAM.
- Page 80 Restart Scenarios where s is the number of seconds that have elapsed since DHCP was invoked. The message on the left appears if 802.1Q tagging is off and access to local programming procedures is not disabled or restricted. (See Chapter 3: Local Administrative Options specifics.) The middle message appears if 802.1Q tagging is on and access to local programming procedures is disabled or restricted.
- Page 81 This usually takes longer than the file download. 15. The telephone contacts the Avaya Media Server and attempts to log in. All IP telephones display the following prompts for an extension:...
-
Page 82: Latest Boot File Loaded/No Application File Or Application File Needs To Be Upgraded
Restart Scenarios 16. Enter a new extension and press OK. To register the telephone without the extension or password (unnamed), press only OK or make no entry and wait 60 seconds. Note: Unnamed registration is the capability to register a telephone with the call server Note: without entry of an extension or password. - Page 83 Scenarios for the Restart Process 3. The software determines whether sufficient IP Address information was downloaded. In this scenario, it is discovered that sufficient information has not been downloaded. The following message displays while the DHCP process is invoked: DHCP: 0 secs * to program The number of elapsed seconds is incremented once per second, until DHCP successfully completes.
-
Page 84: Latest Boot File And System-Specific Application File Already Loaded
Restart Scenarios 8. When the telephone determines that the application file received is valid, the following message displays: File Obtained;please wait... s secs where s is the number of seconds that elapse while non-volatile memory is erased. 9. The following message displays while the application file is stored in flash memory: Saving to flash n%, x secs where n is the percentage of the file that was stored, and x is the number of elapsed... - Page 85 (BOOTNAME) is the latest version, and the name of the application file in the telephone is the same as APPNAME. 8. System-specific registration with the Avaya media server is invoked. 9. When registration finishes, a dial tone is available on the telephone.
- Page 86 Restart Scenarios 86 9600 Series IP Telephones Release 3.1 SP4 Installation and Maintenance Guide...
-
Page 87: Appendix B: Glossary Of Terms
DNS is used mostly to translate between domain names and IP Addresses. Avaya 9600 Series IP Telephones can use DNS to resolve names into IP Addresses. In DHCP, TFTP, and HTTP files, DNS names can be used wherever IP Addresses were available as long as a valid DNS server is identified first. - Page 88 SRTP Secure Real-time Transport Protocol. System - Specific to a particular type of call server, for example, Avaya Communication specific Manager (CM). “System-specific signaling” refers to messages specific to the signaling protocol used by the system, for example, H.323 and/or CCMS messages used by CM and IP Office.
-
Page 89: Appendix C: Related Documentation
Appendix C: Related Documentation IETF Documents IETF documents provide standards relevant to IP Telephony and are available for free from the IETF Web site: http://www.ietf.org/rfc.html. ITU Documents Access the ITU Web site for more information about ITU guidelines and documents, available for a fee from the ITU Web site: http://www.itu.int. - Page 90 Related Documentation 90 9600 Series IP Telephones Release 3.1 SP4 Installation and Maintenance Guide...
-
Page 91: Index
Index Index ....Download File Content ....Download Procedure Numerical ..Downloading Software Upgrades . - Page 92 Index ....TEST Procedure Troubleshooting ....DTMF Tones .
Need help?
Do you have a question about the one-X 9610 and is the answer not in the manual?
Questions and answers