Exabyte EXB-8205 Owner's Manual
8 mm tape drives, for standard and extended-length configurations
Hide thumbs
Also See for EXB-8205:
- Installation and operation manual (46 pages) ,
- Maintenance manual (101 pages)

Related Manuals for Exabyte EXB-8205


Summary of Contents for Exabyte EXB-8205
- Page 1 (;%0;538#)#(;%0;838#;PP# 7DSH#'ULYHV IRU#VWDQGDUG#DQG#H;WHQGHG0/HQJWK#FRQILJXUDWLRQV 2ZQHU·V# 0DQXDO 308061-001...
- Page 2 Copyright Copyright 1994 by Exabyte Corporation. All rights reserved. This item and the information contained herein are the property of Exabyte Corporation. No part of this document may be reproduced, transmitted, transcribed, stored in a retrieval system, or translated into any language or computer language in any...
- Page 3 Emissions is, in a shielded cabinet, using shielded cables, proper grounding of the SCSI bus and input power), Exabyte 8mm tape drives can be expected to maintain Standards their compliance to the standards listed in this section. It is the responsibility of the system integrator to certify and/or verify the final product to the relevant Product Safety, EMI and EMC standards.
- Page 4 Canadian This digital apparatus does not exceed the Class B limits for radio noise D.O.C. emissions from digital apparatus as set out in the radio interference regulations of the Canadian Department of Communications. Notice Le présent appareil numérique n’émet pas de bruits radioélectriques dépassant les limites applicable aux appareils numériques de Classe B prescrites dans le règlement sur le broullage radioélectrique édicté...
-
Page 5: Table Of Contents
Contents Welcome Identifying the tape drives ....8 About this manual ..... . . 9 Conventions used in this manual . - Page 6 Resetting the tape drive ....48 3 Preventive maintenance Exabyte cleaning cartridges ....49 Determining when to clean the tape drive .
-
Page 7: Welcome
System Interface (SCSI) and are ideally suited for back-up and restore tasks, data archiving, and data file interchange. The “eXtended-Length” (XL) versions of the EXB-8205 and EXB-8505 (EXB-8205XL and EXB-8505XL) provide additional capacity by supporting the extended-length EXATAPE™ 160m XL 8mm Data Cartridge. -
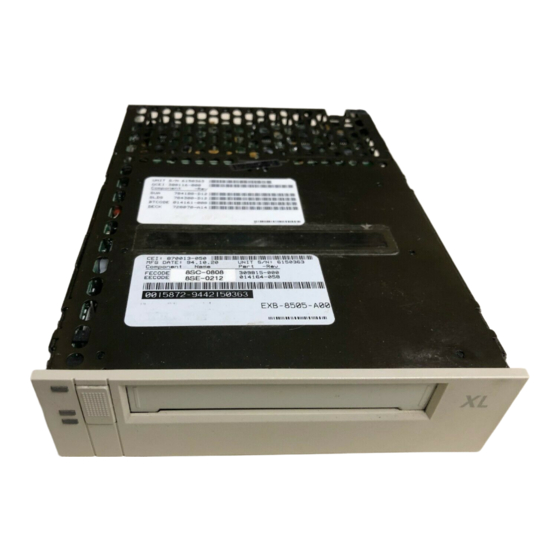
Page 8: Identifying The Tape Drives
The orientation of the LEDs (light emitting diodes) distinguishes the EXB-8205 from the EXB-8505. The following illustrations show the EXB-8205 and EXB-8505, both without enclosures. The XL drives are identical in appearance to the non-XL drives except that they have a raised diamond pattern on the unload button. -
Page 9: About This Manual
About this manual Use this manual as you install and operate your tape drive. Unless specifically noted, instructions in this manual apply to all of the tape drives. In addition to instructions for installation and operation, this manual provides information about selecting and maintaining data cartridges, cleaning the tape drive, obtaining technical assistance, purchasing supplies, and packing the tape drive for shipment. -
Page 10: For More Information
Exabyte Direct Sales as described beginning on page 63. For information about Exabyte Sales Support, refer to Chapter 6 beginning on page 61. For detailed tape drive specifications, refer to the EXB-8205 and EXB-8505 Product Specification for Standard and eXtended-Length Configurations (510504). -
Page 11: Installation
Installation This chapter provides information for the following tasks: Preparing for installation Installing the tape drive Installing the application software Testing your installation To install the tape drive properly, follow all of the instructions in this chapter. You can use the checklist at the beginning of each section to keep track of the steps you need to perform. -
Page 12: Preparing For Installation
Installation Preparing for installation To prepare for installation, follow the steps in this section. Step Procedure Ensure ESD protection Unpack the tape drive and save the packing materials Check the tape drive accessories Check the power cord Check the Compatibility Matrix Register your tape drive Set up your system Step 1 –... -
Page 13: Step 2 - Unpack The Tape Drive And Save The Materials
Chapter 1 Leave the tape drive in its antistatic bag until you are ready to install it. When possible, remove the internal tape drive from its bag and install it directly into the computer without setting it down. If you must lay the tape drive down, place it on top of the antistatic bag. -
Page 14: Step 4 - Check The Power Cord
If a power cord is not included or is inappropriate for your power connection requirements, contact your dealer or Exabyte Sales Support for assistance (see page 61). Step 5 – Check the Compatibility Matrix The tape drive must be compatible with your computer and the application software you plan to use. -
Page 15: Step 6 - Register Your Tape Drive
Chapter 1 Step 6 – Register your tape drive Read the warranty card included with your tape drive. Then fill out the registration card and mail it back to Exabyte. Owner’s Manual... -
Page 16: Step 7 - Set Up Your System
Installation Step 7 – Set up your system Before installing your tape drive, do the following: Obtain the following tools: Medium-size Phillips screwdriver Small flat-nose pliers Install a SCSI adapter card in your computer (if one is not already installed). This may also include installing and configuring a device driver for the adapter card on your computer. -
Page 17: Installing The Tape Drive
Chapter 1 Installing the tape drive Installing your tape drive requires the following general tasks: Step Procedure Set the SCSI ID (pages 17 through 19) Terminate the SCSI bus (pages 20 through 22) For the internal tape drive, install the tape drive in an empty drive bay (pages 23 through 30) For the external tape drive, connect the tape drive to the SCSI bus and a power source (pages 31 through 34) - Page 18 Installation The tape drives are shipped with the SCSI ID set to 2. If you are installing the tape drive on an existing SCSI bus and another device (for example, a hard drive) is already assigned to that ID, you must change the tape drive’s ID.
- Page 19 Chapter 1 Changing the external tape drive’s SCSI ID 1. Locate the SCSI ID switch on the back of the enclosure. 2. Use a fine-tipped instrument to press the buttons on the SCSI ID switch until you reach the desired address for your tape drive. Owner’s Manual...
-
Page 20: Step 2 - Terminate The Scsi Bus
Installation Step 2 – Terminate the SCSI bus The SCSI bus attached to the tape drive must be terminated correctly to ensure proper operation. To accomplish this, the devices located at the physical ends of the SCSI bus must have terminators installed. All other devices attached to the SCSI bus must have the terminators removed. - Page 21 CAUTION If you must replace a terminator, be sure to use the correct type to avoid damaging the tape drive. Replacement terminators are available from Exabyte. Owner’s Manual...
- Page 22 Installation Terminating an external tape drive If your external tape drive will be at the physical end of the SCSI bus, push the external terminator provided onto either of the SCSI connectors on the back of the tape drive enclosure. If the tape drive does not terminate the bus, you will connect SCSI cables into both connectors.
-
Page 23: Step 3 - Install The Internal Tape Drive
Chapter 1 Step 3 – Install the internal tape drive Follow the guidelines in this section to install the internal tape drive in a computer drive bay. If you are installing the tape drive in another type of enclosure, refer to Appendix B for other internal installation requirements, then resume reading on page 34, “Power on the tape drive.”... - Page 24 Installation 4. Remove the cover plate from the drive bay you intend to use. Refer to your computer owner’s manual for instructions. If mounting clips and screws are present, keep them. They may be needed for securing the tape drive to the bay in a later step. Note: If necessary, remove a floppy disk drive to provide an empty half-high drive bay for the tape drive.
- Page 25 Chapter 1 Depending on the type of mounting required, proceed as follows: Use the tape drive as it comes from the package. Without rails Skip to page 26. Use the rails included in the tape drive accessory With standard rails kit.
- Page 26 Installation Connect the SCSI cable to the tape drive The SCSI ribbon cable provided in the accessory kit has three connectors, one on each end and a third one near the middle of the cable. The method you use to connect the cable to the tape drive depends on whether you already have a SCSI device attached to your SCSI adapter card.
- Page 27 Chapter 1 2. From the front of the computer, thread the SCSI ribbon cable into the computer through the open bay. 3. Connect the free end of the SCSI ribbon cable to the connector on your SCSI adapter card. 4. Slide the tape drive into the bay. Skip to page 29 to continue the installation.
- Page 28 Installation If you already have another internal SCSI device installed: Note: These instructions assume that the SCSI adapter card and the previously installed SCSI device terminate the SCSI bus. 1. Locate the existing ribbon cable connecting your SCSI adapter card to the SCSI device already installed in your computer (for example, the hard drive).
-
Page 29: Connect The Power Cable
Chapter 1 Connect the power cable 1. Locate a free power cable coming from your computer’s power supply. Push the connector into the power connector on the back of the tape drive. If your computer does not have a spare power cable or if the cable is not long enough to reach the back of the tape drive, you will need to use the power cable (305218) provided in the accessory box. - Page 30 Installation 2. If your computer uses a grounding wire to provide additional ⁄ grounding to internal devices, locate the wire. Use a -inch female " spade connector to attach the wire to the grounding tab on the back of the tape drive. Attach the tape drive to the drive bay 1.
-
Page 31: Step 4 - Install An External Tape Drive
Chapter 1 Step 4 – Install an external tape drive Installing the external tape drive requires the following steps: Procedure Locate a level surface Install the feet Connect the SCSI cable (page 33) Connect the power cord (page 34) Locate a level surface Locate a level surface close to your computer and near a readily accessible outlet. - Page 32 Installation Remove the backing from the feet and place them within 0.5 inch (1.3 cm) from the sides of each corner of the enclosure. CAUTION When using the tape drive in a vertical position, failure to install the feet on the enclosure can block the air flow through the vents and cause overheating of the enclosed tape drive.
- Page 33 Chapter 1 Connect the SCSI cable 1. Make sure that the power switches on the computer and the tape drive enclosure are in the off position. 2. Plug one end of the SCSI cable provided in the accessory kit into the SCSI connector on the back of the enclosure.
-
Page 34: Step 5 - Power On The Tape Drive
Installation Connect the power cord 1. Make sure that the power switches on the computer and the tape drive enclosure are in the off position. 2. Plug the appropriate power cord, described on page 14, into the power connector on the back of the tape drive enclosure. 3. - Page 35 Chapter 1 3. Wait while the tape drive performs its power-on self-test. During this time, the following occurs: All three of the tape drive’s LEDs light. The tape drive’s 30-second power-on self-test begins. If you have an external tape drive, the power-on LED on the front of the enclosure lights and the fan mounted at the back of the enclosure begins to rotate.
- Page 36 Installation The following illustration shows the placement of the external tape drive’s power-on indicator and the LEDs. The table on page 42 shows the LED combinations you may observe during the self-test. Note: The internal tape drive LEDs are the same as those on the external model.
-
Page 37: Step 6 - Install Your Software Application
If you are unable to See Chapter 5 for information about contacting your resolve the problem dealer, service representative, or Exabyte Sales yourself: Support. Step 6 – Install your software application After installing the tape drive, install your application software. If the application is already installed, you may need to reconfigure it for use with your tape drive. -
Page 38: Step 7 - Test Your Installation
Installation Step 7 – Test your installation After installing your tape drive and application software, check the installation by performing a simple backup and restore operation to verify that your software and tape drive are communicating properly before you begin operation. Note: If this is the first time you have used the tape drive or if the tape drive has been stored for six months or more, repeat steps 4 and 5 of the following procedure at least... - Page 39 See the table on page 42 for information about reading drive’s LEDs the LEDs. are on or flashing: If you are See Chapter 5 for information about contacting your unable to dealer, service representative, or Exabyte Sales Support. resolve the problem yourself: Owner’s Manual...
- Page 40 Installation Notes EXB–8205 and EXB–8505...
-
Page 41: Operating The Tape Drive
Operating the tape drive This section includes information about the following: Reading the tape drive’s LEDs Selecting data cartridges Setting the write-protect switch on the data cartridge Loading and unloading a data cartridge Reading the LEDs The tape drive uses three LEDs to indicate its operating states. The LEDs indicate the following general conditions: When the top (orange) LED is flashing, the tape drive has an error or needs cleaning. - Page 42 Operating the tape drive When the bottom (green) LED is on, a data cartridge is loaded in the tape drive. When this LED is flashing, the tape is moving or the tape drive needs cleaning. The following table shows specific combinations of LEDs that may occur during tape drive operation.
-
Page 43: Selecting Data Cartridges
Data Cartridges are formulated specifically for use in a data storage environment and offer reliability, extended durability, and long-term archivability. In addition, exclusive use of EXATAPE media with Exabyte 8mm tape drives has been shown to prolong head and tape life. Important: Exabyte strongly recommends that you use... - Page 44 14.0 GB Assuming a compression ratio of 2:1. > The 160m XL data cartridge is automatically ejected by the EXB-8205 and EXB-8505. EXATAPE 160m XL 8mm data cartridges All EXATAPE 160m XL data cartridges contain a Recognition System stripe located on the tape leader for media identification. The EXB-8205XL and EXB-8505XL use this stripe to distinguish data-quality metal-particle media, such as EXATAPE, from other 160m media.
-
Page 45: Write-Protecting A Data Cartridge
Chapter 2 Write-protecting a data cartridge Before loading a data cartridge in the tape drive, make sure that the write-protect switch on the cartridge is set correctly for the desired operation. You can use a ball-point pen or similar instrument to set the write-protect switch as shown: Write protect (colored tab fully visible) Write enable (colored tab not visible) -
Page 46: Loading A Data Cartridge
Operating the tape drive Loading a data cartridge To load a data cartridge into the tape drive, follow these steps: 1. Make sure that the write-protect switch has been set correctly for the desired operation, as explained on page 45. 2. -
Page 47: Unloading A Data Cartridge
Chapter 2 4. The tape drive automatically loads the data cartridge and positions the tape to the logical beginning of tape (LBOT) within approximately 45 seconds (assuming that the data cartridge has already been rewound). During the load operation, the tape drive determines the tape format and the length of the tape. -
Page 48: Resetting The Tape Drive
Operating the tape drive Error during unload procedure If an error exists before or during the unload procedure, the unload sequence will be suspended and the orange LED will flash. To clear the error, press the unload button again. The unload sequence will be reattempted;... -
Page 49: Preventive Maintenance
Exabyte cleaning cartridges Use an Exabyte 8mm Cleaning Cartridge or an Exabyte-approved cleaning cartridge to clean the tape drive. The Exabyte 8mm Cleaning Cartridge contains a shed-free fabric tape that traps and removes debris from tape drive heads and tape paths. By using this cleaning cartridge on a regular basis, you maintain data integrity and improve reliability of the tape drive. -
Page 50: Determining When To Clean The Tape Drive
Preventive maintenance Determining when to clean the tape drive You should clean the tape drive’s heads and tape path either once a month or after every 30 tape motion hours (or more frequently if you are operating in a particularly dirty environment). The tape drive keeps track of its tape motion hours internally. - Page 51 Chapter 3 Take-up reel Supply reel Cleaning material 3. Insert the cleaning cartridge in the tape drive. The cleaning cycle is performed automatically by the tape drive and takes from 2 to 3 minutes. When the cleaning cycle is complete, the cleaning cartridge is automatically unloaded and ejected from the tape drive.
-
Page 52: Caring For Data Cartridges
Preventive maintenance Caring for data cartridges To maximize the shelf life of your tapes and assure data integrity, follow these guidelines when storing data cartridges: Place a label or other reference information on the cartridge adjacent to the write-protect switch. On the label, you may want to include the cartridge number (log number), date of backup, and the format of the tape. -
Page 53: Replacing Data Cartridges
Chapter 3 Replacing data cartridges Approximately once each year, you may want to read all of the information on a tape and check the read error statistics. If errors have increased significantly since the previous test or if they exceed a certain predetermined threshold, you should rearchive the data to a new tape and discard the old tape. - Page 54 Preventive maintenance Notes EXB–8205 and EXB–8505...
-
Page 55: Troubleshooting
Problems reported by the application software Often you can solve a problem you experience with your tape drive by trying the steps recommended here. If your problem persists, contact your dealer or Exabyte Sale Support for assistance (see Chapter 5). Owner’s Manual... -
Page 56: Problems With Tape Drive Installation
Troubleshooting Problems with tape drive installation Most problems during installation occur because the SCSI bus is not correctly configured or the backup software is not correctly configured. If your tape drive and backup software are not communicating after installation or your software reports a hardware error, check the following: Compatibility. -
Page 57: Problems With Tape Drive Operation
Chapter 4 Power-on sequence. For the external tape drive, make sure that you power on the tape drive before you power on the computer. When you start your computer, the SCSI adapter card searches for SCSI devices attached to the computer. If your tape drive is not powered on at this point, the SCSI adapter card cannot detect it. - Page 58 Troubleshooting Data cartridge compatibility. Make sure that the data cartridge is compatible with your tape drive. Non-XL tape drives are not compatible with XL 8mm data cartridges and will automatically eject them. When selecting extended-length tapes for the XL tape drives, only use EXATAPE 160m XL 8mm data cartridges.
-
Page 59: Problems Reported By The Application Software
Data cartridge age. If the data cartridge has been in use for a long time or if it has been used frequently, try using a new data cartridge. Cleaning. Clean the tape drive using an Exabyte or Exabyte-approved 8mm Cleaning Cartridge. Refer to page 50 for instructions. - Page 60 Troubleshooting If you have been successfully operating your application software and tape drive in the past, but the software now reports a hardware error, check the following: Data cartridge. Try using a new data cartridge. Tape drive. The tape drive may have experienced a hardware error. Press the unload button to clear the error, then try loading the data cartridge again.
-
Page 61: Getting Help
2. Call your dealer or service representative. 3. If you are still unable to resolve the problem, call Exabyte Sales Support. Contacting Exabyte Sales Support... - Page 62 Any special add-on equipment not part of a standard integrated system Other software you were using at the time the problem occurred Exabyte Sales Support phone numbers Exabyte Sales Support is available in the United States from 8:00 a.m. to 6:30 p.m. Central Standard Time. Phone: 1-800-825-4727 or 1-913-492-6002...
-
Page 63: Ordering Supplies From Exabyte
Chapter 5 Note: If it is more convenient to your location, contact Exabyte Technical Support in Holland at the following numbers: Phone: (31) 3403-51347 Fax: (31) 3403-51230 BBS: (31) 3403-51258 Ordering supplies from Exabyte You can order data cartridges, cleaning cartridges, and manuals directly from Exabyte. -
Page 64: Returning The Tape Drive For Repair
If it is determined that your tape drive requires repair and you need to return it to the factory for service, follow these instructions to ensure rapid, accurate turnaround: Contact Exabyte Direct Service to obtain a Return Materials Authorization (RMA) number and the shipping address. Call: Phone: 1-800-EXATAPE (1-800-392-8273) or... - Page 65 Otherwise, Exabyte will not accept the package. Important: You must obtain an RMA number before returning a tape drive to Exabyte. Packages received without an RMA number clearly marked on the box will be returned unrepaired, freight collect. Write your return address on the outside of the shipping container.
-
Page 66: Moving The Tape Drive
Getting help Moving the tape drive To ship your tape drive or move it a long distance, repack it using the original packing materials. If you do not have the original shipping container, contact your dealer or service representative for shipping instructions. -
Page 67: Appendix A Installation Requirements
Installing a remote SCSI ID switch (page 69) Providing chassis grounding (page 69) Connecting the tape drive to the power supply (page 70) Refer to the EXB-8205 and EXB-8505 Product Specification for Standard and eXtended-Length Configurations for detailed installation specifications for the tape drives. - Page 68 Appendix A Installation requirements Use at least four mounting holes to secure the tape drive. Use the four holes from only one set (“A,” “B,” or “C,” as shown in the following figures). Using combinations of mounting holes from different sets may distort the frame.
- Page 69 Appendixes The ventilation slots at the sides and top of the tape drive must be free of obstruction so that adequate airflow is provided. There must be sufficient space to access and operate the front panel controls. Installing a remote SCSI ID switch If you want to set the SCSI ID remotely, you can attach a remote switch assembly (not provided with the tape drive) to the tape drive’s SCSI ID jumper block.
-
Page 70: Connecting A Power Cable
Appendix A Installation requirements Connecting a power cable The tape drive operates from standard +5 VDC and +12 VDC supply voltages; it cannot use external AC power. Safety agency certification requires that the supplied voltage be from a Safety Extra-Low Voltage source (per IEC 950). -
Page 71: Appendix B Tape Drive Specifications
Appendix B Tape drive specifications General Up to 5.0 GB on one 112m data cartridge > Capacity – EXB-8205 Up to 7.0 GB on one 160m XL data cartridge > EXB-8205XL Up to 10.0 GB on one 112m data cartridge EXB-8505 Up to 14.0 GB on one 160m XL data cartridge... -
Page 72: Appendix C Glossary
Appendix C Glossary Appendix C Glossary address See SCSI ID. A signal line or a set of signal lines used by an interface system (for example, SCSI) to connect a number of devices in order to transfer information to and from those devices. For example, the SCSI cable used to connect the tape drive to the SCSI adapter card serves as a bus. - Page 73 Appendixes eXtended-Length tape A specially manufactured, 160m extended length data cartridge. The 160m XL tapes are equipped with a Recognition System stripe, located on the tape leader. This leader allows an XL tape drive to recognize the tape as data-quality metal-particle media. XL tapes are not compatible with and are automatically ejected by non-XL half-high tape drives.
- Page 74 Appendix C Glossary SCSI ID A unique address (0 to 7) assigned to a SCSI device attached to a SCSI bus. single-ended device A SCSI configuration that uses one signal line to transmit a bus signal between devices. The tape drives described in this manual are single-ended devices, which means that all other devices on the bus must be single-ended devices also (not differential, which use two signal lines.)
-
Page 75: Index
ESD, protecting against Exabyte Sales Support 61 – 62 EXB-8205 and EXB-8205XL SCSI bus identifying EXB-8505 and EXB-8505XL cable requirements identifying internal power extended-length data cartridges remote SCSI ID switch... - Page 76 installation power switch, location on external tape preparing for 12 – 14, 16 drive setting the SCSI ID 17 – 19 power-on procedure 34 – 37 software power-on self-test internal tape drive description initial power-on 38 – 39 LEDs during installing 23 –...
- Page 77 software terminators determining compatibility for external tape drive 13, 22 determining when to install for internal tape drive 20 – 21 guidelines for installing for SCSI bus supplies, ordering requirements for internal support troubleshooting hardware errors reported by software installation problems 39, 56 tape media errors reported by software...
- Page 78 Notes...
Need help?
Do you have a question about the EXB-8205 and is the answer not in the manual?
Questions and answers