Table of Contents
Advertisement
Quick Links
Advertisement
Table of Contents

Related Manuals for Exabyte 8505XL


Summary of Contents for Exabyte 8505XL
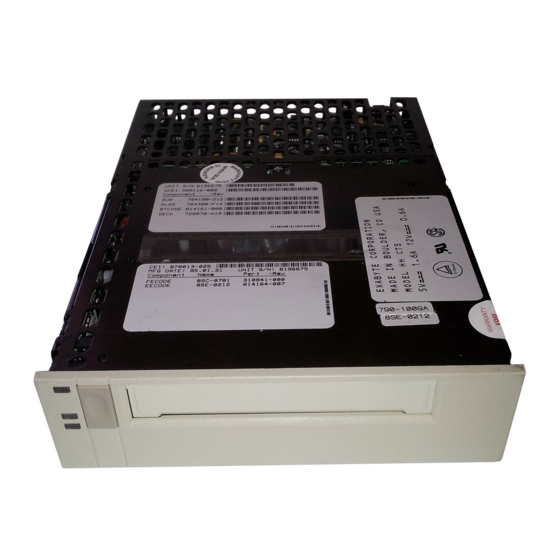
- Page 1 8505XL 8-mm Tape Drive Owner’s Guide Document Number 007-3086-001...
- Page 2 States. Contractor/manufacturer is Silicon Graphics, Inc., 2011 N. Shoreline Blvd., Mountain View, CA 94043-1389. IRIX and Silicon Graphics are registered trademarks and CHALLENGE and Onyx are trademarks of Silicon Graphics Corporation. EXATAPE is a trademark of of Exabyte Corporation. 8505XL 8-mm Tape Drive Owner’s Guide Document Number 007-3086-001...
-
Page 3: Table Of Contents
List of Tables vii About This Guide ix Typographical Conventions x Installation 1 Products that Support the 8505XL 1 Preparing for Installation 2 Ensuring ESD Protection 2 Unpacking the Tape Drive and Saving the Materials 3 Checking the Tape Drive Accessories 3... - Page 4 Contents Operating the Tape Drive 17 Reading the LEDs 17 Selecting Data Cartridges 19 Write-Protecting a Data Cartridge 20 Loading a Data Cartridge 20 Unloading a Data Cartridge 21 Resetting the Tape Drive 21 Preventive Maintenance 23 Recommended Cleaning Cartridges 23 Determining When to Clean the Tape Drive 23 Using the Cleaning Cartridge 24 Caring for Data Cartridges 25...
-
Page 5: List Of Figures
Installing the Tape Drive Into a Horizontal Drive Bay 10 Figure 1-4 Installing the Tape Drive Into a Vertical Drive Bay 11 Figure 1-5 Write-Enable/Disable Switch 13 Figure 1-6 Loading a Data Cartridge 14 Figure 1-7 8505XL Front Panel 18 Figure 2-1 Unload Button 21 Figure 2-2... -
Page 7: List Of Tables
List of Tables Problems and Possible Solutions 15 Table 1-1 LED States and Interpretations 18 Table 2-1 8505XL Tape Capacity 19 Table 2-2 Drive Specifications 31 Table A-1... - Page 8 viii...
-
Page 9: About This Guide
About This Guide This guide helps you set up, install, and operate the 8505XL tape drive. The 8505XL uses 8-mm format tapes and installs in most of the existing Silicon Graphics© systems and data storage units that support single-ended, front-loading drives (FLDs). -
Page 10: Typographical Conventions
About This Guide Typographical Conventions These type conventions and symbols are used throughout this guide: Italics Screen type Bold Screen type Filenames, variables, IRIX® command arguments, command flags, titles of publications, icon names. Code examples, file excerpts, and screen displays (including error messages). User input. -
Page 11: Installation
• installing the tape drive • installing the software driver The 8505XL requires either IRIX 5.3, 6.1 or later software. If your Note: system already has IRIX 6.1, software driver installation is not required. • testing your installation To install the tape drive properly, follow all of the instructions in this chapter. -
Page 12: Preparing For Installation
Chapter 1: Installation Preparing for Installation To prepare for installation, follow the steps described in this chapter. 1. Ensure ESD protection (see “Ensuring ESD Protection” on page 2). 2. Unpack the tape drive and save the packing materials (see “Unpacking the Tape Drive and Saving the Materials”... -
Page 13: Unpacking The Tape Drive And Saving The Materials
The tape drive’s packaging helps protect the tape drive from shock, vibration, moisture, and electrostatic discharge (ESD). Checking the Tape Drive Accessories The 8505XL includes the following items: • tape drive •... - Page 14 ID, you must change the tape drive’s ID. Follow these steps to change the SCSI ID of the 8505XL: The 8505XL SCSI jumpers are located in the back of the drive and are Note: covered by the drive sled hardware. To change the SCSI ID, you must...
-
Page 15: Figure 1-1 Removing/Installing The Drive From/On The Drive Sled
Figure 1-1 Removing/Installing the Drive From/On the Drive Sled 2. Remove the drive adapter and power cables from the 8505XL (see Figure 1-1) and then place the drive on an anti-static surface. 3. Locate the SCSI ID jumper block on the back of the tape drive (see Figure 1-2). -
Page 16: Figure 1-2 Setting The Scsi Id (Default Setting Shown)
Chapter 1: Installation SCSI ID Figure 1-2 Setting the SCSI ID (Default Setting Shown) 4. Using a pair of flat-nose pliers, slide the small plastic jumpers over the pins on the jumper block to obtain the desired address. Extra jumpers are shipped in a separate bag. -
Page 17: Configuring The Drive Sled For Single-Ended Operation
(see Figure 1-1). Configuring the Drive Sled for Single-Ended Operation The 8505XL drive sled assembly houses a SCSI channel adapter board. You must ensure that the drive sled assembly is set to single-ended operation. Caution: Use proper handling and storage procedures to minimize the loss of data and equipment. -
Page 18: Terminating The Scsi Bus
Chapter 1: Installation Single−ended, 50−pin SCSI drive on channel A Setting the Drive Sled for Single-Ended Operation Figure 1-3 Your system disk should always be set to SCSI ID 1. Be sure each SCSI Note: device on a bus has a unique SCSI address (ID). The SCSI bus cannot function properly if more than one device has the same SCSI ID. -
Page 19: Installing Into A Horizontal Drive Bay
Follow these instructions to install a half-height front-loading device: Installing Into a Horizontal Drive Bay Follow these instructions to install the drive into a horizontal drive bay. 1. Orient the FLD and sled assembly so that the connectors on the back are on the bottom half of the drive and face away from you (see Figure 1-4). -
Page 20: Figure 1-4 Installing The Tape Drive Into A Horizontal Drive Bay
Chapter 1: Installation Slide drive lever left to lock sled Drive lever in locked position Installing the Tape Drive Into a Horizontal Drive Bay Figure 1-4... -
Page 21: Figure 1-5 Installing The Tape Drive Into A Vertical Drive Bay
Installing the Tape Drive Drive sled Drive Figure 1-5 Installing the Tape Drive Into a Vertical Drive Bay... -
Page 22: Turning On Power To The Tape Drive
The 8505XL requires IRIX 5.3, 6.1, or later software for proper operation. If your system has IRIX 5.3, an 8505XL software driver from a CD must be installed. If your system has IRIX 6.1 or later software, no additional driver software is required. -
Page 23: Figure 1-6 Write-Enable/Disable Switch
1. Locate a data cartridge that does not contain any valuable information and make sure that its write-protect switch is set to write-enable (see Figure 1-6). 2. Gently push the data cartridge as shown (in Figure 1-7) until the load mechanism pulls the cartridge into the drive. -
Page 24: Figure 1-7 Loading A Data Cartridge
Chapter 1: Installation Figure 1-7 Loading a Data Cartridge 3. Wait while the tape drive loads the tape, determines the tape format, and positions the tape to the logical beginning of the tape (LBOT). This takes about 45 seconds. When the green LED is on solid, the tape drive is ready. - Page 25 4. Perform a backup operation to write a small amount of data to the tape (see your IRIX administration documentation, as required). 5. Rewind the tape and read the data written in step 4 and compare it to the original. This determines whether the software and tape drive are functioning properly.
- Page 26 Chapter 1: Installation...
-
Page 27: Operating The Tape Drive
Reading the LEDs Chapter 2 Operating the Tape Drive This section includes information about the following: • reading the tape drive’s LEDs • selecting data cartridges • setting the write-protect switch on the data cartridge • loading and unloading a data cartridge The tape drive uses three LEDs (Figure 2-1) to indicate its operating states. -
Page 28: Figure 2-1 8505Xl Front Panel
(green or orange) Tape motion indicator (green) Figure 2-1 8505XL Front Panel You may occasionally observe LED combinations and sequences not Note: described in Table 2-1. These other combinations represent special or unusual conditions that are beyond the scope of this table. -
Page 29: Selecting Data Cartridges
Video-grade tape can be less accurate than data-grade tape when recording high-density data. The video-grade tape is also more abrasive to tape-drive recording heads. The 8505XL drive supports 15-m, 54-m, 112-m, and 160-m XL tapes (see Table 2-2). Table 2-2... -
Page 30: Write-Protecting A Data Cartridge
Loading a Data Cartridge The EXATAPE 160-m XL data cartridges contain a recognition system Note: stripe located on the tape leader for media identification. The 8505XL uses this stripe to distinguish data-quality metal-particle media, such as EXATAPE, from other 160-m media. -
Page 31: Unloading A Data Cartridge
Unloading a Data Cartridge Resetting the Tape Drive The unload button is the only operating control on the tape drive. It is used to unload the data cartridge from the tape drive (see Figure 2-2). You can use the unload button to clear some hardware errors. If a Note: hardware error occurs, press the unload button to reset the tape drive. - Page 32 Chapter 2: Operating the Tape Drive...
-
Page 33: Preventive Maintenance
Silicon Graphics recommends that you clean your tape drive with the Exabyte 8 mm cleaning cartridge (supplied with your package) or an Exabyte-approved cartridge. Using this cleaning cartridge regularly allows you to maintain data integrity and improve reliability of the tape drive. -
Page 34: Using The Cleaning Cartridge
If there is no cleaning material remaining, discard the cleaning cartridge and use a new one. The 8505XL ships with a cleaning cartridge that can be used for up to nine cleanings. Caution: Do not rewind and reuse the cleaning cartridge. Reusing a cleaning cartridge redistributes contaminants previously removed from the tape path. -
Page 35: Caring For Data Cartridges
Caring for Data Cartridges To maximize the shelf life of your tapes and assure data integrity, follow these guidelines when storing data cartridges: • Place a label or other reference information on the cartridge adjacent to the write-protect switch. On the label, you may want to include the cartridge number (log number), date of backup, and format of the tape. -
Page 36: Replacing Data Cartridges
Chapter 3: Preventive Maintenance Replacing Data Cartridges Approximately once each year, you may want to read all information on a tape and check the read error statistics. If errors have increased significantly since the previous test or if they exceed a certain predetermined threshold, you should rearchive the data to a new tape and discard the old tape. -
Page 37: Troubleshooting
• If you have IRIX 5.3, make sure that the additional driver software is installed on the system. IRIX 6.1 software already has the 8505XL driver in place. After checking all the items listed, reset the SCSI bus by resetting the system. -
Page 38: Problems With Tape Drive Operation
Chapter 4: Troubleshooting Problems With Tape Drive Operation Most problems with tape drive operation occur with improper cartridge use. If you have been successfully operating your backup software and tape drive in the past, but are now experiencing problems reading and writing data, check the following: •... - Page 39 If you are experiencing operating problems loading or unloading a data cartridge, check the following: • Make sure that your system is turned on. If the system is off, the tape drive may not eject the data cartridge. • The tape drive may have experienced a hardware error. Press the unload button to clear the error, then try loading the data cartridge again.
- Page 40 Chapter 4: Troubleshooting...
-
Page 41: Tape Drive Specifications
Appendix A Tape Drive Specifications Table A-1 shows the specifications for the 8505XL tape drive. Table A-1 Drive Specifications Parameter Interface Capacity 8200 format 8200c format Note: This assumes a 2:1 compression ratio 8500 format 8500c format Physical Characteristics Size... - Page 42 Appendix A: Tape Drive Specifications Table A-1 (continued) Drive Specifications Parameter Power and Reliability Input voltages Power consumption Mean time between failure Specifications Standard + 5 VDC and +12 VDC 5% 14.5 W 160,0000 hours at 10% duty cycle...
Need help?
Do you have a question about the 8505XL and is the answer not in the manual?
Questions and answers