Table of Contents
Advertisement
Advertisement
Table of Contents

Related Manuals for 3D Systems ProJet 1200


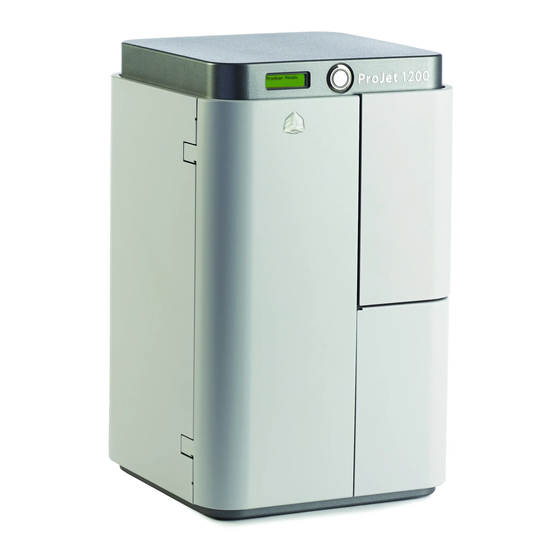
Summary of Contents for 3D Systems ProJet 1200
- Page 1 ProJet™ 1200 Professional 3D Printer User Guide Original Instructions...
-
Page 2: Table Of Contents
Installing the Curing Bulb . . . . . . . . . . . . . . . . . . . . . . . . . . . . . . . . . . . . . . . . . . . . . . . . . . . . . . . . . . . . . . . . . . . . . . . . . . . . . . . . . . . 14 3D Systems, Inc. - Page 3 Remove the Part from the Printer . . . . . . . . . . . . . . . . . . . . . . . . . . . . . . . . . . . . . . . . . . . . . . . . . . . . . . . . . . . . . . . . . . . . . . . . . . . . . . 32 3D Systems, Inc.
- Page 4 REPACKING THE PROJET 1200 . . . . . . . . . . . . . . . . . . . . . . . . . . . . . . . . . . . . . . . . . . . . . . . . . . . . . . . . . . . . . . . . . . . . . . . . . . . . . 39 3D Systems, Inc.
- Page 5 3D Systems, Inc.
-
Page 6: Introduction
Under the copyright laws, this user guide may not be copied, in whole or in part, without the written consent of 3D Systems . The ProJet logo is a trademark of 3D Systems and is registered in the U .S . Use of this logo without the prior written consent of 3D Systems may constitute trademark infringement and unfair competition in violation of federal and state laws . -
Page 7: Warranty
ProJet 1200 3D Printer . The warranty period for the ProJet 1200 3D printer is for one (1) year and starts at the earliest of (i) the date your ProJet 1200 3D printer is activated or (ii) “ninety (90) days after the ProJet 1200 3D Printer is shipped from 3D Systems to the end customer or to the reseller or retailer that sold the ProJet 1200 3D Printer to the end customer .”... -
Page 8: Important Safety Information
Pinch Point: Indicates hands and/or fingers potentially could be pinched when interacting with the equipment. Wear Gloves: Wear gloves when handling uncured VisiJet® build material . Ultraviolet Radiation Inside: Exposure may cause eye damage. Do not operate without covers. Wear UV eye protection . 3D Systems, Inc. -
Page 9: High Voltage Potential & Electrical Safety
Do not modify any safety features or make modifications to the printing system. Doing so is prohibited and voids warranty and contractual agreements . • Use of part materials, print pads or parts other than genuine 3D Systems® ProJet® 1200 components may void warranty and other contractual agreements . •... -
Page 10: Consumable Safety Guidelines
Keep materials away from direct sunlight, heat, flames and other direct light or UV energy sources. For optimal results, keep stored cartons closed and sealed until the cartridge is ready for use . Authorized 3D Systems VisiJet FTX Green Material should only be used in the printer . -
Page 11: Visijet Ftx Material Safety
If the door is opened during operation, use the recommended protective eye wear which blocks the UV light . • Hazardous voltage exists inside the electrical module. Injury or death from electrical shock can result if system’s electrical box covers are removed . When installing replacement modules, ensure power is off before removing panels . 3D Systems, Inc. -
Page 12: At-A-Glance
Print Cartridge Support Print Door Material Cartridge Clamp Lever Elevator Guide Rods UV Curing Bulb Socket Elevator Curing Chamber Carousel Print Platform Clamp Lever UV Curing Bulb Print Platform Curing Chamber Door Material Cartridge Clamp Curing Chamber 3D Systems, Inc. -
Page 13: Connections
CONNECTIONS Ethernet Power Input 3D Systems, Inc. -
Page 14: Specifications And Requirements
1288 1075 Elongation at Break, ASTM D638 8.80% 2.20% 6.20% 13.50% 11.70% 5.70% Flexural Strength, ASTM D638 Ash Content 0.01% 0.008% Primer Gray Transparent Description Wax-up castable Easy to Cast Wearable Metallic Wearable Metallic general purpose Tough 3D Systems, Inc. -
Page 15: Unpacking And Setting Up Your Projet 1200
UNPACKING AND SETTING UP YOUR PROJET 1200 CONTENTS ProJet 1200 Plastic Insert VisiJet® FTX Green Consumable Foam Insert Cartridge Power Supply Build Platform Curing Bulb USB Cable 3D Systems, Inc. -
Page 16: Unpacking The Projet 1200
UNPACKING THE PROJET 1200 CAUTION: Ensure that you save all foam and packing material for the future repacking of your ProJet 1200 . Shipping the printer without original packing materials may cause damage to the printer . Pull the grip handle tabs (A) . - Page 17 NOTE: There should be a minimum of 6”/152 mm air space between the back of the printer and any other object . NOTE: There should be at least 10”/254 mm air space on either side of the printer . Remove the protective film (A) covering the display. 3D Systems, Inc.
- Page 18 (C) . NOTE: When installing the UV curing bulb, ensure the plastic insert is reinserted in the material cartridge clamp . The plastic insert is designed to protect the glass pane in the material cartridge support . 3D Systems, Inc.
-
Page 19: Printer Setup
3 . Insert end of bulb down in hole and bulb base up into NOTCH socket ensuring it locks into place . UV LAMP BULB 4 . Carefully press the bulb base into the socket and ensure the connection is secure . 3D Systems, Inc. -
Page 20: Installing The Material Cartridge
. Cartridge Support Pre 6/12/2014 NOTE: For machines that were manufactured before 6/12/14 Glass Frame Assembly will look like photo at right . 3D Systems, Inc. -
Page 21: Installing The Print Platform
. This will eliminate the need to select Check Cartridge . Installing the Print Platform Always wear protective gloves when handling the print platform . Rotate the print platform clamp lever upward . 3D Systems, Inc. -
Page 22: System Requirements
- 3 button mouse with scroll - Keyboard - Internet connection and network card - Microsoft .NET Framework 4 .0 POLYGON MESH File Extension File Format Features .stl binary STL Import, Export parts .ctl Import, Export parts 3D Systems, Inc. -
Page 23: Create Account
. Your printers serial number appears on the backside of the machine . After registration an email will be sent to you with a link to the 3D Systems 3DS Central login page . Installing the ProJet 1200 Software 3DS Central is the location where you can access user manuals, installation guides, service procedures, software and firmware information . -
Page 24: Install Application
ProJet 1200 from the dropdown menu Select Download the application software by selecting the filename under the software header . NOTE: A window may open asking if you want to open or save the zipped file. Select your preferred option. - Page 25 . When bar is completing green, the next screen will appear. The last step in the process is when the Finalizing Installation screen appears, at this point select Finish . Installation is now complete . 3D Systems, Inc.
-
Page 26: Help Tab
Create Service Log On the Help tab, in the Help Group, click Create Service Log . Use this function when submitting a service request to your reseller . It will capture key information needed to troubleshoot problems . 3D Systems, Inc. -
Page 27: Connecting The Printer
Connecting Printer Using a USB Connection Follow Step 1 above, when LCD display shows ProJet 1200 Ready connect machine via USB cable and wait while machine installs all the necessary drivers for that particular printer on your computer . (This will take a couple of minutes) . - Page 28 Open the ProJet 1200 application . Double-click the ProJet 1200 icon that was placed on your desktop during the software installation . Select Printer icon from Home Tab . A list of available printers will pop up . Select the printer you wish to connect to and click Next .
-
Page 29: Activating Printer
. When new it will say 100% . Once cartridge is determined to be okay, you can carefully pull back the label . NOTE: Do not move the machine with the cartridge inside once it is opened . 3D Systems, Inc. -
Page 30: Operating The Printer
OPERATING THE PRINTER Application overview . SOFTWARE OVERVIEW Quick Access Toolbar Printer and Unit Information Main Menu Print Area Properties Ribbon Structure Tree 3D Systems, Inc. -
Page 31: Printing A Part
PRINTING A PART The ProJet 1200 can import .stl and .cti file formats. Before importing a part to print, you must first select the material that will be used to print the part . Click Select Preferences Select desired material from drop down menu . -
Page 32: Transform Parts
Manual Arrange Select Interactive Transform from the Home tab . Select the part Hover the mouse over top of the boundaries so that a vertical rotation axis appears . Rotate the part so it aligns with the X-axis. 3D Systems, Inc. -
Page 33: Generating And Editing Supports
. Create supports manually by selecting Manual Support from Home tab . Selecting size for support and clicking on the solid surface that support is needed . Close the command by clicking on Manual Support . 3D Systems, Inc. -
Page 34: Sending The Job To Print
. Select Print . NOTE: If you want to rebuild a print that was sent directly to the printer you can find the build file under \My Documents\3D Systems\ Geomagic Print . Print to File The print can also be saved as a file. -
Page 35: Features Of Geomagic Print
Select the part . Hover the mouse over the top boundaries so that a vertical rotation axis appears . Rotate the part so that it aligns with the X-axis. Now the part is properly arranged in the printing platform . 3D Systems, Inc. -
Page 36: Changing Z Compensation
0 .030mm) Green Range: 0 to 0 .27mm Cast Range: 0 to 0 .30mm Gray Range: 0 to 0 .24mm Clear Range: 0 to 0 .24mm Silver Range: 0 to 0 .24mm Gold Range: 0 to 0 .18mm 3D Systems, Inc. -
Page 37: Remove The Part From The Printer
NOTE: Resin may drip from the part . The towel is used to collect dripping resin so that printer parts are not exposed to resin . Pull the print platform handle (A) out from under the clamp . NOTE: The part will hang down under the print platform . 3D Systems, Inc. -
Page 38: Post Processing Parts
POST PROCESSING PARTS CLEANING PARTS The following equipment is needed for cleaning parts produced by the ProJet 1200 . Glass containers with lids • 16 oz, • 3 .5 inch diameter opening (minimum) • This size will hold parts that are “ring height” . -
Page 39: Cleaning Parts Using An Ultrasonic Cleaner
. If you are unsure if liquid resin remains, it is best to repeat steps 10 through 17 . Make certain you replace the lids on Containers 1 and 2 when they are not in use . Containers 1 and 2 can be used to clean 12 platforms before discarding and replacing the IPA . 3D Systems, Inc. -
Page 40: Special Consideration When Cleaning Parts
NOTE: FTX Gray may need longer cleaning time in Container 1 (3-5 minutes) depending on the part size . CAUTION: Leaving parts in IPA for too long may cause warping or delamination (peeling) of the parts . 3D Systems, Inc. -
Page 41: Cure And Post Process The Part
CAUTION: Before building again or touching print platform with skin, cure the printing platforms to avoid contact with any uncured material from getting on skin or contaminating future builds . 3D Systems, Inc. -
Page 42: User Maintenance
. Place the plastic insert (A) on the material cartridge support and place the foam insert (B) inbetween the cartridge support and clamp lever and lower the clamp lever (C) to secure it . 3D Systems, Inc. -
Page 43: Cleaning The Unit
(such as a microfiber). Make certain you inspect the glass that is a part of the print cartridge support. Remove the glass and clean any resin, fingerprints or any other debris which may have accumulated. Cleaning Cartridge Holder Glass Print Cartridge Support 3D Systems, Inc. -
Page 44: Service And Support
REPACKING THE PROJET 1200 At some point the ProJet 1200 may need to be moved or sent back for servicing . It is important to keep all the original packaging to facilitate this process . Follow these steps to safety repack your ProJet 1200 . - Page 45 Place original box over top of printer so it covers entire machine. 10 . Insert plastic handles in holes on the sides of the box. 11 . Press tabs (A) into side of plastic insert to secure handles to the box. 3D Systems, Inc.
- Page 46 3D Systems, Inc . 333 Three D Systems Circle | Rock Hill, SC | 29730 www .3dsystems .com ©2014 3D Systems, Inc . All rights reserved . pn 341410-00 Rev . E 3D Systems, Inc.
Need help?
Do you have a question about the ProJet 1200 and is the answer not in the manual?
Questions and answers