Advertisement
Quick Links
Advertisement

Related Manuals for 3D Systems PostCure 1050


Summary of Contents for 3D Systems PostCure 1050
- Page 1 User Guide Release Date: 1/6/2023 Original Instructions...
- Page 2 2.3 PostCure 1050 Environmental Safety ............................3 2.4 PostCure 1050 Electrical Safety ..............................4 2.5 PostCure 1050 Emergency Shutdown ............................4 2.6 PostCure 1050 First Aid and Protective Equipment ........................5 2.7 PostCure 1050 Safety Notice ................................ 6 2.8 PostCure 1050 Label Installation Diagram ..........................6 POSTCURE 1050 OVERVIEW ......................
- Page 3 8.1 PostCure 1050 Hardware Issues ............................... 58 8.2 PostCure 1050 Network Issues ..............................60 8.3 PostCure 1050 Firmware Issues ..............................61 POSTCURE 1050 SERVICE AND SUPPORT ..................62 POSTCURE 1050 EC DECLARATION OF CONFORMITY ..............63 3D Systems, Inc. p/n 40-D177, Rev. A...
- Page 4 3D Systems may (but shall not be obligated to) make improvements to this document from time to time. However, the Licensed User acknowledges that at any time after the expiration of the date of issuance, 3D Systems may institute a periodic charge or fee payable by the Licensed User in return for ongoing receipt of improvements.
- Page 5 WARNING: THE POSTCURE 1050 IS NOT SUITABLE FOR USE IN LOCATIONS WHERE CHILDREN ARE LIKELY TO BE PRESENT. There are two levels of users of the PostCure 1050, based on the amount and type of training the user has received. The two levels of users (operators and certified service personnel), are described below.
- Page 6 Safety Symbols and Definitions The following are safety symbols that are common to 3D Systems guides. Some or all of these symbols may appear in this guide and/or in other PostCure 1050 documentation. CAUTION: INDICATES THE POSSIBILITY OF LOSS OF DATA OR DAMAGE TO EQUIPMENT.
- Page 7 The air-conditioning system for the room should be sized to account for the added cooling load of the PostCure 1050. If the PostCure 1050 is ducted to remove the exhaust from the room, the added cooling load is much less than if the PostCure 1050 exhausts into the room.
- Page 8 → 2.6 PostCure 1050 First Aid and Protective Equipment The following paragraphs provide general first-aid procedures and recommendations for protective equipment to minimize the risks from material exposure. If professional medical attention is necessary, take the Safety Data Sheet (SDS) for the exact material involved to the attending physician.
- Page 9 PostCure 1050 exhaust to a building exhaust system to remove these cleaning solvent odors from the room environment. Post-curing parts with the PostCure 1050 may result in some odors to the room environment. Many materials generate minimal odors, while other materials generate stronger, more-noticeable odors. If the Post Cure 1050 exhaust is connected to a building exhaust system, this should remove most of the noticeable odors generated during post-curing.
- Page 10 UV Radiation - UV Radiation Hazard - Wear proper eye and skin protection. Electrical Warning - Possible electrical hazard on or behind panel with sticker Hot Surface Warning - Hot surface in vicinity of sticker when machine is operating 3D Systems, Inc. p/n 40-D177, Rev. A...
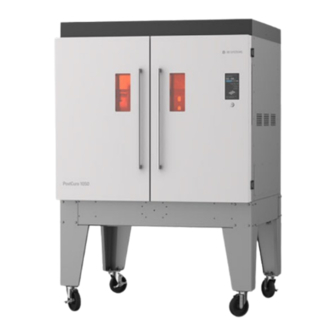
- Page 11 From left to right - PostCure 1050 front, back 3D Systems, Inc. p/n 40-D177, Rev. A...
- Page 12 POSTCURE 1050 OVERVIEW The PostCure 1050 is an industrial-scale post-processing system offering high volume, high-speed drying and curing for batch jobs and large-scale, production-grade resin parts up to 1050 x 800 x 625 mm. 3.1 PostCure 1050 Components Front Viewing Windows - UV protected window through which you can observe your curing parts Touch Screen - Use this to control all machine processes Start/Stop Button - This button is used to automatically start and stop cure jobs.
- Page 13 When doing any maintenance, this switch must be in the off position and the machine must be unplugged. The ethernet port is for connection to 3D Connect and for Service technicians. Power Cable - Cable for 30A plug Right 3D Systems, Inc. p/n 40-D177, Rev. A...
- Page 14 USB Port - Allows connection to a USB device to import/export material recipes for curing, as well as to upgrade machine firmware 3.2 PostCure 1050 Curing Chamber Door-Closed Sensors - Senses whether or not the left or right chamber door is closed Door Light Bars - LED curing lights mounted in the chamber doors Chamber Interior - Where the printed parts cure.
- Page 15 Chamber Fans The curing chamber has four fans to circulate air inside the chamber to ensure optimal temperature uniformity. 3D Systems, Inc. p/n 40-D177, Rev. A...
- Page 16 ~350-450 nm Electrical Requirements 200-230 VAC 50/60Hz Single Phase, 30A (NA)/32A (EU) - requires a dedicated circuit for L6-30 connector Network Ready Built-in Ethernet - only used for 3D Systems' 3D Connect service 3D Systems, Inc. p/n 40-D177, Rev. A...
- Page 17 POSTCURE 1050 SYSTEM SETUP 5.1 Power on PostCure 1050 CAUTION: Ensure that all machine doors are closed before starting it up. Follow the power-on instructions seen in the Facility Requirements Guide. 5.2 PostCure 1050 3D Connect This machine is 3D Connect capable. For more information on 3D Connect architecture, security and requirements, please see the following link: https://www.3dsystems.com/software/3d-connect...
- Page 18 POSTCURE 1050 OPERATION The PostCure 1050 system is a fast, automated solution for all of your SLA/Figure 4 curing needs. The following sections will describe how to operate the machine, from setting up a curing cycle to removing the cured parts from the chamber.
- Page 19 • Settings 6.1.1 PostCure 1050 Status Oven Temp - Internal temperature of the curing oven Door Status - Shows whether the machine's doors are open or closed Light Status - Indicates whether the chamber viewing light is on or off Machine Status - Can be: •...
- Page 20 Recipe Import/Export - Select to import/export recipes via USB Expand Material - Shows more recipe information 6.1.2.1 PostCure 1050 Material Details Tap a recipe name on the Materials screen to access its details. 3D Systems, Inc. p/n 40-D177, Rev. A...
- Page 21 See this section for more information. Customize - Opens recipe parameters that can be changed and saved as a different recipe version Start - Select to begin a curing cycle with this recipe. 3D Systems, Inc. p/n 40-D177, Rev. A...
- Page 22 6.1.2.2 PostCure 1050 Customize Material Recipe To access this screen, tap the Customize button on the Material Details page. You can also tap the icon and select an existing custom recipe to edit it. 3D Systems, Inc. p/n 40-D177, Rev. A...
- Page 23 The 100% value is for the specific recipe. Because different materials require different amounts of light, the 100% value for one recipe is not the same light level as the 100% value for another recipe. 3D Systems, Inc. p/n 40-D177, Rev. A...
- Page 24 This might be useful if you only want the materials you frequently use to be in the recipe list. To do this: 1. Select Archive on the recipe screen. 3D Systems, Inc. p/n 40-D177, Rev. A...
- Page 25 2. On the Material screen, tap the cog to bring up a screen that lets you control whether the archived recipes show up in the recipe list. 3D Systems, Inc. p/n 40-D177, Rev. A...
- Page 26 3D Systems, Inc. p/n 40-D177, Rev. A...
- Page 27 6.1.2.3 PostCure 1050 Cure Job History To navigate to the Cure Job History screen, tap the icon and tap on a previous curing job to see its full history. 3D Systems, Inc. p/n 40-D177, Rev. A...
- Page 28 Events - Operations that occurred during the curing job 6.1.2.4 PostCure 1050 Special Recipes There are special recipes that are not tied to a specific material. On the landing screen, you can select the recipe or a customization of it. When you click on a recipe, you can archive, customize, and start curing with the recipe, as with any material recipe.
- Page 29 → 3D Systems, Inc. p/n 40-D177, Rev. A...
- Page 30 3D Systems, Inc. p/n 40-D177, Rev. A...
- Page 31 If turned off, you can manually set the date, time, and time zone. 6.1.3.1 PostCure 1050 Network Settings On this screen, you can toggle 3D Connect on/off. You can also tap Change Network Settings to see the screen below.
- Page 32 IP address from the network. In this example, DHCP is turned off. IP address - Network address of the PostCure 1050 Subnet Mask - Defines which part of the IP address belongs to the machine vs. the network...
- Page 33 FIG4 Jobs - The total amount of curing jobs run for Figure 4 parts ® SLA Jobs - The total amount of curing jobs run for SLA parts 6.1.3.3 PostCure 1050 Fault Log View this screen to view past machine errors. 3D Systems, Inc. p/n 40-D177, Rev. A...
- Page 34 Date of the error Time of the error Error code Error description 6.1.3.4 PostCure 1050 Set Clock Use this screen to either automatically or manually set date/time and time zone. 3D Systems, Inc. p/n 40-D177, Rev. A...
- Page 35 3D Systems, Inc. p/n 40-D177, Rev. A...
- Page 36 6.1.3.5 PostCure 1050 Maintenance Visit this screen to perform various machine maintenance. 3D Systems, Inc. p/n 40-D177, Rev. A...
- Page 37 Manage LED Bars This screen allows you to test individual light bars to determine if they are operational. If a light bar is determined to be faulty, follow the steps for replacing a light bar 3D Systems, Inc. p/n 40-D177, Rev. A...
- Page 38 1. Tap a button corresponding to the light bar you wish to test; see the Light Bar Chart for reference. Then tap TEST. 3D Systems, Inc. p/n 40-D177, Rev. A...
- Page 39 (below) to officially log the record. 6.2 PostCure 1050 Cure a Printed Part WEAR 100% NITRILE GLOVES WHENEVER HANDLING UNCURED (GREEN) PARTS. 1. Place green parts on the base glass shelf and on the optional middle glass shelf if installed.
- Page 40 1. Close the machine doors. On the touch screen, go to Materials and choose between SLA materials, Figure 4 materials, or Special recipes. 3D Systems, Inc. p/n 40-D177, Rev. A...
- Page 41 1. Tap the material type. You will see a standard recipe for each material. Many materials also have a low distortion recipe. 3D Systems, Inc. p/n 40-D177, Rev. A...
- Page 42 1. On the next screen, you will see a summary of the selected recipe. 3D Systems, Inc. p/n 40-D177, Rev. A...
- Page 43 Step 6 is below that. Sample Part Loads WARNING: THE GLASS PLATE IS RATED FOR NO MORE THAN 113.4 KG (250 LBS.). PLACING MORE WEIGHT THAN THIS LIMIT RISKS GLASS-PLATE BREAKAGE AND PERSONNEL INJURY. MEDIUM HIGH 3D Systems, Inc. p/n 40-D177, Rev. A...
- Page 44 0-15 minutes. WARNING: HANDLING HOT PARTS CAN RESULT IN OPERATOR BURNS AND/OR PART DISTORTION. DO NOT REMOVE PARTS BEFORE THE COOLING CYCLE HAS COMPLETED. 3D Systems, Inc. p/n 40-D177, Rev. A...
- Page 45 Tough-BLK 20 Low Distortion • Eggshell-Amb 10 Low Distortion • High Temp 150C FR Black Low Distortion • Tough 65C Black Low Distortion • Rigid 140C Black Low Distortion • Tough 75C FR Black Low Distortion 3D Systems, Inc. p/n 40-D177, Rev. A...
- Page 46 The PostCure 1050 is large enough to fit ProX 800 and SLA 750 build platforms. This may provide sufficient curing to meet the requirements for the application.
- Page 47 6.2.1 Drying Parts Inside PostCure 1050 CAUTION: Parts must be surface dry before placing into the PostCure 1050. Never place parts in the PostCure 1050 with surfaces wet with IPA or any other flammable solvent. Blow off wet surfaces with compressed air to remove all liquid from part surfaces.
- Page 48 1. Download the firmware update from the Software Downloads page and transfer the file to your USB drive. 2. Tap Settings at the bottom of the screen. 3D Systems, Inc. p/n 40-D177, Rev. A...
- Page 49 3. Tap the wrench icon. 4. Insert your USB drive into the port on the right side of the machine. 3D Systems, Inc. p/n 40-D177, Rev. A...
- Page 50 5. Tap Load system update from USB. 6. Tap the firmware file that shows up on the screen. 3D Systems, Inc. p/n 40-D177, Rev. A...
- Page 51 7. The file will now upload and will show a progress screen and a notification when complete. 6.4 PostCure 1050 Clean Resin Spills Please see the section Cleaning the PostCure 1050. 6.5 PostCure 1050 Power Off Machine To power off the machine: 1.
- Page 52 2. Unplug the power cord from your 30A connection. This will completely cut power to the machine and can be done if the machine will be shut down for a significant amount of time. 3D Systems, Inc. p/n 40-D177, Rev. A...
- Page 53 POSTCURE 1050 PREVENTATIVE MAINTENANCE This checklist is designed to help you keep up to date with regular PostCure 1050 maintenance. This is NOT an official document that must be submitted to your service provider; it is only for your information. Fill out the information in ALL the fields, and then press ctrl+P (cmd+P on Mac) to print the document.
- Page 54 4. To clean the INNER surface of the viewing windows, use IPA and a dry, lint-free wipe. 5. To clean the GUI, clean with a dry, lint-free wipe to remove dust. If there is resin on the screen, lightly dampen the wipe with IPA. 3D Systems, Inc. p/n 40-D177, Rev. A...
- Page 55 IPA or citrus cleaner. CAUTION: Do not pour or spray IPA or citrus cleaner on surfaces. Rather, spray any liquid on your cleaning cloths directly, and then clean surfaces with it. 3D Systems, Inc. p/n 40-D177, Rev. A...
- Page 56 Inspect parts as they are placed on the glass to ensure no liquid resin or solvent drips exist. 7.2 PostCure 1050 Remove-Replace LED Bars Refer to the diagram below to determine which LED bar must be replaced, as there are different kinds throughout the machine.
- Page 57 CAUTION: Ensure that you have put the machine in Standby mode and unplugged it before performing this procedure. 1. Ensure that the power switch on the back of the machine is in the standby position and that the machine is unplugged. 3D Systems, Inc. p/n 40-D177, Rev. A...
- Page 58 4. Slide the LED bracket out and remove the LED bar from the bracket. 5. Install the new LED in the bracket and plug the new LED into the LED power cable. 3D Systems, Inc. p/n 40-D177, Rev. A...
- Page 59 7.3 PostCure 1050 Remove-Replace Chamber Fan If 3D Systems Service has instructed you during troubleshooting to replace a cooling fan, please follow this procedure to so. CAUTION: Ensure that you have received the replacement cooling fan from 3D Systems, as it is the only cooling fan that has been tested to work in the machine.
- Page 60 3. With the new fan, plug in the fan power cable (and thermistor cable, if applicable). 4. Reinstall the fan/bracket using the two screws removed earlier and your T20 driver. 3D Systems, Inc. p/n 40-D177, Rev. A...
- Page 61 Note: Unless troubleshooting steps require the PostCure 1050 to operate, shut down the unit and unplug it before performing troubleshooting steps. 8.1 PostCure 1050 Hardware Issues This page describes troubleshooting hardware issues with the PostCure 1050 that will not show an error on the touch screen. WEAR 100% NITRILE GLOVES WHENEVER HANDLING green parts ISSUE DESCRIPTION CUSTOMER TROUBLESHOOTING STEPS Part is not fully cured in its entirety 1.
- Page 62 Cured resin on a UV lamp b. Cured resin on the glass plate 3. If items 1-2 do not resolve the issue, contact 3D Systems Service. 4. Parts with inner cavities are a challenge to cure well because inside surfaces are shadowed from the light.
- Page 63 Cooling time can be adjusted to be longer or shorter, as needed, to meet application requirements. 8.2 PostCure 1050 Network Issues This page describes troubleshooting network issues with the PostCure 1050. ISSUE DESCRIPTION CUSTOMER TROUBLESHOOTING STEPS PostCure 1050 cannot connect to the Contact your network administrator.
- Page 64 Use the cable on another device, such as a computer, to test it. 8.3 PostCure 1050 Firmware Issues This page describes troubleshooting firmware issues with the PostCure 1050 that will not show an error on the touch screen. ISSUE DESCRIPTION CUSTOMER TROUBLESHOOTING...
- Page 65 • International: +1 803-326-3930 General Printer service procedures must be performed only by a 3D Systems-certified service technician unless this guide explicitly states otherwise. If your printer system needs service, contact 3D Systems Technical Support at the following numbers: •...
- Page 66 POSTCURE 1050 EC DECLARATION OF CONFORMITY 3D Systems, Inc. p/n 40-D177, Rev. A...
- Page 67 2023 by 3D Systems, Inc. All rights reserved. Specifications © 3D Systems, Inc. subject to change without notice. 3D Systems, the 3D Systems 333 Three D logo, and Figure 4 are registered trademarks of 3D Systems, Systems Circle | Inc.
- Page 68 3D Systems, Inc. 333 Three D Systems Circle Rock Hill, SC 29730 www.3dsystems.com Register Statement 2023 by 3D Systems, Inc. All rights reserved. Specifications subject to © change without notice. 3D Systems and the 3D Systems logo are registered trademarks of 3D Systems, Inc.
Need help?
Do you have a question about the PostCure 1050 and is the answer not in the manual?
Questions and answers