Table of Contents
Advertisement
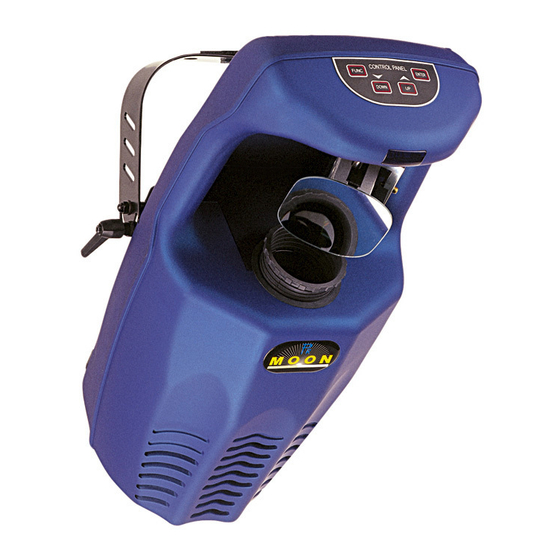
MOON
PR-111ER
This product manual contains important information about the safe installation and
use of this projector. Please read and follow these instructions carefully and keep
this manual in a safe place for future reference.
PR LIGHTING LTD.
No. 571 Yingbin Road, Dashi Panyu, Guangzhou, 511430 China
h t t p : / / w w w . p r- l i g h t i n g . c o m
Advertisement
Table of Contents

Related Manuals for PR Lighting PR-111ER MOON


Summary of Contents for PR Lighting PR-111ER MOON
- Page 1 Please read and follow these instructions carefully and keep this manual in a safe place for future reference. PR LIGHTING LTD. No. 571 Yingbin Road, Dashi Panyu, Guangzhou, 511430 China h t t p : / / w w w . p r- l i g h t i n g . c o m...
-
Page 2: Table Of Contents
INDEX SECTION PAGE SAFE USAGE OF THE PROJECTOR INSTALLING THE PROJECTOR FITTING THE LAMP POWER SUPPLY – MAINS OPERATION STAND-ALONE MODE XLR CONNECTIONS AND TERMINATOR MASTER/SLAVE SYNCHRO MODE CONTROLLER MODE - DMX OPERATION DMX CONTROL CHANNEL FUNCTIONS MAINTENANCE CHANGING THE GOBOS LUBRICATION KEEPING THE PROJECTOR CLEAN TROUBLESHOOTING... -
Page 3: Safe Usage Of The Projector
SAFE USAGE OF THE PROJECTOR The following points are important for safety as well as for the smooth installation and performance of the unit. When unpacking and before disposing of the package check there is no transportation damage before using the projector. Should there be any damage caused by transportation, consult your dealer and do not use the unit. -
Page 4: Installing The Projector
INSTALLING THE PROJECTOR Mount the bracket provided on the body of the projector using the 2 M6 knobs provided, and then suspend the projector via a fixing hole on the bracket using an M12 size bolt and a nut. When you want to adjust the angle of the body of the projector, you only loosen the 2 M6 knobs carefully and then adjust the angle of the body. -
Page 5: Power Supply - Mains
POWER SUPPLY - MAINS Use the plug provided to connect the mains power to the projector paying attention to the voltage and frequency marked on the panel of the projector. It is recommended that each projector is supplied separately so that they may be individually switched on and off. -
Page 6: Stand-Alone Mode
SETUP OPTIONS CODE CHOICE FUNCTION Pan inversion enable-Pan is inverted Pan inversion disable-Pan is normal Tilt inversion enable-Tilt is inverted Tilt inversion disable-Tilt is normal Sound activation enable Sound activation disable Automatic programmes enable Automatic programmes disable Reserved for possible future development Reserved for possible future development Reset enable Reset disable... -
Page 7: Master/Slave Synchro Mode
5-PIN AND 3-PIN CONVERSION MOON uses 3-pin XLR plug / socket. If your controller uses 5-pin XLR plug / socket, you should convert 5-pin plug / socket into 3-pin socket / plug as shown below. DMX TERMINATOR In the Controller mode or Master/Slave mode, the DMX output has to be connected with a DMX terminator at the last fixture in the chain. -
Page 8: Controller Mode - Dmx Operation
In the Master/Slave mode, you may run the master via the auto programmes having been set in the master or via sound activation through MIC inside the master, and the slaves will run synchronously with the master. In the Master/Slave mode, when the master is a combination of setup 3 (sound activation) and 4 (auto programmes), the projectors will run auto programmes. -
Page 9: Dmx Control Channel Functions
DMX CONTROL CHANNEL FUNCTIONS The MOON uses 6 channels with standard DMX 512 protocol. They are listed in the following table. CHANNEL DMX VALUE DESCRIPTION 0-17 White 18-35 36-53 Yellow 54-71 Orange 72-89 Blue 90-107 Green Colour 108-125 Cyan 126-143 Ultraviolet 144-161 Pink... -
Page 10: Changing The Gobos
CHANGING THE GOBOS Carefully lift off the upper plastic body which has the name label sticker on it by loosening the 6 screws. Using a small screwdriver remove the gobo retaining spring. Insert the gobo into position, and then insert the retaining spring. Install the upper cover and tighten the 6 screws. -
Page 11: Keeping The Projector Clean
TROUBLESHOOTING PROBLEM RESOURCE The projector does not start Check the fuse on the socket is blown or not. Check if the lamp is good or not. The projector switches on but does not Check the projector is correctly configurated. answer to commands Check the XLR cable is good. -
Page 12: Electrical Diagram
ELECTRICAL DIAGRAM 12/14 Moon manual.doc... - Page 13 COMPONENT ORDER CODES NAME PART NO. REMARK TRANSFORMER 040010006 230V/50Hz IGNITOR 040090016 230V/50Hz BALLAST 040070026 230V/250W/3A THERMOSTAT 190010035 120° C/15A 030060008 DC12V LAMP 100050018 MSD250W CAPACITOR 140010036 32µF 450V AC MOTOR 1 (COLOUR-WHEEL) 030040056 17HS0002-45L MOTOR 2 (GOBO-WHEEL) MOTOR 3 (SHUTTER) MOTOR 4 (PAN) 030040023 17HS0002-38L...
- Page 14 PR LIGHTING LTD. No. 571, Yingbin Road, Dashi, Panyu, Guangzhou ,China Post-Code: 511430 TEL: +086-020-8478 1888 FAX: +086-020-8478 6023 P/N: 321010021 Last Revision: 28:06:2004 14/14 Moon manual.doc...
Need help?
Do you have a question about the PR-111ER MOON and is the answer not in the manual?
Questions and answers