
Related Manuals for Little Doctor LD8


Summary of Contents for Little Doctor LD8
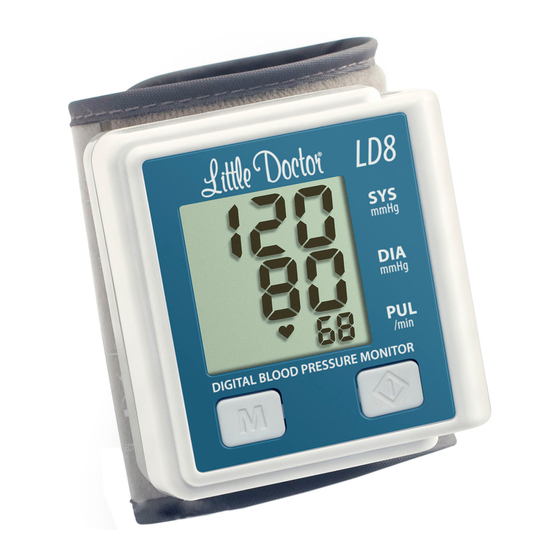
- Page 1 Digital Blood Pressure Monitor Instruction Manual Ciśnieniomierz elektroniczny LD do pomiaru ciśnienia tętniczego krwi i pulsu Instrukcja obsługi...
- Page 2 NAME OF PARTS AND COMPONENTS 1. Electronic unit 6. Battery compartment cover 2. Cuff 7. Case 3. LCD display 8. Battery 4. Key «M» (Memory) 9. Instruction manual 10. Warranty card 5. Key ( on-off power)
-
Page 3: General Information
This guide is intended to provide the user with the safe and efficient operation of a digital blood pressure monitor for measuring blood pressure and pulse rate LD, model LD8 (hereinafter: the device). The device should be used in accordance with the rules set forth herein, and should not be used for purposes other than those described here. - Page 4 USED NEW TECHNOLOGIES OF LD Fuzzy Algorithm – an algorithm of processing the measurement data, which allows to take into account features of human heart, which provides higher accuracy. WARNING! Using a cuff other than the supplied this device is not permitted. RECOMMENDATIONS FOR CORRECT MEASUREMENT 1.
- Page 5 3. In these violations as vascular deep sclerosis , weak pulse wave, as well as in patients with severe rhythm of heartbeats, the correct measurement of blood pres- sure can be difficult. IN THESE CASES, GET ADVICE FOR USE OF ELECTRONIC DEVICE FROM CERTIFIED PHYSICIAN.
-
Page 6: Before Using
BEFORE USING 1. Installation of batteries. 1) Open the battery compartment, gently pulling it towards you. 2) Install two alkaline batteries AAA, observing polarity. Batteries can be easily installed by pressing the end “-” on the spring. 3) Close the cover until it clicks Replace all the batteries when the display continuously shows the battery replacement indicator “... - Page 7 2. Fixation the cuff on the wrist 1) Hold the left hand palm up, place the cuff on the wrist so that the housing was on the side of the palm. 5~10мм 2) Place the cuff on your arm so that its edge is at 5-10 mm from the edge of the palm. 3) Pull the lower part of the cuff, as shown in the picture, fix it so that there is no free space between the cuff and the wrist .
-
Page 8: Correct Posture For Measurement
CORRECT POSTURE FOR MEASUREMENT Correct posture for measurement When there is no table Pressure measurement 1. Sit on a chair. 1. Sit on a chair while lying 2. Lift your left hand slightly palm up and place your elbow 2. Place the cuff at heart level, lightly pressing 1. - Page 9 PROCEDURE FOR MEASURING 1. Before measuring make 5-6 deep breaths and relax. Do not move, talk, and do not strain your arm during the measurement. 2. Touch the key 3. The display will briefly highlight all the characters (Fig. 1) and the appliance will inflate automati- cally the cuff.
-
Page 10: Memory Function
The result of each measurement (blood pressure and heart rate) is automatically stored in the memory of device. DATA IN MEMORY WILL BE SAVED EVEN IN THE DEVICE WITHOUT BATTERIES. IN ORDER TO DELETE SAVED DATA FROM THE MEMORY DEVICE,FOLLOW THE STEPS DESCRIBED IN THE “MEMORY FUNCTION”. If the power is not switched off and the appliance is not used for 3 minutes, then switches off. -
Page 11: Error Reports
Each time you touch the key M, the index of numbers of the memory cell will increase by one and then indicate the contents of the specified memory location on the display. PURIFICATION MEMORY OF THE DEVICE It is necessary to touch the key M and hold it for more than 5 seconds in order to remove all stored measurement results from the memory of device. -
Page 12: Care, Storage, Repair And Recycling
CARE, STORAGE, REPAIR AND RECYCLING 1. This appliance must be protected from excessive moisture, direct sunlight, shock and vibration. UNIT IS NOT WATERPROOF! 2. Do not store or use the device in close proximity to heaters and open flames. 3. If the product is not used for a long time, remove the battery from the unit. The flow of electrolyte from batteries can cause product’s damage. KEEP BATTERIES OUT OF REACH OF CHILDREN! 4. -
Page 13: Warranty
Inflating is stopped and restart again. There is an automatic inflating to ensure correct See PROCEDURE THE MEASUREMENT measurements. Perhaps you talked or moved by hand during the Calm down and repeat the measurement. measurement. Inflating is stopped and restart again. The cuff is not at the level of the heart. Take the correct posture for measurement. -
Page 14: Technical Characteristics
10 °C to 40°C relative humidity 85% and below Conditions of storage and transportation: temperature from 20 °C below zero to 50°C above zero relative humidity 85% and below Cuff Model: CUFF-LD8 Type pre-formed cuff Size adult (circumference of the wrist 12,5-20,5 cm) -
Page 15: Certification And State Registration
3, EN10601-1-2, ISO 14971, EMC (IEC 60601-1-2:2001/A1:2004, CISPR 11:2003/A2:2006, GROUP 1, CLASS B, IEC 61000-3-2:2005, IEC 61000-3-3:1994/A2:2005). Complaints and requests should be addressed to: Little Doctor Europe Sp. z o.o., 57G Zawila Street, 30-390, Krakow, Poland Service phone: +48 12 2684748, 2684749 Manufactured under control: Little Doctor International (S) Pte. -
Page 16: Opis Części I Komponentów
OPIS CZĘŚCI I KOMPONENTÓW 1. Panel przedni. 6. Pokrywa komory baterii. 2. Mankiet. 7. Plastikowe pudełko. 3. Wyświetlacz LCD 8. Baterie. 4. Przycisk «М» (pamięć). 9. Instrukcja obsługi. 10. Karta gwarancyjna. 5. Przycisk « » (włącz/wyłącz). -
Page 17: Informacje Ogólne
Niniejsza instrukcja ma służyć użytkownikom pomocą w bezpiecznym i efektywnym posługiwaniu się automatycznym elektronicznym urządzeniem do pomiaru ciśnienia tętniczego krwi i pulsu LD, model LD8 (dalej w tekście: URZĄDZENIE). Urządzenie powinno być stosowane zgodnie z zasadami przedstawionymi w niniejszej instrukcji i nie należy wykorzystywać go do celów innych, niż tu opisane. Należy przeczytać i zrozumieć... -
Page 18: Zalecenia Dotyczące Prawidłowego Pomiaru
ZASTOSOWANIE NOWYCH TECHNOLOGII LD Fuzzy Algorithm – algorytm przetwarzania danych pomiarowych, pozwala dokładniej odzwierciedlić specyfi kę pracy ludzkiego serca, przez co zapewnia lepszą dokładność. UWAGA! Używanie mankietu nieprzeznaczonego do pracy z tym ciśnieniomierzem może spowodować uszkodzenie urządzenia. ZALECENIA DOTYCZĄCE PRAWIDŁOWEGO POMIARU 1. - Page 19 Wahania ciśnienia tętniczego w cyklu dobowym Skurczowe Rozkurczowe Pora dnia 3. Przy zaburzeniach takich jak: miażdżyca naczyń krwionośnych, słabe tętno oraz wyraźne zaburzenia rytmu serca, pomiar ciśnienia tętniczego może być trudny. W TAKIM PRZYPADKU NALEŻY SKONSULTOWAĆ SIĘ Z LEKARZEM W CELU OKREŚLENIA NAJLEPSZEJ METODY POMIARU. 4.
- Page 20 6. Powtórzenie pomiaru jest możliwe po upływie około 3 min. Po takim czasie powraca normalne krążenie w nadgarstku. W przypadku osób z miażdżycą i innymi chorobami układu krążenia czas ten powinien być (ciężkie) dłuższy, nawet do 10-15 min., dotyczy to również pacjentów z cukrzycą. Określenie dokładnego ciśnienia tętniczego krwi zaleca się...
- Page 21 PRZYGOTOWANIE URZĄDZENIA DO POMIARU 1. Wkładanie/wymiana baterii. 1) Otwórz pokrywę komory na baterie, lekko pociągając ją do siebie. 2) Włóż dwie baterie typu AAA zachowując biegunowość. Łatwa instalacja baterii odbywa się za pomocą przyciśnięcia ujemnej końcówki baterii «–» do sprężyny. 3) Zamknij pokrywę...
- Page 22 2. Zakładanie mankietu 1) Załóż mankiet na nadgarstek trzymając dłoń tak, aby aparat się znalazł po wewnętrznej stronie dłoni. 5~10мм 2) Wsuń mankiet tak, aby jego krawędź znajdowała się w odległości 5-10 mm od zgięcia nadgarstka. 3) Pociągnij dolną część mankietu, tak jak pokazano na rysunku, i zaciągnij mankiet tak, żeby pomiędzy mankietem a nadgarstkiem nie było wolnej przestrzeni.
-
Page 23: Przyjęcie Pozycji Umożliwiającej Pomiar
PRZYJĘCIE POZYCJI UMOŻLIWIAJĄCEJ POMIAR Przyjęcie pozycji umożliwiającej pomiar W przypadku braku możliwości oparcia ręki Pomiar ciśnienia tętniczego 1. Usiądź wygodnie na krześle. 1. Usiądź wygodnie na krześle. krwi w pozycji leżącej 2. Połóż lewą rękę na stole, lekko unosząc ją do góry. 2. -
Page 24: Procedura Pomiaru
PROCEDURA POMIARU 1. Przed pomiarem weź 5-6 głębokich oddechów i rozluźnij się. Nie ruszaj się, nie rozmawiaj i nie napinaj mięśni w trakcie pomiaru. 2. Naciśnij przycisk 3. Przez moment podświetlone zostaną wszystkie symbole (jak na rysunku 1), po czym urządzenie automatycznie zacznie pompować... -
Page 25: Funkcje Pamięci
Wynik każdego pomiaru (ciśnienie i puls) jest automatycznie zapisywany w pamięci urządzenia. DANE O WYNIKACH POMIARÓW POZOSTAJĄ W PAMIĘCI URZĄDZENIA NAWET PO WYJĘCIU BATERII. ABY USUNĄĆ ZAPAMIĘTANE WYNIKI NALEŻY WYKONAĆ CZYNNOŚCI OPISANE W DZIALE «FUNKCJE PAMIĘCI». Urządzenie wyłączy się automatycznie, jeżeli przez 3 minuty po pomiarze nie będzie wykorzystywane. AUTOMATYCZNE POMPOWANIE Jeżeli początkowe pompowanie mankietu do ustalonej wartości (190 mmHg) nie jest wystarczające lub zostanie wykonany ruch ręką, urządzenie napompuje mankiet do wartości wyższej. -
Page 26: Informacje O Błędach
Każde naciśnięcie przycisku M powoduje przejście do kolejnej komórki pamięci. Jeżeli w pamięci urządzenia nie ma zapisanych wyników pomiarów, to przy naciśnięciu M na ekranie nie zostaną wyświetlone żadne wartości. CZYSZCZENIE PAMIĘCI URZĄDZENIA W celu usunięcia z pamięci urządzenia wszystkich zapisanych w niej wyników pomiarów, należy nacisnąć... -
Page 27: Konserwacja I Naprawy
KONSERWACJA I NAPRAWY 1. Urządzenie musi być chronione przed wilgocią, bezpośrednim światłem słonecznym, wstrząsami i wibracjami. URZĄDZENIE NIE JEST WODOSZCZELNE! 2. Nie należy przechowywać lub używać urządzenia w pobliżu grzejników i otwartego ognia. 3. Jeśli urządzenie nie jest używane przez dłuższy czas, należy wyjąć z niego baterię. Wylanie baterii może spowodować uszkodzenie urządzenia. -
Page 28: Wykrywanie Usterek
WYKRYWANIE USTEREK PROBLEM MOŻLIWA PRZYCZYNA ROZWIĄZANIA Na wyświetlaczu nie pojawiają się Baterie są rozładowane. Wymień WSZYSTKIE baterie na nowe. żadne symbole. Nie została zachowana prawidłowa biegunowość baterii. Włóż baterie poprawnie. Brudne styki baterii. Wytrzyj styki suchą szmatką. Pompowanie mankietu jest Urządzenie automatycznie pompuje mankiet celem Patrz PROCEDURA POMIARU. -
Page 29: Dane Techniczne
Nie jest możliwe dokonanie dużej Użyto baterii niskiej jakości. Używaj baterii wyłącznie znanych producentów. liczby pomiarów. Samoczynne wyłączanie się Urządzenie automatycznie wyłącza się. Nie jest to usterka. Urządzenie automatycznie wyłącza się urządzenia. po 3 minutach po pomiarze. Jeżeli pomimo powyższych wskazówek nie jest możliwe dokonanie prawidłowego pomiaru, należy skontaktować się z serwisem. Adres serwisu podany jest w karcie gwarancyjnej. - Page 30 Przechowywanie i transport: temperatura od minus 20°C do 50°C wilgotność względna 85% i poniżej Mankiet: Model CUFF-LD8 mankiet (typ preformowany) Rozmiar obwód nadgarstka 12,5 - 20,5 cm Wymiary: Wymiary (bez mankietu) 62(dł.) x 61(szer.) x 35(wys.) mm Waga (bez opakowania, pudełka i baterii) około 115 g...
- Page 31 Little Doctor International (S) Pte. Ltd., 35 Selegie Road #09-02 Parkline Shopping Centre, Singapore 188307 Producent: Little Doctor Electronic (Nantong) Co. Ltd., No.8, Tongxing Road Economic & Technical Development Area, 226010 Nantong, Jiangsu, PEOPLE’S REPUBLIC OF CHINA Dystrybutor w Polsce: Little Doctor Europe Sp.
- Page 32 Yishun Central P.O. Box 9293 Singapore 917699, Fax: 65-62342197, E-mail: ld@singaporemail.com Shanghai International Trading Corp.GmbH Eiffestrasse 80, 20537 Hamburg, Germany. Tel: 0049-40-2513175 ® Registered trade marks of Little Doctor International (S) Pte. Ltd. E198/1409/03 © Little Doctor International (S) Pte. Ltd., 2006-2014...
Need help?
Do you have a question about the LD8 and is the answer not in the manual?
Questions and answers