
Related Manuals for Little Doctor LD12


Summary of Contents for Little Doctor LD12
- Page 1 LD12 Wrist Digital Blood Pressure Monitor Instruction Manual Ciśnieniomierz elektroniczny automatyczny LD do pomiaru ciśnienia tętniczego krwi i pulsu Instrukcja Obsługi...
-
Page 2: Table Of Contents
TABLE OF CONTENTS PARTS AND COMPONENTS ......... . . 3 GENERAL INFORMATION . -
Page 3: Parts And Components
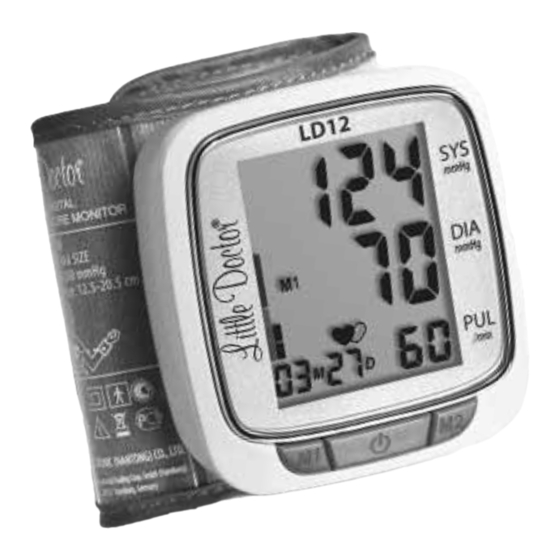
PARTS AND COMPONENTS 1. Electronic Unit. 2. LCD. (Power ON/OFF) 4. «М1» и «М2» (memory). 5. Arm cuff CUFF-LDA. 6. Cover of the battery compartment. 7. Case. 8. Power elements. 9. Instruction Manual. 10. Warranty card. -
Page 4: General Information
Device for measurement of blood pressure and heartbeat rate LD, (modifi cation LD12) (hereinafter – the “Device”). Use this Device according to the rules described in this Manual. Operate the Device only as intended. Do not use the Device for any other purposes. -
Page 5: Recommendations On Correct Measurements
Scale WHO – classification of measurement results according to High Norm recommendation of World Health Organization (WHO). Indication of arrhythmia – special symbol « » on Device display informs about availability of irregular pulse; in this case RECOMMENDATIONS ON CORRECT MEASUREMENTS 1. - Page 6 2. At cardiovascular and some other diseases requiring blood pressure moni- toring make measurements in the hours fixed by your attending doctor. REMEMBER THAT THE DIAGNOSTIC AND ANY TREATMENT OF HYPERTENSION MAY BE CONDUCTED ONLY BY A CERTIFIED DOCTOR ON THE BASIS OF BLOOD PRESSURE VALUES OBTAINED BY THIS DOCTOR.
-
Page 7: Battery Installation
BATTERY INSTALLATION Open the cover of the battery compartment and install 2 ААА size batteries according to polarity marked inside the compartment. Do not use much force to remove the cover of the battery compartment. 2) Close the cover of the battery compartment. FIG.3 Replace all batteries when the Low Battery Indicator “... -
Page 8: Correct Position During Measurement
CORRECT POSITION DURING MEASUREMENT Correct position during measurement 1. Sit on the chair. 2. Raise a hand so that your palm is up and place your elbow on a table. 3. Put a case or folded towel under your forearm and make sure that the cuff... -
Page 9: Cuff Preparation
CUFF PREPARATION 1 While holding your left hand palm up, move the cuff to your wrist so that the monitor display faces your palm. Should you fail to put the cuff on your left-hand 5~10mm wrist, wrap it around the right one and, thereafter, the measurement results may slightly vary. - Page 10 If irregular pulse rhy thm is detec ted during measurement, symbol of arrhythmia “ ”, will appear upon measurement end. Appearance of arrhythmia indicator may also be caused by body movement during measurement. During periodical appearance of this indication apply to You attending doctor. Apart from numerical value of pressure, result is also displayed on scale WHO (fig.
-
Page 11: Memory Function
MEMORY FUNCTION 1. Result of each measurement (pressure, pulse, time and date of measurement) may be kept in the device memory. For this purpose, after measurement, within not more than 3 minutes, memory M1 or M2 shall be selected for memory storage. IF THE NOTICE ON ERROR APPEARS THE MEASUREMENT RESULT WILL NOT BE STORED. -
Page 12: Information About Errors
INFORMATION ABOUT ERRORS Indication Likely cause Methods of correction The arm cuff is applied incorrectly Be sure that the arm cuff is applied correctly and the plug is or the air tube plus is inserted not inserted tightly. Repeat the whole tightly enough. -
Page 13: Troubleshooting Tips
10. Dispose of the Unit and its components according to the application local regulations. No special requirements to disposal of this Unit are defi ned by the manufacturer. 11. The arm cuff may withstand multiple sanitary treatments. The internal tissue surface of the arm cuff... -
Page 14: Warranty
Spontaneous Actuation of automatic This is not a defect. The Unit is failure of power de-energizing system disconnected automatically in 3 supply. minutes after the last operation of the Unit. f regardless of the above recommendation you are unable to get correct measurement results, stop the use of this Device and apply to a maintenance organization (addresses and telephones of authorized organizations may be found in the warranty card). - Page 15 85 and lower Storage and transportation conditions temperature, °C from -20 to 50 relative humidity, % Rh 85 and lower Cuff : CUFF-LD12 Type a preformed type cuff Size adult (circumference 12,5 –20,5 cm) Dimensions: Size (electronic block), mm 66 х 70 х 32...
-
Page 16: Certification And State Registration
CERTIFICATION AND STATE REGISTRATION This Device manufacturing is certified according to international standard ISO 13485:2003. Devices LD12 comply with the requirements of European Directive MDD 93/42/ЕЕС, international standards, EN980. Complaints and requests should be addressed to: Little Doctor Europe Sp. z o.o. -
Page 17: Information In Polish
SPIS TREŚCI Podstawowe części i komponenty ..........18 Informacje ogólne . -
Page 18: Podstawowe Części I Komponenty
PODSTAWOWE CZĘŚCI I KOMPONENTY 1. Panel przedni urządzenia. 2. Wyświetlacz LCD. 3. Przycisk (włącz/wyłącz zasilanie) 4. Przycisk «M1» i «M2» (pamięć). 5. Mankiet. 6. Pokrywa komory baterii. 7. Etui. 8. Baterie. 9. Instrukcja obsługi. 10. Karta gwarancyjna. -
Page 19: Informacje Ogólne
Niniejsza instrukcja ma służyć użytkownikom pomocą w bezpiecznym i efektywnym posługiwaniu się automatycznym, elektronicznym urządzeniem do pomiaru ciśnienia tętniczego krwi i pulsu LD, model LD12 (dalej w tekście: URZĄDZENIE). Urządzenie powinno być stosowane zgodnie z zasadami przedstawionymi w niniejszej instrukcji, nie należy wykorzystywać... -
Page 20: Zalecenia Dotyczące Prawidłowego Pomiaru
ZALECENIA DOTYCZĄCE PRAWIDŁOWEGO POMIARU 1. Dla przeprowadzenia prawidłowego pomiaru należy pamiętać, że CIŚNIENIE TĘTNICZE PODLEGA SILNYM WAHANIOM NAWET W KRÓTKIM PRZEDZIALE CZASOWYM. Wartość ciśnienia tętniczego krwi zależy od wielu czynników. Zwykle jest ona niższa w okresie letnim i wyższa w okresie zimowym. Ciśnienie krwi zależy od ciśnienia atmosferycznego, wysiłku fizycznego, pobudliwości, stresu, diety. - Page 21 3. Przy zaburzeniach takich jak: miażdżyca naczyń krwionośnych, słaby puls, a także u pacjentów z poważnymi zaburzeniami rytmu serca pomiar ciśnienia tętniczego może być utrudniony. W TAKICH PRZYPADKACH NALEŻY SKONSULTOWAĆ SIĘ Z LEKARZEM W CELU OKREŚLENIA NAJLEPSZEJ METODY POMIARU. 4. ABY OT R Z YMY WAĆ PO PR AW NE WYNIKI POMIARU CIŚNIENIA TĘTNICZEGO PODCZAS PRZEPROWADZENIA POMIARU NALEŻY ZACHOWYWAĆ...
-
Page 22: Ustawianie Daty I Godziny
Zamień wszystkie baterie, kiedy na wyświetlaczu ciągle wyświetla się symbol wymiany baterii “ ”, lub nie wyświetla się nic. Symbol wymiany baterii nie wskazuje poziomu naładowania. USTAWIANIE DATY I GODZINY Aby ustawić datę i godzinę należy włączyć urządzenie poprzez naciśnięcie przycisku –... -
Page 23: Zakładanie Mankietu
• Siedząc na krześle, weź 5-6 głębokich oddechów i rozluźnij się. • Wyniki pomiarów mogą nieznacznie różnić się w zależności od przybranej pozycji w czasie pomiaru. Nie zakładaj nogi na nogę w czasie pomiaru. • Pomiary powinny być wykonywane na tym samym nadgarstku w tej samej pozycji. •... - Page 24 Z UWAGI NA TO, ŻE CIŚNIENIE TĘTNICZE I PULS MIERZONE SĄ PODCZAS UWALNIANIA POWIETRZA Z MANKIETU, STARAJ SIĘ NIE PORUSZAĆ RĘKĄ I NIE OBCIĄŻAĆ RAMIENIA. 5. Po zakończeniu pomiaru urządzenie wypuści resztę powietrza z mankietu, na wyświetlaczu pojawi się wynik pomiaru (rys.22) i będzie migać M1/M2, przypominając, o możliwości zapisania wyniku.
-
Page 25: Funkcja Pamięci
CZYNNOŚCI OPISANYCH W ROZDZIALE «FUNKCJA PAMIĘCI». Jeśli po zmierzeniu ciśnienia, urządzenie nie jest wykorzystywane w ciągu 3 minut, to automatycznie przejdzie ono w stan wyświetlania daty i godziny. POMPOWANIE AUTOMATYCZNE Jeżeli początkowe pompowanie mankietu do wartości 190 mmHg nie jest wystarczające lub zostanie wykonany ruch ręką, urządzenie dopompuje mankiet do wyższej wartości. -
Page 26: Zawiadomienia O Błędach
przez 1 sekundę wyświetli się jej zawartość (rys. 25). Przy wyświetlaniu zawartości komórki pamięci, data i godzina pomiaru wyświetlana jest naprzemiennie w dolnej części wyświetlacza. Każde naciśnięcie przycisku M1 (lub M2) powoduje przejście do kolejnej komórki pamięci. Jeśli w pamięci nie ma zapisanych wyników, przy pierwszym naciśnięciu M1 (lub M2) na wyświetlaczu pojawia się... -
Page 27: Konserwacja, Przechowywanie, Naprawa I Utylizacja
KONSERWACJA, PRZECHOWYWANIE, NAPRAWA I UTYLIZACJA 1. Ciśnieniomierz należy chronić przed nadmierną wilgocią, bezpośrednim światłem słonecznym, wstrząsami i wibracjami. URZĄDZENIE NIE JEST WODOSZCZELNE! 2. Nie należy przechowywać lub używać ciśnieniomierza w pobliżu grzejników i otwartego ognia. 3. Jeśli urządzenie nie jest używane przez dłuższy czas należy wyjąć z niego baterie. -
Page 28: Wykrywanie Usterek
WYKRYWANIE USTEREK PROBLEM PRAWDOPODOBNY POWÓD SPOSÓB WYELIMINOWANIA Na wyświetlaczu Baterie są rozładowane. Należy wymienić wszystkie nic się nie baterie na nowe. Nie zachowano wyświetla Włóż baterie poprawnie. biegunowości baterii. Brudne styki baterii. Wytrzyj styki suchą szmatką. Pompowanie Następuje automatyczne Zapoznaj się z rozdziałem mankietu jest podtrzymanie dla “PROCEDURA POMIARU”. -
Page 29: Charakterystyki Techniczne
Jeśli pomimo stosowania się do powyższych wskazówek nie uda się dokonać prawidłowego pomiaru, należy zaprzestać korzystania z urządzenia i skontaktować się z serwisem (adresy i telefony wyspecjalizowanych punktów serwisowych znajdują się w karcie gwarancyjnej). W żadnym przypadku nie wolno naprawiać urządzenia samodzielnie. - Page 30 Reklamacje i prośby należy kierować na adres: Little Doctor Europe Sp. z o.o. ul. Zawiła 57G, 30-390, Kraków, Polska Serwis tel.: +48 12 2684748, 2684749. Wyprodukowano pod kontrolą: Little Doctor International (S) Pte. Ltd., 35 Selegie Road #09-02 Parkline Shopping Centre, Singapore 188307...
- Page 31 Technical Development Area, 226010 Nantong, Jiangsu, PEOPLE’S REPUBLIC OF CHINA Dystrybutor w Polsce: Little Doctor Europe Sp. z o. o., ul. Zawiła 57G, 30-390 Kraków Polska Biuro handlowe tel.: +48 12 2684746, 12 2684747, fax: +48 12 268 47 53.
- Page 32 Yishun Central P.O. Box 9293 Singapore 917699, Fax: 65-62342197, E-mail: ld@singaporemail.com Shanghai International Trading Corp.GmbH Eiff estrasse 80, 20537 Hamburg, Germany. Tel: 0049-40-2513175 ® Registered trade marks of Little Doctor International (S) Pte. Ltd. E536/1404/02 © Little Doctor International (S) Pte. Ltd., 2014...
Need help?
Do you have a question about the LD12 and is the answer not in the manual?
Questions and answers