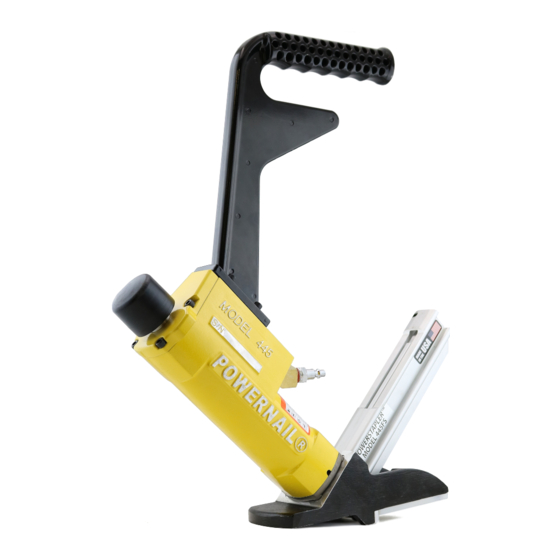
Powernail 445FS Operation And Maintenance Manual
Pneumatic powerstapler
Hide thumbs
Also See for 445FS:
- Operation and maintenance manual (16 pages) ,
- Operation and maintenance manual (13 pages) ,
- Operation and maintenance manual (16 pages)
Table of Contents
Advertisement
Quick Links
POWERNAIL
®
CO.
Models 445FS Pneumatic PowerStapler™
OPERATION AND MAINTENANCE MANUAL
MANUAL DE OPERACION Y DE MANTENIMIENTO
MANUEL D'INSTRUCTIONS ET D'ENTRETIEN
WARNING
Read this manual before you use this PowerStapler®. Follow all safety warnings and
instructions. If you are uncertain about the operation of the stapler, call us directly
at 1-800-323-1653 for assistance or contact the closest Powernail Dealer for help.
Please retain this information for future reference.
rev. 2012.10.12
Advertisement
Table of Contents

Summary of Contents for Powernail 445FS
- Page 1 Read this manual before you use this PowerStapler®. Follow all safety warnings and instructions. If you are uncertain about the operation of the stapler, call us directly at 1-800-323-1653 for assistance or contact the closest Powernail Dealer for help. Please retain this information for future reference.
-
Page 2: Table Of Contents
For those looking for ease of use in a pneumatic tool, the PowerStapler Model 445FS provides several distinct advantages. The Model 445FS can staple 3/4” flooring down to 1/2” tongue and groove hardwood flooring through the use of easy-to-change, no-mar adapter plates. -
Page 3: Safety Instructions
Mechanism and the Stapler. Use the mallet to rack the wood strip, not the Stapler. Do not use any nails other than Powernail Powercleats Nails which are specifically designed for use in any Powerstapler. Powercleats Nails are available in various lengths. Contact your Powernail Dealer for Powercleats Nails. -
Page 4: Operating Instructions
OPERATING INSTRUCTIONS Consult the staple depth chart for the appropriate frequency of lubrication is dependent upon the duty adapter pad to use with the thickness of flooring you cycle of the Stapler. Continuous duty requires more are installing and the selection of Powercleat® length. frequent oiling than intermittent duty. -
Page 5: Drive Blade Change
OPERATING INSTRUCTIONS, continued SEAL REPLACEMENT: There are 7 seals that Stapler DISASSEMBLY: may require replacement. We recommend that TO REPLACE RUBBER BUMPER (#20 or #65): you have your POWERStaple Dealer replace the 1. Disconnect the air supply Seals. 2. Remove the four (4) cap screws holding the SEAL KIT: You may choose to buy a Seal Adapter Foot, Foot and Staple Channel assembly to Replacement Kit and replace the seals yourself. - Page 6 OPERATING INSTRUCTIONS, continued TO REPLACE THE SEALS: Return Cylinder U-Cup Lip Seal (#23): 1. Use a bent paper clip or pick to remove the old Rubber Seat (#19): U-Cup Lip Seal from the internal seal groove inside the 1. Remove the Cylinder Sleeve (#13). The Cylinder Return Cylinder.
- Page 7 9. Position the Safety Yoke in the Plunger groove. For Step-by-Step Videos and Instructions, 10. Install the Body Cap and Plunger Rubber Cap. Visit our Web Site at: www.Powernail.com 11. Turn the Stapler upside down. Install the Rubber Bumper, Staple Channel Assembly and Adapter Foot.
-
Page 8: Parts List
MODELS 445FS PARTS LIST For this parts list and other Powernailer schematics, please visit the Powernail Parts Store at http://www.powernail.com Item Tuneup Seal Sold Separate or PART NO. DESCRIPTION Req’d Assembly # 09-445-29320 Body 09-445-29321 09-445-29703 Handle, Long 09-445-29703.1 Handle, Short... - Page 9 MODELS 445FS PARTS LIST, CONTINUED Tune- Sold Separate or Qty. Seal Part No. Description Item # Req’d Assembly # 09-445-29331 #8-32 X 1-1/2” S.H.C.S. (Standoff) S, A-9 09-445-29325 Two Part Channel W/two B.H.C.S. S, A-9 09-445-29305 Gate Plate S, A-9...
-
Page 10: Seal Locations Diagram
3. Separate the Foot and gate with a screw driver just enough to clear out the jammed nail. Pneumatic Seal Part Numbers and Locations 4. Put thread locking compound on all screws and reassemble the components. -
Page 11: Schematic
445FS PowerStapler SCHEMATIC VIEW Kits Available - For use on the Model 445FS Stapler Seal Kit Tune-up Kit Overhaul Kit (1 Each Of All Seals) Part #: 09-2003058A Part #: 09-445FSTUKIT Part #: 09-445FSOVHKIT Schematic #'s: Schematic #'s: 14,18,19, Schematic #'s: 9,10,11,12,14,17,18,... -
Page 12: Safety Labels
STAPLER SAFETY DECALS CAUTION 1. Do not tie down the Safety Trigger 2. To prevent accidental discharge never attach air hose to loaded Nailer. ↑ Caution: CAUTION: Prevent Refill the nail channel with a Accidental Lubricate clip of Powercleats when empty. Discharge Nailer with Never... -
Page 13: Troubleshooting Chart
PowerStapler 445FS Trouble Shooting Chart PROBLEM POSSIBLE CAUSE SOLUTION 1. Zero of Low air pressure Check air supply for 80 psi minimum to 110 psi maximum 2. Lack of lubrication Manually lubricate through male air inlet fitting 3. Excessive dirt inside Stapler... -
Page 14: Depth Chart
POWERSTAPLE DEPTH CHART This chart will assist you in determining the proper length ® of PowerStaple to use for various thicknesses of flooring. Approximate vertical penetration of the PowerStaple under the hardwood floor is shown for each application. This is only a guide. -
Page 15: Accessory Products
The TOOL BAG holds all Powernailer® configurations including the FLEX and POWER ROLLER models. The Powernail TOOL BAG is built tough with a double wall of padded industrial nylon to protect your tools. Corners are reinforced with leather for durability. -
Page 16: Powernail Company Info
POWERNAIL COMPANY, INC. 1300 Rose Road, Lake Zurich, IL 60047 US Phone: 1-800-323-1653 or 847-847-3000 www.powernail.com...


Need help?
Do you have a question about the 445FS and is the answer not in the manual?
Questions and answers