VADDIO WallVIEW CCU HD-20 Installation And User Manual
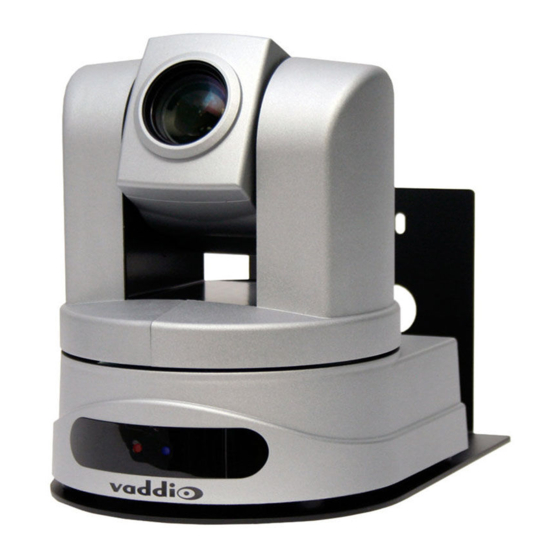
Vaddio wallview ccu hd-20 high definition ptz camera featuring the quick-connect ccu interface with the ezim ccu slot card and the conceal wall mounting system
Hide thumbs
Also See for WallVIEW CCU HD-20:
- Installation and user manual (20 pages) ,
- Installation and user manual (24 pages)
Table of Contents
Advertisement
Quick Links
Installation and User Guide
V
™
W
V
I
E
W
™
C
C
U
H
D
-
2
0
V
™
W
V
I
E
W
™
C
C
U
H
D
-
2
0
A
D
D
I
O
A
L
L
A
D
D
I
O
A
L
L
High Definition PTZ Camera Featuring the Quick-Connect™ CCU Interface
with the EZIM CCU Slot Card and the CONCEAL™ Wall Mounting System
Model Number 999-6957-000 (North America)
Model Number 999-6957-001 (International)
EZIM CCU Slot Card for HD-20
Quick-Connect CCU for HD-18 / HD-20
©2012 Vaddio - All Rights Reserved ● WallVIEW CCU HD-20 ● Document Number 324-0181 Rev. C
Advertisement
Table of Contents

Subscribe to Our Youtube Channel
Related Manuals for VADDIO WallVIEW CCU HD-20


Summary of Contents for VADDIO WallVIEW CCU HD-20
- Page 1 EZIM CCU Slot Card and the CONCEAL™ Wall Mounting System Model Number 999-6957-000 (North America) Model Number 999-6957-001 (International) EZIM CCU Slot Card for HD-20 Quick-Connect CCU for HD-18 / HD-20 ©2012 Vaddio - All Rights Reserved ● WallVIEW CCU HD-20 ● Document Number 324-0181 Rev. C...
- Page 2 The CCU also has three (3) preset scenes available for time of day or other interesting lighting conditions. The WallVIEW CCU HD-20 is an exceptional camera for a wide range of HD video applications such as houses of worship, corporate boardrooms, live events and distance-learning.
- Page 3 IR sensors are built into the front of the ClearVIEW HD-20 to receive IR signals from the IR remote control supplied with the camera. 4) Blue Power Light: A Vaddio blue power light is illuminated when the camera is turned on. Compatible Vaddio Switchers and Joystick Controllers: AutoPresenter...
- Page 4 Interface to supply power and return HSDS video from the camera. 12) Slot for Optional Cards: Optional slot cards can be plugged into the ClearVIEW HD-20 camera (the HD-SDI and the EZIM CCU Slot Cards are available). WallVIEW CCU HD-20 Manual 342-0181 Rev. C Page 4 of 20...
- Page 5 The Gain control boosts the signal level when the iris is open all the way, and there is not enough lighting available. To manually adjust the Gain, Auto Iris must be off. WallVIEW CCU HD-20 Manual 342-0181 Rev. C Page 5 of 20...
- Page 6 Tally on 2-pin Phoenix type connector: Contact Closure lights a Vaddio blue LED on front panel allowing indication of which CCU/camera combination is active in a multi-camera/CCU installation. A tally command will also be sent to the HD-20 camera to illuminate the red LED on the camera’s base.
- Page 7 IR signals to be transmitted over the Cat-5e cable to the head end. When using RS-232 control or Vaddio CCU controllers (also via RS-232), turn the IR OUT to OFF. Turn off when Using CCU. Baud Rate 5: The options for baud rate are either 9600 or 38,400 for RS-232. Use 9600bps for use with CCU.
- Page 8 For RS-232, use a standard straight through RJ-45 connectors (568B termination) from the RS-232 port on the back of a Vaddio camera controller or switcher to the camera. If the camera is connected to a third-party control system (such as AMX or Crestron), a DB-9 to RJ-45 control adapter cable is supplied.
- Page 9 RS-232 RS-232 HD YPbPr Vaddio Precision Camera Controller (Up to 7 PTZ cameras can be controlled) HD Monitor (No Catfish Were Harmed in the Making of the Simulated Video) WallVIEW CCU HD-20 Manual 342-0181 Rev. C Page 9 of 20...
- Page 10 Step 3: System Wiring: Follow the sample wiring diagram on the previous page for connecting the CAT-5 cables to the camera and Quick-Connect CCU, using a Vaddio ProductionVIEW Precision Camera Controller. Additional diagrams are available on our website for installation with other equipment.
- Page 11 Step 7: Connect System Power: Connect the Vaddio 36 VDC power supply to the CCU and to an AC outlet. Power will travel down the Power CAT-5 cable to the camera. The camera will “Home” to a centered position ready for control information from the IR remote control or RS-232 camera controller of the integrators’...
- Page 12 Dimensions 1-RU Rack Mount - 1.75” (43.688) H x 18.93” (480.822mm) W x 6” (152.4mm) D CONCEAL Wall Mounting System for Vaddio ClearVIEW HD-20 Dimensions 5.125” H x 6.75” W x 10” D (13 cm x 17.15 cm x 25.4 cm) Weight Approx.
- Page 13 Operation is subject to the following two conditions: (1) This device may not cause interference, and (2) This device must accept any interference including interference that may cause undesired operation of the device. Changes or modifications not expressly approved by Vaddio can affect emission compliance and could void the user’s authority to operate this equipment.
-
Page 14: Warranty Information
Operation is subject to the following two conditions: (1) This device may not cause interference, and (2) This device must accept any interference including interference that may cause undesired operation of the device. Changes or modifications not expressly approved by Vaddio can affect emission compliance and could void the user’s authority to operate this equipment. -
Page 15: Appendix 1: Ypbpr Video Pin-Out For The Hd-20 Camera & Quick-Connect Analog Ypbpr Output
Vaddio Customer Service: Vaddio will test, repair, or replace the product or products without charge if the unit is under warranty and is found to be defective. If the product is out of warranty, Vaddio will test then repair the product or products. The cost of parts and labor charge will be estimated by a technician and confirmed by the customer prior to repair. -
Page 16: Appendix 2: Clearview Hd-20 Dimensions
HSDS (differential) VIDEO POWER Power+ Power- Power+ 12345678 12345678 Power- PB GND Power+ Y GND Power- Power+ POWER VIDEO Power- Appendix 2: ClearVIEW HD-20 Dimensions Appendix 3: Communication Specification WallVIEW CCU HD-20 Manual 342-0181 Rev. C Page 16 of 20... -
Page 17: Command List
TXD (to RXD of control source) No Flow control NOTE: The Vaddio ClearVIEW HD-20 Control Protocol is similar, but not identical to the Sony® VISCA™ command set in order to be compatible with several popular control devices. Not all VISCA commands are supported and there are many HD-20 specific commands in the following Command and Inquiry Lists. - Page 18 81 01 04 01 03 FF ICR Off **Additional Information: Pan Range: 8044 – 7FBC (-32,700 to +32,700) Tilt Range: E891 – 4C2B (-5,999 to +19,499) Actual Pan/Tilt ranges defined in Inquiry list WallVIEW CCU HD-20 Manual 342-0181 Rev. C Page 18 of 20...
- Page 19 50 00 00 0p 0q FF pq: ExpComp Pos -Iris Position CAM_ICRModeInq 81 09 04 01 FF y0 50 02 FF ICR On y0 50 03 FF ICR Off WallVIEW CCU HD-20 Manual 342-0181 Rev. C Page 19 of 20...
- Page 20 Toll Free: 800-572-2011 ▪ Phone: 763-971-4400 ▪ FAX: 763-971-4464 www.vaddio.com ©2012 Vaddio - All Rights Reserved. Reproduction in whole or in part without written permission is prohibited. Specifications and pricing are subject to change without notice. Vaddio, ClearVIEW, ProductionVIEW, Quick-Connect, AutoPresenter, WallVIEW, EZCamera, HSDS and PowerRite are registered trademarks of Vaddio.
Need help?
Do you have a question about the WallVIEW CCU HD-20 and is the answer not in the manual?
Questions and answers