VADDIO WALL VIEW HD-19 Installation And User Manual
High definition ptz camera featuring the quick-connect sr interface
Hide thumbs
Also See for WALL VIEW HD-19:
- Installation and user manual (21 pages) ,
- Installation and user manual (9 pages) ,
- Installation and user manual (9 pages)
Table of Contents
Advertisement
Quick Links
V
™
V
™
A
D
D
I
O
A
D
D
I
O
High Definition PTZ Camera Featuring the Quick-Connect™ SR Interface
Black Version
Part Number 999-6945-000 (North America)
Part Number 999-6945-001 (International)
Quick-Connect SR Interface
PN: 998-1105-016
©2011 Vaddio - All Rights Reserved
W
V
I
E
W
V
I
E
A
L
L
A
L
L
Arctic White Version
Part Number 999-6945-000AW (North America)
Part Number 999-6945-001AW (International)
●
ClearVIEW HD-19
I
NSTALLATION AND
W
™
H
D
-
W
™
H
D
-
●
Document Number 342-0266 Rev. A
U
G
SER
UIDE
1
9
S
1
9
S
Y
S
T
E
Y
S
T
E
M
M
Advertisement
Table of Contents

Related Manuals for VADDIO WALL VIEW HD-19


Summary of Contents for VADDIO WALL VIEW HD-19
- Page 1 Part Number 999-6945-000AW (North America) Part Number 999-6945-001AW (International) Black Version Part Number 999-6945-000 (North America) Part Number 999-6945-001 (International) Quick-Connect SR Interface PN: 998-1105-016 ©2011 Vaddio - All Rights Reserved ● ● ClearVIEW HD-19 Document Number 342-0266 Rev. A...
- Page 2 ClearVIEW HD-19 Inside Front Cover - Blank ClearVIEW HD-19 Manual 342-0266 Rev. A Page 2 of 20...
-
Page 3: Intended Use
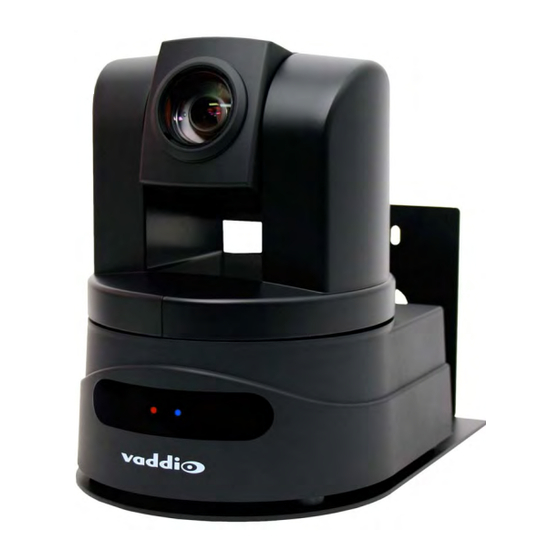
Read and understand all instructions before using. Do not operate any device if it has been dropped or damaged. In this case, a Vaddio technician must examine the product before operating. To reduce the risk of electric shock, do not immerse in water or other liquids and avoid extremely humid conditions. - Page 4 IR sensors are built into the front of the ClearVIEW HD-19 to receive IR signals from the IR remote control supplied with the camera. 4) Blue Power Light: A Vaddio blue power light is illuminated when the camera is turned on. Compatible Switchers and Joystick Controllers: AutoPresenter...
- Page 5 ClearVIEW HD-19 ClearVIEW HD-19 PTZ Camera, Rear View with Feature Call-outs: ⑤ ⑨ ⑥ ⑩ ⑦ ⑪ ⑧ ⑫ 5) RS-232 IN & IR Out: The RS-232 accepts modified VISCA protocol for camera control, as well as transmits IR signaling received by the IR receivers, which can be transmitted to third party devices.
- Page 6 For RS-232, use a standard Cat-5e cable and RJ-45 connectors (568B termination) from the RS-232 port on the back of a Vaddio camera controller or switcher. If the camera is connected to a third-party control system (such as AMX or Crestron), a DB-9 to RJ-45 control adapter cable is supplied.
- Page 7 IR signals to be transmitted over the CAT-5 cable to the head end. When using RS-232 control or Vaddio CCU controllers (also via RS-232), turn the IR OUT to OFF. Baud Rate 4: The options for baud rate are either 9600 bps or 38,400 bps. Default is 9600 bps.
- Page 8 ClearVIEW HD-19 Basic Wiring Configuration of the WallVIEW HD-19 to a Vaddio Joystick Controller Rear Panel HD-19 YPbPr & Power on one (1) Cat-5e up to 100’ (30.5m) ← YPbPr (HSDS differential) → Power RS-232 Cat-5e Rear Panel Quick-Connect SR Interface...
- Page 9 HD-19 as the main camera. Depending on the codec that is used, special DB-9 to RJ-45 adapters may sometimes be required. Refer to Vaddio’s website, price list for adapter functions and part numbers. ClearVIEW HD-19 Manual 342-0266 Rev. A...
- Page 10 Step 3: Place the camera onto the camera mount and use the ¼”-20 screws to secure the camera to the mount. Step 4: Connect the Vaddio 24 VDC power supply to an AC outlet and to the Quick Connect SR Interface.
- Page 11 Operation is subject to the following two conditions: (1) This device may not cause interference, and (2) This device must accept any interference including interference that may cause undesired operation of the device. Changes or modifications not expressly approved by Vaddio can affect emission compliance and could void the user’s authority to operate this equipment.
-
Page 12: Warranty Information
Vaddio Customer Service: Vaddio will test, repair, or replace the product or products without charge if the unit is under warranty and is found to be defective. If the product is out of warranty, Vaddio will test then repair the product or products. The cost of parts and labor charge will be estimated by a technician and confirmed by the customer prior to repair. -
Page 13: Appendix 1: Ypbpr Video Pin-Out For The Hd-19 Camera And Quick-Connect Sr Interface
ClearVIEW HD-19 Appendix 1: YPbPr Video Pin-Out for the HD-19 Camera and Quick-Connect SR Interface YPbPr Pr GND Y GND Pb GND EZCamera Power & HD Video RJ-45 Connector Pin-outs The EZCamera Power and HD Video RJ-45 Connector is for use with either the Quick-Connect SR Interface or the Quick-Connect DVI/HDMI SR Interface ONLY (568B Wiring Standard). -
Page 14: Appendix 3: Communication Specification
TXD (to RXD of control source) No Flow control NOTE: The Vaddio ClearVIEW HD-19 Control Protocol is similar, but not identical to the Sony® VISCA™ command set in order to be compatible with several popular control devices. Not all VISCA commands are supported and there are many HD-19 specific commands in the following Command and Inquiry Lists. - Page 15 ClearVIEW HD-19 HD-19 Command List (2/2) Command Set Command Command Packet Comments CAM_Backlight 8x 01 04 33 02 FF 8x 01 04 33 03 FF CAM_Aperture Reset 8x 01 04 02 00 FF 8x 01 04 02 02 FF Down 8x 01 04 02 03 FF Direct 8x 01 04 42 00 00 0p 0q FF...
- Page 16 ClearVIEW HD-19 HD-19 Inquiry List (1/1) Inquiry Command Command Response Packet Comments CAM_PowerInq 8x 09 04 00 FF y0 50 02 FF y0 50 03 FF Off(Standby) CAM_ZoomPosInq 8x 09 04 47 FF y0 50 0p 0q 0r 0s FF pqr: 0-0x6B3 CAM_FocusPosInq 8x 09 04 48 FF...
- Page 17 ClearVIEW HD-19 Appendix 3 (continued): Iris Position: Index F-Stop (Iris Position) 0x11 F1.6 0x10 F2.0 0x0F F2.4 0x0E F2.8 0x0D F3.4 0x0C F4.0 0x0B F4.8 0x0A F5.6 0x09 F6.8 0x08 F8.0 0x07 F9.6 0x06 F11.0 0x05 F14.0 0x04 F16.0 0x03 F19.0 0x02 F22.0...
- Page 18 ClearVIEW HD-19 Appendix 3 (continued): Shutter Position (Speed): Index Shutter (Speed) 0x23 1/30000 0x22 1/10000 0x21 1/5000 0x20 1/2500 0x1F 1/1500 0x1E 1/1000 0x1D 1/700 0x1C 1/600 0x1B 1/500 0x1A 1/480 0x19 1/360 0x18 1/300 0x17 1/250 0x16 1/240 0x15 1/200 0x14 1/180...
- Page 19 ClearVIEW HD-19 Inside Back Cover - Blank ClearVIEW HD-19 Manual 342-0266 Rev. A Page 19 of 20...
- Page 20 ©2011 Vaddio - All Rights Reserved. Reproduction in whole or in part without written permission is prohibited. Specifications and pricing are subject to change without notice. Vaddio, ProductionVIEW, ClearVIEW, Quick-Connect, EZCamera, AutoPresenter, HSDS and PowerRite are registered trademarks of Vaddio.
Need help?
Do you have a question about the WALL VIEW HD-19 and is the answer not in the manual?
Questions and answers