Table of Contents
Advertisement
Quick Links
To w e r
®
Hobbies
guarantees
this kit to be
free from defects
in both material and
workmanship
at
the
date of purchase. This
warranty does not cover any
component parts damaged by
use or modification. In no case
shall Tower Hobbies' liability exceed
the original cost of the purchased kit.
Further, Tower Hobbies reserves the right to
change or modify this warranty without notice.
In that Tower Hobbies has no control over the final
assembly or material used for final assembly, no
liability shall be assumed nor accepted for any damage
resulting from the use by the user of the final
user-assembled
product.
user-assembled product, the user accepts all resulting liability.
If the buyer is not prepared to accept the liability associated with the
use of this product, the buyer is advised to return this kit immediately in
new and unused condition to the place of purchase.
To make a warranty claim send the defective part or item to Hobby Services at
the address below:
Hobby Services • 3002 N. Apollo Dr. Suite 1 • Champaign IL 61822 • USA
Include a letter stating your name, return shipping address, as much contact information
as possible (daytime telephone number, fax number, e-mail address), a detailed description
of the problem and a photocopy of the purchase receipt. Upon receipt of the package the
problem will be evaluated as quickly as possible.
®
© 2014 Tower Hobbies.
A subsidiary of Hobbico, Inc.
I N S T R U C T I O N M A N U A L
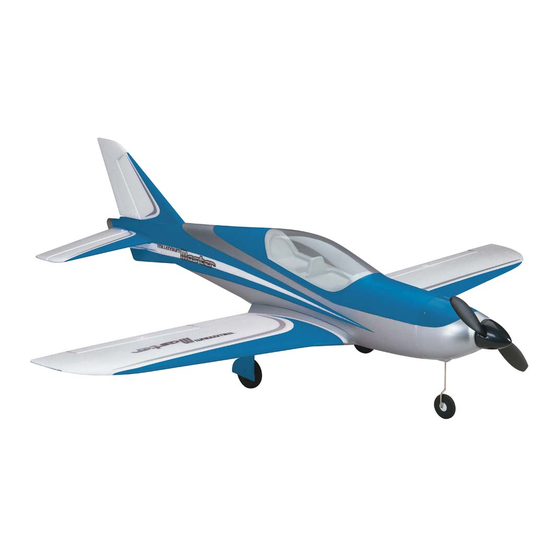
WINGSPAN
41 in [1040 mm]
RADIO
4 channel
26.8 − 28.8 oz [760 −815 g]
By
the
act
of
using
the
LENGTH
38.5 in [980 mm]
14.4 −15.5 oz/ft
WING AREA
268 in
2
[17.3 dm
2
]
WEIGHT
READ THROUGH THIS MANUAL
BEFORE STARTING CONSTRUCTION.
IT CONTAINS IMPORTANT INSTRUCTIONS
AND WARNINGS CONCERNING THE
ASSEMBLY AND USE OF THIS MODEL.
™
WING LOADING
2
[44 − 47 g /dm
MOTOR
37mm, 1000 kV outrunner,
30A ESC, 9 x 4.5
Slow-Flyer propeller included
TOWER HOBBIES
Champaign, Illinois
(217) 398-8970 ext. 5
airsupport@hobbico.com
TOWA3604
2
]
Advertisement
Table of Contents

Subscribe to Our Youtube Channel
Related Manuals for Tower Hobbies Millennium Master Rx-R


Summary of Contents for Tower Hobbies Millennium Master Rx-R
-
Page 1: Tower Hobbies
Further, Tower Hobbies reserves the right to change or modify this warranty without notice. READ THROUGH THIS MANUAL In that Tower Hobbies has no control over the final assembly or material used for final assembly, no BEFORE STARTING CONSTRUCTION. liability shall be assumed nor accepted for any damage... -
Page 2: Table Of Contents
TABLE OF CONTENTS INTRODUCTION ....... .2 GET THE MODEL READY TO FLY....9 AMA . -
Page 3: Required For Completion
hours or more to charge your battery. Eventually you’ll want We, as the kit manufacturer, provide you with a top quality, to get more batteries and an advanced charger so you can thoroughly tested kit and instructions, but ultimately the charge faster and fl... -
Page 4: Kit Inspection
T O W A 6 2 0 7 Tail Surfaces F L Z A 6 2 1 4 Propeller Adapter Replacement parts for the Tower Hobbies Millennium ARF T O W A 6 2 0 8 Canopy F L Z A 6 2 1 5... -
Page 5: Assembly
ASSEMBLY Mount the Wing and Tail Surfaces ❏ 1. Attach the rougher, “hook” side of the included adhesive- back Velcro strip to the fuselage where shown. Attach the softer, “loop” side to your battery. If more Velcro is required for additional batteries use Great Planes 1"... - Page 6 Tighten the bolt fi nger tight, then use a screw driver to turn it an additional half-turn. ❏ 7. Mount the control horn to the right elevator with the retainer on the other side. Cut off the excess part of the horn that protrudes through the retainer, then add a few drops of CA.
-
Page 7: Final Assembly
Final Assembly ❏ 8. Connect the elevator and rudder pushrods to the horns with the keepers—the elevator pushrods connect to the outer holes in the horns and the rudder pushrod connects to the middle hole in the horn. ❏ 1. Temporarily mount the prop adapter, spinner and propeller. - Page 8 ❏ 2. Mark the C.G. on the top of the wing. Usually this would be NOTE: This is where your model should balance for the done with small strips of tape so you can feel the C.G. locations fi rst fl ights. Later, you may experiment by shifting the C.G. with your fi...
-
Page 9: Get The Model Ready To Fly
GET THE MODEL READY TO FLY Check the Controls The next few steps will require working on the model with the radio turned on and power to the motor. To prevent an accident or possible injury, temporarily remove the spinner cone and propeller. ❏... -
Page 10: Preflight
Pushrod Farther Out Pushrod Closer In MORE LESS THROW THROW PREFLIGHT Use a ruler at the widest part (front to back) of the trailing edge of each control surface to measure the throws, then adjust Balance the Propeller as necessary to get the measurements in the following chart. An unbalanced prop can cause enough vibration to damage If your radio does not have dual rates, we recommend setting parts or break glue joints. -
Page 11: Balance The Model Laterally
this happens, simply disconnect the battery from the charger, Balance the Model Laterally wait for the GREEN LED to illuminate, and then reconnect ❏ the battery to the charger to continue charging. 1. With the wing level, have an assistant help you lift the model by the motor propeller shaft and the bottom of the fuse Range Check under the tail skid. -
Page 12: Flying
In the air, the Millennium doesn’t exhibit any particular Radio Control characteristics that you need to be made aware of ahead of time, other than it may help to carry a “click” or two of throttle 1) I will have completed a successful radio equipment ground when landing.
Need help?
Do you have a question about the Millennium Master Rx-R and is the answer not in the manual?
Questions and answers