Sign In
Upload
Download
Table of Contents
Contents
Add to my manuals
Delete from my manuals
Share
URL of this page:
HTML Link:
Bookmark this page
Add
Manual will be automatically added to "My Manuals"
Print this page
×
Bookmark added
×
Added to my manuals
Manuals
Brands
Kyocera Manuals
Copier
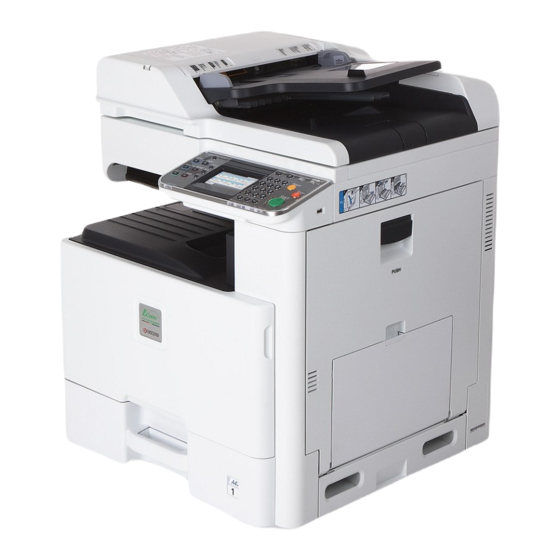
FS-C8020MFP
Operation manual
Kyocera FS-C8020MFP Operation Manual
Hide thumbs
Also See for FS-C8020MFP
:
Operation manual
(380 pages)
1
2
3
4
Table Of Contents
5
6
7
8
9
10
11
12
13
14
15
16
17
18
19
20
21
22
23
24
25
26
27
28
29
30
31
32
33
34
35
36
37
38
39
40
41
42
43
44
45
46
47
48
49
50
51
52
53
54
55
56
57
58
59
60
61
62
63
64
65
66
67
68
69
70
71
72
73
74
75
76
77
78
79
80
81
82
83
84
85
86
87
88
89
90
91
92
93
94
95
96
97
98
99
100
101
102
103
104
105
106
107
108
109
110
111
112
113
114
115
116
117
118
119
120
121
122
123
124
125
126
127
128
129
130
131
132
133
134
135
136
137
138
139
140
141
142
143
144
145
146
147
148
149
150
151
152
153
154
155
156
157
158
159
160
161
162
163
164
165
166
167
168
169
170
171
172
173
174
175
176
177
178
179
180
181
182
183
184
185
186
187
188
189
190
191
192
193
194
195
196
197
198
199
200
201
202
203
204
205
206
207
208
209
210
211
212
213
214
215
216
217
218
219
220
221
222
223
224
225
226
227
228
229
230
231
232
233
234
235
236
237
238
239
240
241
242
243
244
245
246
247
248
249
250
251
252
253
254
255
256
257
258
259
260
261
262
263
264
265
266
267
268
269
270
271
272
273
274
275
276
277
278
279
280
281
282
283
284
285
286
287
288
289
290
291
292
293
294
295
296
297
298
299
300
301
302
303
304
305
306
307
308
309
310
311
312
313
314
315
316
317
318
319
320
321
322
323
324
325
326
327
328
329
330
331
332
333
334
335
336
337
338
339
340
341
342
343
344
345
346
347
348
349
350
351
352
353
354
355
356
357
358
359
360
361
362
363
364
365
366
367
368
369
370
371
372
373
374
375
376
377
378
page
of
378
Go
/
378
Contents
Table of Contents
Troubleshooting
Bookmarks
Table of Contents
Table of Contents
Printing
Menu Map
1 Preface
Notice
Safety Conventions in this Guide
Environment
Precautions for Use
Safety Switch
Legal Restriction on Copying/Scanning
Legal and Safety Information
Legal Information
Original Ssleay License
Monotype Imaging License Agreement
Low Power Mode
Energy Saving Control Function
Automatic 2-Sided Copy Function
Paper Recycling
Energy Star (ENERGY STAR®) Program
About this Operation Guide
Conventions in this Guide
Copy Screen
Originals and Paper Sizes
2 Preparation before Use
Part Names
Machine
Operation Panel
Touch Panel
Determining the Connection Method and Preparing Cables
Connection Example
Preparing Necessary Cables
Preparing Necessary Cables
Connecting Cables
Connecting LAN Cable
Connecting USB Cable
Connecting the Power Cable
Power On/Off
Power on
Power off
When Turning off the Main Power Switch
Installing Software
Installing Printer Driver
Setting TWAIN Driver
Setting WIA Driver
Energy Saver Function
Low Power Mode and Auto Low Power Mode
Sleep and Auto Sleep
Energy Saver
Machine Setup Wizard
COMMAND CENTER (Settings for E-Mail)
Sending E-Mail
3 Common Operations
Loading Paper
Before Loading Paper
Loading Paper in the Cassettes
Load Paper
Loading Paper in the Multi Purpose Tray
Loading Originals
Placing Originals on the Platen
How to Load Originals
Loading Originals in the Document Processor
Load Originals
Original Loaded Indicator
Checking the Equipment's Serial Number
Checking the Counter
Login/Logout
Login
Logout
Favorites
Registering Favorites
Function Type
Editing and Deleting Favorites
Using Favorites
Shortcuts
Registering Shortcuts
Editing and Deleting Shortcuts
Using Shortcuts
Quick Setup Wizard
Help Screen
Canceling Jobs
Using Various Functions
Common Functionality
Original Size
Original Orientation
Mixed Size Originals
2-Sided/Book Original
Continuous Scan
Paper Selection
Paper Output
Collate/Offset
Margin
Margin Width
Staple
Density
Scan Resolution
Original Image
Sharpness
Prevent Bleed-Through
Background Density Adjust
Prevent Bleed-Through
Zoom
File Format
Color Selection
Job Finish Notice
File Name Entry
Priority Override
4 Copying
Basic Operation
Selecting Color Mode
Entering the Copy Quantity
Start Copying
Copying Functions
Zoom
Standard Zoom
Duplex
Combine
Ecoprint
Hue Adjustment
Color Balance
Saturation
Auto Image Rotation
Auto Image Rotation
Interrupt Copy
5 Printing
Printing from Applications
Printing Data Saved on the Printer
Private Print
Proof and Hold
Automatic Delete Setting for Temporary Documents
6 Sending
Basic Operation
Specifying Destination
Preparation for Sending a Document to a PC
Checking What to Enter for [Host Name]
Checking What to Enter for [Login User Name]
Creating a Shared Folder
Checking the [Path]
Configuring Windows Firewall (for Windows 7)
Specifying Destination
Choosing from the Address Book
Choosing by One Touch Key
Choosing by One Touch Key
Entering a New E-Mail Address
Specifying a New PC Folder
Checking and Editing Destinations
Sending to Different Types of Destinations (Multi Sending)
Registering Destinations in the Address Book
Adding a Contact
Adding a Group
Editing and Deleting Address Book Entries
Adding a Destination on One Touch Key
Adding a Destination
Editing and Deleting One Touch Key
Sending Functions
Sending Size
File Separation
E-Mail Subject/Body
FTP Encrypted TX
WSD Scan
Scanning Using TWAIN
7 Document Box
Printing Documents Stored in Removable USB Memory
Enter the Quantity
Saving Documents to USB Memory (Scan to USB)
Removing USB Memory
Functions for Document Box
Duplex
Encrypted PDF Password
JPEG/TIFF Print
XPS Fit to Page
Storing Size
8 Status / Job Cancel
Checking Job Status
Details of the Status Screens
Checking Job History
Sending the Log History
Setting the Destination
Automatic Log History Transmission
Manual Log History Transmission
Setting E-Mail Subject
Check of Device Status
Removable Memory
Checking the Remaining Amount of Toner and Paper
9 Setup, Registration, and User Management
System Menu
Operation Method
System Menu Settings
Language
Report
Status Page
Report Print
Result Report Settings
User Property
Cassette/Mp Tray Settings
Common Settings
Original Settings
Paper Settings
Function Defaults
Preset Limit
Error Handling
Color Toner Empty Action
Copy
Send
Keyboard Layout
Usb Keyboard Type
Printer
System
Interface Block Setting
Secure Protocol
Lan Interface
Date/Timer
Optional Memory
Main Memory
Adjustment/Maintenance
Color Registration Procedure
Detailed Settings
User Login Administration
First User Login Administration
User Login Settings
Enabling/Disabling User Login Administration
Adding a User
User Name
Access Level
Local User Authorization
Adding a User
My Panel
Editing and Deleting Users
Simple Login
Group Authorization
Obtain Network User Property
Job Accounting
First Job Accounting Setup
Job Accounting Settings
Enabling/Disabling Job Accounting
Login/Logout
Adding an Account
Editing and Deleting Accounts
Restricting the Use of the Machine
Counting the Number of Pages Printed
Printing an Accounting Report
Print Reports
Setting Items
Job Accounting Default Setting
Unknown Login User Name Job
10 Troubleshooting
Toner Container Replacement
Waste Toner Box Replacement
Replacing Staples
Cleaning
Glass Platen
Document Processor
Solving Malfunctions
Responding to Error Messages
Clearing Paper Jams
Jam Location Indicators
Multi Purpose Tray
Inside the Right Cover 1
Cassette 1
Inside the Right Cover 3
Cassette 2 or 3
Optional Document Finisher
Optional Document Finisher Staple Jam
Bridge Unit
Document Processor
11 Appendix
Optional Equipment
Overview of Optional Equipment
Paper Feeder (Single Cassette)
Paper Feeder (Double Cassette)
Document Finisher
FAX Kit
Expansion Memory
Card Authentication Kit
Gigabit Ethernet Board
USB Keyboard
Optional Function
Character Entry Method
Entry Screens
Entering Characters
Paper
Basic Paper Specifications
Choosing the Appropriate Paper
Supported Paper Sizes
Moisture Content
Special Paper
Thick Paper
Recycled Paper
Specifications
Common Functions
Copy Functions
Printer Functions
Scanner
Document Processor
Paper Feeder (Single Cassette) (Option)
Paper Feeder (Double Cassette) (Option)
Document Finisher (Option)
Environmental Specifications
Glossary
Auto Paper Selection
Default Gateway
Ecoprint Mode
Enhanced Wsd
Ip Address
Printer Driver
Ra (Stateless)
Send as E-Mail
Subnet Mask
Index
Advertisement
Quick Links
Download this manual
FS-C8020MFP
FS-C8025MFP
OPERATION GUIDE
Table of
Contents
Previous
Page
Next
Page
1
2
3
4
5
Advertisement
Table of Contents
Need help?
Do you have a question about the FS-C8020MFP and is the answer not in the manual?
Ask a question
Questions and answers
Subscribe to Our Youtube Channel
Related Manuals for Kyocera FS-C8020MFP
All in One Printer Kyocera TASKalfa 205c Operation Manual
205c/255c operation guide (380 pages)
Copier Kyocera FS-1028DP Operation Manual
(432 pages)
Copier Kyocera FS 9530DN Advanced Operation Manual
Kyocera operation guide copier and printer fs-9130dn, fs-9530dn (172 pages)
Copier Kyocera FS-C8025MFP Operation Manual
(378 pages)
Copier Kyocera FS-1018MFP Basic Operation Manual
(132 pages)
Copier Kyocera FS-1060DN Service Manual
(131 pages)
Copier Kyocera TASKalfa 265ci Service Manual
(344 pages)
Copier Kyocera DP-670 Installation Manual
Option copier (97 pages)
Copier Kyocera KM-1635 Operation Manual
Kyocera copier (150 pages)
Copier Kyocera TASKalfa 3051ci Service Manual
(1403 pages)
Copier Kyocera KM-2540 Service Manual
(365 pages)
Copier KYOCERA KM-1620 Operation Manual
16-sheet/20-sheet (124 pages)
Copier Kyocera TASKalfa 3050ci Operation Manual
(593 pages)
Copier Kyocera 5035 Operation Manual
Kyocera copier user manual (292 pages)
Copier Kyocera KM-1620 Service Manual
(217 pages)
Copier Kyocera ECOSYS M6030cdn Operation Manual
(50 pages)
This manual is also suitable for:
Fs-c8025mfp
Table of Contents
Print
Rename the bookmark
Delete bookmark?
Delete from my manuals?
Login
Sign In
OR
Sign in with Facebook
Sign in with Google
Upload manual
Upload from disk
Upload from URL


Need help?
Do you have a question about the FS-C8020MFP and is the answer not in the manual?
Questions and answers