Table of Contents
Advertisement
Quick Links
®
.40-SIZE RADIO CONTROLLED MODEL AIRPLANE KIT
INSTRUCTION MANUAL
© Copyright 1999 Version 1.1
READ THROUGH THIS INSTRUCTION MANUAL FIRST. IT
CONTAINS IMPORTANT INSTRUCTIONS AND WARNINGS
CONCERNING THE BUILDING AND USE OF THIS MODEL.
Tower Hobbies
®
guarantees this kit to be free from defects in
both material and workmanship at the date of purchase. This
warranty does not cover any component parts damaged by use
or modification. In no case shall Tower Hobbies' liability exceed
the original cost of the purchased kit. Further, Tower Hobbies
reserves the right to change or modify this warranty without
notice.
In that Tower Hobbies has no control over the final assembly or
material used for final assembly, no liability shall be assumed nor
accepted for any damage resulting from the use by the user of
the final user-assembled product. By the act of using the
user-assembled product, the user accepts all resulting liability.
If the buyers are not prepared to accept the liability associated
with the use of this product, they are advised to return this kit
immediately in new and unused condition to Tower Hobbies.
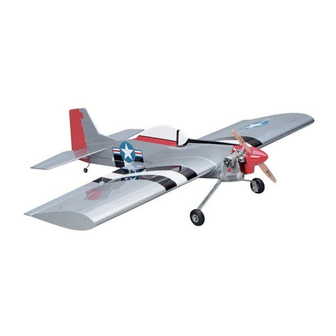
The Profile Alternative
WARRANTY
Wing Span: 44 in.
Wing Area: 627 sq. in.
Weight: 3.5 lb.
Length: 34.5 in.
Wing Loading: 13 oz./sq. ft.
Engine: .35 to .51 Radio: 4 ch./5 servos
The Fun 51 is not a toy, but rather a sophisticated, working
model that functions very much like an actual airplane.
Because of its performance, the Fun 51, if not assembled and
operated correctly, could possibly cause injury to yourself or
spectators and damage property.
To make your R/C modeling experience totally enjoyable, we
recommend that you get experienced, knowledgeable help with
assembly and during your first flights. You'll learn faster and
avoid risking your model before you're truly ready to solo.
You can contact the national Academy of Model Aeronautics
(AMA), which has more than 2,500 chartered clubs across the
country. Through any one of them, instructor training programs
and insured newcomer training are available.
Contact the AMA at the address or toll-free phone number
below.
Web Site: HTTP://WWW.MODELAIRCRAFT.ORG
2
PRINTED IN USA FP51PO2
Academy of Model Aeronautics
5151 East Memorial Drive
Muncie, IN 47302-9252
Tele. (800) 435-9262
Fax (765) 741-0057
®
Advertisement
Table of Contents

Related Manuals for Tower Hobbies FUN 51


Summary of Contents for Tower Hobbies FUN 51
- Page 1 The Profile Alternative © Copyright 1999 Version 1.1 PRINTED IN USA FP51PO2 The Fun 51 is not a toy, but rather a sophisticated, working READ THROUGH THIS INSTRUCTION MANUAL FIRST. IT model that functions very much like an actual airplane.
-
Page 2: Table Of Contents
If you have been looking for a way to put the FUN back into ® 1/4" Foam rubber (HCAQ1000) your Sunday flying, you have just found it. The FUN 51 is a 2-1/4" Spinner (GPMQ4517 Red) nimble little profile hot-dogger that assembles in only a few hours and is easy on the budget. -
Page 3: Die Patterns
DIE PATTERNS to identify the die-cut parts and mark them before removing We, as the kit manufacturer, provide you with a top quality kit them from the sheet. Save all scraps. If any of the die-cut parts and great instructions, but ultimately the quality and flyability are difficult to remove, do not force them! Instead, cut around of your finished model depends on how you build it;... -
Page 4: Build The Fuselage, Fin & Rudder
BUILD THE FUSELAGE, FIN AND RUDDER (2) Drill a 5/32" diameter hole through the laminated fuselage core at the two landing gear center marks and also at the balance point. (1) Punch out the plywood die-cut parts. Use 30-minute epoxy to laminate the fuselage core, scoop frame, canopy frame &... - Page 5 the perimeter and the wing cutout. Use leftover balsa trimmed from the aft end of the fuse to fill in the top of the canopy and scoop area. (9) Flip the fuselage over and sheet the open side using (2) 3/32"...
-
Page 6: Build The Horizontal Stabilizer & Elevators
BUILD THE HORIZONTAL STABILIZER AND ELEVATORS (15) Assemble the elevators over the plan as shown. (13) Pin the horizontal stabilizer and the elevators portion of the plan to the building board. Cover this portion with wax paper. Trim the 1/4" x 3" x 4-3/8" balsa stabilizer platform as shown. - Page 7 Important: When positioning the spars, be sure that the top and bottom splices are at opposite ends of the wing. (5) Glue all of the #2 ribs onto the bottom spar and trailing (4) Glue the four #1ribs onto the bottom spar and trailing edge.
- Page 8 (9) Cut, fit and glue the 1/4" square, hard balsa hatch mount rails between the ribs as shown on the plan. Trim the 1/16" x 3- 1/4" x 5-1/4" plywood hatch cover to fit as shown. See the plan for the correct location of the six #2 x 3/8" flat head hatch screws.
- Page 9 (13) Sand the top and bottom leading edge sheeting until it is flush with the front face of the sub-leading edge, as shown. (12) Cut, fit and glue the 3/32" x 3" balsa wing center Diagonally splice, at the wing centerline, the two 1/4" x 1-1/8" sheeting and 3/32"...
-
Page 10: Final Assembly
Hold the rudder in position and mark the location as TowerKote ™ to finish your Fun 51 (Top Flite MonoKote ® of the tail gear steering arm. Drill a 1/8" diameter hole into the used to cover the model shown on the cover of this instruction rudder at the marked location. -
Page 11: Repairing Surface Dings
5. Top of left and right wing panel and wing tips 6. Fuse sides (overlap at top and bottom) The Fun 51 does not require any painting to obtain the scheme 7. Stab bottom shown on the box, as all of the finish is MonoKote. -
Page 12: Balance Your Model
(6) Drill four 1/8" holes through the ply engine mounts. Use two #6 washers between the engine and the mounts under the two front holes. This will provide the required 2 degrees of right (4) Assemble your 4 or 6 oz. fuel tank. thrust. -
Page 13: Control Surface Throws
which your model should balance for your first flights. Later, you CONTROL SURFACE THROWS may wish to experiment by shifting the balance up to 1/4" forward or back to change the flying characteristics. Moving the Control throw adjustment balance forward may improve the smoothness and arrow-like (1) By moving the position of the clevis at the control horn tracking, but it may then require more speed for takeoff and toward the outermost hole, you will decrease the amount of... -
Page 14: Flight
Excessive “play” or “backlash” in servo gears; and Insecure servo mounting. Flying: We recommend that you take it easy with your Fun 51 for Landing: When it’s time to land, fly a normal landing pattern and the first several flights, gradually “getting acquainted”...
Need help?
Do you have a question about the FUN 51 and is the answer not in the manual?
Questions and answers