Table of Contents
Advertisement
Quick Links
Instruction Manual
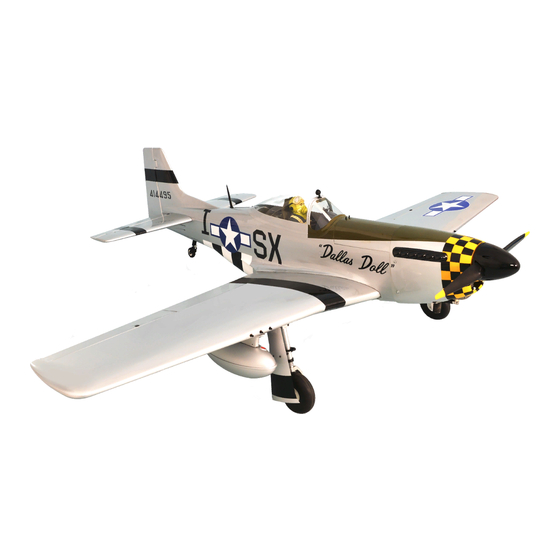
Wing span: 1550mm (61 inches)
Length:
1230mm (48.4 inches)
g
3200 - 3600 gr. (6.4 - 7.2 lbs)
Weight:
Engine:
60 two stroke - 91 four stroke
Radio:
6 channel 9 servos standard
Made in Vietnam
We wish you many enjoyable flights with your plane and once again thank you for your choosing a Phoenix Model product
Advertisement
Table of Contents

Related Manuals for Phoenix Model Mustang P51


Summary of Contents for Phoenix Model Mustang P51
- Page 1 3200 - 3600 gr. (6.4 - 7.2 lbs) Weight: Engine: 60 two stroke - 91 four stroke Radio: 6 channel 9 servos standard Made in Vietnam We wish you many enjoyable flights with your plane and once again thank you for your choosing a Phoenix Model product...
-
Page 2: Kit Contents
KIT CONTENTS: We have organized the parts as they come out of the box for better identification during assembly. We recommend that you regroup the parts in the same manner. This will ensure you have all of parts required before you begin assembly KIT CONTENTS AIR FRAME ASSEMBLIES RUDDER CONTROL SYSTEM... -
Page 3: Installing The Aileron Servos
CENTERED before gluing! This will assure proper assembly. The MUSTANG P51 is hand made from natural materials, every plane is unique and minor adjustments may have to be made. However, you should find the fit superior and assembly simple. - Page 4 Remove the covering 6. Repeat step # 2 - # 5 to install the second aileron servo in the opposite wing half. 3. Place the servo into the servo tray. Center the servo within the tray and drill 1,6mm pilot holes through the block of wood for each of the four mounting screws provided with the servo.
- Page 5 INSTALLING THE CONTROL HORNS for flap 5. Center the aileron and hold it in place using a couple of pieces of masking tape. Repeat step #1 - #3 from installing the control horn for aileron to install the control horn for 6.
- Page 6 INSTALLING THE LANDING GEAR 5. Install and secure the retract gear into the wing. 1. Install the gear servo into the servo tray in the fuselage. 6. Secure the wheel. 2. Remove the covering from the bottom of the wing. 7.
- Page 7 Cowl (head) 8. Install the adjustable servo connector to the Retract and the gear is opened. servo arm of the servo retract gear. Cowl (head) 9. Slide both wing to the fuselage, attach both metal pushrod to the servo arm of the servo retract gear.
- Page 8 9. Secure the wing to the fuselage using the plastic screws. Plastic screw 4. When you are sure that everything is aligned correctly, mix up a generous amount of 30 INSTALLING THE HORIZONTAL STABILIZER minute epoxy. Apply a thin layer to the bottom and to the top of the stabilizer mounting area 1.
- Page 9 INSTALLING THE RUDDER Repeat step 1 - step 2 from the installing aileron for the installing rudder. INSTALLING THE TAIL WHEEL 1. Using the knife cut away the wood from the bottom of the rudder and slide the two nylon clasps into the slot.
- Page 10 4. Slide the pushrod housing through the hole in the firewall, through the hole in the forward bulkhead, and into the servo compartment. Wheel 5. Apply a couple of drops of thin C/A to the pushrod housing where it exits the firewall and where it passes through the forward bulkhead.
- Page 11 4. Carefully bend the third nylon tube down at a 45 degree angle (using a cigarette lighter). This tube will be vent tube to the fueling valve When the stopper assembly is installed in the tank, the top of the vent tube should rest just below the top surface of the tank.
- Page 12 10. Plug the elevator servo into the receiver and 3. Working from inside the fuselage, slide the center the servo. Install the servo arm onto the threaded end of the pushrod until it reaches the servo. The servo arm should be perpendicular exit slot.
- Page 13 INSTALLING THE THROTTLE 1. Install one adjustable metal connector through the third hole out from the center of one servo arm, enlarge the hole in the servo arm using a 2mm drill bit to accommodate the servo connector. Remove the excess material from the arm.
- Page 14 INSTALLING THE RECEIVER AND BATTERY 3. Slide the cowl back into place. Align the front of the cowl with the crankshaft of the engine. The 1. Plug the servo leads and the switch lead into front of the cowl should be positioned so the the receiver.
- Page 15 OPEN AND CLOSE THE CANOPY 4. Glue the air scoop. BALANCING INSTALLING THE air SCOOP 1. It is critical that your airplane be balanced 1. Remove the covering. correctly. Improper balance will cause your plane to lose control and crash. THE CENTER OF GRAVITY IS LOCATED 130mm BACK FROM THE LEADING EDGE OF THE WING, AT THE FUSELAGE.
- Page 16 LATERAL BALANCE After you have balanced a plane on the C.G. You should laterally balance it. Doing this will help the airplane track straighter 1. Turn the airplane upside down. Attach one loop of heavy string to the engine crankshaft and one to the tail wheel wire.
- Page 17 I/C FLIGHT GUIDELINES Operate the control sticks on the When ready to fly, first extend the transmitter and check that the control transmitter aerial. surfaces move freely and in the ALWAYS land the model INTO the CORRECT directions. wind, this ensures that the model lands at the slowest possible speed.
Need help?
Do you have a question about the Mustang P51 and is the answer not in the manual?
Questions and answers