Table of Contents
Advertisement
Quick Links
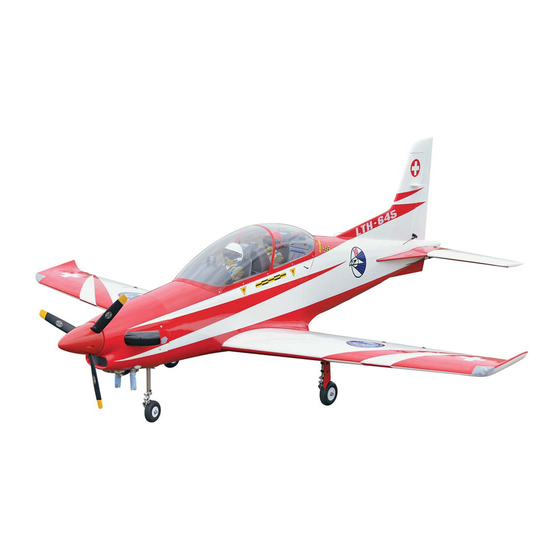
PC21 PILATUS MK2
SIZE .120 OR 30CC SCALE 1:5 ARF
SPECIFICATION
- Wingspan: 1772mm (69.72in)
- Length: 2019mm (79.5 in)
- Flying weight: 6.4 - 7.2 kg
- Wing area: 57.6 dm2
- Wing loading: 113g/dm2
- Wing type: Naca airfoils
- Covering type: Genuine ORACOVER®
- Retract gear type: Air-retract With CNC
Suspension Metal Struts (included)
- Spinner size: 90mm (included)
- Radio: 6 channel minimum (not included)
- Servo: 10 standard servo: 2 aileron;2 flap;
2 elevator; 1 rudder; 1 steering nose; 1 retract;
1 throttle (not included)
- Recommended receiver battery:
4,8-6.0V 2000mAh NiMH (not included)
- Servo mount: 21mm x 42 mm
- Propeller: suit with your engine
- Engine: 1.20/ 2-stroke or 1.40/4-stroke glow
engine or 20-30cc gas engine (not included)
Instruction Manual
- Motor: brushless outrunner 1600-2200 W,
450 KV (not included)
- Gravity CG: 166 mm (6.5 in) Back from the
leading edge of the wing, at the fuselage
- Control throw Ailerons: Low: 10mm up/down,
10% expo; High: 12mm up/down, 10% expo
- Control throw Elevators: Low: 10mm up/down,
12% expo; High: 12mm up/down, 12% expo
- Control throw Rudder: Low: 30mm right/left,
15% expo; High: 40mm right/left, 15% expo
- Control throw Flaps: Mid: 25mm down; L
anding: 35mm down
- Experience level: Intermediate
- Plane type: Scale Military
RECOMMENDED MOTOR AND BATTERY SET UP
- Motor: RIMFIRE .120 (not included)
- Lipo cell: 5-6 cells / 5500 – 6000mAh (not included)
- Esc: 120-160A (not included)
Advertisement
Table of Contents

Related Manuals for Phoenix Model PC21 PILATUS MK2


Summary of Contents for Phoenix Model PC21 PILATUS MK2
- Page 1 Instruction Manual PC21 PILATUS MK2 SIZE .120 OR 30CC SCALE 1:5 ARF SPECIFICATION - Wingspan: 1772mm (69.72in) - Motor: brushless outrunner 1600-2200 W, - Length: 2019mm (79.5 in) 450 KV (not included) - Flying weight: 6.4 - 7.2 kg - Gravity CG: 166 mm (6.5 in) Back from the - Wing area: 57.6 dm2...
-
Page 2: Tools And Supplies Needed
This will assure proper assembly. The PC21 PILATUS MK2 SIZE.120 OR 30CC SCALE 1:5 ARF is hand made from natural materials, every plane is unique and minor adjustments may have to be made. -
Page 3: Installing The Control Horns
Instruction Manual PILATUS - PC21 4. Using the thread as a guide and using masking tape, tape the servo lead to the end of the thread: carefully pull the thread out. When you have pulled the servo lead out, remove the masking tape and the servo lead from the thread. -
Page 4: Installing The Aileron Linkages
Instruction Manual PILATUS - PC21 INSTALLING THE AILERON LINKAGES 8. Insert the 90 degree bend down through the hole in the servo arm. Install one nylon snap keeper over the wire to secure it to the arm. 1. Working with the aileron linkage for now, thread Install the servo arm retaining screw and one nylon clevis at least 6 turns onto one of remove the masking tape from the aileron. - Page 5 Instruction Manual PILATUS - PC21 6. Secure the air retract to the wing. 2. Remove the covering. Remove the covering 3. Glue the wheel well by C.A glue. 7. Pull out the air tube through the wing section. C.A Glue 8.
-
Page 6: Installing The Horizontal Stabilizer
Instruction Manual PILATUS - PC21 3. Slide the joiner to the stabilizer. 10. Secure the wooden plate. Machine screw Dihedral brace 4. Attach the stabilizer to the fuselage. Aluminum Collar Dihedral brace 11. Secure the wing to the fuselage using the plastic screws. -
Page 7: Installing The Motor And Battery
Instruction Manual PILATUS - PC21 Install with OS 120 two stroke Remove the covering 145mm Install with OS 22cc Engine 145mm - Glue two plate of wood into the rudder. INSTALLING THE MOTOR AND BATTERY Plate C.A glue Installing the electric motor This model can fly with electric, here is our recommended for set up the system. - Page 8 Instruction Manual PILATUS - PC21 Battery INSTALLING THE THROTTLE PUSHROD HOUSING 1. Place the engine into the engine mount and align it properly with the front of the cowling. The distance from the firewall to the front of the engine thrust washer should [120mm-145mm]. Screw If your engine is equipped with a remote needle valve, we suggest installing it into the engine at...
-
Page 9: Installing The Elevator Pushrod
Instruction Manual PILATUS - PC21 3. Carefully bend the second nylon tube up at a 45 degree angle (using a cigarette lighter). This tube will be the vent tube to the muffler. 4. Carefully bend the third nylon tube down at a 45 degree angle (using a cigarette lighter). - Page 10 Instruction Manual PILATUS - PC21 Remove the covering 3. Working from inside the fuselage, slide the threaded end of the pushrod until it reaches the 7. Attach clevis to the hole in the control horn. exit slot. Carefully reach in with a small screw driver and guide the pushrod out of the exit slot.
-
Page 11: Installing The Rudder Pushrod
Instruction Manual PILATUS - PC21 Elevator servo Remove the covering Elevator servo INSTALLING THE RUDDER PUSHROD 1. Locate the pushrod exit slot on the right side of the fuselage. 2. Carefully cut away the covering material from the slot. Remove the covering 7. -
Page 12: Mounting The Cowl
Instruction Manual PILATUS - PC21 13. Insert the 90 degree bend up through the hole Motor control servo in the servo arm. Install one nylon snap keeper over the wire to secure it to the arm. Install the servo arm retaining screw and remove the masking tape from the rudder. -
Page 13: Installing The Nose Gear
Instruction Manual PILATUS - PC21 Machine screw Screw 7. Install the muffler. Connect the fuel and pressure 3. Prepare the air tube. lines to the carburator, muffler and fuel filler valve. Tighten the screws completely. FINAL ASSEMBLY 350mm INSTALLING THE SPINNER The propeller should not touch any part of the spinner cone. -
Page 14: Installing The Control Air System
Instruction Manual PILATUS - PC21 INSTALLING THE CONTROL AIR SYSTEM 6. Secure the spring. 1. Install the servo to the fuselage. Spring 7. Install and secure the air retract to the fuselage. 2. The air valve. Machine screw 8. Slide the cable. 3. -
Page 15: Superlock Air Retracts
Instruction Manual PILATUS - PC21 SUPERLOCK AIR RETRACTS AIR SUPPLY VALUE ONE WAY MAIN GEAR 3 WAY CONNECTOR NOSE GEAR VALVE CONTROL 4 WAY CONNECTOR MAIN GEAR AIR TANK SERVO 4 WAY CONNECTOR BALANCING 1. It is critical that your airplane be balanced 166mm correctly. -
Page 16: Control Throws
Instruction Manual PILATUS - PC21 CONTROL THROWS 1. We highly recommend setting up a plane using the control throws listed. 2. The control throws should be measured at the widest point of each control surface. 3. Check to be sure the control surfaces move in the correct directions.
Need help?
Do you have a question about the PC21 PILATUS MK2 and is the answer not in the manual?
Questions and answers