Table of Contents
Advertisement
Quick Links
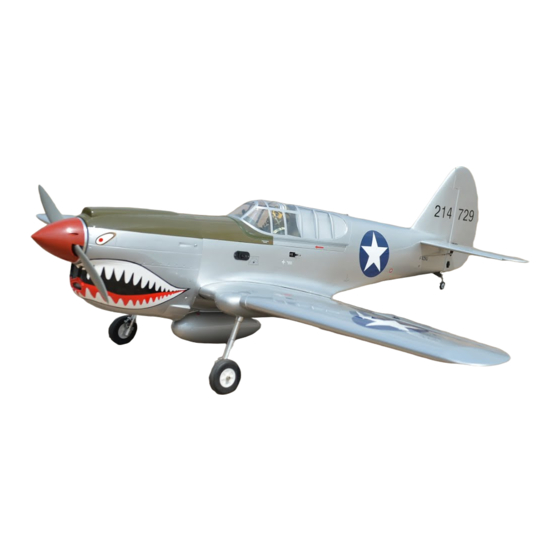
GP/EP Size .91/15cc SCALE 1:7ARF
SPECIFICATION
- Wingspan: 1615mm (63.5in)
- Length: 1425mm (56.1 in)
- Flying weight: 4500-5000 g
- Wing area: 47.6 dm2
- Wing loading: 95g/dm2
- Wing type: Naca airfoils
- Retract gear type: Rotary Air-retract 90 degree
With CNC Suspension Metal Struts (included)
- Spinner size: 95mm (included)
- Pressure for air tank retract: 7 bar (100 PSI)
- Radio: 6-channel radio system minimum. 7 standard
hi-torque servo: 2 aileron; 2 flap; 1 elevator; 1 rudder;
1 throttle; 1 air valve control (not included)
- Engine: .91 two stroke plug engine or 15cc gas
engine (not included)
- Motor: brushless outrunner 1800-2000 W,
500 KV (not included)
Instruction Manual
- Recommended receiver battery:
6.0V 2400/2600mAh NiMH (not included)
- Propeller: suit with your engine
- Gravity CG: 95-100 mm (3.7-3.9 in) Back from the
leading edge of the wing, at the fuselage
- Control throw Ailerons: Low: 9mm up/down,
10% expo; High: 11mm up/down, 10% expo
- Control throw Elevators: Low: 9mm up/down,
12% expo; High: 11mm up/down, 12% expo
- Control throw Rudder: Low: 20mm right/left,
15% expo; High: 35mm right/left, 15% expo
- Control throw Flaps: Mid: 15mm down;
Landing: 25mm down
- Experience level: Intermediate
- Plane type: scale military
RECOMMENDED MOTOR AND BATTERY SET UP
- Motor: RIMFIRE .60-.80 (not included)
- Lipo cell: 6 cells / 4500 – 5500mAh (not included)
- Esc: 80-100A (not included)
Advertisement
Table of Contents

Related Manuals for Phoenix Model P40 KITTY HAWK


Summary of Contents for Phoenix Model P40 KITTY HAWK
- Page 1 Instruction Manual GP/EP Size .91/15cc SCALE 1:7ARF SPECIFICATION - Recommended receiver battery: 6.0V 2400/2600mAh NiMH (not included) - Wingspan: 1615mm (63.5in) - Propeller: suit with your engine - Length: 1425mm (56.1 in) - Gravity CG: 95-100 mm (3.7-3.9 in) Back from the - Flying weight: 4500-5000 g leading edge of the wing, at the fuselage - Wing area: 47.6 dm2...
-
Page 2: Table Of Contents
Thank you for purchasing Phoenix Model products. With over 20 years experience in production and fly testing, Phoenix Model is committed to bring the best quality products and good service to customers. Along with a team of creative engineers and skilled workers, we will always accompany with customers by our great experiences, fully enthusiasm... -
Page 3: Warranty
Vacuum the parts and the work area to assemble and use this. thoroughly after working with fiberglass parts. In that Phoenix Model has no control over the final assembly or material used for final assembly, Phoenix SUGGESTION Model is not responsible for loss of use , or other incidental or consequential damages. -
Page 4: Flight Warnings
Instruction Manual P40 KITTY HAWK FLIGHT WARNINGS ADHESIVES AND REQUIRED TOOLS When ready to fly, first extend the transmitter aerial. Thin CA Switch on the transmitter. 30-minute epoxy Switch on the receiver. 6-minute epoxy Check that the wings are correctly fitted to the Threadlocker thread locking cement fuselage. - Page 5 Instruction Manual P40 KITTY HAWK • Officially designated AMA Air Show Teams (AST) are authorized to use devices and practices as defined within the Team AMA Program Document. (AMA Document #718.) (j) Not operate a turbine-powered aircraft, unless in compliance with the AMA turbine regulations. (AMA Document #510-A.)
-
Page 6: Preparations
Instruction Manual P40 KITTY HAWK PREPARATIONS INSTALLING THE AILERON And flap Remove the tape and separate the ailerons SERVOS from the wing and the elevators from the stab. Use a covering iron with a covering sock on 1. Install the rubber grommets and brass eyelets high heat to tighten the covering if necessary. -
Page 7: Installing The Control Horns For Aileron
Instruction Manual P40 KITTY HAWK 5. Place the aileron servo tray / hatch into the servo box on the bottom of the wing and drill 1,6mm pilot holes through the tray and the servo box for each of the four mounting screws. -
Page 8: Installing The Aileron Linkages
Instruction Manual P40 KITTY HAWK INSTALLING THE AILERON LINKAGES 8. Insert the 90 degree bend down through the hole in the servo arm. Install one nylon snap keeper over the wire to secure it to the arm. 1. Working with the aileron linkage for now, thread... -
Page 9: Installing The Main Landing Gear
Instruction Manual P40 KITTY HAWK INSTALLING THE LANDING GEAR SUPERLOCK AIR RETRACTS AIR SUPPLY VALUE ONE WAY MAIN GEAR 3 WAY CONNECTOR VALVE CONTROL 3 WAY CONNECTOR MAIN GEAR AIR TANK SERVO 3 WAY CONNECTOR 3. Prepare the air tube. -
Page 10: Installing The Horizontal Stabilizer
Instruction Manual P40 KITTY HAWK 5. Secure the air retract to the wing. 9. Secure the retract door cover. Screw Screw INSTALLING THE HORIZONTAL STABILIZER 6. Install and secure the retract gear into the wing. 1. Using a modeling knife, cut away the covering from the fuselage for the stabilizer and remove it. -
Page 11: Vertical Stabilizer Installation
Instruction Manual P40 KITTY HAWK Glue with epoxy 6. After the epoxy has fully cured, remove the masking tape or T-pins used to hold the stabilizer in place and carefully inspect the glue joints. Use more epoxy to fill in any gaps that were not filled previously and clean up the excess using a paper towel and rubbing alcohol. -
Page 12: Assemble And Install The Tail Gear
Instruction Manual P40 KITTY HAWK Glue with C.A glue 3. Now, remove the vertical stabilizer and using a assemble and install the tail gear modeling knife, carefully cut just inside the marked lines and remove the film on both sides 1. -
Page 13: Installing The Throttle Pushrod Housing
Instruction Manual P40 KITTY HAWK INSTALLING THE THROTTLE PUSHROD HOUSING INSTALLING THE MOTOR AND BATTERY 1. Place the engine into the engine mount and align it properly with the front of the cowling. The distance from the firewall to the front of the Installing the electric motor engine thrust washer should 125mm. -
Page 14: Fuel Tank
Instruction Manual P40 KITTY HAWK When the stopper assembly is installed in the tank, the top of the vent tube should rest just below the top surface of the tank. It should not touch the top of the tank. Atter confirming the direction (see front view of fuel tank). -
Page 15: Servo Installation
Instruction Manual P40 KITTY HAWK 2. Carefully cut away the covering material from the slot. 3. Working from inside the fuselage, slide the threaded end of the pushrod until it reaches the exit slot. Carefully reach in with a small screw CA glue driver and guide the pushrod out of the exit slot. -
Page 16: Installing The Rudder Pushrod
Instruction Manual P40 KITTY HAWK 8. Connect the two elevator pushrod using the domino. 9. Locate one nylon servo arm, and using wire cutters, remove all but one of the arms. Using a 2mm drill bit, enlarge the third hole out from the center to accommodate the elevator pushrod wire. -
Page 17: Installing The Throttle
Instruction Manual P40 KITTY HAWK INSTALLING THE THROTTLE 2. The air valve. 1. Install one adjustable metal connector through the third hole out from the center of one servo arm, enlarge the hole in the servo arm using a 2mm drill bit to accommodate the servo connector. -
Page 18: Final Assembly
Instruction Manual P40 KITTY HAWK 3. Slide the cowl back into place. Align the front of the cowl with the crankshaft of the engine. INSTALLING THE RECEIVER AND BATTERY The front of the cowl should be positioned so the crankshaft is in the middle of the precut 1. -
Page 19: Open And Close The Canopy
Instruction Manual P40 KITTY HAWK OPEN AND CLOSE THE CANOPY THE CENTER OF GRAVITY IS LOCATED 95-100mm BACK FROM THE LEADING EDGE OF THE WING, AT THE FUSELAGE. 2. Mount the wing to the fuselage. Using a couple of pieces of masking tape, place them on the top side of the wing 95-100mm back from the leading edge, at the fuselage sides. -
Page 20: Flight Preparation Pre Flight Check
Instruction Manual P40 KITTY HAWK FLIGHT PREPARATION PRE FLIGHT CHECK 1. Completely charge your transmitter and receiver batteries before your first day of flying. 2. Check every bolt and every glue joint in your plane to ensure that everything is tight and well bonded.
Need help?
Do you have a question about the P40 KITTY HAWK and is the answer not in the manual?
Questions and answers