Table of Contents
Advertisement
Quick Links
SPARE PARTS LIST
Part No.
10094
Hot air gun heating element
30105S
Plastic handle of hot air gun
S012
Hot air gun complete handle
20962
Hot air gun metal pipe
P005
Diaphragm Pump
C001
Soldering Iron heating element
3098S
Plastic handle of soldering iron
B004
Soldering Iron complete handle
201701
Soldering Iron Tip enclosure
Manufacturer:
AOYUE TONGYI INTERNATIONAL LIMITED
Jishui Industrial Zone, Nantou, Zhongshan City,
Guangdong Province, P.R.China
http://www.aoyue.com
24
Description
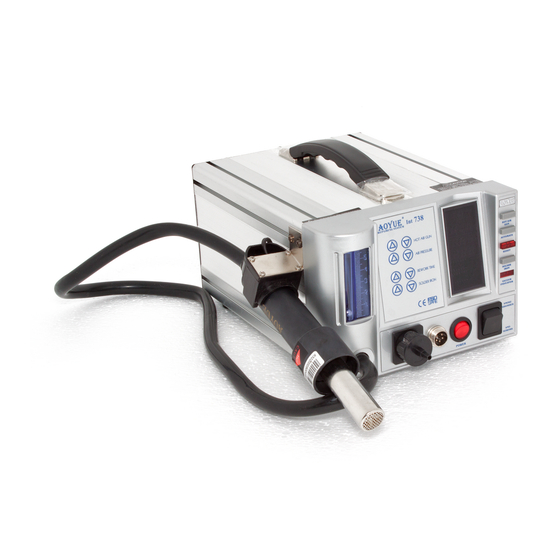
Professional Repairing System
INSTRUCTION MANUAL
Thank you for purchasing Aoyue Int738 Professional Repairing System.
It is important to read the manual before using the equipment.
Please keep manual in accessible place for future reference.
I
738
I
738
NT
NT
Advertisement
Table of Contents

Related Manuals for aoyue INT 738


Summary of Contents for aoyue INT 738
- Page 1 SPARE PARTS LIST Part No. Description 10094 Hot air gun heating element 30105S Plastic handle of hot air gun I 738 NT NT S012 Hot air gun complete handle 20962 Hot air gun metal pipe Professional Repairing System P005 Diaphragm Pump C001 Soldering Iron heating element 3098S Plastic handle of soldering iron B004 Soldering Iron complete handle INSTRUCTION MANUAL 201701 Soldering Iron Tip enclosure Thank you for purchasing Aoyue Int738 Professional Repairing System. It is important to read the manual before using the equipment. Please keep manual in accessible place for future reference. Manufacturer: AOYUE TONGYI INTERNATIONAL LIMITED Jishui Industrial Zone, Nantou, Zhongshan City, Guangdong Province, P.R.China http://www.aoyue.com 24 ...
- Page 2 AIR NOZZLES This manual is designed to familiarize the technician with proper operation maintenance equipment. The “Care and Safety Precautions” section explains the hazards of using any type of soldering or reworking device. Please read carefully and observe the Note: The above items are sold separately. guidelines in order to maximize usage and minimize the risk of injury or accidents .
-
Page 3: Table Of Contents
REPLACEMENT TIPS TABLE OF CONTENTS Product Description ……………………………………… 4 Package Inclusion ………………………………..…..… 5 Spare Parts List .…..……………………..…….………… 5 Specifications ……………………………..……………. 6 Functions & Features ……………………….………….. 7 Safety Precautions ……….……………………….……... 7 Operating Guidelines Control Panel ………………………………………. 8 Assembly and Preparation ……………………….. 9 Startup procedures ………………………………. -
Page 4: Product Description
BASIC TROUBLESHOOTING GUIDE PRODUCT DESCRIPTION PROBLEM 6: AIR PRESSURE LEVEL IS SIGNIFICANTLY LOW NO The Aoyue I 738 Professional Repairing System is a reworking MATTER HOW HIGH THE AIRFLOW LEVEL IS CALIBRATED equipment that combines the functionality of a Hot Air Gun, Soldering Case 1: Check the mains voltage (AC power source). If the voltage level Iron, and Smoke absorber in one sophisticated package. falls significantly low, about 1520% lower than the standard, there will One of the notable features of this device is the autocooling process also be a noticeable drop in the air pressure level. of the Hot Air Gun. This functionality protects the device (and its ... -
Page 5: Package Inclusion
PACKAGE INCLUSION BASIC TROUBLESHOOTING GUIDE PROBLEM 1: THE UNIT HAS NO POWER 1. Check if the unit is switched ON. 738 Main Station 2. Check the fuse. Replace with the same type if fuse is blown. 3. Check the power cord and make sure there are no disconnections. 4. Verify that the unit is properly connected to the power source. Air Nozzles o PROBLEM 2: TEMPERATURE DISPLAY IS ALWAYS ABOVE 500 C (1124, 1130, o Description: Constant display of above 500 C temperature from the 1197,1010, 1313, panel then displays a blinking “OFF” on the panel after a few minutes. Hot Air Gun and SOLUTION: Hot Air Gun Holder Soldering Iron with The thermal sensor may be broken and needs to be replaced. Smoke Absorber PROBLEM 3: ACTUAL AIR TEMPERATURE IS NOT INCREASING Description: Actual temperature reading is not increasing or decreasing based ... -
Page 6: Specifications
CARE and MAINTENANCE SPECIFICATIONS Solder the other RED wire of heating element with YELLOW wire on ● PCB. MAIN STATION Solder BLUE wire of heating element with BLUE wire on PCB. ● Power Input : available in 110V / 220V Solder WHITE wire of heating element to with BLACK wire on PCB ● Station Dimensions: 188(w) x 126(h) x 250(d) mm The 5 pin Solder Iron socket can be tested to detect faults in the Weight: 6.3 Kg hand piece: Before plugging in the hand piece conduct the following test: SOLDERING IRON Power Consumption: 45W Pins 4 & 2 ∞ Temperature Range: 200°C 480°C Pins 4 & 1 ∞ Pins 5 & 1 ∞ Heating Element: Ceramic Heater Pins 5 & 2 ∞ Output Voltage: 24V HOT AIR GUN If any of the above mentioned combination registers a short review the steps in replacing the heating element to ensure proper connections. ... -
Page 7: Functions & Features
FUNCTIONS and FEATURES CARE and MAINTENANCE Microprocessordriven ESD safe equipment. To test if the heating element of the soldering iron is in working ● 3in1 repairing system combining Hot Air Gun, Soldering Iron, ● condition: and Smoke absorber in one sophisticated package. Let whole assembly cool down to room temperature and unplug from Digital ... -
Page 8: Control Panel
CARE and MAINTENANCE CONTROL PANEL GUIDE STEPS in Checking, Cleaning and Tinning the Tip 1. Set temperature to 250°C (482°F) 2. After real temperature reaches the set temperature, use a damp sponge to clean the tip and check for damages. 3. If the tip has oxidation, apply solder and wipe using the damp sponge, repeat these steps until oxidation is removed. 4. After cleaning, coat tip with a thin layer of solder and set it aside ready for the next usage. ... -
Page 9: Assembly And Preparation
ASSEMBLY and PREPARATION OPERATING PROCEDURE E.. SMOKE ABSORBER A. Soldering Iron 1. Install the solder wire to the soldering iron holder as in Figure 2. 1. Wait until the soldering iron reaches the set temperature and stabilizes. 2. Set Vacuum Control to smoke absorber . 3. Check if the Vacuum Indicator lights up. 4. Fumes absorbed will pass through a filter and be blown out thru the hot air gun. So the smoke that is blown out from the hot air gun during soldering is already filtered. ... -
Page 10: Startup Procedures
OPERATING GUIDELINES OPERATING GUIDELINES C. AUTOMATE HOT AIR REWORKING 1. Turn on the hot air gun function switch , and set to the desired IMPORTANT REMINDERS: reworking temperature. Turn of hot air gun function switch. 1. Make sure the equipment is placed on a flat stable surface and 2. Turn on the automate function switch,”16” from the panel, Set the all its heatgenerating components placed on their respective time by using the up/down rework time button,”4” from the panel. holders/stands. It is preset at 300 seconds. 2. Ensure all switches are OFF prior to reworking. 3. After preferred automate rework time has been set. Turn on the hot 3. Ensure all terminal connections are properly secured. air gun function switch. 4. Timer would start counting down when the actual hot air NOTE: Please refer to the CONTROL PANEL GUIDE if needed. temperature has reached the set temperature. Once automate A. STARTUP PROCEDURE rework time is finished, it would cool down automatically, and 1. Plug the device to the main power source. display the letters “End” indicating automate process is finished. 2. Switch ON the device using the main power switch (item 9 on the 5. ... -
Page 11: B. Hot Air Gun
OPERATING GUIDELINES OPERATING GUIDELINES Autosleep mode — unit is also programmed to have an autosleep B. HOT AIR GUN mode, this is activated when hot air gun is turned on but is placed on the 1. Switch ON the equipment by activating main power switch (9). hot air gun holder and not put to use for set amount of minutes, 2. ... - Page 12 OPERATING GUIDELINES OPERATING GUIDELINES Autocool off function 6. You may start reworking as soon as the desired air temperature and 1. When reworking is complete, return the Hot Air Gun to its holder air pressure levels are reached. and DO NOT immediately unplug the device from the main power 7. . When reworking is complete, place the Hot Air Gun back to its source. holder. 2. Deactivate ...
Need help?
Do you have a question about the INT 738 and is the answer not in the manual?
Questions and answers