Table of Contents
Advertisement
Quick Links
Advertisement
Table of Contents

Related Manuals for Martin Jem Hazer Pro


Summary of Contents for Martin Jem Hazer Pro
- Page 1 READ AND SAVE THESE INSTRUCTIONS P/N 35010039-C user manual...
-
Page 2: Dimensions
The Martin logo, the Martin name, the Harman name and all other trademarks in this document pertaining to services or products by Martin Professional or its affiliates and subsidiaries are trademarks owned or licensed by Martin Professional or its affiliates or subsidiaries. -
Page 3: Table Of Contents
Contents Dimensions ..........................2 Contents ............................. 3 Safety information ........................5 Product overview ........................8 Product description ........................ 8 Features at a glance ....................... 8 Product details ........................9 Quick Start ..........................10 Setting up ..........................10 Making haze ......................... 10 Switching off ......................... - Page 4 Specifications .......................... 25 Contents...
-
Page 5: Safety Information
If the machine or any cables connected to it are in any way damaged, defective, wet, or show signs of overheating, stop using the machine and contact Martin Service for assistance. If the supply cord is damaged, it must be replaced by a special cord or assembly available from the manufacturer or its service agent. - Page 6 • Do not remove the covers or attempt to repair a faulty machine. Refer any service not described in this manual to Martin. • Do not operate the machine if any parts are damaged, defective or missing. Moisture and electricity do not mix. Do not aim haze output at electrical •...
- Page 7 P r e v e n t i n g b r e a t h i n g p r o b l e m s • A haze machine can operate safely only with the haze fluid it is designed for.
-
Page 8: Product Overview
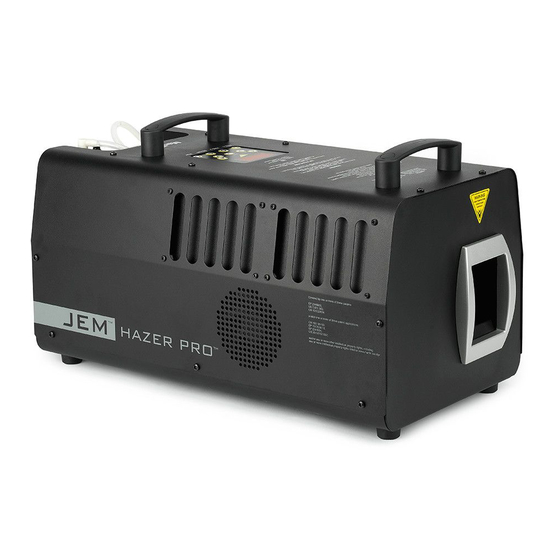
P r o d u c t d e s c r i p t i o n The Jem Hazer Pro™ is a top of the range haze machine from Martin Professional designed for the highly demanding professional market. Its ability to produce... -
Page 9: Product Details
P r o d u c t d e t a i l s Digital remote plug AVR program upload socket and status LEDs Main power 3 pin DMX switch input and link Power inlet connector 5 pin DMX input and link Digital control panel... -
Page 10: Quick Start
Locate the machine in a suitably large area with nothing in front of the haze output. Fill the fluid tank with Martin C-Plus Haze Fluid™ only. Use of other fluid will void the warranty. Connect a suitably rated power supply to the machine using the supplied Neutrik Powercon cable. -
Page 11: Installation And Setting Up
“Safety information” on page 5. L o c a t i o n The Jem Hazer Pro™ is designed to be located on the floor or may be suspended using the optional flying kit. If suspending the machine, the handles are removed and four eyebolts provided in the flying kit are fitted in their place. -
Page 12: Setting Up
5. • the haze fluid is one of the genuine Martin fluids listed under “Haze fluid options” on page 21. the machine is electrically grounded (earthed) •... -
Page 13: Control Settings
Control settings O v e r v i e w The digital display in the centre of the top panel allows you to configure the machine using option menus. Enter/store button Digital display Menu previous/next Value down/up buttons buttons Quick access buttons PRE1 PRE2 SILENT RUN The brightness of the display can be changed to LOW, NORM or HIGH using the... -
Page 14: Setting Run Mode
S e t t i n g R u n m o d e The Run menu sets the operational mode of the unit, either Off, Standby (heaters remain on), Fan only, Timer mode or Continuous mode. Use the Menu Previous / Next buttons to select the option. Use the Up/Down buttons to select ... -
Page 15: Setting The Dmx Base Address
S e t t i n g t h e D M X b a s e a d d r e s s Use the Previous / Next buttons to select the option. Use the Up/Down buttons to set the DMX base address from to . If you hold down the button the address will count up or down. - Page 16 Use the Up/Down buttons to change the option to . Press the Enter button to reset all options. To exit this menu if you decide not to reset the options, select and press Enter. Control settings...
- Page 17 The factory settings are: option setting HAZE FAN TRUN seconds TOFF seconds ADDR DISP LINK PRME PRE1 PRE2 Control settings...
-
Page 18: Remote Control
3-pin XLR plug on the rear panel of the Jem Hazer Pro™ (not the 3-pin DMX plug). The remote control is powered through its cable by the Jem Hazer Pro™; no batteries are required. -
Page 19: Dmx Control
15. The Jem Hazer Pro™ requires three DMX channels. For example if the Jem Hazer Pro™ is set to DMX address 100, channel 1 will be controlled by address 100, channel 2 will be controlled by address 101 and channel 3 by address 102. -
Page 20: Rdm Operation
R D M o p e r a t i o n The Jem Hazer Pro supports DMX Remote Device Management (RDM). This allows configuration and status monitoring of the machine from a suitably equipped lighting console or control system. -
Page 21: Haze Fluid Types
To find your local dealer visit www.martin.com DANGER! The Jem Hazer Pro™ can run safely only on the specific haze fluid it is designed for. Use ONLY the Martin haze fluid designated in this manual. -
Page 22: Basic Service
Basic service Before servicing the Jem Hazer Pro™, read and observe all the precautions listed in “Safety information” on page 5. Any service not described in this section must be carried out by a Martin service technician. To find your local Martin service centre visit www.martin.com... -
Page 23: Troubleshooting
Troubleshooting Problem Probable cause(s) Suggested remedy Machine not at operating Wait until message temperature no longer shown Machine will not produce set to 0 Increase setting haze when control panel set to RUN or remote control set to 0 Increase setting Haze switch turned on... -
Page 24: Status Messages
call Martin Service to obtain a replacement battery. R e s e t t i n g t h e m a c h i n e a f t e r f l u i d o u t If the machine runs out of fluid simply refill the fluid container and follow the priming instructions on page 15. -
Page 25: Specifications
Specifications P h y s i c a l Length ......................565mm Width ......................269mm Height ......................298mm Dry weight ....................... 15Kg P e r f o r m a n c e Operating time ..................continuous Warm up time (approx) ................6 minutes Maximum operating time at minimum output with 2.5L fluid ..... - Page 26 Fluid container, 2.5l A c c e s s o r i e s Multifunction Digital Remote Control, JEM Hazer Pro™ ..... P/N 92765041 Flying kit, JEM Hazer Pro™ ..............P/N 92610002 O r d e r i n g i n f o r m a t i o n JEM Hazer Pro™...
- Page 27 Dis p o s ing o f th is p ro d uct Martin™ products are supplied in compliance with Directive 2002/96/E C of the E uropean Parliament and of the Council of the E uropean Union on WE E E (Waste E lectrical and E lectronic E quipment), as amended by Directive 2003/108/E C, where applicable.
- Page 28 • Olof Palmes Allé 18 • 8200 Aarhus N • Denmark Tel: +45 8740 0000 • Fax: +45 8740 0010...
Need help?
Do you have a question about the Jem Hazer Pro and is the answer not in the manual?
Questions and answers