Advertisement
Quick Links
HD90 QUICK START GUIDE
About this Guide
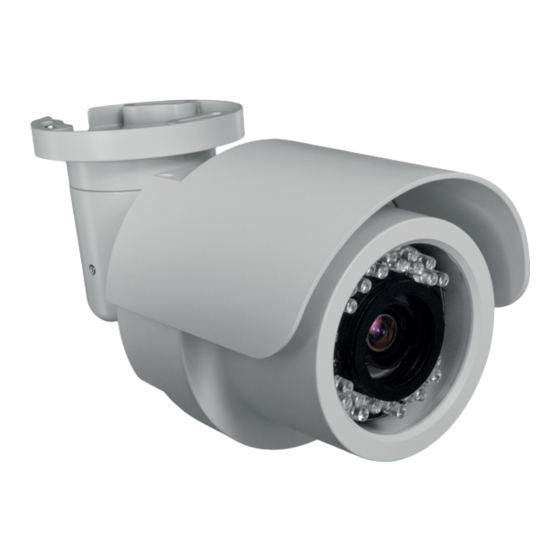
This guide is a quick reference for users to install and operate HD90 Night Vision HD
Indoor/Outdoor Bullet Cameras. It provides only basic information regarding HD90IR,
HD90IRV, HD90IRM, and HD90IRMH models. For further details on installation and
operation, please refer to the User Manual.
CONTENTS
Before proceeding, please check to confirm that the box contains the items listed
here. If any item is missing or has defects, DO NOT install or operate the product and
contact AvertX for assistance.
HD90 Bullet Camera
Hex Head Wrench
Anchors
Screws
Quick Start Guide & Installation CD
INSTALLATION
Remove Cover
Align Holes on Wall
Adjust Aim
All HD90 cameras can be installed directly
onto a wall or ceiling. Be sure that the
structure is strong enough to support the
camera.
1. Remove the HD90 camera from the
packaging.
2. Connect the Ethernet cable from the
ceiling or wall to the dongle on the
camera.
3. Affix the mounting bracket to the ceiling
or wall with the included self-tapping
screws.
4. Use the included hex-head wrench to
lossen the bolt on the side of the bracket
mount and on the camera housing.
5. Adjust the position of your camera.
6. Tighten the bolts to secure your camera.
Note
HD90 cameras are equipped with
a seal inside the housing to prevent
moisture from entering. If you have
concerns about moisture entring
through the wall via the cable, AvertX
recommends sealing the opening at the
wall and the base of the camera with
silicone caulking.
31629AA
Advertisement

Subscribe to Our Youtube Channel
Related Manuals for avertX HD90


Summary of Contents for avertX HD90
-
Page 1: About This Guide
HD90 QUICK START GUIDE INSTALLATION About this Guide This guide is a quick reference for users to install and operate HD90 Night Vision HD All HD90 cameras can be installed directly Indoor/Outdoor Bullet Cameras. It provides only basic information regarding HD90IR, onto a wall or ceiling. -
Page 2: Connecting To The Camera
The viewer software will automatically be installed on your PC the first time you Your HD90 camera is equipped with a slot for a Micro SD card, which can be used connect to the camera. If your internet browser doesn’t install the viewer software, for emergency video backup.
Need help?
Do you have a question about the HD90 and is the answer not in the manual?
Questions and answers