Sharp DX-B350P User Manual
Hide thumbs
Also See for DX-B350P:
- User manual (146 pages) ,
- Specifications (4 pages) ,
- Installation manual (28 pages)
Table of Contents
Advertisement
Quick Links
Download this manual
See also:
Installation Manual
Advertisement
Table of Contents

Related Manuals for Sharp DX-B350P


Summary of Contents for Sharp DX-B350P
-
Page 1: Laser Printer
MODEL: DX-B350P DX-B450P LASER PRINTER User's Guide Downloaded From ManualsPrinter.com Manuals... - Page 2 Downloaded From ManualsPrinter.com Manuals...
-
Page 3: Table Of Contents
Contents 1 Introduction......................1-1 Conventions ............................1-1 Safety Notes ............................1-2 Printer Orientation..........................1-2 2 Getting to Know Your Printer................. 2-1 Components............................2-1 Front View ............................ 2-1 Rear View ............................. 2-2 Internal Components ........................2-3 Turning the Printer On and Off......................2-4 Turning the Printer On ........................ - Page 4 4 Windows Operations ....................4-1 Installing PCL5e and PostScript 3 Drivers ..................4-1 Setting Default Values ........................4-2 Printing a Test Page........................... 4-4 Cancelling Printing ..........................4-5 Cancelling a Print Job at the Printer ..................... 4-5 Cancelling Print Jobs at the Computer..................4-5 Accessing the Driver from an Application ..................
- Page 5 Protocols ............................7-1 Initial Setting of the Printer’s IP Address ................... 7-1 Setting the IP Address through DHCP ................... 7-1 Setting the Network Configuration Manually ................. 7-2 Setting the IP Address through the Embedded Web Server ..........7-2 Configuring the Driver ........................7-2 Printer Network Configuration ......................
- Page 6 Duplex at the paper exit ......................10-8 Duplex at the interior of the top cover ..................10-9 At the Offset Catch Tray........................ 10-10 11 Windows Utilities....................11-1 Font and Macro Manager Utility ...................... 11-1 Status Monitor Utility........................11-2 PCL5 Tray Mapping Utility ....................... 11-2 Direct PDF Utility ..........................
-
Page 7: Introduction
Chapter 1: Introduction Thank you for selecting the DX-B350P/B450P Laser In this Chapter... printer. The DX-B350P prints 35 ppm on Letter paper and 34 ppm on A4 paper. The DX-B450P prints 45 ppm on • Conventions Letter paper and 43 ppm on A4 paper. This guide contains •... -
Page 8: Safety Notes
Safety Notes Introduction Safety Notes For your own safety, please read these carefully before using the machine. • Do not place the machine in a hot, humid, dusty, or poorly ventilated environment. Prolonged exposure to these adverse conditions can cause fire or electric shock. •... -
Page 9: Getting To Know Your Printer
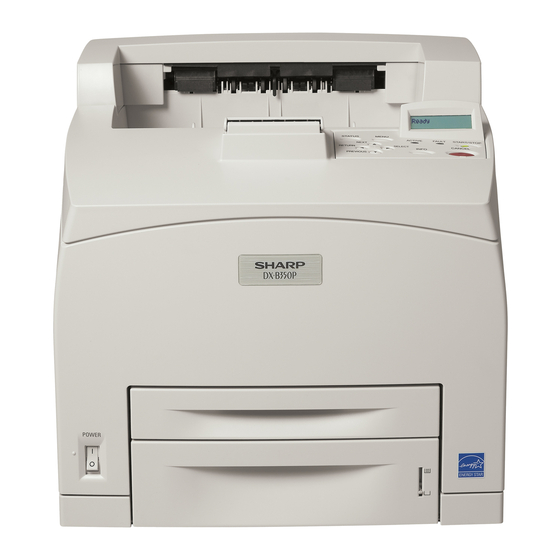
Chapter 2: Getting to Know Your Printer Components In this Chapter... Front View • Components • Turning the Printer On and Off • Available Printer Drivers • Paper Usage • Loading Paper • Replacing the Toner Cartridge • Power Save Mode •... -
Page 10: Rear View
Components Getting to Know Your Printer The maximum paper capacity with all options installed is 1800 sheets of 20 lb. (75 gsm) paper. The label in each paper tray indicates the maximum stacking capacity for certain paper types. Tray 1 Tray 2 Rear View Name... -
Page 11: Internal Components
Components Getting to Know Your Printer Internal Components Name Description Paper Stop Raise this when printing on paper larger than A4/Letter size. Toner Cartridge Contains the toner and the photosensitive drum. Top Cover Open this when replacing the Toner Cartridge and removing jammed paper. Fuser Unit Fixes the toner on the paper. -
Page 12: Turning The Printer On And Off
Turning the Printer On and Off Getting to Know Your Printer Turning the Printer On and Off Turning the Printer On 1. Press the power switch to the <I> position to turn the power on. Turning the Printer Off 1. Make sure that the printer is not processing a print job. 2. -
Page 13: Paper Usage
Paper Usage Getting to Know Your Printer Paper Usage This section describes available paper sizes, paper types, recommended papers, unusable paper, and which paper types and sizes can be used in which trays. NOTE: GSM indicates the weight of a 1 m sheet of paper in grams per square meter. -
Page 14: Custom Sizes
“Custom Size Paper” on page 4-14.When using the EWS, turn Auto-Sense OFF and press Submit to gain access to Custom Size settings. Paper Types The printer supports the following paper types Paper Types Fuser Mode Restrictions Plain (64-105 gsm DX-B350P) Normal None (68-105 gsm DX-B450P) Transparency Transparency No duplex... -
Page 15: Printing Transparencies
Thick 3 DX-B450P only Thick3 No duplex Half Speed on DX-B450P Not available on DX-B350P Thin (64-67 gsm) DX-B450P only Thin Not available on DX-B350P You should set your printer Media Type to Thick1 or any of the other paper types that use Thick1 fuser mode for any paper that is from 106 gsm to 159 gsm. -
Page 16: Printing Envelopes
Paper Usage Getting to Know Your Printer 8. In the printer driver or the computer application program, select Transparency as the paper type you wish to use. Printing Envelopes Envelopes can be printed from all trays. There are 5 sizes of standard envelopes that can be used. -
Page 17: Available Paper
Paper Usage Getting to Know Your Printer Available Paper The following table describes common brands of paper and other media that are supported for this printer. Paper Type Paper Name Weight (gsm) Size Part Number Plain, Pre-Punched, Letter, Color, Pre-Printed Xerox 4200DP 20lb Letter 3R2047... - Page 18 Paper Usage Getting to Know Your Printer Paper Type Paper Name Weight (gsm) Size Part Number 3M Transparency(CG3300) A4 Transparency CG3300 A4 Postcard Xerox Postcard Premier TCF160 CUT 3R91798A Thick 1, Thick 2, and Thick 3 Xerox Premier200gsm 3R93011 Oxford Index Card 3 by 5 40801 Xerox 65lb Cover Stock...
-
Page 19: Unusable Paper
Loading Paper Getting to Know Your Printer Unusable Paper Using the following types of paper might cause paper jams, malfunctions or damage to the printer. Do not use these types of paper. • Full-color transparencies • Paper that is too thick or thin •... - Page 20 Loading Paper Getting to Know Your Printer 2. Remove the lid. 3. If the base plate of the paper tray is raised, push it down. 4. Squeeze the length guide and slide it to the desired paper size. 2-12 User’s Guide Downloaded From ManualsPrinter.com Manuals...
- Page 21 Loading Paper Getting to Know Your Printer 5. Squeeze the right width guide and slide it to the desired paper size. 6. Fan the paper well. 7. Load the paper with the side to be printed facing up and all 4 corners aligned. Make sure the right width guide is correctly aligned with the paper.
-
Page 22: Loading Paper Larger Than A4/Letter Size In The Paper Tray
Loading Paper Getting to Know Your Printer 8. Replace the lid of the paper tray and firmly close the lid. 9. Firmly insert the tray in the printer. Loading Paper Larger Than A4/Letter Size In The Paper Tray 1. Place the paper tray on a flat surface. 2. -
Page 23: Replacing The Toner Cartridge
The Toner Cartridge should be replaced when it reaches the end of its print life. The Toner Cartridge prints up to 18K (DX-B350P)/ 21K (DX-B450P) images. The printer will produce a warning on the Operator Panel to inform you when the remaining toner amount is low. You can press START/STOP to continue printing with low toner. - Page 24 Replacing the Toner Cartridge Getting to Know Your Printer 1. Open the top cover and remove the empty Toner Cartridge. 2. Take the Toner Cartridge out of the box and shake it 7 to 8 times as shown in the diagram. 3.
-
Page 25: Power Save Mode
Power Save Mode Getting to Know Your Printer 4. Hold the Toner Cartridge by the grip and insert it into the slot inside the printer. 5. Close the top cover securely. 6. Wait for the printer to become Ready. Power Save Mode This printer is equipped with a low power mode to reduce power consumption when it is left idle. - Page 26 Understanding Printing Options Getting to Know Your Printer 2-18 User’s Guide Downloaded From ManualsPrinter.com Manuals...
-
Page 27: Operator Panel
Chapter 3: Operator Panel Operator Panel Features In this Chapter... The Operator Panel is located on the front of the printer. It contains the display, indicators, and push buttons that allow • Operator Panel Features you to view and change default printer settings. All features of the printer are accessible through the Operator •... -
Page 28: Led Indicators
Operator Panel Features Operator Panel LED Indicators The LED indicators indicate printer status. The table below explains the LED indicators. Color When Off When On When Blinking Green Printer is NOT Printer is READY START/STOP READY Green Printer is IDLE Printer is ACTIVE (processing Printer is WAITING (a partial ACTIVE... -
Page 29: Navigating The Operator Panel Menus
Operator Panel Features Operator Panel Navigating the Operator Panel Menus When you press the MENU button on the Operator Panel, you enter the printer’s menu system. At that point, the first line of the display contains the text “Menu”, indicating that you are in the menu system. -
Page 30: Printing A Configuration Summary
Printing a Configuration Summary Operator Panel 1. Pressing the MENU button on the Operator Panel enters the printer’s menu. The first line of the display contains the text “Menu”. 2. Press the NEXT button until the text “Paper Menu” is shown on the second line of the display. -
Page 31: Operator Panel Menus
Operator Panel Menus Operator Panel Operator Panel Menus The tables below describe the items available in the Operator Panel. Each item is listed along with the values available for selection. If no values are available for selection, the Value and Default columns are blank. -
Page 32: Paper Menu
Operator Panel Menus Operator Panel Paper Menu The Paper menu provides a variety of options for paper type selection as well as paper input and output. Items available in this menu are described below Menu Item Value Default Description Copies 1-999 Sets number of copies printed. - Page 33 Operator Panel Menus Operator Panel Menu Item Value Default Description Media Type Plain Plain Set the paper type for a selected tray. See Transparency “Paper Types” on page 2-6 for more Pre-Punched information. Letter Head Color Pre-Printed Bond Labels Card Stock Postcard Envelope Thick 1...
-
Page 34: Interface Menu
Operator Panel Menus Operator Panel Menu Item Value Default Description Custom Size Unit Inches Inches for 110V Set the unit of measurement for the Custom Millimeters mm for 230V Paper Size feature. Edge to Edge On/Off Enables a printing to the physical edge of the paper on all four sides. - Page 35 Operator Panel Menus Operator Panel Menu Item Value Default Description Delay Out Close On/Off When ON, the printer will wait until the job is completely printed and delivered to the output tray before terminating the connection, allowing all reverse-channel data to be sent back to the host. This will cause a reduction in printer throughput.
- Page 36 Operator Panel Menus Operator Panel Menu Item Value Default Description RTS On1/Off1 On/Off If On, the RTS signal will reflect the Online/ Offline status. RTS Error On/Off If On, the RTS signal will reflect the Error status. XON Ready/Busy On/Off If On, the XON response will reflect the Ready/Busy status.
- Page 37 Operator Panel Menus Operator Panel Menu Item Value Default Description Network Address <hex display Displays MAC address of network interface. of MAC address> IP Address data entry 000.000.000.000 IP Address. If DHCP is enabled, this is read-only. Otherwise, this can be changed by the address can be set manually here Subnet Mask data entry...
- Page 38 Operator Panel Menus Operator Panel Menu Item Value Default Description Binary PS On/Off When On, the feature allows all binary codes to be processed by the PostScript interpreter. When Off, special binary control codes may be intercepted per the Format item setting. Factory Defaults Resets the menu to factory network defaults.
-
Page 39: Ps Menu
Operator Panel Menus Operator Panel Menu Item Value Default Description Format Configures how incoming print jobs are Normal scanned for special binary control codes. Binary RAW=no processing Normal = “Adobe Standard Protocol” (ASP) Binary = “Binary Control Protocol” (BCP) When Interpreter setting is Auto Switch and this setting is Raw, the printer will automatically determine the control code method, defaulting to Normal if no codes are... - Page 40 Operator Panel Menus Operator Panel Parameter Value Default Description Pitch 0.08 - 100.00 10.00 Change the default pitch of text. Symbol Set All available 10U:PC-8 CP437 Choose a default symbol set. symbol sets Lines Per Page 5-128 60/Letter Change the default number of lines per page. 64/A4 Default value varies by paper size selected.
-
Page 41: System Menu
Operator Panel Menus Operator Panel System Menu The System menu allows you to specify system-level operation of the printer during normal and certain error conditions. Items available in this menu are described below Menu Item Value Default Description Factory Defaults U.S. -
Page 42: Quality Menu
Operator Panel Menus Operator Panel Menu Item Value Default Description Job Timeout 00000 - 99999 00000 Increase or decrease the limit (in seconds) for the total time of processing a PostScript job. A 0 setting indicates no timeout. This setting applies only to PostScript jobs. Jam Recovery On/Off Turn jam recovery on or off. -
Page 43: Flash/Disk/Cf Menu
Operator Panel Menus Operator Panel FLASH/Disk/CF Menu For each installed drive: FLASH, Disk, CF the following menu items are available. The menu only appears on the Operator Panel if the accessory is installed. Items available in this menu are described below Menu Item Value Default... -
Page 44: Status Information
Operator Panel Menus Operator Panel Status Information Status information is printed on the Configuration Summary. Category Description Status Info This listing on the Configuration Summary provides the status for each tray’s Paper Type, Paper Size, and capacity used. It also provides Toner status (consumable life tracking). Usage Count displays the current amount of usage of the printer. - Page 45 Operator Panel Menus Operator Panel Parameter Value Default Description mDNS SVC Name data entry Model Name plus last 7 digits of MAC (Network) address Current Zone empty Shows the name of the current zone for EtherTalk networking Preferred Zone Allows you to choose from a list of existing zones.
-
Page 46: Understanding Page Counters
Operator Panel Menus Operator Panel Understanding Page Counters Page Counters are included in Status information. Counter Type Definition Image Counter This counter reflects the number of images (sides) printed for the printer. Toner Page Count This counter reflects the number of pages printed using the installed cartridge. Sheet Counter This counter displays the number of sheets (one sheet equals two sides) the printer has printed. -
Page 47: Windows Operations
PostScript 3 are also provided on the installation CD and • Saved Settings can be installed as follows: • Main Tab 1. Place the Sharp Installation CD into your CD drive. • Paper Tab 2. From the Control Panel, select Printers and Faxes. • Advanced Tab 3. -
Page 48: Setting Default Values
• XL is for PCL6 drivers For example, the path D:\Drivers\ENUS\W2K\PS installs the English PostScript 3 drivers for XP. 11. Select either SHARP DX-B450P or SHARP DX-B350P driver, depending on your model. 12. The Name Your Printer screen appears. 13. Click Next. - Page 49 Setting Default Values Windows Operations The Printer’s configuration window appears. The driver can automatically recognize all the installed options for your printer. To get the installed options, click the Configuration tab and then the Auto Configuration button. You can also manually install an option by selecting it from the pulldown and changing its status.
-
Page 50: Printing A Test Page
Printing a Test Page Windows Operations 3. On the General Tab, click Printing Preferences The Printing Preferences window appears. 4. Any options set in any tab become your default values. Printing a Test Page You can print a Test page to verify printer connectivity and operation. To print a test page through your Printer Properties: 1. -
Page 51: Cancelling Printing
Cancelling Printing Windows Operations Cancelling Printing To cancel printing, you can either cancel the print job at the printer or at the computer. Cancelling a Print Job at the Printer Press the CANCEL button then press the Start button on the Operator Panel. Pages being printed at the moment will continue to be printed. -
Page 52: Accessing The Driver From An Application
Server and printer settings set via your application, the application settings supersede any other setting. To access Printer Properties from an application: 1. Select the Print option from your application. 2. Select the desired DX-B350P/B450P printer. 3. Click the Printer’s Properties button. The Printer’s Properties window appears. User’s Guide... -
Page 53: Navigating The Printer Properties Window
Navigating the Printer Properties Window Windows Operations Navigating the Printer Properties Window The driver screens are divided in to five groups of functionality as described in the table below. Functions Comments Main Copies Allows you to select number of copies, one Document Style or two-sided printing, binding and margin N-up Printing... -
Page 54: Main Tab
Main Tab Windows Operations Main Tab Selecting Number of Copies You can select the number of copies to print via your Printer Properties. When selecting the number of copies, you should also decide if those copies are collated. To select number of copies: 1. -
Page 55: Collating Copies
Main Tab Windows Operations Collating Copies When printing multiple copies of a job, the output can be automatically collated. When copies are collated, they are printed in groups by the print job, not by the page. If you do not select the collate option, your copies will be printed by page. -
Page 56: Poster Printing
Main Tab Windows Operations To print on both sides of the paper from your Printer Properties: 1. Select the Main tab within your Printer Properties. 2. Select Book, Tablet, or Pamphlet 2-sided printing. You can select how the printer will orient the page layout when duplexing. Depending on your page orientation, duplexing on the long-edge or short-edge of the paper produces different results. - Page 57 Main Tab Windows Operations 1. Select the Main tab within your Printer Properties. 2. Select the PosterPrint Document Style. 3. Click Options. The PosterPrint window appears. 4. Enter the desired parameters. Enter the X and y axis enlargement and orientation. 5.
-
Page 58: Multiple Pages To Single Sheet (N-Up)
Main Tab Windows Operations Multiple Pages to Single Sheet (N-up) You can print multiple pages on a single sheet when printing a multi-page document. This can save paper and is handy for draft reviews. You can print one, two, four, six, eight, nine, or sixteen pages per sheet. -
Page 59: Job Offset
Paper Tab Windows Operations Job Offset The Offset Catch Tray can place sheets in alternate positions to separate one print job from another. This is called job offsetting. When selected, the output position changes after the final sheet of the print job is printed. The next job is offset (shifted a bit) to keep it separate from the previous print job. -
Page 60: Selecting Paper Size
Paper Tab Windows Operations Selecting Paper Size You can select from a list of standard paper sizes. Available sizes are defined in “Paper Sizes” on page 2-5. To select the paper size through your Printer Properties: 1. Select the Paper tab. 2. -
Page 61: Zoom Settings
Paper Tab Windows Operations Zoom Settings You can scale any page image to fit the paper size being used. Zoom settings are unavailable if you have chosen a Document style of N-Up or Pamphlet. Fit to Page is unavailable if you have chosen Pamphlet. -
Page 62: Skip Blank Pages
Paper Tab Windows Operations “Load Paper” “Load Paper TrayX” “X” is the tray number where the paper should be loaded. If “Load Paper” is the displayed message, the paper may be loaded into any tray. If the paper size being loaded cannot be auto-sensed, then the Operator Panel must be used to configure the paper size. -
Page 63: Manual Feed
Advanced Tab Windows Operations Manual Feed Tray 1 can be used for manual feed. You must also set your Printer Properties for manual feed. Tray 1 normally operates in multiple-purpose mode, where multiple sheets can be loaded and printed continuously. In Manual mode, you are prompted to press the Start button for each sheet. -
Page 64: Using Overlays
To use an overlay after they have been created: 1. Open any document in any application. 2. Select File>Print within that application. 3. Select the DX-B350P or DX-B450P printer. 4. Click Properties. 5. Select the Advanced tab. 6. Click Overlay Options. -
Page 65: Job Handling Tab
Job Handling Tab Windows Operations 3. Click the Font Substitution button. 4. Select the desired TrueType Download Type. 5. Check Font Substitution checkbox. 6. Click New to add a new substitution or Edit to change an existing substitution. You can also delete and existing substitution or reset the substitutions to default settings. 7. -
Page 66: Job Retention And Storage
Job Handling Tab Windows Operations Column Description Duration How long it took the job to print. T1 - T4 Sheets Number of sheets printed from each tray. 600 dpi pages Number of pages printed at this resolution. 1200 DPI pages Number of pages printed at this resolution. -
Page 67: Hold Only
Watermark Tab Windows Operations To set retention options: 1. Select the Job Handling tab within your Printer Properties. 2. Click the Retention checkbox. 3. Select the desired job handling function. 4. Enter the job name in the Job name box. 5. - Page 68 Watermark Tab Windows Operations The text is shown centered on the page. 5. Use the sliders to change the size, position, and angle of the text. Click the center button if you wish to recenter the text. Click the First page only text box if you only want the text to appear only on the first page of the document.
-
Page 69: Macintosh Operations
Chapter 5: Macintosh Operations Installing the Driver In this Chapter... The Mac driver is installed by installing the PPD for the desired printer. The PPD is located on the installation CD. • Installing the Driver PPD installation may vary by Mac operating system. •... - Page 70 Installing the Driver Macintosh Operations 2. Select Print & Fax from the Hardware menu. 3. Click + to add the printer. 4. Enter a name for the printer. 5. Enter the IP address of the printer in the location field. User’s Guide Downloaded From ManualsPrinter.com Manuals...
-
Page 71: Accessing The Driver
Accessing the Driver Macintosh Operations 6. Select Other from the Print Using pulldown. A browse window is displayed. 7. Browse to the CD to select the desired PPD. 8. Click Open. 9. Click Add. The printer is installed. Accessing the Driver The Driver can be accessed from your application’s Print menu. -
Page 72: Navigating The Driver
Navigating the Driver Macintosh Operations Navigating the Driver Driver features and presentation may vary by Mac operating system. In general, the driver provides a group of “always there” option at the top of the driver window and a pulldown of Printer features available towards the middle of the window. - Page 73 Navigating the Driver Macintosh Operations Navigation Level 1 Navigation Level 2 Navigation Level 3 Description and Available Items Always there options: Printer Selects the printer with which to print . Presets Selects the presets with which to print. Copies Defines number of copies printed. Collated Turns the collate option on/off.
- Page 74 Navigating the Driver Macintosh Operations Navigation Level 1 Navigation Level 2 Navigation Level 3 Description and Available Items Scale down only Prints smaller page sizes on the current page size. Checked by default. . Page Order: Determines the order in which pages are printed. Options are: Automatic* default, Normal, and Reverse.
- Page 75 Navigating the Driver Macintosh Operations Navigation Level 1 Navigation Level 2 Navigation Level 3 Description and Available Items Tray Switching Checked by default Jam Recovery Checked by default User’s Guide Downloaded From ManualsPrinter.com Manuals...
- Page 76 Navigating the Driver Macintosh Operations User’s Guide Downloaded From ManualsPrinter.com Manuals...
-
Page 77: Embedded Web Server
Chapter 6: Embedded Web Server This printer comes with an Embedded Web Server (EWS). In this Chapter... The EWS resides in the printer and requires no installation. The EWS contains access to printer features and presents • Accessing the them as HTML web pages. The changes made via the EWS change the printer settings in the same manner as the •... -
Page 78: Navigating The Ews
Navigating the EWS Embedded Web Server Navigating the EWS The EWS interface consists of a left-navigation area and a display area. Use the left-navigation area to locate the desired items and make any configuration changes in the display area. Left-navigation area Display Area After each selection in the EWS, you must press the Submit button for the request to take effect. - Page 79 Navigating the EWS Embedded Web Server The following table defines the structure of the EWS. Some EWS functions require an Administrator Login. The default password is “admin”. Functions that require the Administrator Login are shown in Italics. Left-Navigation Left-Navigation Item Display Area Functions Comments Item...
- Page 80 Navigating the EWS Embedded Web Server Left-Navigation Left-Navigation Item Display Area Functions Comments Item Second Level Top Level File Management User Flash Directory of files in User Flash EWS only Feature View the files located on the Flash. System Settings Total Count Image Counter See section “Understanding...
- Page 81 Navigating the EWS Embedded Web Server Left-Navigation Left-Navigation Item Display Area Functions Comments Item Second Level Top Level Network Settings Protocol Settings TAB: TCP/IP Settings related to the TCP/IP TCP/IP: TCP/IP, DHCP, IPv6, IP protocol. Address, Subnet Mask, Default Gateway Network Settings Protocol Settings TAB: Netware...
- Page 82 Navigating the EWS Embedded Web Server User’s Guide Downloaded From ManualsPrinter.com Manuals...
-
Page 83: Networking
Chapter 7: Networking The DX-B350P/B450P is a fast network capable printer In this Chapter... and supports an Ethernet 10/100 Base-Tx network connection. • Protocols • Initial Setting of the Printer’s IP Protocols Address • Configuring the The following protocols are supported: Driver •... -
Page 84: Setting The Network Configuration Manually
Configuring the Driver Networking Setting the Network Configuration Manually You can make changes to the printer’s default network configuration using the Operator Panel. Once the settings for DHCP or IP address are changed, the printer automatically re-initializes. To manually set the printer’s IP address: 1. -
Page 85: Printer Network Configuration
Printer Network Configuration Networking Printer Network Configuration The Operator Panel and the Embedded Web Server allow control of many Network configuration settings. Network Protocol Configuration following protocols can be enabled or disabled: DHCP mDNS SNMP IPv6 EtherTalk Netware HTTP Port Number I/O Port Configuration The following I/O ports can be enabled or disabled: Parallel... -
Page 86: Notifications
Notifications Networking Notifications Automatic notifications of printer unavailability during printing can be sent in the following ways: SNMP monitoring E-mail configured via the EWS Status Monitor Utility. IP Filtering The purpose of IP filtering is to limit access to the printer to only those Host computers that have IP addresses within IP ranges predefined on the configuration page. -
Page 87: Ipv6 Implementation
IPv6 Implementation Networking IPv6 Implementation Specifications The IPv6 implementation conforms to the following IETF documents: RFC 2460: Internet Protocol, Version 6 (IPv6) Specification RFC 2461: Neighbor Discovery for IP Version 6 (IPv6) RFC 2462/4862: IPv6 Stateless Address Auto Configuration RFC 1981: Path MTU Discovery for IP Version 6 RFC 2463/4443: Internet Control Message Protocol (ICMPv6) RFC 2710/3810: Multicast Listener Discovery Version 2 (MLDv2) -
Page 88: Supported Object Identifiers
SNMP Networking In an SNMP agent, parameters are arranged in a tree. SNMP uses an Object Identifier (OID) to specify the exact parameter to set or get in the tree. An OID is a list of numbers separated by periods. An OID is a combination of two values. The first value is the OID of the generic object and the second is the instance value, which specifies the particular instance of the object. -
Page 89: Accessories
Chapter 8: Accessories The following optional accessories are available for this In this Chapter... printer: • Tray module (A4/ Letter, 550 sheets) • Paper trays • Duplex module • Offset Catch Tray • Memory Expansion Module • Hard Disk Drive •... -
Page 90: Tray Module (A4/Letter, 550 Sheets)
Tray module (A4/Letter, 550 sheets) Accessories Tray module (A4/Letter, 550 sheets) NOTE: You can add up to two Tray Modules. NOTE: Tray Modules differ by model and can not be interchanged. Installing/Uninstalling the Tray Module The optional Tray Module (A4/Letter, 550 sheets) is available for this printer. CAUTION: Be sure to switch off the power and unplug the power cord from the outlet before carrying out the operations. -
Page 91: Installing The Tray Module
Tray module (A4/Letter, 550 sheets) Accessories Tray module (A4/Letter, 550 sheets) Tray module (A4/550 sheets) Fasteners (four pieces) Paper tray (A4/550 sheets) Installing the Tray Module 1. Place the tray module to be installed at the lowest level on a flat location. NOTE: Proceed to Step 5 if you are installing only one tray module. - Page 92 Tray module (A4/Letter, 550 sheets) Accessories 2. Lift up the tray module to be installed at the top level by holding the parts as shown in the diagram. 3. Align the front and back corners of the top and bottom tray modules, and slowly lower the top module so that the guide pins at the 4 corners of the bottom module fit into the holes at the base plate of the top module.
- Page 93 Tray module (A4/Letter, 550 sheets) Accessories 5. Switch off the power to the printer. 6. Pull out the power cord from the power outlet and then the printer. 7. Remove any paper in the Standard Output Tray (1) and return the Paper Stop to its original position if it’s raised (2).
- Page 94 Tray module (A4/Letter, 550 sheets) Accessories 8. Pull the paper tray out of the printer. 9. Lift up the printer by holding the recessed areas as shown in the diagram. 10. Align the corners of the printer and the tray modules, and lower the printer gently so that the guide pins at the 4 corners of the tray modules fit into the holes at the base plate of the printer.
-
Page 95: Uninstalling The Tray Module
Tray module (A4/Letter, 550 sheets) Accessories 11. Insert the fasteners provided into the 2 locations inside and 2 locations at the back of the printer. Insert the fasteners securely. 12. Push the paper tray completely into the printer. Uninstalling the Tray Module NOTE: This procedure explains the uninstalling of two tray modules as an example. - Page 96 Tray module (A4/Letter, 550 sheets) Accessories 3. Remove any paper in the Standard Output Tray (1) and return the Paper Stop to its original position if it’s raised (2). 4. Pull the paper tray out of the printer. 5. Remove the fasteners found at the 2 locations inside and at the 2 locations at the back of the printer.
- Page 97 Tray module (A4/Letter, 550 sheets) Accessories 6. Lift up the printer by holding the recessed areas as shown in the diagram and then remove it from the tray modules. 7. Remove the fasteners found at the 2 locations inside the tray modules and at the 2 locations at the back of the tray modules.
-
Page 98: Paper Trays
Install this module to the printer to enable 2-sided printing. NOTE: Although there are different duplex modules for the DX-B350P and DX-B450P models, installation of these modules is the same. The DX-B450P Duplex module is slightly larger and weighs more than the DX-B350P model Duplex module. -
Page 99: Installing The Duplex Module
Duplex module Accessories Installing the Duplex Module 1. Switch off the power of the printer. 2. Pull out the power cord from the power outlet and then the printer. 3. Remove the rear cover of the printer after pushing the two tabs as shown in the diagram. Next, remove the connector cover of the printer as shown in the diagram. -
Page 100: Uninstalling The Duplex Module
Duplex module Accessories 4. Insert the right and left tabs at the bottom of the duplex module into the holes at the back of the printer and then align the top part of the duplex module with the printer. Ensure that the connector of the duplex module is connected to the connector of the printer. - Page 101 Duplex module Accessories 2. Pull out the power cord from the power outlet and then the printer. 3. Loosen the screws at the both ends of the bottom of the duplex module. 4. While supporting the duplex module with your hand, lift the lever at the top left hand side of the duplex module to unlock it and then tilt the top part of the duplex module away from the printer.
-
Page 102: Offset Catch Tray
Offset Catch Tray Accessories 5. While holding up the duplex module, remove the right and left tabs of the duplex module from the holes at the back of the printer. 6. Push in the cover and connector cover, which were removed during installation of the duplex module, until it clicks into the back of the printer. -
Page 103: Installing/Uninstalling The Offset Catch Tray
Offset Catch Tray Accessories Installing/Uninstalling the Offset Catch Tray You can install an optional Offset Catch Tray to this printer. CAUTION: Be sure to switch off the power and unplug the power cord from the outlet before carrying out the operations. Installing the Offset Catch Tray 1. - Page 104 Offset Catch Tray Accessories 3. Lift up the second lever from the top left corner of the back of the printer. 4. Open the rear cover. NOTE: Do not touch any parts inside the printer. 5. Loosen the right and left thumb screws as shown in the diagram to uninstall the top cover of the paper exit.
- Page 105 Offset Catch Tray Accessories 6. Insert the right and left tabs of the Offset Catch Tray into the holes at the top of the printer (1) and put it down to the top of the printer slowly (2). 7. Secure the screws at both ends of the bottom of the Offset Catch Tray. 8.
-
Page 106: Uninstalling The Offset Catch Tray
Offset Catch Tray Accessories Uninstalling the Offset Catch Tray 1. Switch off the power to the printer. 2. Pull out the power cord from the power outlet and then the printer. 3. Close the stopper and the extension tray of the Offset Catch Tray. 8-18 User’s Guide Downloaded From ManualsPrinter.com Manuals... - Page 107 Offset Catch Tray Accessories 4. Lift up the second lever (1) from the top left corner of the back of the printer to open the rear cover (2). 5. Remove the screws on both sides of the Offset Catch Tray (1), and while holding up the Offset Catch Tray, remove the right and left tabs from the holes at the top of the printer (2).
-
Page 108: Memory Expansion Module
Memory Expansion Module Accessories Memory Expansion Module 1. Ensure that the printer power switch is set to the OFF <O> position. 2. Disconnect the power cord from the wall outlet. 3. Remove the side cover from the printer. 4. Remove the inside panel by removing the screws as shown below: 5. -
Page 109: Hard Disk Drive
Hard Disk Drive Accessories Hard Disk Drive 1. Ensure that the printer power switch is set to the OFF <O> position. 2. Disconnect the power cord from the wall outlet. 3. Remove the inside panel (see “Memory Expansion Module” on page 8-20). 4. -
Page 110: Compact Flash (Cf) Card
Compact Flash (CF) Card Accessories 9. Connect the power cord to the wall outlet.Turn the printer power switch to the ON <I> position. When ready the printer may advise to press the select key to format the hard drive. This has to be done so that the hard drive can be used. The installation of your Hard Disk option in your printer is now complete. -
Page 111: Troubleshooting
Chapter 9: Troubleshooting This chapter provides information to help you trouble In this Chapter... shoot problems. It explains what to if the printer is not printing at all, is not printing correctly, or if error messages • Poor Print Quality are displayed. -
Page 112: Poor Print Quality
Poor Print Quality Troubleshooting Poor Print Quality Paper Is Output Blank or All Black Status Items to check Action Nothing is printed. Is the seal of the Toner Cartridge pulled out? Pull out the seal. Are two or more sheets of paper fed Remove and fan the papers well. - Page 113 Poor Print Quality Troubleshooting Status Items to check Action Black spots are printed. Is the correct type of paper used? Load the correct type of paper. Is the Toner Cartridge defective or damaged? Replace it with a new Toner Cartridge. Ensure that you are not printing outside the non printable area.
- Page 114 Poor Print Quality Troubleshooting Status Items to check Action Shadows are printed Are you using paper that has been left Replace with paper from a new ream. around black filled areas. unwrapped for a long period of time (especially when the humidity is low)? White dots appear in black Is the correct type of paper used? Load the correct type of paper.
- Page 115 Poor Print Quality Troubleshooting Status Items to check Action Image is printed at an Are the paper tray guides set in the correct Set the length guide and width guide in the angle. positions? correct positions. Image is printed at an unexpected location.
-
Page 116: No Power
No Power Troubleshooting Status Items to check Action Text is blurred. Is the paper damp? Replace with paper from a new ream. Is the correct type of paper used? Load the correct type of paper. No Power Status Items to check Action There is no power. -
Page 117: Printing Is Not Clear
Printing is Not Clear Troubleshooting Printing is Not Clear Status Items to check Action Transparencies are not printed clearly. Are the correct type of transparencies Load the correct type of transparencies. used? Are the transparencies correctly loaded Load the transparencies correctly in the in the paper tray? paper tray. -
Page 118: Noise
Noise Troubleshooting Noise Status Items to check Action Strange noise occurs. Is the printer placed on a flat location? Shift the printer to a stable surface. Is the top cover open? Close the top cover tight. Is the paper tray pushed in? Push the paper tray completely into the printer. -
Page 119: Error Messages
Error and Warning Messages Troubleshooting Error Messages The table below lists error messages, the possible causes of each error, and the actions required to recover from each error. When Error messages are displayed, the printer stops printing and user intervention is required before printing can continue. Error Message Line 1 Error Message Line 2 Possible Cause... - Page 120 Error and Warning Messages Troubleshooting Error Message Line 1 Error Message Line 2 Possible Cause Action ROS Failure Call Service The ROS has failed. Turn the printer off, then turn it on. If the problem reoccurs, contact an authorized Fuser Failure Call Service The fuser has failed.
- Page 121 Error and Warning Messages Troubleshooting Error Message Line 1 Error Message Line 2 Possible Cause Action JOBLIB Error 03 Press Start JobLibrary private mode Ensure the PIN is entered datastream missing PIN. JOBLIB Error 04 Press Start JobLibrary datastream Ensure the PIN matches or change the attempted to overwrite a Job Name Private job, but PIN did...
- Page 122 Error and Warning Messages Troubleshooting Error Message Line 1 Error Message Line 2 Possible Cause Action Printing Job printing None Normal Printer Operation Processing Data received None Normal Printer Operation Ready Printer is ready and idle None Normal Printer Operation Resetting Printer has received a None...
-
Page 123: Clearing Paper Jams
Chapter 10: Clearing Paper Jams When there is a paper jam, refer to the following In this Chapter... procedures and follow the instructions. • At the Paper Trays • At the Fuser Unit CAUTION: Never touch areas labeled as “High Voltage.”... -
Page 124: At The Paper Trays
At the Paper Trays Clearing Paper Jams At the Paper Trays 1. Pull the paper tray out of the printer. The paper tray must be pulled out completely. If the paper tray is pulled out halfway and pushed in again, the paper may be damaged. NOTE: If the paper is jammed inside the printer and behind the first level paper tray, pull out both the first and the second level paper trays. - Page 125 At the Paper Trays Clearing Paper Jams 3. Remove any paper jammed inside the printer. NOTE: If the printer is installed with the two optional tray modules, examine the interior of all the tray modules. 4. Push the paper tray completely into the printer. 5.
-
Page 126: At The Fuser Unit
At the Fuser Unit Clearing Paper Jams At the Fuser Unit 1. Remove any paper from the Standard Output Tray. NOTE: If the duplex unit is installed, open the cover of the Duplex module first. See“At the Duplex Module” on page 10-8. 2. - Page 127 At the Fuser Unit Clearing Paper Jams 4. Open the cover of the Fuser Unit and remove any jammed paper. If paper is torn, check for any remaining torn pieces of paper. The Fuser Unit is hot. Be careful not to touch it as you can get burned. Make sure that the levers at both ends of the Fuser Unit are returned to the positions they were in before clearing the jam.
-
Page 128: At The Toner Cartridge
At the Toner Cartridge Clearing Paper Jams 6. Open and close the top cover to clear the Jam message. At the Toner Cartridge 1. Remove any paper in the Standard Output Tray. 2. Open the top cover to clear the Jam message. NOTE: Do not touch any parts inside the printer. - Page 129 At the Toner Cartridge Clearing Paper Jams 3. Hold the Toner Cartridge by the grip and pull it out slowly. Then place it on a flat surface. NOTE: To prevent the toner from getting the surface dirty, lay a piece of paper down to place the Toner Cartridge on.
-
Page 130: At The Duplex Module
At the Duplex Module Clearing Paper Jams NOTE: Do not touch any parts inside the printer. Ensure that the Toner Cartridge is correctly installed. 7. Close the top cover securely. At the Duplex Module Duplex at the paper exit 1. Examine the paper exit and remove any jammed paper. If paper is torn, check for any remaining torn pieces of paper. -
Page 131: Duplex At The Interior Of The Top Cover
At the Duplex Module Clearing Paper Jams 2. Open and close the top cover to clear the Jam message. Duplex at the interior of the top cover 1. Lift the lever at the top left hand side of the duplex module to unlock it and open the top cover of the duplex module. -
Page 132: At The Offset Catch Tray
At the Offset Catch Tray Clearing Paper Jams 3. Close the top cover of the duplex module to clear the Jam message. At the Offset Catch Tray 1. Open the Offset Catch Tray cover by pulling the tab at the top left of the cover. 2. - Page 133 At the Offset Catch Tray Clearing Paper Jams 3. Close the Offset Catch Tray cover. 4. Lift up the second lever from the top left corner of the back of the printer to open the rear cover. 5. Remove any jammed paper. If paper is torn, check for any remaining torn pieces of paper. The Fuser Unit is hot.
- Page 134 At the Offset Catch Tray Clearing Paper Jams 6. Close the rear cover to clear the Jam message. 10-12 User’s Guide Downloaded From ManualsPrinter.com Manuals...
-
Page 135: Windows Utilities
Chapter 11: Windows Utilities A variety of Windows utilities are available with your In this Chapter... printer. During installation, you can choose to install any of these utilities. If you have not installed a desired utility and • Font and Macro Manager Utility wish to, rerun the installation and select the desired utility. -
Page 136: Status Monitor Utility
Status Monitor Utility Windows Utilities Status Monitor Utility The printer Status Monitor utility runs on the Windows XP, Win2K, or Vista system to which the printer is connected via a Parallel, USB, or network port. This utility communicates bi-directionally with the printer to obtain status information about error conditions and status. These conditions are reported using “pop-ups”... - Page 137 PCL5 Tray Mapping Utility Windows Utilities To use the program: 1. Select the target printer. The printer must be installed on a Windows system to be a target printer. 2. Enter new tray IDs. 3. Click OK. User’s Guide 11-3 Downloaded From ManualsPrinter.com Manuals...
-
Page 138: Direct Pdf Utility
Direct PDF Utility Windows Utilities Direct PDF Utility The printer’s Direct PDF Utility allows you to send a Version 1.3 PDF file directly to the printer without the use of Adobe Acrobat on the host computer and without using the printer driver. To start Direct PDF Print, right-click on the PDF document and select Direct PDF Print. - Page 139 Index Symbols <CANCEL> button 4-5 Cancel printing 4-5 SNMP Alerts 7-6 Cannot print 9-6 Numerics Carbon paper 2-11 Cardstock 2-6 2-Sided Printing 4-9 CF 3-17 CF Card 8-22 A4 2-5 Clarity 9-7 A5 2-5 Clock Adjust 6-4 A6 2-5 Collate 4-9 About 1-1 Collated 5-5 Access panel 2-1...
- Page 140 Drivers 2-4 GSM 2-5 Duplex 3-6, 4-9, 6-4 Duplex Bind 3-6, 6-4 Duplex Module 2-2, 8-10, 10-8 Hard Disk Drive 8-21 DX-B350P 1-1 Heat sensitive paper 2-11 DX-B450P 1-1 Hewlett Packard Web Jet Administrative Com- patibility 7-6 Hex Print 3-16, 6-4...
- Page 141 Margin shift 4-11 Mass Storage Error 6-5 Jam Recovery 3-16, 6-4 mDNS 6-5 Jams 10-1 Media Job Accounting 4-18, 6-4 suggested 2-9 Job Accounting Menu 3-5 Media Check 4-14, 5-6 Job Handling 4-21 Media Type 3-7, 5-6 Job Handling tab 4-7, 4-18 Media Types 2-6 Job Library 6-3 Memory Expansion Module 8-20...
- Page 142 Offset Catch Tray 2-1, 5-6, 8-14, 10-10 PCL5 Tray Mapping Utility 11-2 Offset Catch Tray Rear Cover 2-2 PCL5c 2-4 Offset from GMT 3-17 PCL5e 2-4 On 2-4 PCL6 2-4 Operator Panel 2-1, 3-1 PDF Utility 11-4 Operator Panel Menus PDLs 2-4 Defined 3-5 Pitch 3-14, 6-4...
- Page 143 Properties 4-2 SMTP Settings 6-4 Protocols 7-1 SNMP 6-5, 7-5 PS Menu 3-13 Source 4-12 PSERVER 6-5 special coating 2-11 pulp paper 2-11 Special Media 4-12 Specify Time Zone 6-4 Stained 9-2 Quality 4-16 Standard Output Tray 2-1 Quality Menu 3-16 Start 3-2 Start/Stop 3-2 Status 3-2, 6-3...
- Page 144 Tray 2 2-1, 8-10 front 2-1 Tray 3 2-1 internal 2-3 Tray 4 2-1 rear 2-2 Tray Controls 6-4 Vista 32/64 2-4 Tray Linking 3-7, 6-4 Tray Module 2-1, 8-2 Wait Timeout 3-15, 6-4 Tray Settings 4-12 Warning messages 9-8 Treated colored paper 2-11 Watermark 4-21 Troubleshooting 9-1...
- Page 145 Downloaded From ManualsPrinter.com Manuals...
- Page 146 SHARP ELECTRONICS CORPORATION 1 Sharp Plaza, Mahwah, New Jersey 07495-1163. www.sharpusa.com SHARP ELECTRONICS OF CANADA LTD. 335 Britannia Road East, Mississauga, Ontario, L4Z 1W9 This manual has been printed using a vegetable-based soy oil ink to help protect the environment.
Need help?
Do you have a question about the DX-B350P and is the answer not in the manual?
Questions and answers