Minicom Smart IP Access User Manual
Kvm switch
Hide thumbs
Also See for Smart IP Access:
- Quick installation manual (9 pages) ,
- User manual (39 pages)
Table of Contents
Advertisement
Quick Links
International HQ
Jerusalem, Israel
Tel: + 972 2 535 9666
minicom@minicom.com
Smart IP Access
User Guide
w w w . m i n i c o m . c o m
North American HQ
Linden, NJ, USA
Tel: + 1 908 486 2100
info.usa@minicom.com
Technical support -
European HQ
Dübendorf, Switzerland
Tel: + 41 44 823 8000
info.europe@minicom.com
support@minicom.com
5UM20143 V1.9 8/07
Advertisement
Table of Contents

Related Manuals for Minicom Smart IP Access


Summary of Contents for Minicom Smart IP Access
-
Page 1: User Guide
Smart IP Access User Guide w w w . m i n i c o m . c o m International HQ North American HQ European HQ Jerusalem, Israel Linden, NJ, USA Dübendorf, Switzerland Tel: + 41 44 823 8000... -
Page 2: Table Of Contents
2. Introduction..................... 3 3. Key Features ....................4 4. System components ..................4 5. The Smart IP Access unit ................5 6. Pre-installation guidelines................6 6.1 Avoiding general rack mounting problems ............6 6.2 Rack mounting the IP Access................7 7. - Page 3 25. Troubleshooting - Restoring factory defaults..........31 26. Technical Specifications................34 27. Video Resolution and Refresh Rates ............35 28. Safety......................35 29. User Guide Feedback.................. 35 30. WEEE Compliance ..................36 © 2007 Copyright Minicom Advanced Systems. All rights reserved.
-
Page 4: Welcome
SMART IP ACCESS 1. Welcome Thank you for buying the Smart IP Access system. This system is produced by Minicom Advanced Systems Limited. This document provides installation and operation instructions for Minicom’s Smart IP Access. It is intended for system administrators and network managers, and assumes that readers have a general understanding of networks, hardware and software. -
Page 5: Key Features
1 RS232 Cross cable (p/n 5CB00566) · Rack-mount kit (p/n 5AC20255) The RS232 Cross cable connects the Smart IP Access to Serial manageable devices such as Power Management units, Routers, etc. RS232 Cross cable option Smart IP Access has two RS232 RJ45 connectors. You can purchase another... -
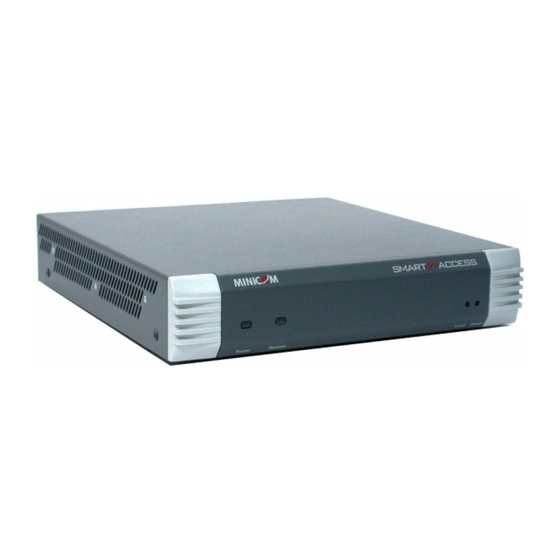
Page 6: The Smart Ip Access Unit
When pressed, Smart IP Access disconnects the Client computer’s link to the Target Server, and the Local Mouse and Keyboard become operational. Reset Restarts the Smart IP Access unit The figure below illustrates the rear panel of the Smart IP Access. SERIAL 1 and 2 Computer RS232 Monitor... -
Page 7: Pre-Installation Guidelines
Place the Smart IP Access on a flat, clean and dry surface. The Smart IP Access is not intended for connection to exposed outdoor lines 6.1 Avoiding general rack mounting problems Elevated operating ambient temperature The operating ambient temperature of the rack environment may be greater than the room ambient when installing into a closed or multi-unit rack assembly. -
Page 8: Rack Mounting The Ip Access
Rack mount the Smart IP Access using the supplied Rack-mount kit. There are 2 possible positions on the side of the Smart IP Access to connect the bracket. Screw the bracket to the Smart IP Access using 2 screws. See Figure 3. Screw the other bracket section to the rack. - Page 9 USER GUIDE 4. Connect Smart IP Access to the network by attaching one of the LAN ports to an Ethernet port on your Network. IP Access has two LAN interfaces – see Initial Settings 5. Connect to the power supply using the power cord provided.
-
Page 10: Default Ip Address
LAN 2 boots with the default IP configuration: IP Address - 192.168.0.155 Subnet mask - 255.255.255.0 You can use the default Smart IP Access IP address if your computer resides on the same subnet where Smart IP Access is installed, or you can connect a Crossover... -
Page 11: Logging Into The Web Interface
USER GUIDE LAN connector cable to the Smart IP Access on one end, and to the Ethernet adapter of your computer at the other end. 11. Logging into the Web interface To complete the initial setup via the Web configuration interface: 1. -
Page 12: Ssl Certificate Notes
12. Network > Configuration Consult your Network Administrator for the network settings. Device name - Type the name for the Smart IP Access. Default device name consists of the letter ‘D’ followed by the 6-digit device number (D.N.) found on the silver label on the underside of the IP Access box. -
Page 13: Lan 1
IP Access, if it resides on the same network segment. Manager IP – If Smart IP Access resides on a different segment, type the static IP address of the KVM.net Manager. (We advise typing the static IP address of the KVM.net Manager even if the Smart IP Access resides on the same network... -
Page 14: Network > Snmp Settings
From the menu click SNMP settings. The following appears. Figure 8 SNMP settings From this page you can activate or deactivate SNMP logging. Enable traps - Check to enable SNMP traps of Smart IP Access events and operation. Community – type the SNMP community... -
Page 15: Administrator
USER GUIDE 14.1 Administrator An Administrator has unrestricted access to all windows and settings and can “take over” any active session. An Administrator can change the name and password of all users. 14.2 User A User has no access to the Web configuration interface. When accessing a Target Server a User cannot use the following: ·... -
Page 16: Editing A User
SMART IP ACCESS 14.5 Editing a user To edit a user: 1. Select the user from the list. 2. Click . You can now change all the parameters – user name, permission and password. 3. Click , the changes are saved. -
Page 17: Administration > Serial Settings
USER GUIDE Figure 10 Switch configuration 1. Choose the manufacturer and model of the connected KVM switch. The number of possible connected servers appears in the Server Name section. 2. Change the name of the connected servers by selecting the server and typing a new name. -
Page 18: Show
SMART IP ACCESS Figure 11 Serial Settings For both Serial ports (where relevant), type in a device name and choose the correct device parameters. 16.1 Show Tick Show to make the device appear in the list of servers/devices that can be accessed. -
Page 19: Security > Ssl Certificates
From the menu, select SSL Certificate, the SSL Certificate page appears, see Figure 13. Figure 13 The SSL Certificate page You can replace the current Smart IP Access’s SSL certificate. Certificate File - Browse to locate the cer file. Private File - Browse to locate the private key file. -
Page 20: Security > Event Log
20. Maintenance > Set System Time From the menu select Set System Time. The Time Settings page appears see Figure 15. Set the correct date and time for Smart IP Access so that the logs record the correct time of the events. -
Page 21: Maintenance > Firmware Upgrade
USER GUIDE 21. Maintenance > Firmware Upgrade Upgrade the Smart IP Access firmware to take advantage of new features. You can receive firmware updates by email or download them from the Minicom Web site. Save the firmware file on the Client computer. -
Page 22: Saving Changes And Logging Out
(both lower case). On first connection install the Minicom certificate and ActiveX control. The screen of the Target Server connected directly to Smart IP Access, or the currently selected server on the KVM switch with Smart IP Access toolbar appears... -
Page 23: Taking Over A Busy Remote Session
USER GUIDE Figure 18 Remote session window 24.1 Taking over a busy remote session When connecting to a busy Target Server an Administrator has the option to take over the Target Server. A User only has this option when the current session is run by another User, but not by an Administrator. -
Page 24: Moving Or Hiding The Toolbar
The Toolbar can be dragged and dropped to anywhere on the screen, by clicking and dragging the logo To hide the Toolbar, either: Double-click the Smart IP Access System tray Icon Press F9. To display the Toolbar repeat the above actions. See also page 31. -
Page 25: Changing The Performance Settings
USER GUIDE 24.5 Changing the performance settings You can alter the bandwidth settings from the Toolbar. To alter the settings: From the Toolbar, click . The Settings.. box appears, see Figure 20. Figure 20 Settings.. box Bandwidth Choose from the following options Adaptive –... -
Page 26: Adjusting The Video Settings
SMART IP ACCESS 24.6 Adjusting the Video settings To change the video settings: From the Toolbar, click . You have the following options: · Refresh · Manual Video Adjust · Auto Video Adjust Each option is explained below. 24.6.1 Refresh Select Refresh or press Ctrl+R to refresh the Video image. -
Page 27: Auto Video Adjust
USER GUIDE 2. Move the sliders to change the displayed image. Click in the area of the sliders for fine-tuning. Brightness / Contrast - use the scales to adjust the brightness and contrast of the displayed image. Horizontal Offset - defines the starting position of each line on the displayed image. - Page 28 SMART IP ACCESS Figure 22 Special Key Manager box To add a predefined sequence: 1. Click Add Predefined. A list of sequences appears. 2. Select the desired sequence and click OK. The sequence appears in the Special Key Manager box.
-
Page 29: Synchronizing Mouse Pointers
NT4, 2000 or 98: From the Toolbar click / Calibrate. Smart IP Access saves this alignment so calibration is only needed once per Target Server. If the Video Noise Level is above zero, calibration may not work. Go to Video Adjustment and try to eliminate the noise by pressing Auto video adjust and/or adjusting the bars in Manual video adjust, then perform the mouse calibration. -
Page 30: Manual Mice Synchronization
SMART IP ACCESS Note! If the mouse settings on the Target Server were ever changed, you must synchronize mouse pointers manually, as explained below. 24.9.3 Manual mice synchronization If the mouse settings on the Target Server were ever changed, or when the... -
Page 31: Minicom Logo Menu Features
Mouse Emulation box appears see Figure 25. Figure 25 Mouse Emulation box Select the mouse connected to the Local Console port on the Smart IP Access, e.g. if the local mouse is a non-Microsoft 2 button mouse, select Standard Mouse and uncheck Microsoft Mouse. -
Page 32: Disconnecting The Remote Session
Section 22 on page 20 explained how to restore factory settings from the Web interface. When you cannot access the system e.g. you have forgotten the Username or Password, you can restore factory defaults from the Smart IP Access unit. - Page 33 USER GUIDE 5. Wait 2 minutes until the unit finishes booting. 6. Connect the lower network interface (LAN 2) to the network, and login with the default IP address of the unit: http://192.168.0.155/config. The Login box appears see Figure 27. Figure 27 Login box 7.
- Page 34 SMART IP ACCESS 11. Wait for 2 minutes and then type the default configuration IP address of the unit: https://192.168.0.155/config into your web browser. The Login page appears as in Figure 6 on page 10. 12. Type the default Administrator user name and password. Username: admin, password: access.
-
Page 35: Technical Specifications
USER GUIDE 26. Technical Specifications Target Server Windows 3.1, 9X, 2000, XP, NT4, 2003 Server, Vista. DOS, Novell 3.12 – 6, Linux Operating systems Client Computer Windows NT4.0, 2000, XP or 2003 Server, with IE 6.0 or higher Target Server Up to 1600x1200 @85Hz Resolution Client Computer... -
Page 36: Video Resolution And Refresh Rates
SMART IP ACCESS 27. Video Resolution and Refresh Rates → 640x480 720x400 800x600 1024x768 1152x864 1152x900 1280x720 1280x768 1280x960 1280x1024 1600x1200 28. Safety The device must only be opened by an authorized Minicom technician. Disconnect device from AC mains before service operation! Caution Risk of explosion if battery is replaced by an incorrect type. -
Page 37: Weee Compliance
USER GUIDE 30. WEEE Compliance WEEE Information for Minicom Customers and Recyclers Under the Waste Electrical and Electronic Equipment (WEEE) Directive and implementing regulations, when customers buy new electrical and electronic equipment from Minicom they are entitled to: · Send old equipment for recycling on a one-for-one, like-for-like basis (this varies depending on the country) ·... - Page 38 SMART IP ACCESS Regional Offices Germany France Italy Kiel Vincennes Rome Tel: + 49 431 668 7933 Tel: + 33 1 49 57 00 00 Tel: + 39 06 8209 7902 info.germany@minicom.com info.france@minicom.com info.italy@minicom.com England Camberley Tel: + 44 (0) 1276 25053 info.uk@minicom.com...
Need help?
Do you have a question about the Smart IP Access and is the answer not in the manual?
Questions and answers