Minicom Smart 216 User Manual
Smart 216 / 232 ip
Hide thumbs
Also See for Smart 216:
- User manual (50 pages) ,
- User manual (34 pages) ,
- User manual (87 pages)
Table of Contents
Advertisement
Quick Links
Download this manual
See also:
User Manual
International HQ
Jerusalem, Israel
Tel: + 972 2 535 9666
minicom@minicom.com
Smart 216 / 232 IP
User Guide
w w w . m i n i c o m . c o m
North American HQ
Linden, NJ, USA
Tel: + 1 908 486 2100
info.usa@minicom.com
Technical support - support@minicom.com
European HQ
Dübendorf, Switzerland
Tel: + 41 44 823 8000
info.europe@minicom.com
5UM20184 V1 6/08
Advertisement
Table of Contents

Subscribe to Our Youtube Channel
Related Manuals for Minicom Smart 216


Summary of Contents for Minicom Smart 216
-
Page 1: User Guide
Smart 216 / 232 IP User Guide w w w . m i n i c o m . c o m International HQ North American HQ European HQ Jerusalem, Israel Linden, NJ, USA Dübendorf, Switzerland Tel: + 41 44 823 8000... -
Page 2: Table Of Contents
3. Key features ........................ 4 4. System components....................5 5. Compatibility ....................... 5 6. Terminology ........................ 5 7. The Smart 216 IP unit ....................5 7.1 LED and button table .......................... 6 7.2 Connector table ........................... 6 8. Pre-installation guidelines................... 7 8.1 Avoiding general rack mounting problems .................. - Page 3 28.8 Saving changes to the settings....................... 43 29. Video resolution and refresh rates................43 30. Technical specifications..................44 31. Safety........................45 32. User guide feedback....................45 33. WEEE compliance ....................45 © 2008 Copyright Minicom Advanced Systems. All rights reserved.
-
Page 4: Welcome
SMART 216 / 232 IP 1. Welcome Thank you for buying the Smart 216 / 232 IP system. This system is produced by Minicom Advanced Systems Limited. This document provides installation and operation instructions for Minicom’s Smart 216 / 232 IP. It is intended for system administrators and network managers, and assumes that readers have a general understanding of networks, hardware and software. -
Page 5: Section I
This section explains how to configure and operate the Smart 216 / 232 IP system remotely over IP. Section II on page 39, explains how to operate the Smart 216 / 232 IP switching system locally through the On Screen Display (OSD). -
Page 6: System Components
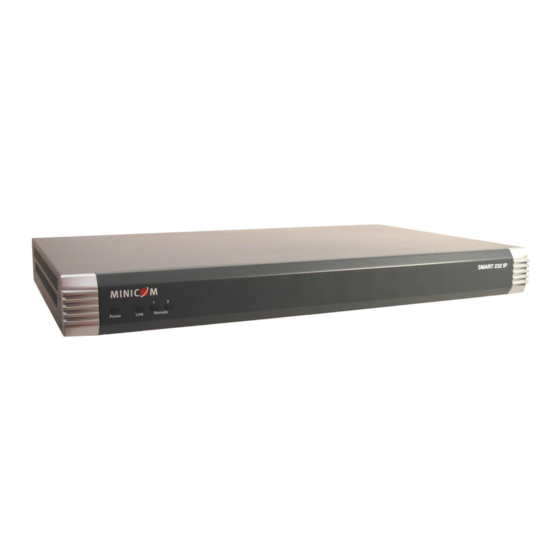
Seamless power control – with Minicom’s Serial Remote Power Switch. 4. System components The system consists of: • 1 Smart 216 IP (p/n 1SU70036) or 1 Smart 232 IP (p/n 1SU70037) • Rack mounting set (p/n 5AC20247) • ROCS - PS/2, USB 5. -
Page 7: Led And Button Table
Figure 2 Smart 216 IP ports – side 2 7.2 Connector table Connector Function Console KVM Connect a keyboard, video and mouse to operate the Smart 216 IP locally Serial 1 Connect any Serial device. Note! Minicom’s Serial Remote Power Switch must be connected to Serial 1 Serial 2 Connect any Serial device. -
Page 8: Pre-Installation Guidelines
• Place the Smart 216 IP on a flat, clean and dry surface • The Smart 216 IP is not intended for connection to exposed outdoor lines • Ensure that the maximum distance between each computer and the Smart 216 IP, does not exceed 30m/100ft for ROCs. -
Page 9: Rack Mounting The Smart 216 Ip
USER GUIDE 8.2 Rack mounting the Smart 216 IP Rack mount the Smart 216 IP using the supplied Rack-mount kit. The brackets can be placed in 2 possible positions, see Figure 3. Front of unit Position here for Position here... -
Page 10: Connecting The System
Figure 5 Smart 216 IP system overview 9.1 The ROCs Each computer/ server is directly connected to the Smart 216 IP via the appropriate RoC using CAT5 cable in a star configuration. No external power is needed at the remote ROCs. The ROCs draw their power from the computer’s keyboard port (ROC PS/2) or from the USB port (ROC USB). -
Page 11: Connecting A Roc Ps/2
USER GUIDE To computer’s Video Card To computer’s USB Port Figure 7 ROC USB 9.1.1 Connecting a ROC PS/2 Figure 8 illustrates the ROC PS/2 connections. You can connect the ROC PS/2 to a powered on computer, but it must be in the following order: 1. -
Page 12: Connecting A Roc Usb
Server port Figure 9 ROC USB 9.2 Connecting to the network Connect the network cable to the LAN port of the Smart 216 IP. This must be done before powering on the Smart 216 IP. 9.3 Connecting the CAT5 cables 1. -
Page 13: Connecting The Power Supply
USER GUIDE 9.5 Connecting the power supply 1. Using the Power cord provided, connect the Smart 216 IP to a socket outlet with grounding connection. Only use the power cord supplied with the unit. 2. Switch on the Smart 216 IP. -
Page 14: Logging Into The Web Interface
Enable DHCP – When a DHCP server is active on the same network to which Smart 216 IP is connected, DHCP provides automatic IP assignment. When DHCP is disabled – (Recommended) – You can assign a fixed IP address to the Smart 216 IP. -
Page 15: Ssl Certificate Notes
To complete the initial setup via the web configuration interface: 1. Open your web browser (Internet Explorer version 6.0 or higher). 2. Type the Smart 216 IP system IP address – http or https://IP address/ - and press Enter. The login page appears, see Figure 13. -
Page 16: Connecting To A Target Server
SMART 216 / 232 IP Figure 14 Targets page By default an Administrator can access all connected Targets, so they all appear on the Targets page. Columns: Server name - The server name can be changed in the configuration settings to give the server an identifiable name. -
Page 17: Network > Configuration
Figure 15 Network >Configuration page 12.1 Network > Configuration Consult your Network Administrator for the network settings. Device name - Type a name for the Smart 216 IP. TCP Ports - Choose any 3 TCP ports from port #800 to 65535. (When managed ®... -
Page 18: Kvm.net
Smart 216 IP, if it resides on the same network segment. Manager IP – If Smart 216 IP resides on a different segment, type the static IP address of the KVM.net Manager. (We advise typing the static IP address of the KVM.net Manager even if the Smart 216 IP resides on the same network segment... -
Page 19: Adding A User
USER GUIDE Administrator An Administrator has unrestricted access to all windows and settings. An Administrator can change the name and password and Target server permissions of all users. User A User can access/control permitted Target servers, but cannot use the advanced mouse settings. -
Page 20: Blocking A User
Uncheck Block to allow the user access. 14. Administration > Switch Configuration Give the servers connected to the Smart 216 IP unique names, so that users accessing the system can identify the servers easily. To do so: 1. -
Page 21: Administration > Power Management
15. Administration > Power Management Where you have a Minicom Serial Remote Power Switch (SRPS), connect it to the Serial 1 port of the Smart 216 IP. Configure the Power Management switch as follows: 1. From the menu, click Power Management. The Power Management window appears, see Figure 17. -
Page 22: Administration > Serial Settings
SMART 216 / 232 IP 16. Administration > Serial Settings Where you have a Serial device connected to the system you must configure the RS232 settings. To do so: From the menu click Serial Settings, the Serial Settings appear, see Figure 19. -
Page 23: Security > Settings
USER GUIDE Figure 20 User Targets Configuration 2. Select a user from the User drop-down menu. 3. Check the Target servers the user can access (according to his access permissions). To select all Target servers, press 4. Click Apply, the selection is saved. 5. -
Page 24: Security > Ssl Certificate
SMART 216 / 232 IP Password Policy For local and remote users you have the option of a standard or high security level of password. The table below shows the parameters of the 2 options. Standard security policy High security policy... -
Page 25: Maintenance > Switch Upgrade
USER GUIDE 20. Maintenance > Switch Upgrade Upgrade the Smart 216 IP firmware to take advantage of new features. Download the firmware from the Support section of Minicom’s website –www.minicom.com. Save the firmware file on the Client computer. From the menu select Switch Upgrade. The Upgrade window appears showing the current firmware version see Figure 23. -
Page 26: Restore Factory Settings
Figure 24 RICCs/RoCs Upgrade 22. Restore Factory Settings You can restore the Smart 216 IP unit to the factory settings. This restores the original Smart 216 IP parameters, resetting all the information added by the administrators, including: Network settings*, servers, users, and passwords etc. -
Page 27: Set Time & Date
To save any configuration changes click the relevant button on the current page. This could be or just To restart the Smart 216 IP press To exit the Configuration menu and close the session, click Only one Administrator can log into the Configuration area at a time. After the idle... -
Page 28: Accessing A Target Server
SMART 216 / 232 IP 26. Accessing a Target server Log in to the web interface as explained on page 13. The web interface opens at the Targets page, see Figure 14 on page 15. To connect to a Target or serial device, click the desired Target/device in the Server Name Column. -
Page 29: Switching To A Different Server
. When minimized the icon glides to a side of the screen. To hide the Toolbar, either: Double-click the Smart 216 IP System tray icon Press F9. To display the Toolbar repeat the above action. See also page 36. 26.2 Switching to a different server To connect to a different server: 1. -
Page 30: Adjusting The Video Settings
SMART 216 / 232 IP Bandwidth Choose from the following options Adaptive – automatically adapts to the best compression and colors according to the network conditions. (Not recommended because network parameters may change frequently impacting on user experience). Low - Select Low for high compression and 16 colors. -
Page 31: Auto Video Adjust
USER GUIDE Figure 30 Manual Video Adjustments controls Brightness / Contrast - use the scales to adjust the brightness and contrast of the displayed image. Move the sliders to change the displayed image. Click in the area of the sliders for fine-tuning. For the following controls choose the appropriate measurement. -
Page 32: Power Cycle
SMART 216 / 232 IP 26.5 Power cycle Where a Minicom Serial Remote Power Switch is connected to Serial 1 port of the IP Control, you can power manage the Target servers as follows: From the Toolbar, click . The Power menu appears, see below. -
Page 33: Synchronizing Mouse Pointers
USER GUIDE 2. Select the desired sequence and click OK. The sequence appears in the Special Key Manager box. 3. Click OK. The sequence appears in the Keyboard Key sequence list. To record a key sequence: 1. From the Special Key Manager box press Record New. The Add Special Key Dialog box appears, see Figure 33. -
Page 34: Aligning The Mice Pointers
NT4, 2000 or 98: From the Toolbar click / Calibrate. Smart 216 IP saves this alignment so calibration is only needed once per Target server. If the Video Noise Level is above zero, calibration may not work. Go to Video Adjustment and try to eliminate the noise by pressing Auto video adjust and/or adjusting the bars in Manual video adjust, then perform the mouse calibration. - Page 35 USER GUIDE Figure 34 Mouse Settings Dialog box 2. Select the Target server’s Operating System and click OK. Instructions and sliders appear. 3. Follow the instructions and set any relevant sliders to the same values as set in the Target server’s Mouse Properties window. 2 examples! For Windows XP, 2003 Server, Vista and 2008 Server.
-
Page 36: Adjustments In General
Disconnect – You can disconnect the session by clicking Disconnect. About - Click About to verify the Client, Firmware and Switch file versions installed on your Smart 216 IP. Local Settings – Click Local settings, the Client Configuration Dialog box... -
Page 37: Full Screen Mode
USER GUIDE Figure 36 Client Configuration Dialog box Pointer type – From the Drop-down menu you can change the Client computer mouse pointer to appear as a dot or to not appear at all. Hide Toolbar – Check this option to hide the Toolbar from the next reconnection onwards. -
Page 38: The Targets
SMART 216 / 232 IP 27. The Targets page menu When logging into the system as an Administrator or a User, you reach the Targets page, see Figure 14 page 15. From the menu you can: • Change the password •... -
Page 39: Downloading The Log
USER GUIDE Navigate through the events pages using the forward or backward arrows, marked as (A) in Figure 38, From the drop down menu, marked as (B) in Figure 38, choose the number of events that will appear on each page - between 10 – 40. 27.2.1 Downloading the log You can download and save the log. -
Page 40: Section Ii
SMART 216 / 232 IP Section II Section II explains how to operate the Smart 216 IP system locally via the OSD. 28. The OSD To display the OSD: 1. From the local keyboard, press the left Shift key twice. The OSD Main window appears. -
Page 41: Power Management Hotkey - Left Shift, F12
USER GUIDE 28.3 Power management hotkey – left Shift, F12 To power manage a server connected to a power management switch: 1. Navigate to the computer line you desire to power manage. 2. Press Left Shift, F12. The Power Control dialog box appears, see Figure 40. Note! If you change the OSD hotkey from Shift, Shift to Ctrl, Ctrl, then the power management hotkey becomes left Ctrl, F12. -
Page 42: Tuning - F5
4. When the image is satisfactory, press Esc. Note! Picture quality is relative to distance. The further away a remote computer is from the Smart 216 IP, the lower the image quality, and the more tuning needed. So place the higher resolution computers closer to the Switch. -
Page 43: Ddc - F10
Display Data Channel (DDC) is a VESA standard for communication between a monitor and a video adapter. From the Settings window, input the DDC information of the monitor connected to the Smart 216 IP switch into the memories of all connected ROCs when first installing system. To input the DDC information: Press F10. -
Page 44: Saving Changes To The Settings
SMART 216 / 232 IP 28.8 Saving changes to the settings To save changes to the settings and return to the Main window, press Esc. 29. Video resolution and refresh rates → 640x480 720x400 800x600 1024x768 1152x864 1152x900 1280x720 1280x768... -
Page 45: Technical Specifications
USER GUIDE 30. Technical specifications Target server Windows, Novell, Linux, SUN Solaris Operating systems Client Computer Windows 2000 or higher with IE 6.0 or higher and ActiveX Target server Up to 1600 x 1200 @ 85Hz Resolution Client Computer Recommended - resolution should be higher than on Target server Distance from Switch to ROCs Up to 30m/99ft. -
Page 46: Safety
SMART 216 / 232 IP 31. Safety This device contains no serviceable parts. Any servicing of the device must be performed by an authorized Minicom Technician in a Minicom authorized Service Center. 32. User guide feedback Your feedback is very important to help us improve our documentation. Please email any comments to: ug.comments@minicom.com... - Page 47 USER GUIDE Regional Offices Germany France Italy Kiel Vincennes Rome Tel: + 49 431 668 7933 Tel: + 33 1 49 57 00 00 Tel: + 39 06 8209 7902 info.germany@minicom.com info.france@minicom.com info.italy@minicom.com England China Asia Pacific / S. Korea Tel: + 44 121 288 0608 Tel: +86 21 6445 3181 Tel: +972 2 535 9618...
Need help?
Do you have a question about the Smart 216 and is the answer not in the manual?
Questions and answers