Minicom Smart 216 User Manual
Hide thumbs
Also See for Smart 216:
- User manual (50 pages) ,
- User manual (34 pages) ,
- User manual (47 pages)
Table of Contents
Advertisement
Advertisement
Table of Contents

Subscribe to Our Youtube Channel
Related Manuals for Minicom Smart 216


Summary of Contents for Minicom Smart 216
-
Page 1: User Guide
Smart 216/232 IP User Guide www.minicom.com International HQ North American HQ Jerusalem, Israel Linden, NJ, USA Tel: + 1 908 486 2100 Tel: + 972 2 535 9666 info.usa@minicom.com minicom@minicom.com Technical Support – support@minicom.com 5UM20184 V2.0 4/11... -
Page 2: Legal Notice
Minicom Advanced Systems Limited. ii | Smart 216/232 IP... -
Page 3: About This Document
About this Document About this Document This document provides installation and operation instructions for the Smart 216/232 IP system, produced by Minicom Advanced Systems Limited. It is intended for system administrators and network managers. Chapters and Their Contents Introduction Provides an introduction to the document, Smart Pg. -
Page 4: Style Conventions
About this Document 216/232 IP Switching OSD. System Locally Technical Lists and describes Smart 216/232 IP specifications. Pg. 84 Specifications Video Resolution and Lists video resolutions and refresh rates. Pg. 84 Refresh Rates Style Conventions Convention Used for Verdana Regular text. -
Page 5: Table Of Contents
................13 OMPLIANCE INSTALLATION ................... 15 ..................15 VERVIEW ................ 15 YSTEM OMPONENTS 2.2.1 The Smart 216/232 IP Unit ........... 15 ............17 NSTALLATION UIDELINES 216/232 IP U ......... 17 OUNTING THE MART 2.4.1 Rack Mounting Safety Considerations ........17 2.4.2 Mounting the Unit.............. - Page 6 ............. 43 ONFIGURING OWER UTLETS 3.13 P ....... 44 ERFORMING DDITIONAL ONFIGURATION PERATIONS 3.13.1 Installing an SSL Certificate ..........44 3.13.2 Upgrading Firmware ............45 3.13.3 Upgrading RICCs/ROCs ............46 3.13.4 Restoring Factory Settings............ 47 vi | Smart 216/232 IP...
- Page 7 Table of Contents 3.13.5 Backing Up and Restoring............. 48 3.14 R ................49 ELOADING A 3.15 S ............49 AVING HANGES AND OGGING CONDUCTING A REMOTE SESSION ............52 .............. 52 TARTING A EMOTE ESSION 4.1.1 Remote Session Toolbar Buttons ........... 54 ...............
- Page 8 ..............75 AVING THE VENTS ..............75 LEARING THE VENT TROUBLESHOOTING – RESTORING FACTORY SETTINGS ..... 76 OPERATING THE SMART 216/232 IP SWITCHING SYSTEM LOCALLY .. 77 OSD................ 77 ISPLAYING THE OSD ............... 77 AVIGATING THE ..............78 ELECTING A OMPUTER ...............
-
Page 9: Table Of Figures
Table of Figures Table of Figures Figure 1 – Smart 216 IP Unit Front Panel ..............15 Figure 2 – Smart 216 IP Unit Rear Panel ..............16 Figure 3 – Smart 232 IP Rear Panel ...............16 Figure 4 – Bracket Positions ..................18 Figure 5 –... - Page 10 Figure 62 – OSD Main Window ................77 Figure 63 – Power Control Dialog Box..............78 Figure 64 – Power Prompt ..................79 Figure 65 – Image Tuning Label ................80 Figure 66 – OSD Settings Window ................. 80 x | Smart 216/232 IP...
-
Page 11: Introduction
CAT5 cable at a distance of up to 30 m / 100 ft in a star configuration. No external power is needed at the remote ROC. The Smart 216 IP and Smart 232 IP are functionally the same. The Smart 216 IP has 16 Server ports; the Smart 232 IP has 32 Server ports. -
Page 12: Terminology
The computer/server that is accessed remotely via Smart 216/232 IP Target server The PC running a remote Smart 216/232 IP session Client computer The process of accessing and controlling target servers connected to Smart 216/232 IP Remote session from a user workstation 1.3 Compatibility... -
Page 13: Safety
If operation of this equipment in a residential area causes radio frequency interference, the user, and not Minicom Advanced Systems Limited, will be responsible. Changes or modifications made to this equipment not expressly approved by Minicom Advanced Systems Limited could void the user’s authority to operate the equipment. - Page 14 Introduction WEEE Compliance Instructions for both customers and recyclers / treatment facilities wishing to obtain disassembly information are provided in our website www.minicom.com. 14 | Smart 216/232 IP...
-
Page 15: Installation
2.1 Overview Install the Smart 216/232 IP system as follows: 1. Remove the Smart 216/232 IP system from the package, and check that all components are present and in good working condition. 2. Mount the Smart 216/232 IP unit in a rack. -
Page 16: Figure 2 - Smart 216 Ip Unit Rear Panel
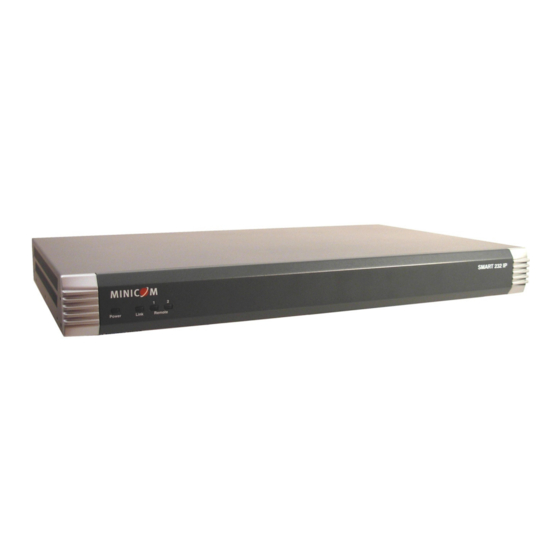
Illuminates to indicate that the unit is connected to the network. Link The Smart 216 IP unit rear panel is illustrated in Figure 2; it has 16 server ports. The Smart 232 IP unit rear panel is illustrated in Figure 3; it has 32 server ports. -
Page 17: Pre-Installation Guidelines
Installation Pre-Installation Guidelines Port Functionality For updating firmware of the analogue part of the Smart 216/232 IP system - OSD, Flash Switch, RICCs, and ROCs. For connecting to the 10/100 Mbit Ethernet. The LED illuminates yellow when the unit is connected to LAN;... -
Page 18: Mounting The Unit
(for example, use of power strips). Mounting the Unit 2.4.2 You can connect the Smart 216/232 IP unit to a server rack, using the supplied rack mounting kit. The brackets can be placed in two possible positions, as illustrated in the following figure. -
Page 19: Connecting The System
Connecting the System Figure 5 – Bracket Connected for Rear Facing 3. Install the Smart 216/232 IP nit into the server rack by connecting the bracket to the rack with screws, according to the rack manufacturer’s instructions. 2.5 Connecting the System Figure 6 illustrates the Smart 216/232 IP system overview. -
Page 20: Connecting To The Servers
Connecting to the Servers 2.6 Connecting to the Servers Each computer/server is directly connected to the Smart 216/232 IP via an appropriate ROC using a CAT5 cable in star configuration. No external power is needed at the remote ROCs. The ROCs draw their power from the computer’s keyboard port (ROC PS/2, SUN) or from the USB port (ROC USB). -
Page 21: Connecting A Roc Usb
Installation Connecting to the Servers Figure 9 – ROC PS/2 Connections You can connect the ROC PS/2 to a powered on computer, by performing the steps of the following procedure in order. To connect the ROC PS/2 to a powered on computer: 1. -
Page 22: Connecting To The Network
2. Connect the other connector to one of the Smart 216/232 IP computer ports. 2.9 Connecting the KVM Console You can connect a KVM console to Smart 216/232 IP, in order to operate the system locally. 22 | Smart 216/232 IP... -
Page 23: Connecting The Power Supply
2.10 Connecting the Power Supply To connect the power supply to Smart 216/232 IP: 1. Using the power cord provided, connect Smart 216/232 IP to a socket outlet with a grounding connection. Only use the power cord supplied with the unit. -
Page 24: Configuring The Network
5. Back up and restore configuration data. 3.1 Boot-Up Process By default, Smart 216/232 IP boots with an automatically assigned IP address from a DHCP (Dynamic Host Configuration Protocol) server on the network. The DHCP server assigns the Smart 216/232 IP a valid IP address, gateway address, and subnet mask. -
Page 25: Logging Onto The Web Configuration Interface
5. Once the IP address is satisfactory, proceed to log onto the Web interface to complete the configuration. 3.2 Logging Onto the Web Configuration Interface You can complete the initial setup of the Smart 216/232 IP system via the Web configuration interface. User Guide | 25... -
Page 26: Figure 13 - Web Page
http://www.java.com/en/download/index.jsp To log into the Web interface: 1. Open your Web browser (Internet Explorer 7.0 / Firefox 3 or later). 2. Type the Smart 216/232 IP system IP address http://IP address/ https://IP address/, and press Enter. The Web page appears. -
Page 27: Web Configuration Interface Tabs
Configuring the Network Logging Onto the Web Configuration Interface 5. Click Enter. The Targets page opens, displaying all your available target servers (see Figure 43). 6. In the menu in the left pane, click The Network configuration page appears with the Device tab open. Figure 15 –... -
Page 28: Web Configuration Toolbar Buttons
Installs the SSL certificate onto the device 3.3 Changing your Password You can change your password, according to the set password policy. To change the password: 1. In the menu in the left pane, click The Change Password page is displayed. 28 | Smart 216/232 IP... -
Page 29: Configuring The Network Settings
Configuring Device ID Settings 3.4.1 You can assign a name to the Smart 216/232 IP device, and select a TCP port. The default device name consists of the letter ‘D’ followed by the 6-digit device number (D.N.), which is printed on the silver label on the underside of the Smart 216/232 IP box. -
Page 30: Configuring The Device Ip Address
Configuring the Device IP Address 3.4.2 When a DHCP server is active on the same network to which Smart 216/232 IP is connected, the DHCP can provide automatic IP assignment. However, best practices recommend using MAC address reservations in the DHCP server to ensure that the IP address of the Smart 216/232 IP will not be changed. -
Page 31: Configuring User Settings
Centralized Management. 2. Select the Manager Auto Discovery checkbox to cause the Centralized Management system to automatically detect Smart 216/232 IP, if they both reside on the same network segment. In Manager IP Address, type the static IP address of the Centralized Management Manager. -
Page 32: Figure 17 - Users Page
(see Section 3.8 on page 36). 4. In Confirm Password, retype the password. 5. In the Permission dropdown menu, select the permission type: Administrator or User. 6. Click OK. The User is added to the list of Users. 32 | Smart 216/232 IP... -
Page 33: Deleting User(S)
Configuring the Network Configuring User Settings Deleting User(s) 3.5.2 You can delete one or multiple Users at a time from the system. You cannot delete an Administrator who is logged onto the system. To delete a User: 1. In the Users page (see Figure 17), select User(s) to delete. Select a group of Users by selecting the first User in the group, pressing the Shift button, and then selecting the last User. -
Page 34: Configuring The Kvm Switch
The User page opens with the user information changed accordingly. 3.6 Configuring the KVM Switch When a KVM switch is connected to the Smart 216/232 IP system, configure the following switch parameters: The names of the servers connected to the KVM switch – It is recommended to give the servers connected to Smart 216/232 IP unique names, so that users accessing the system can easily identify the servers. -
Page 35: Figure 21 - Kvm Switch Configuration Page For Smart 232 Ip
The servers that are connected to the selected KVM switch, appear in the Servers section. The number of servers that appear corresponds to the number of ports in the KVM switch – 16 for Smart 216 IP; 32 for Smart 232 IP. The following information is displayed for each potential server:... -
Page 36: Configuring The Serial Port Settings
This section describes how to configure the security features, such as Account Blocking, Password Policy, Idle Timeout, and Serial Terminal Policy. For local and remote users, you have the option of a standard or high security level of password. The following table describes both these options. 36 | Smart 216/232 IP... - Page 37 4002 respectively. Hence, when “Enable direct SSH connection” is selected: 1. Connect to the Serial device, by typing the IP address of the Smart 216/232 IP, followed by the TCP port number in your SSH client. 2. Log in to the Smart 216/232 IP SSH shell with the user name and password configured in the Smart 216/232 IP.
-
Page 38: Figure 23 - Security Page
Configuring the Network Configuring the Security Settings Restart the Smart 216/232 IP device after adding Telnet permissions to the users in order to enable login over SSH connection. These settings are customizable, enabling you to choose the TCP port used for that purpose, if that port is already taken by another service on your network. -
Page 39: Configuring User Targets
Configuring the Network Configuring User Targets 3. Select the High security password policy checkbox to enable the high security password policy; clear the checkbox for the standard security policy to apply. 4. Select the Enable OSD password checkbox, to require a password for local user access to the OSD. -
Page 40: Configuring The System Date And Time
This section describes how to configure the system date and time. The system time and date are used when recording log events (see Chapter 5). To configure the date and time: 1. From the configuration menu, select Date & Time. The Date and Time page appears. 40 | Smart 216/232 IP... -
Page 41: Configuring Power Devices
Configuring the Network Configuring Power Devices Figure 25 – Date and Time Page 2. In Date, type the current date: Day, Month, and Year. 3. In Time, type the current time: Hour, Minute, and Second. 3.11 Configuring Power Devices This section describes how to configure the details of all power devices in the system. These details include the PDU (power device) name, type, and IP address. -
Page 42: Editing A Power Device
The Edit PDU page appears. Figure 29 – Edit PDU Page 2. Select/type new values for the PDU Name, Type, and/or IP address, as required. 3. Click OK. The Power Devices page opens with the modified details. 42 | Smart 216/232 IP... -
Page 43: Removing A Power Device
Configuring the Network Configuring Power Outlets Removing a Power Device 3.11.2 You can remove a power device that no longer exists in the system. To delete a power device: 1. In the Power Devices page, select a power device, and click the Delete button The Delete PDU confirmation page appears. -
Page 44: Performing Additional Configuration Operations
3. For each Outlet, select the Server Name from the dropdown list of the server connected to it. 3.13 Performing Additional Configuration Operations You can perform the following additional operations on Smart 216/232 IP: Install an SSL certificate. Upgrade firmware. -
Page 45: Upgrading Firmware
Upgrading Firmware 3.13.2 You can upgrade the Smart 216/232 IP firmware to take advantage of new features. To upgrade firmware: 1. Download the firmware from Minicom’s website at: http://www.minicom.com/phandlh.htm. 2. Save the firmware file on the client computer. -
Page 46: Upgrading Riccs/Rocs
User settings, KVM switch settings, mouse and video adjustments, and RS232 settings. The network settings remain intact. For more information, refer to the firmware release notes. Upgrading RICCs/ROCs 3.13.3 You can upgrade the RICC/ROC firmware to take advantage of new features. 46 | Smart 216/232 IP... -
Page 47: Restoring Factory Settings
7. Click the Start Upgrade button. Restoring Factory Settings 3.13.4 You can restore the Smart 216/232 IP unit to its factory settings. This restores the original Smart 216/232 IP parameters, resetting all the information added by the administrators, including: Network settings*, Servers, Switches, Users, and Passwords. -
Page 48: Backing Up And Restoring
Factory settings are restored. Backing Up and Restoring 3.13.5 You can backup all configuration data and restore it at a later date. To back up data: 1. In the toolbar, select The Backup/Restore Data page appears. 48 | Smart 216/232 IP... -
Page 49: Reloading A Page
3.14 Reloading a Page You can load the parameters on any configuration page with the settings from the Smart 216/232 IP device. This is convenient if you have already changed settings on the page, and want to restore the device settings. -
Page 50: Figure 39 - Device Reboot Confirmation Message
3. Click Yes. A message box informs that Save has completed. Figure 40 – Save Succeeded Message 4. Click OK. Device reboots, and when it completes a Logon page appears. Figure 41 – Device Rebooting Progress Box 50 | Smart 216/232 IP... -
Page 51: Figure 42 - Logon Page After Rebooting
Configuring the Network Saving Changes and Logging Out Figure 42 – Logon Page after Rebooting 5. Type your User name and Password and click Enter. The Configuration page opens. To log off: 1. In the screen toolbar, click the button. The Configuration screen is closed, and the session closes. -
Page 52: Conducting A Remote Session
Displaying the target inside a remote console window To start a remote session: 1. Log into the Smart 216/232 IP system, by following steps 1 to 5 of the procedure in Section 3.2. The Targets screen appears. Only targets that the User is permitted to use, appear on the page. -
Page 53: Figure 43 - Server Targets
Conducting a Remote Session Starting a Remote Session Figure 43 – Server Targets The following table describes the Targets page parameters and buttons. Parameter/Button Description The server name. The server name can be changed in the Server Name Configuration settings to give the server an identifiable name (see Section 3.6). -
Page 54: Remote Session Toolbar Buttons
Toggle button for displaying/hiding toolbar. Session button. Pressing this button opens up a dropdown menu for selecting: Session Profile – enables configuring remote session profile session About – displays client, firmware, Switch File, and KME version information 54 | Smart 216/232 IP... -
Page 55: Sharing A Remote Session
Conducting a Remote Session Sharing a Remote Session Button Description Video button. Pressing this button opens up a dropdown menu for performing: Refresh – for refreshing the video image Video Adjust – for automatically adjusting the video image Advanced – for manually setting video settings Performance –... -
Page 56: Exclusive Session
Prevent other users from logging into the same session. To set the session profile: 1. On the toolbar, select > Session Profile The Session Profile window appears. 56 | Smart 216/232 IP... -
Page 57: Full Screen Mode
Conducting a Remote Session Setting the Session Profile Figure 46 – Session Profile Dialog Box 2. In Local Mouse Pointer, select one of the following options to set the appearance of the client computer mouse pointer: None – to hide the mouse pointer Dot –... -
Page 58: Verifying Remote Presence Solutions Information
4.5 Verifying Remote Presence Solutions Information You can verify the client, firmware, KME (Keyboard/Mouse Emulation firmware), and Switch file versions installed on your Smart 216/232 IP. This information can assist system administrators in troubleshooting and support. To verify Remote Presence Solutions information: 1. -
Page 59: Changing The Video Performance Settings
Conducting a Remote Session Changing the Video Performance Settings 4.6 Changing the Video Performance Settings From the toolbar, you can alter the video performance settings, by selecting a different mode or bandwidth. The mode can be set to: Fixed – Enables you to select any bandwidth option. For example, in a LAN environment, it is best to set the bandwidth setting to High. -
Page 60: Adjusting The Video
The video image may require refreshing when changing the display attributes of a target server. Refreshing completely regenerates the video image. To refresh the video image: 1. On the toolbar, select > Refresh. The image is refreshed. 60 | Smart 216/232 IP... -
Page 61: Automatically Adjusting The Video Image
Conducting a Remote Session Adjusting the Video Automatically Adjusting the Video Image 4.7.2 The video view may need to be adjusted for each target server or new screen resolution. In most cases, adjusting the video view using the default video settings gives the optimal view. -
Page 62: Figure 50 - Manual Video Adjustments Controls
Adjust Phase and Scale to reduce the noise level to a minimum 4. In Filter, select the filter of the input video from the server. A higher filter reduces the noise level but makes the image heavier. Options are Auto, No Filter, Low, Medium, High. 62 | Smart 216/232 IP... -
Page 63: Power Managing The Target Servers
4.8 Power Managing the Target Servers When a Minicom Remote Power switch or POC is connected to the Serial port of the Smart 216/232 IP unit, you can power manage the target servers via the Power menu. To power manage the target servers: 1. -
Page 64: Adding A Keyboard Sequence
To add a keyboard sequence: click 1. On the toolbar, > Special Keys. The Special Key Manager box appears. Figure 52 – Special Key Manager 2. Click the Add Predefined button. A list of existing sequences appears. 64 | Smart 216/232 IP... -
Page 65: Recording A New Custom Key
Conducting a Remote Session Managing Keyboard Sequences Figure 53 – Add a Predefined Key Dialog Box 3. Select a key sequence and click OK. The sequence appears in the Special Key Manager box. 4. In the Special Key Manager box, click OK. The sequence appears in the Keyboard Key sequence list. -
Page 66: Editing A Key Sequence
The names of the pressed keys appear in the provided area. 4. Click Stop Recording. 5. Click OK. The key sequence definition is updated in the system. Deleting Key Sequence(s) 4.9.4 You can delete a single or multiple key sequences from the system. 66 | Smart 216/232 IP... -
Page 67: Synchronizing Mouse Pointers
Conducting a Remote Session Synchronizing Mouse Pointers To delete a keyboard sequence: 1. In the Special Key Manager box (see Figure 52), select the desired key sequence(s) to delete. Select a group of keys by selecting the first key in the group, pressing the Shift button, and then selecting the last key. -
Page 68: Figure 56 - Relative Mouse Settings
The Mouse Settings box appears. For SMART 216/232 IP PS/2 devices, the default mode is Relative Mouse Position (see Figure 56); for SMART 216/232 IP USB devices, the default mode is Absolute Mouse Position (see Figure 57) Figure 56 – Relative Mouse Settings... -
Page 69: Selecting The Mouse Mode
Absolute Mouse Position Apple Macintosh Mouse Relative Mouse Position The mouse mode that you can select depends on the type of SMART 216/232 IP device and on the target operating system / computer: For SMART 216/232 IP USB devices: If the operating system on the Target is Windows ME or later, select Absolute Mouse Position mode (see Figure 57);... -
Page 70: Relative Mouse Position Mode
Conducting a Remote Session Synchronizing Mouse Pointers For SMART 216/232 IP PS/2 devices: Relative Mouse Position is the only possible mode. Relative Mouse Position Mode Selecting Relative Mouse Position mode enables you to configure mouse settings, set the USB option (see The USB Option), and advanced settings (see Advanced Mouse Emulation). -
Page 71: Figure 59 - Mouse Emulation Box
1. In the Mouse Settings box (see Figure 57), click Advanced The Mouse Emulation box appears. Figure 59 – Mouse Emulation Box 2. Select the mouse connected to the Local Console port on the SMART 216/232 IP, as follows: User Guide | 71... -
Page 72: Aligning The Mouse Pointers
When accessing the target server, the mouse pointers may appear at a distance to each other, due to the mouse on SMART 216/232 IP losing sync with the mouse on the host system. You can align the local mouse pointer with the remote target device’s mouse pointer. -
Page 73: Switching To A Different Server/Device
Conducting a Remote Session Switching to a Different Server/Device 4.11 Switching to a Different Server/Device In the middle of a remote session, you can switch to a different server or device. To connect to a different server or device: 1. On the toolbar, click A list of connected servers/devices appears. -
Page 74: Managing The Events Log
The log of all system events is displayed. Figure 60 – Events Log 5.2 Reloading the Events Log As new events are constantly added to the log, you can reload the Events Log at any time. 74 | Smart 216/232 IP... -
Page 75: Saving The Events Log
Managing the Events Log Saving the Events Log To reload the Events Log: 1. In the Events Log page (see Figure 60), in the toolbar, click The Events Log page is refreshed. 5.3 Saving the Events Log You can download and save the Events Log to a .csv file. The file can then be viewed using Microsoft Excel or compatible software. -
Page 76: Troubleshooting - Restoring Factory Settings
To restore factory defaults using a USB drive: 1. In the root of the USB drive, create an empty file named “default”. 2. Place the USB drive into one of the USB ports of the Smart 216/232 IP and restart it by power cycling it. -
Page 77: Operating The Smart 216/232 Ip Switching System Locally
Displaying the OSD 7 Operating the Smart 216/232 IP Switching System Locally This chapter explains how to operate the Smart 216/232 IP Switching system locally. 7.1 Displaying the OSD To display the OSD: 1. From the local keyboard, press the left Shift key twice. -
Page 78: Selecting A Computer
Operating the Smart 216/232 IP Switching System Locally Selecting a Computer 7.3 Selecting a Computer To select a computer: 1. Navigate to the desired computer line. Type the two-digit port number of the desired computer. 2. Press Enter. The selected computer is accessed. A Confirmation label appears showing which computer is accessed. -
Page 79: Moving The Confirmation Label (F1)
Operating the Smart 216/232 IP Switching System Locally Moving the Confirmation Label (F1) Figure 64 – Power Prompt 3. Select the desired option and press Enter. The power command is sent. 7.5 Moving the Confirmation Label (F1) The Confirmation label appears briefly, showing which computer is currently accessed. -
Page 80: Configuring The Osd Settings (F2)
4. When the image is satisfactory, press Esc. Picture quality is relative to distance. The further away a remote computer is from the Smart 216/232 IP, the lower the image quality, and the more tuning is required. Therefore, place the higher resolution computers closer to the Switch 7.7 Configuring the OSD Settings (F2) -
Page 81: Changing The Network Parameters
KVM.Net address Configuring the Device IP Address When a DHCP server is active on the same network to which Smart 216/232 IP is connected, the DHCP can provide automatic IP assignment. However, best practices recommend using MAC address reservations in the DHCP server to ensure that the IP address of the Smart 216/232 IP will not be changed. -
Page 82: Changing The Osd Hotkey
Operating the Smart 216/232 IP Switching System Locally Configuring the OSD Settings (F2) 2. Navigate to KVM.NET ADD, and modify the static IP address of the AccessIT Centralized Management Manager. To disable AccessIT Centralized Management: 1. In the OSD Settings window (see Figure 66), navigate to the KVM NET MANG line, and press the Space bar until Disable appears. -
Page 83: Saving Changes To Settings
Configuring the OSD Settings (F2) When first installing the system, emulate the DDC information of the monitor connected to the Smart 216/232 IP switch into the memories of all connected ROCs. To input the DDC information: 1. From the OSD Settings window (see Figure 66), press F10. -
Page 84: Technical Specifications
ROC USB VGA – HDD15 VGA – HDD15 Connections KM – MiniDin6 KM – USB System – RJ45 System - RJ45 From Keyboard port From USB port Power 100 g / 0.20 lb Product Weight 84 | Smart 216/232 IP... - Page 85 Technical Specifications Specification ROC PS/2 ROC USB 172 g / 0.38 lb Shipping Weight 65 x 25 x 25 mm / 2.6 x 0.98 x 0.98 in Dimensions (H x D x W) User Guide | 85...
-
Page 86: Video Resolution And Refresh Rates
Video Resolution and Refresh Rates 9 Video Resolution and Refresh Rates Hz → 640x480 720x400 800x600 1024x768 1152x864 1152x900 1280x720 1280x768 1280x960 1280x1024 1600x1200 86 | Smart 216/232 IP...
Need help?
Do you have a question about the Smart 216 and is the answer not in the manual?
Questions and answers