Table of Contents
Advertisement
Advertisement
Table of Contents

Subscribe to Our Youtube Channel
Related Manuals for Martin RoboScan Pro 918


Summary of Contents for Martin RoboScan Pro 918
-
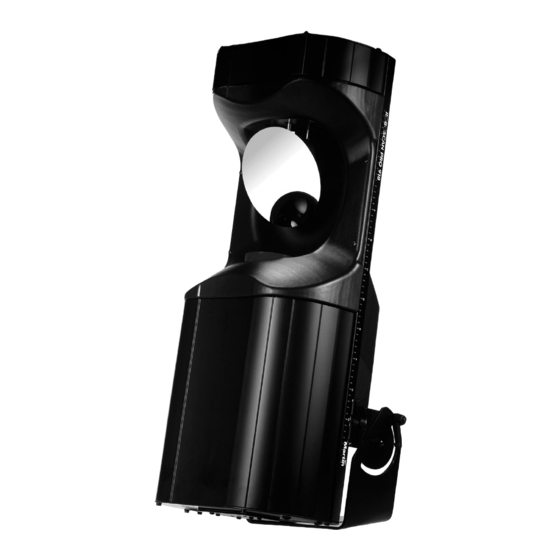
Page 1: Roboscan Pro
RoboScan Pro 918 u s e r m a nu a l... - Page 2 ©1998 - 1999 Martin Professional A/S, Denmark. All rights reserved. No part of this manual may be reproduced, in any form or by any means, without permission in writing from Martin Professional A/S, Denmark. Printed in Denmark. P/N 35000053, Rev. C...
-
Page 3: Table Of Contents
Readouts ................................11 Manual control................................ 12 Stand-alone sequences............................12 Utilities..................................12 section 4 Operation Martin RS-485 control ............................14 DMX-512 control ..............................14 Stand-alone control ..............................14 Controllable effects..............................15 section 5 Basic Service and Maintenance Accessing parts ..............................17 Changing voltage and frequency settings ...................... -
Page 4: Safety Precautions
This manual covers all models of the RoboScan Pro 918 and describes the features found in CPU software version 1.4. The latest Pro 918 information and software is available from the Martin Professional web site at http:// www.martin.dk. -
Page 5: Setup
15 minutes before removing it from the fixture. 1. The RoboScan Pro 918 must be cool and isolated from AC power. Remove the 2 screws (A) securing the lamp assembly to the back plate. Gently pull out the assembly. -
Page 6: Powering The Fixture
O W E R I N G T H E F I X T U R E W A R N I N G ! For protection from dangerous electric shock, the fixture must be grounded (earthed). The AC mains supply shall be fitted with a fuse or circuit breaker and ground-fault protection. -
Page 7: Connecting The Serial Link
DMX controller with 3-pin output: use a normal cable with 3-pin male and female connectors. • Martin RS-485 Protocol controller: use a phase-reversing cable, such as P/N 11820006, with 3-pin male and female connectors, or reconfigure the data sockets as described on page 19. - Page 8 Use an amplifier if the serial link exceeds 500 meters. • Never use a “Y” connector to split the link. To split the serial link into branches use a splitter such as the Martin 4- Channel Opto-Isolated RS-485 Splitter/Amplifier.
-
Page 9: Control Panel
The DMX or Martin address, depending on the protocol setting, and any error messages are displayed when the RoboScan Pro 918 is turned on. To enter the menu, press >MENU@ï Use the >↑@ and >↓@ keys to move within the menu. -
Page 10: Personality Settings
E R S O N A L I T Y S E T T I N G S Personality Path Options Effect (Default settings shaded.) Optimize mirror movement for speed.* FAST Pan/tilt speed PT SP Optimize mirror movement for smoothness.* SLOW Map DMX pan control to tilt channel and vice versa. -
Page 11: Protocol And Address Selection
MAd r address). Press [ENTER] to confirm. 4. Press [↑] or [↓] to select a DMX address from 1 to 512 or a Martin address from 1 to 31. Press [ENTER] to confirm. 5. Press [MENU] to return to the main menu. Depending on the protocol selected, the DMX or Martin address is displayed. -
Page 12: Manual Control
A N U A L C O N T R O L M a n u a l c o n t r o l ( The manual control menu permits you to do the following without a controller: • reset the fixture ( •... - Page 13 U p l o a d m o d e ( UPL d Upload mode prepares the RoboScan Pro 918 to receive control software. It is normally engaged automatically when using a Martin uploader. In certain circumstances, however, you may have to set upload mode manually as described under “Updating software”...
-
Page 14: Operation
C O N T R O L The Pro 918 may be controlled with the Martin 3032 controller with version 2.04 or later software. While the Pro 918 is not officially implemented in version 2.04, it may be set up and operated as a MAC 500. -
Page 15: Controllable Effects
I r i s The iris closes from full open down to 10 percent. There are 6 variable/random pulsating iris effects callable on chan- nel 9. These can be disabled by switching DMX Macros ( SP EC/ dMAC ) off. RoboScan Pro 918... - Page 16 F i x e d ( s t a t i c ) g o b o s The fixed-gobo wheel provides 9 metal gobos plus an open posi- tion. It has 2 operating modes. In “fixed” mode ( SP EC/ gMO d/F IX ), the wheel steps between fixed positions and shakes at variable speeds.
-
Page 17: Basic Service And Maintenance
B A S I C S E R V I C E A N D M A I N T E N A N C E The RoboScan Pro 918 operates under challenging conditions presented by heat, humidity, dust, and touring. It requires regular cleaning and lubrication to keep performing at its peak. -
Page 18: Changing Voltage And Frequency Settings
250 V green 230 V / 50 Hz 1. Make sure the RoboScan Pro 918 is isolated from AC power. Access the trans- 250 V former and ballast as described above. 2. Find the correct transformer setting for your AC supply in the table above. The 230 V colors refer to the wires that enter the connection block at the bottom. -
Page 19: Replacing Fuses
Connect the uploader to the fixture just like a controller. Under normal conditions, software can be installed from a remote location - there is no need to set the RoboScan Pro 918 to boot mode. Please refer to the uploader manual for further instructions. -
Page 20: Custom Gobos
U S T O M G O B O S For best focus, custom gobos for the RoboScan Pro 918 should be made with the artwork reversed on the coated side. See page 31 for gobo specifications. -
Page 21: Changing Color Filters
Allen wrench to position the lamp socket plate a distance of 38 mm (1.5”, outside measurement) from the access plate as shown below. 3. Replace the lamp assembly. 4. Apply power to the fixture and allow it to reset. RoboScan Pro 918... -
Page 22: Cleaning
Lubricate the rotating-gobo bearings if movement is rough on slow rotation or if they become noisy. 1. Fill a syringe with Martin P/N 37302003, “Silicone oil, 500 ml,” or P/N 37302004, “Silicone oil, 200 ml, in applicator bottle.”... -
Page 23: Dmx Protocol
181 - 184 71 - 72 White Continuous rotation CW, fast Æ slow 185 - 215 73 - 84 CCW, slow Æ fast 216 - 245 85 - 96 246 - 255 96 - 100 Enable alternate color functions. RoboScan Pro 918... - Page 24 DMX Channel Start code = 0 Value Percent Function DMX1 DMX2 DMX3 DMX4 COLOR 2: Normal Functions Continuous scroll White ÆCTC 3200-4100 0 - 16 0 - 6 CTC 3200-4100 Æ CTC 3200-5600 16 - 32 6 - 13 CTC 3200-5600 Æ Blue 104 32 - 48 13 - 19 Blue 104 Æ...
- Page 25 96 - 96 Random opening pulse, fast 247 - 249 97 - 98 Random opening pulse, slow 250 - 252 98 - 99 Random closing pulse, fast 253 - 255 99 - 100 Random closing pulse, slow RoboScan Pro 918...
- Page 26 DMX Channel Start code = 0 Value Percent Function DMX1 DMX2 DMX3 DMX4 Prism 0 - 19 0 - 7 Prism out Prism in, CCW rotation, fast Æ slow 20 - 79 8 - 31 80 - 89 31 - 35 Prism in, no rotation Prism in, CW rotation, slow Æ...
-
Page 28: Error Messages
AC voltage. MERR (Memory error) ...the EEPROM memory cannot be read. • Contact Martin service personnel for assistance. CSER (Check-sum error) ...a software upload is unsuccessful. • Reload software, see page 19. -
Page 29: Troubleshooting
Effect wheel or magnetic sensor requires Disable effects feedback (page 10). Contact after fixture reaches operat- mechanical adjustment. Martin technician for assistance. ing temperature. The ballast and transformer settings do Disconnect fixture. Check ballast and trans- not match local AC voltage and frequency. -
Page 30: Circuit Board Layout
a p p e n d i x d C I R C U I T B O A R D L A Y O U T Hard boot jumper XLR pin-out jumper Lamp feedback Circuit Board Layout... -
Page 31: Specifications
4 Channel Opto-Isolated RS-485 Splitter/Amplifier................... P/N 90758060 • Retention spring for rotating-gobo holder....................P/N 17760040 • Frost filter for MAC 500/RS 918, assembled....................P/N 91611003 • Rotating-gobo holder........................... P/N 17320090 • Retention spring for rotating gobo ......................P/N 17760210 RoboScan Pro 918...
Need help?
Do you have a question about the RoboScan Pro 918 and is the answer not in the manual?
Questions and answers