Table of Contents
Advertisement
Quick Links
Advertisement
Chapters
Table of Contents

Related Manuals for Martin MAC Viper XIP


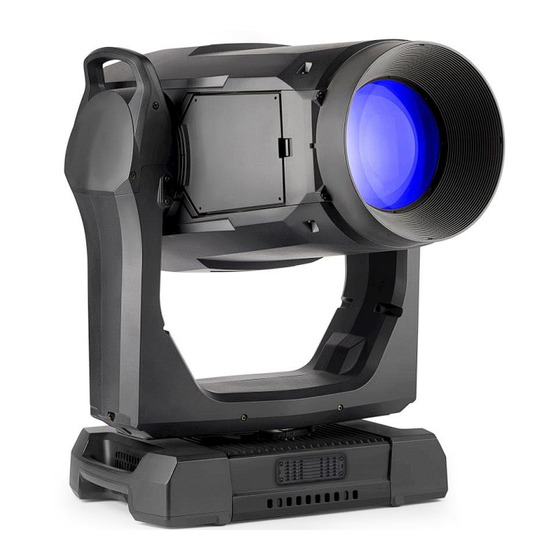
Summary of Contents for Martin MAC Viper XIP
- Page 1 MAC Viper XIP User Manual with Safety and Installation Manual...
- Page 2 Martin is a registered trademark of HARMAN PROFESSIONAL DENMARK ApS registered in the United States and/or other countries.
-
Page 3: Table Of Contents
Table of contents Introduction....................5 Operating the fixture ............... 5 Applying mains power ..............6 Cold starting ................... 6 Connecting to data..................6 Data via DMX cable ................ 6 Data via Ethernet cable ..............7 Control options ..................9 DMX ....................9 P3 creative LED and video .............. - Page 4 Viewing stored status messages ........... 26 Fixture test sequences ..............26 Resetting the fixture ..............26 Calibration ..................27 Adjustment menu (Martin Global Service only) ......28 Loading factory default calibration values ........28 Displaying test patterns ..............28 ‘Identify device’ signal ..............28 Control panel ..................
-
Page 5: Introduction
Before applying power to or operating the MAC Viper XIP: • Read the ‘Safety Information’ section of the fixture’s Safety and Installation Manual that is included at the end of this User Guide, supplied with the fixture and available for download from the Martin website at www.martin.com. -
Page 6: Applying Mains Power
All sockets are protected by rubber caps. Keep the rubber caps in place at all times on unused sockets. Data via DMX cable The MAC Viper XIP has 5-pin locking XLR sockets for DMX and RDM input and output via DMX cable. The pin-out on both sockets is: •... -
Page 7: Data Via Ethernet Cable
• The MAC Viper XIP is compatible with 10/100 Mbit Ethernet only. Do not connect the fixture to a network port or device that is fixed to Gigabit Ethernet speed. If you need to integrate an MAC Viper XIP in a Gigabit Ethernet network, use a network switch to allow the link towards the fixture to operate at 100 Mbit/s Ethernet speed. - Page 8 Any Ethernet switch used to relay Art-Net, sACN or P3 data to the fixture must be capable of running at 10/100 Mbps speed, as the fixture does not support Gigabit Ethernet data rates. ® Martin MAC Viper XIP User Manual Rev. B...
-
Page 9: Control Options
Control options You can control the MAC Viper XIP using DMX and/or Martin P3 protocol, and the fixture is also RDM- compatible. The fixture auto-senses the type of data that it is receiving and will respond correctly with no need for manual protocol selection. -
Page 10: Rdm
The P3 protocol will supply both DMX data and video pixel data to fixtures over a network cable. On the MAC Viper XIP you can use the video pixel data to control the intensity and/or the color of the fixture’s output with real-time control using the P3 Mix DMX channel. -
Page 11: Effects
Effects This section gives details of the effects available in the MAC Viper XIP. See the ‘DMX protocols’ section starting on page 43 for a full list of the DMX channels and values required to control the different effects. Shutter and strobe effects The fixture’s electronic shutter effect provides instant blackout and snap open as well as regular or... -
Page 12: Rotating Gobos
Rotating gobos The gobos on Gobo Wheel 1 and 2 in the MAC Viper XIP have the same dimensions and specifications and are therefore interchangeable, but the goboholders on the two gobo wheels are different. You cannot move a goboholder from one gobo wheel to the other. - Page 13 P/N: 5141778-00 Hazey Waves P/N: 5141779-00 Limbo P/N: 5141840-00 Up Is Down P/N: 5141780-00 Brush Up P/N: 5141781-00 Sponge P/N: 5141782-00 All Wrapped Up P/N: 5141783-00 MAC Viper XIP Gobo Wheel 2 ® Martin MAC Viper XIP User Manual Rev. B...
-
Page 14: Animation Wheel
Light and heavy frost The MAC Viper XIP features two frost filters that are controllable via DMX: a light and a heavy filter. The light frost filter is mounted in the same plane as the prism inside the fixture, so you cannot use these two effects at the same time. -
Page 15: Framing
The MAC Viper XIP’s zoom lens varies the focused field angle from 5.7° to 51°. Wide zoom angles allow sharp focus on projection surfaces close to the fixture. At narrower zoom angles, sharp focus is only possible further from the fixture. -
Page 16: Fx: Pre-Programmed Effects Macros
PWM dimming. Pan and Tilt The MAC Viper XIP ’s head can pan through a range of 540° and tilt through 268° with 16-bit control resolution available in all the fixture’s DMX Modes. See the pan/tilt orientation reference drawings at the end of this user manual for a guide to the direction of pan and tilt movement. -
Page 17: Fixture Setup
Available using: Control panel – RDM – P3 The MAC Viper XIP offers three DMX modes: Basic, Extended and Ludicrous. See the ‘DMX protocols’ section at the end of this manual for details of the DMX control options available in the different modes and the number of DMX channels used. -
Page 18: Pan/Tilt Inversion
Sending a RESET PAN/TILT LIMITS command erases all the limits that have been stored. An LIM message appears in the control panel display when one or more pan and tilt limits are active. ® Martin MAC Viper XIP User Manual Rev. B... -
Page 19: Pan And Tilt Feedback
‘afterglow‘ effect after dimming. This mode gives the ‘look and feel’ of a fixture that uses an incandescent light bulb as its source. ® Martin MAC Viper XIP User Manual Rev. B... -
Page 20: Gobo Ct Correction
Focus tracking is enabled and set to ‘Medium distance’ by default. ® Martin MAC Viper XIP User Manual Rev. B... -
Page 21: Video Tracking
This signal processing takes fractions of a second and is normally invisible, but if the fixture is used to display video (using a Martin P3 System Controller, for example) the processing can interfere with video response times. We recommend that you disable video tracking during normal DMX control. -
Page 22: Studio Mode
Display intensity Available using: Control panel – RDM – P3 You can set the brightness of the control panel display from 10% to 100%. ® Martin MAC Viper XIP User Manual Rev. B... -
Page 23: Display Contrast
The MAC Viper XIP features a standalone mode in which you first set up the ‘scene’ (i.e. the preset) that you want the fixture to display in standalone mode, and then set the fixture to show that scene whenever it is not receiving a DMX signal. -
Page 24: Storing And Recalling Custom Settings
Available using: Control panel – RDM – P3 The fixture receives a unique 12-digit RDM ID number at the factory to allow RDM devices to identify it. You can view this number, but it is of course non-resettable. ® Martin MAC Viper XIP User Manual Rev. B... -
Page 25: Fan Cleaning
2. Use the UP and DOWN buttons to scroll to the DMX value from 000 to 255 (or 000 to 65535 where 16-bit control is available) that you want to send to that effect. Press ENTER to confirm and send that value. 3. To return to the list of effects, press MENU. ® Martin MAC Viper XIP User Manual Rev. B... -
Page 26: Viewing Stored Status Messages
You can reset the entire fixture, returning it to its state when first powered on. Be prepared for the head to move through its full range of pan and tilt movement while pan and tilt resets. The reset process takes several seconds. ® Martin MAC Viper XIP User Manual Rev. B... -
Page 27: Calibration
Creating calibration offsets allows you to fine-tune fixtures and achieve uniform behavior in multiple fixtures. Martin fixtures are adjusted and calibrated at the factory, and further calibration should only be necessary if fixtures have been subjected to abnormal shocks during transport or if normal wear and tear has affected alignment after an extended period of use. -
Page 28: Adjustment Menu (Martin Global Service Only)
Available using: Control panel only It is possible to overwrite the factory-set calibration values and replace them with the currently defined calibration values, but take care when doing this. Please contact Martin Service if you have any questions about making this change. -
Page 29: Control Panel
If ERROR MODE is set to SILENT, display the error message by entering the menus and going to SERVICE → ERROR LIST. • FLASHING: No DMX signal detected. • CONSTANT: Valid DMX signal detected. The status LED remains active even if the display enters sleep mode. ® Martin MAC Viper XIP User Manual Rev. B... -
Page 30: Battery Power
Martin supplier. The MAC Viper XIP contains a CR123A 3-volt lithium battery behind a cover next to the control panel. The battery gives access to the most important functions in the control panel when the fixture is not connected to AC power. -
Page 31: Using Rdm
• Standalone show programming with automatic start when fixtures are powered on. RDM functions A full list of the RDM functions that MAC Viper XIP fixtures support is given at the end of this chapter. We refer to these functions using the more specific term ‘PIDs’ (‘Parameter IDs’). -
Page 32: Example: Setting A Dmx Address
You can set the DMX address of a fixture (or fixtures) on the data link via RDM. An example procedure from Martin Companion v. 2.0 might look like this, but the procedure will vary depending on which RDM controller you use: 1. - Page 33 Invert pan ✓ ✓ 0x0601 TILT_INVERT Invert tilt ✓ ✓ 0x8310 DIMMER_CURVE Set dimmer curve Enable fixture ✓ ✓ 0x8001 DMX_RESET resettable via DMX ✓ ✓ 0x8301 EFFECT_SPEED Set effects speed ® Martin MAC Viper XIP User Manual Rev. B...
- Page 34 Capture current ‘look’ ✓ 0x1030 CAPTURE_PRESET and store as preset Play back any of the ✓ ✓ 0x1031 PRESET_PLAYBACK stored presets Override DMX control ✓ ✓ 0x8220 MANUAL_MODE_OVERRIDE with values sent via ® Martin MAC Viper XIP User Manual Rev. B...
- Page 35 0x810C OFFLINE_MODE is not receiving DMX Status messages Get queued ✓ 0x0020 QUEUED_MESSAGE messages Get status/error ✓ 0x0030 STATUS_MESSAGES information Status/error ✓ 0x0031 STATUS_ID_DESCRIPTION description Clear status/error ✓ 0x0032 CLEAR_STATUS_ID queue ® Martin MAC Viper XIP User Manual Rev. B...
-
Page 36: Control Menus
Control menus The following commands are available in the fixture’s control panel. Note that commands can also be available via RDM, via DMX on the Control/Settings channel or via P3 using a Martin P3 System Controller. Default settings are given in bold print. - Page 37 Color mixing optimized for saturation MEDIUM FOCUS TRACKING Focus tracks zoom position NEAR DISABLED Color fading optimized for speed of ENABLED color changes VIDEO TRACKING DISABLED Color fading optimized for smoothness ® Martin MAC Viper XIP User Manual Rev. B...
- Page 38 INTENSITY (default = 50%) ROTATE 180 Control panel display inverted DISPLAY ROTATION Control panel display orientation NORMAL normal DISPLAY Set control panel display contrast 3 … 100 CONTRAST (default = 50%) ® Martin MAC Viper XIP User Manual Rev. B...
- Page 39 (not user-resettable) POWER ON Display number of times fixture has 0 … XX HR CYCLES been powered on since last counter reset RESETTABLE CLEAR COUNTER? Reset counter → YES/NO ® Martin MAC Viper XIP User Manual Rev. B...
- Page 40 Press MENU button to exit test. Run test sequence of pan functions. Press MENU button to exit test TEST PAN/TILT Run test sequence of tilt functions. TILT Press MENU button to exit test ® Martin MAC Viper XIP User Manual Rev. B...
- Page 41 (varies depending on select. Adjust position and press Enter effect) to confirm. CALIBRATION LOAD DEFAULTS LOAD Load factory default calibration settings Replace factory default calibration SAVE DEFAULTS SAVE settings with current calibration settings ® Martin MAC Viper XIP User Manual Rev. B...
- Page 42 UPDATING FILES USB memory device Select firmware from versions stored in AVAILABLE XX.XX.XX ... internal memory. Scroll to select FIRMWARE XX.XX.XX version, then press Enter and confirm your choice to update. ® Martin MAC Viper XIP User Manual Rev. B...
-
Page 43: Dmx Protocols
6–23 No function Snap Color wheel indexing Open Open → Slot 1 25–40 Slot 1 Slot 1 → Slot 2 42–57 Slot 2 Slot 2 → Slot 3 59–74 Slot 3 ® Martin MAC Viper XIP User Manual Rev. B... - Page 44 Indexed at 0° Indexing 0° → +180° 16385–32767 Fade 16384 Gobo rotation CW gobo rotation fast → slow 32768–49150 49151–49152 Stop (gobo stops at current position) CCW gobo rotation slow → fast 49153–65535 ® Martin MAC Viper XIP User Manual Rev. B...
- Page 45 Horizontal pattern 76–126 Diagonal patterns Vertical pattern Wheel shake Horizontal pattern shake slow → fast 128–148 Diagonal pattern shake slow → fast 149–169 Vertical pattern shake slow → fast 170–190 No function ® Martin MAC Viper XIP User Manual Rev. B...
- Page 46 Opening pulse slow → fast 193–223 Closing pulse Stop (iris stops at current position) Closing pulse slow → fast 225–255 Zoom Fade 32768 Wide → narrow 0–65535 Focus Fade 32768 Infinity → near 0–65535 ® Martin MAC Viper XIP User Manual Rev. B...
- Page 47 Forward → backward 0–65535 Fixture Control/Settings – see ‘Control/Settings DMX channel’ on page 56 LED Frequency Hybrid dimming Variable -2% → 0% 1–127 Snap 2400 Hz Variable 0% → +2% 129–254 No function ® Martin MAC Viper XIP User Manual Rev. B...
- Page 48 FX Synchronization No sync Fixture offset (shift 10° → 350°) 1–35 Synchronized 37–100 No function Snap 101–120 Random start (FX1 adjust channel controls overall speed) 121–140 Random duration 141–255 No function ® Martin MAC Viper XIP User Manual Rev. B...
-
Page 49: Extended Dmx Mode
Slot 1 → Slot 2 42–57 Slot 2 Slot 2 → Slot 3 59–74 Slot 3 Slot 3 → Slot 4 76–91 Slot 4 Slot 4 → Slot 5 93–108 Slot 5 ® Martin MAC Viper XIP User Manual Rev. B... - Page 50 Indexed at 0° Indexing 0° → +180° 16385–32767 Fade 16384 Gobo rotation CW gobo rotation fast → slow 32768–49150 49151–49152 Stop (gobo stops at current position) CCW gobo rotation slow → fast 49153–65535 ® Martin MAC Viper XIP User Manual Rev. B...
- Page 51 Horizontal pattern 76–126 Diagonal patterns Vertical pattern Wheel shake Horizontal pattern shake slow → fast 128–148 Diagonal pattern shake slow → fast 149–169 Vertical pattern shake slow → fast 170–190 No function ® Martin MAC Viper XIP User Manual Rev. B...
- Page 52 Opening pulse slow → fast 49153–57343 Closing pulse 57344 Stop (iris stops at current position) Closing pulse slow → fast 57345–65535 Zoom Fade 32768 Wide → narrow 0–65535 Focus Fade 32768 Infinity → Near 0–65535 ® Martin MAC Viper XIP User Manual Rev. B...
- Page 53 Forward → backward 0–65535 Fixture Control/Settings – see ‘Control/Settings DMX channel’ on page 56 LED Frequency Hybrid dimming Variable -2% → 0% 1–127 Snap 2400 Hz Variable 0% → +2% 129–254 No function ® Martin MAC Viper XIP User Manual Rev. B...
- Page 54 FX Synchronization No sync Fixture offset (shift 10° → 350°) 1–35 Synchronized 37–100 No function Snap 101–120 Random start (FX1 adjust channel controls overall speed) 121–140 Random duration 141–255 No function ® Martin MAC Viper XIP User Manual Rev. B...
-
Page 55: Ludicrous Dmx Mode
Ludicrous DMX mode gives individual control of the six LED segments that make up the light engine. The segments are numbered as shown below (fixture hanging downwards, display and connectors at back of fixture, pan at 50%, fixture tilted forward). ® Martin MAC Viper XIP User Manual Rev. B... -
Page 56: Control/Settings Dmx Channel
Low fan speed, regulated light output intensity (1 sec.) Ultra-low fan speed, regulated light output intensity (1 sec.) 59–60 No function Hibernation = ON (1 sec.) Hibernation = OFF (default, 1 sec.) ® Martin MAC Viper XIP User Manual Rev. B... - Page 57 Store CTB filter keylight calibration (5 sec.) Start CTO flag keylight calibration (5 sec.) Start Spectral Enhancement filter keylight calibration (5 sec.) Store CTO flag keylight calibration (5 sec.) Store Spectral Enhancement filter keylight calibration (5 sec.) ® Martin MAC Viper XIP User Manual Rev. B...
- Page 58 Store all calibration values except keylight calibration (5 sec.) Reset all calibration values to factory default (excluding keylight calibration, 5 sec.) 200–255 No function ® Martin MAC Viper XIP User Manual Rev. B...
-
Page 59: Pan/Tilt And Zoom Orientation Guide
Pan/tilt and zoom orientation guide Fixture shown in illustrations is for example purposes only ® Martin MAC Viper XIP User Manual Rev. B... - Page 60 Fixture shown in illustrations is for example purposes only ® Martin MAC Viper XIP User Manual Rev. B...
-
Page 61: Service And Display Messages
Service and display messages The MAC Viper XIP gives service and maintenance information by displaying a large 3- or 4-character short code and a smaller full-text message in the fixture’s display. The short code is visible at a distance, allowing easier reading with the fixture still in the rig, for example, while the full-text message gives more detailed information. -
Page 62: Error Messages
The possible error messages are listed below: Short code Long message and explanation AW POS ERROR APER Animation Wheel position error. AW ROT ERROR ARER Animation Wheel rotation error. COLORWHEEL 1 ERR C1ER Color Wheel error. ® Martin MAC Viper XIP User Manual Rev. B... - Page 63 HEAD FAN 3 ERR HEAD FAN 4 ERR HEAD FAN 5 ERR HEAD FAN 6 ERR HEAD FAN 7 ERR HEAD FAN 8 ERR HEAD FAN 9 ERR HEAD FAN 10 ERR ® Martin MAC Viper XIP User Manual Rev. B...
- Page 64 Gobo Wheel 1 position error. GOBO W 2 ERR G2ER Gobo Wheel 2 position error. HEAVY FROST ERROR HFER Heavy frost effect position error. IRIS ERROR IRER Iris effect position error. ® Martin MAC Viper XIP User Manual Rev. B...
- Page 65 GOBO W 1 ROT ERR R1ER Gobo Wheel 1 rotation error. GOBO W 2 ROT ERR R2ER Gobo Wheel 2 rotation error. ARTNET SOURCES EXCEED SEER Number of Art-Net control sources exceeded. ® Martin MAC Viper XIP User Manual Rev. B...
- Page 66 ZF TEMP CUTOFF ZFTC Zoom/focus module temperature cutoff activated. ZF TEMP SEN ERR ZFTE Zoom/focus module temperature sensor error. ZOOM ERROR ZOER Zoom position error. ZOOM SENSOR ERROR ZSER Zoom position sensor error. ® Martin MAC Viper XIP User Manual Rev. B...
-
Page 67: Accessories And Service Procedures
Fixture information and settings are not affected when you upload new firmware to the fixture. All MAC Viper XIP fixtures that are powered on and connected via a DMX link to the fixture that you update will also have their firmware updated. -
Page 68: Installing A Universal Connect Module
1. Apply power to the MAC Viper XIP fixture(s) and allow it to boot. 2. Connect the Martin Companion Cable’s USB connector to a USB port on your PC. Connect the Martin Companion Cable’s XLR connector either directly to the fixture’s DMX IN connector or to the DMX link. -
Page 69: Installing A Hexcel Louver
Installing a Hexcel Louver A Hexcel Louver for the MAC Viper XIP is available from City Theatrical, Part Number 2817. See details at www.citytheatrical.com. See illustration on right. The Hexcel Louver mounts onto the head using the four screws provided on the front of the head, two screws (arrowed), on each side. -
Page 70: Removing The Top Head Cover
1. Disconnect the fixture from power and allow it to cool for 20 minutes. 2. Place the fixture on a stable work surface, tilt the head so that the Martin logo is facing the correct way up – in this position the top head cover faces upwards – and apply the tilt lock. -
Page 71: Reinstalling The Head Cover
1.5 Nm. 4. Check that the head cover is secure, with no gaps visible around any part of the cover. 5. Release the tilt lock before operating the fixture. ® Martin MAC Viper XIP User Manual Rev. B... -
Page 72: Replacing Rotating Gobos
• Do not use gobos with dark coatings on either side, as these will absorb heat – either directly from the light source or reflected back from other optical components – and will not be durable. • Do not use metal gobos in the MAC Viper XIP: their durability may be reduced when used in this fixture. - Page 73 5. Check that the gobo is pushed fully into its clip and held securely. To check that the goboholder is correctly installed, rotate the goboholder at least 180° in both directions in the gobo wheel and check that it and all the other goboholders move freely. ® Martin MAC Viper XIP User Manual Rev. B...
- Page 74 Replacing a gobo in a goboholder The rotating gobos in the MAC Viper XIP are held in their holders by springs and can be removed from their holders as described in this section. Gobo orientation: general Make sure that you install gobos facing in the correct direction, or they may suffer heat damage. The orientations shown below are correct in most cases, but consult your Martin dealer or gobo supplier if you are in any doubt about the orientation of a specific gobo type.
- Page 75 Gobo orientation, Wheels 1 and 2 On both gobo wheels in the MAC Viper XIP: • Images or text on gobos must appear correctly (i.e. not flipped left to right) when looking at the goboholder from the side with the spring.
- Page 76 5. Reinstall the goboholder in the gobo wheel and reinstall the top head cover following the directions given earlier in this section. ® Martin MAC Viper XIP User Manual Rev. B...
- Page 77 Compliance and specifications See the Safety and Installation Manual attached to this user manual for details of this product’s compliance with national and international standards, FCC rules etc. See the Martin website at www.martin.com for technical specifications for this product.
- Page 78 www.martin.com...
- Page 79 MAC Viper XIP Safety and Installation Manual...
- Page 80 Martin is a registered trademark of HARMAN PROFESSIONAL DENMARK ApS registered in the United States and/or other countries.
- Page 81 Connecting to power .................. 16 Data connections ....................16 Service and maintenance ..................17 Service mode ..................... 17 Cleaning ....................17 Cleaning air filters ..................18 Battery replacement ................... 19 Lubrication ....................20 ® Martin MAC Viper Safety and Installation Manual Rev. A...
-
Page 82: Safety Information
Safety and Installation manual or in the fixture’s User Manual must be referred to an authorized Martin service technician. The MAC Viper XIP is for professional use as a stage light only. It is not for household or general lighting applications. Respect all locally applicable laws, codes and regulations when installing, powering, operating or servicing the fixture. - Page 83 The latest versions of this Safety and Installation Manual and the fixture’s User Manual are available for download from the MAC Viper XIP area of the Martin website at www.martin.com. Before you install, operate or service the fixture, check the Martin website and make sure that you have the latest user documentation for the fixture.
- Page 84 5 A when operating within this mains power voltage range. • Do not connect more than three (3) MAC Viper XIP fixtures in total to each other in an interconnected chain when supplying the fixture with mains power from 200 V to 240 V.
- Page 85 Do not attempt to bypass thermostatic switches or fuses. ® Martin MAC Viper Safety and Installation Manual Rev. A...
- Page 86 Do not try to suspend the fixture from only one rigging clamp. Do not use safety cables as the primary means of support. ® Martin MAC Viper XIP Safety and Installation Manual Rev. A...
- Page 87 Do not modify the fixture in any way not described in the fixture’s user documentation. Install only parts and accessories that are supplied by or approved by Martin for the fixture. Refer any service operation not described in this manual to Martin Service or an authorized Martin service partner.
-
Page 88: Introduction
MAC Viper XIP area of the Martin website at www.martin.com. If you have any difficulty locating this document, please contact your Martin supplier for assistance. -
Page 89: Cold Starting
It is not necessary to release the tilt lock before transporting the MAC Viper XIP in its Martin flightcase, but the head must be angled at approximately 45° to match the flightcase insert. -
Page 90: Physical Installation
Martin in sets of 12 (P/N 50400765). Air filter replacement takes no more than a few seconds. Avoiding damage from other light sources Do not point the light output from other lighting fixtures at the MAC Viper XIP, as powerful light can damage the display. Standing the fixture on a flat surface The fixture can be placed on a hard, fixed, flat horizontal surface provided that there is no risk that it may cause an obstruction or be knocked over. -
Page 91: Mounting The Fixture On A Truss
6. Secure the fixture with a safety cable as directed below. 7. Make sure that there is no possibility of the head colliding with other fixtures or objects when it moves through its full pan and tilt ranges. ® Martin MAC Viper Safety and Installation Manual Rev. A... -
Page 92: Securing With A Safety Cable
4. Make sure that the safety cable will hold the fixture if a primary attachment fails. Quarter-turn receptacles in base ® Martin MAC Viper XIP Safety and Installation Manual Rev. A... -
Page 93: Ac Mains Power
AC mains power input. The cable must meet the requirements listed under “Protection from electric shock” on page 5. Martin can supply suitable input cables with connectors 1.5 m (4.9 ft.) or 5 m (16.4 ft.) long, as well as loose input connectors (see the Martin website at www.martin.com). -
Page 94: Connecting To Power
Data connections See the MAC Viper XIP User Manual available for download from www.martin.com for full details of connecting the fixture to control data. Use shielded twisted-pair Ethernet cable of type S/UTP, SF/UTP, S/STP or SF/STP only for the data link. -
Page 95: Service And Maintenance
Manual. Finally, the user may install or uninstall an optional wireless DMX accessory that fits onto the fixture’s USB port following instructions from Martin. All other service operations on the MAC Viper XIP must be carried out by Martin, its approved service agents or trained and qualified personnel using the official Martin service documentation for the MAC Viper XIP. -
Page 96: Cleaning Air Filters
When using the fixture in dusty conditions we recommend the use of head air filters with paper elements. These are available as accessories in sets of 12 from Martin suppliers by ordering P/N 50400765. -
Page 97: Battery Replacement
The MAC Viper XIP has a non-rechargeable 3-volt lithium battery that provides power to the control panel and display when the fixture is not connected to AC mains power. If the battery runs flat, you must replace it. -
Page 98: Lubrication
8. Dispose of the used battery responsibly: send to an authorized waste recycling and disposal center. Lubrication The MAC Viper XIP does not require lubrication under normal circumstances. Moving parts can be checked and a long-lasting Teflon-based grease reapplied by a Martin service partner if necessary. - Page 99 Specifications For full product specifications, see the MAC Viper XIP area of the Martin website at www.martin.com FCC compliance This equipment has been tested and found to comply with the limits for a Class B digital device, pursuant to part 15 of the FCC Rules. These limits are designed to provide reasonable protection against harmful interference in a residential installation.
- Page 100 www.martin.com...
Need help?
Do you have a question about the MAC Viper XIP and is the answer not in the manual?
Questions and answers