Table of Contents
Advertisement
Advertisement
Table of Contents

Subscribe to Our Youtube Channel
Related Manuals for Trojan Pegasus


Summary of Contents for Trojan Pegasus
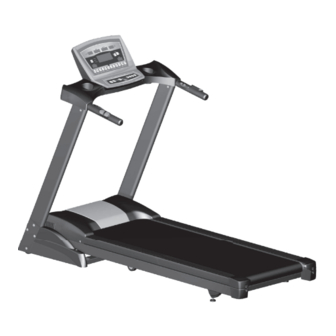
- Page 1 / in your own time PEGASUS TREADMILL CARE INSTRUCTIONS AND ASSEMBLY MANUAL CAUTION READ ALL PRECAUTIONS AND INSTRUCTIONS IN THIS MANUAL BEFORE USING THIS EQUIPMENT CALL KEEP THIS MANUAL FOR www.trojanfi tness.com.au 08-93015557 FUTURE REFERENCE...
-
Page 3: Table Of Contents
INDEX SAFETY INSTRUCTION BEFORE YOU BEGIN HARDWARE LIST ASSEMBLY STEP COMPUTER FUNCTION FITNESS TIPS AND TRCHNIQUES CONDITIONING GUIDELINES WARM-UP AND COOL-DOWN PART LIST EXPLODED DRAWING TROJAN 1 YEAR LIMITED WARRANTY TROJAN REPAIRS PROCEDURE PROOF OF PURCHASE 1458AU-3... -
Page 4: Safety Instruction
6. Use the TROJAN PEGASUS TREADMILL only as described in the manual. 7. Do not attempt to adjust the back rest cushion while you are on the TROJAN PEGASUS TREADMILL. 8. Before using this equipment to exercise, always do stretching exercises to properly warm up. -
Page 5: Before You Begin
BEFORE YOU BEGIN Thank you for choosing the TROJAN PEGASUS TREADMILL.We take great pride in producing this quality product and hope it will provide many hours of quality exercise to make you feel better, look better and enjoy life to its fullest. -
Page 6: Hardware List
HARDWARE LIST Description Q’ty Description Q’ty Curved Washer (ø5/16” x 19 x 1.5T) Lubricant Button Head Socket Screw (5/16” x15m/m) Combination M5 Allen Wrench & Phillips Head Screwdriver Phillips Head Screw (M5 x 15m/m) Allen Wrench (M6) Safety Key NOTE : The described parts are all you need to assemble this machine. -
Page 7: Assembly Step
ASSEMBLY STEP 1458AU-7... -
Page 8: Assembly Step
ASSEMBLY STEP STEP 1 Remove all parts from the carton. STEP 2 Connect Computer Cable (Lower) (38) with Computer Cable (Middle) (37). STEP 3 • Hand tighten Right and Left Handrails (4,5) into the Frame Base (2) with 8 pcs of5/16”x 15m/m •... -
Page 9: Computer Function
COMPUTER FUNCTION Getting started: Power the treadmill on by plugging it into an appropriate wall outlet, then turn onthe power switch located at the front of the treadmill below the motor hood.Ensure that the safety key is installed, as the treadmill will not power on withoutit. When the power is turned on, all the lights on the display will light for a shorttime.Then the Time and Distance windows will display Odometer readings for ashort time.The Time window will show how many hours the treadmill has been inuse and the Distance window will show how many miles (or Kilometers if thetreadmill is set to metric readings) - Page 10 COMPUTER FUNCTION Quick-Start Operation STEP 1 Press and release theStartkey to wake display up(if not already on).Note:Installing the tether key will also wake up the console. STEP 2 Press and release theStartkey tobegin belt movement,at 1.0kmph (0.6 mph), thenadjust to the desired speed using theFast / Slowkeys (console or hand rail).You mayalso use the rapid speed keys 2 through 12 to adjust the speed.
- Page 11 COMPUTER FUNCTION Dot Matrix Center Display (Manual Operation) Twenty rows ofRed “dots”(8 high) indicate each segment of a workout.The dots are only to show anapproximate level (speed/incline) of effort.They do not necessarily indicate a specific value - only anapproximate percent to compare levels of intensity.
- Page 12 COMPUTER FUNCTION To Select a Program STEP 1 Press the desiredProgram Up / Downkey. Press enter to set the program.The display willprompt you through the programming or you can just press Start to begin the program with defaultvalues. STEP 2 If Enter was pressed,the Time window will blink with the default value of 20 minutes.Youmay use any of the up/down keys to adjust the time.
- Page 13 COMPUTER FUNCTION SPEED PROFILE INCLINE PROFILE P1 SPEED PROFILE P1 INCLINE PROFILE P2 INCLINE PROFILE P2 SPEED PROFILE P3 SPEED PROFILE P3 INCLINE PROFILE P4 SPEED PROFILE P4 INCLINE PROFILE P5 SPEED PROFILE P5 INCLINE PROFILE 1458AU-13...
- Page 14 PROGRAMMABLE OPERATION OF YOUR TREADMILL Target Heart Rate • The old motto,“no pain, no gain”, is a myth that has been overpowered by the benefits ofexercising comfortably. A great deal of this success has been promoted by the use of heart ratemonitors.With the proper use of a heart rate monitor, many people find that their choice of exerciseintensity is either too high or too low and exercise is much more enjoyable by maintaining their heartrate in the desired benefit range.
-
Page 15: Using A Heart Rate Transmitter
USING A HEART RATE TRANSMITTER How to wear your wireless chest strap transmitter: 1. Attach the transmitter to the elastic strap using the locking parts. 2. Adjust the strap as tightly as possible as long as the strap is not too tight to remain comfortable. 3. -
Page 16: Heart Rate Control
HEART RATE CONTROL How the Heart Rate Control Program Works Heart Rate Control (HRC) uses your treadmill’s speed and incline systems to adjust your heart rate.Increases and decreases in elevation affect heart rate much more efficiently than changes in speedalone.The HRC program automatically changes the speed and elevation gradually to achieve theprogrammed target heart rate. - Page 17 UNFOLDING / FOLDING TRANSPORTATION UNFOLDING Hold the treadmill running board with left hand. Pull the locking knob with yourright hand and slowly lower the treadmill running board. *Remove your righthand as you slowly lower the running board to the floor.(As shown Figure 1.) FOLDING Ensure the incline angle of the treadmill is at its lowest position.
-
Page 18: Treadmill Lubrication
BELT TRACKING ADJUSTMEANT If during use you notice that walking belt either shifts to the right or the left of center, firstremove “Safety Key” and unplug equipment from AC power source. Using M6 Allen wrenchprovided, turn left rear roller adjustment as indicated below clockwise no more the 1/4”... -
Page 19: Fitness Tips And Trchniques
FITNESS TIPS AND TRCHNIQUES AEROBIC EXERCISE Aerobic exercise is any sustained activity that sends oxygen to your muscles via your heart and lungs. Aerobic exercise improves the fitness of your lungs and heart - your body’s most important muscle. Aerobic exercise fitness is promoted by any activity that uses your large muscle -arms, legs, or buttock, for example.Your heart beats quickly and you breathe deeply. -
Page 20: Conditioning Guidelines
CONDITIONING GUIDELINES How you begin your exercise program depends on your physical condition. If you have been inactive for several years, or are severely overweight, you must start slowly and increase your time on the equipment; a few minutes per workout. Initially, you may be able to exercise only for a few minutes in your target zone, however, your aerobic fitness will improve over the next six to eight weeks. -
Page 21: Warm-Up And Cool-Down
WARM-UP AND COOL-DOWN WORKOUT GUIDELINES Each workout should include the following three parts: A warm-up, consisting of 5 to 10 minutes of stretching and light exercise. A proper warm-up increases your body tem- perature, heart rate, and circulation in preparation for exercise. Training zone exercise, consisting of 20 to 30 minutes of exercising with your heart rate in your training zone. -
Page 22: Part List
PART LIST Description O’ty Description O’ty 1485AU-01 Main Frame 1485AU-30 Safety Key 1485AU-02 Frame Base Connecting Cable (Black) 1485AU-31 (150m/m x 764 x 764) 1485AU-03 Incline Bracket 1485AU-04 Left Handrail 1485AU-32 Power Cord 1485AU-05 Right Handrail Connecting Cable (White) 1485AU-33 (100 m/m x 764 x 764) 1485AU-06 Console Support... - Page 23 PART LIST Description O’ty Description O’ty 1485AU-53L Rear Adjustment Base (L) 1485AU-81 Flat Washer (ø25x10 x1.5T) 1485AU-53R Rear Adjustment Base (R) 1485AU-82 Flat Washer (ø19x10x1.5T) 1485AU-54 Foot Pad Cap 1485AU-83 Spring Washer (ø10 ) 1485AU-55 Square End Cap (25.4 x 25.4 mm) 1485AU-84 Concave Washer (ø6.5x25x1T) 1485AU-56...
-
Page 24: Exploded Drawing
EXPLODED DRAWING 1458AU-24... -
Page 25: Trojan 1 Year Limited Warranty
TROJAN 1 YEAR LIMITED WARRANTY Trojan Fitness Pty Ltd (“the Supplier”) hereby provides a limited warranty to the original purchaser of this product (“the Consumer”) that this product will be free of manufacturing defects in materials and workmanship which under normal,... -
Page 26: Trojan Repairs Procedure
TROJAN REPAIRS PROCEDURE 1. Procedure for repairs Should you experience any faults or breakdowns on your Trojan Ellipti-cycle 200 Elliptical, please adhere to the following procedure to have the fault rectifi ed speedily and professionally. • Do not return the product to the store* •... -
Page 27: Proof Of Purchase
The Consumer does not need to return the product to the store. The Consumer shall phone the Trojan hotline on 08 9301 5557 and the Supplier’s authorized agent will at its discretion either repair the item at the Consumer’s residence or collect and repair the item at their premises. - Page 28 1458AU-28...
Need help?
Do you have a question about the Pegasus and is the answer not in the manual?
Questions and answers